
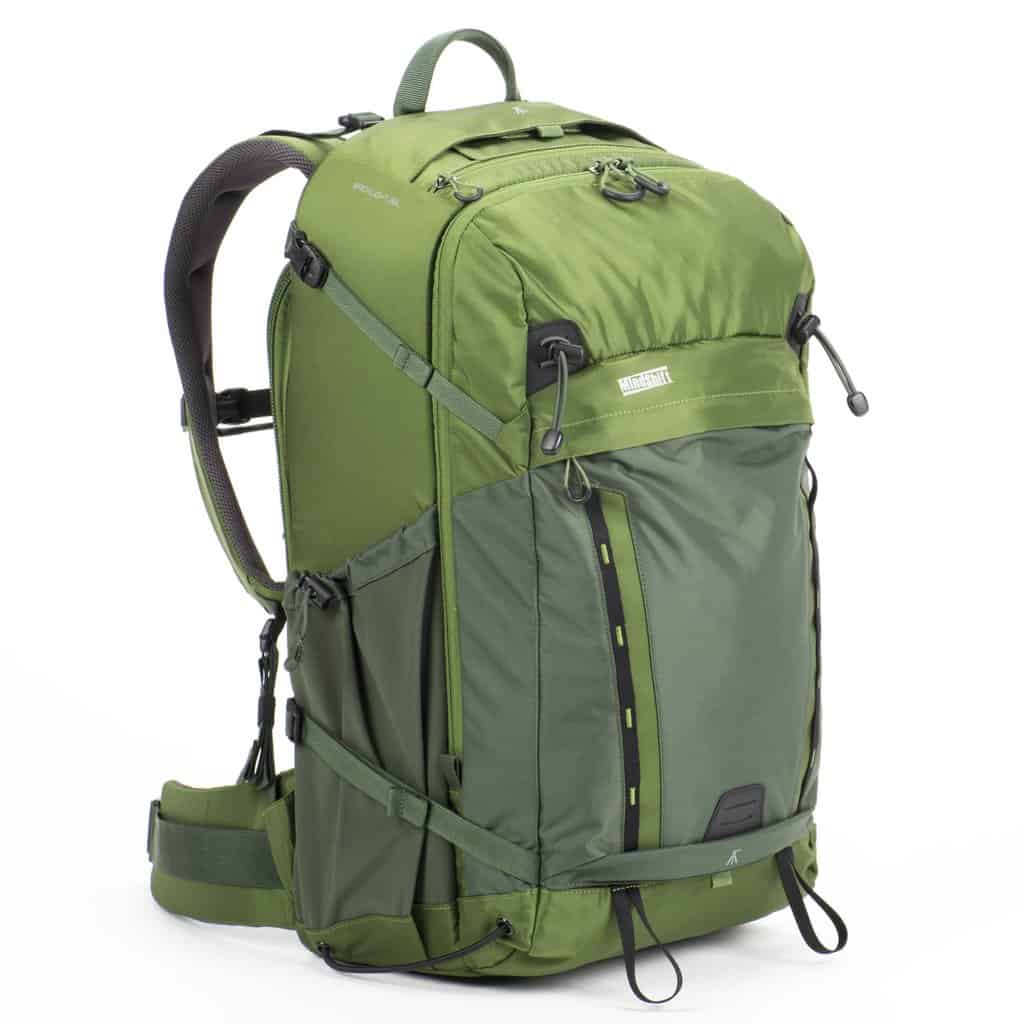
In this review we’re taking a look at the BackLight 36L outdoor photography pack from MindShift Gear. I’ve been testing this as my main photo pack for the last month, prior to its public release. As usual, there’s a ton of photos in this review, as well as a video walk-through of the features and some suggestions about other bags that you might consider when looking to buy a bag of this size for outdoor photography.
For those that aren’t familiar with the brand, MindShift Gear is Think Tank Photo’s sister company. Whilst Think Tank concentrates more on the urban, wedding and photojournalistic photography markets, MindShift Gear is all about the outdoors. They make products that are designed for landscape photographers, nature and wildlife photographers and adventure lovers. I’ve reviewed almost all of their products on this site over the years simply because their target market is essentially someone exactly like me!
As a disclaimer, I also want to make it clear that I am now working in a tighter partnership with MindShift Gear in the development of future products. That said, this won’t prevent me from creating an unbiased review of these products as you will see. I’m never going to be shy about things I don’t like in a product, because it doesn’t help you as the consumer, or the brand, because they don’t then get the feedback that helps them create better products for you and me in the future. I did not have a hand in the development of the BackLight 36L, but I will with some future products.
BackLight 36L Quick Specifications
- Holds 2 gripped DSLRs with lenses attached and 4-6 standard zoom lenses plus a flash.
- Holds 2 gripped mirrorless bodies with lenses attached and 6-8 lenses plus a flash.
- Fits up to a 15” laptop & full size tablet
- Fits personal gear in the 11L front compartments
- Maximum lens size: 600mm f/4 detached from body
- Meets most international and US carry-on requirements
- Daisy chain, ice axe loops and additional lash points for expanding your carry capacity
- Includes tripod/monopod mounting system on front or side
- Comfortable padded waist belt for all day comfort on the trail with webbing rail for additional MindShift
accessories (Filter Nest/Hive and Switch Case). - Flap keeper neck strap allows you to work out of the bag,
unencumbered - 2 Large water bottle pockets with cinch cord fits a 32oz Nalgene
- Highest quality YKK zippers, 420D Velocity and 420D high-density
nylon for long lasting durability and strength - Front stuff pockets for trail essentials: headlamp, gloves, chargers
- Interior mesh pockets for storing filters, batteries, cables, etc
- Seam-sealed rain cover included, folds flat for use as a ground cover
- Compatible with the Tripod Suspension Kit
- ED: 13.8” W x 22.4” H x 10.2” D (35 x 57 x 26 cm)
- ID: 12.6” W x 21” H x 7.1” D (32 x 53.5 x 18 cm)
- Laptop: 11.2” W x 16.1” H x 1”D (28.5 x 41 x 2.5 cm)
- Tablet: 10.6” W x 10.2” H x 0.6” D (27 x 26 x 1.5 cm)
- Total Volume: 36L
- Weight: 4.9 lbs (2.2 kg)
BackLight 36L Video Review
BackLight 36L Features
The large front pocket section of the BackLight 36L is really the standout feature that separates it from the other bags in the MindShift lineup. This section can hold a full 11 litres of additional non-photographic equipment, and it does it with two main pockets and a series of small organizer pockets for a laptop, tablet, notepad and pens. The main pocket feels cavernous, and was easily big enough for me to store waterproof pants, and GoreTex snow/rain jacket and my goes-everywhere-with-me Arcteryx Cerium SL down vest. On top of those larger items, it also held smaller ones such as gloves, the bag’s included rain cover and my waterproof Think Tank camera rain cover that comes with me everywhere.
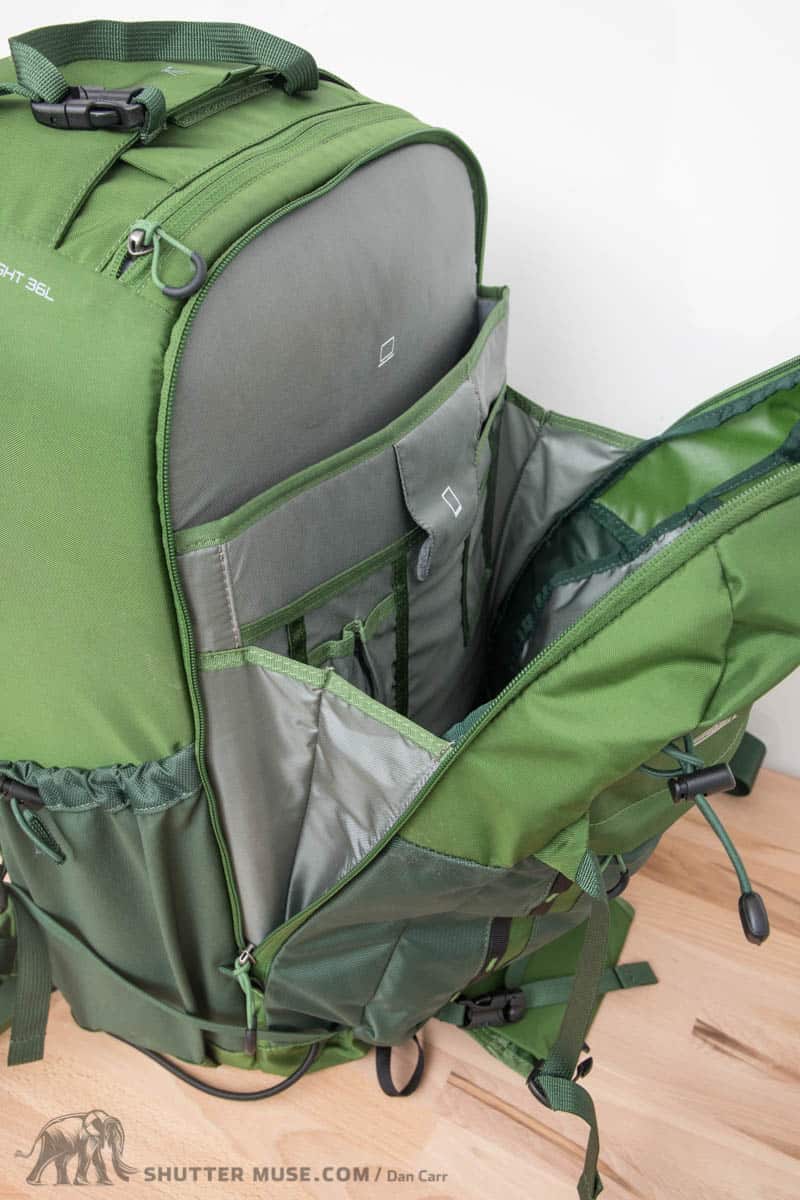
The secondary front pocket isn’t quite as deep, so I found that it was a good place to store my food and snacks. If I placed them in the larger pocket, they sank beneath my clothing. Whilst I don’t tend to carry a laptop and tablet around in my camera bag, the option is there is you need it. I ended up making use of those pockets to store my wireless microphone kit and some cables. What I really appreciated was that the laptop sleeve is pretty low profile. If you aren’t the kind of person that carries a laptop in your bag, you don’t feel as though you are forced to carry around unnecessary bulk and weight for a feature you aren’t going to use. Top marks for keeping that art simple! The laptop sleeve will fit up to a 15″ machine, and if you want additional padding, the sleeve is sized to allow a neoprene sleeve around the computer when you slip it into the pocket.
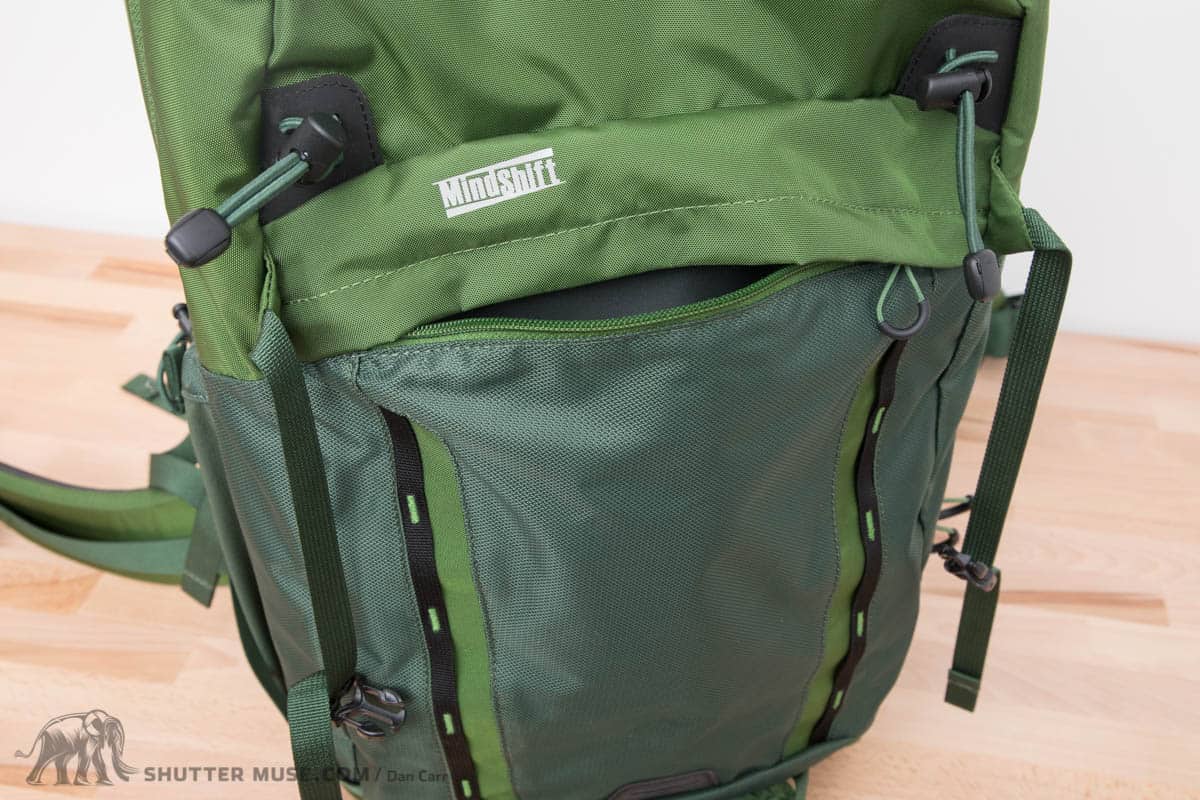
What’s also great is the way the zippers on the main front pocket go so deep down the side of the bag. It allows the front of the bag to open up extremely wide, which is necessary when you have fully packed it with gear. Less well thought out though is the placement of the bag’s side compression straps. Because they are attached to the front of the bag, it means that you have to unclip them in order to really open that front pocket up to its full extent. If you don’t have items in the side pockets, it’s not a huge deal, but if you do have tripods or lightstands there then it becomes more off a pain in the ass than it really ought to be. I wish the side straps had been stitched to the bag behind the front pocket zipper so they didn’t interfere with the opening of it at all.
Tripod attachment on the BackLight 36L comes in three flavours that will be pretty familiar to people who have seen previous reviews of their products. The first option is to use the side pockets of the bag, and for the 36L pack we have increased depth in those pockets, making this a suitable option for even the largest of tripods. The bottom of that elasticated pocket is also reinforced to prevent damage occurring from the tripod feet.

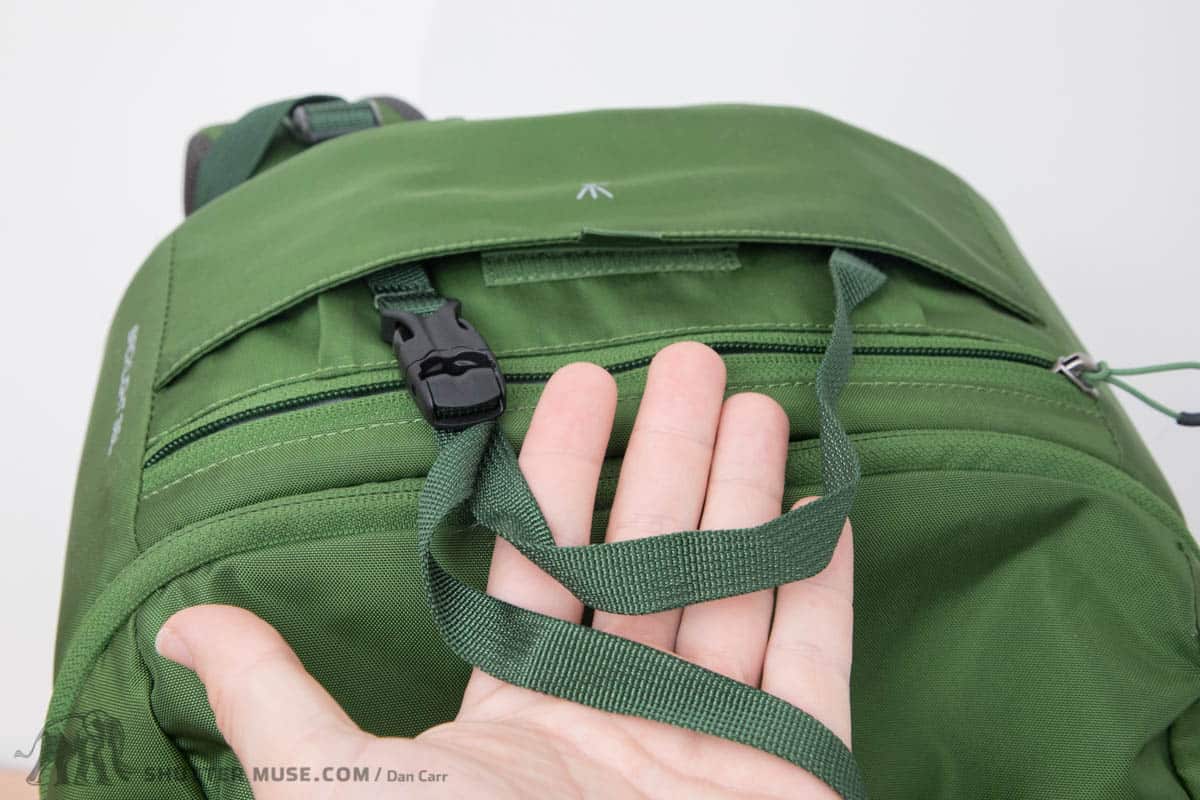
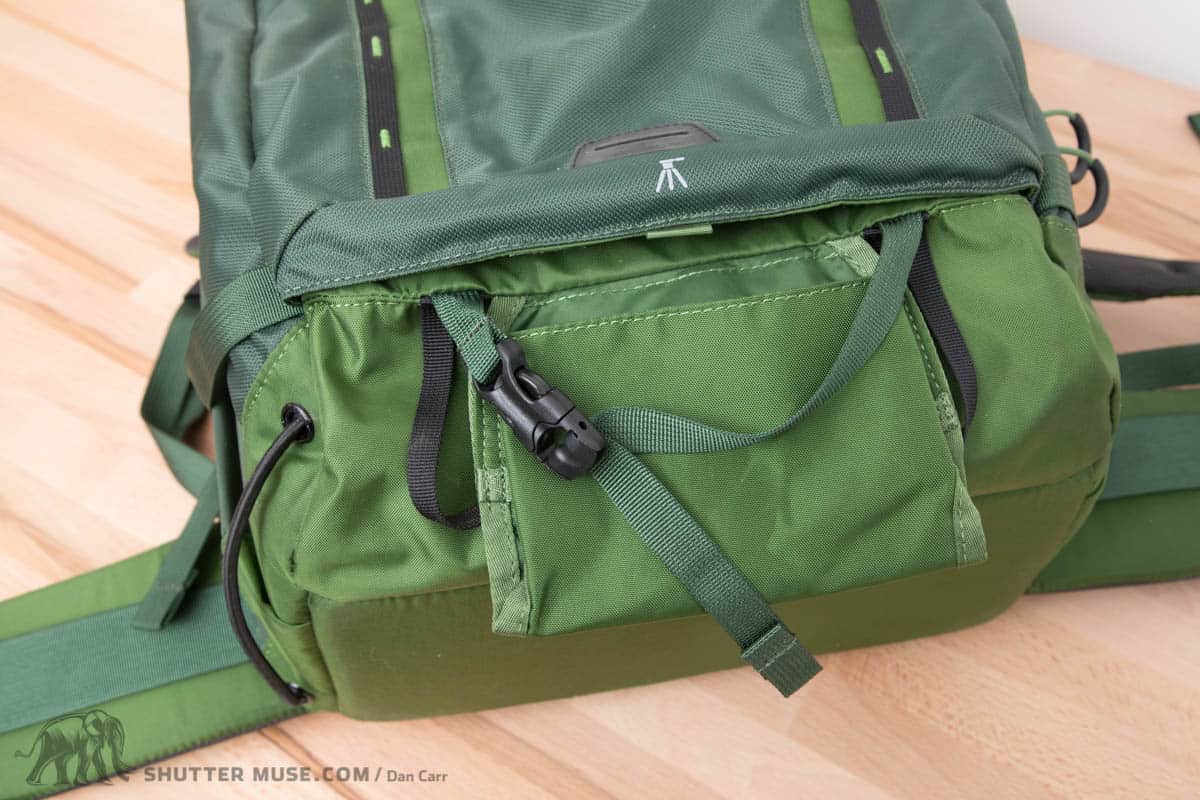
The second option is to use the straps on the front of the bag. There’s a hidden top strap in a dedicated pocket, and a hidden bottom strap and foot cup in another pocket. I like that they are always there if you need them, but they are low profile enough that they don’t get in the way if that isn’t your preferred carrying method. The BackLight 36L is a pretty deep bag, especially when you pack a lot of gear in that front section. If you then pack a heavy tripod on the back like that, it really pulls you backwards when you are moving around a lot with the pack on. For this reason, I prefer to keep the weight of my tripod closer to my centre of gravity by using the side pocket. If you have a lighter tripod though, the back mounting system is definitely useable, but you also need to be aware that it makes getting things out of the front pocket a little awkward. It’s hard to dig into the front pocket with a tripod on there, and if you unstrap it, you’ve also got to unstrap those side straps as well so it becomes a bit of a mission to retrieve small items in the front. I think most people will want to consider the side pocket as the main tripod carrying method for these BackLight packs.

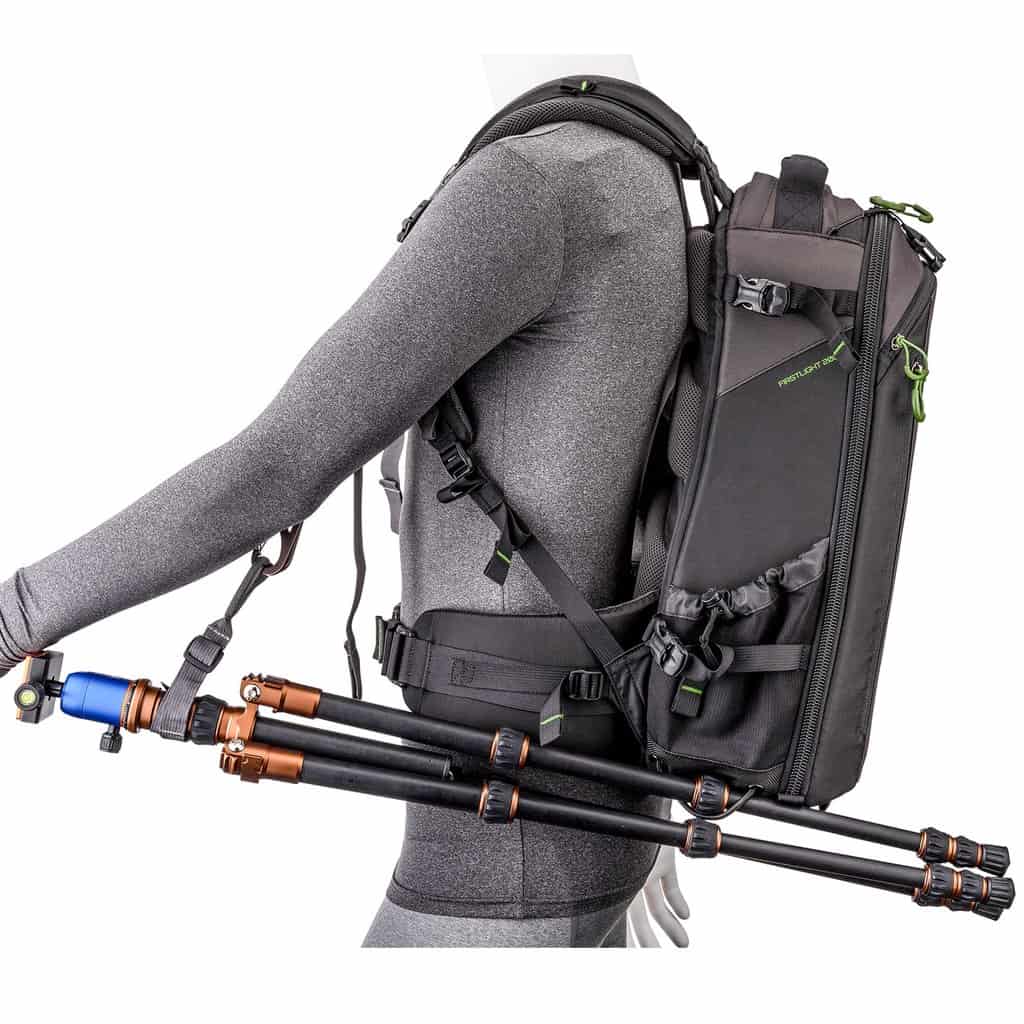
The third option is their Tripod Suspension kit which is an optional purchase ($39). This strap works by hanging the weight of the tripod off the front of the shoulder straps, and then steadying it with an elastic loop on the side of the bag. I like to use it if I’m hiking on relatively flat ground, and in this usage it’s a great way to evenly distribute the tripod’s weight. The caveat is that you have to use your hand to steady it. It’s comfortable, like an arm rest, on flat ground, but no good at all if you have to scramble up terrain that requires the use of both hands. I keep the straps with me and use it when I can though.
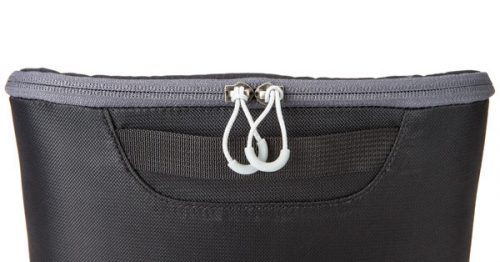
On the top of the bag there’s a small zippered pocket that I couldn’t really find a good use for. It’s pretty tight, so it doesn’t give you a lot of options other than maybe as a passport pocket if you’re travelling. I wish it had a bit more volume to it, and a key clip inside it because then it would make the perfect place to stash the House of Cards memory cards wallet that I like so much. As it stands, there’s no clip anywhere on the bag to attach that to. It’s an odd omission given that such a clip is present on other bags like the PhotoCross, and it’s one I pointed out in my review of the BackLight 26L a couple of years ago.
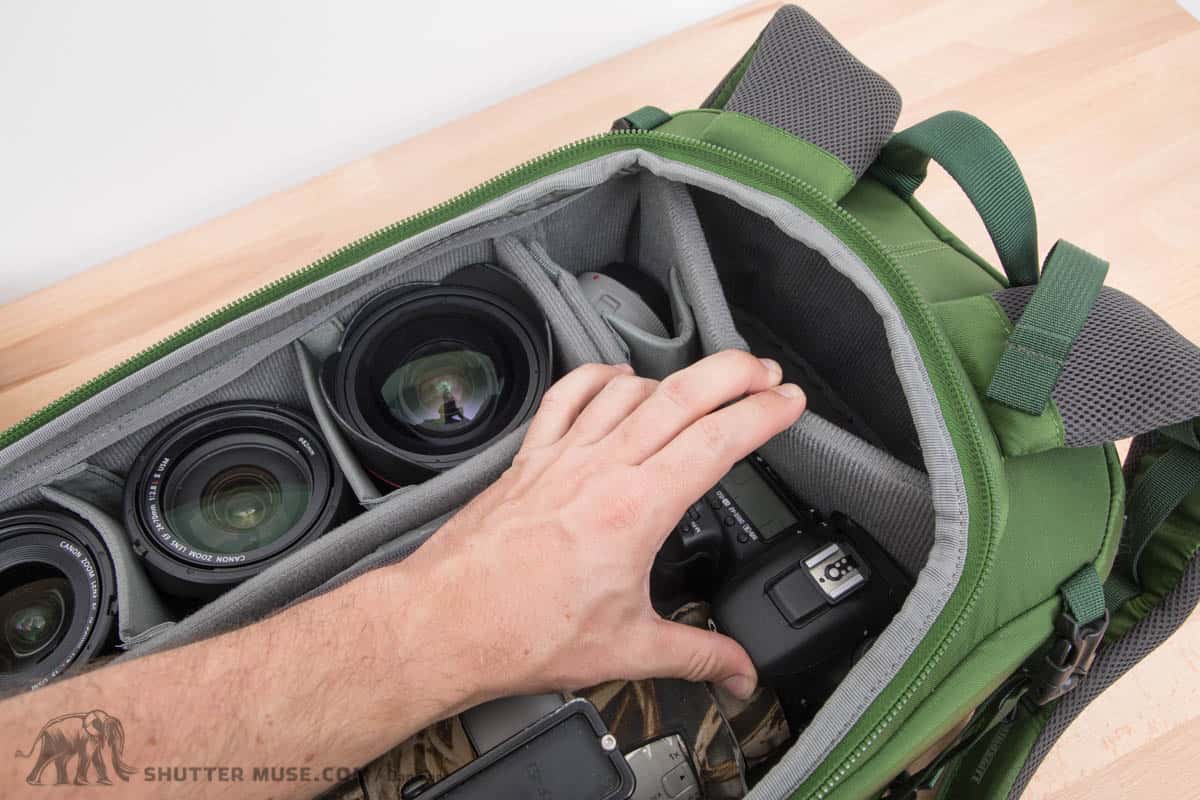
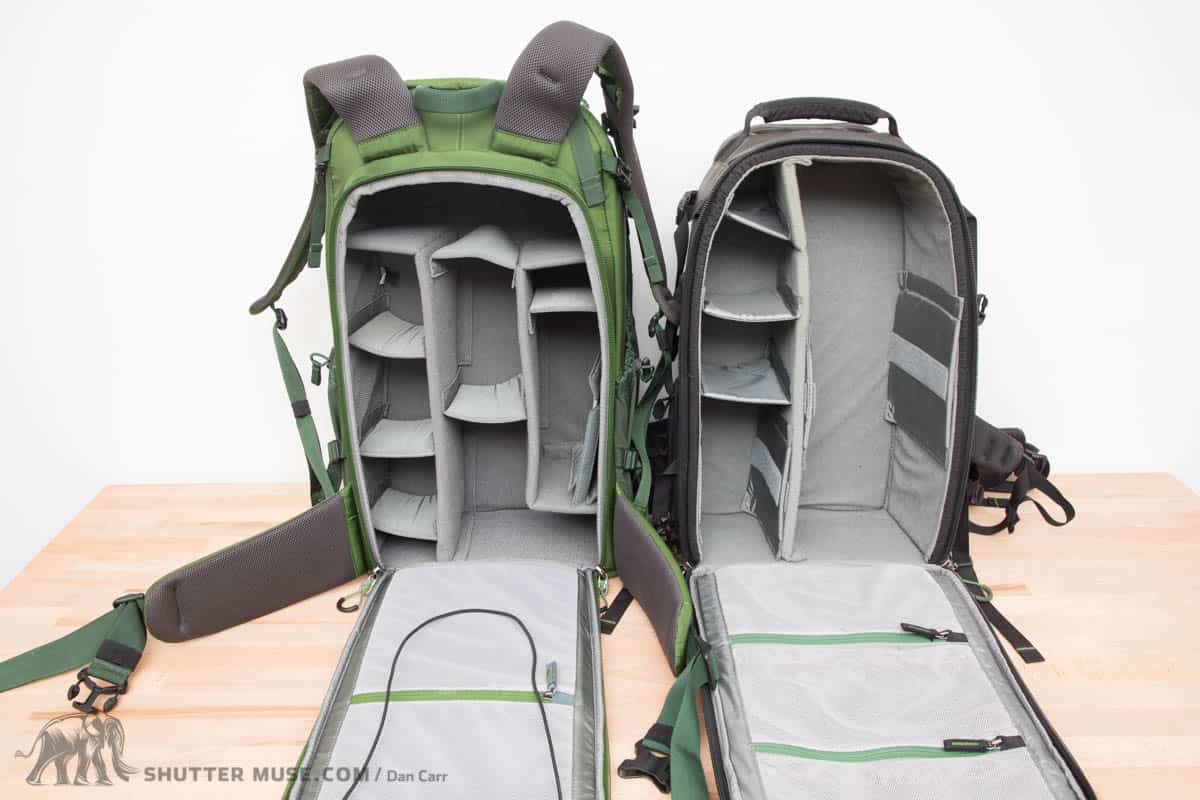
Let’s move on to the back of the bag shall we? The BackLight series has a back panel opening design which is popular in bags that are designed for outdoor usage. The main benefit of this style is that when you put the bag on the ground, the back panel is facing upwards, so you don’t get a ton of dirt/sand/dust/snow/mud all over the bag’s harness and padding, which could then be subsequently transferred to you when you put it back on. The downside of this opening style is that you get a slightly tighter opening to pull your camera in and out of, because there has to be room on the back panel to have zippers and harness attachment points. When pulling large camera setups out of the bag you definitely feel more constricted compared with working from a front panel opening bag like the FirstLight series of camera bags. That said, the camera compartment in this bag is pretty huge, so it’s not going to make a difference to most people, and it’s by no means a deal breaker.
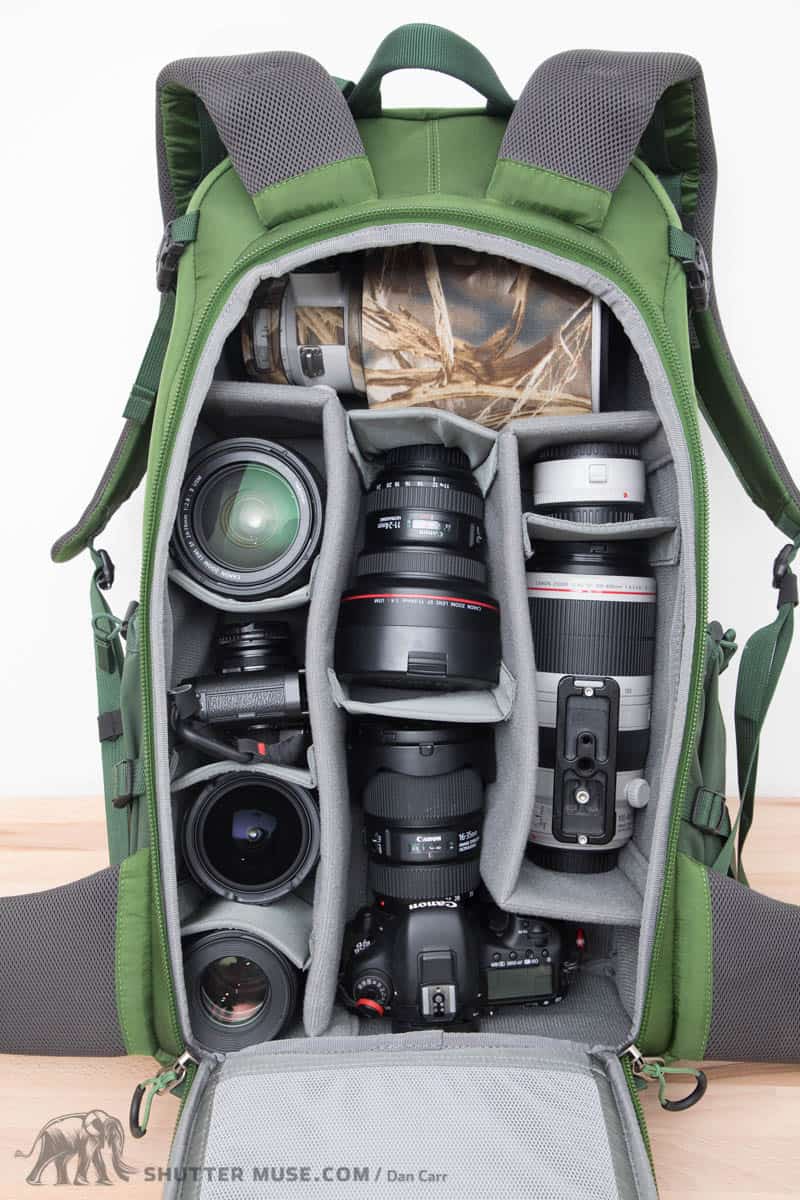
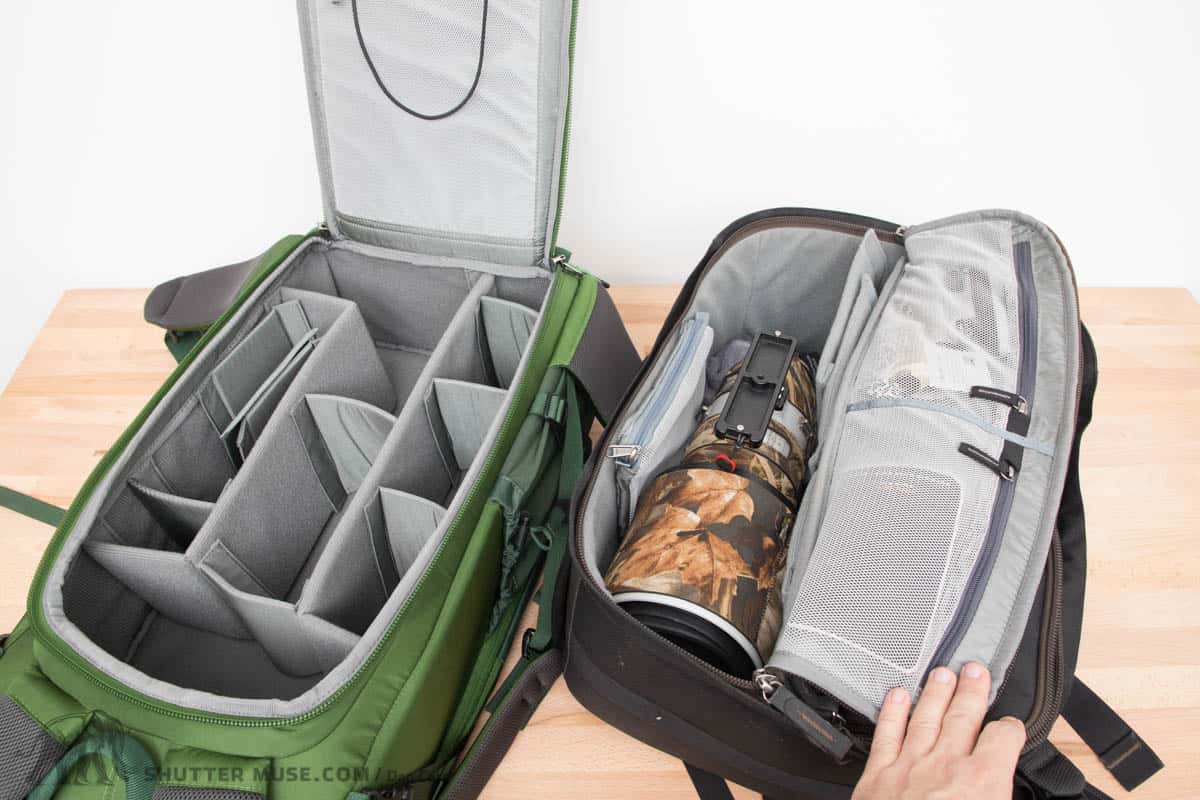
Compared to the BackLight 26L, the 36L is wider, taller and deeper. It means that you can get lenses in three rows, and you can comfortably accommodate multiple pro-sized camera bodies which was a real push in the smaller version. For the photos in this post I packed my big Canon 200-400 which is comparable in size to a 500mm f/4 as well. As you can see, it fits just fine and this means you can also fit a 600mm f/4 in there too, although you might have to remove the camera body to do that. If you wanted to take two super telephoto lenses, perhaps a 600mm f/4 and a 300mm f/2.8 combo, then the FirstLight series or the MP series would be a better option as they are slightly wider, but if you’ve just got the one big lens then this works great.

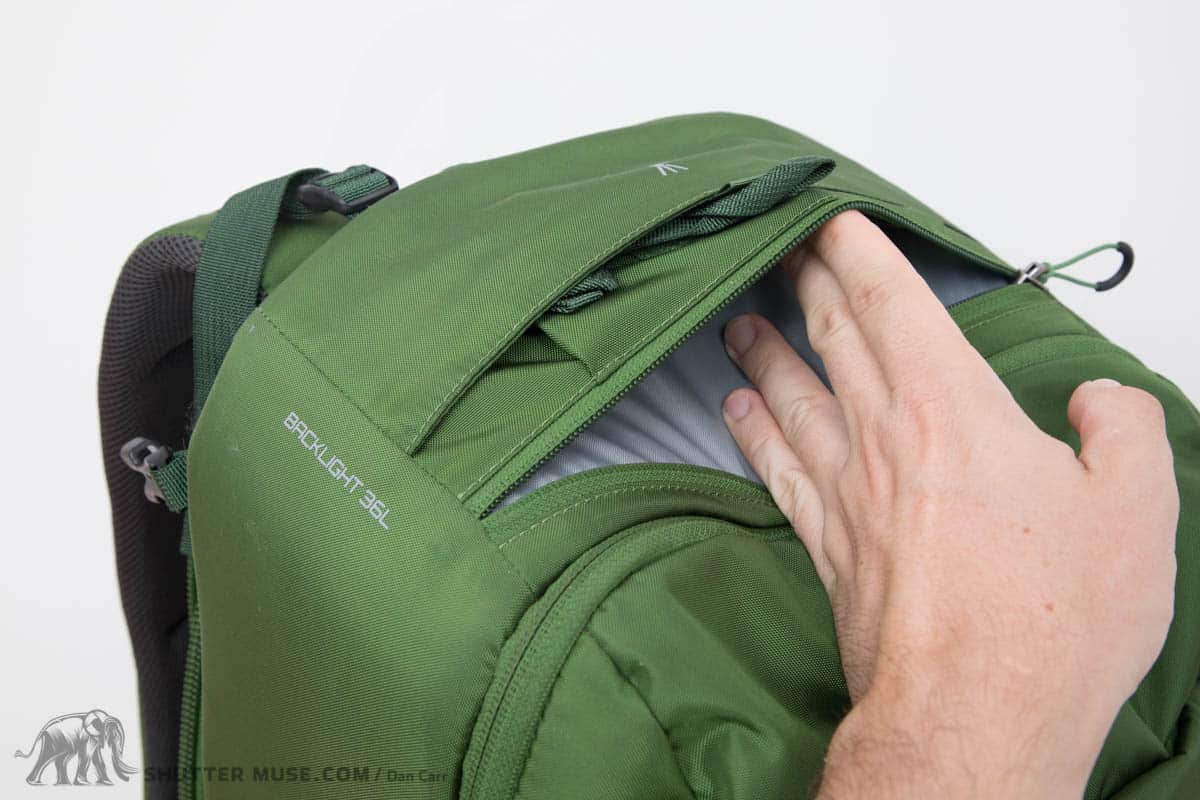
Due to the taller bag dimensions compared to the 26L version, there’s also an additional hidden area at the top of the bag behind a small divider. It’s a great place to store something like a hard drive that needs to be well protected, but not necessarily accessed very often. The divider is also removable, so you could set the interior up to have long lenses protrude into that area.
On the inside of the back panel there’s a pair of mesh pockets that can be used for extremely thin items. Pro batteries for things like a Nikon D5 or Canon 1D X will not fit, but you might get smaller batteries in there depending on the size of the gear that’s in the camera compartment. I wish the pockets had more volume, but I do see that it’s a tough choice for the designers to make. If you make them too big, people will stuff things in them and that will definitely be felt through the back panel if you also stuff the camera section. Small flat items will fit, but don’t expect to be able to stuff larger things in there as you can do in the lid pockets of the FirstLight bags.

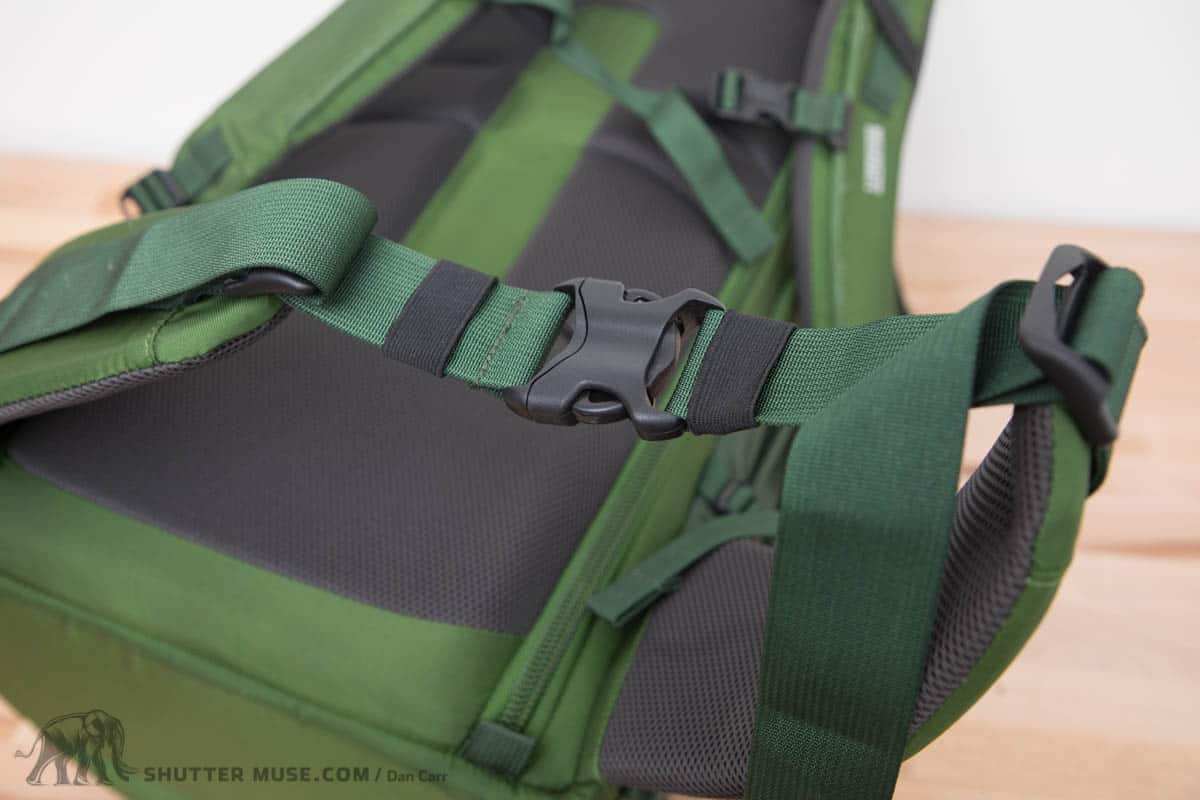
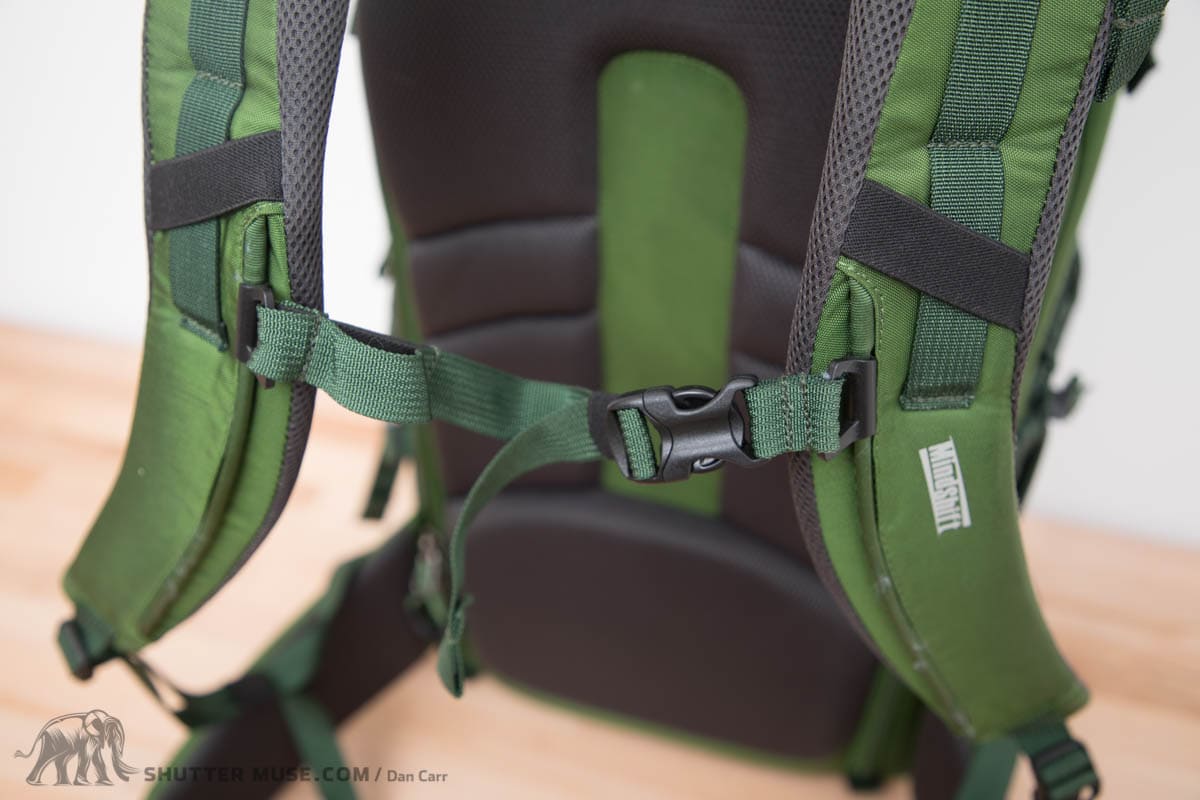
The shoulder harness and waist belt on the bag are well padded, and in my testing I found them to be pretty comfortable for all day usage. Not as comfortable as the Rotation 180 pro which I have long held as the absolute gold standard for camera bag comfort, but definitely very comfortable and with a nice deep lumbar support. If you compare the back panel padding on this with other similar packs from F-Stop Gear and Lowepro, there’s a lot more padding on the MindShift bag, and that’s noticeable on a long hike with a loaded bag.
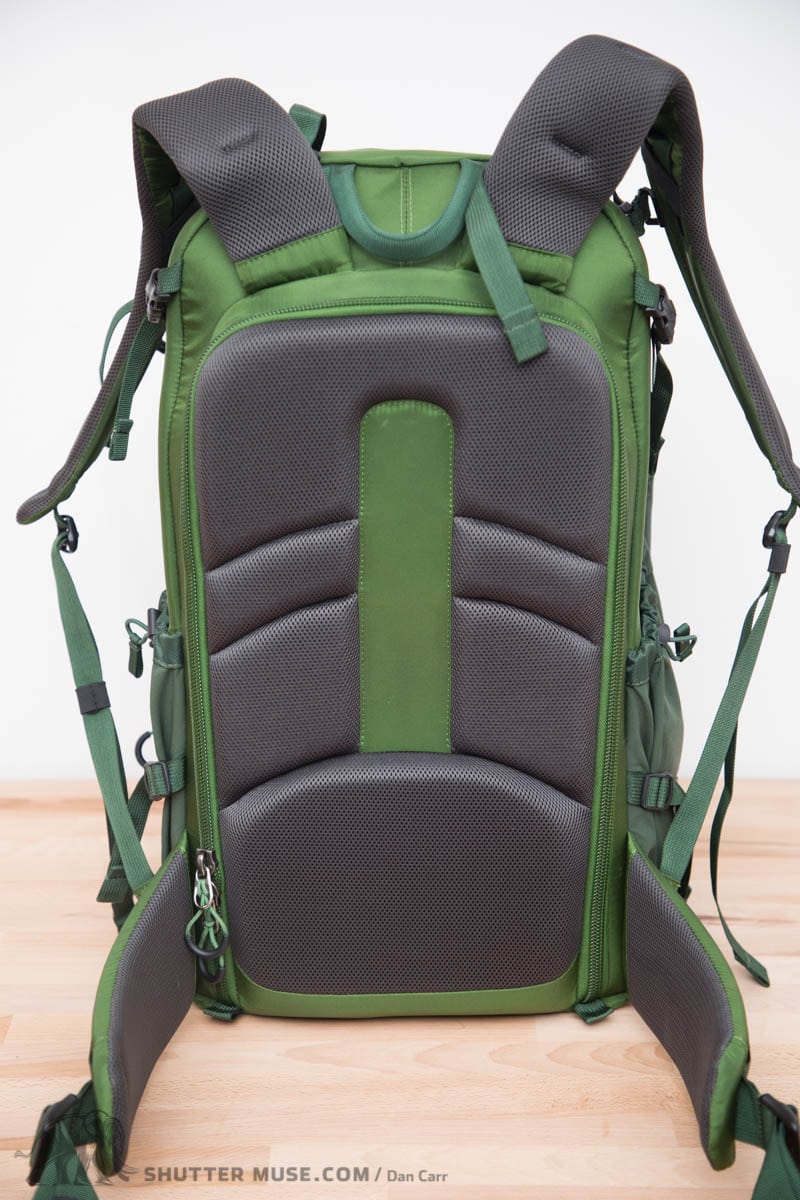
Speaking of long hikes, one slight negative that I did notice in my testing was that the green material did change colour when I sweated into it. Yeah I know, it’s kind of gross, but we all sweat, and this is an honest review. I was climbing a tough hike up a mountain in 90+degree weather with extreme humidity. It was just one of those days when you have to give up on staying dry, there’s no bag in the world that is going to prevent you sweating profusely in those conditions. This isn’t something new to me in my line of work, but it is the first time I’ve noticed a bag change colour and have sweat marks remain on the shoulder straps of the bag. Take that for what you will! I feel I should mention it because I haven’t seen it before, but at the same time I’m never going to say to someone “you shouldn’t buy that bag because you might end up with a stain on it if you happen to sweat as much with it as I did one hot summer day in British Columbia..” Like I’ve said before, I report everything I find when I put bags like this through their paces.

Other Alternatives
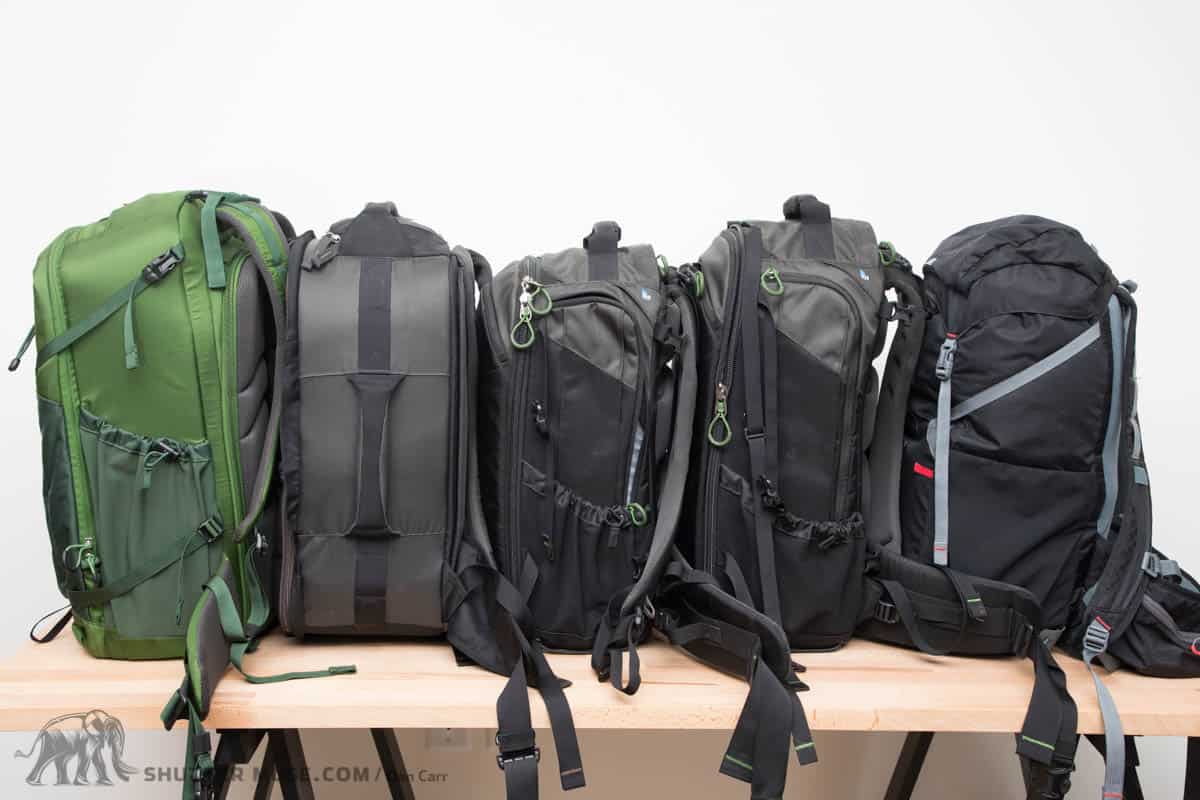
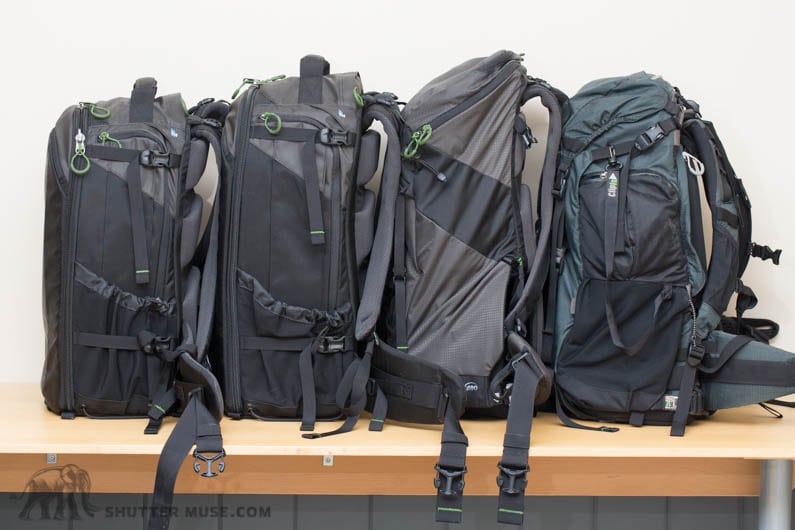
Bags that are sized in the 30-40 litre range are pretty perfect for most outdoor photographers because it gives you plenty of room to bring camera gear, and also pack some food, clothing outdoor accessories. With MindShift being a brand that concentrates on the outdoor photography sector, it should come as no surprise that they have quite a few different options in this size range. I’ve used and reviewed them all, and many of them happened to be at my office when I photographed the BackLight 36L so I took the opportunity to include some comparative photos.
FirstLight 30 and 40
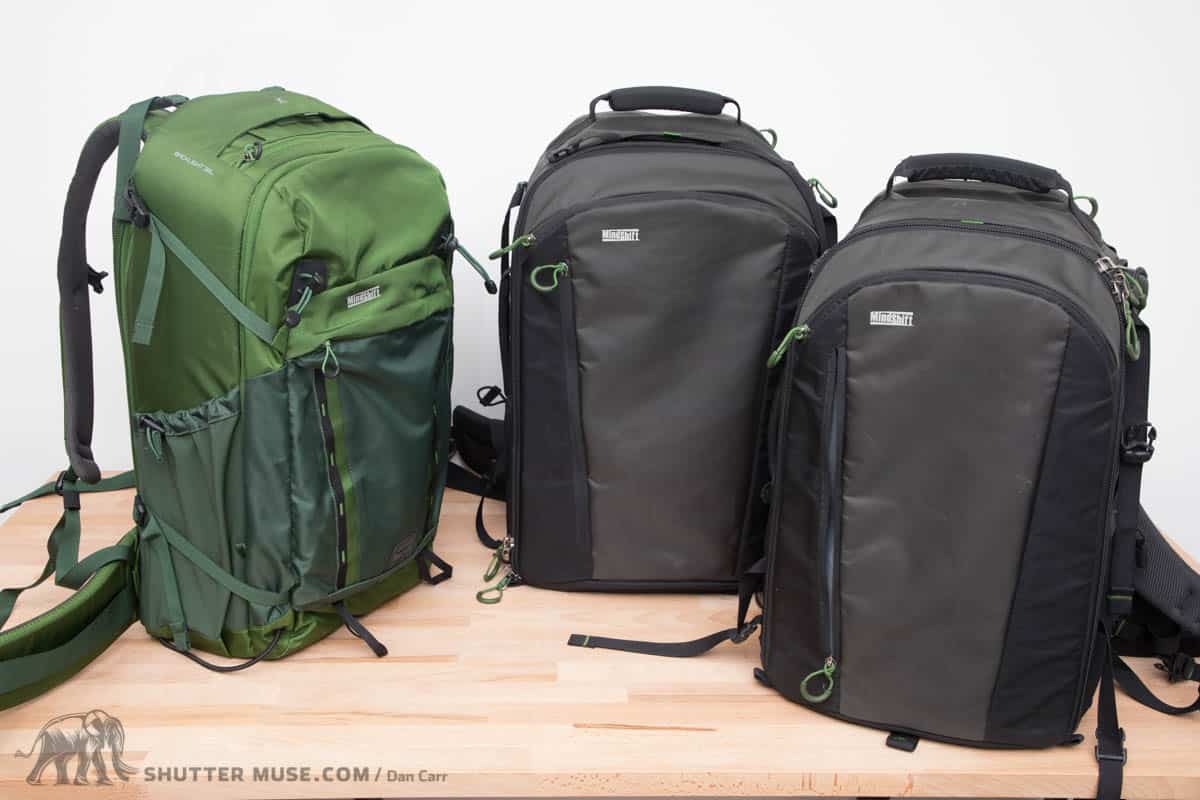
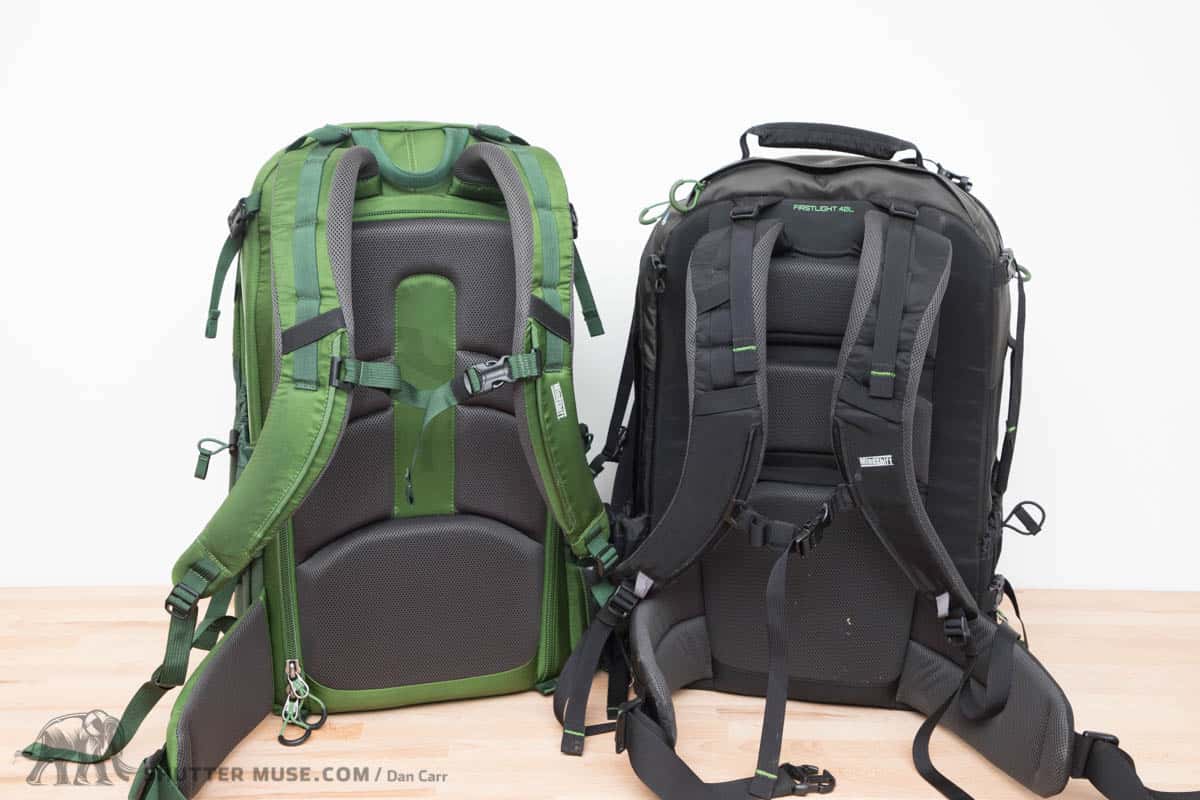
The FirstLight series of packs has a front panel opening instead of a back panel one. The result is a camera compartment that is easier to work out of, but at the expense of getting a dirty back panel and support system if you put it down on the ground. There’s also far less room in the front pocket of the FirstLight packs to put all your other non-photographic gear. I find the FirstLight packs to be excellent bags to work out of in a vehicle when using long lenses, where you can really make use of the large opening style. They are on par with the BackLight 26 and 36 bags in terms of comfort, but they do have the bonus feature of adjustable torso length which might help exceptionally tall photographers. If you don’t tend to take much more than your camera gear when you’re out photographing, and you don’t need a laptop sleeve, the FirstLight might be a good alternative. The 40 litre version is up there with the largest bags that MindShift make, and definitely holds considerably more camera gear than the BackLight 36L. The FirstLight 30L holds roughly the same amount of camera equipment as the BackLight 36L.
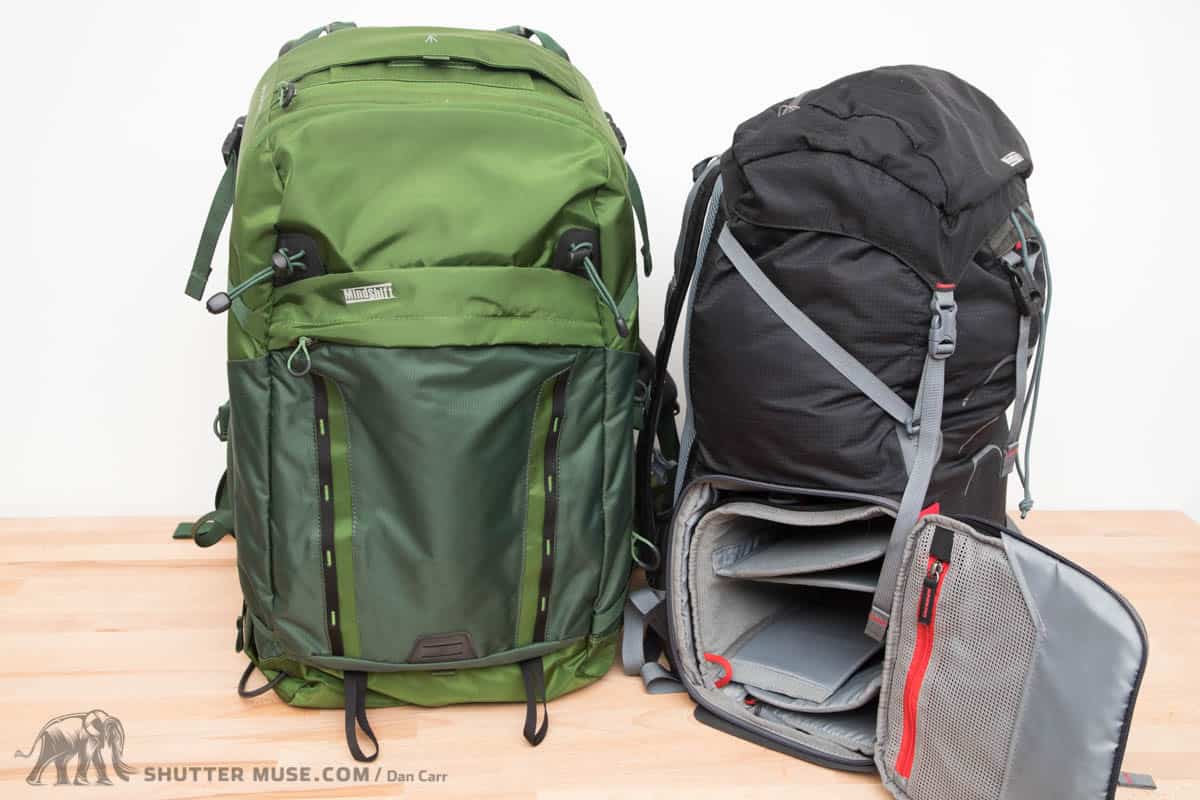
UltraLight Dual 36L

This pack has a vastly different design to most of the MindShift packs. The top 2/3 of the bag is a large open section for clothing and other outdoor gear, including food and water. The bottom of the bag has a side opening camera compartment that’ll hold a pro-sized camera body and 2-3 lenses depending on their length. This pack, as the name suggests, is very lightweight compare to the other bags in their range. It has much less padding on the back panel and support straps, so favours lighter loads. Whether this is a suitable alternative to the BackLight 36L depends entirely on whether you have more gear than will fit in the bottom section. If you are planning on keeping a light load, I absolutely love the versatility of the UtraLight Dual 36L. You can even break down the divider between the top and the bottom, remove the lower camera compartment and just use the whole thing as a regular 36L backpack.
BackLight 26L
This bag really is identical in features to its bigger brother, but the main factor in your choice is going to be whether or not you want to use a pro-sized camera body in your bag (or one with a battery grip). The BackLight 36L is deeper, and whilst you can squeeze bigger cameras in the 26L, I’m certain you’ll be happier with them in the larger bag.
MP-3 V2
Another unique design in the MindShift lineup is the Moose Peterson series of packs. The MP-3 V2 is my pick of the bunch, because the MP-1 is MASSIVE and won’t work for flying, and the MP-7 is a bit on the small size with some oddly positioned (in my opinion) side pockets on it. I love the MP-3 V2, and it comes in at around the 35L mark when you work out the volume. The MP series isn’t very comfortable to hike with, so you wouldn’t want to be walking very far with this one, but it is a great bag to have in a car or on an airplane with it’s tuck-away backpack straps and cubic design. You can really get a lot of gear in this, but it’s designed for camera gear and not additional outdoor gear. This would be my pick for a safari bag, where you need to protect gear in a vehicle, but generally don’t ever have to carry it far on your back.

Rotation 180 Horizon
In terms of the gear you can carry, this is very similar to the UltraLight Dual 36L, with the bottom of the bag dedicated to camera gear, and the top for all your other gear. The slight difference is that the camera compartment on the R180 Horizon isn’t as deep as that on the UltraLight, so whilst you can fit 2-3 lenses, one of them can’t be as long as the longest that fits in the UltraLight. Really, you’d pick this one over the BackLight 36L is you want the unique R180 system, but it doesn’t suit carrying a lot of camera gear because the bottom compartment is quite small, and the support system isn’t as padded and comfortable as that on the BackLight bags.
R180 Pro
This big beast of a bag might be another option, but one that’ll cost you much more money due to the high-end materials that are use in its construction. It’s the most comfortable camera bag I’ve ever used for hiking, and with the optional camera compartment in the top section of the bag, it holds roughly the same amount of gear at the BackLight 36L. The main difference is that it can only hold a 300mm f/2.8 or a 400mm f/4 DO when it comes to super telephoto lenses. This is, of course, due to the split in the bag that is necessitated by the Rotation 180 mechanism. It’s a truly remarkable camera bag, but you definitely pay for it!
There are of course other outdoor photo bags from other manufacturers as well. It’s not possible to have tried and tested them all, but you might consider the LowePro Whistler 450 AW. I have reviewed this pack and it has a lot to like about it, but for its large size, it doesn’t do a great job of carrying a large amount of camera gear. The biggest drawback of it is that the camera compartment is oddly small in some dimensions, so if you’re considering that bag vs. the BackLight 36L, I can tell you straight away that you can comfortably fit way more gear in the BackLight 36L compared to the Whistler 450, even though the external dimensions are somewhat similar.
BackLight 36L Accessories
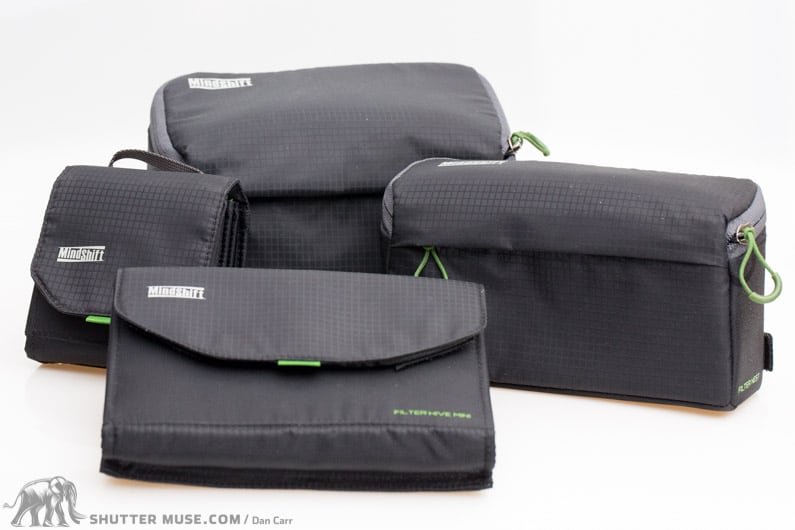
We’ve already mentioned the Tripod Suspension Kit as an option but you might also want to take a look at the Lens Switch Case. It’s a handy accessory pouch that can be mounted to either the left or right side of the hip belt. The Filter Hive of Filter Nest also has the ability to be attached to either side of the hip belt.
Conclusion
The BackLight 36L is an excellent outdoor photography pack for those that want to carry more than just camera gear, and considering the features and build quality I think the price very good. It’s great that they came out with a bag that brought the features of the BackLight 26L into a size that works for professionals with larger lenses and taller camera bodies. More than any other bag in the MindShift lineup, this bag work as a one-bag travel solution as well, because it includes ample room for a laptop and associated accessories. With ever-shrinking carry-on allowances, this can only be a good option to provide people with. It’s not perfect, but there’s no deal-breakers. If the zippered top pocket has more volume to it, and a clip to hold your SD card holder then this would be even better. This is definitely a worthy addition to the growing MindShift lineup!
Get a Free Gift From MindShift Gear (& free shipping)
As a friend of this site, you’ll get a free gift at the checkout if you spend more than $50 through MindShift’s online store, as long as you click through one of the links to their store on this page, like this one. I may make a small commission if you purchase from them after clicking one of these links, but as always, it’s greatly appreciated when you use these and it doesn’t cost you a penny more.
Purchase Links
The following links will take you to the MindShift Gear online store where you can order and take advantage of the special offer that’s described above.
If MindShift Gear don’t ship to your country from their online store, your best bet is to use B&H Photo because they have excellent international shipping options (find the BackLight 36L here) or Amazon.


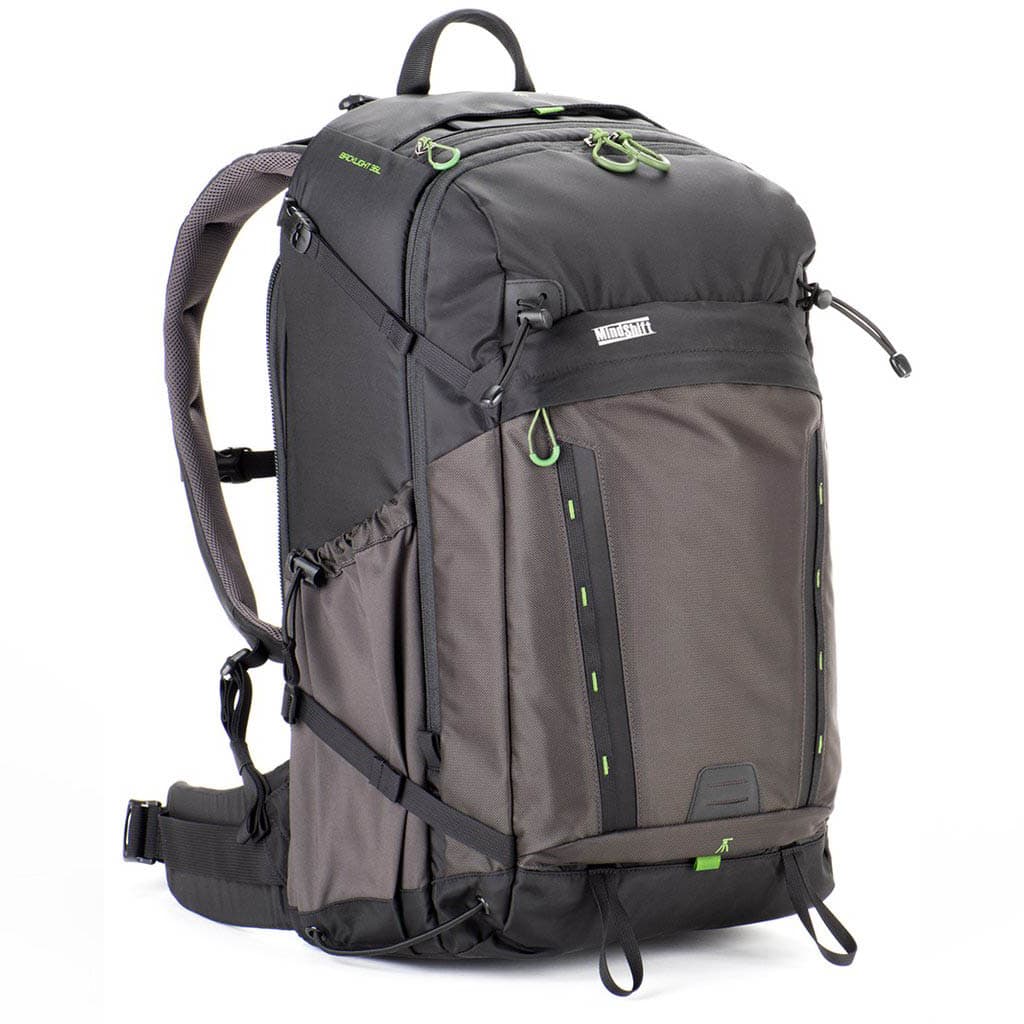
Perhaps the sweat stains issue makes the charcoal color a better option. With my 26L BackLight, I stuff micro-fiber clothes in that skinny upper exterior pocket, probably the best and only use for it. The interior mesh hold my body and lens caps (and the elastic neck band thingie).
Yeah I think it wouldn’t show on the charcoal one. It’s not a major issue, and probably people wouldn’t notice it unless you pointed them to it.
Top pocket is perfect for passports 🙂
Oh! Good to know. Thanks.
Hi Dan, I know it’s been a while since you reviewed the MindShift Gear BackLight 36L backpack, and even longer since you reviewed the Lowepro Whistler, but I wonder which one do you think is best and more practical?
I believe the Whistler pack has been updated since the version I reviewed, so it’s not really possible for me to answer this as I have not used that newer version.
Thank you.
Hi Dan,
When flying with the bag were you able to keep it under the seat? I have the 18L version now, but recently got a 500 f4 that I need to take with me.
It’s pushing it for under-seat storage. On some planes, yes. On others, no. And even to get it to a “yes” you’ll need to make sure there is almost nothing in that large front pocket, which doesn’t make it the most efficient way to travel. I think with a 500mm and this bag, you should work under the assumption that it will have to go in the overhead locker.