Guest post by macro photographer, Michael Webb Stephens – www.capturedbymiwebb.com
I have always loved the world of macro photography. In my earliest years of film photography, in the mid 80s, I was constantly seeking a way to get that pesky “nifty-fifty” 50mm lens to focus closer—mostly with bad results. I used various magnifying glasses, old microscope lenses, telescope objectives, and even tried hand holding a second 50mm lens backwards in front of the camera. All I wanted to do was enlarge the beautiful details that were rarely noticed or seen by the human eye.
Fast-forward 30+ years and I’m still trying to push the boundaries of macro photography. I am not on as strict of a budget now, but I have learned that sometimes simple is better – or at least, good enough. The purpose of this article is to encourage anyone who is interested in macro photography to realize that it is a specialty, but not at all impossible to do, and does not have to be cost prohibitive. My initial macro equipment was rudimentary, but learning and building my own macro rig over the years has helped me to better understand the physics behind magnification of light and how to diminish the difficulties associated with macro images.
I am not a professional photographer but I consider myself a solid “serious amateur” in the world of macro, particularly as it pertains to mitigating the shallow depth of field, and limited light that’s inherent in macro photography. I quickly realized that handholding was just not going to work for the detailed images I was seeking. The slightest movement, the wind, vibration, and even my own breathing made macro images greater than 1x magnification nearly impossible with ambient light.
When digital cameras were introduced, it was several years before I could find enough megapixels to capture the detail that the lens would produce. In other words, the pixel density just wasn’t enough to show detail. Now, with the current advancements in technology, macro photography possibilities are endless. At the moment I’m mostly using my old Canon 5D Mark II . It produces amazing images and the megapixel count is enough for great detail but small enough to keep the file sizes down. When mirrorless cameras advance a little more, I will likely invest in one so there are less moving parts, but for now I use mirror lockup and a shutter release cable to eliminate as much vibration as possible from the mirror’s movement.
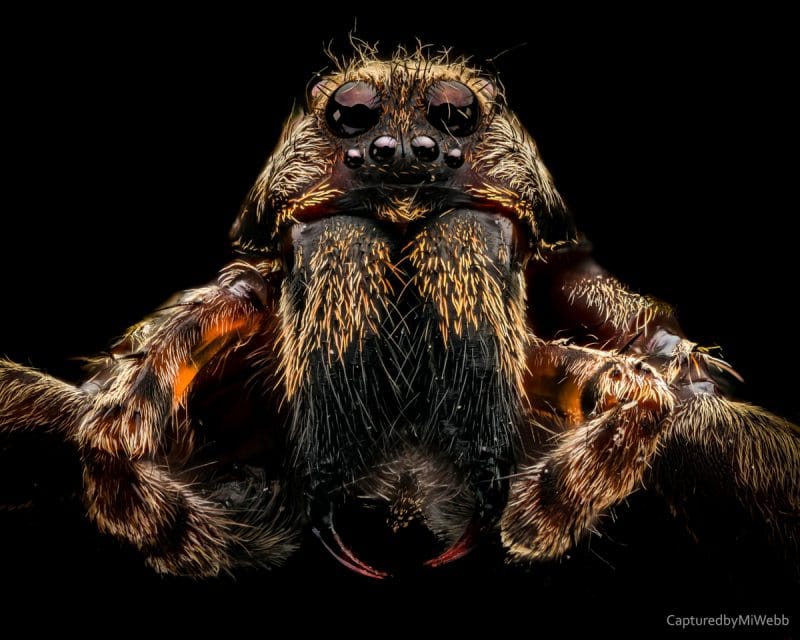
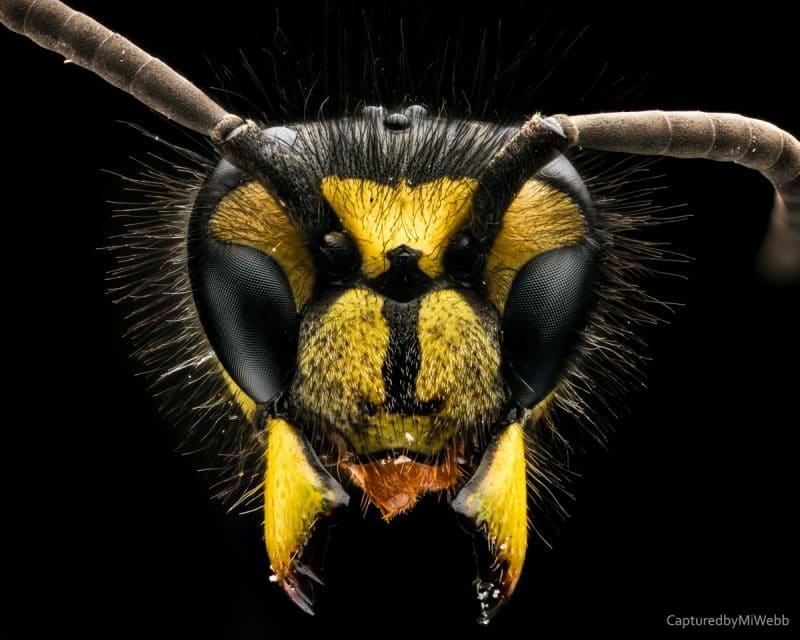
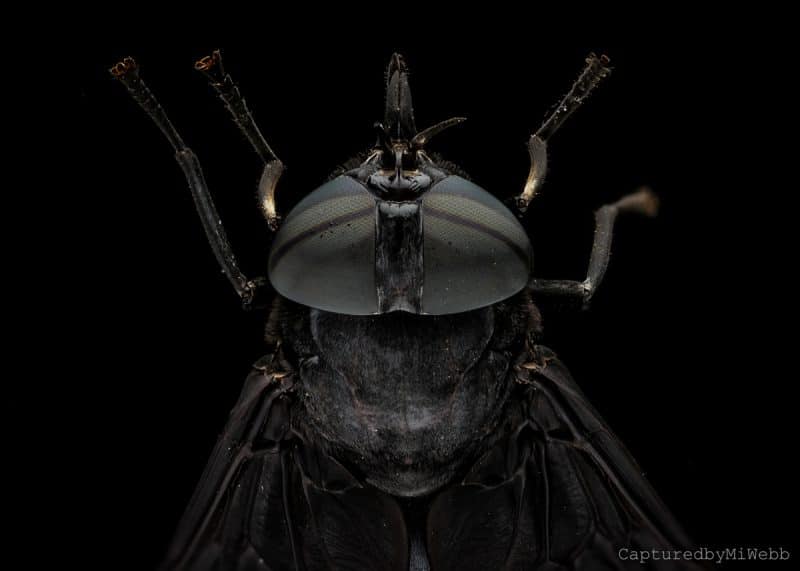
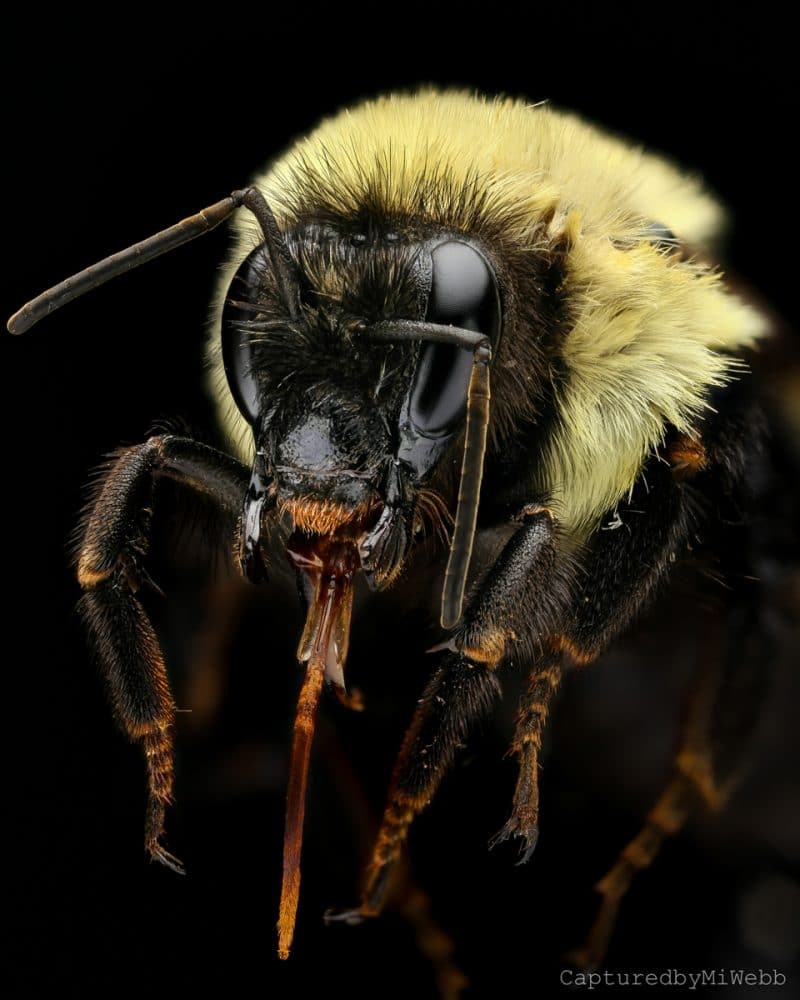
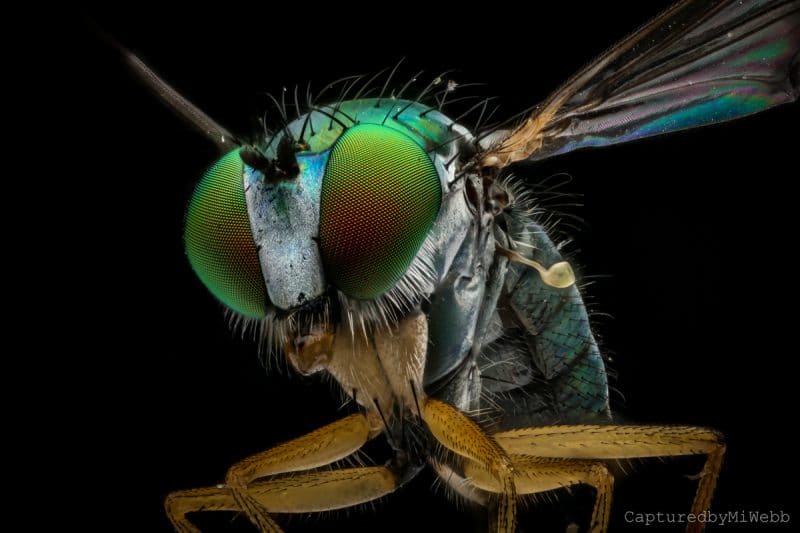
As of late, I have also found one extremely helpful macro technology that has made things even better, and allowed me to capture even more detail – that is, focus stacking. Focus stacking utilizes multiple images and specialized software to create incredibly sharp macro images with a deep depth of field. Essentially, the camera is set on a sturdy base and proceeds to take images as if it were slicing through the subject like a meat slicer. Gradual (sometimes less than fractions of a millimeter) movements change the focal plane and each image has a sharp slice or layer of detail – with the remainder of the image being blurry and outside the DoF.
Once the images are taken, they are downloaded to a computer where specialized software then analyzes each image, extracts the sharp in focus pixels, and discards the rest. After it has done so with each image, it stacks them digitally and flattens them into one image with astonishing depth of field, sharpness, and clarity. There are many focus stacking programs available; I use Helicon Focus but I have also used Zerene Stacker and even Photoshop’s built-in focus stacking algorithm.
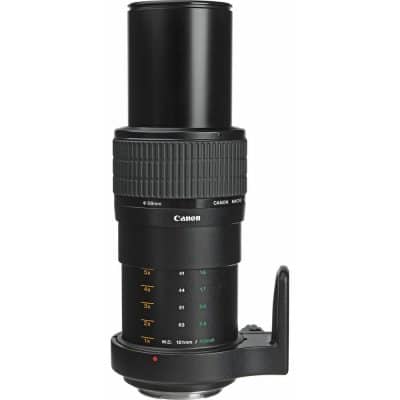
My original setup was a cheap video rail and macro adjustment slider; both from Amazon and quite inexpensive. I did all of the focus movements and micro step adjustments by hand, and used a speedlight flash head with diffuser box on it. I had purchased several macro lenses over the years so I tried a variety of lenses with macro attachments. I used screw on filter lenses, a backward mounted lens and anything else I could find to increase magnification. Eventually I purchased the Canon MPE-65mm Macro lens and this is what made all the difference.
I have always said that the lens is the most important part of a photography setup and this one solidifies that position. It only does one thing, but it does it incredibly well. My macro “rig” has been in a constant beta state of evolution and the current setup consists of a kitchen cutting board with the stepper motor rail system mounted on it. Initially I used an inexpensive video rail but later eliminated it and hard mounted a Cognisys Stackshot rail system instead.
Typically, I use a needle to mount the insects, although sometimes I will put them on a stick to resemble a “natural” look. I then use cheap LED video lights to set up the photo so I can see the subject for the initial positioning and focus. After that, they remain on but are not bright enough to influence the final exposure – not even as fill.
My gear:
- Canon 5D Mark II (find second hand)
- Canon 100mm f/2.8 Macro
- Canon MP-E 65mm f/2.8 Macro
- Cheap macro slider rail set – such bad quality I won’t even list details…
- Cognisys Stackshot stepper motor macro rail
- Paul C. Buff monolight strobes
- Fotodiox 32” Octabox with baffles installed
- White foam core poster board (cut into small reflectors)
- Inexpensive Video Camera LED lights for setup and focus only
- Panavise small vise, electronic soldering vise and clips, tweezers, plastic flex arms, etc. to hold the insects.
- Wooden cutting board for the base
As important as the lens is, lighting is the next most challenging aspect of my macro work. I tried using several models of macro camera flashes, then I tried “hot lights” and LED constant light sources but they all fell short of the mark. In the end, I found that a single, reasonably affordable, Paul C. Buff lights monolight with a cheap off-brand octabox pointed straight down gave me the best light.
To soften the light, I use a Fotodiox ocotabox with the inner baffle and diffuser in place. The light is mounted about six inches above the subject so I get a wrapping effect from the large light source which again helps to further soften the light. I then use small pieces of foam board to reflect the light back up onto the subject, filling in more of the shadows from the sides.
Whilst it looks like I might use a black backdrop, I actually don’t. I use the absence of light to create that deep black background in the image. I position the rig so that there is no stray light bouncing back into the camera, and I keep a good distance from walls. The focal length, combined with the downward light and 1/200 synch exposure ensures that only the subject is illuminated.
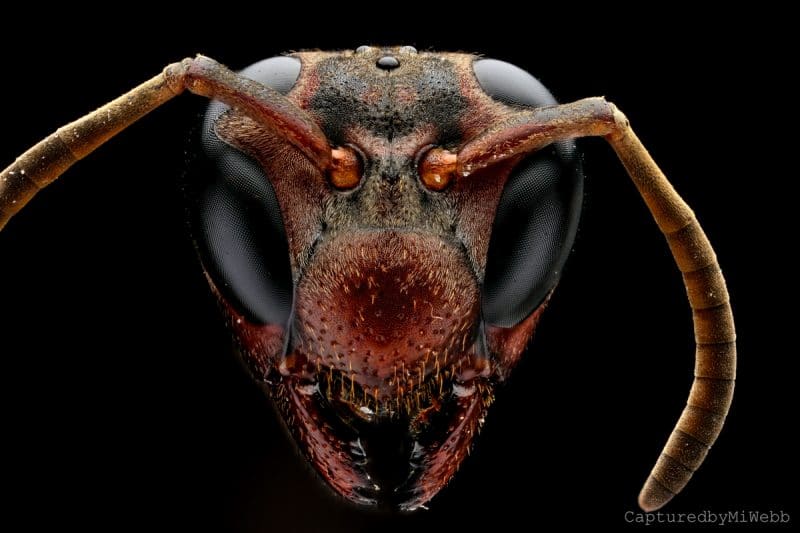
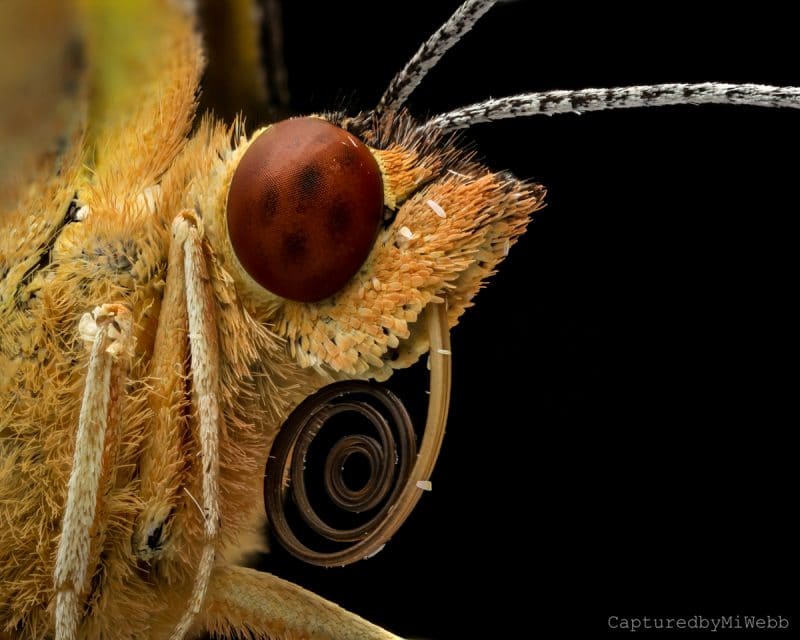
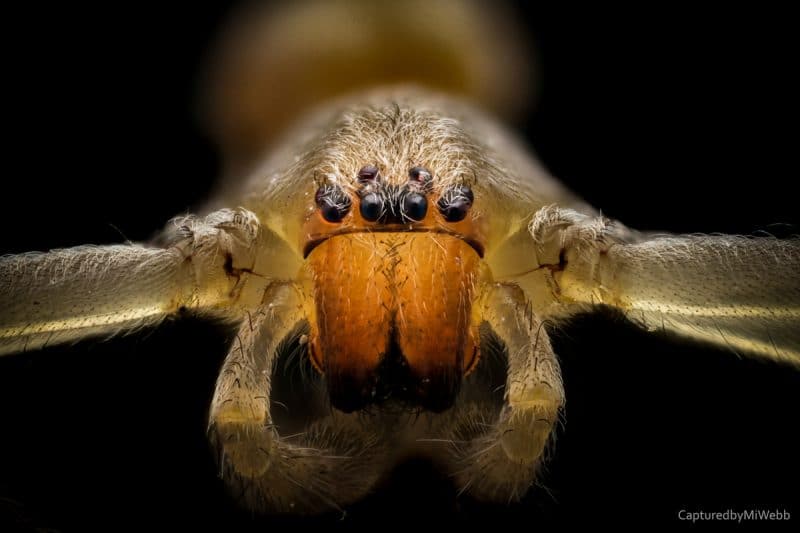
I find most of my insects and spiders just around my house. You would be surprised at the amount of insects that are within the boundaries of your own yard! I leave the porch lights on and gather up dead bugs in the morning, and also just stroll through the yard keeping a sharp eye out for interesting insects. Many of my subjects are dead and imperfect, e.g., they are dried up a little too much, colors have faded some, antennae and legs missing, etc. But they still make good images when you’re closely framing a small portion of the insect.
Interestingly, when I started to share my images with my friends and co-workers, they began to bring me Ziploc Baggies full of specimens! I have quite the affinity for jumping spiders, they are truly amazing little creatures and remain quite beautiful even when expired.
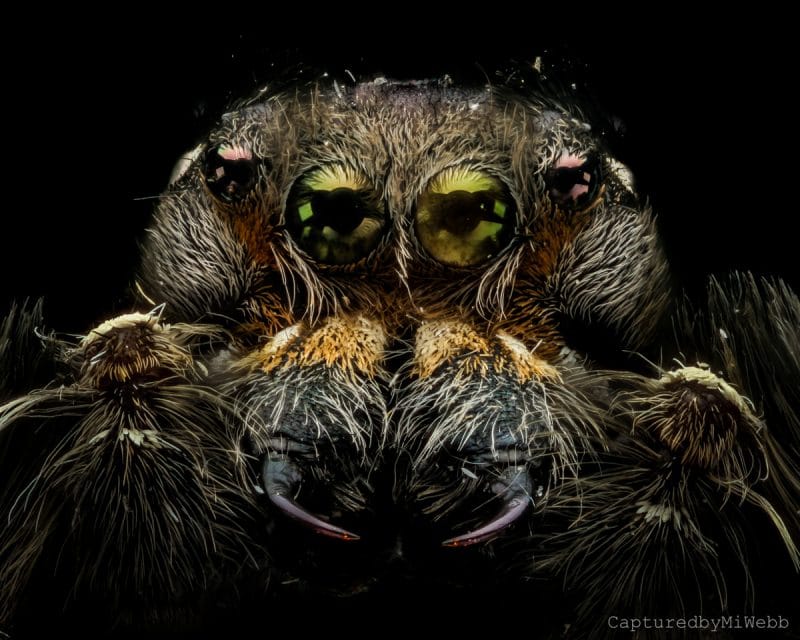
One thing I am always asked, is if I kill insects and spiders just to take a picture of them? The answer is that sometimes I do, yes. Generally I find them dead, but I do occasionally find one at the end of their life cycle (fall of the year) that I do place in a freezer for the most humane death I can muster for them. Of course, there are some folks who mentally melt down at my psychotic killer actions. After I discuss the numbers of insects that they themselves kill with the windshield of their car, pesticides, stepping on them and other means, they generally calm a bit. I do still shoot field macro and live subjects, but I will continue to delve deeper into the magnified world within my home. My next realm is utilizing microscope objectives, but that will take some time and a little more money. Until I can afford an electron microscope that renders brilliant color, I will have to stick with what I have.
Hopefully these images and a description of my techniques will inspire some of you to take a closer look at the macro world within your home.







Love your work! I just purchased my stackshot and I’m excited to get into macro photography! Thank you for your write up
Let us know how you get on with the stackshot!
Great work. I am stuck trying to get a full length of a fly using a pin . I spray painted the pin black that I used to mount the fly. Can’t seem to get the pin from showing up in the frame. Any suggestions?
Do you need to make it vanish in the frame? If it’s close to black, and on a black background, it should be easy enough to clone out in Photoshop?