
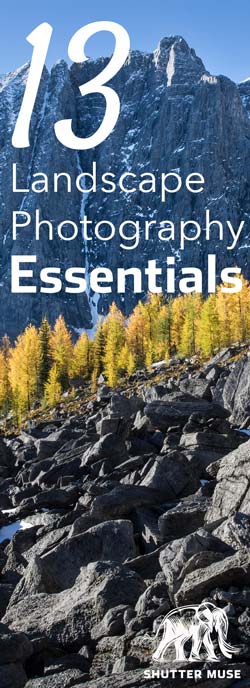
For the past two decades, I have undertaken photographic assignments and projects worldwide and tested and reviewed various equipment throughout those journeys. Most types of photography require a slightly different set of gear. In the past, I’ve written about gear for wildlife photography, macro photography, and even the necessities for the traveling photographer. Today, I will piece together a list of landscape photography gear essentials based on the gear I take whenever I head out on a landscape mission.
Table of Contents
A Circular Polarizing filter
A circular polarizing filter (CPL filter) cuts down reflected light in a photo, removing glare from water, foliage, clouds, and other reflective surfaces. They can dramatically alter the look of a landscape photo, almost infinitely more than any camera or lens upgrade you might be considering. For this reason, a circular polarizing filter is the first thing I recommend buying when you want to get more serious about landscape photography.

When you use a polarizer, leaves will get greener, skies will get bluer, and everything will pop with more contrast and vivid colors–all controllable by simply rotating the polarizer on the front of your lens. While many beginners take a “fix it in the post” attitude towards landscape photography, the specific effects of a polarizer cannot be recreated in editing software. For example, a CPL filter will remove glare from the surface of a lake, allowing you to see beneath the water.

Be careful, though, because a poor-quality polarizer can cause a color cast on your photos, soften the images, and make your lens more susceptible to flare. Breakthrough Photography makes the best CPL filters on the market, but the Amazon Basics Polarizer is also surprisingly good and an absolute bargain. I can’t think of anything else this cheap and simple that can so dramatically affect your photography.
If your lenses have varying filter thread sizes, make sure you get a polarizer to fit the largest one and then use step-up rings to fit it to the smaller ones. You should also protect your filter in a suitable photography filter case.
ND Filters
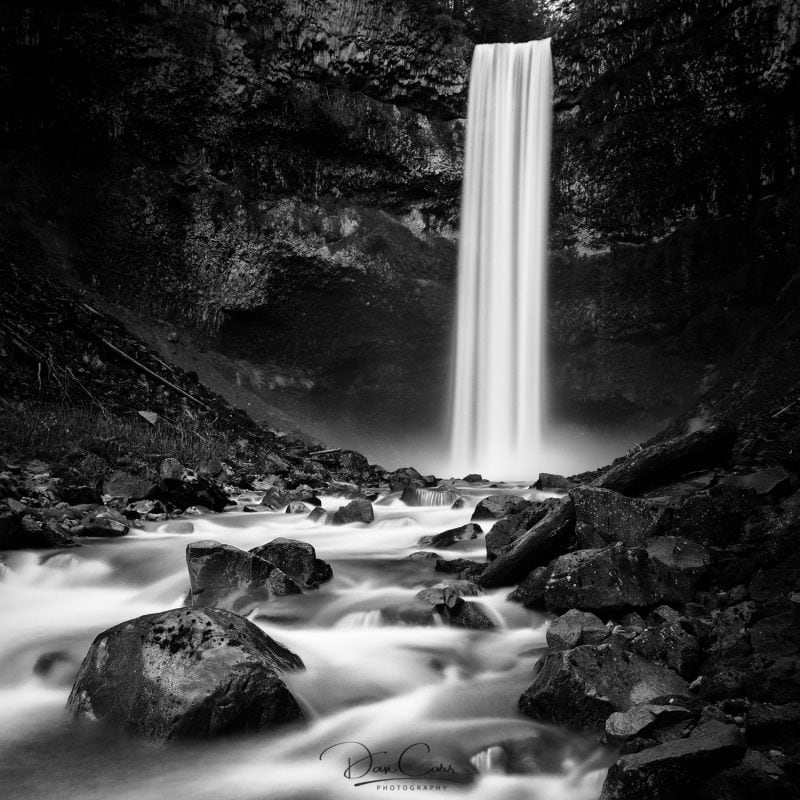
If you want to blur the motion of water or clouds in your landscape images, the easiest way is to use a neutral density filter (ND) on the front of your lens. The ND filter cuts the amount of light hitting your camera’s sensor and allows you to use a much longer shutter speed while maintaining the correct exposure.
Blurring water or clouds this way adds an intriguing element to your image, often captivating viewers who suddenly imagine the passing of time through a single image. It can also simplify an image by smoothing out water ripples and specular highlights that might otherwise be a distraction from the scenery and composition. When used correctly, an ND filter is a powerful tool whose effect is difficult and time-consuming to recreate in Photoshop or other editing software.
Buying a poor-quality ND filter will leave a nasty color cast on your photo, which is a real pain to remove during editing. As with the CPL filter, I’m a big fan of the Breakthrough Photography X4 ND filters. They make the best and most color-neutral ND filters on the market. Their popularity can make them hard to get hold of, but you can’t go wrong if you see that they are in stock on their website.
The most common type of ND filter for landscape photographers is a 3-stop or a 6-stop. If I could only carry one in my filter case, it would be the 6-stop because it gives long enough exposures to blur open water, such as lakes and the ocean. Breakthrough Photography even makes a product called the Dark CPL, a CPL filter combined with an ND filter. If you can only buy one filter for your landscape photos, their 6-stop Dark CPL is a great choice.
Note: ND filters are available in two different types: Screw-on and square. I have written in-depth comparing screw-on filters with square ND filters, so you should check that out before making your choices.
Shutter Release
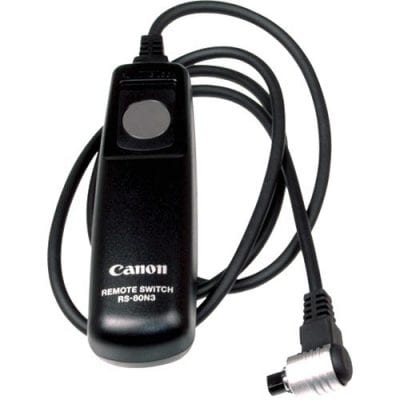
A shutter release is a remote control for your camera that allows you to take a photo without touching the camera body. If you’re working with longer exposures on a tripod, touching the camera can introduce vibrations that lead to softer photos. A shutter release is a quick, easy, and relatively cheap way to improve the sharpness of your landscape photos.
Shutter releases come in two types: Cable releases that attach to the remote port on the side of your camera and Bluetooth remotes that work wirelessly. The most basic cable releases are cheaper, don’t require a battery, and will be less prone to technical glitches at inopportune moments. More complex battery-powered cable releases are only needed to create time-lapses.

Bluetooth wireless remotes, such as the Sony RMT-P1BT that I use, are convenient and offer the added benefit of triggering the camera from a distance when you want to include yourself in the photo or start a video recording when you are in front of it. I often do this for review images on this site.
A Photography Specific Backpack
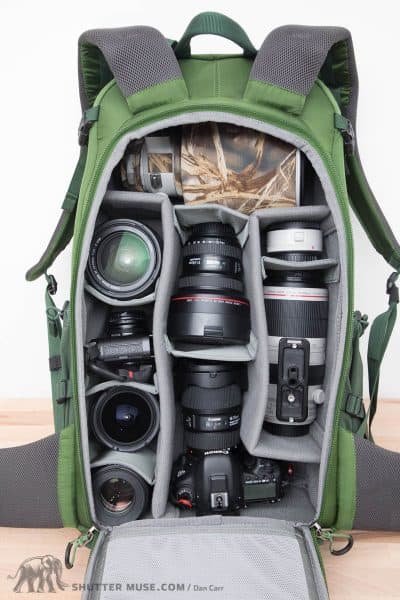
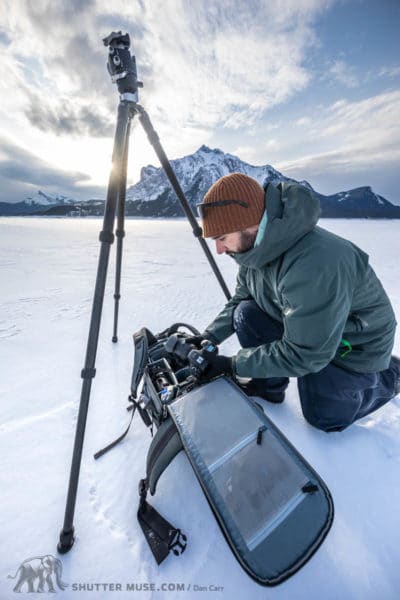
For landscape photography, I can’t think of a better way to carry your gear than a dedicated photography backpack. When you need to cover some distance to get to a location, the carrying comfort of a good backpack can’t be beaten. I know that many people like shoulder bags in an urban situation, but they’re uncomfortable when walking long distances.
Not all photography backpacks are suitable for landscape photography. Some features you should look for are a water bladder or bottle holder, a solid tripod strap system, durable materials on the base of the bag, thickly padded shoulder straps, and a wide, padded waist belt that sits on your hips to distribute the load.
For landscape photography, my favorite backpacks are the MindShift BackLight series and the Shimoda Designs Explore series. Both these series offer backpacks in various sizes to fit different heights and body shapes, as well as different amounts of camera gear. For more details, check out my Shimoda Designs Explore review, MindShift BackLight Elite review, MindShift BackLight 26 review, MindShift BackLight Sprint review, and the Backlight 36 review. If MindShift or Shimoda don’t have something that suits your needs, I also like the lightweight LowePro PhotoSport packs.
Shimoda Designs has offered Shutter Muse readers a 10% discount on anything purchased through their online stores. US, Canadian, UK, French, or German residents should use the discount code ShutterMuse10 after clicking here to access the store. Australian readers should use the same code on the local Shimoda distributor’s site, Maxxum, instead.
US Customers spending over $50 in Think Tank Photo’s online store can get a free gift at checkout after following one of the links to the store from this review–like this one. If you have any issues, please follow the instructions on this page.
Tripod
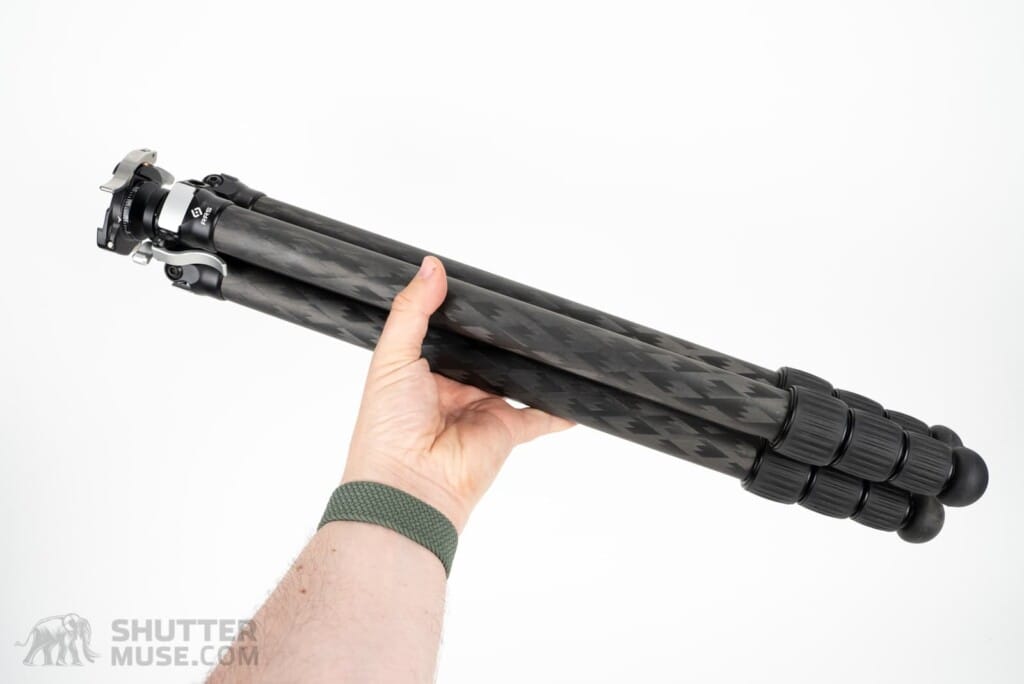
A good tripod is one of the most important items in any landscape photographer’s kit. If you want to shoot at the lowest possible ISO to maximize image quality and a small aperture to maximize your depth of field, you’ll need a stable platform. You’ll also need one if you want to use your ND filter for long-exposure images that blur water and clouds, as discussed earlier in the article.
Key considerations for tripod selection are weight, capacity, folded length, maximum height, material (aluminum or carbon), and the number of leg sections. Choosing the perfect tripod is about finding the best compromise between the specifications that are most important to you. At a minimum, you should look to get a tripod that extends high enough to place your camera at eye level.

The folded size of the tripod is greatly affected by the number of leg sections (usually 3, 4, or 5). The more leg sections there are, the smaller the tripod can collapse, but overall stability is the tradeoff. For example, a 3-section tripod will always be more stable than an equivalent 5-section tripod.
I use an RRS Ascend-14L and a TVC-24L, but Benro, Leofoto, Robus, and Manfrotto all offer great options at a slightly lower price than RRS tripods. The previously reviewed Peak Design Travel Tripod is also a very popular choice. The key is to understand that most people are going to screw this up and buy a cheap, crappy tripod because they don’t appreciate how much of a difference it can make. If you don’t make that mistake, you’re doing well!
Once you have chosen your tripod, there are some additional tripod accessories that you may find helpful. Some of them will help you make your landscape photos even sharper. To keep this current guide a reasonable size, I have put my list of favorite tripod accessories in a separate article.
Ball Head
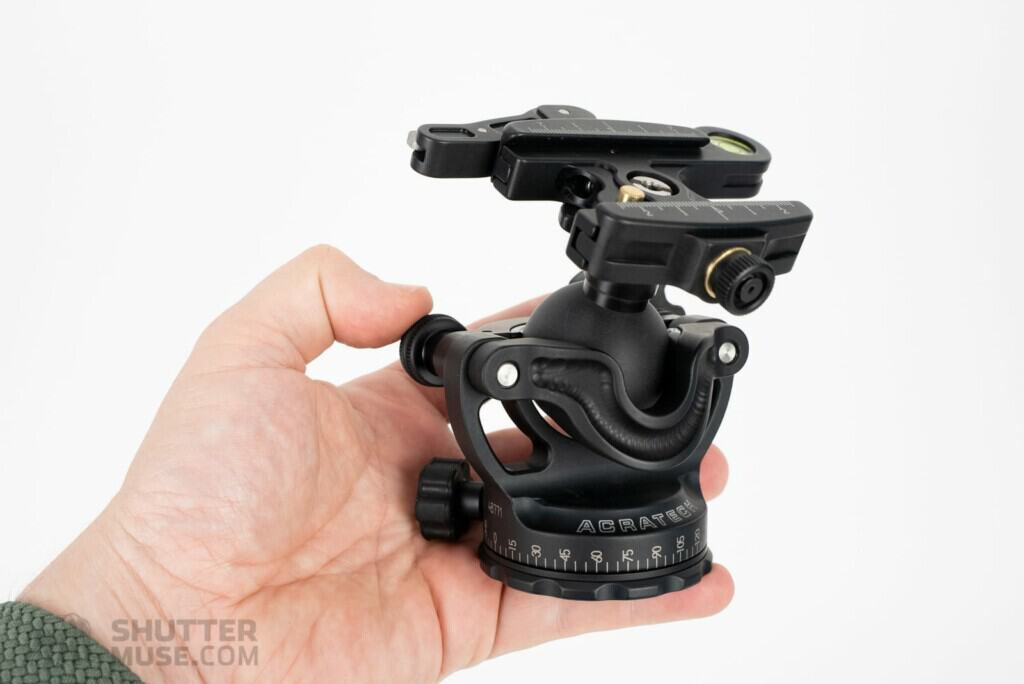
Tripod heads come in all shapes and sizes, but a ball head is most useful for landscape photography. In its most basic form, a ball head will have a single knob that unlocks the full range of motion. As you progress upwards in quality and price, you’ll find ball heads that have a second knob to control the horizontal panning base and sometimes a third knob that controls the tension of the ball when moving around in the un-locked position.
Many cheaper tripods come with a ball head. If that’s the case with your chosen tripod, please make sure that the head is of decent quality. In the past, I have seen good tripods packaged with garbage ball heads so the manufacturer can say “includes ball head” in the product description. A lousy ball head can ruin all the good that your tripod is doing.
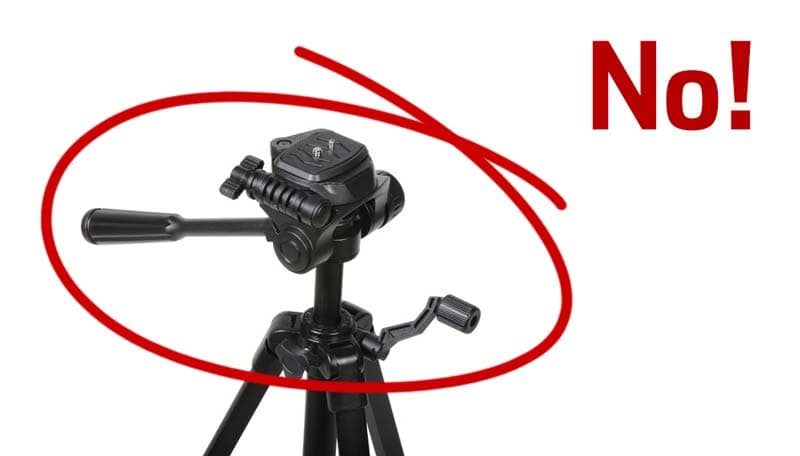
While teaching photography workshops, I’ve encountered a surprising number of beginners who have cheap tripods with pan/tilt video heads. In most cases, these are hand-me-down tripods, second-hand purchases, or simply the result of walking into a photo store and saying, “Give me the cheapest tripod you have.” For landscape photography, you want a ball head 99% of the time. And you never want a head that looks like the one in the photo above!
When choosing your ball head, check the weight ratings to make sure it can handle the weight of your heaviest camera and lens combination. If you’re looking to do some panoramic photography, you’ll want to find one with a panning base. A ball head with a panning base will have two nobs on it (at least). My current ball heads of choice are the Acratech GXP or GXP-SS, the RRS BH-40, and the PMG BH50.
Camera L Bracket

An L bracket–sometimes called an L plate–is a quick-release camera bracket that lets you easily switch your camera between portrait and landscape orientation on a ball head. As the image above demonstrates, when you switch orientations while using an L bracket, the camera position and the viewfinder position barely change. When you make the same change using the 90-degree drop-notch on a ball head, the camera moves significantly downwards and to the side.
When exploring the available composition of any landscape photography scene, it’s always a good idea to consider both landscape and portrait orientations. Sometimes, one will outshine the other, or even better; sometimes, you can create two beautiful compositions instead of just one. I love it when I can provide my clients with orientation options, be it for their walls or the pages of a print product.
Without an L bracket on my camera, I would have to change the tripod’s position and the tripod legs’ height every time I want to switch back and forth. I then have to re-frame the scene entirely. This wastes time, and if we’re honest, whenever there is a barrier at a critical moment, there will always be times when we skip it altogether.
With an L bracket on my camera, I use my ball head’s quick-release clamp to flip the camera quickly, and then I might only need a minor tweak to the camera position. Ease of re-positioning is the primary reason for using an L bracket, but other reasons are written about in my guide to camera L brackets.

Really Right Stuff makes the best brackets, albeit the most expensive. If I want something more wallet-friendly, I often choose Kirk Photo’s brackets for my cameras. Leofoto and SmallRig also have good selections on the cheaper end of the spectrum.
Camera Rain Cover
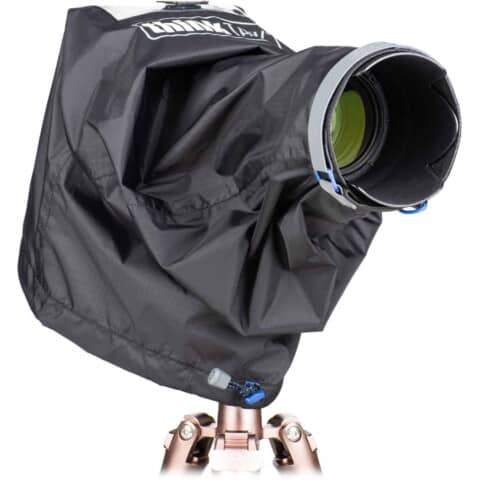
It’s easy to get discouraged by bad weather, but the fact is that some of the most dramatic cloud formations can be found during those moments before and after a good storm. A camera rain cover in your backpack will keep you shooting all day, whatever the weather. If you’ve traveled a long way to get to your location, you must give yourself the best chance of coming home with worthwhile landscape photography.
I love the Think Tank Emergency Rain Cover series because they’re small and light enough to keep in my camera bag at all times. The ingenious hot shoe mount keeps the cover in place, even when the wind is howling, and there’s enough space beneath the cover to get your hands out of the wind and rain. My camera rain cover guide discusses other options at various price points.
US Customers spending over $50 in Think Tank Photo’s online store can get a free gift at checkout after following one of the links to the store from this review–like this one. If you have any issues, please follow the instructions on this page.
A Wide-Angle Lens

An excellent wide-angle lens should be central to most landscape photography kits. Usually, it is something as wide as 24mm on a full-frame sensor. A wide-angle lens allows you to exaggerate vast landscapes in your images and include close foreground objects that are useful for balancing natural compositions.
The 16-35mm focal range is the most beloved by landscape photographers, and every camera manufacturer has excellent options in this range. If you’re using a cropped sensor camera, a 10-22mm zoom will give you roughly the same angle of view as a 16-35mm full-frame camera. Some excellent options are the Canon RF 14-35 f/4 L, the Canon RF 15-35mm f/2.8, the Tamron 17-28 f/2.8 for Sony, the Sony 16-25mm f/4 G, the Nikon Z 14-24mm f/2.8 or the Fuji XF 8-16mm f/2.8 WR.
Although some of the best wide-angle lenses have a fast f/2.8 aperture, this isn’t necessary for landscape photography. In most cases, for landscape images, you will shoot with a much smaller aperture (larger f-number) to increase the depth of field. As you explore the options, don’t be afraid to consider those slower f/4 lenses.
A Telephoto Zoom Lens

Beginner landscape photographers often overlook telephoto lenses. Look into a professional’s backpack, though, and I’d bet you see one right away. While the wide-angle lens certainly is essential–probably slightly more so than the telephoto–many of my favorite landscape photographs have been captured with focal lengths in the 70-200mm or 100-400mm range.
A telephoto zoom lens gives you greater flexibility when working a scene. By zooming in tighter, you can easily pick and choose the elements that you want to appear in the photo. If there is a small patch of color in the sky or a tiny area of attractive light, a telephoto lens allows you to punch in on that and make it the sole focus of the image. With a wide-angle lens, smaller areas of localized awesomeness can be lost in a broader, duller landscape.
When selecting your telephoto focal length for telephoto landscape photography, I recommend having a lens that includes 70mm or 100mm. This includes all the 70-200mm, 100-400mm and 100-500mm lenses on the market, of which there are many. But it does not include 150-600mm lenses or the Sony 200-600mm lens, Canon RF 200-800mm and Nikon Z 180-600mm. I have tried using those lenses for this purpose, and more often than not, found that I missed that wider end of the focal range in the 70-150mm region. Sony users should also check out the excellent Tamron 35-150mm f/2-2.8, the Tamron 70-180mm f/2.8, and the Tamron 28-200mm f/2.8-5.6 for some great lenses that deliver incredible bang for the buck.
Photography Planning App for iOS or Android
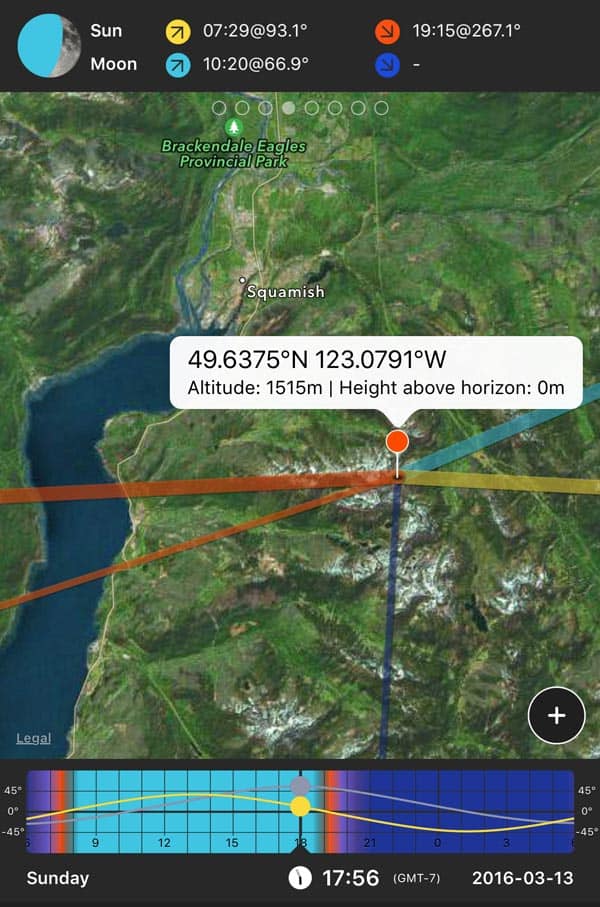
Photopills or Photographer’s Ephemeris are two mobile apps that offer similar features and stand out above the crowd when it comes to photoshoot planning apps. I use PhotoPills, but after studying the features of both apps, I found that they appear nearly identical. Not only do the apps contain all manner of photographic calculators for time-lapses, star trails, and depth of field, but they also allow you to visualize the path of the sun and the moon across any part of the world at any time in the past, present, or future.


Before visiting any new location for landscape photography, I load up this app and figure out when and where the sun will rise and set. There’s nothing worse than wasting time figuring these things out on the fly and then realizing at the end of the day that the location you have just arrived at would have looked much better if you had been there in the morning.
For nightscapes, the augmented reality features will even show you the path of the Milky Way through the night while you hold your phone up and point it at the scene. This allows precise positioning while you wait for it to rise, and it means you won’t get caught and have to run around in the dark trying to reposition yourself at the last minute. I have made several images in the last few years that wouldn’t have been possible without an app like this. PhotoPills is $14.99 from the iOS store or Android store, and The Photographer’s Ephemeris is $9.99 on the iOS store.

Comfortable Clothing for the Environment

I have always maintained that it is essential to be comfortable while you are out searching for beautiful photos. Landscape photography often requires extended periods of waiting outdoors and potentially hiking through a landscape to reach your destination. If you spend all of your time feeling too hot, cold, or wet, it’s a distraction from the creative process, and you’re far more likely to give up and go home too early.
Warm environments are simple to deal with–ensure you have plenty of water, sunscreen, and bug repellant. Cold, wet environments are a little trickier because they require specialist clothing. If you want to delve deep into this particular subject, I’ve written an in-depth guide to photography in cold weather, based on my fifteen+ years of living in Western Canada and, more recently, Northern Canada in the Yukon.
The short version is that developing an excellent layering system using clothing from quality brands is well worth your time. You don’t need a lot of cold-weather gear, but a good base layer, mid-layer, and shell are worth investing in and should last many years of use if you take care of them.
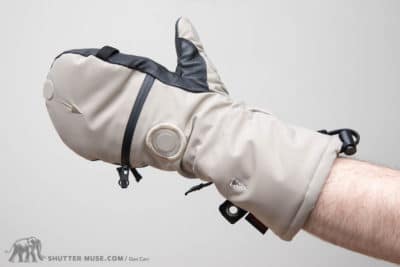
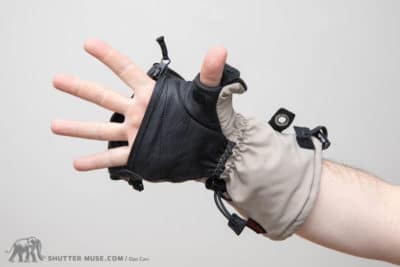
My own basic setup during outdoor movement is a merino wool base layer, a mid-layer with synthetic insulation, and a Gore-Tex shell. Then I’ll also carry a highly packable down-filled mid-layer that can be applied when at rest, and my favourite photography gloves.
Cleaning Kit + Tools
A functional tripod is an essential piece of gear for successful landscape photography, and much as I have implored you earlier not to buy a piece of crap tripod, I know many will ignore that hard-learned advice. Even for those who spend a little more on their support gear, accidents still happen, and a tripod– with its long, spindly legs–will always be one of the more fragile items in your kit, especially in cold weather where materials become brittle.

To be prepared for a worst-case scenario, carrying a tripod tool for general in-the-field maintenance and a little duct tape for emergencies is a good idea. Of course, a tripod fixed with tape won’t have its original rigidity, but if the wind is calm and the ground is relatively steady, it’ll still be a darn sight more valuable than a two-legged “tripod.” I carry a couple of feet of tape wrapped around one of the tripod legs for just such emergencies.
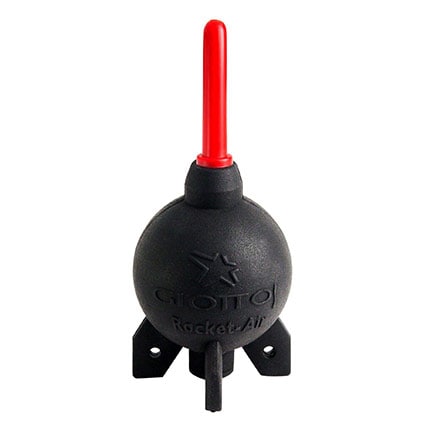
I also like to carry a rocket blower with me at all times. Much as their odd shape can be annoying to pack into your bag, there have been many times when they have been helpful. In regular shooting with a wider aperture, sensor dust doesn’t show up that often. But once you stop that lens down to a smaller aperture, as you frequently do for landscapes, any dust will become evident in your photos. Combined with your camera’s dust removal function, the simple rocket blower solves the problem 99% of the time.
Pin This Post


Hi Dan, I’d add a GPS if I was working in areas that I’m not familiar with. Garmin make some reasonably priced examples.
That’s a good idea. Do you find a dedicated unit is necessary? Instead of using a phone?
Only because I started with a Garmin long before phone apps were available for GPS. I’m trying one on my iPhone, but like many apps it is more complicated than needed. Any suggestions for a good iPhone GPS app? Ideally it must store longtitude and latitude data for a later date. There is a stand of birch trees in Scotland that I’m never going to find again with my Garmin 😉
Gaia GPS is pretty much the high water mark for GPS apps.
3 1/2 years later, but I use PhotoPills and its feature to save locations for future reference. The built-in GPS from my phone finds the place, then I can save that location. 🙂
Or I use “What3Words” to mark a very specific location and pass that around in mail, text message, etc.
Yeah, those are good ideas. Photopills is excellent.
In the UK we have OS maps online, I never get lost with this. Shows the terrain all the footpaths, heights etc. Can plan and scout using this app and discover new places
That sounds very useful! I remember the paper OS maps very fondly from my childhood growing up in the UK.
For a remote shutter release, as an alternative to a remote release cable I use the Canon or Fuji apps with a bluetooth connection to the camera. That works reasonably well with low fuss and usually ones phone is sufficiently charged, and the apps are free. 😉
It also has the advantage that at least on my Fuji cameras, the phone will then send location data to the cameras so that the camera can embed that into the EXIF data. (I don’t know if the Canon app can do that too with higher end models of Canon than mine).
NB: It is also possible to use the phone as shutter release and viewfinder etc over WiFi, with many more features than just shutter release or remote control. But that is more of a hassle to set up, so that’s not what I generally use — remote control over bluetooth is easy to set up and once configured automatically reconnects and easy to use in my experience.
That is interesting. Perhaps these apps are getting better. When I tried them in the past it was always such a pain in the ass to get the camera to connect with the phone. Then it would forget things, and you’d be standing there trying to re-pair devices while the light fades away.
HI Dan, Thanks for this – valuable information and insight as always! One question that I have is around you adoption of the RRS Ascend tripod. I know you were an advocate of the TFC-14 and as such I would appreciate you views on how the both compare. Thanks again, Alex
Hi Alex. There’s a section discussing this in my RRS tripod guide: https://shuttermuse.com/really-right-stuff-tripod-guide/
I suppose it’s pretty obvious – I just didn’t spot it on the list. Spare battery (check that it’s charged too, as well as checking the one IN the camera) and spare memory card[s].
I generally carry a pen sized torch too – although the need for that might lessen as more camera makers switch to illuminated settings on external controls. I got caught out with this one, badly, one night on an astronomic photography outing – it was very embarrassing! I just couldn’t dig myself out, till the head guy took pity on me and sorted it.
BTW – I really love the RRS L-brackets. Brilliant idea!
Hi Dan,
Are you aware of any way to use your discount code for Shimoda that will work in Canada? I can’t seem to make anything work that accepts the code and ships here. Thanks!
Charlene
Hi Dan,
Since you mentioned the panning base for panoramas in your ball head section I think we should mention a nodal slide to prevent parallax, and make the stitching process in post less of a challenge as well.
Dan,
Also a simple leveling base with a bubble indicator underneath the ball head for me is a must for good landscape photography because getting the tripod fine adjusted with just the legs is a bear. If you are into mountain pictures with wildflowers in the foreground then I’d also include a Groundpod, and a tilt-shift lens as optional items.