A dedicated camera bag is the best way to carry your precious gear in most situations. Still, from time to time, it’s necessary to protect your camera inside a regular bag or backpack that was designed for a different purpose. The four main reasons for carrying a camera in a regular bag:
#1
The bag you need to use has a specific niche functionality and purpose for a particular activity. For example, when using a backcountry skiing pack that holds your skis and safety equipment or a fully waterproof bag for a kayaking trip.
#2
You only need to carry a minimal amount of camera gear, such as a single camera and lens, amongst a larger amount of non-photographic equipment. For example, when backpacking for multiple days, and most of your bag is filled with camping gear, or when flying away for a quick city break with carry-on luggage only, your bag is primarily filled with clothes and toiletries.
#3
Your current non-camera bag has sentimental value. You’ve been through a lot together. Perhaps travelled around the world. The bag’s battle scars tell a story that’s important to you.
#4
You have a limited budget and can’t justify buying a big expensive camera bag when you already have a perfectly good bag or backpack.
If any of these sounds like you, read on. This latest entry into our gear guide series contains the perfect solution.
Table of Contents
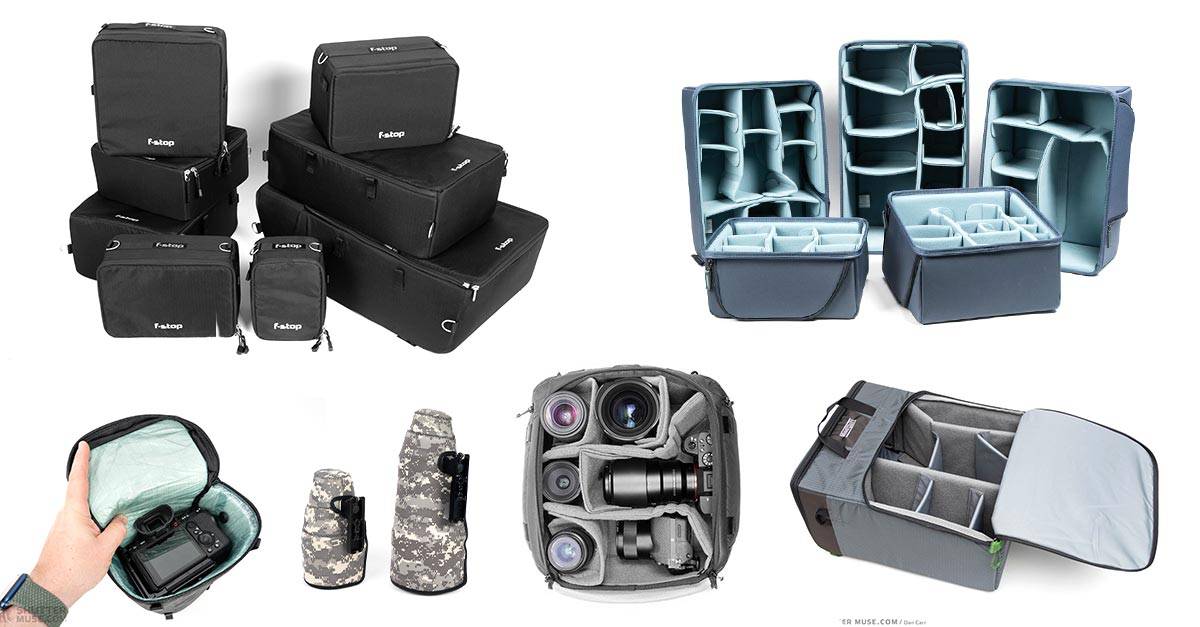
Think Tank Stash Master


Think Tank Photo makes five sizes of padded camera cubes called Stash Masters. These five protective camera cubes are specifically designed to help people turn any existing bag, backpack, or duffle into a camera bag. Each one comes with a shoulder strap allowing you to use the cube as a camera bag once you reach your destination. They also have convenient grab handles, top and back openings to cater to different styles of bags, and a zippered pocket for camera batteries and memory card holders.
US Customers spending over $50 in Think Tank Photo’s online store can get a free gift at checkout after following one of the links to the store from this review–like this one. If you have any issues, please follow the instructions on this page.
F-Stop ICU

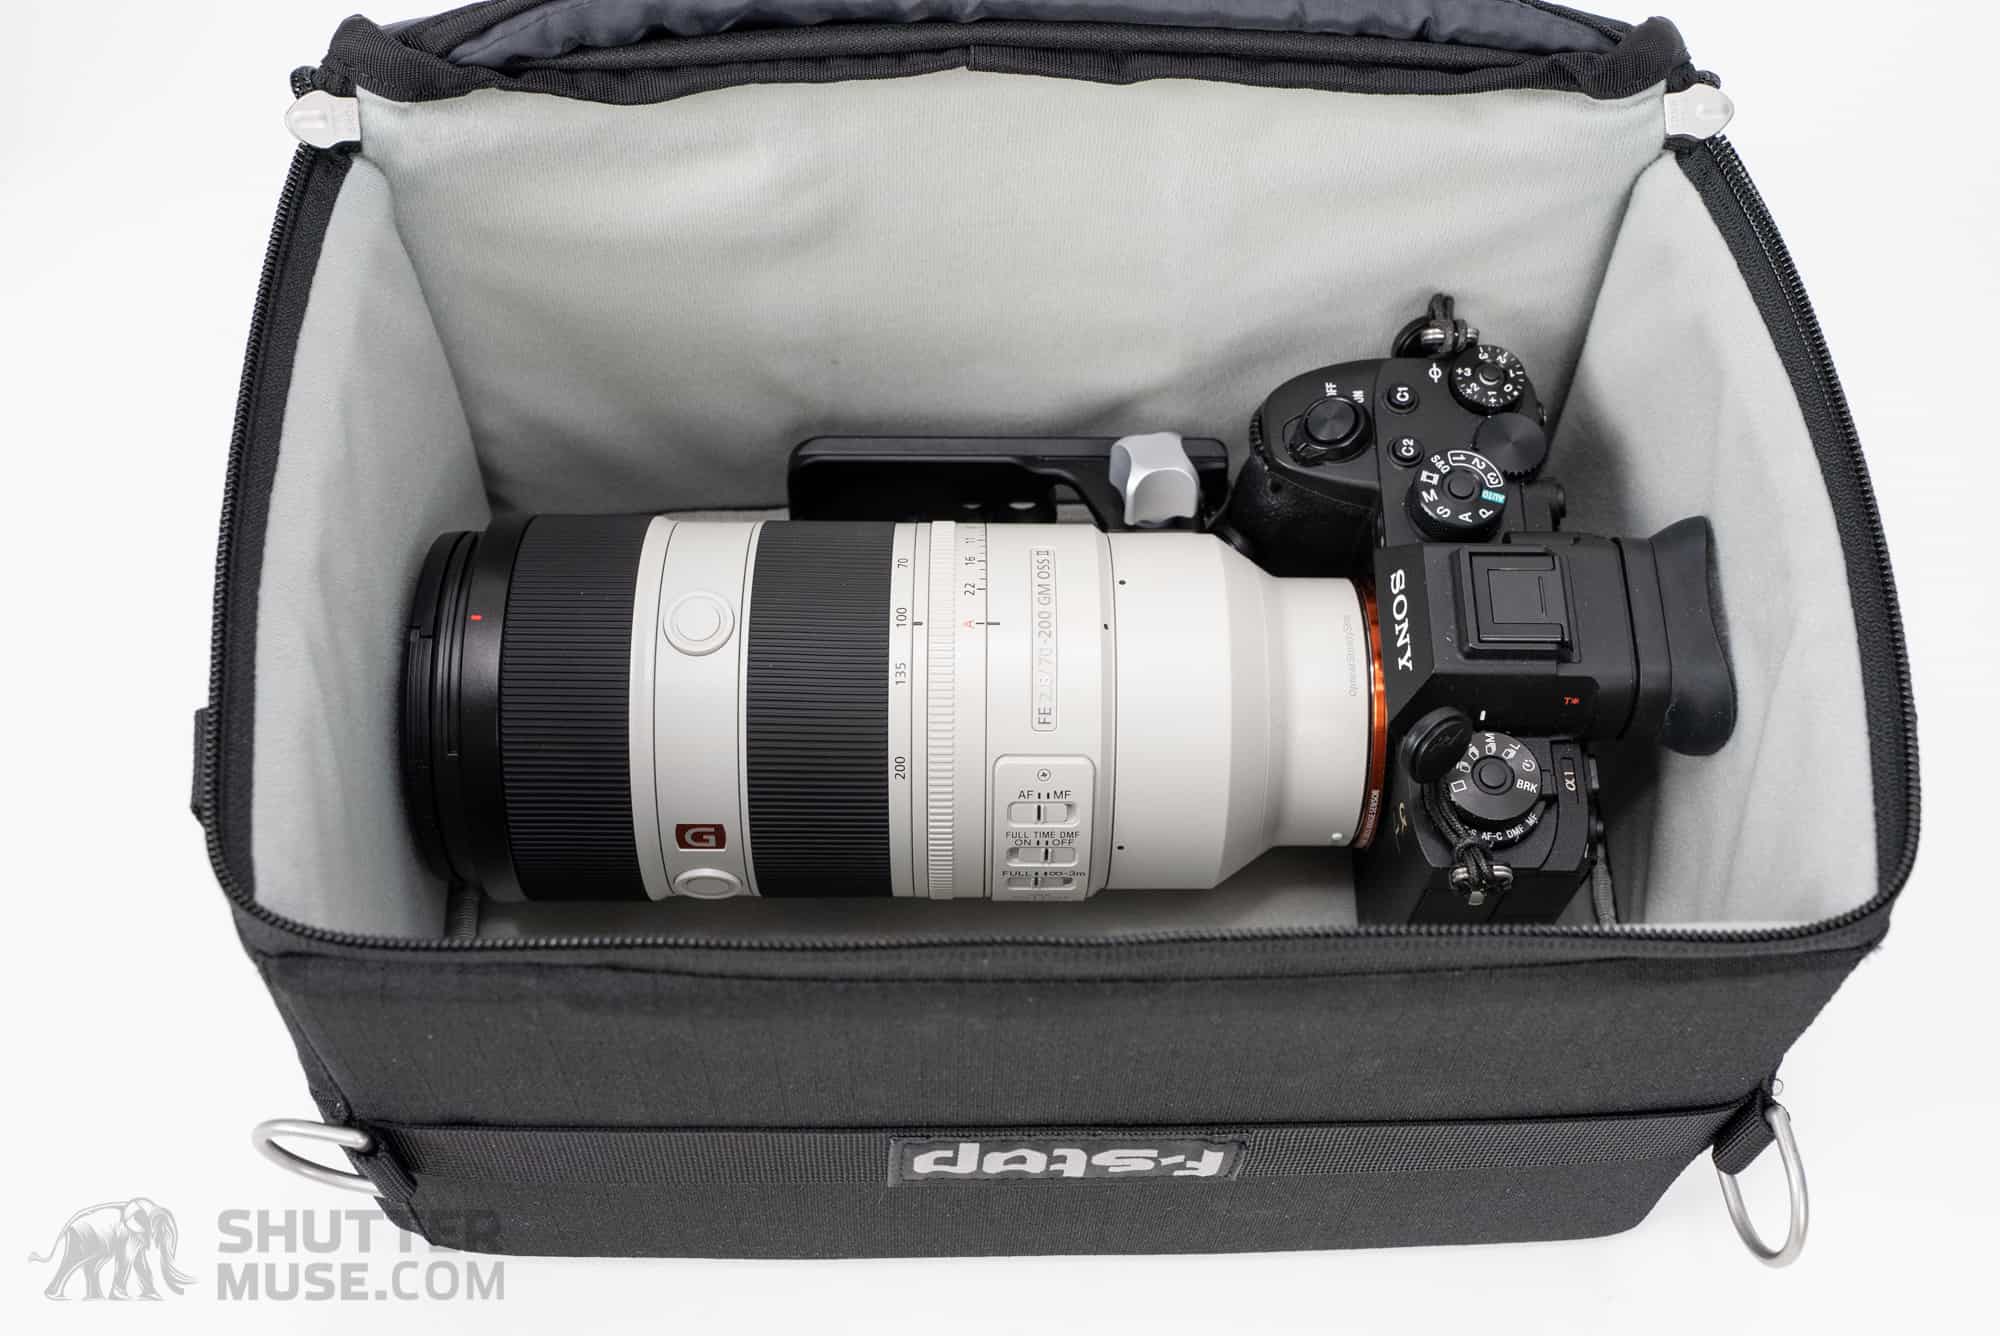
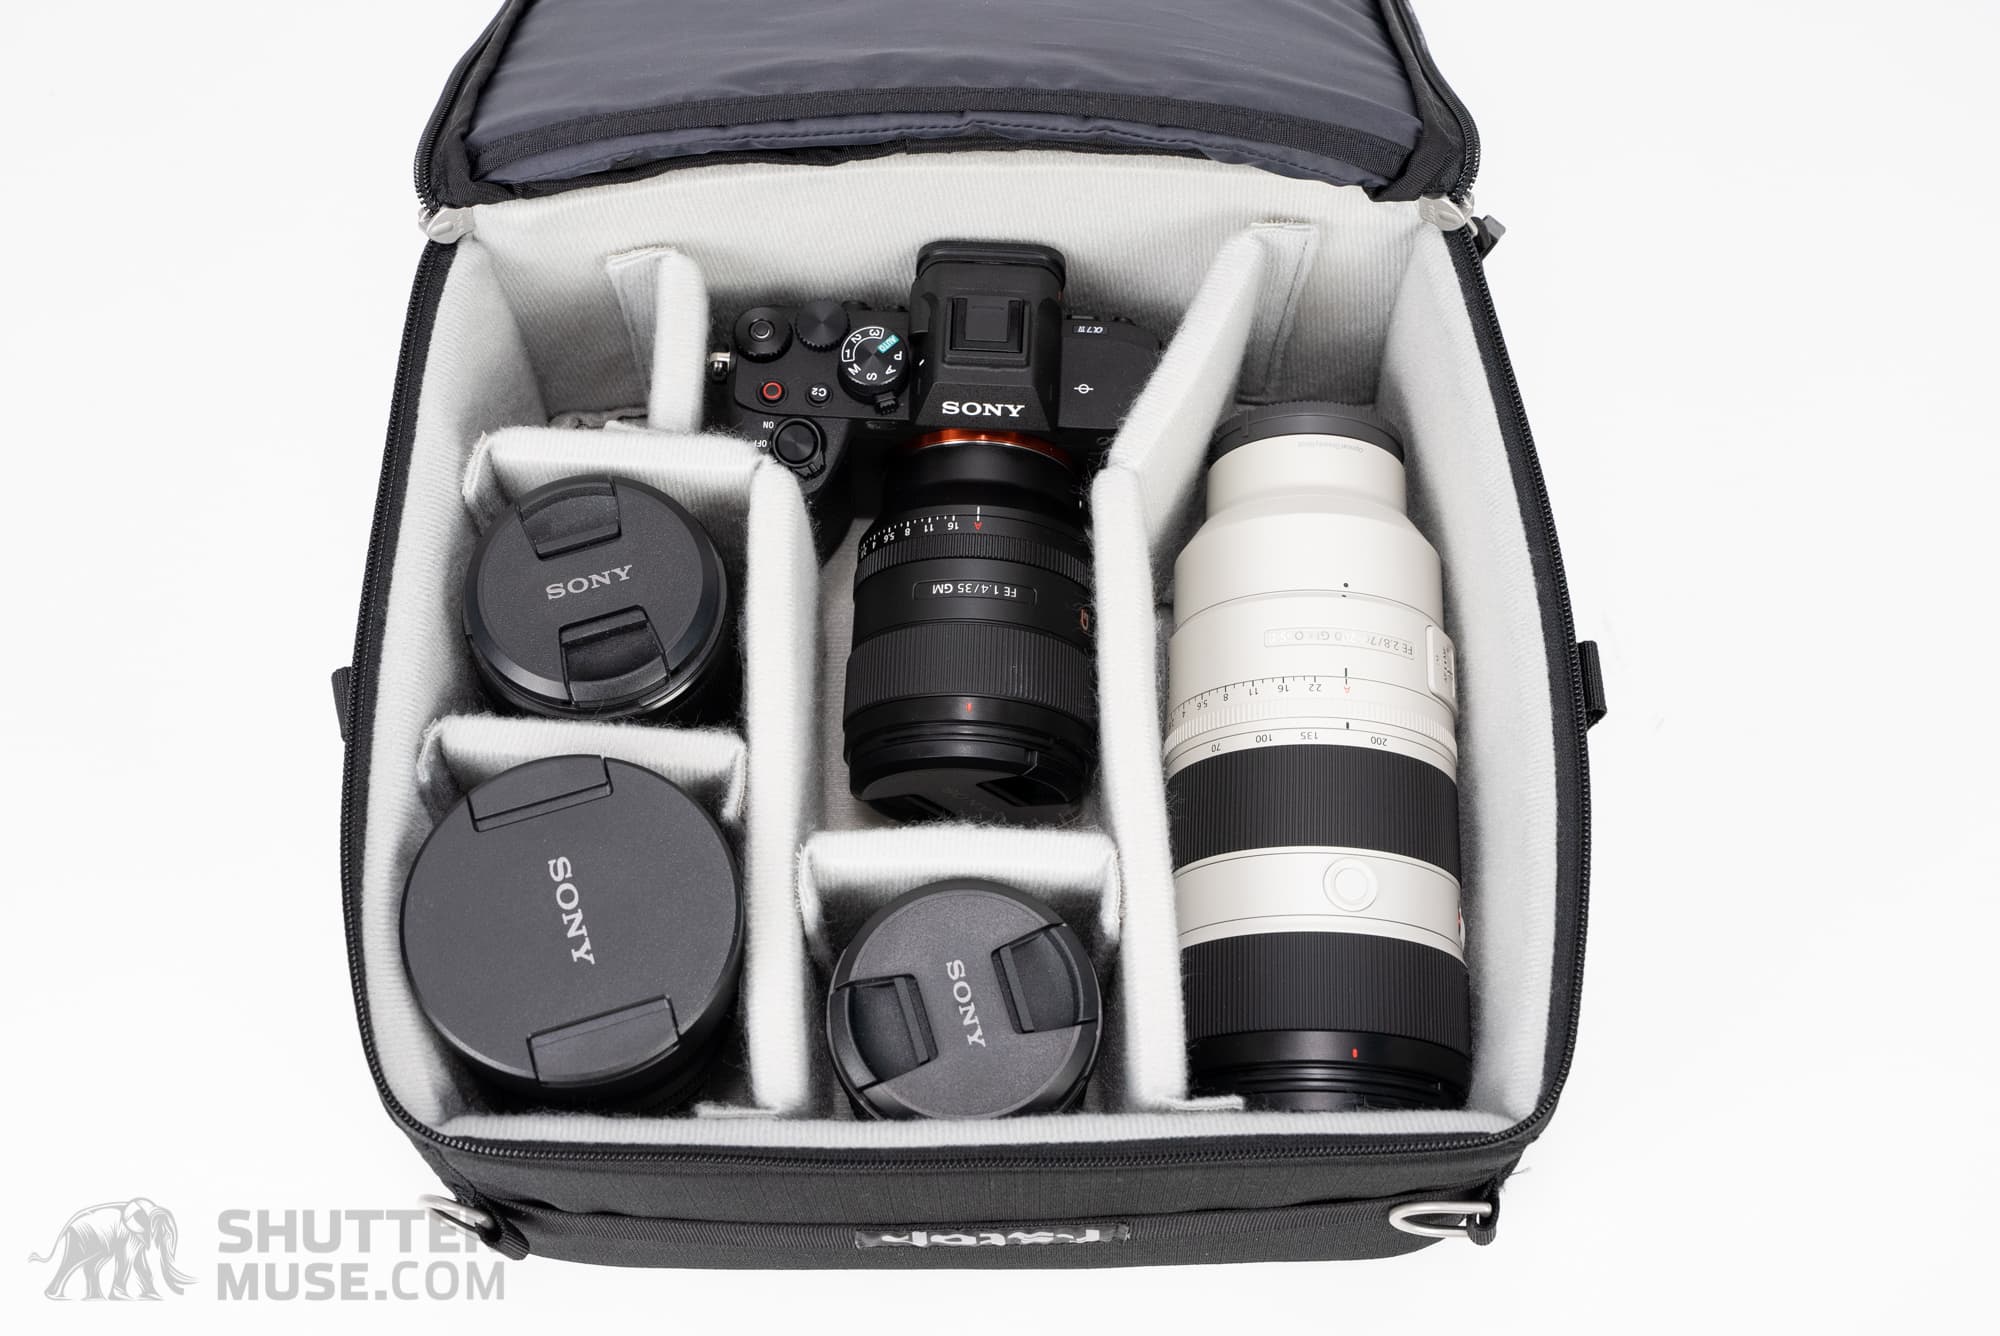

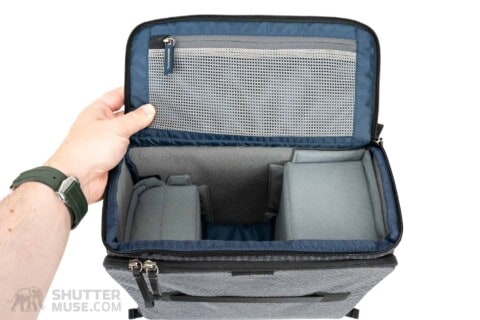
These days, many camera bag companies offer removable “camera blocks” for their bags and backpacks, but the unquestioned pioneer of this feature is F-Stop. When the first F-Stop camera bags were introduced over fifteen years ago, the idea of the ICU (Internal Camera Unit) was born. Since then, F-Stop has expanded the ICU lineup to include a selection of shapes and sizes unmatched by other brands.
These ICUs are thickly padded, made from durable heavy-denier nylon and come with plenty of dividers to organize your gear. Metal D-Rings are stitched into the top handle to give you a shoulder strap attachment point. The strap attachment helps make an ad-hoc camera shoulder bag once you reach your destination and pull the ICU from within a larger backpack or duffle bag.
F-Stop’s range of outdoor photography packs features a back panel opening to access the camera gear. The ICUs have a zippered panel that opens on three sides to match this design. If you plan on placing an ICU into a non-F-Stop bag, consider how you will access your camera. They work best with a back or front panel opening backpacks.
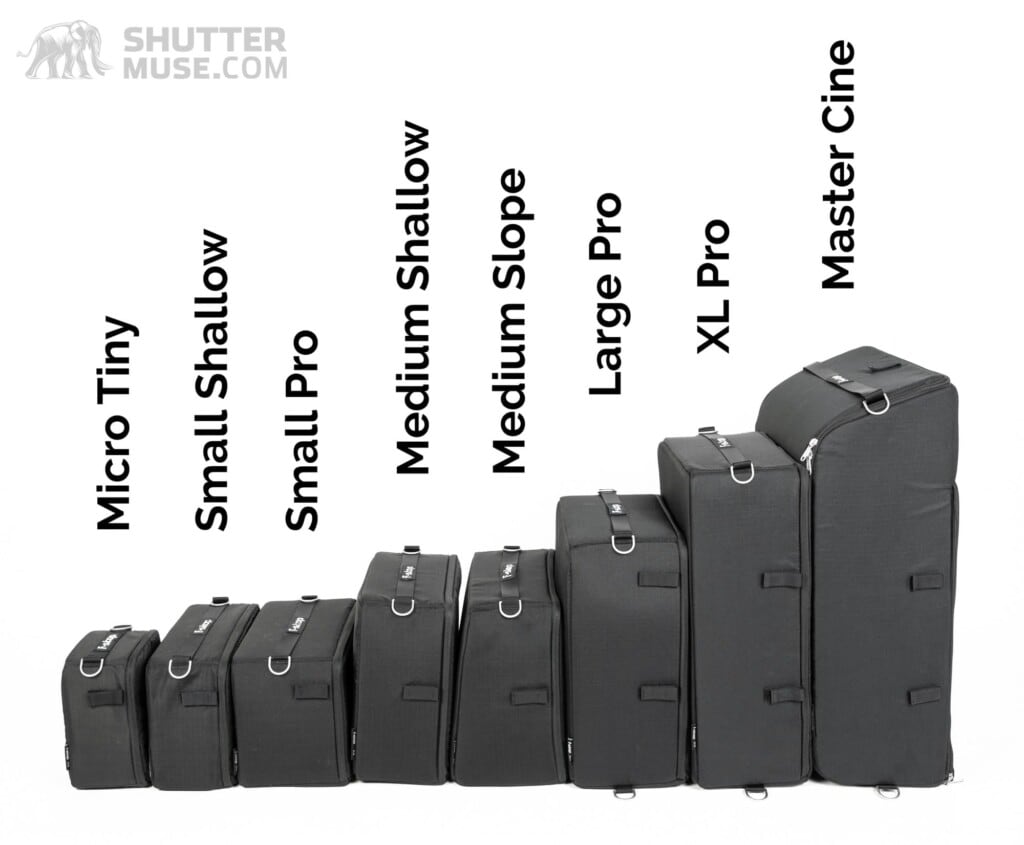
Alternatively, you can use them with any other pack, as long as you don’t mind pulling the ICU out of the bag to get to your gear. Every ICU have a top handle for easy extraction, and if you place the padded cube at the top of your pack, it’s little trouble to get your camera. Most large backpacks can accommodate the three smallest ICU sizes – Micro Tiny, Small Shallow and Small Pro – with the zippered opening facing upwards, allowing fast and easy access to your camera. Those wishing to protect camera gear inside a duffle bag, pelican case or suitcase will find the large zippered access to the ICUs highly beneficial, and likely the perfect solution.
Related Reading: F-Stop ICU Size Guide – Every Model Compared
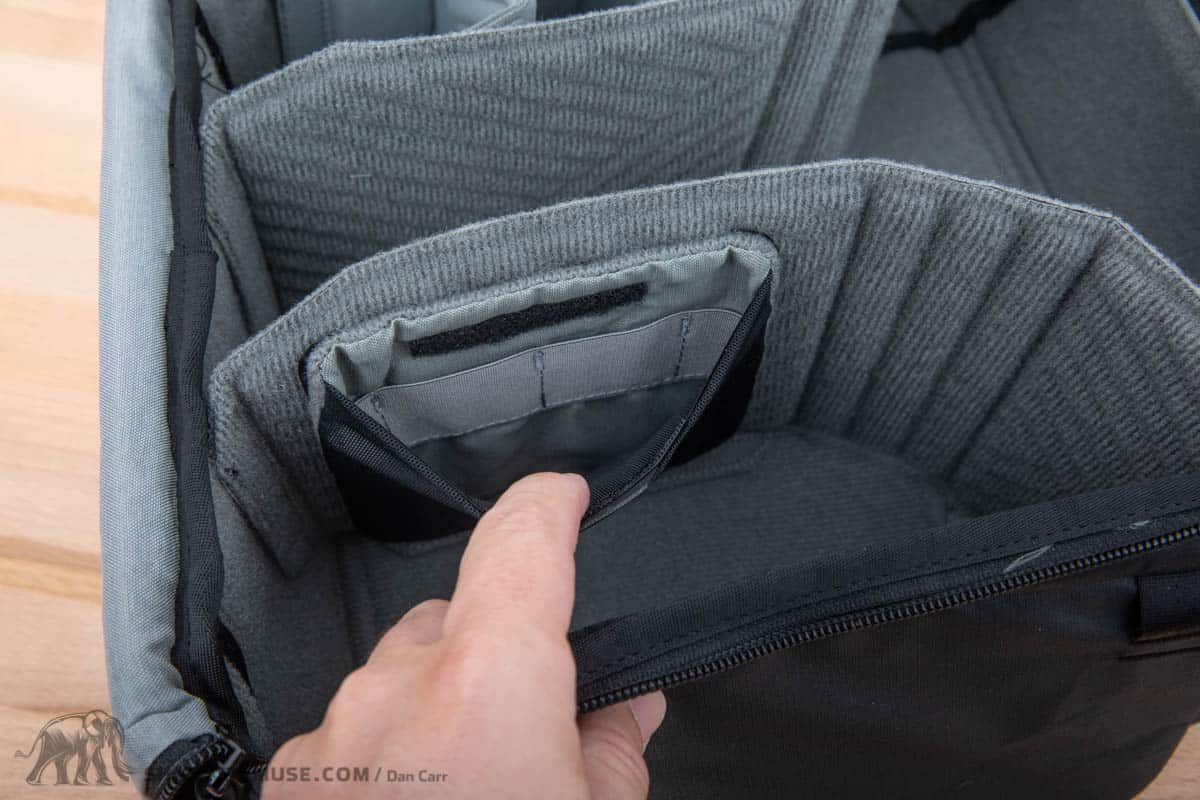
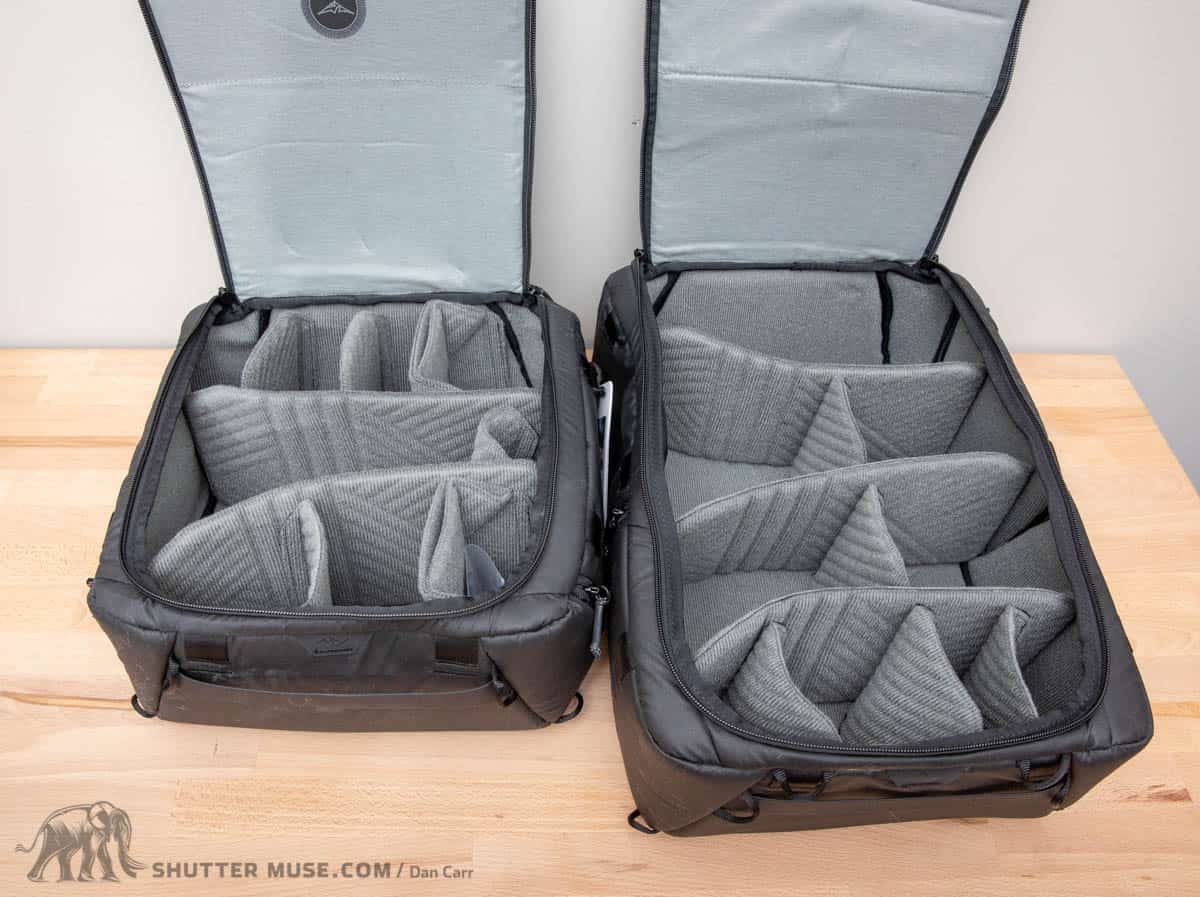
Shimoda Core Units
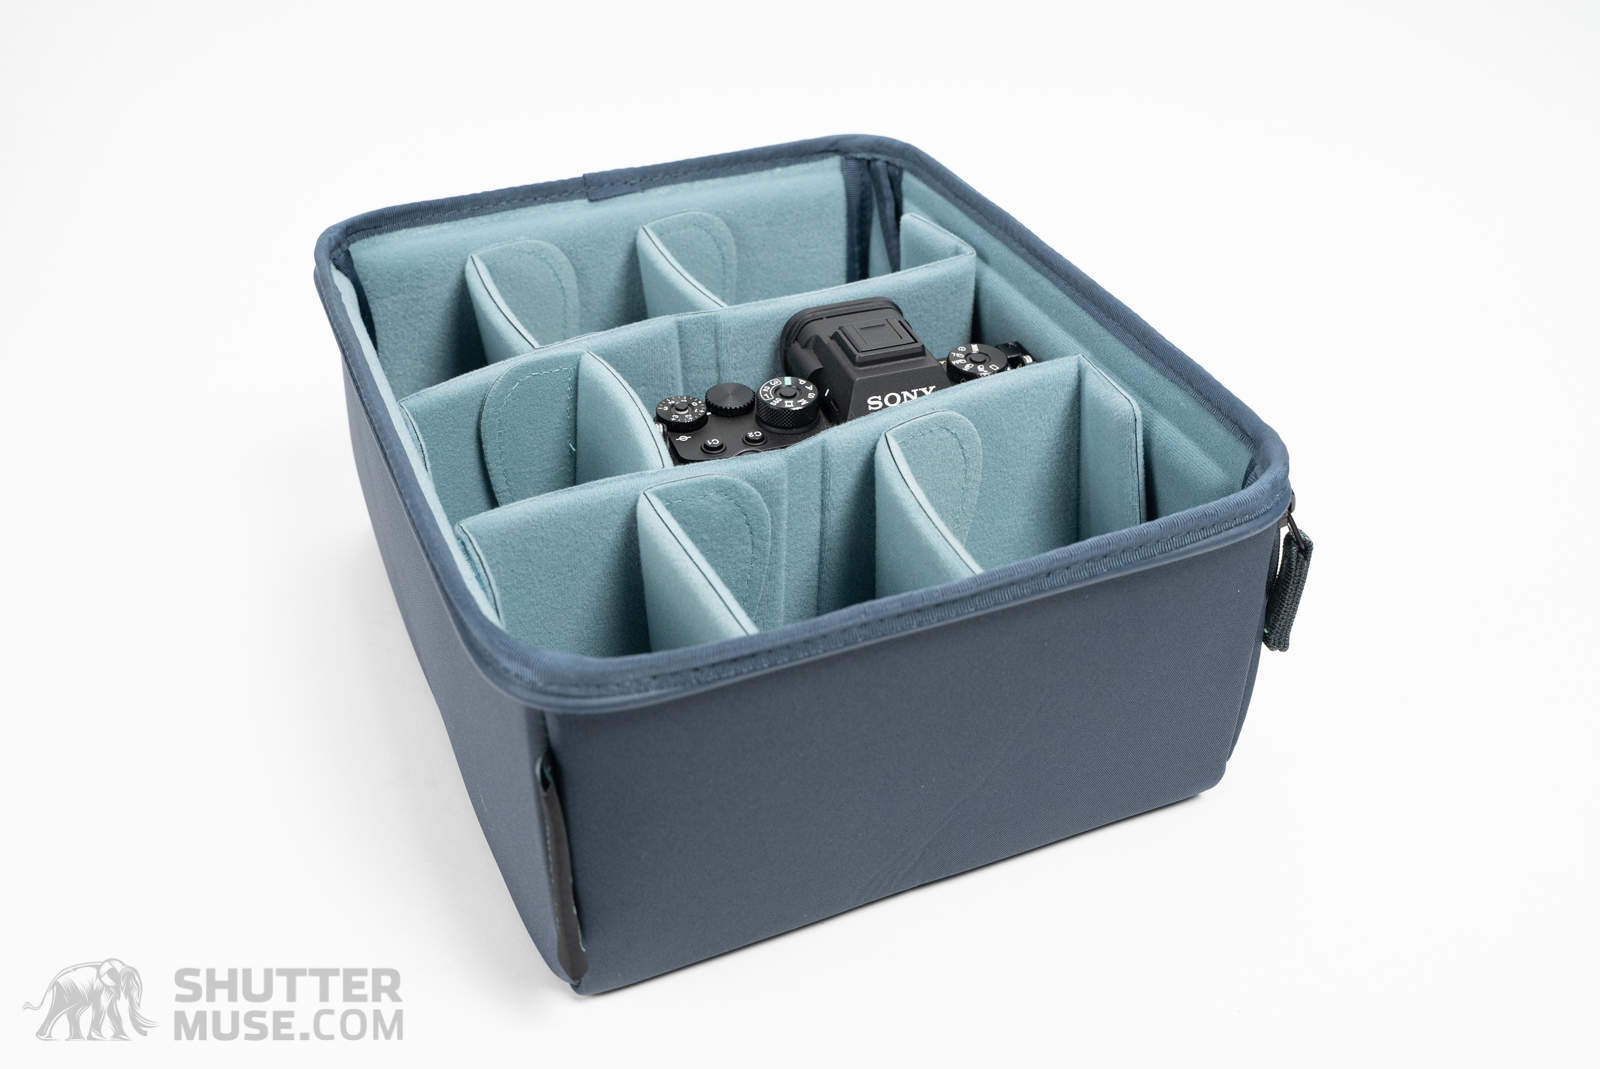
Shimoda Design’s Core Units are available in a range of sizes that nearly parallels the F-Stop ICUs already mentioned. Where you will find a difference is in the rigidity and padding. The Core Units bases and sides are thinner than F-Stop ICUs but constructed from a denser foam that provides slightly better blunt force impact protection. The added foam density makes Shimoda’s padded cubes much more rigid.
Depending on how you plan to pack, this added rigidity can be good or bad. If you want to place heavy objects on the camera gear, rigidity is good. However, if you plan to cram many oddly shaped items in your bag around the padded cube, the F-Stop ICUs will conform better to those other items.
Hyperlite Mountain Gear Camera Pod
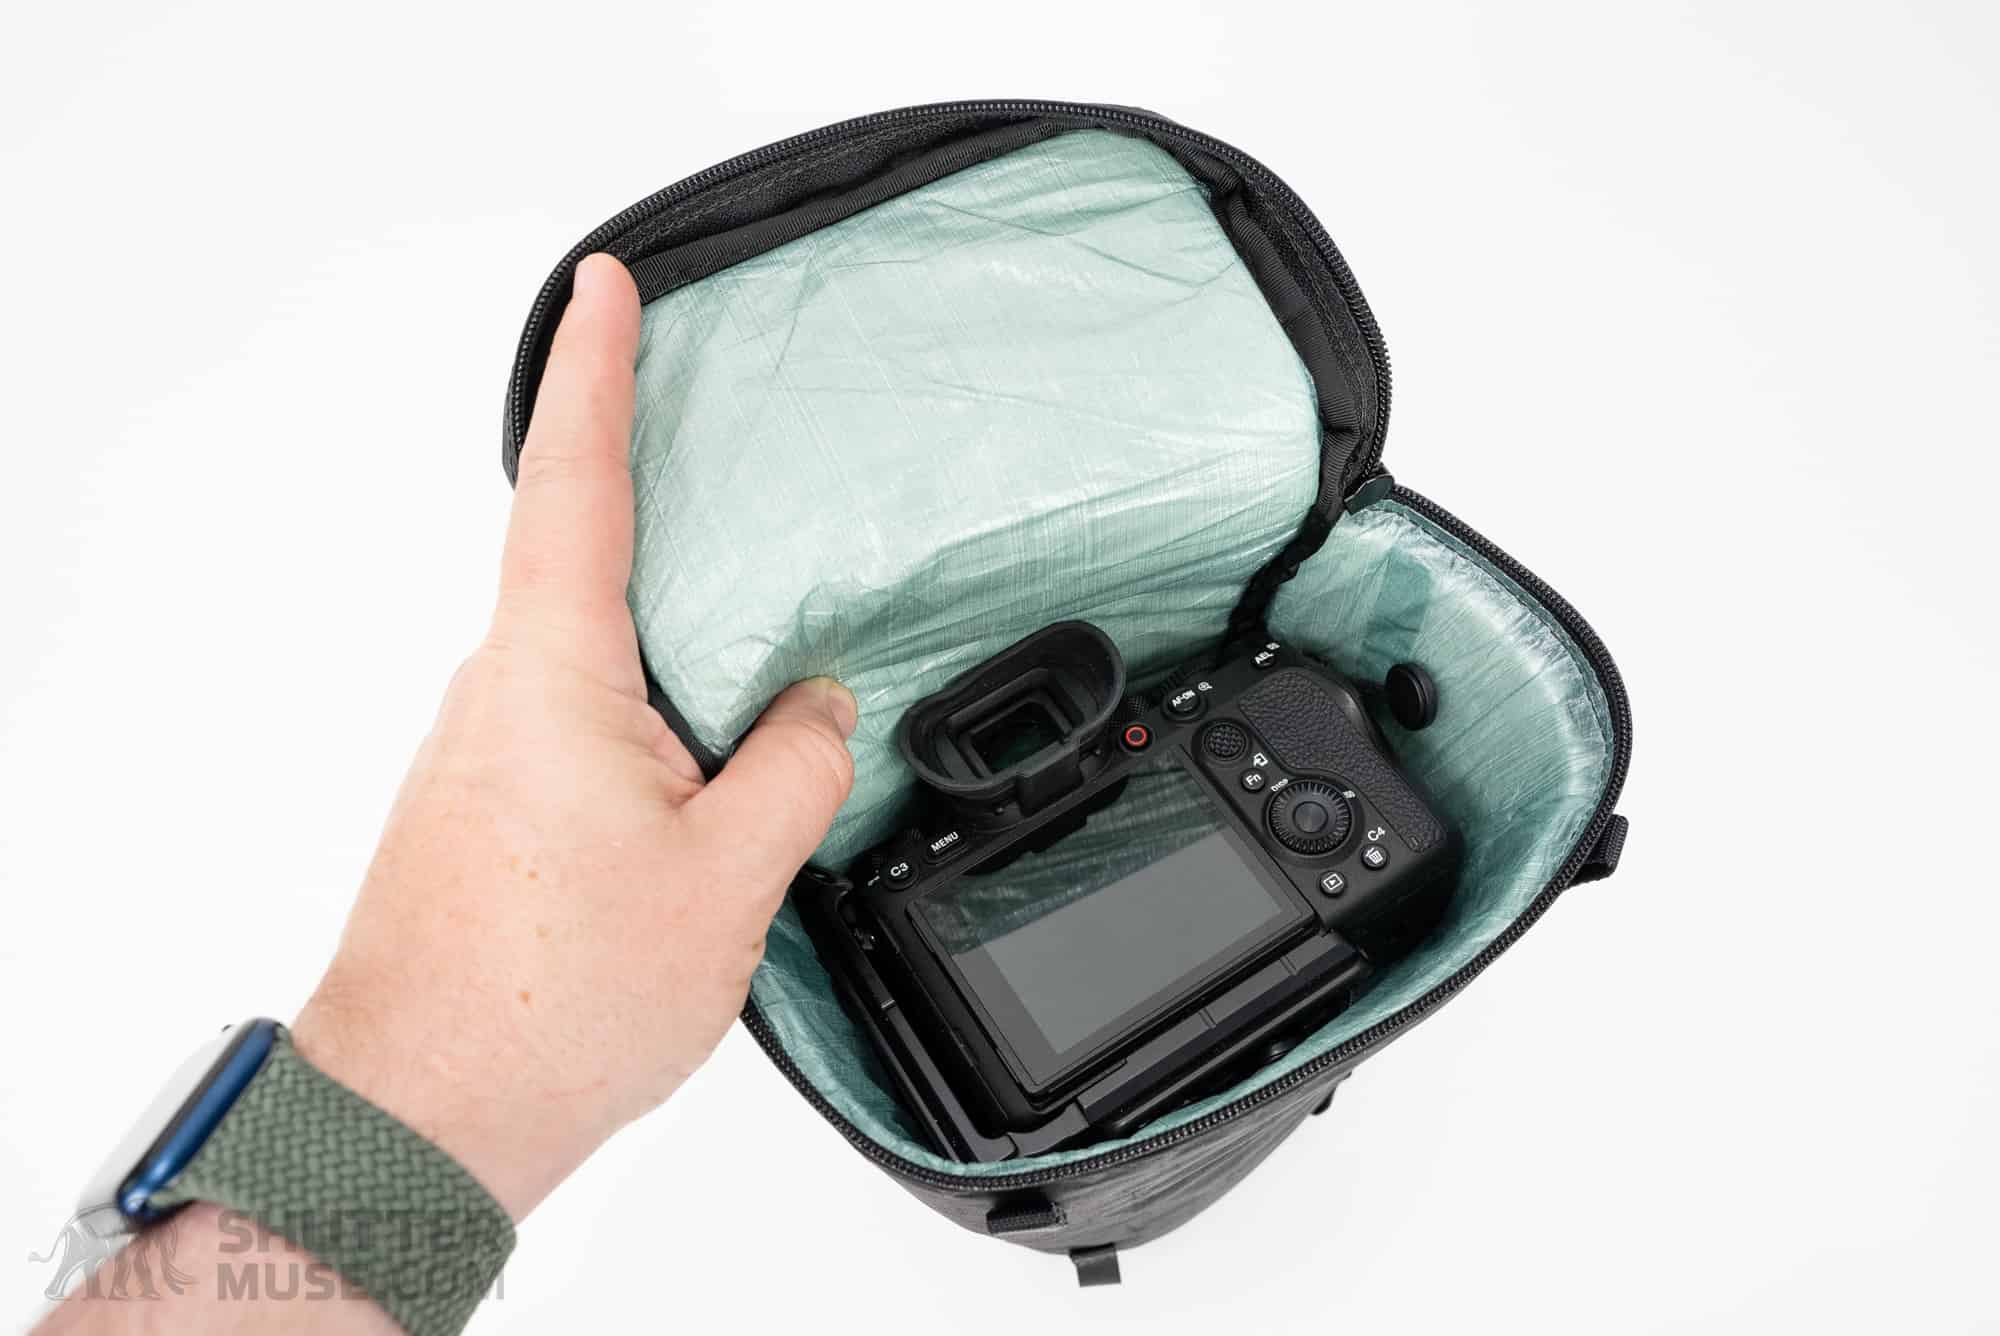

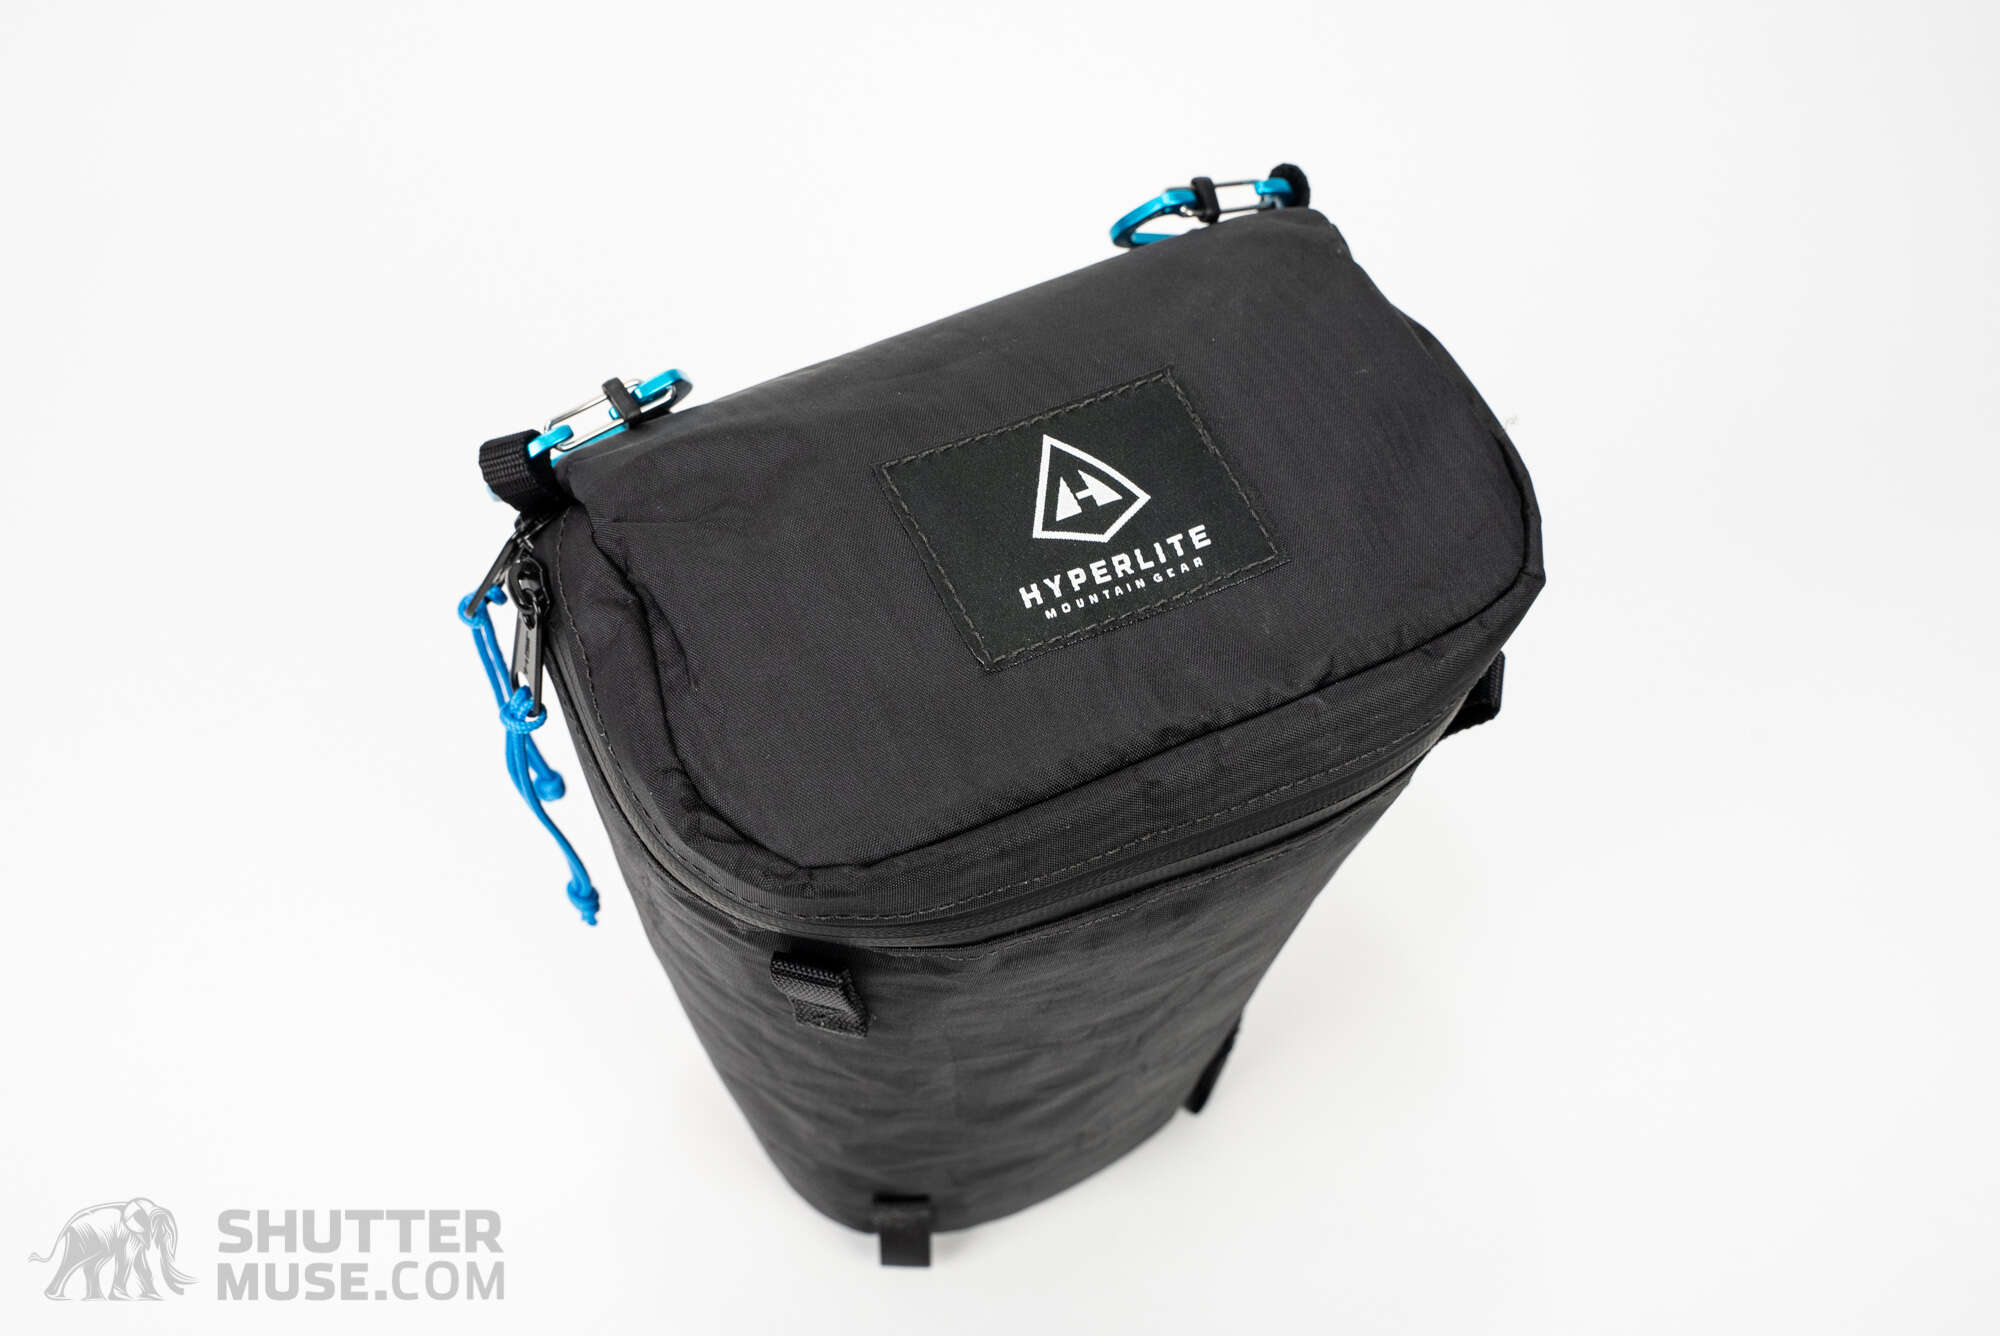
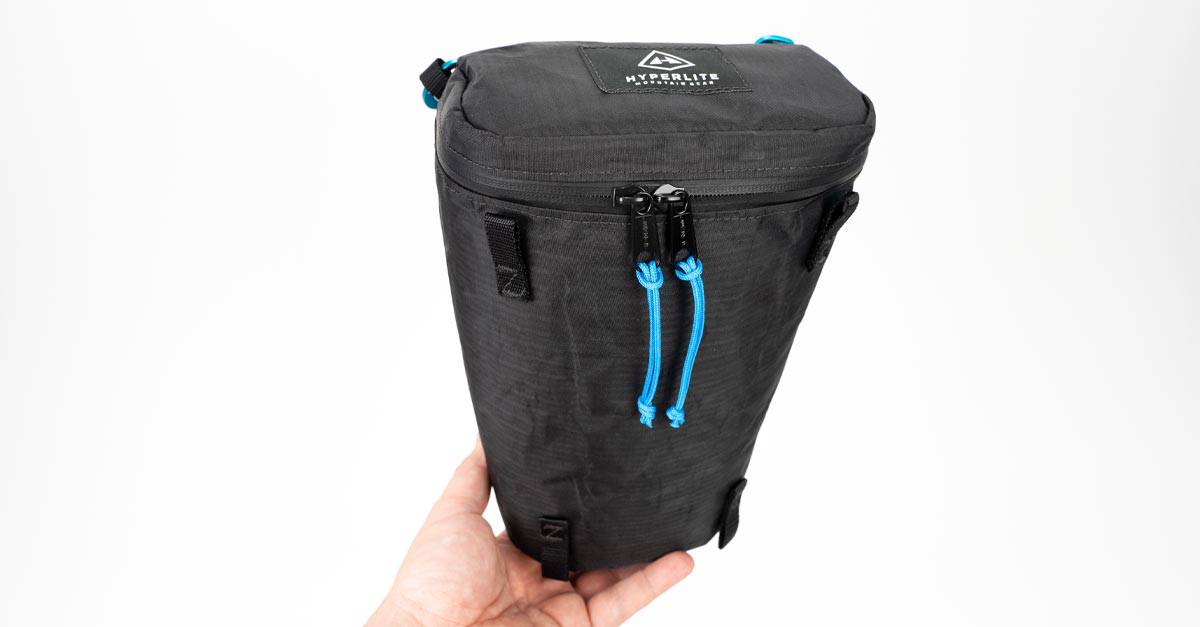
The Camera Pod from Hyperlite Mountain Gear is the lightest camera bag in the world. Constructed from rugged and waterproof Dyneema, the Camera Pod weighs just 2.71oz (76.8g). If you are looking for a way to add minimalist bump and scratch protection to a camera packed into a lightweight hiking backpack, this is a great, albeit slightly expensive, option.
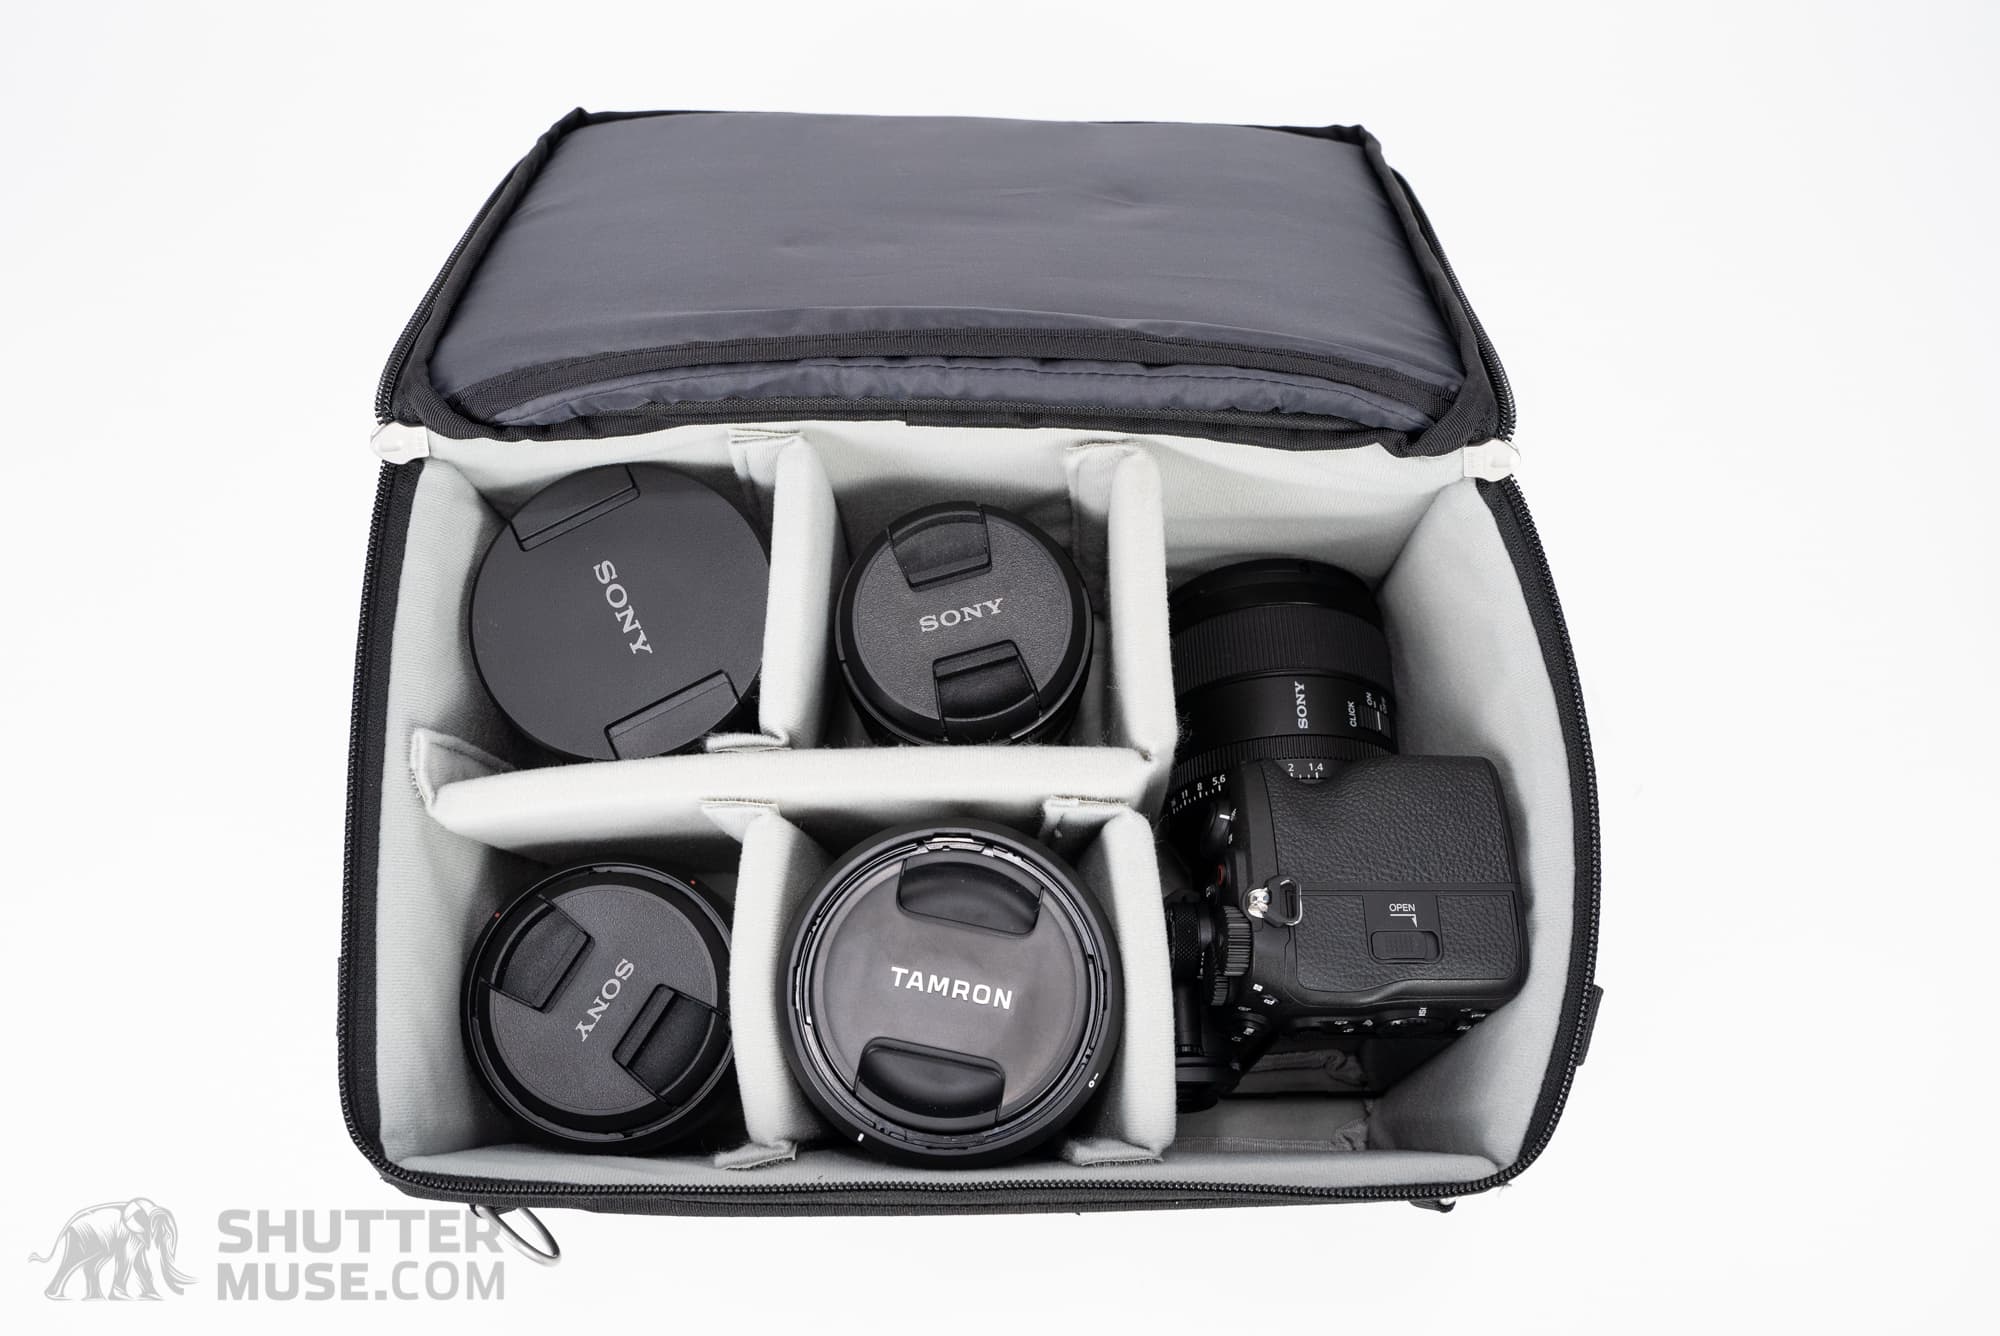
Peak Design Camera Cubes
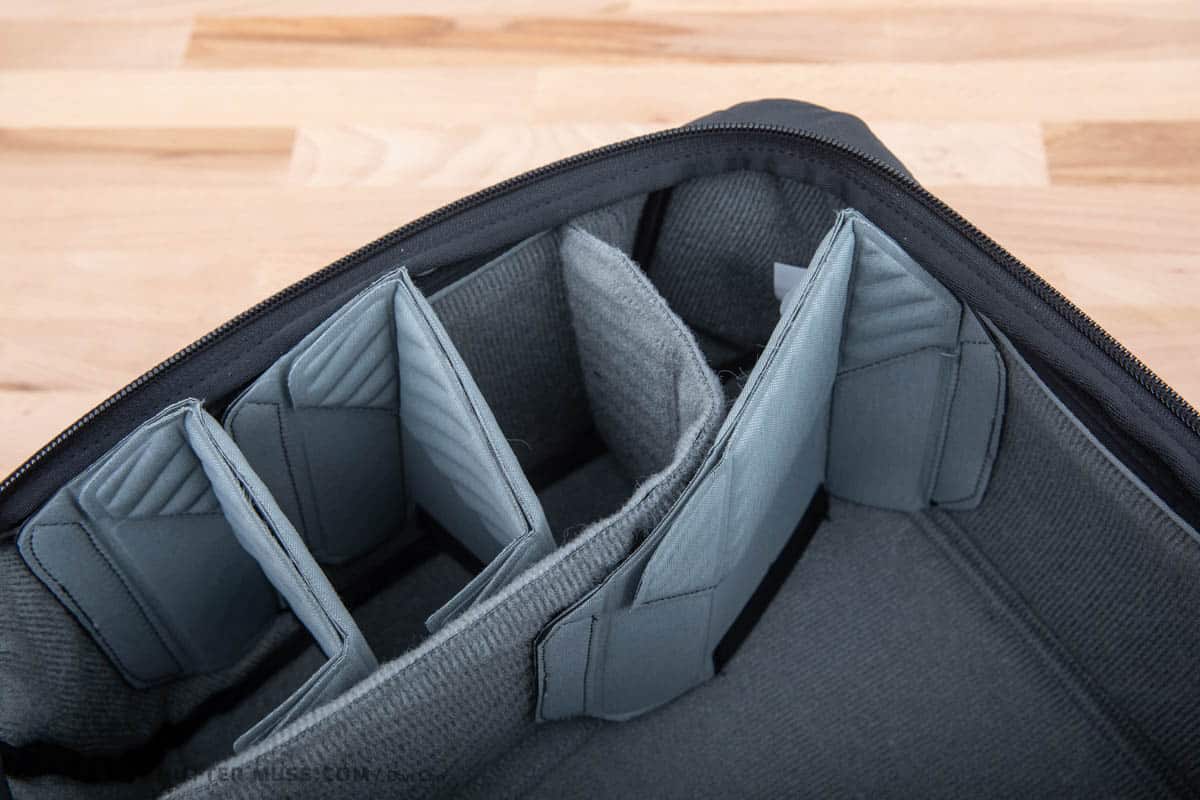
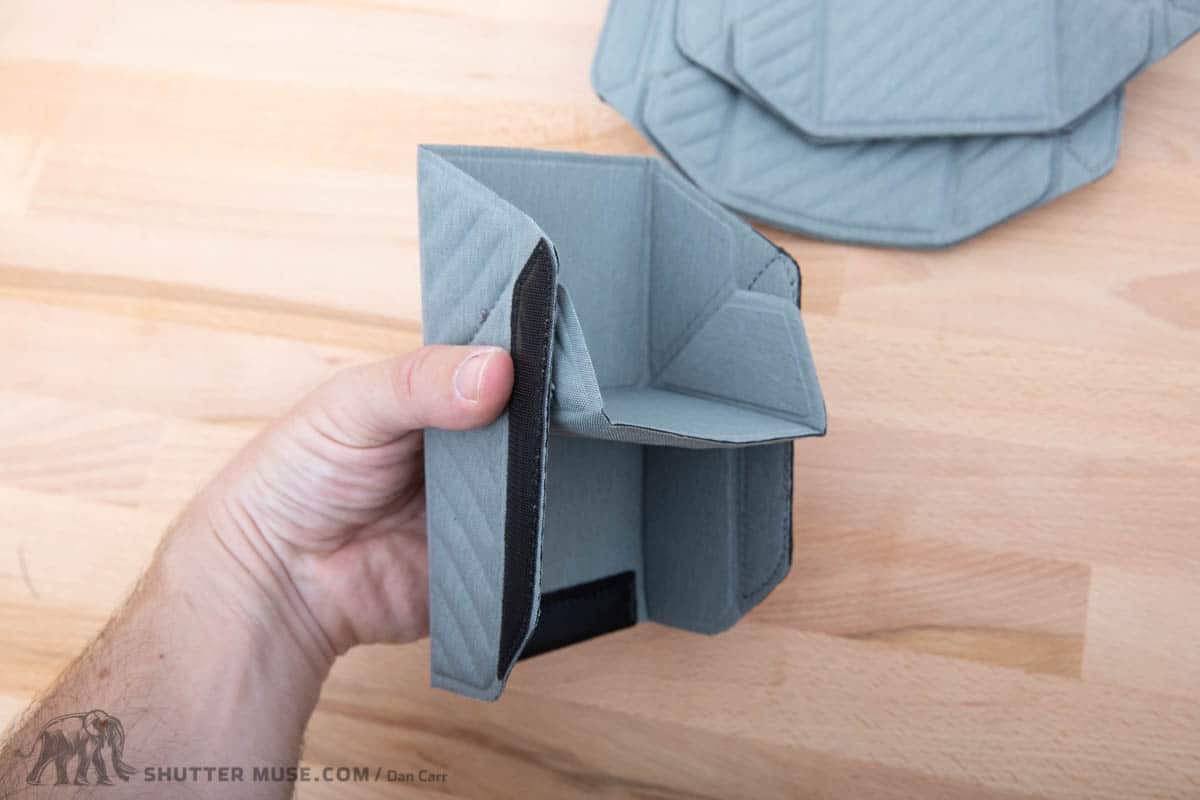
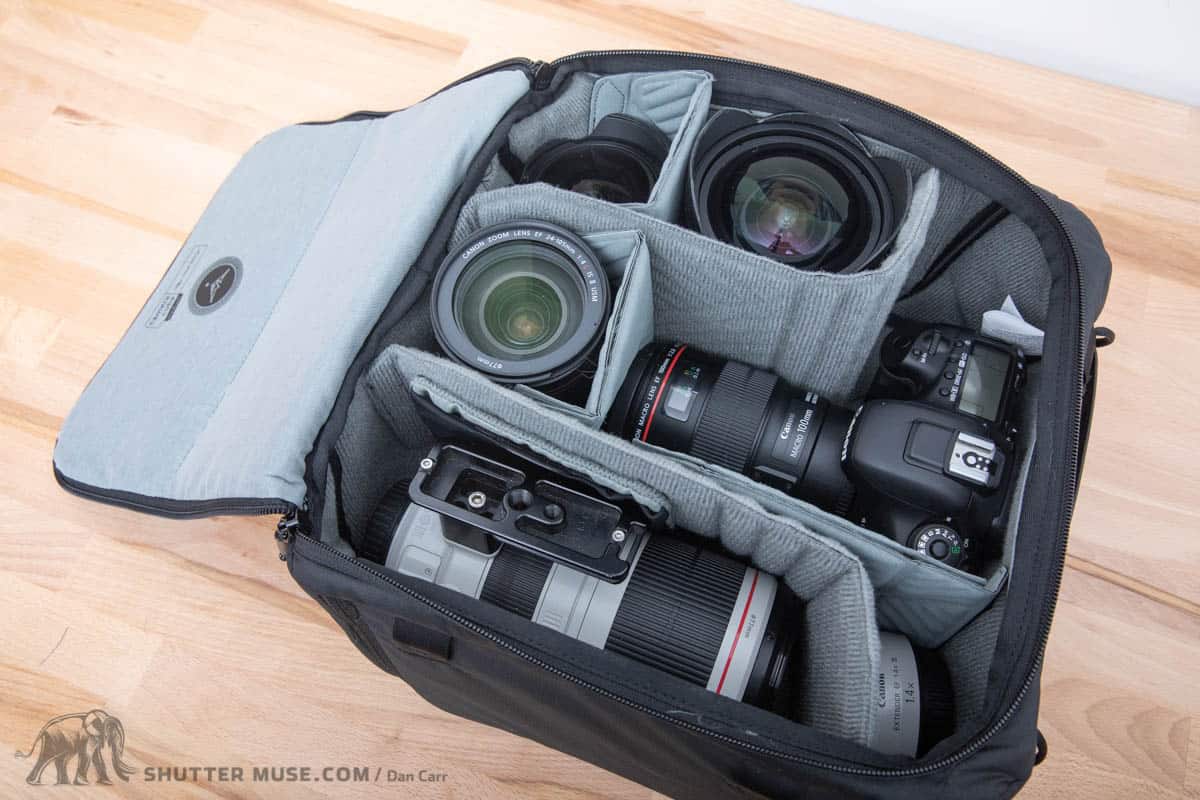
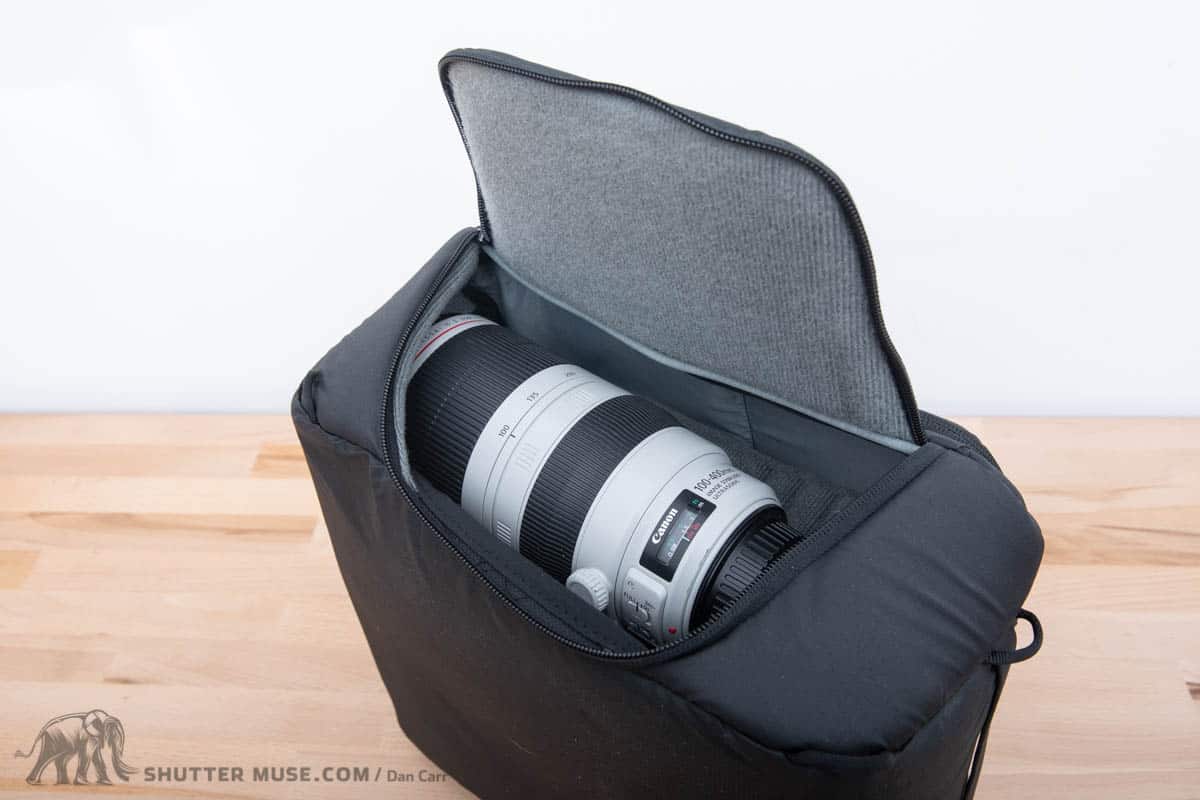
Peak Design launched a range of Camera Cubes alongside the 45L Travel Backpack (review). While they are sized to the width of that particular backpack, you’ll find that just like the previously mentioned F-Stop ICUs and Shimoda Core Units, they also fit into many other backpacks and duffle bags.
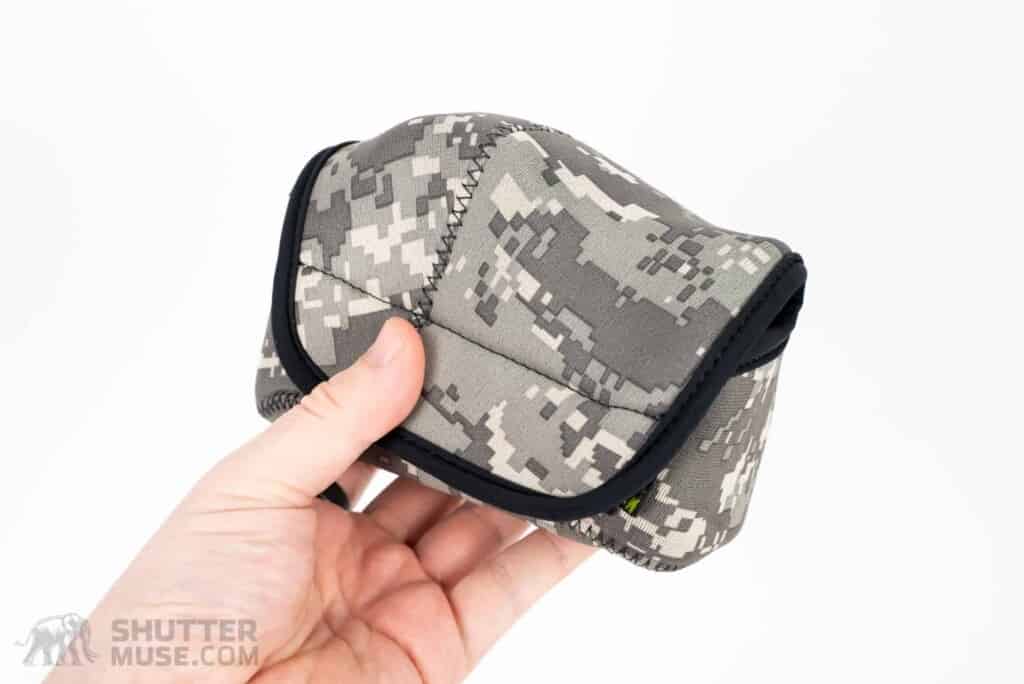
LensCoat BodyBags and TravelCoats


Small Pelican Cases


Dan, great reviews. I have an Osprey Atmos 50L backpack and have the MindShift holster you reviewed. I want to put a cube in the lower portion of my backpack to carry lenses and accessories. It has front zipper access and is typically used for stashing a sleeping bag and/or tent. The backpack has a panel inside that separates the lower compartment from the upper compartment so the gear on top should not crush cube below but still I’m thinking about getting the Mountainsmith cube kit because it is more rigid than the Fstop unit. What do you suggest?
If it’s going to be on the bottom of the pack, that’s probably a solid choice because it will give more rigidity when you stand the bag up.
Would the medium Peak cube hold 2 DSLRs ( 1 with a 18-300 zoom, 1 with a 11-16 wide angle) No other lenses.
Yes I think it would.
frustrating nether the change up or the mind shift holster are available anymore
B&H Photo has the MindShift holsters and they are on a significant discount. Likely about to be discontinued I guess. Get it here while they last https://shuttermuse.com/go/bh-mindshift-outbound-holster/
Sadly it does look like the Change Up has been discontinued.
Congratulations on your website. I really liked what I saw.
This is a useful summary of the various inserts. One other option: The Tenba BYOB (Bring Your Own Bag) inserts. They come with a strap and can function as a camera bag when you are not using your backpack. My BYOB 9 insert works well with a Leica M2 film camera and several lenses (a bit tight but compact).
Thanks! I haven’t come across the Tenba BYOB before. Next time I update this article I will see if I can get my hands on one.