A tripod is one of a photographer’s most important pieces of gear. Whether you shoot landscapes, wildlife, or even portraits, there will always be a time when you need a great tripod. Once you’ve made your 3-legged choice and chosen a great tripod head to go on it, there are several tripod accessories that can be very useful. Some are designed to protect your expensive investment, and some can even unlock additional stability and image sharpness.
Table of Contents
Tripod Spikes
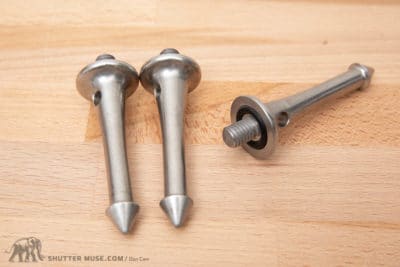

Most good tripods from major brands such as Manfrotto, Benro, Induro, Gitzo, Really Right Stuff have a 3/8″ 16 threaded female socket on the bottom of the legs for adding spikes. Tripod spikes can lead to sharper images by giving you added stability in windy conditions or on loose surfaces such as sand. In some cases, they might even prevent your tripod from being accidentally knocked over when set up in a precarious position.
For those on a tight budget, Benro makes a cheap set of spikes that are a great value option at just $20. These days I am using the much larger Really Right Stuff TA-3-FS spikes. The longer length provides better purchase in the pacific coast’s wet sands, and the added height above ground level keeps nasty saltwater further from the leg threads.
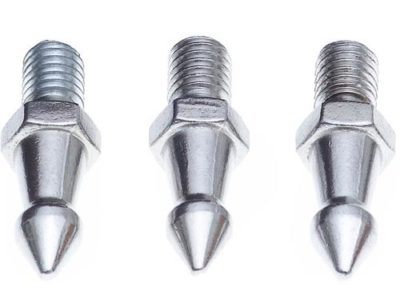
These RRS tripod spikes also have holes that allow you to use a hex wrench as a tightening lever. I always have one in my bag, so I don’t need to carry an additional tool with me, as you do with others. Thirdly, the built-in rubber o-ring on them grips tight to the base of the tripod leg. These things will never come off on their own, which is good because they cost $96 per set.
Warning: Some tripod brands like Feisol use a metric thread system for their tripod feet, and it means that the more common 3/8″ 16 threads will not fit. Check your tripod specifications before making a purchase!
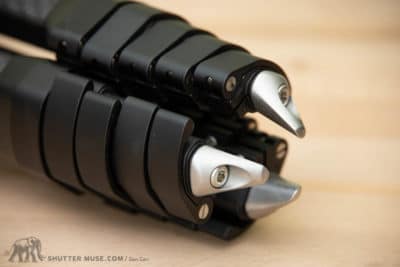

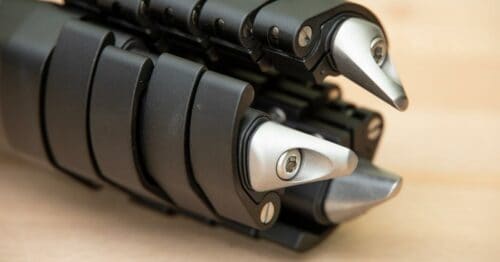
Not all tripod spikes provide the same level of grip and stability. Looking at the two examples above, I would prefer the Fotopro spikes over the Peak Design Travel Tripod spikes if I were trying to stabilize my tripod on compact dirt. Look at those things! They are like eagle talons.
If your tripod doesn’t come with spikes and you are buying from a store, use your common sense to evaluate their spikiness for effectiveness on the surfaces you are most likely to encounter. Also, remember that if you go for very spikey ones, you must continually remove them if you want to switch to some form of indoor shooting.
Tripod Shoulder Pad

There are many different ways to carry a tripod, and it comes down to a mix of personal preference and the weight of your camera bag. If you use a small travel tripod such as the Ulanzi Travel Tripod, it’s unlikely that you will need a tripod shoulder pad. However, if you use larger 2-series or 3-series tripods with heavy ball heads or gimbals mounted, there can be times when this is a great comfort.
If my camera bag is already heavy and I’m using a heavy tripod, there are times when I prefer to hand-carry my tripod rather than upsetting the balance by strapping it to the side of the bag. I usually alternate between carrying it with one hand or the other and hefting it up onto my shoulder when I’m doing this. Instead of trying to balance it perfectly on my bag’s shoulder strap, it’s much nicer to have a thick, cushy tripod shoulder pad, which I can then wedge up against the strap for stability.

A tripod shoulder pad is also useful when using a super-telephoto lens on a gimbal and changing positions as you scout or follow wildlife. Extracting a large lens from your bag and setting it up perfectly on a gimbal can be time-consuming. Many photographers opt to move the whole rig in one piece, often leaving the legs extended. Believe me when I tell you that your body will thank you for the tripod padding if you ever plan on walking more than a few minutes like that. Most people don’t have a lot of fat there, and it’s easy to bruise.
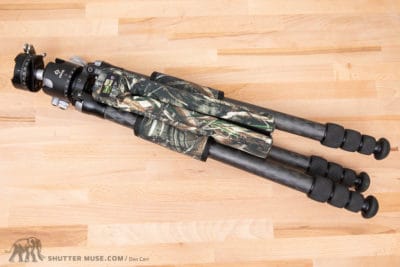

When it comes to tripod padding, the go-to solutions are going to be from LensCoat. Their basic LegCoats will cover those who want to carry the tripod on their shoulder, and they come in various colors or patterns. For the wildlife photographers who recognize the second scenario all too well, I can recommend the LensCoat LegCusion. This clever device spans the distance between two legs, giving you a nice, comfy v-shaped pad to push your shoulder into.
With your shoulder wedged between the padding, your hand can firmly grip one tripod leg to steady the setup. Not only is this a comfortable way to carry things, but it also feels much more secure when traversing tricky terrain with $15,000 of gear on your shoulder! Carrying the tripod like this also means the weight of your camera is pushing down into the tripod head, not at a right angle, as when you hang the tripod perpendicular to your body off the back of your shoulder.
Tripod Strap
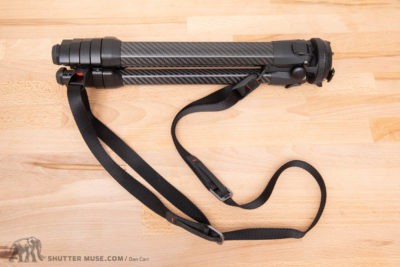
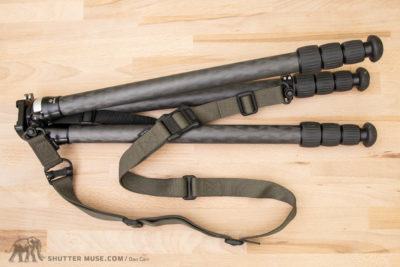
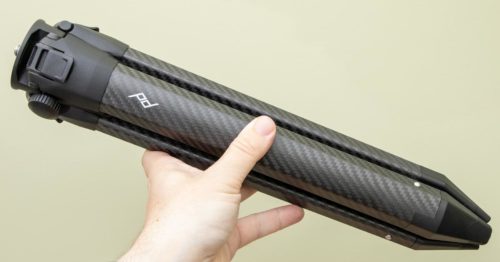
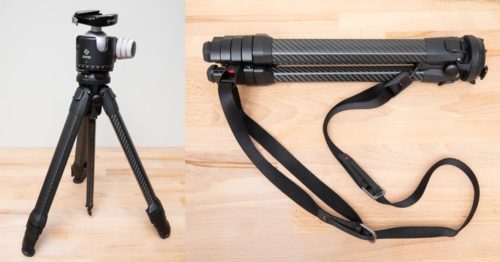
A shoulder strap can be helpful when your camera bag doesn’t have a good way to carry a tripod. Camera backpacks generally have a good way to carry a tripod, but shoulder bags, camera holsters, and camera sling bags typically do not. Some tripods, such as the Peak Design Travel Tripod, have a built-in method for attaching a tripod strap. Some other companies, such as Really Right Stuff, sell optional tripod strap attachment kits.
One thing that both of these pictured tripod strap systems have in common is that the strap can be removed in a second with a quick-release system. A shoulder strap helps carry a tripod from A to B, but once it’s time to get to work, you need that quick-release mechanism to spread and extend the legs. Keep this in mind if you plan to cobble together a homemade solution using any spare camera straps you might have around.
If your tripod brand doesn’t have a specific solution, take a look at the AirCell Universal Tripod Strap. This strap uses little pockets of air for padding on the back of a stretchy neoprene strap. They are of good value and very comfortable.

Tripod Hooks
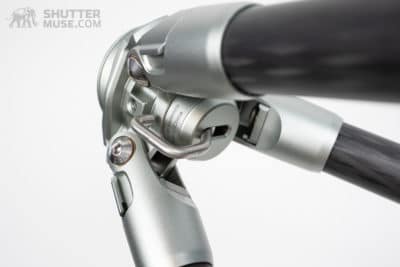


A tripod hook is used to add weight and stability to your tripod, usually by hanging your camera bag on it. Most tripods come with a hook, either on the underside of the ball head platform or on the end of the adjustable center column. Usually, these are hook-shaped, but occasionally, you might find a closed metal loop designed to have a carabiner clipped to it.
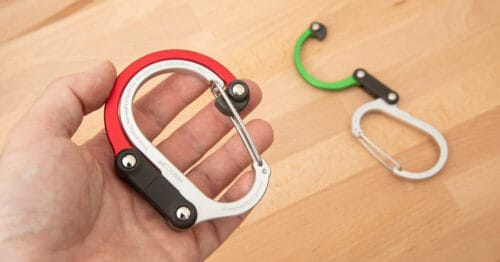
If you have a large camera bag, getting it hooked onto something in the small space where the tripod legs converge is challenging. Using a carabiner to extend the hook will fix this problem. I used a Heroclip carabiner in the photo above to easily hang a larger camera bag on my tripod.
Tripod Quick Release
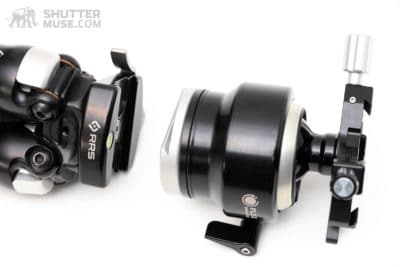

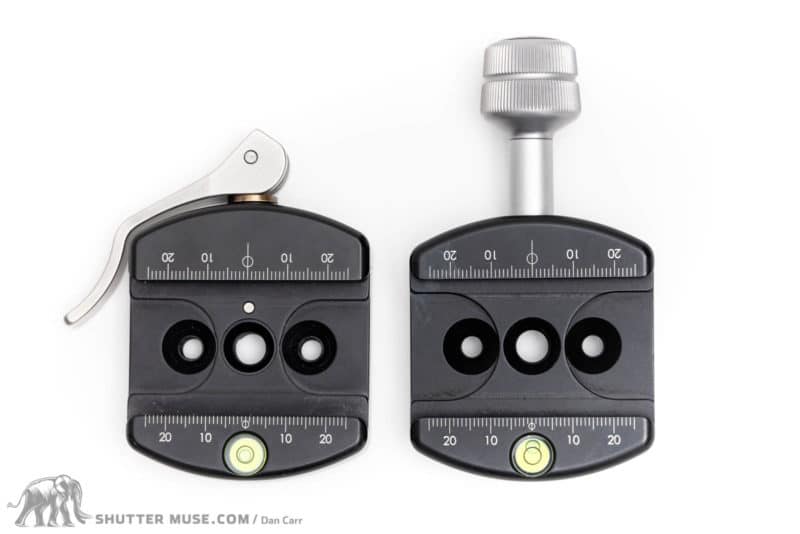
A tripod quick-release plate is perfect if you often swap between different tripod heads or want a faster way to remove a ball head for travel. A quick-release system will consist of a clamp on the tripod and a quick-release plate on each of your tripod heads.
You can choose either a screw-knob clamp or a lever-release clamp for the tripod side of the equation. For the tripod head, I recommend the Kirk Arca-Swiss Dovetail Ball Head Plates that come in a couple of different sizes to suit varying ball head base diameters. These are some of my favorite tripod accessories!
Tripod Camouflage
Camouflage patterns are popular on tripod accessories, but so far, none of the items on this list has aimed to obscure your tripod from view. I’m a big fan of being able to conceal yourself in certain wildlife photography situations. Time and time again, I see better results with certain species when I hide myself.
As usual, with this website in mind, I have experimented with several different types of tripod camouflage. Perhaps this is stretching the definition slightly, but the first one I’m going to mention is a photo blind like those made by Tragopan. Only camouflaging your tripod would be pointless; you also need to conceal yourself. A photography blind solves both problems, but they are not very portable.
A more portable solution is a LensCoat LensHide. This camouflage cover is designed to go right over you and your tripod. They are available in several different patterns, as well as other material weights to suit different climates. This is a great solution, but even the lightweight cover still adds noticeable weight to my backpack when hiking longer distances.
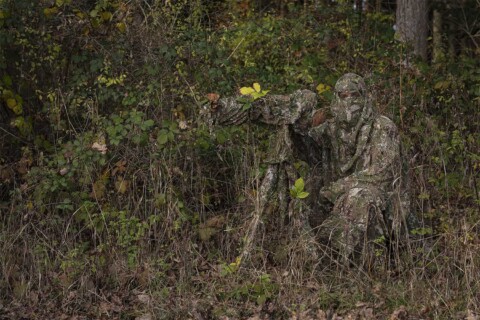

The final solution is the lightest tripod camouflage on the market. The GhostHood Tripod Camo from ConCamo is made from a particular material designed for the German military, which features “25 superimposed layers that combined create a chaotic illusion”. ConCamo stands for Confusion Camouflage. The material is so light and compressible that the whole thing can easily be screwed up into a jacket pocket. I haven’t written my review of this gear yet, but I have been using the tripod cover, as well as a matching camera cover and poncho for several months. I’m very impressed.
Tripod Grease
Tripods need maintenance, and the most important thing to do is occasionally dismantle the leg-locking system and clean out sand and other particles from the screw-lock threads. I use an old toothbrush for this, and for some reason, I find the process strangely relaxing.
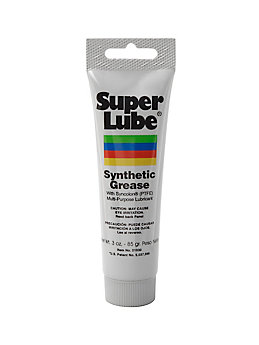
Once clean, the tripod leg locks need to be lubricated before putting them back together. I once asked Really Right Stuff about which grease would be the best for this purpose, and they recommended SuperLube Synthetic Grease. If it’s good enough for their tripods on the assembly line, this is what you want to use during your tripod maintenance. You only need a small amount for each leg locking collar, so a tube should last a long time.
Emergency Tape

This is a simple trick. I like to keep some Gorilla Tape wrapped around the leg of my tripod just in case I break one of the legs in the field. So far, I have never needed it, but a busted tripod leg isn’t the only thing that can be fixed with this stuff, so I’m sure it will come in handy one day. You could also use gaffer tape, but you might find that it doesn’t hold up so well to rain and snow if you often find yourself shooting in those environments.
Tripod Bag

Tripod bags come in three main varieties. The first is a heavily padded bag, usually with a shoulder strap, offering real impact protection. They are helpful for at-home tripod storage and packing your tripod into a larger suitcase or duffel for travel. They’re also beneficial when you want to toss your tripod into the trunk of your car. Oddly, the cheaper tripods often come with a padded case. If you buy an expensive Gitzo or RRS tripod, you’ll need to purchase a tripod bag separately. The Manfrotto Padded Tripod Bags are an excellent place to start.

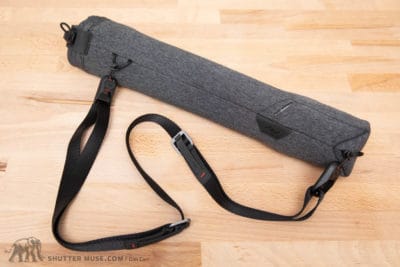
I would never walk far with one of the heavily padded tripod bags. Instead, I use what I call a tripod sleeve. This simple style of tripod bag is only designed to provide scratch protection and environmental protection (rain, sand, snow, etc.).
I have used the tripod sleeve from F-Stop – available in Large and Medium sizes – for nearly two decades. Durable and water-resistant, this tripod bag has daisy chain loops to help you attach it to a backpack. The roll-top closure system allows you to carry a variety of tripod sizes with the same tripod bag.
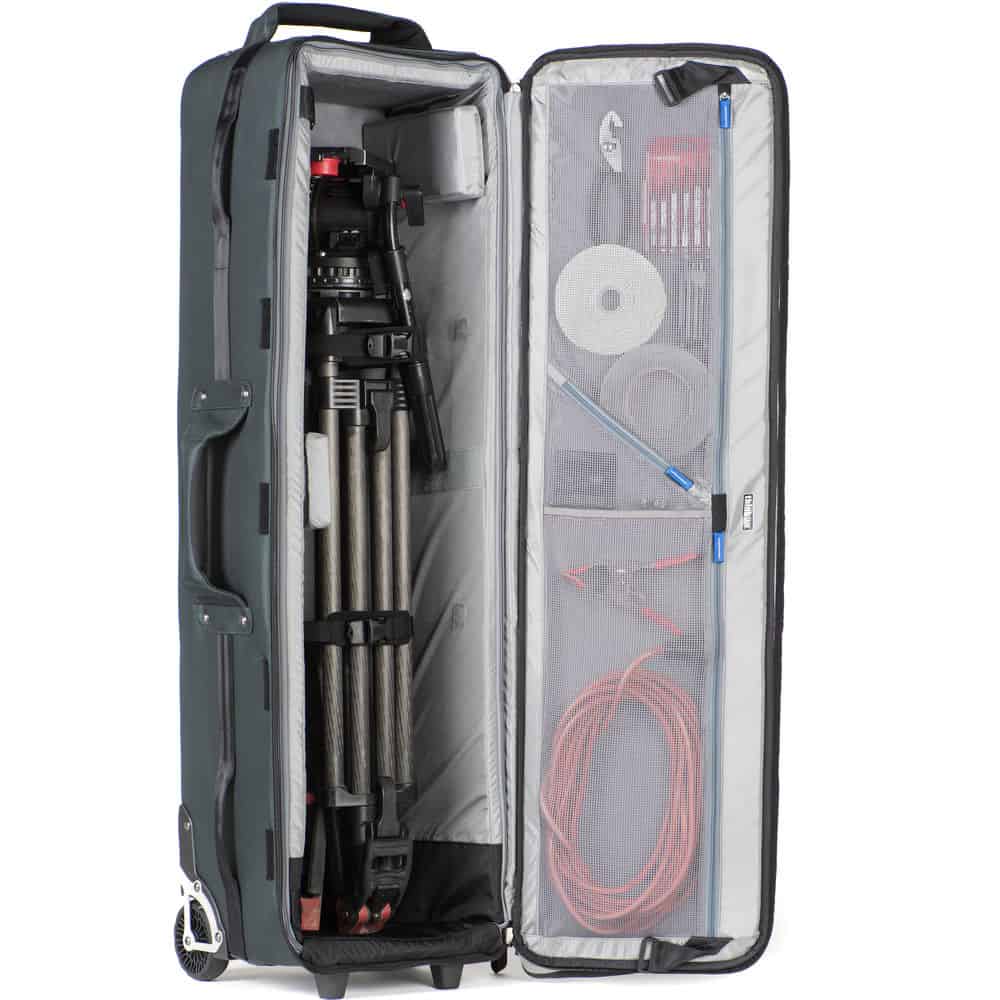

The final type of tripod bag is the large roller bag. These are usually used with much heavier video tripods, but they can be useful for serious wildlife photographers who want a travel case that will fit a large tripod and a gimbal head. The Think Tank Tripod Manager is good for video tripods, while the slightly smaller Logistics Manager 30 is a good option for carrying a photo tripod. In fact, I use this one myself and often carry several tripods in it with other gear packed around them. If you prefer something more straightforward than the Think Tank options, I recommend the HPRC 6200 or 6300 rolling tripod hard cases.


US Customers spending over $50 in Think Tank Photo’s online store can get a free gift at checkout after following one of the links to the store from this review–like this one. If you have any issues, please follow the instructions on this page.
Tripod Waders
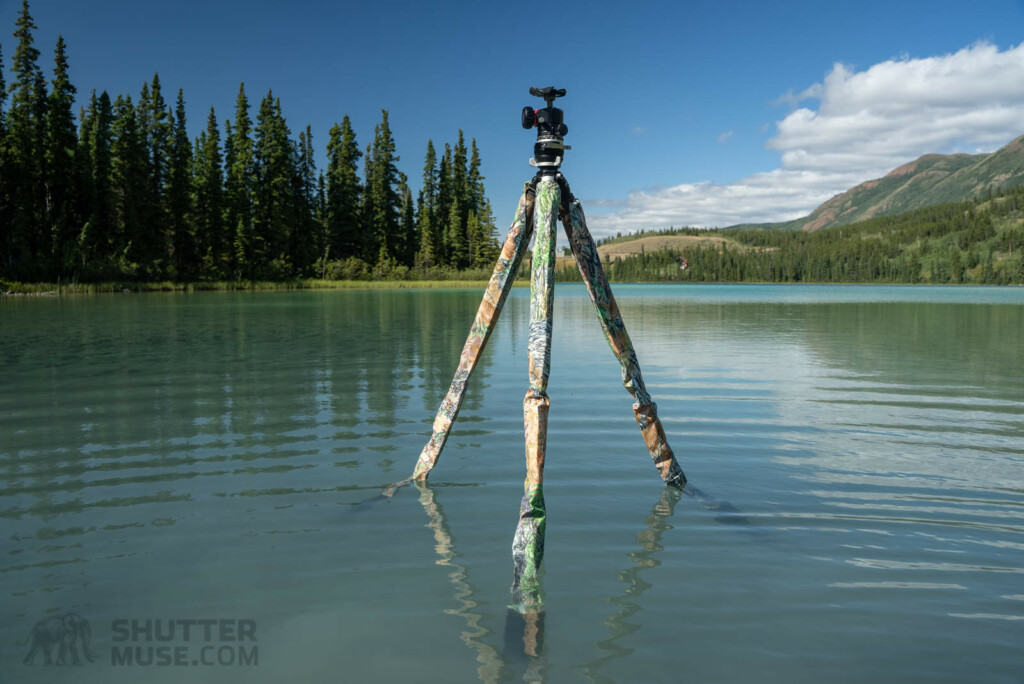
The Avocet Tripod Waders from Tragopan are a simple solution to the problem of getting sand and grit in your leg locks when using the tripod in lakes, rivers, or at the beach. They also stop water from getting trapped in the leg tubes, which can become stagnant and smell bad if you leave your tripod in the car for a while. I’m speaking from experience…
The waders are waterproof for their entire length, and the lowest portion is reinforced with extra durable PVC to ensure that rough rocks hidden under the water don’t puncture them. Of course, if you’re using your tripod in saltwater, you’re probably aware that salt and expensive gear never go well together. These waders will also save you from the need to quickly wash down your tripod with fresh water after you’re done in the ocean. This is a handy tripod accessory to have in your photo go-bag.





Does the entire system you describe here fit inside the F-Stop bag?
The F-Stop bag is pretty wide, so yes you could leave the leg pads on the tripod and fit into the F-Stop bag. You would not be able to fit the LensSack though. That thing is quite large, and when filled with buckwheat hulls it’s not compressible. Does that answer your question?
Hi Dan, thanks for sharing. Very helpful! About the tripod waders- how stable is the tripod with the waders on? Assuming that you are using your spikes on your RRS tripod while shooting on sandy/ muddy ground, one can’t do so while using the waders. Thanks!
The stability is very dependant on what’s at the bottom of the pond. Importantly, the tops of each ware are not air tight, so the legs do not ballon and float! On dry land there is no difference between your stability with or without the waders. And yes, take your spikes off before using them 🙂
Very good ideas! Thanks for posting them for us to see and enjoy!
You’re very welcome, Chad. Glad you found them useful.
Hi Dan. Interesting as Always !
I do a lot of Astro images & in some pretty daft places too, so another thing I always have on my tripod – like your tape – is some 4mm cord, wound round one of the legs.
This is so I can tied the legs of the tripod securely to various places in case of any wind, or an exposed place, such as the top of a big drop for example.
Lightweight & easy to always have there too.
Andy, this is a great tip! A safety tether. I always have a carabiner and some nylon webbing on my camera bag from my climbing kit. I have used it to tether a tripod in the past, too. Thanks for sharing your tip!
Leaving for Iceland soon. Should I grab some spikes for my Peak Design travel tripod? If so which ones are compatible?
The PD Travel Tripod is a tricky one. They make their own spikes which you can find here: https://shuttermuse.com/go/peak-design-spike-feet-set/
Because they use a non-standard thread size compared to all other tripod brands, your only option is to buy those feet. No other feet will fit. If you sign up to our newsletter you can get a discount; https://shuttermuse.ck.page/peak-design-discount
I didn’t realise that I could use the Peak Design anchors on my Peak Design tripod – I used to use them on my old 3LT tripod, but had not thought to use them on the replacement. Spare anchors have now been attached!
Nice!
I had been using some Gitzo Leg pads but was never really satisfied. I just got a new PMG tripod and had seen a video from Hudson Henry where the talks about using bicycle cork grip padding on the legs. I gave it a go because they are not sticky, won’t leave residue, and are ultra-lightweight.
I’m shocked at how much I love this as a solution. The grips are about as waterproof as I want to take my camera in, protect my legs, don’t add any weight, are grippy, don’t spin, and provide a little padding. And most importantly, they are not cold in the winter.
WOW! What a great site with so much useful and otherwise troublesome to find information. Wish I had found it years ago. THANK YOU for such a wonderful site and your efforts in putting this together!
Hey! I’m looking for a tripod accessory that can clamp onto one of the legs and be able to hold a power bank. I’m always needing to find a place to put the power bank will filming and have not found anything yet…
I would love to 3D print something like this custom for my tripod, but have no experience nor a 3D printer…
Any suggestions?
Nothing comes to mind if you’re using a generic USB power bank. If you use a V-Mount battery with a USB output there are tons of v-mount clamps out there. To be honest, I usually just hang my power banks off the tripod in a small bag.
Carrying a camera mounted on a tripod over the shoulder can create big problems: two photographers I know had their shoulder ‘pod carried cameras impact branches adjacent to their walking trails, significantly damaging the cameras. I remove my camera from the quick-release Arca-Swiss style clamp on the tripod ball head and carry it using my neck strap. I reattach it to the ball head when the tripod is set up.
Yep! Got to be careful!
A couple of easy tripod tricks. I heartily agree with the previous comment about wrapping the legs in the cork tape that cyclists use on their road bike handlebars. Inexpensive, doesn’t mar the finish, thin, light weight, and very comfortable on the hands.
Reflective slap bracelets like runners wear on their wrists and ankles work great on tripod legs. They make it easy to see your sticks at night and won’t damage the finish the finish.
The strap that came with your tripod bag can be easily converted to a tripod strap with a couple of small dog collars You put a collar around each end of your tripod, clip the strap to the collars’ D-rings, and you’re good to go. Saves you from having to having to buy yet another strap. Collars nowadays are made of nylon webbing and fasten with quick release clips so they’re perfect for the job, and nobody will be the wiser.
Great stuff!! Thanks for sharing your experience and advice. Love seeing useful comments in our community and not the trash talk you get in some other places 🙂
Hey Dan! I’m looking all over for an easy way to attach stuff to my tripod arms? legs?… I like to keep my camera plugged in and use a power bank to do so. I currently use velcro straps or electric tape to attach the power bank to the leg of the tripod but I want something more efficient and easier to use. Any ideas?
Two things come to mind. Firstly, there are the so-called tripod hammocks like this one: https://www.bhphotovideo.com/c/product/1038289-REG/oben_stb_10_stone_bag_for_tripods.html/BI/7152/KBID/7700/DFF/d10-v21-t1-x598584/SID/DFF
It might not be quite what you are looking for, as you can only use it to hold things once you have the tripod in place. The second thing is called a LensCoat LensTote. It’s a new product that came out this month. I have one here and will review it soon. You can see it here: https://shuttermuse.com/go/lenscoat-lenstote/
It’s designed to carry telephoto lenses; however, it does add two pockets to your tripod, so it would achieve the desired effect. Other than that, the only other thing you could do is hang an accessory holder or small lens bag from the tripod hook using a carabiner. I do this when I’m doing timelapses and need a USB pack. Basic solution, but it does the trick.