
I started my professional photography career living in the resort town of Whistler in British Columbia, Canada. For those that don’t know, Whistler is a mountain town that arguably boasts the best skiing, snowboarding and mountain biking terrain on the planet. Just 50km south of Whistler, down the Sea to Sky Corridor, is the coastal town of Squamish. A town that is almost as well known for its climbing as Whistler is known for its skiing.
Throw in a healthy mix of rapid rivers for kayakers, high winds for kiteboarding and the nearby North Shore mountains of Vancouver for all manner of additional mountain activities, and you have yourself the perfect home for an adventure photographer.
For close to 15 years this was my home, and adventure photography was my job. In fact, the ski resort of Whistler Blackcomb actually made a short video about my life in the Whistler valley, which you can view in this previous post if you want to see some shots of me on the job.

Although my photographic interests have broadened since I recently moved to the Yukon, I still love to capture adventurous people doing wild things in wild places. Just take a look at the under-ice freediving photo further down this page for example. I took that shot while freediving under the Yukon ice just a few days before I sat down to write the first version of this post.
Why am I telling you all this?
One of the things I have always prided myself in is that I create my posts here on Shutter Muse by using my own experiences. While many other photography blogs will happily write a post like this by simply Googling what other people have said before, having zero experience of the topic themselves, that’s not how I roll. That is why I always include my own sample images in posts like this, and in my tutorials. While you might not agree with my suggestions and advice, you can at least be guaranteed that the advice came from a place of experience, and not just from a Google search.

Table of Contents
1- A Great Camera Backpack
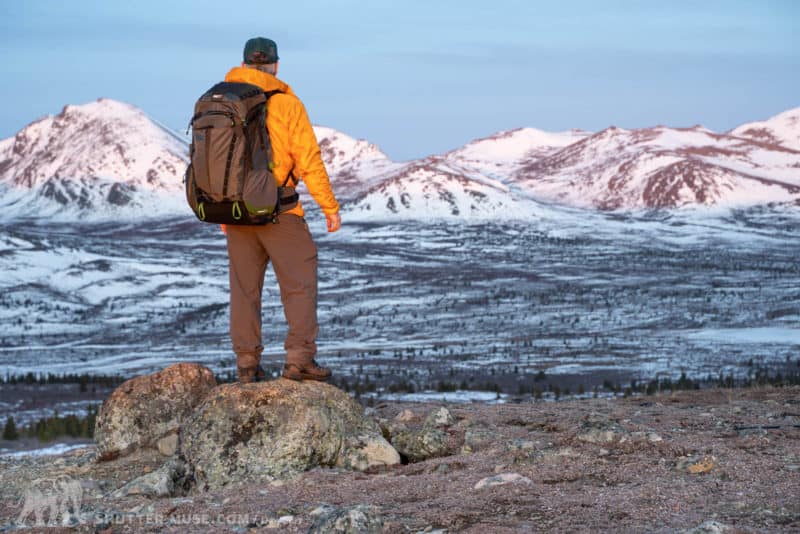
Different types of photography require different ways to carry your gear. As an adventure photographer, your main camera bag is always going to be a backpack. There’s no better way to carry a heavy load over a large distance, and if you’re using a pack with a good harness, you’ll be able to climb, ski, bike and hike your way to the perfect location without any trouble.
Recommended Adventure Photography Packs
MindShift BackLight Elite 45L
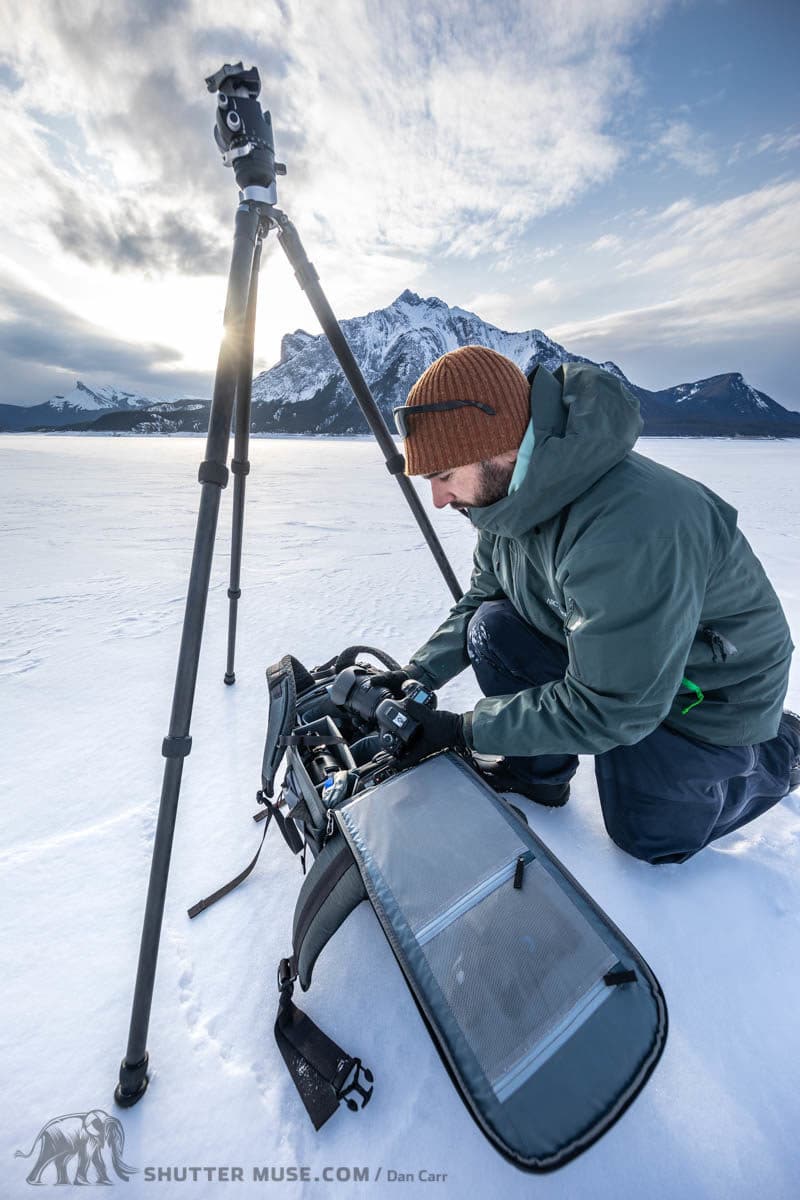
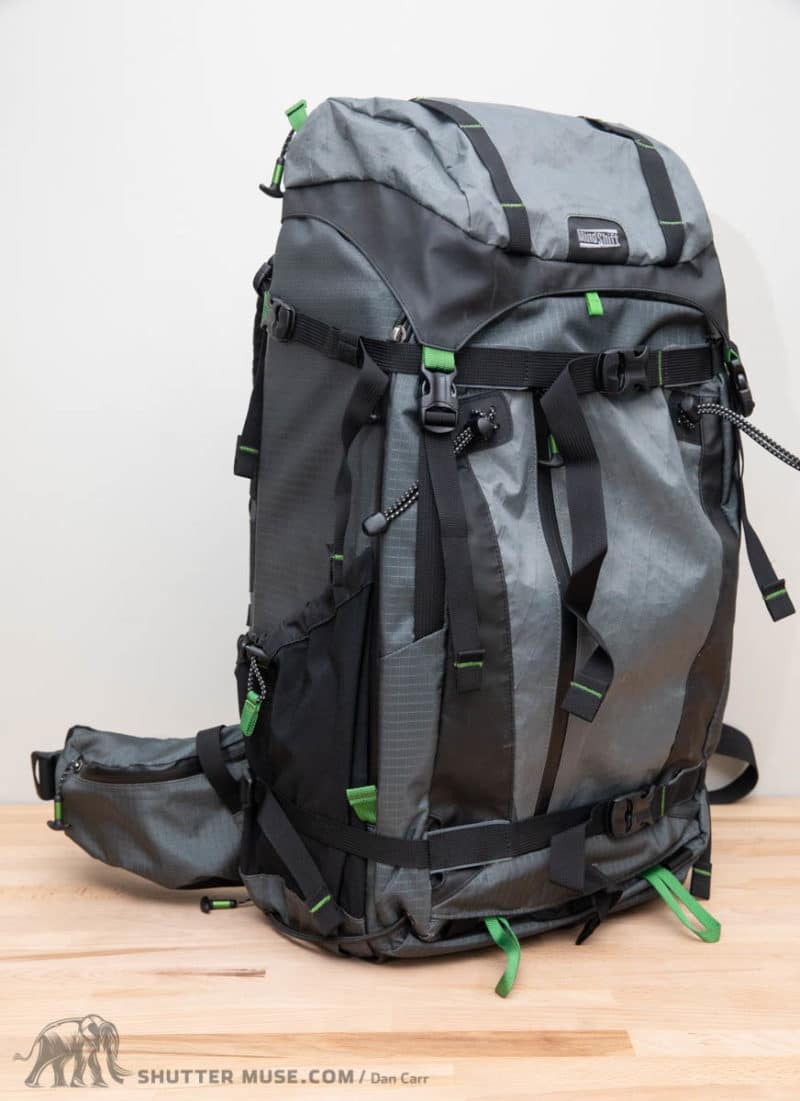
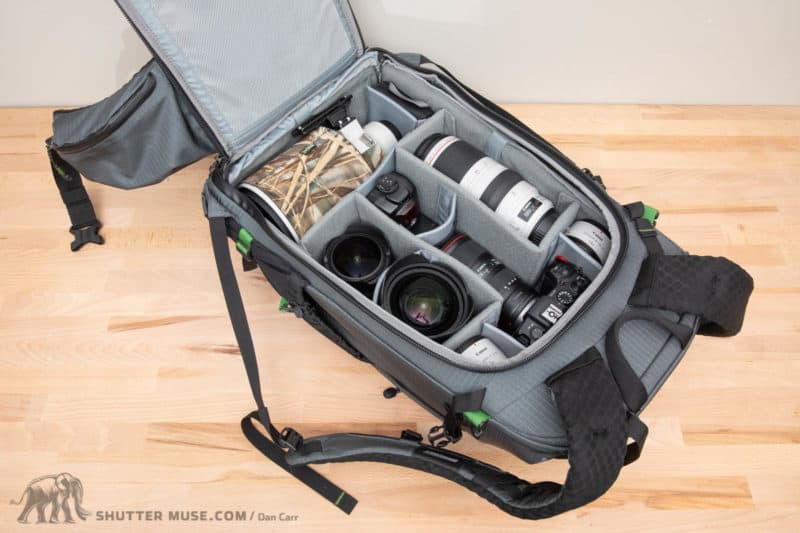
I love the MindShift Backlight Elite 45L pack. But I would say that because I helped them to design it, and we tested prototypes of this bag for two years before it came to the market. The front of the bag and the removable top pocket are made from ultralight ripstop sail cloth. This keeps the bag as light as possible while allowing for the usage of slightly heavier, but waterproof and durable TPU on the base. No wet gear if you stand the bag in the snow or on wet ground.
This pack also has a number of features designed to help you while you travel. The hip belt and top pocket are removable, which cuts the bulk of the bag considerably in the eyes of those pesky airline gate agents. If you do run into issues on smaller regional aircraft, or light aircraft heading to isolated locations, the internal camera block is removable and even has a pair of built-in shoulder straps. Simply slide it out, and you have all your important stuff in a much smaller package that will easily fit under the seat of tiny aircraft. For more information, please check out my review of the MindShift Backlight Elite 45L photo pack.
Shimoda Action X v2
The Action X v2 series from Shimoda is great for those that like an expandable roll-top bag. The reason I purchased the 70L version is that it is, to my knowledge, the largest photo pack on the market. Although I do not need a 70L+ capacity regularly, there are times when it is called for. When I do load it up for overnight camping trips or with diving gear, it carries very well due to an incredibly thick and comfortable set of shoulder straps.
Gura Gear Kiboko
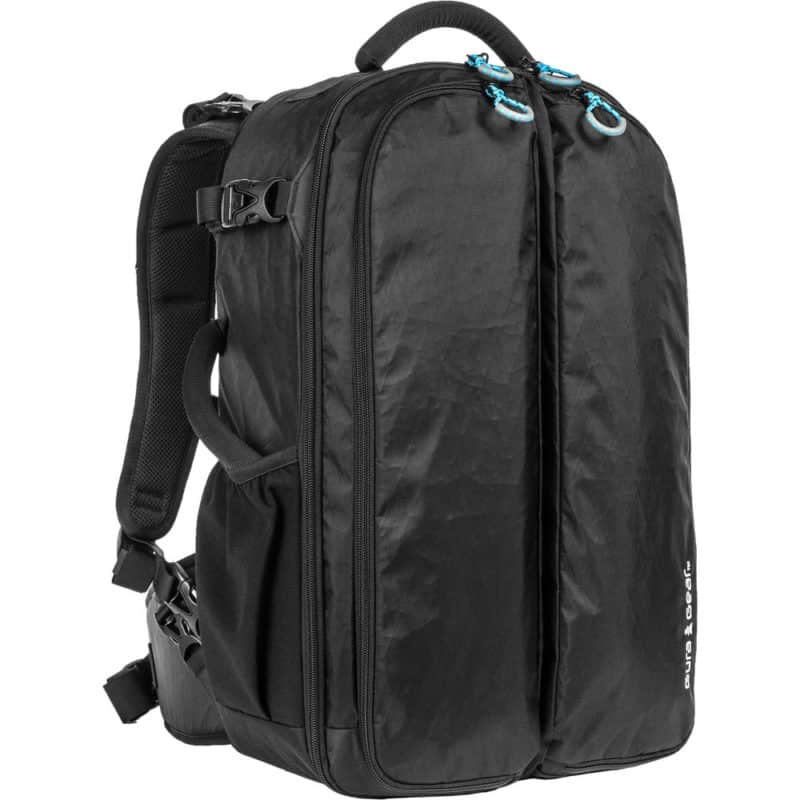


A third option I highly recommend is the Gura Gear Kiboko 30L backpack. This pack has been designed primarily for people who need a super-telephoto lens. The butterfly design means that either side of the pack can hold up to a 600mm lens. You could put a 600mm on one side and a 300mm with your camera on the other if you wanted!

For my work as an adventure photographer, I do use a super-telephoto lens a lot less often than I do for my wildlife photography, however, there are occasions when it is needed. Shooting extreme skiing in places like Alaska, for example. When you need very fast access to a very big lens, the Kibokko is a fantastic photo pack.
MindShift Rotation 180 Series
A fourth option is to use one of MindShift’s Rotation 180 backpacks. The bag is available in three different sizes and has a unique feature that allows you to quickly access your camera gear without removing your pack. The video demonstrates this feature, and you’ll immediately see why this is useful.
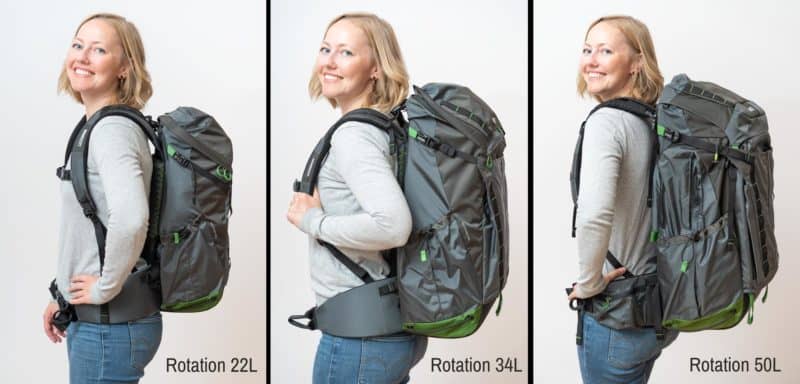
I have spent time with all of the bags in the Rotation 180 lineup and you can read detailed reviews of them at the following links: Rotation 22L review, Rotation 34L review, Rotation 50L review.
Shimoda Explore V2 Series
The Explore v2 series from Shimoda is top-rated. Check out my in-depth Explore v2 review to find out why. This bag is available in three different sizes: 25L, 30L and 35L. While these are useful for different purposes, the smallest 25L is unique. This is the smallest high-end adventure photo pack on the market, suitable for people with smaller torsos or those that want an ultra-light yet rugged backpack.
Shimoda Designs has offered Shutter Muse readers a 10% discount on anything purchased through their online stores. US, Canadian, UK, French, or German residents should use the discount code ShutterMuse10 after clicking here to access the store. Australian readers should use the same code on the local Shimoda distributor’s site, Maxxum, instead.
2 – A Good Headlamp

Spend enough time outside chasing adventure and you’ll quickly realise that early morning and late nights are par for the course. You’re going to need a good headlamp to light the way. I recommend getting one that is rechargeable via USB so that it can be topped up with a USB battery pack or charged directly with a small portable solar panel.
I also recommend that you carry a headlamp that has a red LED mode. Red LEDs will not kill your own natural night vision, so they are very useful when you are working with your camera at night and still need to maintain a certain amount of night vision for composition. When you’re walking, by all means, use the regular white light. But switch to a red light once it is time to shoot. This helps to ensure you don’t blow our other people’s night vision if you’re working with models or athletes.
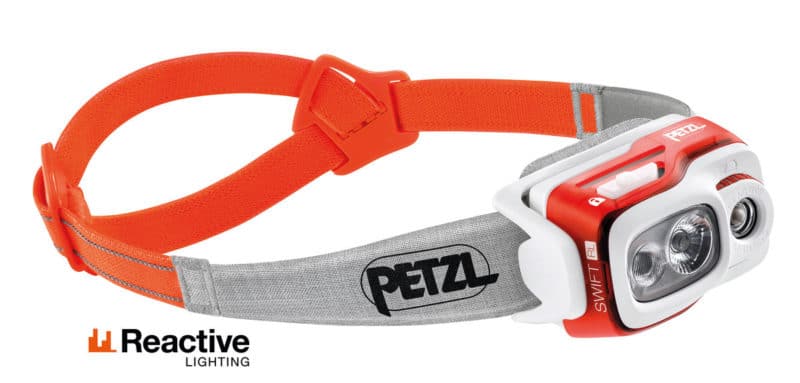

I carry two headlamps with me wherever I go. One is an ultra-bright 900 lumen Petzl Swift RL. It’s like switching on the high beams of your car! The second is a tiny, easily pocketable Petzl Bindi that always stays in my emergency kit as a backup, or when I need the red LED (which the Swift does not have). Although I have always used Petzl headlamps, I also hear a lot of good things about the Black Diamond ones, too.
3 – Rugged Backup Drives

Hopefully, you are following a 3-2-1 backup strategy for your hard-earned photos. For in-the-field or on-the-road backups, adventure photographers should definitely be looking at using portable drives that offer some sort of environmental and impact protection.
My favourite drive is the OWC Envoy Pro Elektron. This tiny palm-sized drive has an enclosure that is milled from a solid block of metal. It is waterproof, crushproof, dustproof and carries an IP67 rating. Using the latest NVMe SSD technology, the Elektron has a theoretical speed of 1011MB/s. In my testing, I was able to achieve very close to the theoretical maximum over USB-C. You can read more about it in my OWC Envoy Pro Elektron review.


Although not quite as rugged as the OWC Elektron, the Samsung T7 Shield is an excellent portable SSD available in larger capacites than the Elektron, and for a lower price. Check out my review of the SamsungT7 Shield SSD for more info and speed test results. A few additional options are also mentioned in a group test of the best rugged drives for photographers.
4 – First Aid + Emergency Kit
I have seen some nasty accidents over the years. Having a first aid kit in your bag is important so that you can repair yourself, and potentially other members of your party. This kit should be built around the type of activities that you are going to be photographing, which is why I’m not going to include a full list of specific items that you should have, just in case someone takes it as gospel for every situation.
Some elements of the kit should also take into account your own body and history of injuries. For example, I carry medication that specifically targets a lingering back issue. Not an uncommon problem for a photographer that has carried heavy loads for many years.
5 – Camera Cover
These products are always called “rain covers” but they are just as useful for protecting your camera from snow or flying mud and sand. Being confident in how well your expensive gear is protected, will lead to more shots in difficult weather. There is no point putting a ton of effort and energy into getting yourself into a crazy location, only to keep your camera in your bag because you’re scared of ruining it.
Camera covers come in all shapes and sizes. I did a huge group test to find the best camera rain covers, so I now have a box full of them in my office and I have used them all extensively. The key thing for adventure photography is that you really need to find a lightweight solution. Some of the covers on the market, like the Hydrophobia from Think Tank, are designed primarily for sports photographers sitting on the sidelines. They offer incredible protection, but there are too heavy and bulky for adventure photography.
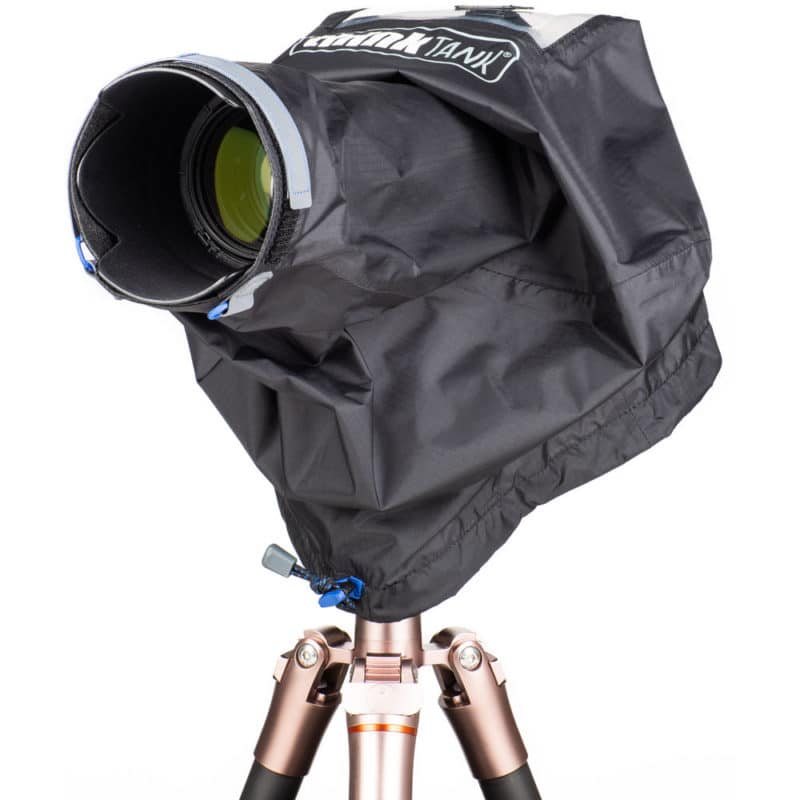


One of the newer products on the market, created from feedback about this exact problem, is the Think Tank Emergency Rain Cover. These are ultralight covers that work with any camera and are small enough to stuff into the side or top pocket of your pack.
6 – Rugged Memory Cards

Adventure photographers are the most likely type of photographer to push the capabilities of their memory cards to the limit. I have regularly found myself in in temperatures as high as 45c (115F) or as low as -45c (-49F). As long as my camera allows it I will always shoot to two memory cards at the same time to add some redundancy, but I’d still recommend spending a few extra dollars to make sure you have durable cards that are designed to withstand extreme environments.

I currently use Sony Tough SD cards, as well as Sony Tough CFexpress Type-A cards. For more details on these cards, I would recommend taking a look at my review of the Sony Tough cards where I froze them into a block of ice to test their claims of durability.
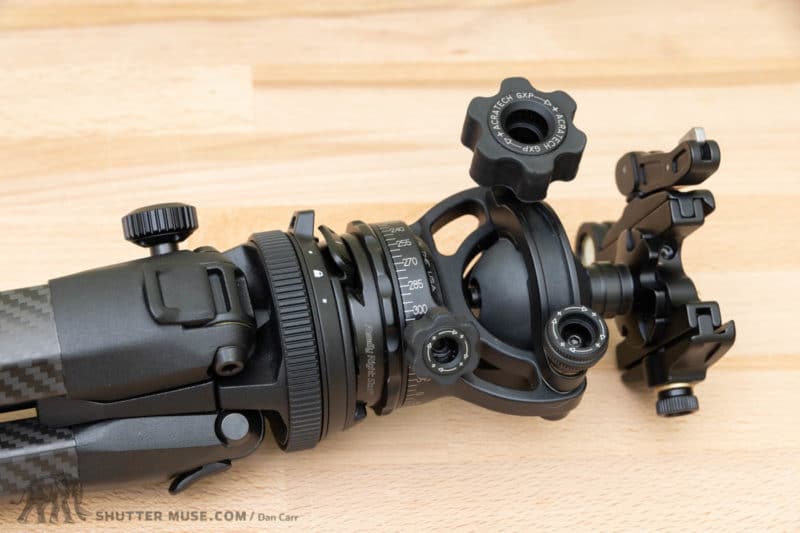
7 – A Really Tough Ball Head

I have a large collection of ball heads that have been amassed over the years, but it wasn’t until fairly recently that I discovered what I consider now to be the perfect solution for adventure photography. The Acratech GXP weighs just 1lb (450g) but has a capacity of 50lbs. This is by far one of the best capacity to weight ratios on the market, which makes it perfect for travel and adventures where your gear is on your back.
This is also a ball head that has been designed for rugged environments. The open ball design means that there are no greasy corners for sand and dirt to get stuck in. In fact, if you do get this head dirty, Acratech recommend simply running it under a tap to clean it out, or splashing it about in a river.
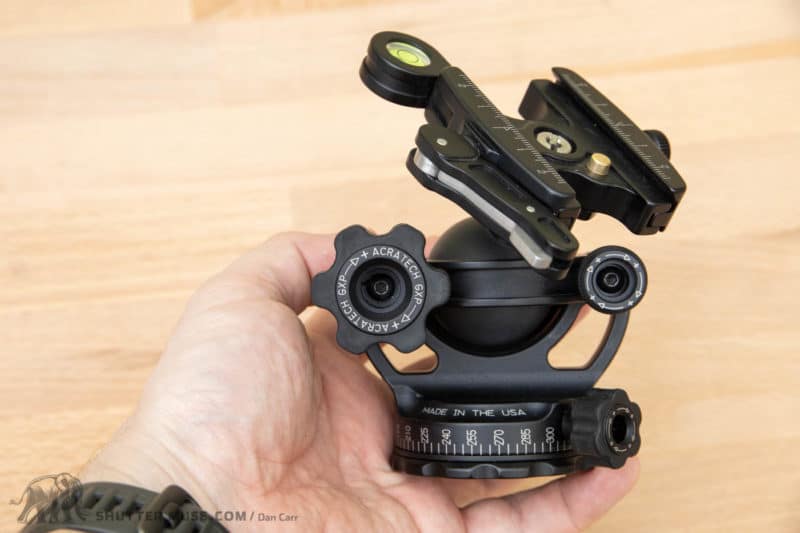

I do agree that aesthetically it might not be the most beautiful ball head. The lightweight skeletonized design is polarizing among people that first see it. Beauty is in the eye of the beholder, though. Once you use the head, you will appreciate the reasons for the design, and then you’ll understand that you have a ball head that can take a beating in any environment and still work perfectly. Check out the Acratech GXP review for more details.

If you want to go really lightweight with your head choice, I also recommend the unique RRS BC-18 head. This is a tiny inverted ball design that is small enough to fit in a shirt pocket, yet capable of holding massive loads. If you are counting every gram in your pack, this is also worth a look. If I’m carrying two tripods to use two cameras simultaneously, one tripod will always be fitted with the BC-18 to save some weight.
8 – GPS Messaging Device

GPS messengers are becoming a lot more common and I personally don’t leave home without one these days. With this device, I can message back and forth with any cell phone number, without needing to have cell phone service. Instead, the messages are relayed via satellite, and importantly they also contain GPS data for my exact location. Should I get in any sort of trouble, I can call the emergency rescue services to my location with the push of a button. I can also send automatic location updates to an online map that can be monitored by my family from their home. No matter where I am in the wilderness, or even in the middle of the ocean, they can look at the map to see my location.
Aside from the useful emergency features, I also use the device all the time to mark points of photographic interest or animal sightings. Over the years I have built up a database of locations that can be easily viewed via the mapping software on the InReach web portal. More on this within my InReach Mini review for photographers.
9 – Portable Battery Power

I’m a big fan of portable battery banks, both big and small. I used to use a lot of Goal Zero products but have mostly transitioned to using a combination of products from Jackery and Anker these days. Their products much better value.
The Jackery Explorer 500 (review) and Explore 1000 are fantastic lithium power banks that can be kept in your car for extended road trips. They will power your battery chargers, your laptop, lights and even a 12v fridge! Using products like this has allowed me to undertake multi-week car trips to places like the Arctic Ocean, with zero fear of ever running out of power. These packs can be charged up with solar panels like the Jackery SolarSaga (review) when you are resting in one place. Or they can be charged from your car while you drive to your next destination.
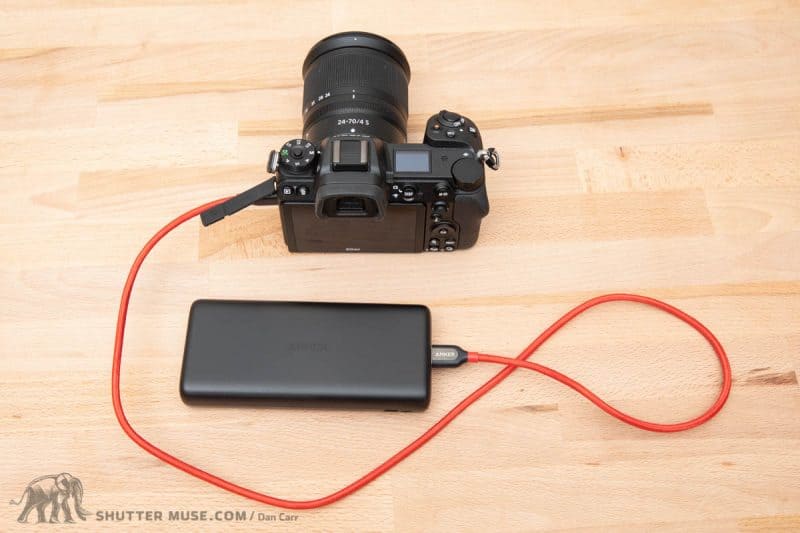
Large batteries such as the Jackery Explorer series are great when you have a vehicle to work from, but in the field obviously use something smaller. Different packs come onto the market every few months, but I tend to stick to the smaller USB batteries from Anker. The ones with Power Delivery outputs can be used to charge my camera while it’s in my backpack, and in a pinch, they can also be used to add an hour or two of battery time to my laptop.
10 – Water Filter

Even though I always take a bottle of water with me, I still keep a small water filter in my camera bag. Rather than carrying all of my daily water needs in a bottle all day long, I prefer to carry some of my daily water needs in a bottle and re-fill that during the day using a filter. This helps to keep the weight of my pack down, which is often important when carrying a lot of camera gear.
The MSR TrailShot is a pocket-sized filter that has been my go-to solution for the last few years. What I love about this design is that you can use it to re-fill a bottle, or you can simply put the spout in your mouth and the hose in a stream to filter. I love this thing, and think the price-point is very reasonable.
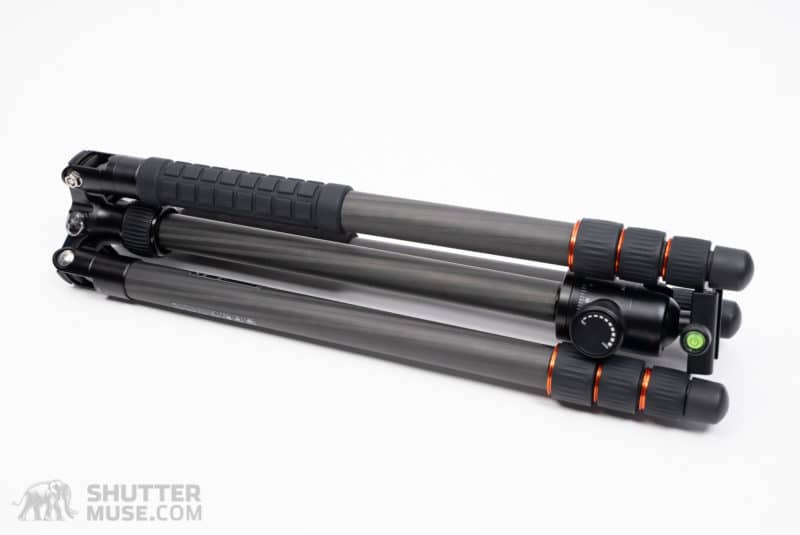
11 – A Lightweight Tripod
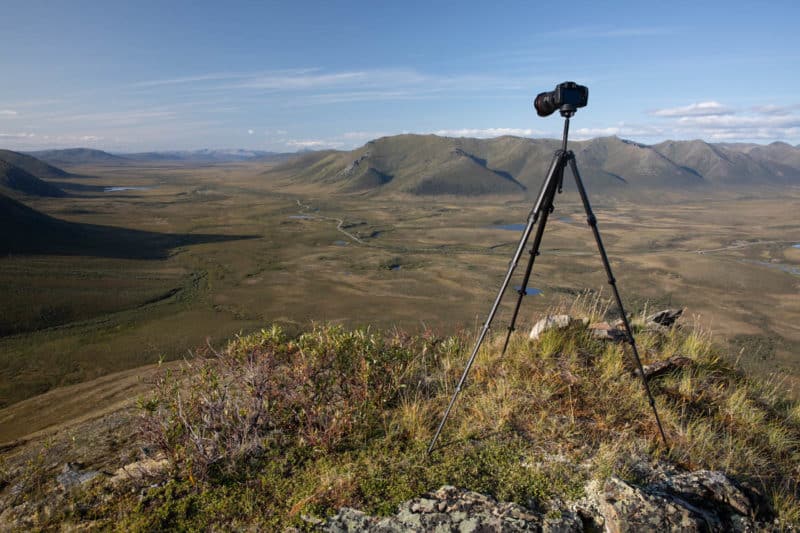
Tripods are usually associated with long-exposure photographs that rarely include people in them. So why would an adventure photographer need a tripod? Well, first of all, you might have noticed that several of the photos mixed into this guide are actually self-portraits. This is something I often do because it’s simply not possible to find a suitable model or athlete for some of my adventures. Of course, any kind of self-portrait is going to require a tripod (and a remote control). A tripod is also useful for creating timlapses, shooting video content and grabbing a few landscape images along your journey.
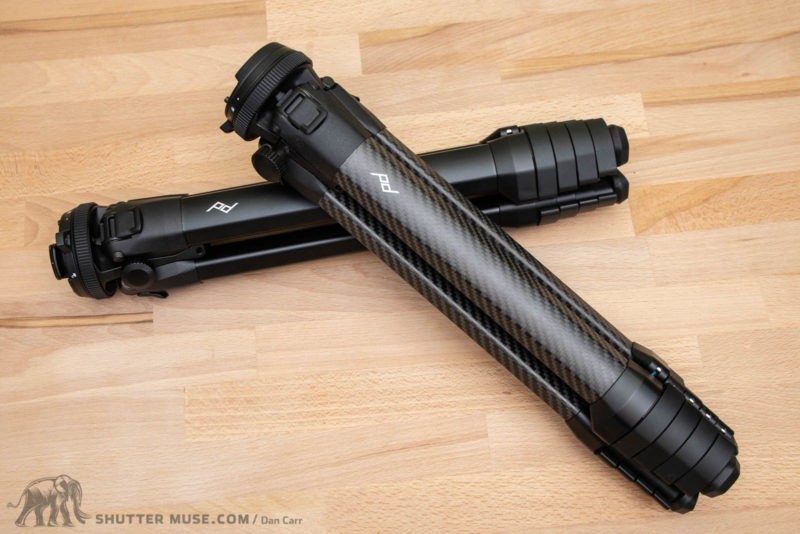
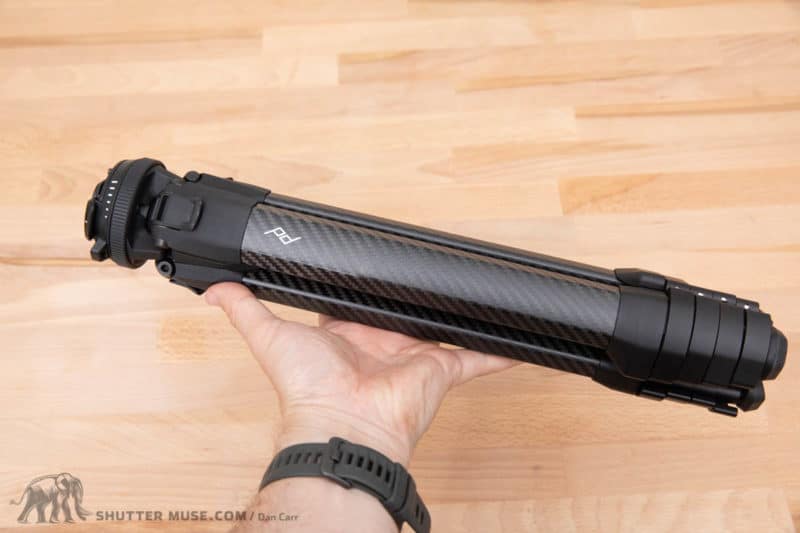
The Peak Design Travel Tripod is an excellent option for adventure photographers because it packs down into a very small package by using specially shaped leg sections. I have reviewed a lot of tripods, but none are more compact than the PD Travel Tripod. You should read the full travel tripod review for all the details, but the long and the short of it is that the aluminium version is the best value, although you’ll save some weight with the carbon version. Either one is an excellent adventure companion, but they work best when paired with a proper ball head such as the previously mentioned Acratech GXP.
Other excellent options include the RRS Ascend-14 tripod for those that have no budget concerns or the FotoPro X-Go Max (review) for those who have a very tight budget but still want lightweight carbon legs.
12 – Polarizing Filter

If there is one filter that should be in the bag of every adventure photographer, it’s a circular polarizing filter. This filter cuts down reflected light in your images and really makes the colours pop. While it does cut incoming light to the sensor, it’s usually not by enough that you can’t compensate for it with your ISO or aperture to maintain enough shutter speed for your adventure subject.
My recommended brand of polarizers is Breakthrough Photography. They are not the cheapest on the market, but they are built very well and don’t add weird colour casts to your images. They also make a filter called a dark CPL which combines a polarizer with a regular neutral density filter. If you’re going to carry a second filter with you, a 6-stop dark CPL is a great choice.
13 – Action Camera

I regularly use a GoPro to capture interesting behind-the-scenes photos and videos from my adventures. Social media marketing is an important part of being a photographer these days, and you need to keep a fairly constant flow of content on your feed. Using action cameras such as a GoPro is an excellent way to vary the social content you are creating, while showing people how hard and/or exciting it can be to do the job of a professional adventure photographer.

I often find that exciting behind-the-scenes photos get more likes on social platforms than my A-grade portfolio shots because they usually generate a lot of comments with questions, which in turn causes the social algorithms to show the image to more people. Given the relatively low cost of an action camera compared to my proper cameras, I get good marketing value from them by capturing and sharing my adventures. These days I’m using a GoPro Hero 9 Black and really loving the extra battery life they have given this camera by making the batteries a little larger.
14 – Photography Gloves

I was going to write that unless I’m going to the desert, there will always be a pair of photography gloves in my bag. But then I remembered how cold it gets in the desert before the sun comes up. So I guess I can say that there is always a pair of photo gloves in my bag.
Sometimes these gloves are giant mittens that allow me to shoot in temperatures down to -40c (-40F). Sometimes they are much simpler fingerless mitts that add a little warmth, while still letting me operate a camera or a drone without issue. I have written an exhaustive guide to the best photography gloves on the market this year, so you should definitely check that out if you think this is an item you want to grab from the list to add to your own kit. Right now, I’m particularly enjoying the RucPack Extreme Glove, which I have reviewed here.
15 – Lenses
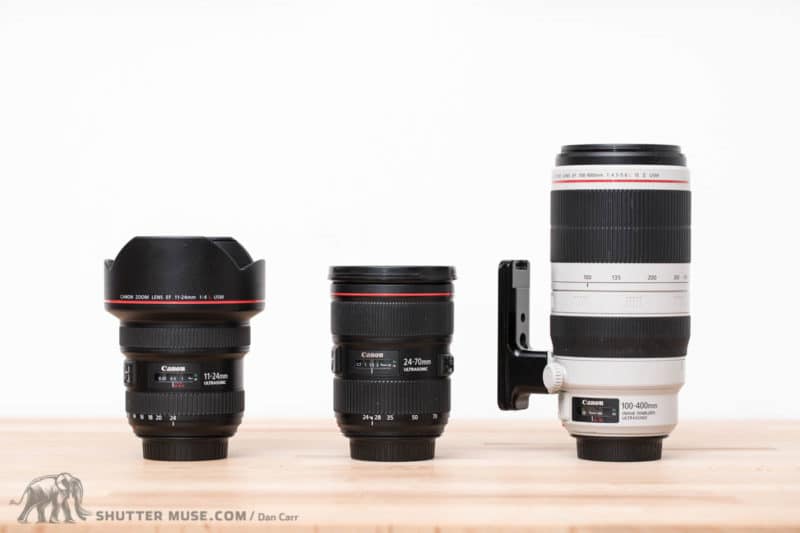
Well, yes, of course, lenses are essential. But let’s talk about which lenses are essentials for the adventure photography genre. Based on the lenses that I have used over the years, if I were to build the perfect lens kit for adventure photography it would consist of:
- 12-24mm or 16-35mm (f/4 or f/2.8)
- 24-70mm f/2.8
- 70-200mm (f/4 or f/2.8)
- 35mm (f/1.4 or f/1.8)
- 1.4x Teleconverter
- Rent as needed: 300mm f/2.8
Two decades ago zoom lenses were not considered a sharp enough replacement for fast primes, but that has all changed. All manufacturers now make at least some exceptional zoom lenses, and in a few cases such as the Sony 12-24mm f/2.8 GM, the zooms now trump equivalent primes.
For adventure photographers, zoom lenses are fantastic. It allows you to cover a wide range of focal lengths while keeping your pack weight to a minimum. There will always be people that say “just zoom with your feet”, but any seasoned adventurer will know that this is often not possible due to the geography of the location, or the potential dangers. How are you going to zoom with your feet while you are abseiling down a cliff face? Not to mention the potential for wasting time in critical moments while you need to swap lenses. No. Zoom lenses are the bread and butter for adventure photographers.
That said, I always recommend having one fast prime in your kit because a wide aperture can create such a different look. If you are creating a series of images, mixing in some nice bokeh-filled portraits from those in-between moments will really lift the portfolio. Personally, I love the 35mm focal length for this job, but perhaps you are a 50mm kind of person.
As for the choice between f/2.8 and f/4, you’ll notice that I only made a definitive selection for the 24-70mm. This will likely be the most used lens, so it makes sense to have a fast aperture for added flexibility. If you’re going to go all out on one lens, this is the one to do it with. At 70mm and f/2.8, you can get some nice background bokeh that is noticeably better than an f/4 lens at 70mm.

For the 70-200mm, I go back and forth between f/2.8 and f/4 lenses. The weight saving of the f/4 lens is always appreciated on long missions. Even with an f/4 lens, you can still get great background separation from 100-200mm. The reason that I would sometimes choose the f/2.8 lens is that typically, at least in the past, a 70-200 f/2.8 lens has been a flagship lens for any manufacturer, and in many cases, they were much sharper. If image performance were equal, though, I would choose the f/4 version to keep pack weight down.
As for the wide-angle zoom, the f/2.8 aperture gives you the opportunity for a faster shutter speed at a lower ISO, but you aren’t really going to see a lot of difference in the bokeh of such a wide lens. For budget reasons, many will choose the f/4 lens and that’s totally fine. If you want to shoot things such as night time-lapses, northern lights or milky way landscapes, you should opt for the faster aperture.
16 – Reliable but Lightweight Camera Strap
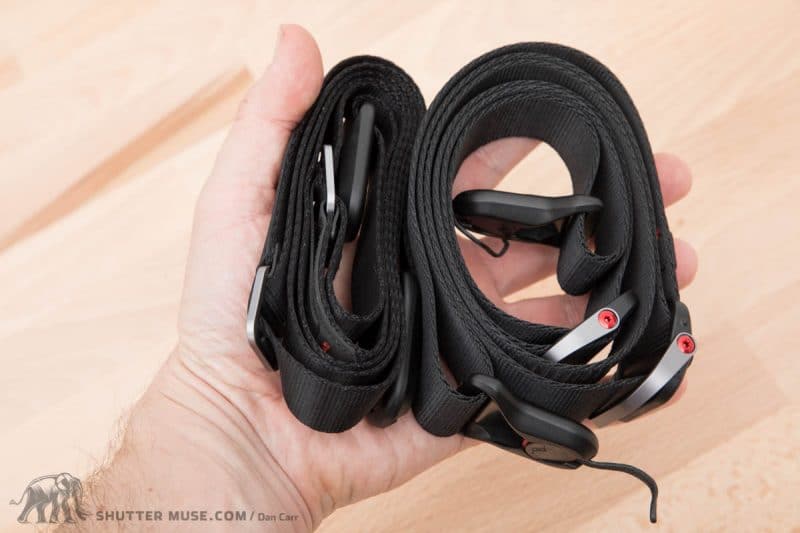
I’m not a big camera strap guy. I often shoot for days without using one because I’m usually moving from one spot to another, extracting the camera from a backpack to get the shot. Got the shot? The camera goes back in the pack.
While this works for me on most days, there will always be times when a camera strap is going to be useful, or even necessary from a safety point of view. If I’m working out of a vehicle (ground or air), working on the edge of a cliff, or the edge of a river, I’ll use a strap.
For my work, I don’t see the point in carrying a bulky, heavy strap around all day for those one or two moments when I need it. For that reason, I always use a very lightweight camera strap that has a simple quick-release mechanism to detach or attach it as needed. The Peak Design Leash and the Slide Lite straps are perfect for this way of working. If you want to see a few more options, check out my group test of the best camera straps on the market this year.
17 – Tools and Cleaning
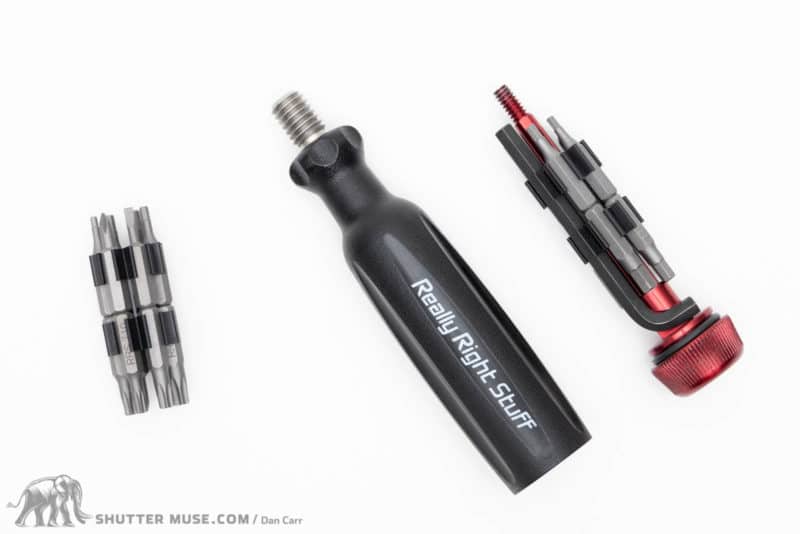
I have a small kit of basic camera cleaning gear that comes with me everywhere I go. Given the often dirty environments I have worked in, this kit gets a lot of use. The whole thing is rolled up in a Shimoda Panel Wrap (review) to keep it organized.

I never do deep sensor cleaning in the field, but I will carry a rocket blower. I also carry a Delta 1″ camel hair brush which is great for cleaning fine dirt and sand out of small cracks such as focus rings or tripod leg collars. For tools, I carry an RRS MTX camera tool, pictured above, and a Leatherman Charge+. I also keep a couple of feet of duct tape wrapped around my tripod leg for emergencies.
Bonus – Underwater Camera Housing

I was on the fence about including this in the list because I’m not sure it could really be classed an an “essential” item. However, I do think it could be easily classed as a “very good idea”. If you were to take a poll of your top 10 adventure photographers and ask them if they have any sort of underwater camera housing, I would bet that at least 75% of them answer “yes”.

You don’t even need to take your camera deep into the water to make use of these. In many cases, they are simply useful for capturing those cool under/over shots where you can see both above and below the surface of the water. Many adventure sports involve water or traverse landscapes that are filled with water. If you have an underwater housing it opens up incredible opportunities for angles that other people can’t get.

By far the most popular brand of housings for adventure photographers is Aquatech. Their housings are extremely durable, as well as being upgradeable as you switch from camera to camera. They also have a wide range of lens ports to fit almost any lens for any camera brand you can think of. The folks at Aquatech also seem to be people that love what they do. They have always been really helpful to me, and on occasion even created some bespoke solutions for me when I needed remote wiring solutions that weren’t available off the shelf.


There is also a valid alternative to Sony Tough SD cards: https://www.manfrotto.com/us-en/products/memory-cards/sd-cards/
Thanks for sharing these. I actually had no idea about them.
Maybe also some big ziploc bags for condensation control of gear plus one or two large cloths for wiping?
embarrassed, at the same time, which meant I didn’t want to talk