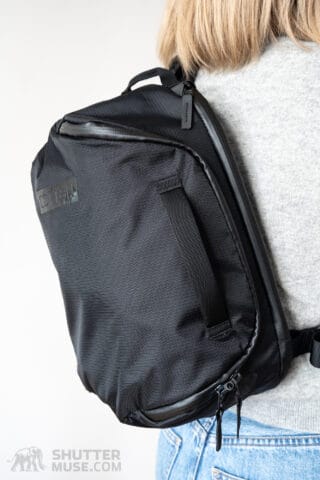
Cotton Carrier is well-known for their unique camera-carrying devices, including the previously reviewed Skout G2 and G3 Harnesses. The Canadian brand is now broadening its catalog by introducing its first camera bag, the Cotton Carrier Hyker. This multi-purpose bag combines a traditional sling bag with the brand’s patented camera (or binocular) quick-release system to create a unique amalgamation of camera harness/holster and sling bag.
Before writing this review, I tested the Hyker for a month in various scenarios. Already familiar with Cotton Carrier’s camera harnesses, my primary focus during testing was to find out how the Hyker can be used by photographers, nature observers, or birdwatchers in a way that offered more utility than Cotton Carrier’s existing products. As you’ll see in the review, the multi-purpose design of the Hyker permits it to be used in many different ways. Of course, I’ll also do my usual deep dive into the bag’s features, as well as provide a pile of photos of varying camera gear in use with the bag, and make some recommendations about the size and weight of cameras that can be used on the bag’s quick-release harness.
Disclaimer: Cotton Carrier provided the Hyker Slingbag for testing and review. They also compensated me for the time it takes to create such an in-depth review, but they were not allowed to see it before it was published, nor was I guided in any way about what I should or should not discuss. I appreciate the trust that my readers put in me and my reviews. My review is honest, so I talk about the good and the bad. Read on to find out what they are.
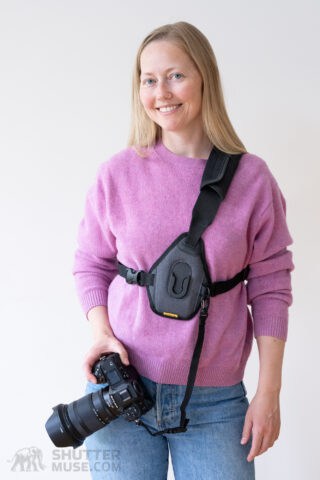

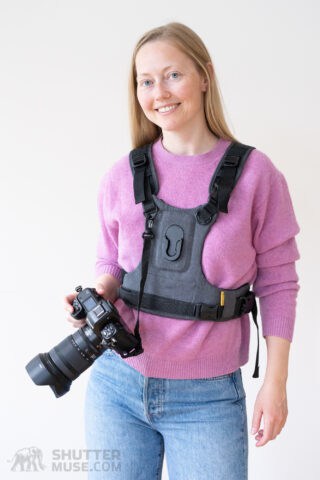
Table of Contents
Cotton Carrier Hyker Specifications
- Dimensions (Hyker Slingbag) – 15 x 10.5 x 6.5 inches (38 x 26.6 x 16.5 cm)
- Dimensions (Optional Insert) – 4 x 4 x 9 inches (10 x 10 x 23 cm)
- Volume – 12L
- Weight (without insert) – 1.79 lb (810 g)
- Weight (with insert) – 2.42 lb (1097 g)
- Exterior Material – Water-repellent N400d nylon
- Hardware – YKK zippers, UTX buckles
- Laptop/Tablet – Up to 13″
- Price – $199 (save 10% with code SHUTTERMUSE)
Cotton Carrier Hyker Design and Features
Twist & Lock Receiver
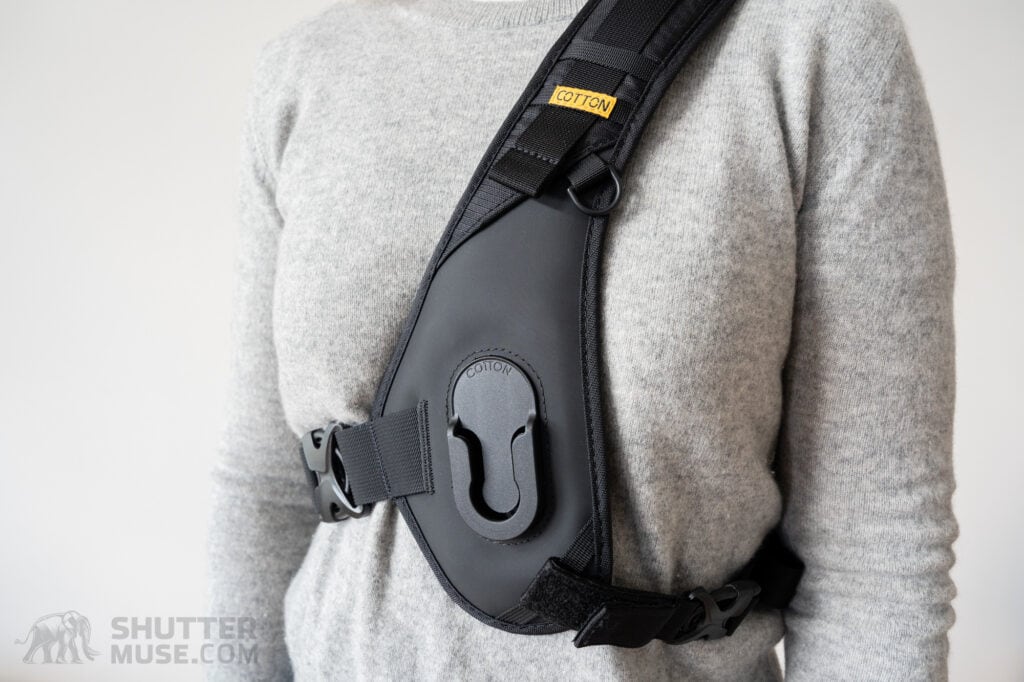
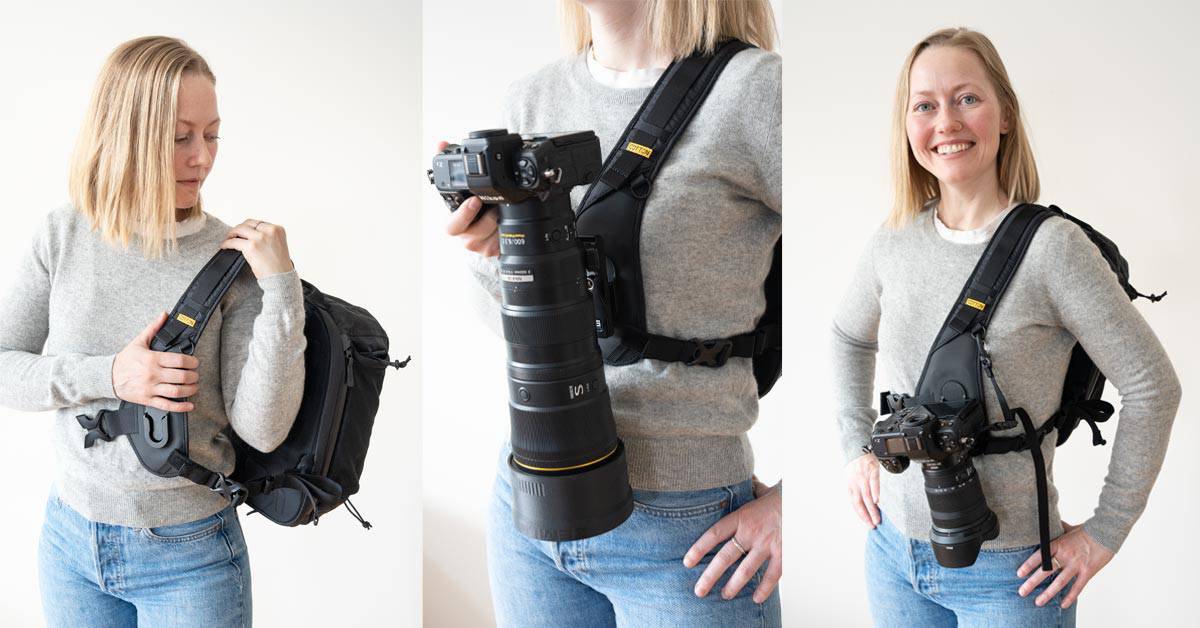
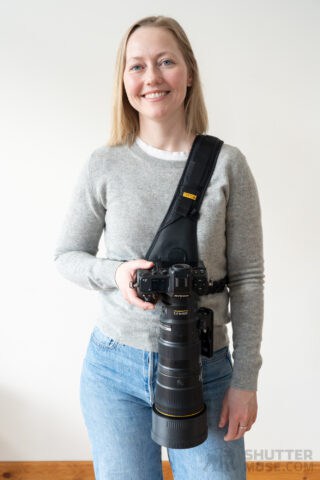
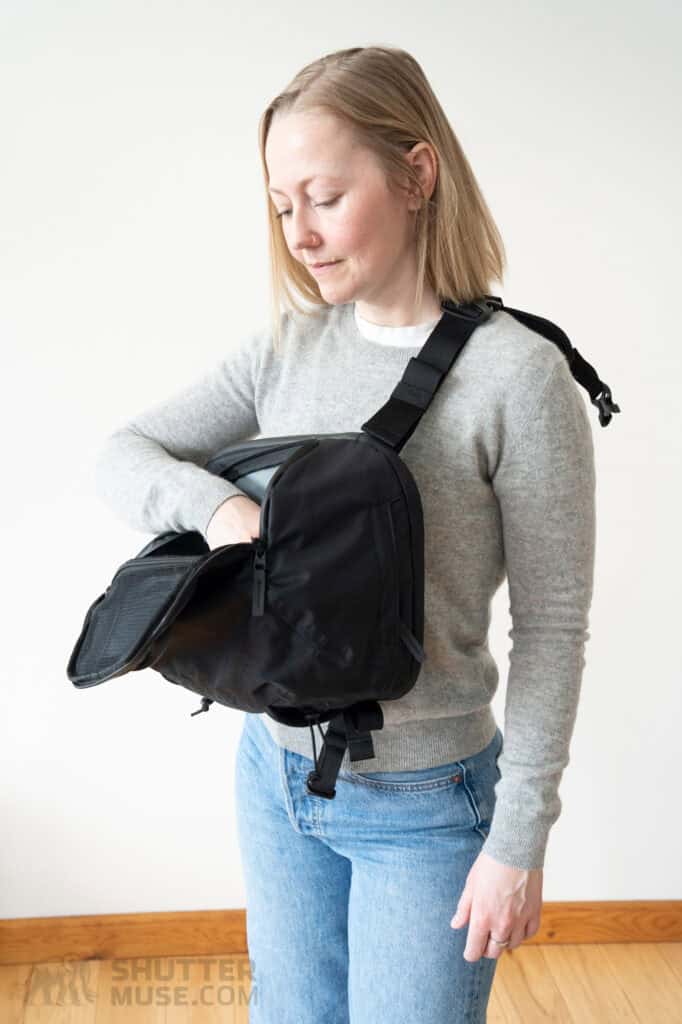
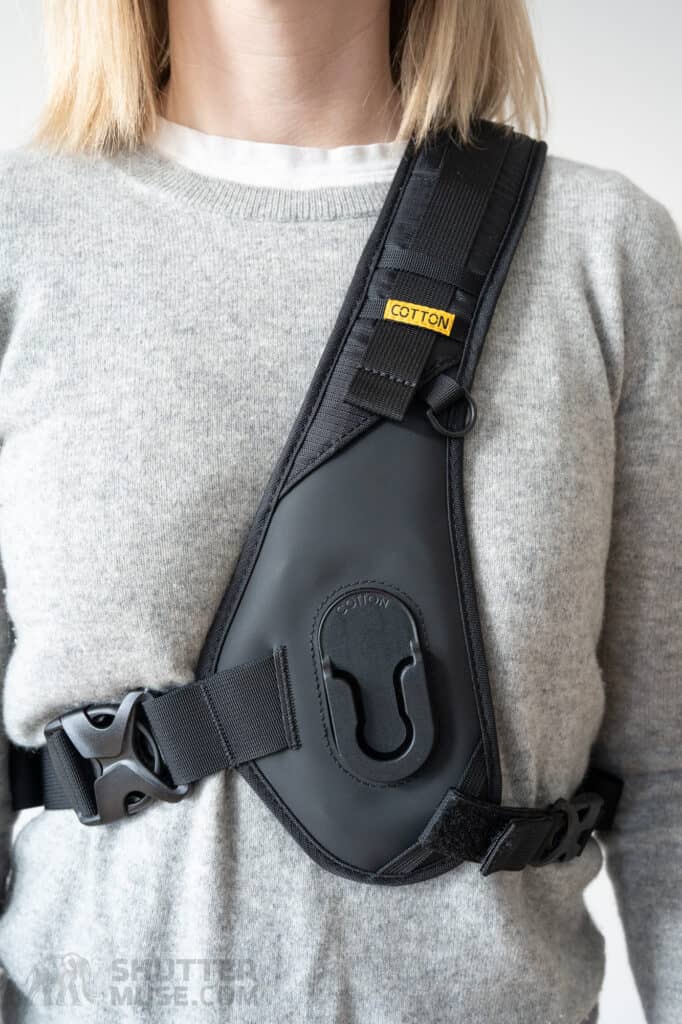
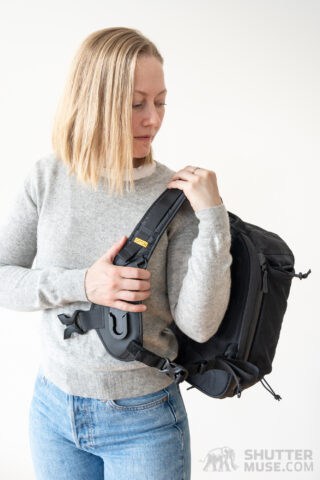
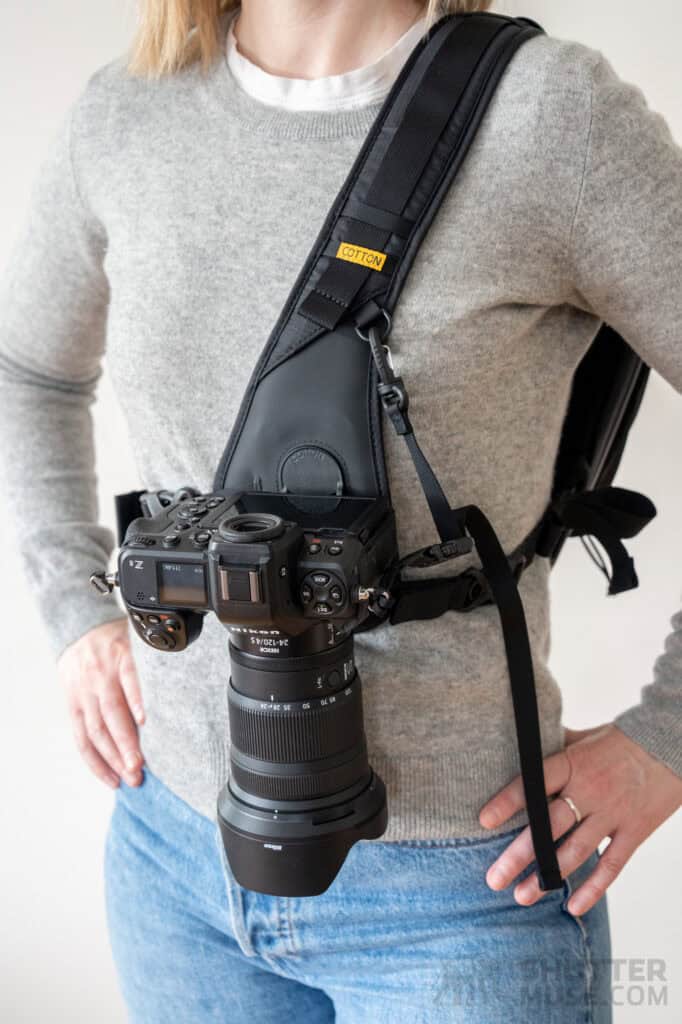
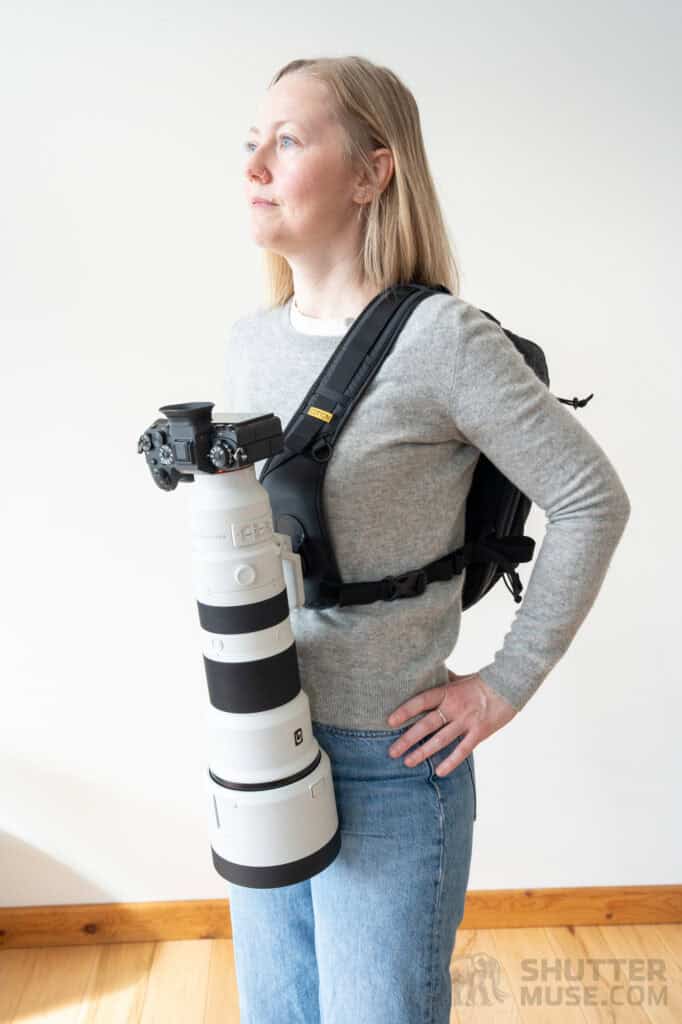
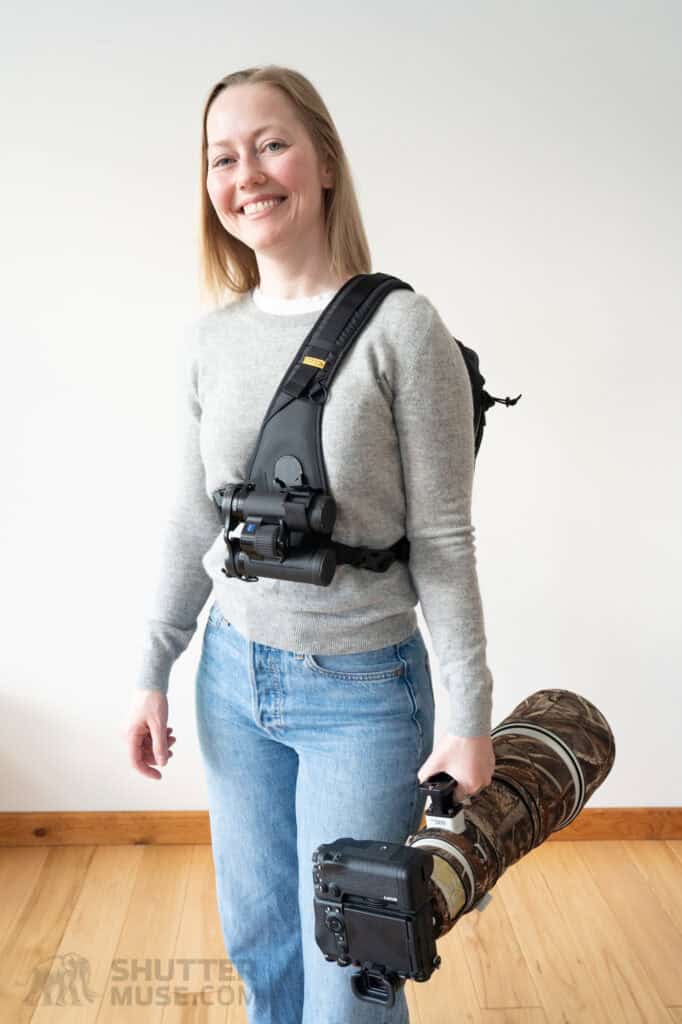
The headline feature of the Cotton Carrier Hyker is the patented twist-and-lock receiver on the front of the harness, also found on their other camera harnesses. The whole point of a camera harness like that found on the front of the Hyker is to make your camera easily accessible for those fleeting moments you’d otherwise miss if it were buried in a backpack. At other times, the constant presence of your camera encourages you to take more photos. Both concepts work wonders for me.
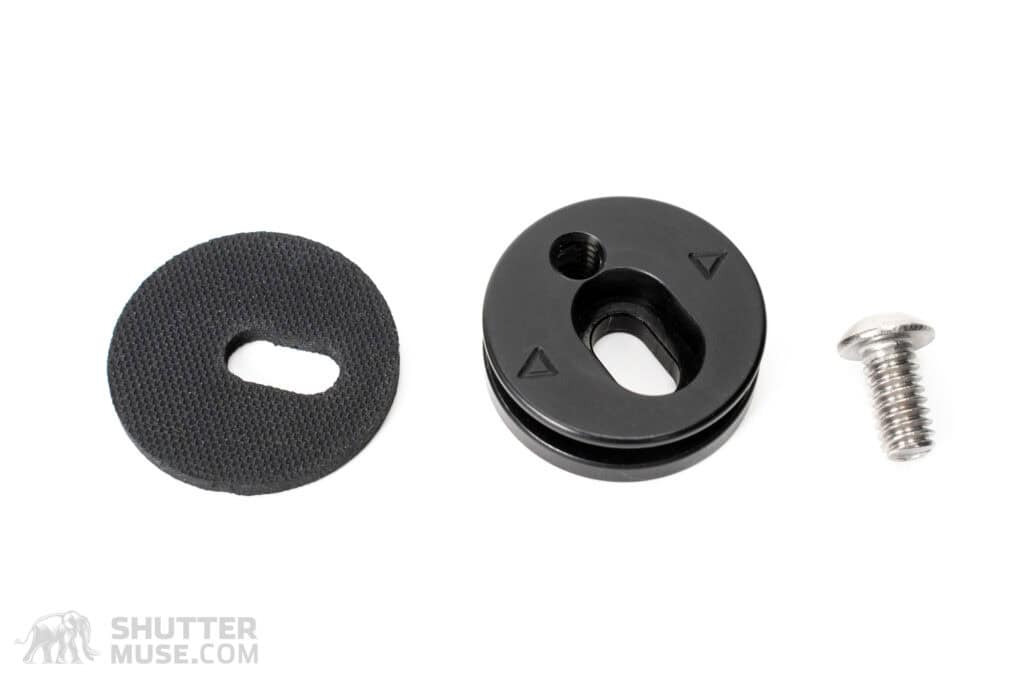

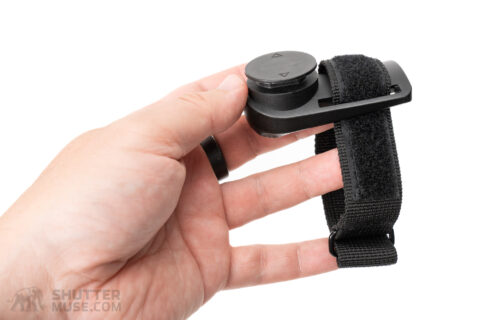
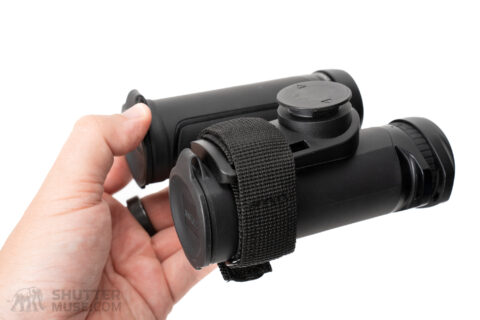
The harness uses a patented Twist-and-Lock mechanism to attach and detach your camera with a 45-degree twist while inserting or removing it from the nylon channel. The system requires you to attach an included anodized aluminum hub to the 1/4″ 20 thread on the base of your camera or lens foot. A thick rubber washer stops the Hub from rotating.
The Twist-and-Lock mechanism works exceptionally well. The aluminum hub slides smoothly into the nylon channel without binding. After ten minutes of walking around practicing with it, you’ll find the slight twist to insert or release the camera becomes second nature. Perhaps most importantly, it feels secure once the camera’s hub is seated snugly in the nylon channel.
Of important note is the difference in comfort between carrying a camera in the harness on the front of the Hyker (or other Cotton Carrier harness) and simply holding it over your shoulder on a camera strap. There is no comparison. Even a smaller lens like a 24-120mm f/4 on a full-frame camera becomes a nuisance on your shoulder after an hour or two. Conversely, the Hyker’s broadly padded harness spreads the camera’s load while also centrally positioning it on your body. No more lop-sided shoulders at the end of the day. Most people should have no issues carrying a camera all day on the Hyker, as long as you don’t go too crazy with the size of the lens (more on this later).
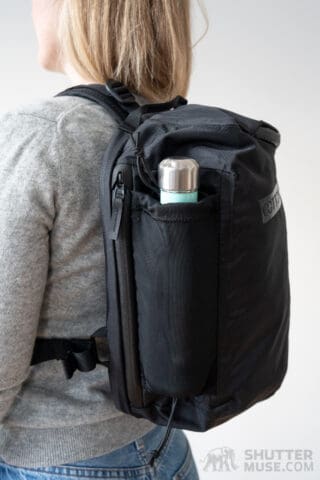
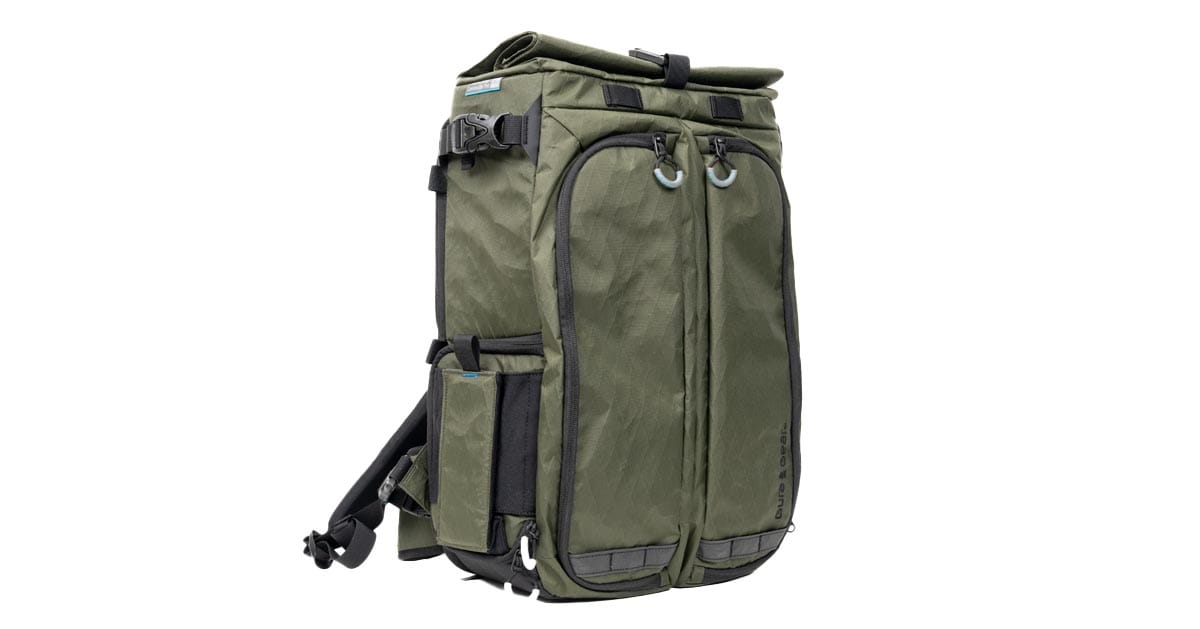
Adjustable Side Pocket
The Hyker features an elasticated pocket on the side with elastic cinch straps to open or close both ends. You can carry a water bottle by closing off the bottom of the pocket. However, I don’t consider the pocket large enough to hold a 1L Nalgene bottle. I fought with one for a few minutes, trying to get it to fit, and eventually gave up. My partner saw my struggles and gave it a go herself, but also failed. That’s a shame, as these are my go-to bottles. Still, I have plenty of others with a smaller diameter that will fit, or I can use the side pocket for a rolled-up jacket and stick my Nalgene inside the bag.
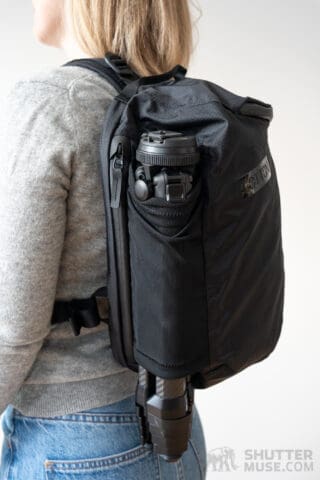
Opening the bottom of the pocket and carefully, tightly positioning the two cinch straps allows you to carry a lightweight travel tripod. I tested this using the Peak Design Travel Tripod and used the lip of the leg locks to hook onto the top of the side pocket to prevent it from slipping too far through the side pocket. You should be able to use a similar technique with most smaller tripods, but I wouldn’t recommend using it for anything larger than a compact travel tripod.
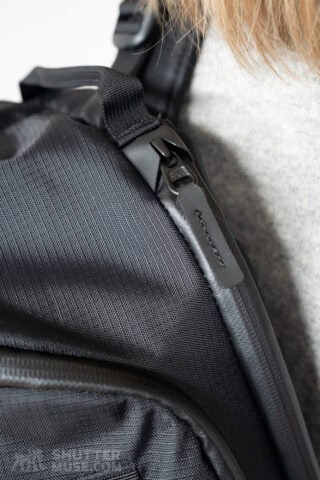
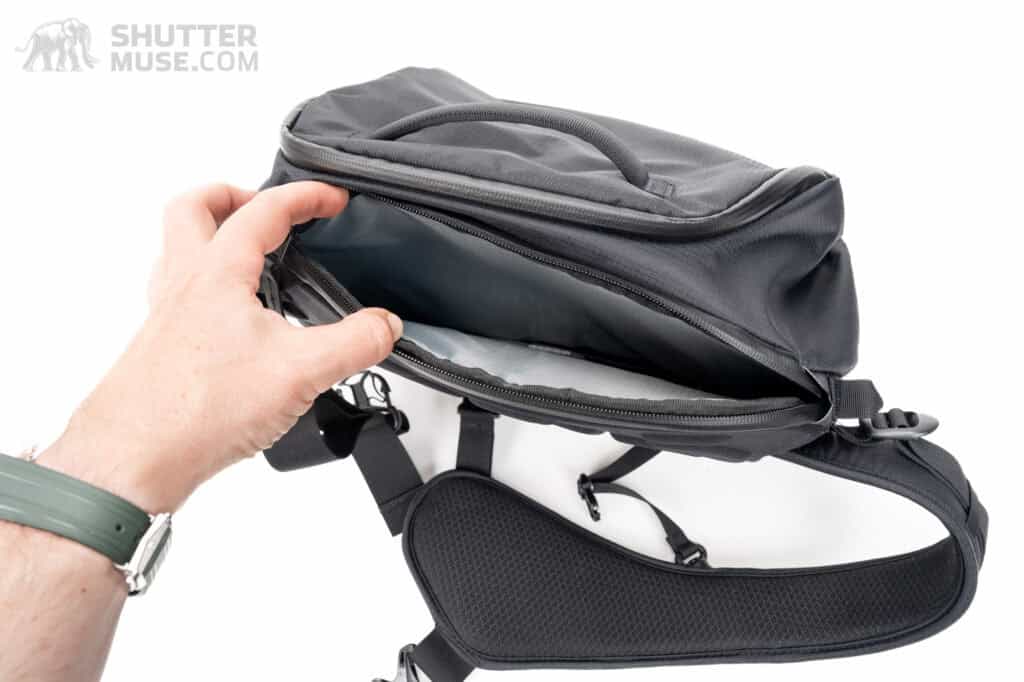
Main Compartment
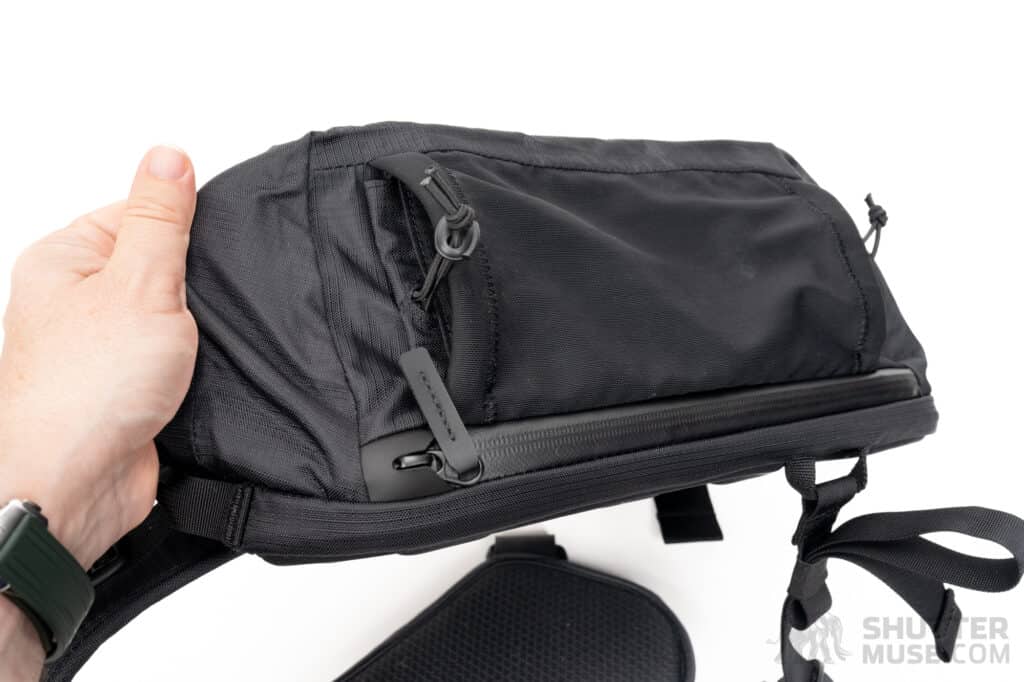
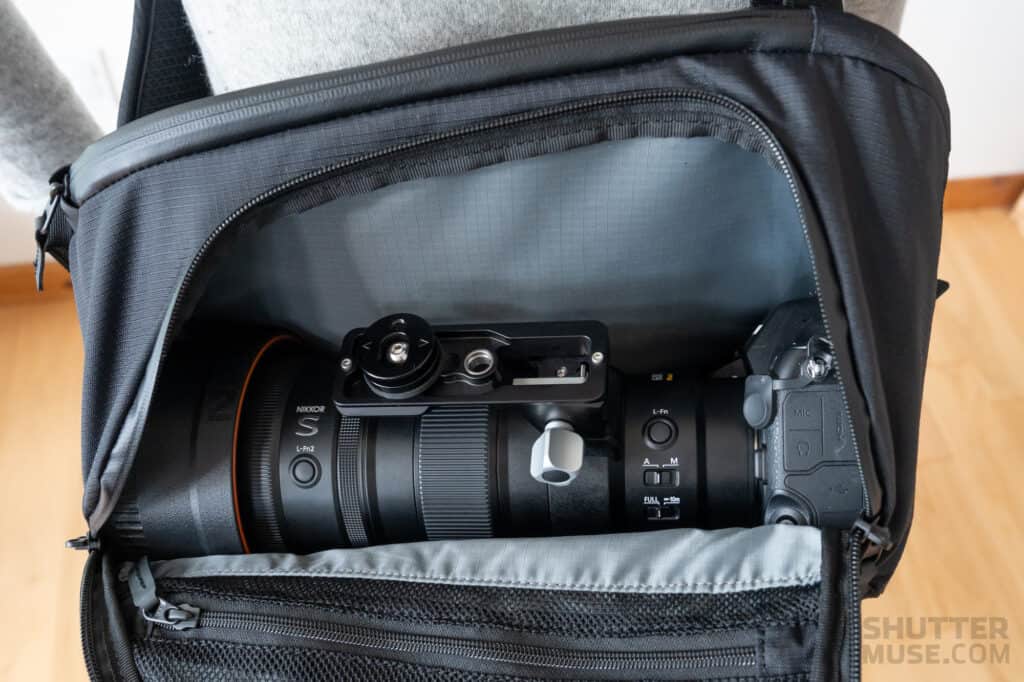
The sling bag’s main compartment features a weather-resistant AquaGuard zip to access the 12-liter main volume. How you use this space is entirely up to you. You may want to store your camera with an attached lens in here before hanging it on the front holster at your destination. You may wish to store a second lens in there, or you may choose to use it to carry food and drink supplies for the day, alongside some extra clothing layers.
Later in the review, I will discuss the optional padded lens protector insert that can be used in this compartment. However, I will immediately ensure you know that the optional insert is too small if you want to carry a telephoto lens attached to a camera in this compartment. Those who wish to hold such larger camera gear in the main compartment instead of solely relying on hanging it on the front quick-release holster may decide to wrap it up in a jacket for a little added protection.
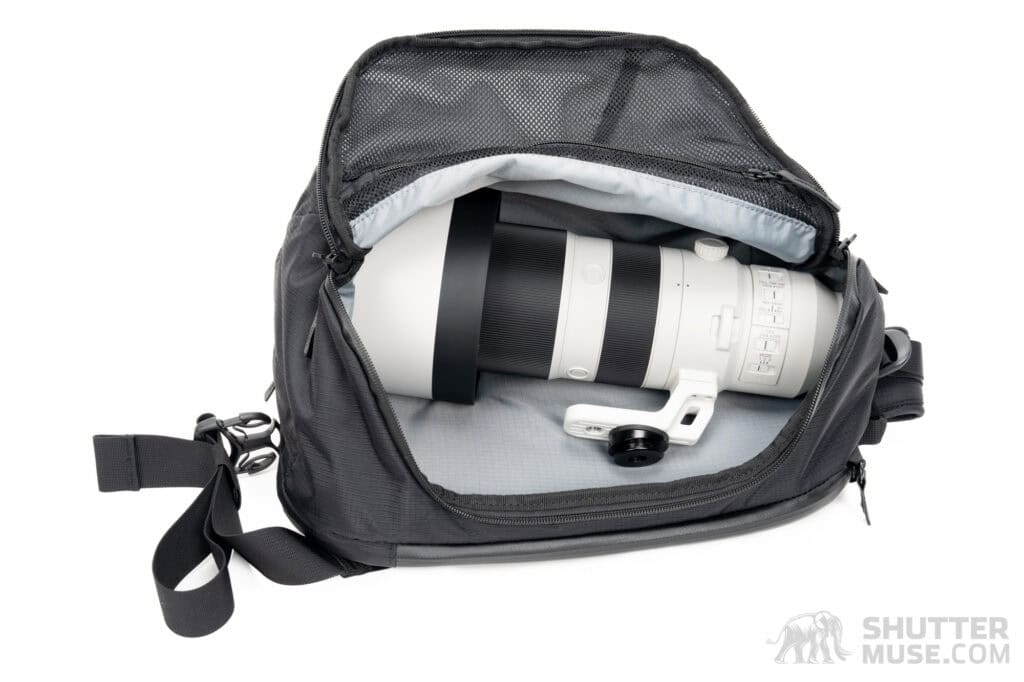
In my testing, I didn’t bother with added protection for a lens or lens+camera in the main compartment beyond burying it in whatever jacket was already there. Of course, you couldn’t do this if you had multiple lenses or lose cameras in the bag clanging into each other, but it worked fine for a single additional lens or a lens attached to a camera. If I did want to add separate items, I’d wrap things in neoprene wraps or cases. I have included several photos of cameras and lenses that fit in the main compartment so that you can judge the size and shape of the main volume.
Remember: the bag’s main highlight is the front quick-release holster. Most people will be carrying their camera there, not in the sling. If you’re looking for a traditional, well-padded camera bag to bring multiple cameras and an array of lenses in neatly padded cells, this isn’t the bag for you. This is about being fast, light, and mobile while maintaining quick access to your camera and one or two lenses.
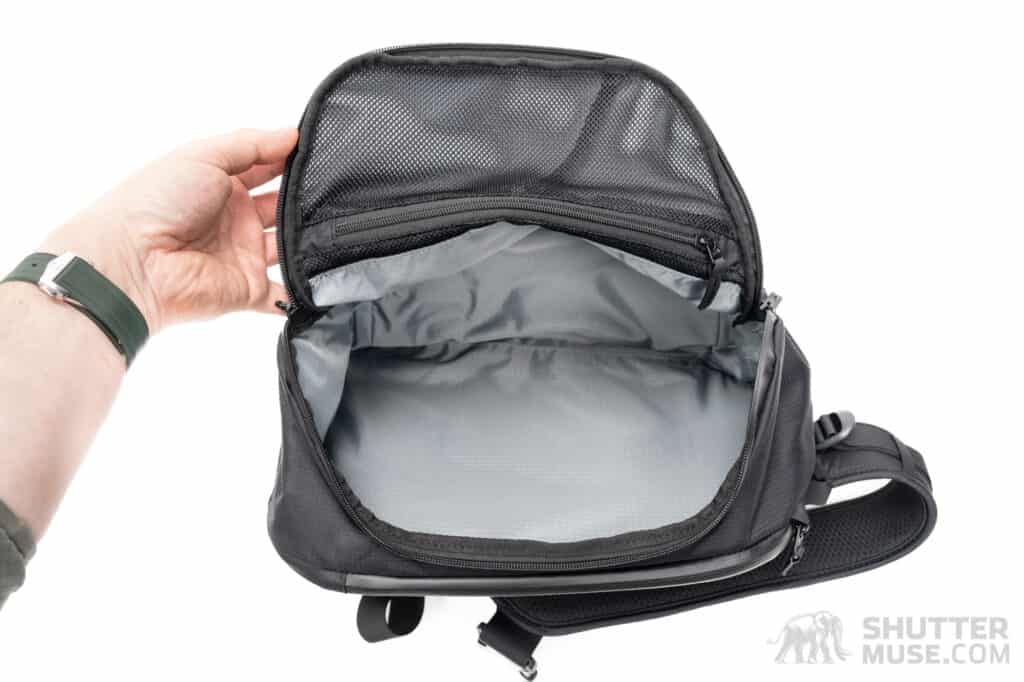
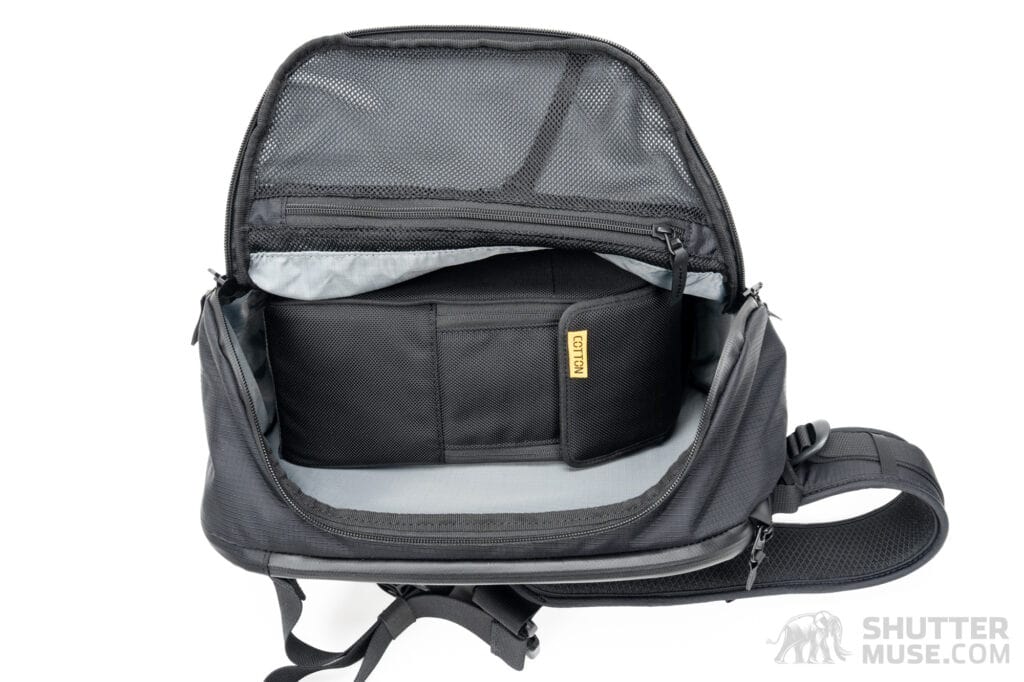
Inside Lid Pocket
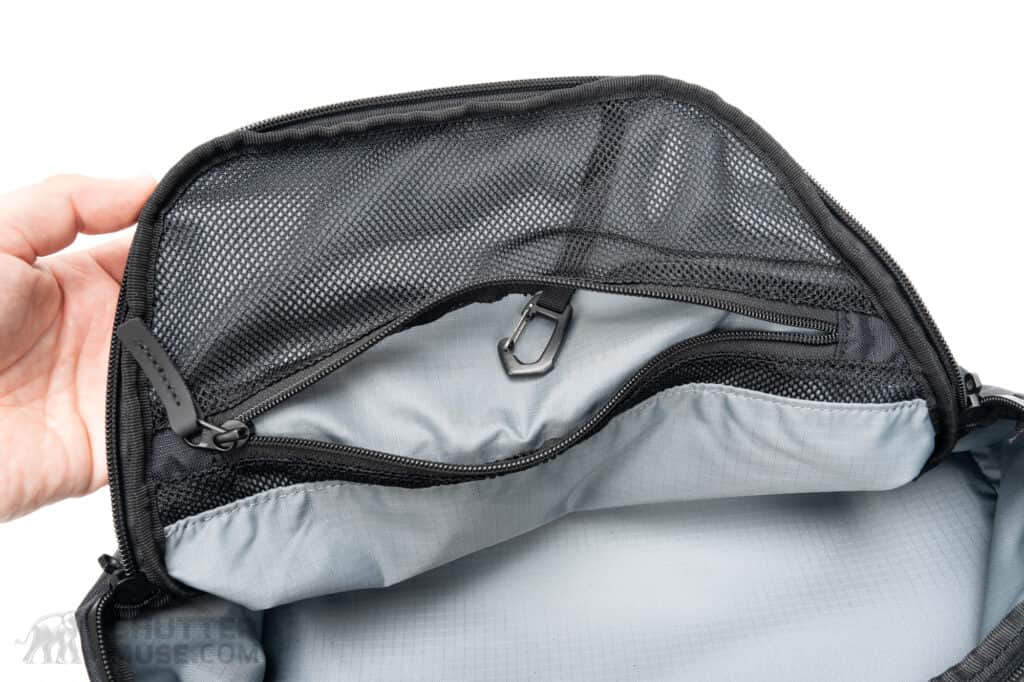
Inside the lid of the bag’s main compartment is a zippered mesh pocket with a key clip. This pocket is the ideal place for your spare camera batteries, and I use the key clip to secure a memory card wallet with my all-important, and very expensive, CFexpress cards.
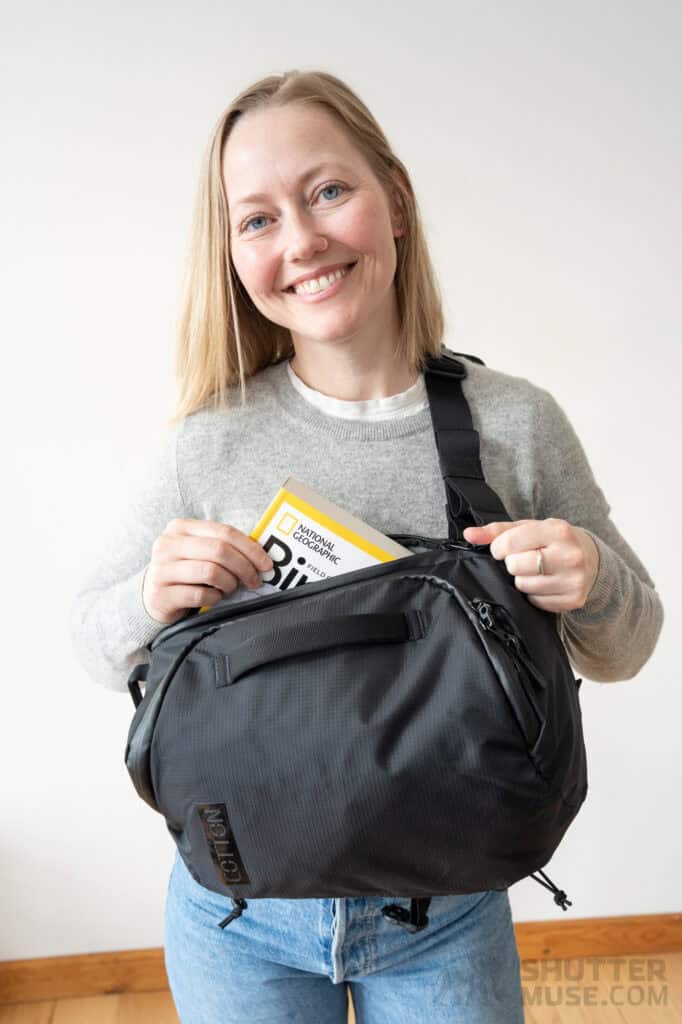
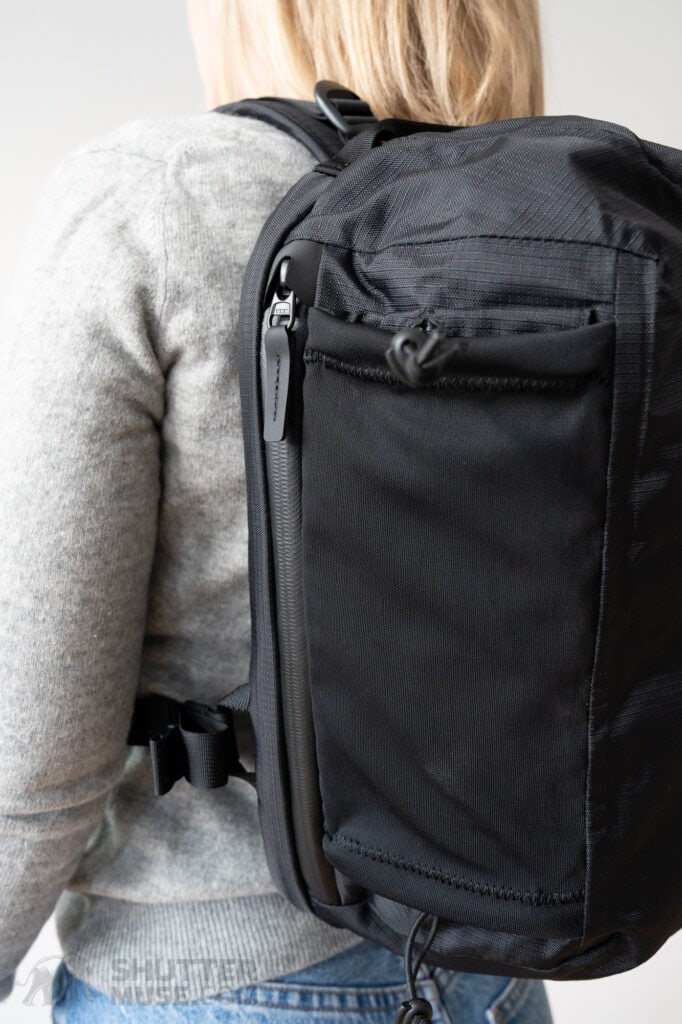
Zippered Laptop or Tablet Sleeve
The Cotton Carrier Hyker features two large zippered pockets in addition to the bag’s main compartment. The larger of these two zippers is on the same side of the bag as the main compartment’s access zipper and is large enough to hold up to a 13″ laptop or tablet. This pocket’s interior is sensibly padded on both sides to protect those devices. If you aren’t carrying anything of the sort, it’s also a great place to store your nature guides, maps, or bird and animal ID books. When wearing the Hyker and rotating the sling bag to your front, this pocket will be easily accessible alongside the bag’s main compartment.
Secondary Zippered Storage Compartment
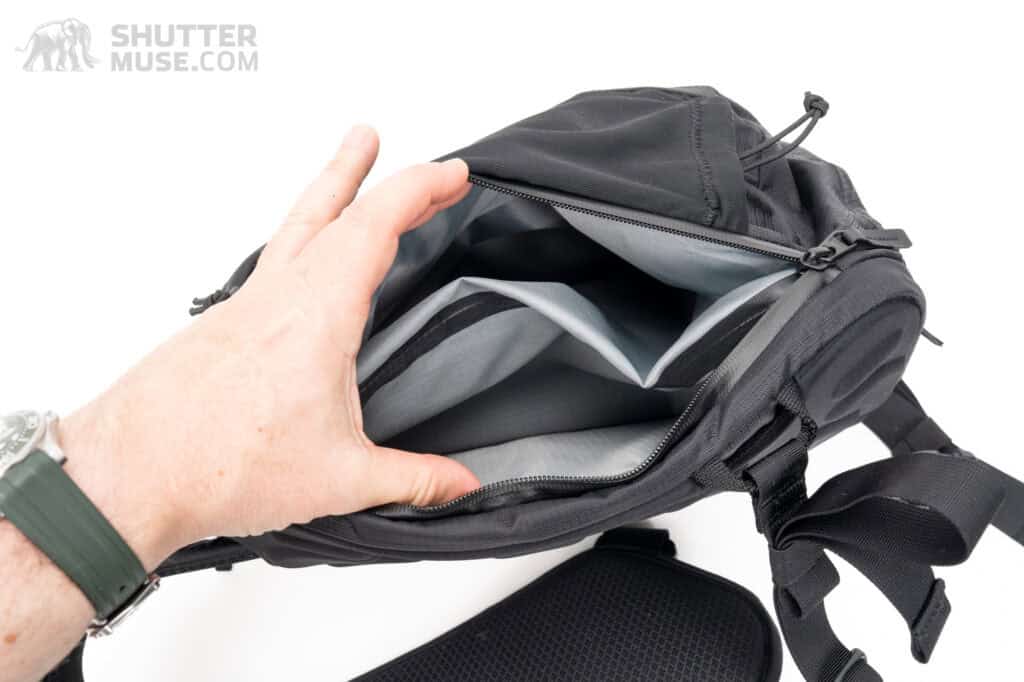
What wasn’t apparent to me in the initial product photos of this bag was the existence of a second large zippered pocket on the opposite side of the bag to the laptop sleeve. This zipper is located behind the adjustable side tripod/water bottle pocket. The inside of this pocket is cleverly divided into two. The top section expands into the bag’s main compartment and can consume half of its volume if you want it to. This is a great way to segregate wet or dirty outerwear from camera gear, organize two sets of gear, or your gear and food for the day.
Another storage area is hidden behind the same zipper, but below the divider. At first, I couldn’t fathom how they had achieved this incredibly complex piece of construction. It’s one of the most intricate, cleverly constructed pockets I have ever seen on a camera bag, and you wonder where all its space came from. Hopefully, the photos are clear enough to show what I mean!
This lower pocket has a flat profile similar to the laptop pocket but is only padded on one side. You could store guidebooks or a tablet up to 10″ in size. The thing to remember with whatever you put into this pocket, whether in the top or bottom section, is that it’s only accessible when you remove the bag from your shoulder. Wearing the bag and rotating it around your body gives you easy access to the main compartment and the larger zippered laptop pocket on the other side of the bag. When you do that, this secondary zippered pocket faces downwards towards the ground.
Remember, if you carry a camera on the front holster harness, you will have to remove that first, then remove the bag from your shoulder to access the contents of this pocket, so it pays to think carefully about what you store here. It makes sense to use this side of the bag for emergency rain layers and lunch, while using the other side for your ID guides and camera accessories.
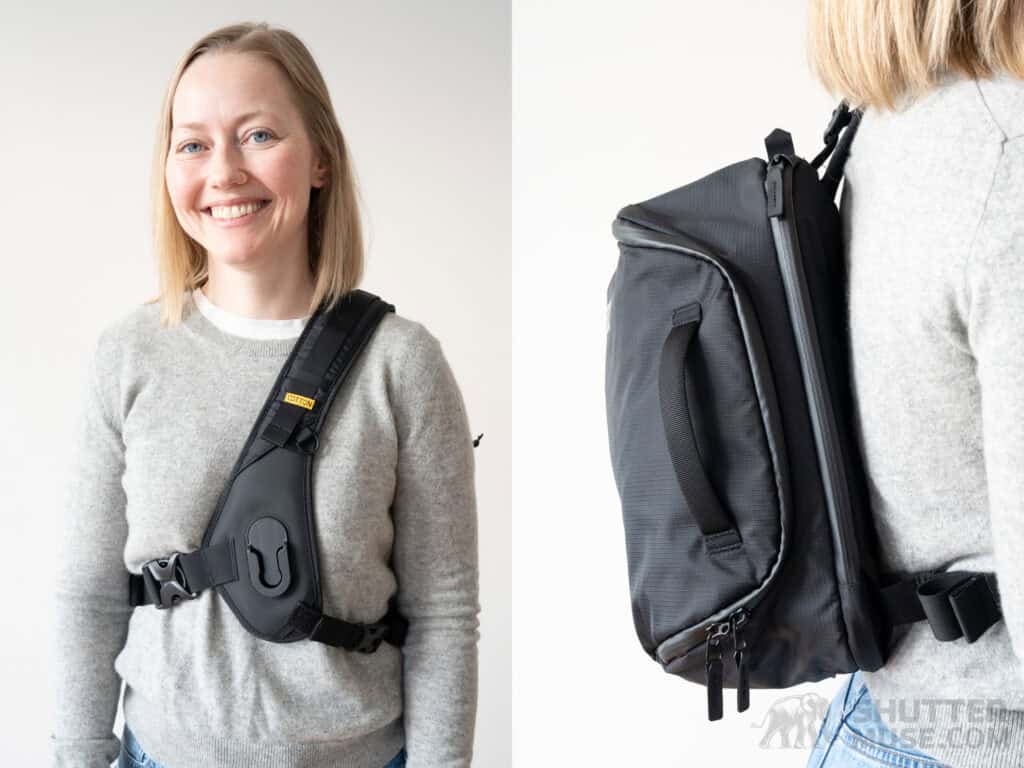
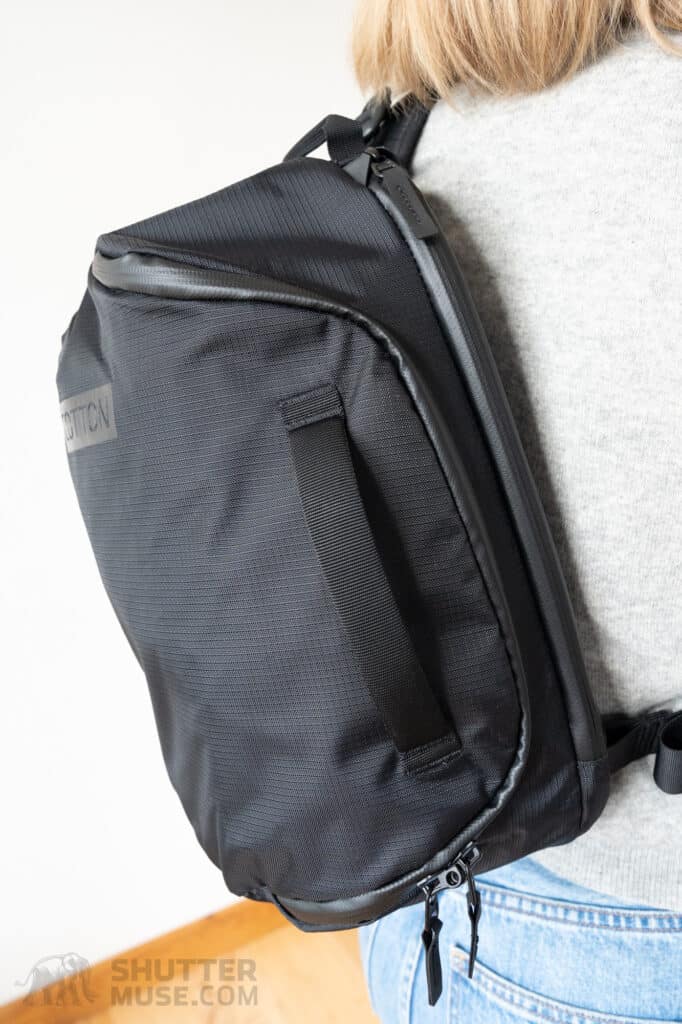
Harness and Straps
The bag is secured on your back from three directions. A thickly padded shoulder strap takes most of the load and is adjustable in length, allowing you to easily reposition the quick-release holster higher or lower on your chest. Length adjustment is performed using a hook-and-loop attachment hidden in a hole behind the bag’s back panel. As someone with a thick chest and bigger shoulders, I was pleased to see the incredible adjustment available here. I didn’t measure it, but I’d guess there is somewhere in the region of 8-10″ of shoulder strap length adjustment, which should allow a great fit on people of all shapes and sizes.
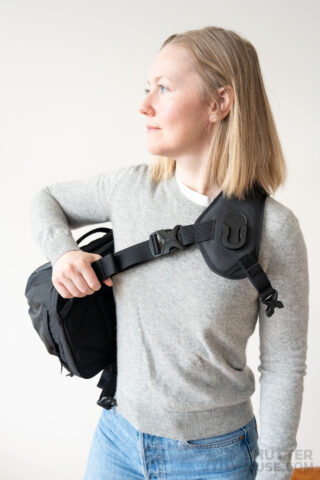
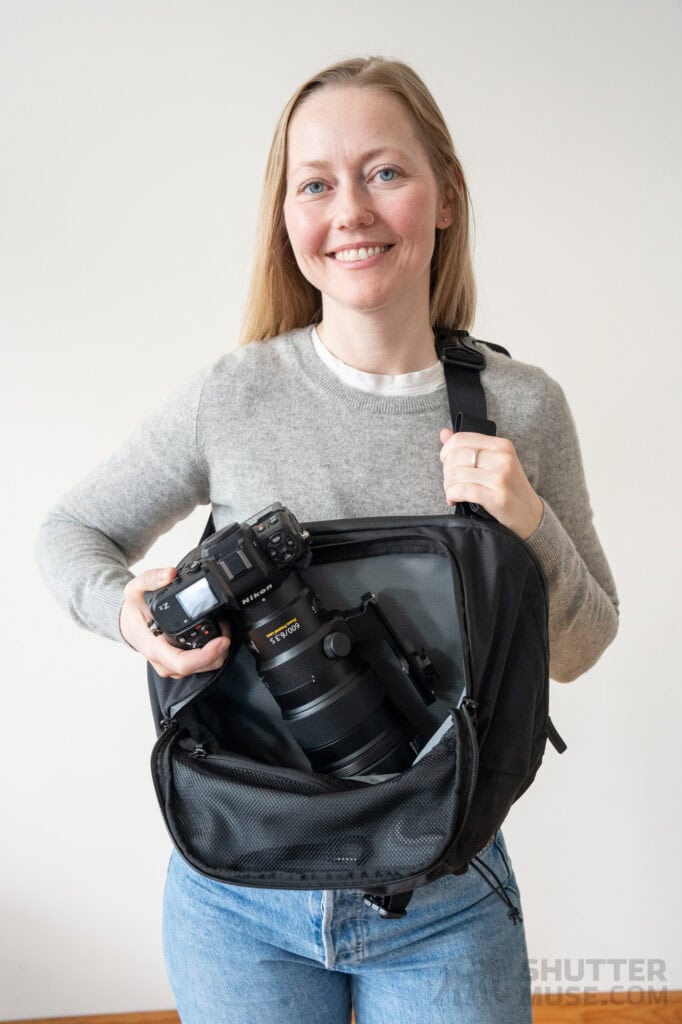
The other two straps on the Hyker use different webbing and buckle widths, which is handy for reminding you of their differing purposes. When you want to unclip the bag and rotate it, sling-style, around your body to access the bag’s contents, you must unclip the small buckle on your left-hand side. This leaves the bag attached diagonally around your body and easily rotatable. Any accessory mounted to the broader, more supportive right-hand strap stays attached while you access gear in the bag.

To remove the bag from your shoulder entirely, you unclip the larger buckle on the right-hand side. This leaves the bag on your left shoulder, and you can easily slide it off like a shoulder bag. Remember that when you do this, you must pay attention to any accessory bags you may have mounted to that right-hand strap. Just like a bag or pouch that you slide onto the waist belt of a backpack, when you unbuckle this strap, they could fall off if you don’t support them or re-clip the buckle once the bag is off your back,
Safety Tether
A quick-release safety tether connects your camera to the Hyker harness for peace of mind. I have no reason to expect the Twist-and-Lock mechanism to fail, but it’s always possible that I will fail and fumble the connection process if I haven’t had my morning coffee. It hasn’t happened yet in nearly ten years of using CC harnesses, but if or when it does, my camera will be safe.
Rain Covers
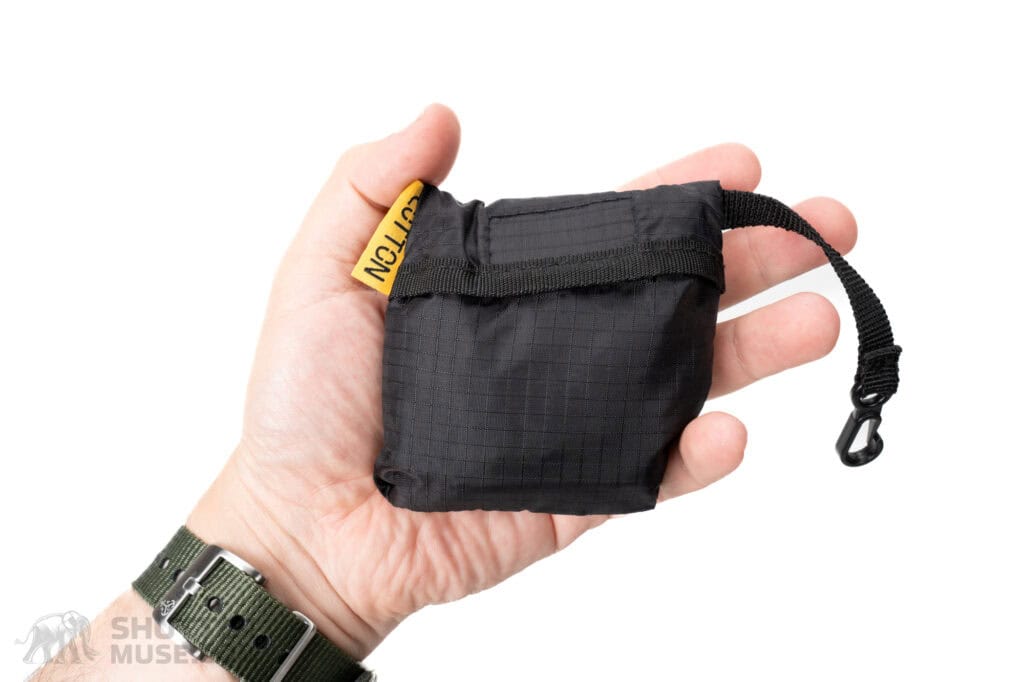
The Hyker comes with a waterproof nylon cover in a zippered pocket on the bottom of the bag. Like most backpack covers, once installed, it surrounds the bag and limits access to zippered pockets. While most photographers will stay indoors on a rainy day, sometimes you can get caught out, so it’s always nice to see something like this included and not sold as a separate item.
Along with the backpack cover, a waterproof nylon camera cover is also included to protect the camera attached to the chest mount. This is the same cover that Cotton Carrier included with their camera harnesses, and it’s large enough to enclose a camera/lens combination of up to 10 inches in length, such as a camera with an attached 70-200mm f/2.8 or 100-400mm-sized lens. If you plan to carry anything larger than that on the chest mount, I recommend sticking a Think Tank Emergency Rain Cover in the bag.
Optional Insert
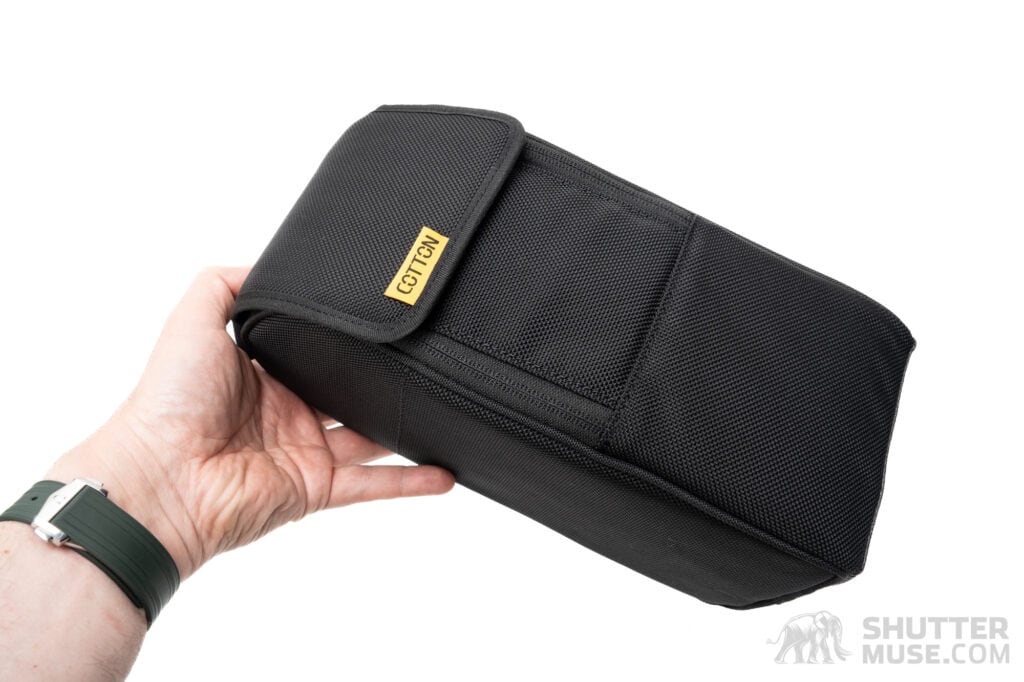
The rectangular insert, included for free for a limited time, resembles the padded lens cases sometimes included with telephoto lenses. It’s large enough to hold a standard-sized 70-200mm f/2.8 or a 100-400mm/100-500mm lens. I also squeezed the Nikon Z 400mm f/4.5 in there, but the Nikon 600mm f/6.3 didn’t fit.
If you had reason to, you could use it to store a camera, positioning the body lengthways. The limiting factor of the insert is that it’s not wide enough or tall enough to allow you to store anything more than a small APS-C camera with an attached lens. I tried a Nikon Z8 and a Canon R5 Mark II with attached lenses and couldn’t close the zipper. Even a full-frame Sony body, which I consider small in comparison to the Nikon and Canon equivalents, was too tight.
While many ways to use the Hyker are discussed in detail in the following section, carrying the optional insert inside the bag would limit you to using it as a padded lens changer. i.e, a safe place to store a second lens that gets swapped out for the lens on an externally carried camera. If you want to maintain the ability to store the camera with an attached lens in the backpack – perhaps while journeying to your shooting location – it doesn’t make sense to use the optional padded case.
I’d love to have seen a bespoke insert that better utilizes the internal space of the Hyker. The bag’s interior is large enough to store a full-frame camera with a lens as big as the Nikon 600mm f/6.3, or a Sony 300mm f/2.8 GM, so it’s a shame that the padded insert doesn’t even offer a way to protect a full-frame camera with an attached 24-70mm or 100-400mm.
Camera Harness Comfortable Weight Capacity
Cotton Carrier doesn’t recommend a maximum size or weight for the gear you carry in the bag’s front harness, but since this is a common question, I’ll share my experiences with the Hyker, compared to Cotton Carrier’s G3 and Skout G2.


Skout G2
With the Skout G2, I always found it to work best and remain most comfortable with a total weight up to a lens like a 24-105 mm, 24-120mm, 24-70mm, or 28-70mm on a full-frame camera. This weight bracket includes certain all-in-one superzooms like the excellent Nikon Z 28-400mm VR. I find the camera and harness move around too much with anything larger while walking. This makes the Skout G2 perfect for fast-and-light landscape or travel photography, or for carrying a pair of binoculars.
G3 Harness
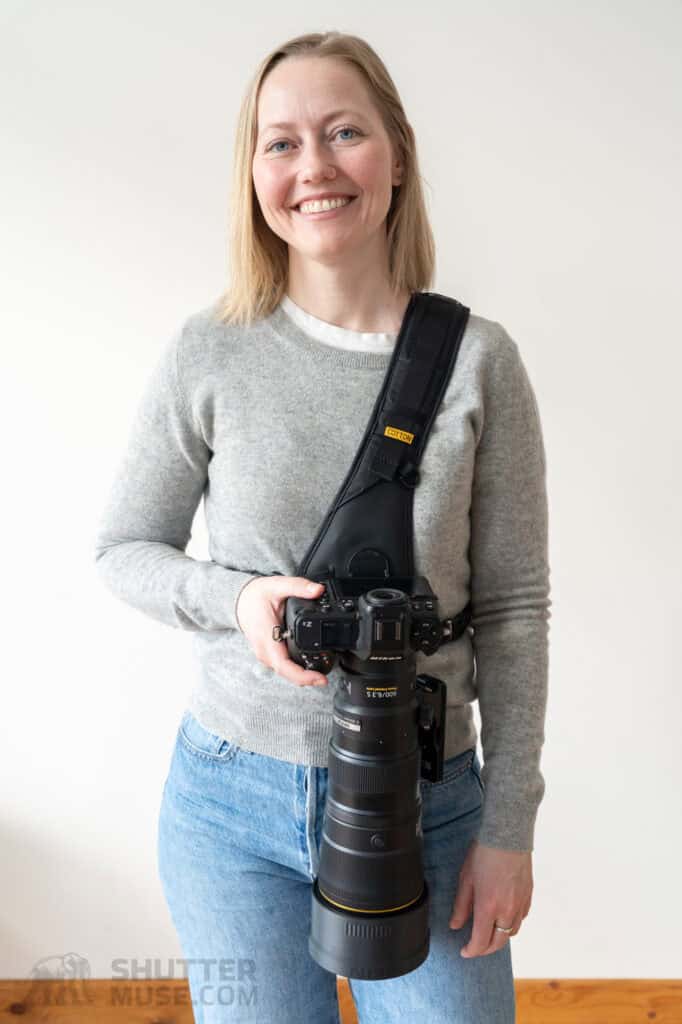
For the larger G3 camera harness, I’m happy to walk around all day carrying a 70-200mm f/2.8, a 100-400mm, the Canon 100-500mm, the Sigma 500mm f/5.6, the Nikon 400mm f/4.5, or the Nikon 600mm f/6.3. I can also walk for hours with a lens like the Sony 200-600mm, Sony 400-800mm, Nikon 180-600mm, or mid-sized telephoto primes like the Sony 300mm f/2.8 GM.
Trying to use the G3 with a 400mm f/2.8 or 600mm f/4 was a step too far for my liking, mainly due to the awkwardness of their size, not the lack of support offered by the harness. Cotton Carrier offers a dedicated long lens plate to assist with lens balance if you want to try the big super-telephoto primes with the G3. To a certain extent, torso length determines whether that setup will work for you. As I said, the harness comfortably the weight of those big teles, but the length felt a bit awkward. Your mileage may vary. I know some people love that setup.
Hyker Slingbag
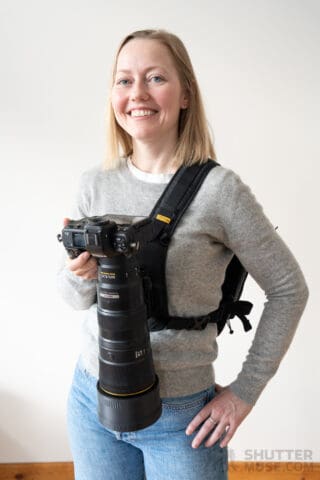
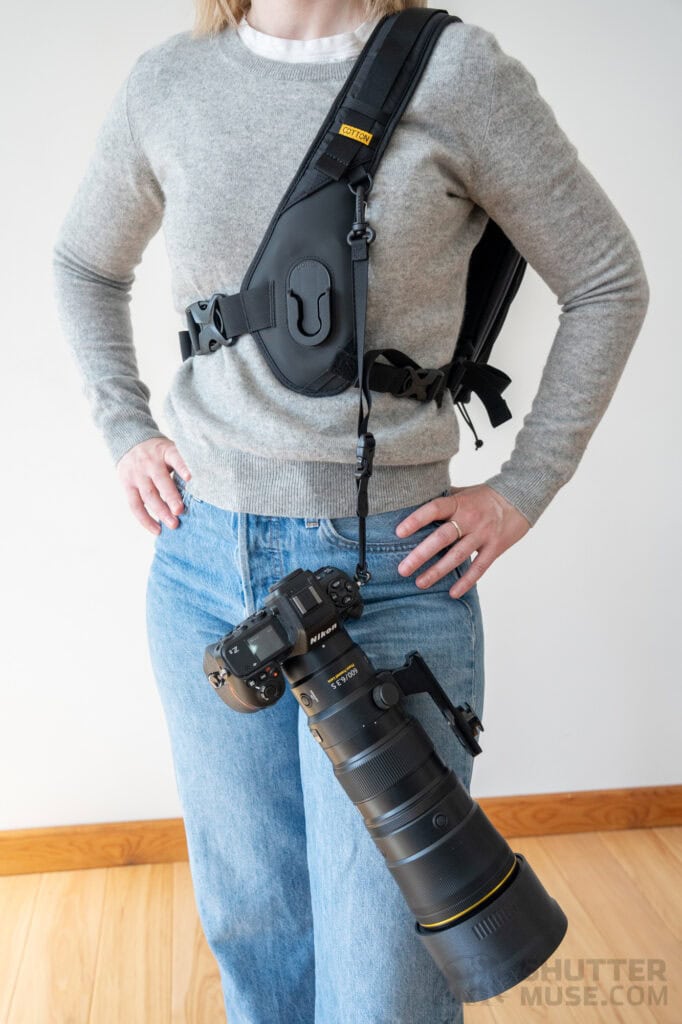
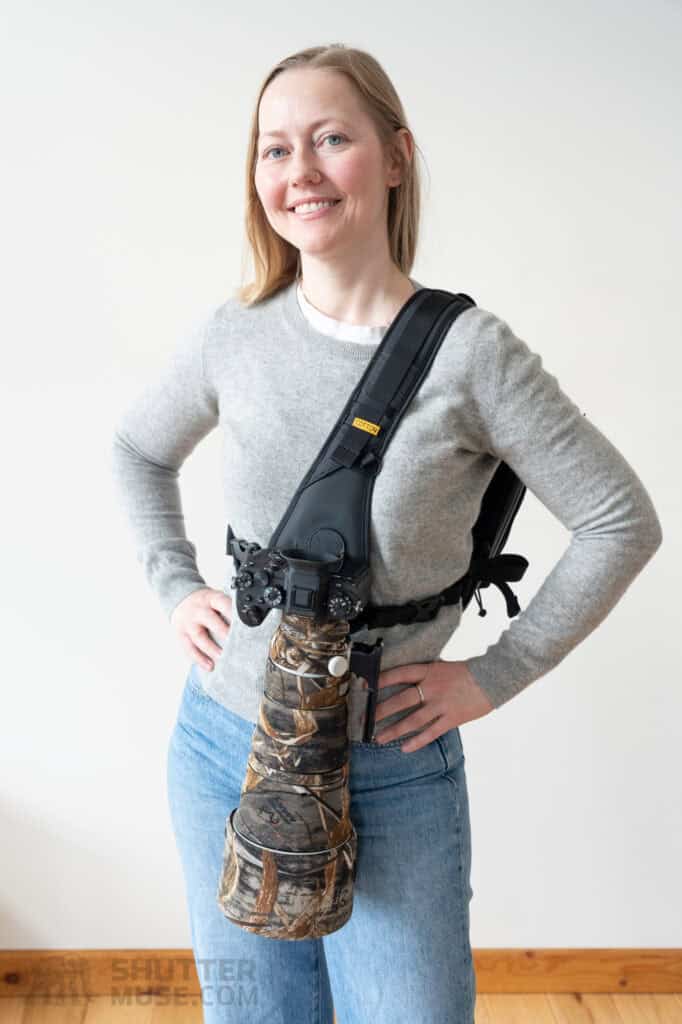
Here’s where things took an unexpected turn for me. When I first saw the Hyker, I looked at the photos and took it for a Skout G2 with an attached sling bag. After some considerable testing, I have changed my opinion. The Hyker can comfortably carry a camera and lens combination much heavier than anything I would ever put on the Skout G2. This is excellent news because I most often want to chest carry a light telephoto prime or mid-weight telephoto zoom for wildlife photography, and initially had some concerns about whether the Hyker would be up to the task.
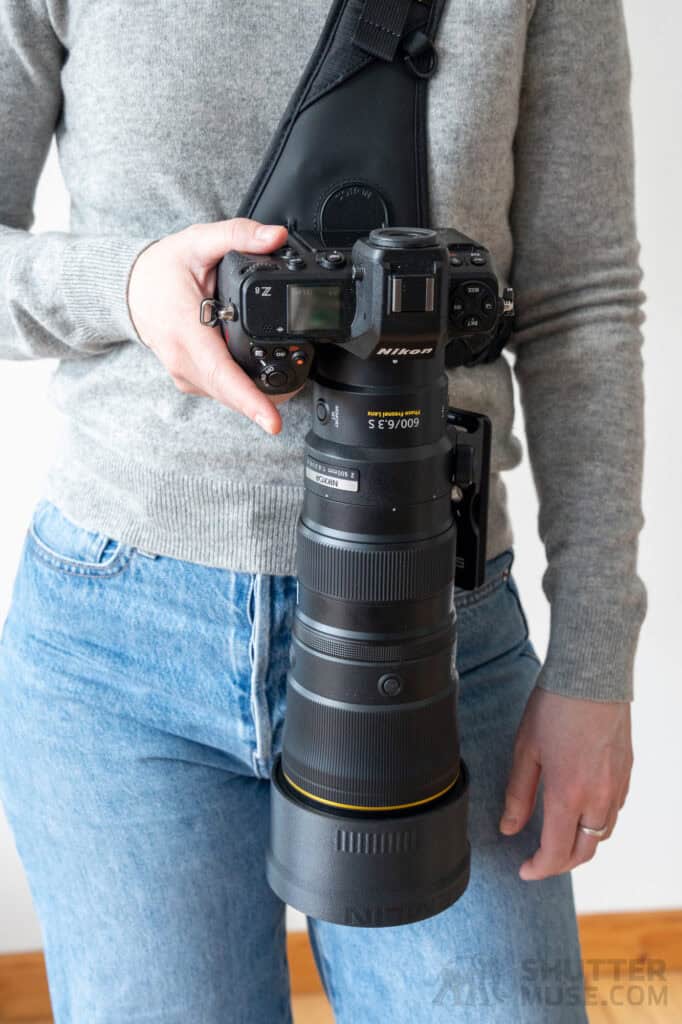
Those concerns have been alleviated. While the padded area under the twist-and-lock receiver is similar in size to that of the G2, the combination of the much wider side strap, the broad, padded back panel of the sling bag portion, and the wider, more thickly padded shoulder strap of the Hyker makes a considerable difference in terms of support and harness stability while on the move. Any weight you place in the sling bag also conveniently counterbalances the front-loaded weight of the camera on the harness. I had no issues carrying my Sony 300mm f/2.8 GM with a Sony a1 II, a Canon R5 Mark II with a 100-500mm lens, and my Nikon Z8 with a 600mm f/6.3 PF on the Hyker – my three favorite lightweight wildlife photography kits for those respective brands.
Taking things a step further with weight, I tested the Hyker sling with the Nikon Z 180-600mm, the Sony 200-600mm G, the Canon 200-800mm, and the brand new Sony 400-800mm. The first three lenses weigh roughly the same, while the Sony 400-800mm is about 15% heavier. These lenses’ overall carrying comfort and stability on the Hyker felt somewhere between the Skout G2 and the G3.
I could and would use these lenses on the Hyker if the needs of the day’s mission made the sling bag portion worthwhile, say, as a place to store extra layers during changeable weather. Conversely, I would never recommend using lenses this heavy on the smaller Skout G2, so the Hyker is a nice new option for users of those lenses who weren’t sure about the G3 harness. With the larger lenses, I prefer to put the hub for the twist-and-lock holster mechanism on the camera body instead of the lens foot, to keep the setup closer to my center of gravity.
Hyker Vs. G3 Harness
Are these telephoto zoom lenses more comfortable to carry on the G3 harness? Yes, undoubtedly. However, the margin in comfort is smaller than I thought it would be. I suspect I will use the Hyker with these larger zoom lenses when I’m out with my camera for a couple of hours. If I’m headed out for a day-long hike, I’ll likely use a G3 harness for its slightly better weight distribution, and the fact that on a much longer hike, I may want to carry a backpack with more gear than fits in the Hyker’s 12L sling.
I find the complete wraparound design of the G3 can make me sweaty in hot climates. The Hyker will be cooler to wear as less material is in contact with your body. For this reason, having the Hyker as a holster option for larger lenses in tropical or sub-tropical climates is also a benefit. In the past, I’d love to have used the Skout G2 in warmer climates, but as I’ve said, it just doesn’t have the weight capacity for wildlife photography lenses. Also, it must be noted that currently, the G3 costs $129, while the Hyker’s construction complexity and added features push its price to $199, which may make the decision for some people sitting on the fence between the two options.
How to Use the Cotton Carrier Hyker
The Cotton Carrier Hyker is a unique camera bag, so it’s worth taking a moment to talk about the different ways it can be used. Having tested this bag for a month, I have my preference, but yours may vary based on the gear you need to carry.
Setup 1 – The Camera Bagger
For this setup, you would use the bag the same way you’d use a traditional camera bag. All the camera gear you carry is fitted into the bag until you arrive at your destination. At this point, some or all of the gear is moved to the Twist & Lock camera mount on the front strap for easy walkaround access.
The benefit of this setup is that you have protection for all the camera gear you carry. If you want to remove the bag from your back, everything is stored inside the bag, just like a standard camera sling bag or backpack. At the same time, you still have access to Cotton Carrier’s camera attachment system for quick access to your gear at your destination. The downside is that this setup allows you to carry the minimum amount of camera gear. Everything must fit in the bag or the optional rectangular insert if you choose to use that.
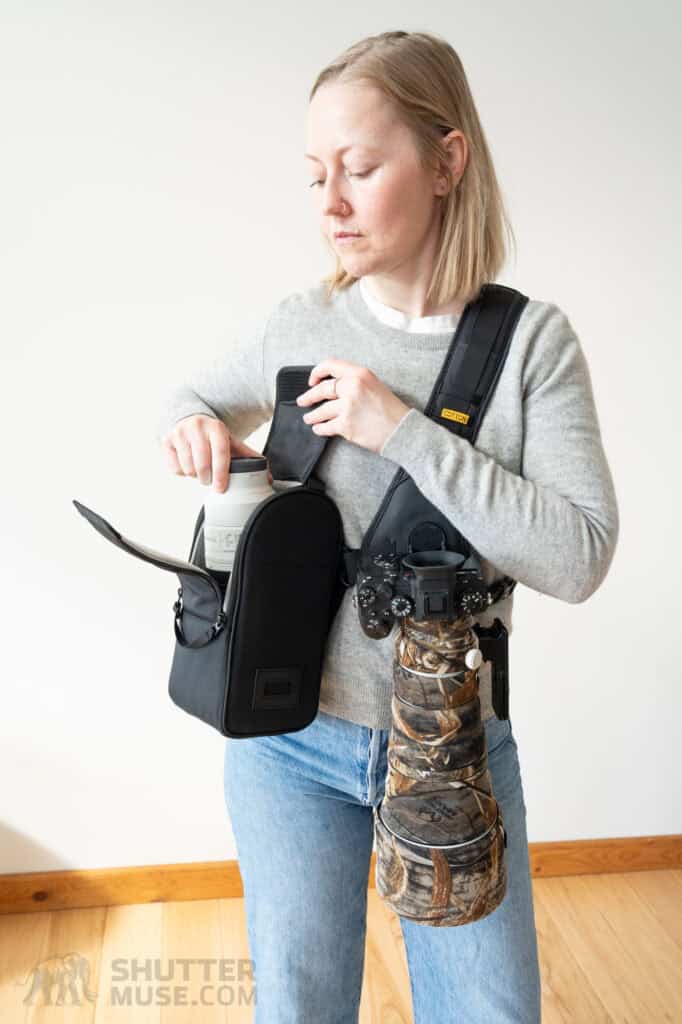
Setup 2 – The Lens Changer
In this setup, instead of carrying a camera and lens(es) in the sling bag, you’re carrying a camera with an attached lens on the front camera mount and using the sling bag to bring an additional telephoto lens or two or three smaller lenses. When you need to swap lenses, you’ll rotate the sling bag around your body to access another lens.
The benefit of this setup is the significantly increased number of lenses you can carry. The downside is that you now have more gear than will fit into the sling bag, so there is no easy way to remove the bag without at least some of your gear feeling unprotected, and if you get caught in some monumental weather event, you can’t pack everything into the sling.
Setup 3 – The Outrigger
The optional padded insert has a nylon loop on the back, allowing you to mount it to the Hyker’s strap for what I call the Outrigger setup. With one lens attached to your camera and securely mounted in the Twist & Lock attachment, a second lens can be stored in the padded insert and mounted on the strap. This leaves the sling bag portion of the Hyker empty and available for all the other items you may want during your hike, including the option to store even more camera gear in there if you want to.
The benefit of this setup is that the second lens is more easily accessible than if stored in the sling bag. It’s a great solution if you often switch back and forth between two all-purpose zoom lenses, such as a 24-120mm and a 100-400mm. The downside to this setup is that you’ll have more camera gear than is possible to fit into the bag. So there’s no option to pack it all away completely. I’d use this setup if I were driving to a location for a walk and then returning to my car, where I could either pack all the camera gear into a larger bag back at the car or stow it amongst some blankets or other soft items.
Setup 4 – The Wildlife Photographer

In this setup, you’ll use the camera holster on the harness to carry a lightweight telephoto prime lens like the Sony 300mm f/2.8 GM, Sigma 500mm f/5.6, Nikon Z 600mm f/6.3, Nikon Z 400mm f/4.5, or a telephoto zoom like a 200-600mm. You’ll store your snacks, water, guidebooks, gloves, hat, spare batteries, and memory cards in the sling bag. Next, you’d add an optional Cotton Carrier Wanderer Camera Holster to the Hyker’s side strap (or your belt) to carry your binoculars.
The benefit of this setup is that you have quick access to both your camera and binoculars. It’s far more comfortable to scan large areas or maintain a static view on a specific area when using binoculars instead of always holding your telephoto lens up to your eyes.
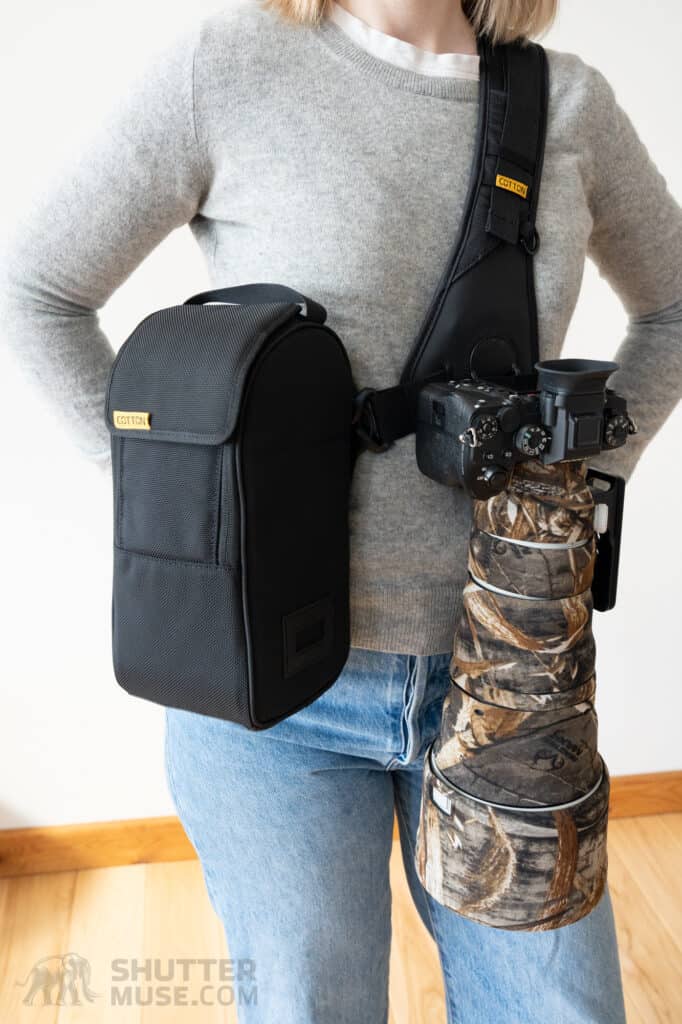
Setup 5 – The Super Telephoto Companion
I love this use case. I often shoot with big super-telephoto lenses that are too long or heavy to use on the Hyker’s Twist & Lock camera attachment. When I’m using those bigger lenses, I like to keep my overall load to a minimum, so I use the Hyker to carry my two teleconverters, spare batteries, spare memory cards, a lightweight rain jacket, a water bottle, any animal/bird field guides I might need, sunscreen, gloves, and a hat. Then, I use the Twist & Lock attachment on the strap to hold my all-important binoculars. The big super-telephoto lens is either hand carried by the lens foot, or thrown on my shoulder attached to a tripod or monopod. Like this, I can stay fast and nimble for a day of exploratory wildlife photography.
The big plus for this setup, for me at least, is that I already used a similar system before the Hyker came along, albeit a solution that wasn’t quite as neat. Before the Hyker, I used the Cotton Carrier Skout G2 harness to have instant access to my binoculars. Then, I’d carry a separate lightweight sling bag with all the previously mentioned items in it. Different bags came and went, but most recently, it was the Peak Design Outdoor Sling 7L. The previous two-piece solution has been simplified with the Hyker Slingbag.
Setup 6 – The Birder or Nature Observer
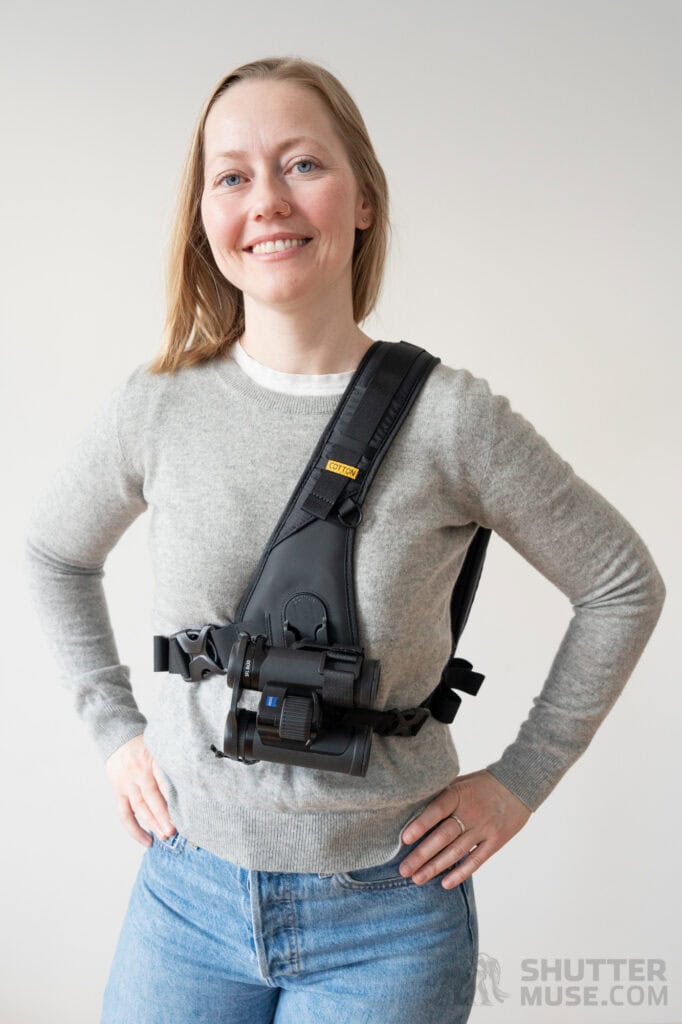
If you’re not a photographer but enjoy birding or observing nature, the Hyker makes a great companion. With your binoculars securely mounted to the Twist & Lock attachment on the front of the strap, the sling bag has ample room for your rain layers, ID books, 1L water bottle, snacks, tablet computer, tripod, and a small spotting scope. Occasionally, I use a Swarovski ATC 17-40×56 scope, which is a perfect match for the Hyker.
Travel With the Hyker Slingbag
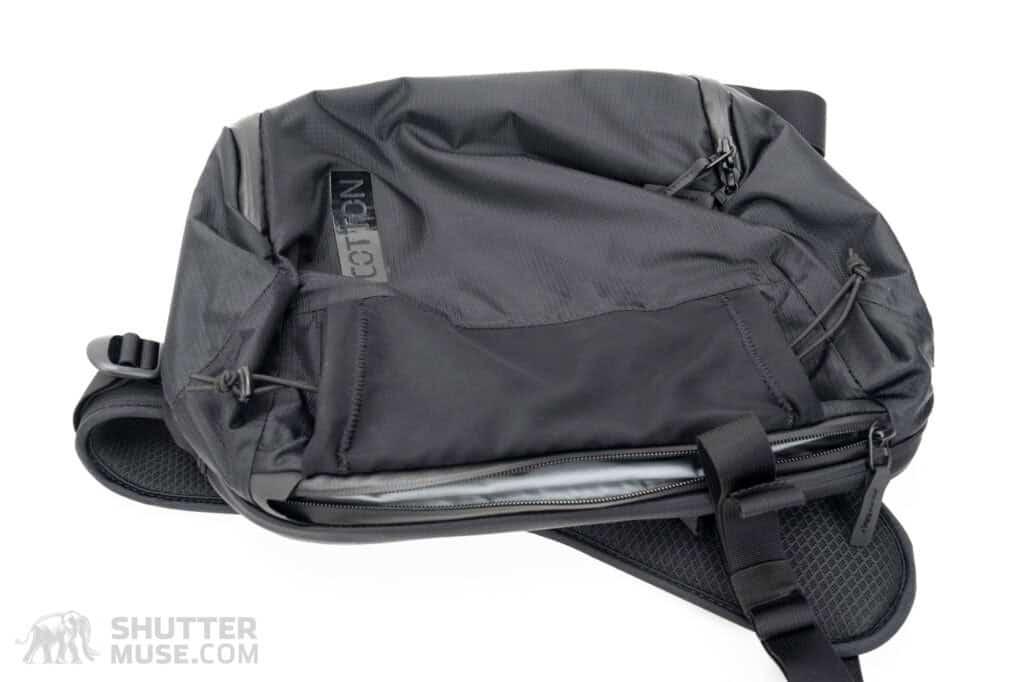
No matter how you plan to use the Cotton Carrier Hyker, I wanted to draw attention to the compact nature of the bag when you don’t need the optional insert. If you plan to travel to a far-away destination for some photography, chances are you’ll be using a larger carry-on compliant backpack or roller bag for the air travel portion of your trip.
What I like about the Hyker is that I can easily pack it flat into my duffel bag with my clothes and use it as needed when I reach my destination. Even if I work out of a larger camera backpack for most of my trip, there will always be times when a compact sling is handy, whether that is for one of the discussed photography setups from the previous segment or even just for personal items while exploring a city along the way. Alternatively, if you aren’t carrying a laptop larger than a 13″, the Hyker makes a great “personal item” to take onboard with you alongside a larger camera bag.
Conclusion
Truly unique products are hard to come by in photography, but the Cotton Carrier Hyker is just such a product. The Hyker combines the brand’s well-engineered and much-loved quick-release camera/binocular harness with an incredibly well-thought-out 12L sling bag capable of carrying your camera accessories, extra clothing, and food for a day’s nature photography or observation. This bag is full of little features that tell me it was designed by people who want to use it themselves.
Perhaps most impressive to me, since I’m already familiar with the convenience and comfort of Cotton Carrier’s other camera harnesses, is the cleverly designed sling bag portion of the Hyker. They could have opted for a simple bag with one large main pocket for gear. Instead, the designers created a sling with incredibly intricate internal compartmentalization that uses three separate zippered compartments and a divider system to create four distinct internal areas for storage.
Despite its relatively small size, this design allows you to separate food, wet clothes, camera gear, and a tablet or nature guides using a construction that doesn’t get in the way of itself if you don’t need that level of organizational granularity. This is real camera bag nerd stuff, but it’s one of the cleverest uses of a 12L volume I’ve ever seen, and it works fantastically to create a truly multi-purpose bag for outdoor adventures.
Whether hiking with your camera gear or just exploring nature with your binoculars, the Hyker’s quick-release harness will place your camera or optics at your fingertips, and everything else within easy reach in the rotating sling bag. Add to the intelligent design the rugged materials and high-quality zipper/buckle hardware, and Cotton Carrier is onto a winner among nature lovers with this concept.
Where to Buy + Save 10%
Cotton Carrier has offered Shutter Muse readers a 10% discount on anything purchased in their online store. Simply use the discount code SHUTTERMUSE after clicking here to access the store.
As always, using my links for your purchases is appreciated. Of course, the best way to buy the Cotton Carrier Hyker Slingbag is to buy directly and use our discount code above to save yourself 10%.
- Cotton Carrier Hyker Slingbag – Cotton Carrier
- Cotton Carrier Bino Bracket – Cotton Carrier / B&H Photo / Amazon / Adorama
- Cotton Carrier Universal Tripod Adapter – Cotton Carrier / B&H Photo / Amazon / Adorama
- Cotton Carrier Wanderer Holster – Cotton Carrier / B&H Photo / Amazon / Adorama


Great review. Ironically, Canadians can’t buy direct from the Cotton Carrier website unless they’re willing to spend 40+% more by paying in U.S. dollars.
Steve, I wanted to add to this further. After you raised this point, I talked to Cotton Carrier’s COO. As of today, you can now shop in CAD on the Cottoncarrier.com website, and it will give you CAD pricing that is WAY lower than the previously converted USD prices. Thanks for bringing this to my attention!
I’m a keen user of the Skout and the Harness.
The mount leaves my hands free to cycle, XC ski or clamber around a rolling boat.
The Hyker looks like something I could use. The quality of the bag storage would determine whether I’d buy one and your review Dan is positive on this score.
I’ll be in the sub- and Antarctic in a few months, landing at places where bird flu means no sitting, kneeling or placing anything on the snow/ground. You’ve outlined a couple solutions to lens changing and accessory access using CC gear that would suit these restrictions and I’ll think them through. So far, I’m equipped with a Wanderer to go on a belt to carry a second Z8 with mid zoom.
I wouldn’t mount a large telephoto lens rig via the camera body. My concern is that the lens mount would experience excessive forces, and the rig would drop too low for unhindered walking.
What’s good about the Skout is the slight offset which allows me to see what my feet are doing a little more clearly. The Hyker has this virtue too.
Thanks for your review.
You’re welcome, Ern. One thing to consider, regarding the bird flu issue, is that to rotate the bag to your front, you must remove the lens from the harness. Typically, I just set the lens on the ground while I do that, but you can’t do that. You’ll need to hold the lens/camera in your hand. Just wanted to make sure that was part of your consideration 🙂
Yes, thanks Dan.
Lens changing in a Zodiac can also be a challenge and another reason to go with two bodies.