
When it comes to shooting video with a DSLR or mirrorless camera, a monitor is an almost essential purchase. Even if your camera has the basic video necessities such as focus peaking and zebras, simply having a larger view will enable more accurate framing and much more comfortable shooting experience when using a tripod.
Recently I needed to find a budget-friendly on-camera monitor for studio usage, and a bit of research led me to a Chinese brand called FeelWorld. I have no idea what the name means, but the brand’s range of monitors was impressive. Even more so when you looked at the price. The FeelWorld F5 Pro comes in at just under $140.
The further I read down the spec list, the more I knew that this was a monitor I simply had to try. Not only did it seem to tick all the boxes for my own needs, but it also looked like it could be a great monitor to recommend to my readers who are just starting in filmmaking.
The full spec list is published below, but let’s just get this out of the way to start with: This is a full HD monitor with HDMI loop-through and the capability to take in a 4k signal. It has almost ever video assist tool you could hope for, and it can even be powered via USB-C. It comes with a sun hood, a vari-angle hot shoe mount, and it’s a full touchscreen.
So the specifications are impressive and appear to reach well beyond what you would expect at this price point. But is it actually any good? Is this the best budget on-camera monitor for budding filmmakers and YouTubers? Let’s find out…
Specifications
- 5.5″ Panel Details
- Full HD 1920×1080
- Contrast: 1000:1
- Brightness: 500cd/m²
- 160° wide viewing angles IPS Panel
- Input resolutions
- 4K UHD 3840×2160p (30/29.97/25/24/23.98Hz), 4096×2160p (24Hz)
- 1080p (60/59.94/50/30/29.97/25/24/24sF/23.98/ 23.98sF)
- 720p (60/59.94/50/30/29.97/25/24/23.98)
- 1080i (60/59.94/50)
- 480i/576i/480p/576p
- Video Assist Features
- Histogram
- Peaking Focus Assist (Red,Green,Blue three colors optional highlight over parts of the image in focus)
- False Colors
- Zebra Exposure
- Nine Grid
- Scan Mode (Under Scan, Over Scan)
- Zoom (4x,9x,16x)
- Anamorphic Mode (1.3x, 2.0x, 2.0x mag, User-defined adjustment: 1.20X~2.00X)
- Pixel to Pixel
- Center Marker
- Safe Area (80%,85%,90%,93%,96%,2.35:1)
- Ratio marker (4:3,13:9,14:9,15:9,16:9,1.85:1,2.35:1)
- Marker Color (Red,Green,Blue,White,Black)
- Check Field (Red/Green/Blue/Mono)
- Image Flip (H, V, H/V)
- Image Freeze
- Color Temperature Adjustment
- Power Input
- 5v USB-C
- 12v DC
- Sony L-Series NP-F type battery
- Power Output
- Auxiliary power output to camera (8.4v)
- NP-F L-Series auxiliary mount
- Headphone jack
- Weight: 245g
Features and Function
Panel Quality
The full HD panel is rated to 500nits of brightness, with a 1000:1 contrast ratio. Judging by what I saw, I have no reason to doubt this. Contrast looked great, and the IPS panel construction provided reasonable off-angle viewing. Certainly enough for an on-camera monitor where you will largely be stood right behind it.
What’s worth noting is that 500nits is on the lower end of panel brightness. I would say that this is the monitors biggest shortcoming. While some manufacturers will claim 500nits is “daylight viewable”, I disagree. I think a panel really needs to have 1000nits to be genuinely useful in direct sunlight. 1500-2000nits would be better.
That’s not to say you can’t use the monitor outside, but you will want to use the included sun hood and occasionally adjust the monitor angle to keep the screen as shaded as possible. When comparing this monitor to similar, slightly more expensive options such as the SmallHD Focus (800nits), this is one of the differentiating factors. For those that plan on using the monitor indoors, this will be a non-issue.
HDMI In/Out
HDMI loop-through is a feature I didn’t expect to see on such a cheap monitor. Normally you would have to spend several times more money to get this feature, and you certainly aren’t going to find it on lower-end monitors from SmallHD or Atomos. Even if you spend close to $450 on something like a SmallHD Focus 7, you still don’t get HDMI loop-through. It’s certainly a nice feature to have if you want to send the video signal from the monitor into a wireless transmitter, or directly over to a larger director’s monitor.


Physical Controls

A total of eight buttons control the monitor functions, two of which are custom function buttons that can have video assist functions assigned to them as you see fit. Personally, I set F1 to turn focus peaking on and off, and F2 to turn exposure zebras on and off.
The buttons are functional, but of course, at this price point, they lack a truly great feeling. Given their positioning on the top of the monitor, often out of your direct view, it would have been good to have a better way to differentiate the buttons by feel. Perhaps adding a small lump to the menu button for example. You could do this yourself by adding a small square of gaffer tape to one or two of the buttons to slightly alter the feel.
Touchscreen Functions

This is a touchscreen monitor. Menus can be browsed and altered by touch as you would expect. When the touchscreen is enabled and you are viewing an HDMI feed, you can also swipe on one half of the screen to adjust monitor brightness, and the other half to adjust headphone volume.
Do you need a monitor like this to be touchscreen? No, not really. It goes without saying that if you do use these touchscreen functions you are going to smear greasy fingerprints all over the monitor in short order. Importantly, you can simply disable the touchscreen features and use the physical buttons for menu navigation instead.
Aside from a quick test to see if it worked, I disabled this feature and don’t see myself ever using it. I would expect most users will do the same thing. When comparing the specs and feature list of this monitor to other options on the market I simply ignored the existence of touchscreen functions. I don’t see this as a plus, it’s just not a practical thing to use on a device whose sole purpose is to give you a clear view.
Menu System
The menu is split into four main sections, and sub-sections expand outwards from there. The menu is completely intuitive. I never once needed to look at the instruction manual. Setting things like the custom function buttons and on-screen displays was a breeze. I really can’t fault the menu system at all. This is a good reminder that while FeelWorld might be producing these small low-budget monitors, this is far from their first rodeo. Their monitor product catalogue is vast, containing a huge variety of monitors for use by small and very large productions. They have clearly developed a very good menu system over many years of experience. It doesn’t look flashy, it’s just simple, clear and concise. I appreciate that.
Included Accessories
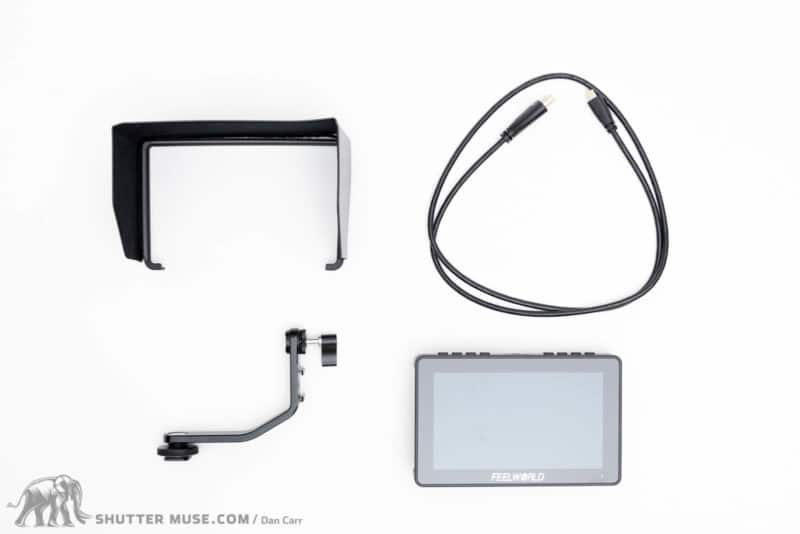
Sun Hood
A sun hood is provided with the monitor. It consists of a plastic frame that snaps into place on the monitor and a 3-panel hood. The hood attaches to the frame using a simple hook and loop. I like that the hood is not entirely rigid, making it much easier to tuck into your camera bag, and less likely to get broken.
It’s hard to fault this feature. Usually, monitors require the separate purchase of sometimes ludicrously priced sun hoods. To get this thrown into the package for an already silly-low price point is fantastic.


Hot Shoe Bracket
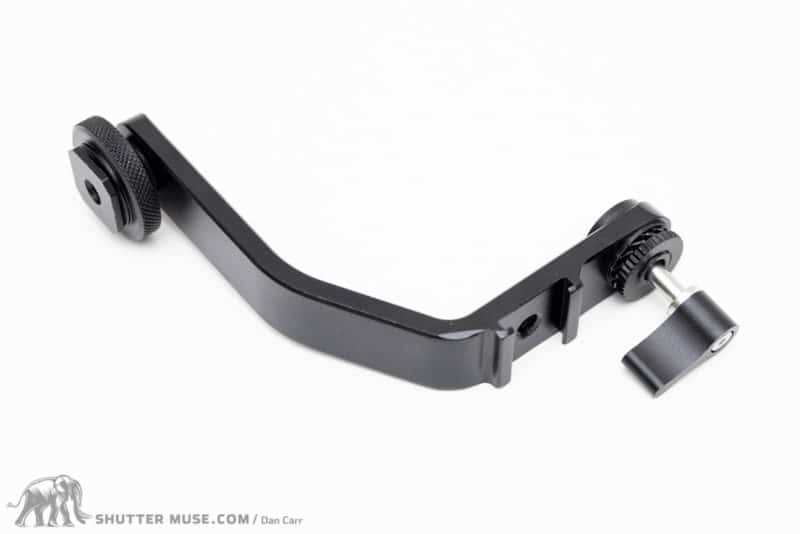
The F5 Pro monitor also comes with a hot shoe mounting bracket. This allows you to tile the screen up or down, and again it’s something I find quite remarkable to be included in such a low-priced product. The bracket attaches nicely to the camera hot shoe with a large knurled wheel and never came loose in my testing.
On the right side is a small lever and rotation mechanism. The lever is only for attaching the monitor to the bracket, it does not control the movement of the monitor. Instead, the monitor is tilted using a rather stiff constant friction mechanism. While there is no way to lock the monitor’s movement, I didn’t find that to be the problem. Quite the opposite in fact. Instead, I found the tilt movement to be very stiff, and I feared a little for the strength of the monitor-to-bracket attachment point in the all-plastic monitor case.


The other problem that I had here was the placement of the 5v USB-C power input. Powering this monitor over USB-C is an absolutely brilliant feature, and it’s the sole reason I waited for this new Pro version instead of buying an older version of the same monitor. I really wanted to be able to power the monitor from a small USB-C battery in the field, and with a simple USB-C charger in my studio. I already keep these things in my bag to power my cameras and so many other daily-use accessories.
While this USB power feature does work as advertised, I found that the USB-C port was far too close to the monitor bracket when the screen is tilted forwards. Even my smallest USB-C cables got caught on the bracket, and I was forced to head to Amazon and look for a USB-C right-angle adapter. Such adapters are readily available and cheap, but I don’t like to add additional points of failure to a system. I will probably look for an actual USB-C cable with a right-angle plug on the end soon. If you buy this monitor and intend on using the bracket, I suggest you do the same thing.
I would say that most people using this monitor with a DSLR or a mirrorless camera will probably use the included bracket. Most people using the monitor with larger cine-style cameras will probably use some sort of friction arm to give a wider range of positioning options. If you use an arm, you can mount it to the top, bottom or side of the monitor and you won’t run into any issues with the positioning of the USB-C power input.
Power Options
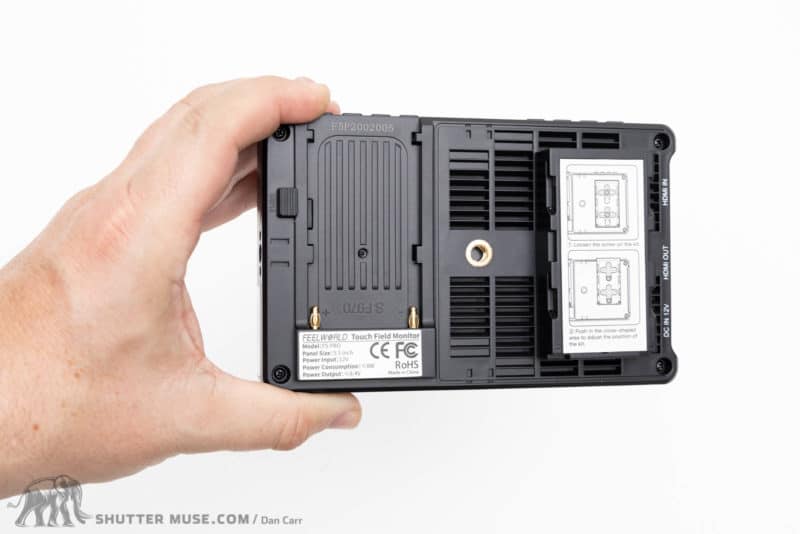
Power Input
The FeelWorld F5 Pro has several different options for powering the monitor, and a pair of power outputs to help you power additional items in your cine rig. The most obvious power input is the ubiquitous Sony NP-F L-Series style of battery connection that is used by the majority of small cine accessories. I tested the monitor using my 47Wh Anton Bauer NP-F batteries and it would basically run all day.
The next option you have is a 12v barrel connector on the side of the monitor. No power adapter is supplied with the monitor though, so you would have to source a mains plug, or use a d-tap to 12v cable from a larger cine-style battery.
The third option is the 5v USB-C input that requires at least 2amps. As I mentioned in the earlier section about the mounting bracket, this USB-C input is a fantastic addition to the monitor, and practically ensures you will be able to power it from items you already own. Should you find yourself in a bind, having forgotten some gear when out on a shoot, I’m sure you could find a USB-C battery or adapter in short order. I love this feature!
Power Output
The F5 Pro also features two ways to output power from the monitor so that you can power additional items on your rig. The first is an 8.4V DC output from a barrel connector ((5.5mm outer, 2.1mm inner). The main usage for this output would be to power a DSLR or mirrorless camera, as these often require this lower voltage. A quick hunt on Amazon or B&H Photo would find you a dummy battery for your camera and a DC barrel connection cable.
The second output is sort of a reverse Sony L-Series battery, visible clearly on the photo of the rear of the monitor. If you have a second accessory that also uses NP-F style L-Series batteries, you can actually mount that accessory directly to the back of the monitor to power it. This is mainly designed for use with wireless video transmitters or receivers such as the Hollyland Mars 300 PRO.
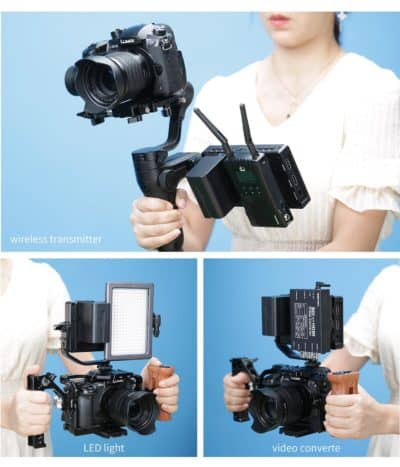
This is a clever feature because it not only takes care of the power for the transmitter, but it also gives you a really easy way to mount the transmitter or receiver to the monitor. You could use this to create a very small footprint and budget-friendly wireless director’s monitor when pairing the monitor with a receiver. Or you can just simplify your rig’s wireless transmission by pairing it with a transmitter.
If yo do not wish to use this NP-F style power output, you can peel off the sticker on the bulge and then unscrew it to remove it from the monitor. While this bulge doesn’t weigh much, this would make the monitor smaller when packing into your bag.
Could you power it with a mini V-Lock battery?
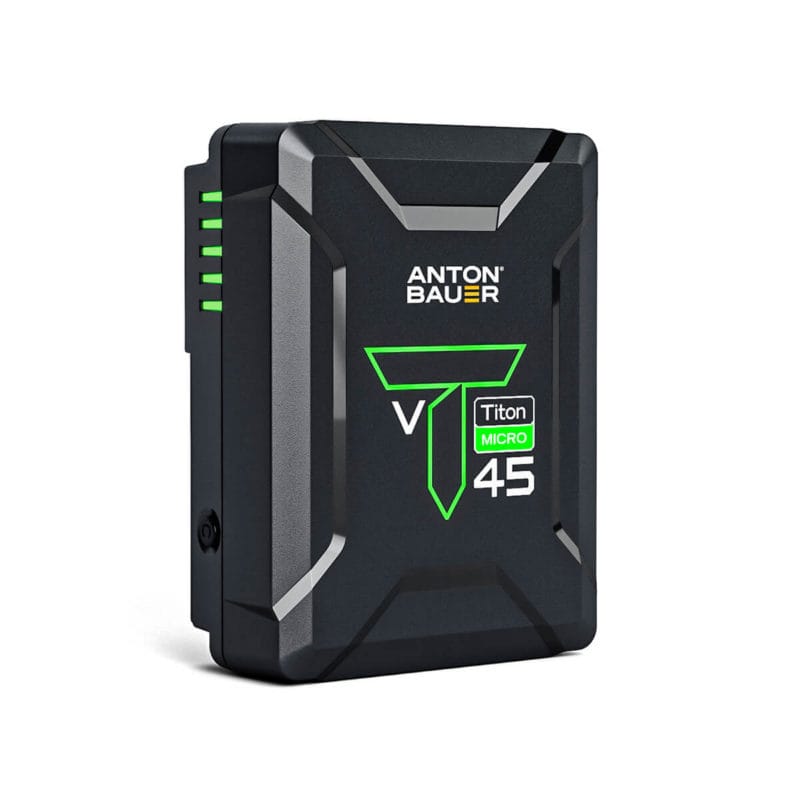
V-Lock/V-Mount batteries have been shrinking dramatically in size in the last few years. All major cine battery manufacturers now have a “mini” battery series and some of those are small enough to consider mounting onto small monitors such as the F5 Pro. In particular, you’d want to be looking at batteries in the 45-50Wh range such as the excellent Fxlion Nano One, the Bebob V45 Micro or the Anton Bauer Titon Micro 45.


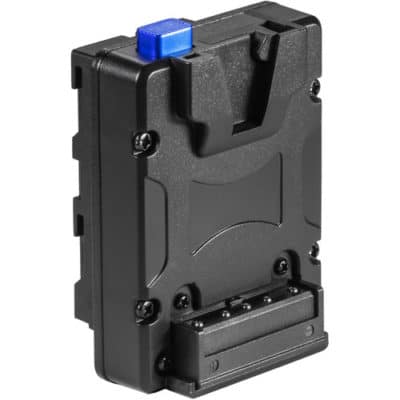
The benefit of using a v-mount battery like these ones is that they can easily power the monitor, the camera and several other accessories simultaneously using d-tap outputs. Watson makes a mini V-lock plate to NPF L-Series battery converter, so these batteries can mount directly on to the back of the F5 Pro. Alternatively, you could mount the battery elsewhere on your rig and run a d-tap to 12v cable from the battery to the 12v barrel connector on the side of the monitor. The F5 Pro really gives you all the options you need.
Need a Monitor Case?
If you need a monitor case, look no further than the outstanding CineBags Monitor Pack. This small bag feels indestructible and is cleverly designed to hold a 5″ or 7″ monitor, as well as all your cable, arms and batteries.
Check out my full CineBags Monitor Pack Review here.


Conclusion

LCD panel prices have plummeted in the last few years and the FeelWorld F5 Pro is the result. A full HD IPS screen on a monitor with HDMI loop-through, for under $140. Not only that, but it also has a headphone jack to monitor embedded audio, three ways of powering it, including via USB-C, and two ways of powering additional external devices such as the camera and a wireless video transmitter. Quite simply, this monitor is a bargain. Yes, it is made entirely out of plastic so you’ll want to take good care of it on set, but you really can’t fault that on a monitor in this price bracket.
Aside from the host of physical features and the included sun hood and hot shoe bracket, the F5 Pro is also stacked with most of the professional video monitoring features you might want: Focus peaking, histogram, zebras, false colour, anamorphic de-squeeze and safe areas. The only software features that are missing are a vectorscope and RGB parade. To get those you would need to move up their range to the larger 7″ LUT7 model.
If you’re looking to start filmmaking or start a YouTube channel with a limited budget, I think the FeelWorld F5 Pro is a fantastic monitor. From a functional point of view, the one thing you are most likely to struggle with is daylight viewability. 500nits is on the low end. I personally don’t count that as enough brightness to view in direct sunlight, despite what manufacturers may claim. This can be largely solved by using the included sun hood, but it’s something to be aware of if you are usually shooting outside. Inside, the monitor has more than enough brightness.
As my first experience with a FeelWorld product, I couldn’t be more impressed with the value they are offering people with this 5.5″ monitor. I have happily installed mine into my studio to assist with our own YouTube product reviews.


I got issue with my monitor. When I take a picture the monitor will lose the signal and the picture for 10 seconds and the signal will come back. Is this normal?
I got a Nikon D5500
I have sl2 ( 200D ) pair with this but every time hit record and review it i didn’t hear any noise coming from monitor. Is the monitor has built in speakers?
No, these monitors don’t have speakers. The sound coming from the speakers would then be heard by the camera’s microphone and this would escalate into a feedback loop.