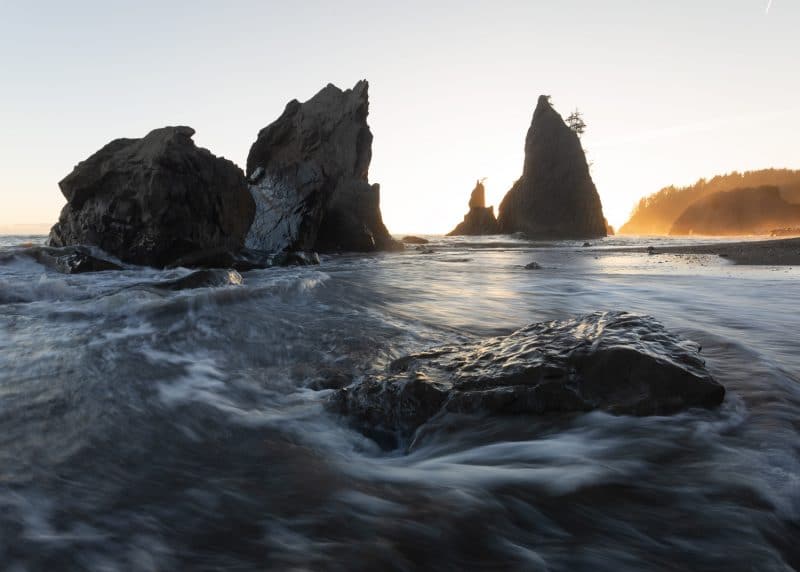
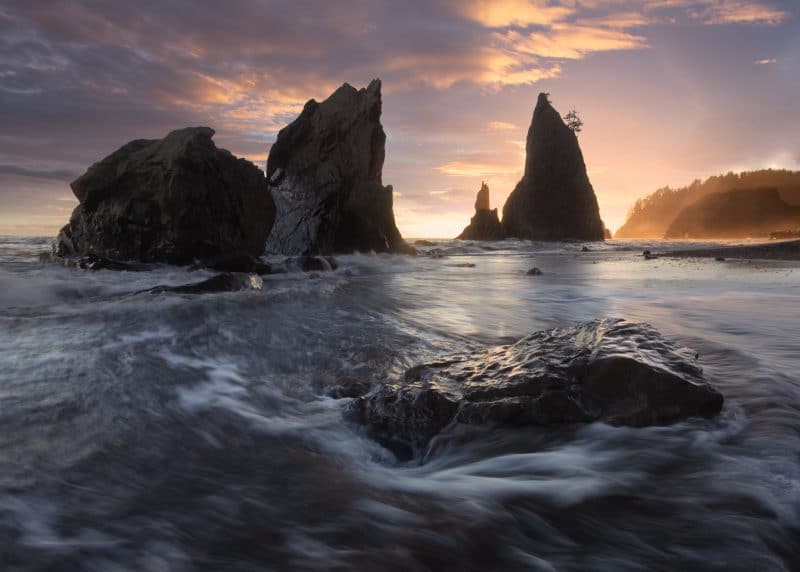
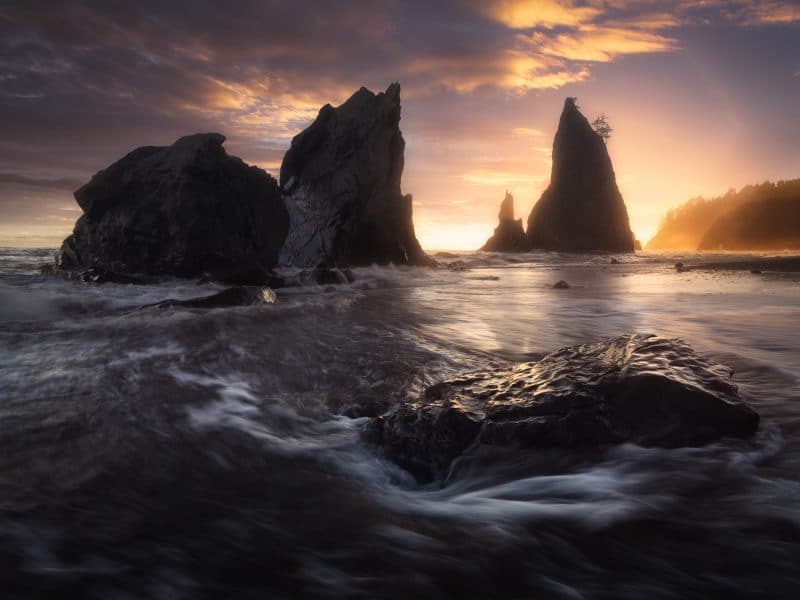
I took this shot at Rialto Beach on the tail end of a trip to Olympic National Park this past summer with a friend of mine. The tide was at the perfect point to get some interesting long exposures with the water receding back into the ocean.
It was a tough scene to shoot with the sun setting behind the sea stacks (my subject), which made me have to tighten up my aperture in order to get an exposure long enough to get some water streaks in my foreground. On top of messing around with settings I also knew I was going to do an exposure blend to take care of the dramatically bright sky, something I do regularly with sunset and sunrise shots.
Once I got home and had my first look at the images, I was happy with everything except for the boring sky. After a few months of letting the images sit, I decided I should make something out of them and not let them go to waste, which is why I decided to do this sky replacement.
In this walkthrough we will take a quick look at the steps I took create the final shot.
Equipment Used for this Shot
Step by Step: Photoshop Editing Workflow
1 – This is the starting point we’re working from today. The raw image, taken at Rialto Beach, Olympic National Park with my Canon 6D and a 17-40mm lens.
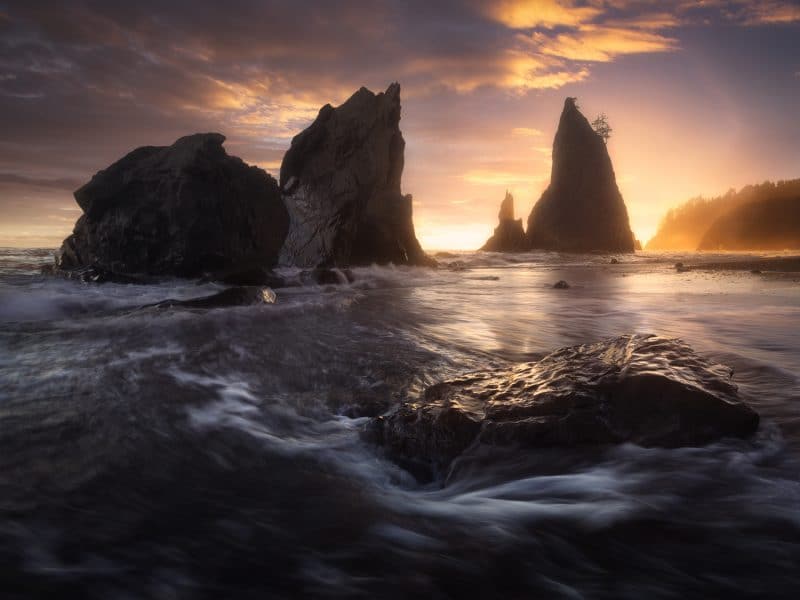
2 – This next looks similar in small screen resolutions, but it actually consists of 2 separate shots taken at different focal points. The first shot is focussed on the rock at the front, and the second is focussed on the rocks in the background.
I blended them together using Photoshop’s layer mask feature, leaving me with a consistently sharp image front to back. This technique is called focus stacking and it’s a great way to get more depth of focus in your images.

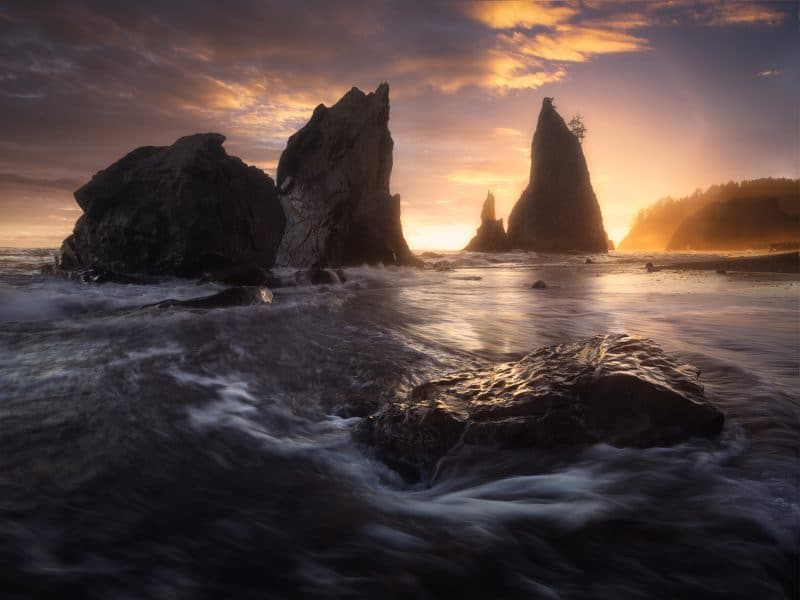
3 – Though the light was great, the sky was lacking interest. I didn’t want to scrap this shot so I decided to pull out another sunset from my harddrive and make something out of what I had. Here I replaced the sky using more layer masks and luminosity masks inside of Photoshop.
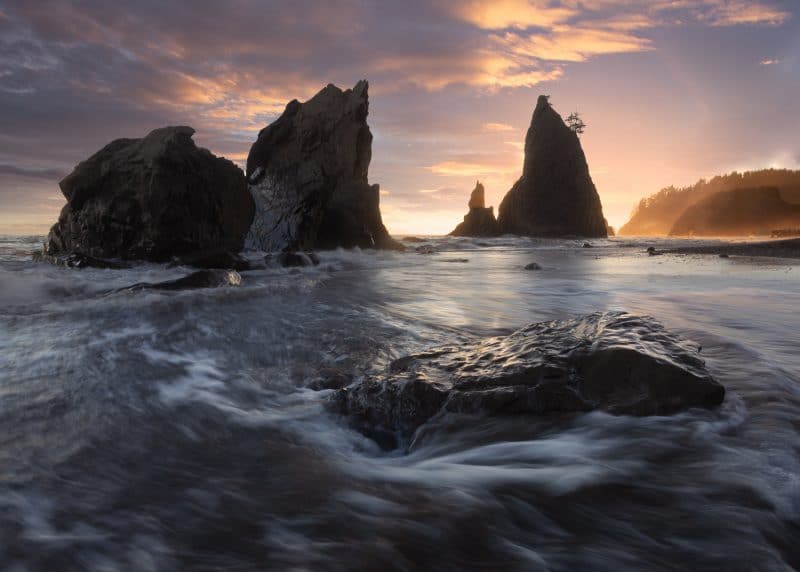
4 – I wanted the sea stacks to look more intimidating and rugged so I did some warping using the warp tool in Photoshop to compress the rocks together. I also shrunk the foreground rock so it was less distracting.
The overall effect is to create a better balance between foreground and background compositional elements.
5 – I then used luminosity masks and layer masks to selectively brush in contrast to the areas of the image I thought needed it most.
6 – I noticed the image was looking a bit too cool in comparison to the sky, so using a new layer with the blend mode set to soft light, I selected the orange colour in the sky and painted in some warmer tones in where I thought it was needed. I also added an Orton effect layer to give a dreamy glow to the image.
7 – I wanted the eye to be attracted towards the center of the frame so I added a slight vignette. I also thought the shadows were a bit too dark so I opened them up by using a levels layer and adjusting the black point.
8 – I decided to change my crop from 7:5 to 4:3 as I felt there was too much empty space on the right side of the frame.

9 – I wanted to add yet more warmth to the sky, so using the same technique with the soft light layer, I painted more colour into the sky region, while also letting a bit of it bleed into the foreground.
I do this to try and keep the light looking natural and to help blend the two different shots (foreground + sky).
10 – I finished off the colour work on this photo with one last dodge and burn layer. I spent about an hour with a low opacity brush slowly highlighting and darkening the spots of the image that I thought could use it.
I do my dodging and burning with either an overlay layer or a soft light layer. I also add a bit of colour depending on what part of the image I’m painting which prevents the colours from drying out.
11 – I then had second thoughts about the crop I had done earlier, so using the free transformation tool I was able to compress it back into my 4:3 crop, leaving me with this final image!
Hopefully this walkthrough has given you some ideas for your future landscape images. Don’t forget to photography interesting skies when you see them, you never know when they will come in handy!