
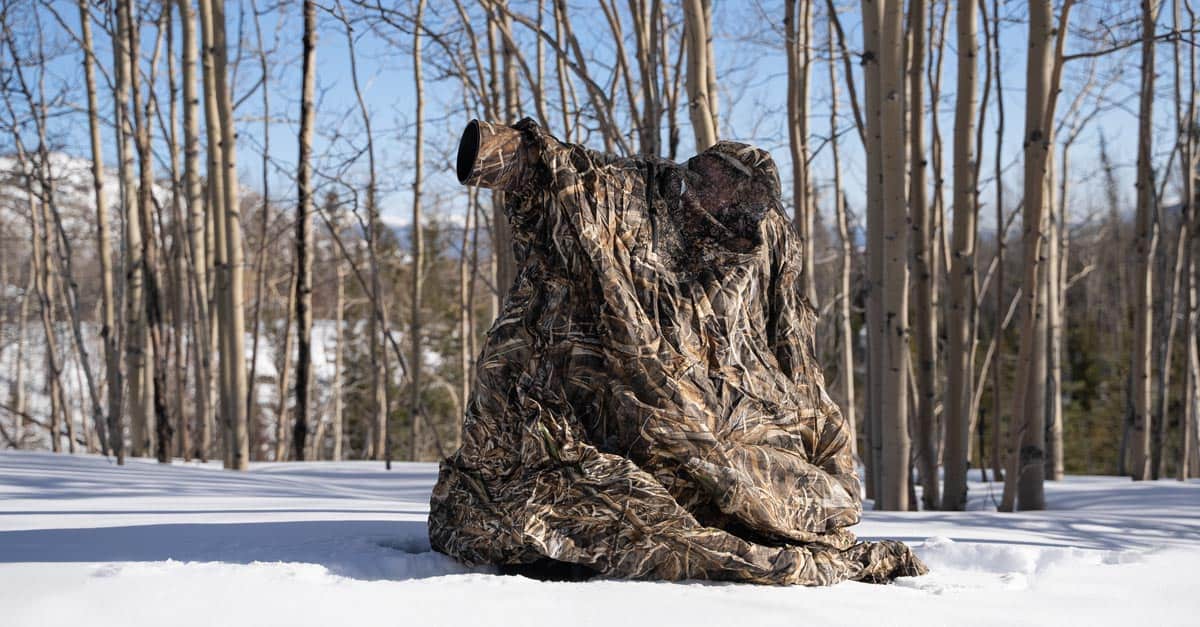
It’s often beneficial to use a little fill flash in wildlife photography to brighten up the shadows on a backlit animal or add a catch light into your subjects eye to help it look a little more alive. You can forget about ever doing these things with your camera’s built-in pop-up flash, they simply don’t have enough power, so that means you’ll most likely be looking at a hot shoe flash. To do so effectively is going to require a very specific piece of equipment.
Table of Contents
Why Do You Need a Flash Extender for Wildlife?
If you’ve used a hot shoe flash before, you might have noticed that they sometimes have zoom settings on them, which help you control the flash output’s focus to suit a particular focal length. The problem that wildlife photographers face is that none of these zoomable flash heads has settings that go past 200mm, but you’ll almost certainly be using at least 300-400mm when shooting animals, and often more than 600mm.
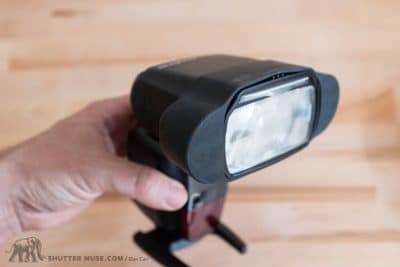
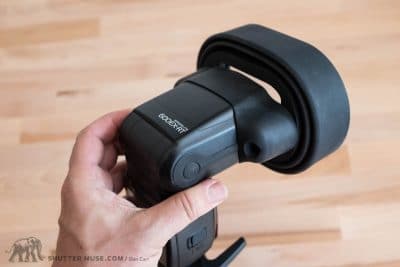
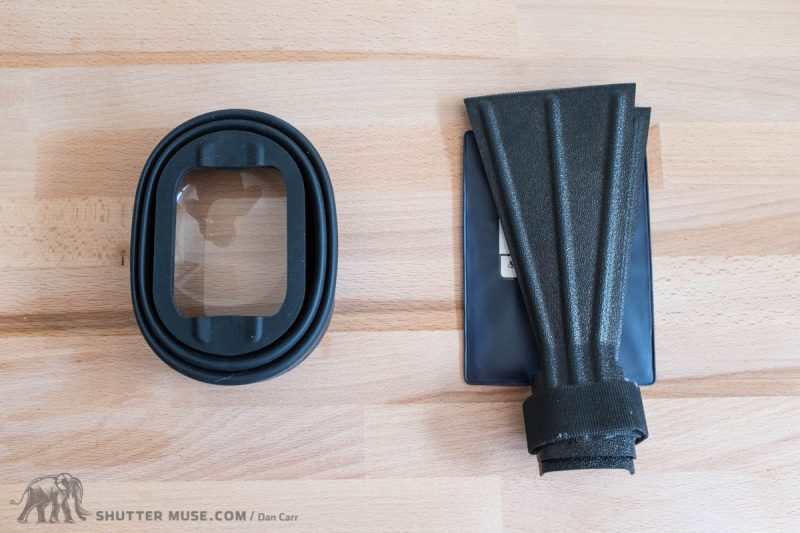
What you need is something that can constrain that flash output and focus it into a beam that’s more suitable for usage with these longer focal lengths. The MagBeam from MagMod is just such a tool. It uses a Fresnel lens to focus that flash output, much like that which you would find in a spotlight at a theatre. The lens is built into a clever collapsible rubber tube that sticks to the front of your flash using incredibly strong magnets.

What Does the MagBeam Actually Do?
MagMod claims the MagBeam will increase effective flash power by 2-3 stops, and I found this to be true in my testing. To be clear about this, obviously, the flash has a finite amount of power that it’s able to pump out at any given setting, but what the MagMod MagBeam does is simply funnel all of that light into a much tighter circle, effectively increasing the brightness of the light in that one particular spot by 2-3 stops.
Increased brightness is great, but there are other knock-on effects from this. If you didn’t actually need the flash to be brighter, it means you can now turn your flash power down and get the same flash brightness you were getting before, but now using 2-3 stops less power.
This means your batteries last longer, and your flash will recycle several times faster! That last part is a pretty big deal when you’re working with fast-moving, skittish animals. It could make the difference between you getting the shot or not because hot shoe flash recycle times can be a couple of seconds when used at full power.
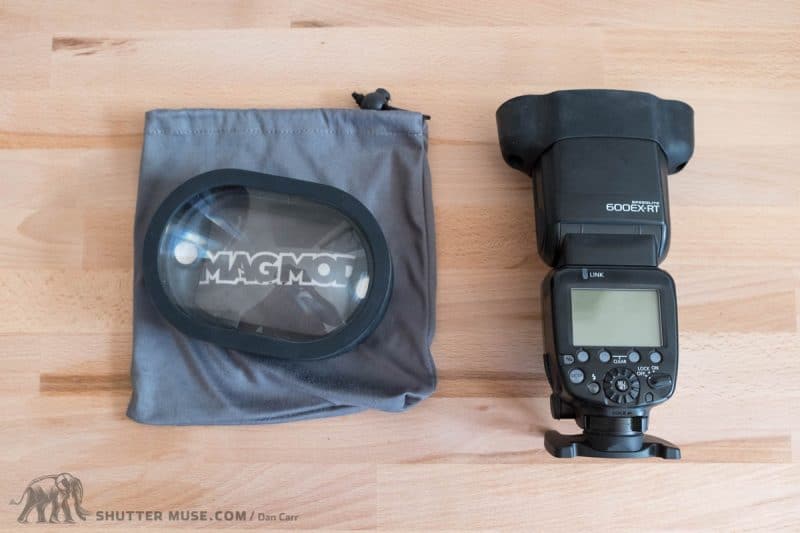
MagMod MagBeam Kits
The MagMod MagBeam is available in two different kits. The first kit, called the Wildlife Kit, includes the Fresnel lens, the rubber snoot that holds the lens and the elastic band with the magnets, that goes around your flash head. As the name implies, this kit is designed specifically for wildlife photographers, and it sells for $75.
The second available kit is simply called the MagMod MagBeam kit. This contains everything from the WIldlife Kit but also contains three metal gobos that can be used to project light patterns on the wall behind your subject for portrait lighting. In a way, I think perhaps this kit should have been called the MagBeam Portrait Kit to ease some of the confusion.
MagMod MagBeam Design and Use
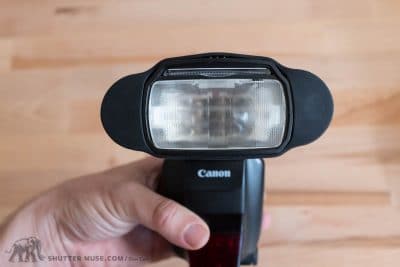
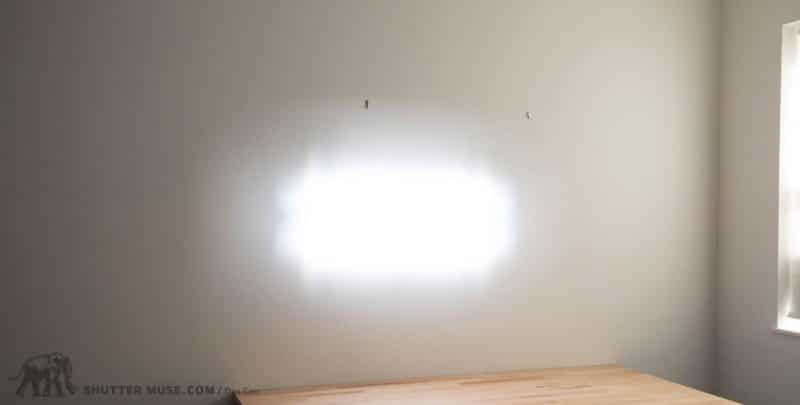
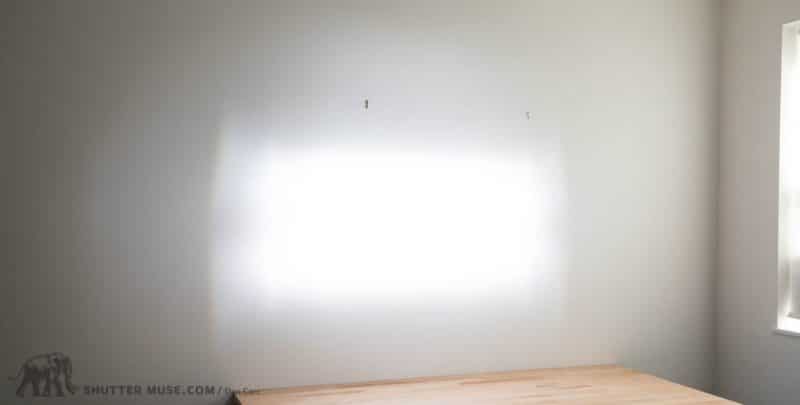
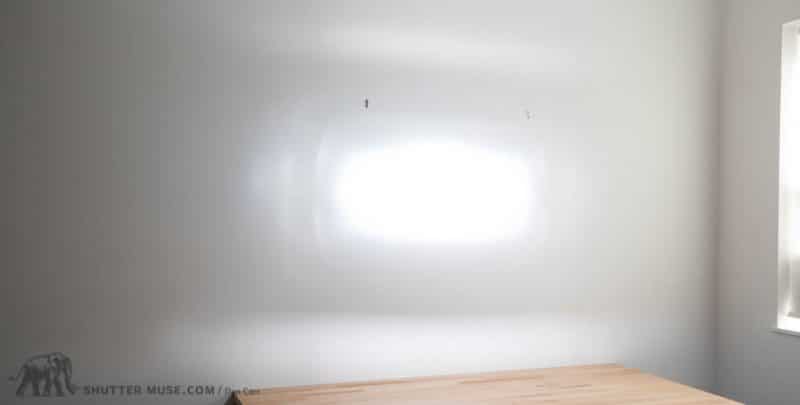
I like the design of the MagBeam a lot, and it feels like a quality product as soon as you start to unpack it. The rubber fresnel lens holder can be extended to two different positions, giving three total positions, including the fully collapsed state. As you can see from the beam pattern samples further down the page, this means you have some control over the spread of the beam, which could be handy if you’re switching between a few super-telephoto lenses such as a 300mm and a 600mm, or a 100-400.

MagBeam Vs. Better Beamer Flash Extender


For twenty years the Better Beamer Flash Extender was the only option in town, and while it works and is cheap, I never enjoyed the experience of using it. The hook-and-loop mounting strap is fiddly and prone to failure, and the whole multi-piece design meant carrying a collection of parts in your bag at all times.
It’s hard to be too down on the Better Beamer though because it’s so cheap (about $35) that you can’t reasonably expect more for the price. It should also be noted that my testing of it has shown it to be just as effective at extending flash range as the more expensive MagBeam, so the result is the same.
I prefer the MagBeam though because you can leave the magnetic adapter on your flash, which means setup time is under one second. If you’ve been surprised by a chance animal encounter then it could make the difference between getting the shot, and not.
Being made from rubber also makes the MagBeam feel much more durable, and the included soft pouch is a nice touch. The price difference between the two is about $40, but I think it’s well worth the extra money to get the MagBeam. I regularly use other MagMod accessories too, such as the gels and the grids, so for me, it’s also part of a system, and I simply leave the magnetic adapter on my flash all the time.
All the other accessories can be stacked together with the MagBeam too, so there’s potential for some interesting effects, such as gelling the flash with a CTO gel to shift the ambient white balance.
As you can see from the beam pattern examples, the final benefit is the ability to adjust the beam spread to one of three positions. This could come in extremely handy if you’re trying to add fill light to some larger mammals where the fully focussed beam is too concentrated.
Video Review
Beam Pattern Examples
These images (click to view larger) show the beam pattern of a standard Canon flash at the wide and tele end of its built-in zoom, plus the MagBeam in its three different positions. I’ve also included the Better Beamer for comparison.


Additional Accessories
MagMod makes a variety of flash accessories and they all revolve around the same magnetic adapter. This means that once you have purchased the Wildlife Kit (fresnel lens + mag adapter), it’s relatively cheap to get other MagMod items since you already have the mounting system.
You can buy gel packs, grids and also masks to create interesting patterns using the fresnel lens. The rubber fresnel lens holder that is the main component of this Wildlife Kit also has a slot in it for inserting gels or masks, and the grids are simply magnetic so they can stack between the flash and the fresnel lens. Overall, it’s a super flexible kit that really lets you get creative!
Conclusion
For wildlife photography with a flash, quite simply, I think this is a must-have accessory. The clever collapsible design and malleable rubber make it easy to fit into any camera bag amongst your existing gear. The increased 2+ stops of light will help you in many ways when you need to reach distant subjects. Even if your subject isn’t that distant, this will allow you to be much more efficient with your flash’s output, and therefore decrease recycle times and extend battery life.
Where to Buy
Whenever possible, I do recommend buying directly from the manufacturer so that you get the best support.


Hi Dan, Question on the use of the better beamer or the mag beamer…I have seen on a couple of articles on the use of a flash extender and some have mentioned for better result to get an arm of some sort to elevate the flash unit above the camera…is this so and why” I am planning a trip to Brazil to shoot big cats….I have a nikon 300mm fixed F2.8 lens and will probably be getting an 1.4 or 2x extender for that lens for more reach….so all this I have been told to be sure to take a flash extender….I have a nikon sb600 and sb800. please give me your thoughts on the use of arm to raise the flash above the camera? Also if you have experience or thoughts on 1.4 vs 2x extender for the lens…your thoughts.
thanks for you response.
Hey Bill,
Raising the flash creates a greater angle between the light direction and the lens direction. The greater the angle, the more contrast you get on your subject from the light source. Granted, a flash bracket doesn’t make a huge difference, but it can make some. The second reason is that in the case of very long lenses you might get some shadow in the flash beam from the lens if the flash is very close to the lens. Raising it up higher can help with this. Honestly though, it’s a MINIMAL difference, ad if your budget it tight or space in your bag is at a premium, I wouldn’t worry much about it. Why not take some test shots? Just set up a static subject like a furry toy animal, and raise the flash up incrementally using your hand. See if you can see an improvement that you think it worth it!
As for the extenders… 2x is VERY hard to use in low early morning and evening light. If you want to use that, you’d better have a camera that you can push up to ISO4000 at least. Also they will want to be static subjects because AF speed will be decreased. Here’s a guide I wrote: https://shuttermuse.com/ultimate-guide-to-extenders-teleconverters/
Hi Dan,
Your article convinced me to buy a Magbeam. I am using it along with a Godox V860ii flash on a D500 and Nikon 500 mm FL F4 rig. When the Magbeam is in full extension it is causing the Flash head to tilt downward to it’s lowest position. Is this normal? I can always glue a wedge near the flash hinge to avoid this , but that doesn’t seem to be an elegant solution. Your opinion?
Regards
Som
I’m afraid that says more about the construction quality of the Godox flashes than anything else. It certainly doesn’t do that on any Canon flash I ever tried it on. Godox is functional and cheap, but I’m afraid to say that the more I hear about them, the more I’m sure that you get what you pay for. Perhaps a thick elastic band could work if you wedge it into the hinge when needed.
Just wondering if there is a work around to attach them to a circular speed light like ProFoto A1 or recent Godox copy?
Not that I have seen, no. I mean if you really wanted to you could make a cardboard tube to fit the flash and then try and hold the fresnel lens on the end of it. But it’s going to be clunky, and not very light efficient as the fresnel isn’t round.