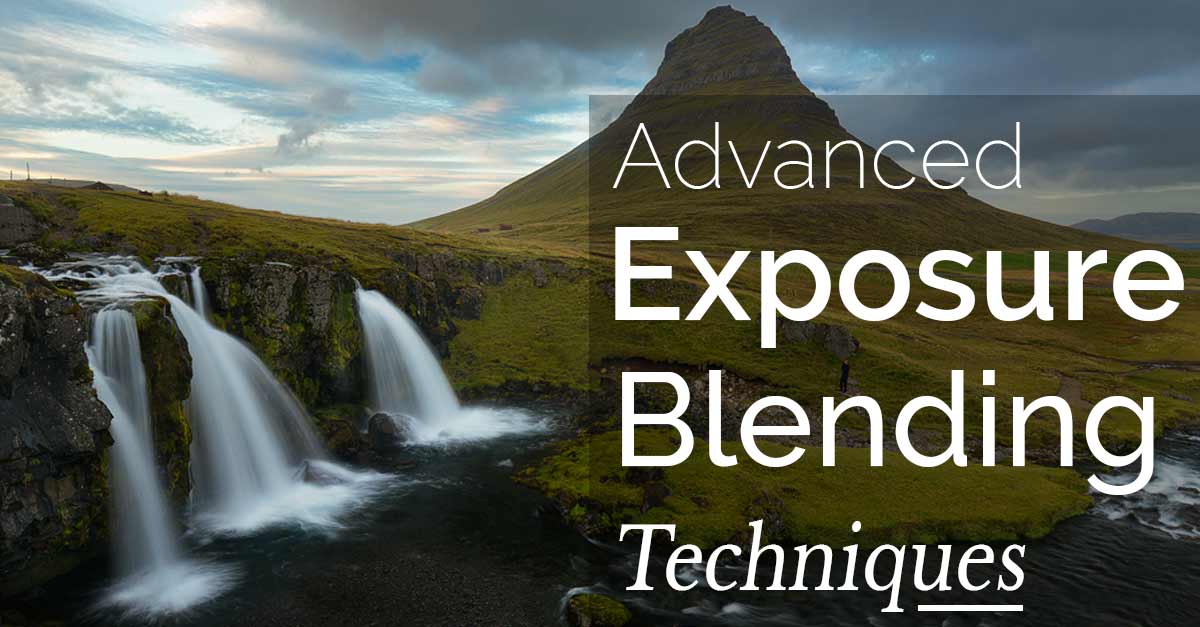
A little over a year ago I made a change to the process in which I take photographs, shifting from the idea of using hardware, to relying on software for creating my vision of a scene. I gave up my dedicated use of graduated neutral density filters in the field (see the previous post on this topic) and adopted the use of more advanced post-processing techniques to create what I consider a more detailed image. Again, I’m not bashing the use of grad ND’s, they’re still a great tool for photography and serve a much-needed purpose in certain genres. However, for my work and the direction I and many photographers are going these days, this particular type of tool is dated technology. Here is an introductory look at some options available to photographers for advanced exposure blending techniques. Rather than too go in-depth on each I’ll give you a basic overview and direct you to useful resources for learning how to master these techniques.
What Are The Advantages?
Many photographers put forth a lot of effort to ensure they’re ‘getting it right in camera, so minimal work has to be applied in post-production. Others (including myself at one point during my photographic evolution) do not want to spend hours in front of a computer with complex editing techniques that can be tedious and sometimes appear to overtake the simple idea of creating an image. These are completely valid reasons and points that should be kept in mind as you move forward with advanced processing techniques. So now you might be saying why even put forth the time and effort into all of this?
Getting it right in camera these days is getting much, much easier. In today’s era of digital cameras, sensor technology is progressing, especially with the big full frame sensors in the Nikon and Sony cameras. These camera offerings are recording more dynamic range in a single image than ever before, and now increased sensitivity is even making its way to APS-C sensors. What often took a grad ND filter or 2 images blended together a few years ago can be obtained in the editing of a single file. With the expanding development of better low light sensitivity and higher dynamic range sensors, the technology has begun to eliminate the need of filters like grad ND’s.
Moving into the idea of taking multiple images to create a high dynamic range photo, or as it has been known more so in the past just as ‘HDR’ scares people. Maybe it was all of those horrendous creations that ensued with the release of Photomatix in the early days or the built in HDR functions of some cameras, but it seems there remains a fear or distaste of the image being ‘fake’ or ‘not real’. There are those that consider this an impure form of photography and that it’s no longer photography and just digital art. As much as this argument has been weighed I think from my perspective is the direction of the image lies in the hands of the artist. With today’s camera advancements we are just starting to approach the ability to record the same dynamic range that the human eye can register (the human eye can register around 14 stops, which the Nikon D810 has the ability to meet 14 stops at ISO 32). Depending on the sensitivity of the camera sensor, many photographers would have to use multiple exposures to do so.
One of the biggest challenges with camera sensors is the ability to properly recover details at either end of the histogram. Using multiple exposures gives you a much wider dynamic range of information to incorporate into an image, ensuring detail from the darkest to the lightest pixels. DSLR cameras, depending on format, can have difficult times recovering the information in the shadows or highlights without degradation to the file like banding or increased noise. Using multiple exposures through bracketing allows the photographer to compensate for proper exposure.
Putting multiple files to work
So now that we’ve addressed the steps in compensating for increased dynamic range, where do we go from here? There are various methods of approach for bringing multiple images together to create your envisioned final image. This is not an inclusive list of options, but this will give you an idea of options out there for post processing. Some require more in depth techniques and time investment, but as a tradeoff offer a better final result versus some of the “quicker” options offered by software generated blending.
Lightroom Enfuse
Lightroom Enfuse is a donation-ware plugin that allows you to merge multiple images together through Lightroom without the need of Photoshop or any additional software. This software isn’t a true high dynamic range program as it does not tone map the images before combining them. This program works best after you’ve applied your basic global adjustments to the images you are working with and then begin the process of merging the multiple exposures together. The plugin will auto align the images to ensure everything merges properly and then allows you to weight the importance of processing variables – exposure, saturation, and contrast. Enfuse also gives you output options similar to the standard Lightroom menus, allowing you to choose TIFF formats, proper bit depth and color space preference.
This is a very basic way of creating an image with more dynamic range without having to use multiple processing programs and appeals to many who want to keep things simple. The program also allows you to merge multiple focal points or focus stacking and blends images together to produce star trails. An image generated from Enfuse still is lacking as it does not compensate for ghosting if there is a moving element within the group of images. Also the software takes a significant amount of time to generate an image if having to align the various exposures.
Lightroom’s Merge to HDR Pro
The combination of Lightroom and Photoshop offers one of the simplest ways of creating a true high dynamic range file from multiple exposures. Similar to the prerequisites of Enfuse, this method takes a group of exposures (personally I find using 3 to 5 images bracketed at 2/3 of a stop to 1 stop increments) that have been synced for global adjustments and pushed from Lightroom through the Develop module by selecting Photo>Edit In > Merge to HDR Pro in Photoshop. Once the files begin rendering in Photoshop, the HDR Pro generator offers you a checkbox at the top right to eliminate any ghosting effects between the multiple images. When the file is created and saved, the file is automatically imported back into Lightroom as a 32 Bit file. Now you can select the 32 bit file in Lightroom with an exposure range of +/- 10 stops versus the original +/- 5 stops of range for the standard 16 bit files. This process also increases the power of shadow and highlight recovery and those can be heavily applied upon the image without issues of shadow noise or banding in the sky.
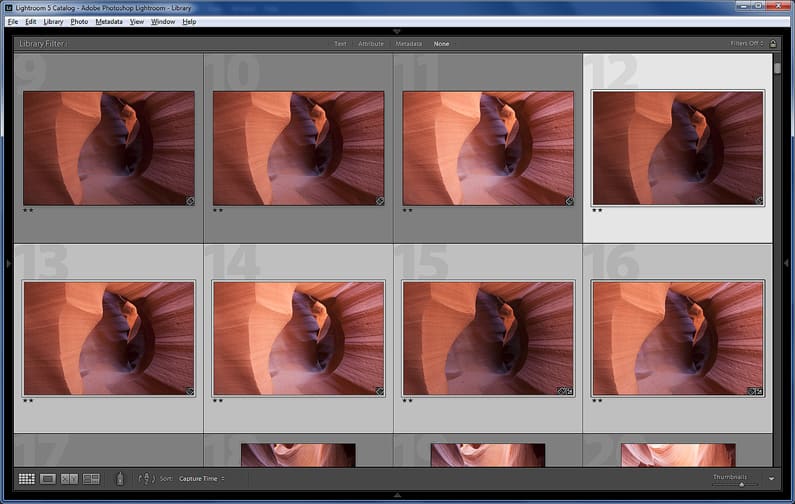
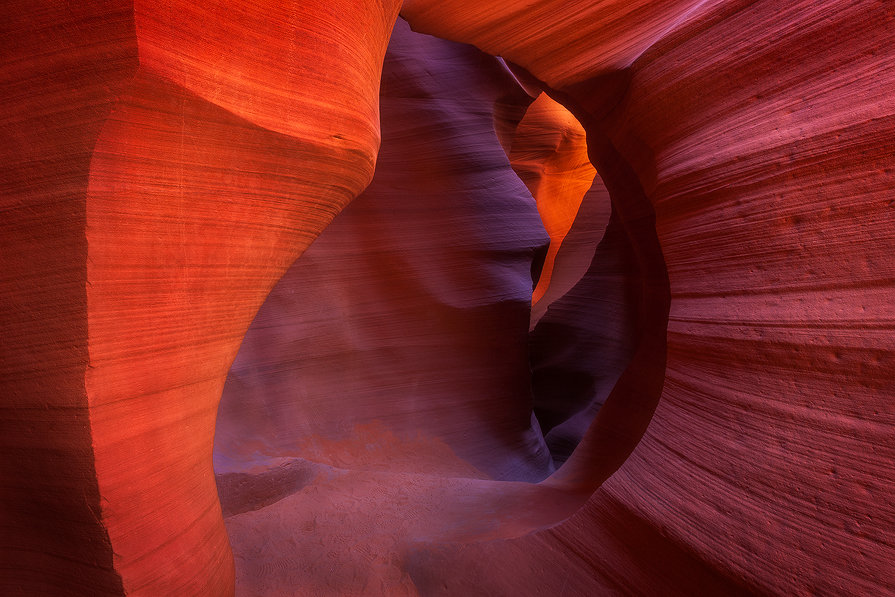
In my trial and errors with this technique it seems to produce relatively useable imagery but I find it to work on a case by case basis for my photography. I will on occasion use this method to bring images together but you are again relying on a computer algorithm to generate something based on the files you’ve captured and it may not necessary come out just as you wanted to interpret the scene. Often trial and error in the number of exposures used in the creation of the HDR image can help with this and patience through a little practice. That being said, I often use other methods for high dynamic range images more frequently versus this technique. If you’d like to see this work , you can see an in depth walk through showcasing the creation of a 32 bit HDR file from Lightroom and Photoshop on Sean Bagshaw’s YouTube channel here.
Hand Blending layers via Photoshop CC
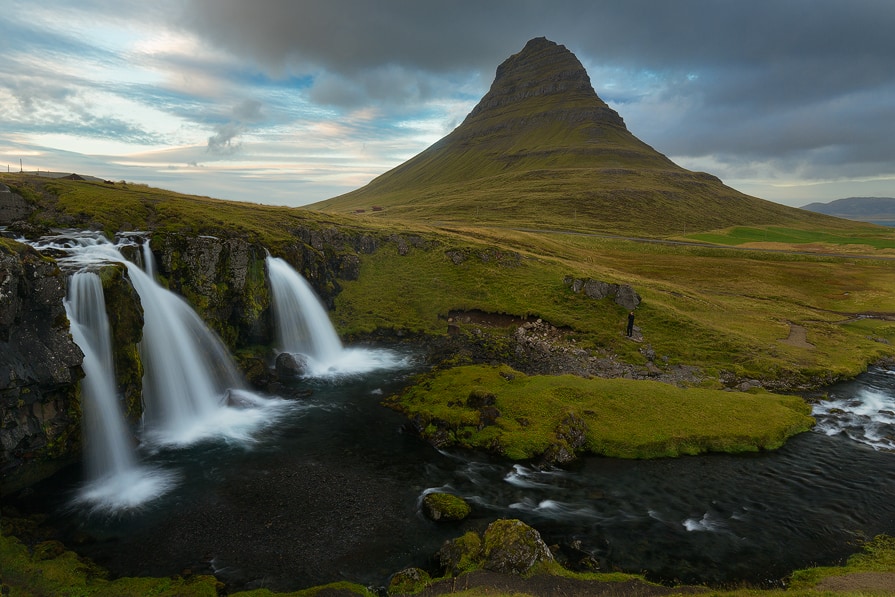
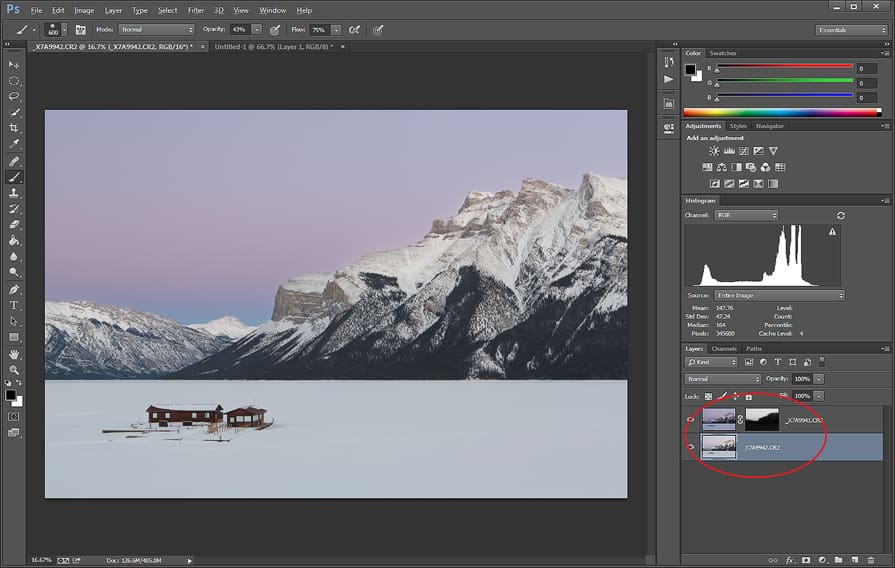
The next technique that I find is my most frequently used in my work is hand blending images through the use of layers in Photoshop. For the sake of practicality we’ll walk through a basic combination of two files for foreground and sky so that you can see the potential of this method. Keep in mind that these techniques can be applied with more than two images to cover the range of highlight, midtone, and shadow detail. Typically this process starts from Lightroom where I apply my basic global adjustments. From there, I select the files I want to blend and from the menu selection I choose Photo> Edit In > Open as Layers in Photoshop. Once in Photoshop, I select the darker exposure and move it so that it is the layer above my lighter exposure. Next I auto align these images to make certain they are identical to one another so there is no issues when I start the blending process. Now I can start looking at what portions of the overlying darker exposure I want to bring in to start creating my final image. With my darker exposure highlighted, I toggle the foreground color in the Tools panel to ‘black’ before clicking ‘Add New Layer Mask” at the bottom of the layers panel. The black filled layer mask eliminates the darker exposure from being seen on the image, so when I begin painting in the portions of the darker exposure for the underlying brighter exposure it will start to show up in the image. With a feathered edge brush tool selected, set my parameters for the hand blend – the opacity of the brush is set to around 20-30% and the flow of the brush is set between 75-100%. As I proceed with hand painting the portion of the darker exposure the idea is the inclusion of white will allow those pixels to bleed through the black mask so that it will be subtly applied on the makings of the final image. If you go too far with painting, you can easily toggle back to the inverse color (here that would be black) and paint over the portion you aren’t happy with. Changing the percentage of opacity here also lets you correct an issue gradually. To aid with all of this detailed work, I use a Wacom Intuos5 tablet for all of my post processing. This not only allows me to carefully bring in my small adjustments in this style of blending, but also the pen is pressure sensitive and changes intensity depending on how hard I press on the tablet.

In a basic blend such as this there are some easy tweaks to help create a more natural look. In Photoshop menus go to ‘Select>Refine Mask’. This option allows me to feather the blending lines of the layer mask further to create a more organic look to the image. As you shift the ‘Feather’ slider back and forth you will see a real time preview of the feathering effect based on how much it is being applied to the image. Once I’m happy with how much feathering is to be applied and the blend is as I want it, I continue on with my other adjustments of the image. If you aren’t satisfied with the blending and mask refinement results, you can easily go backwards with the aforementioned steps which supports the philosophy of a non-destructive workflow.
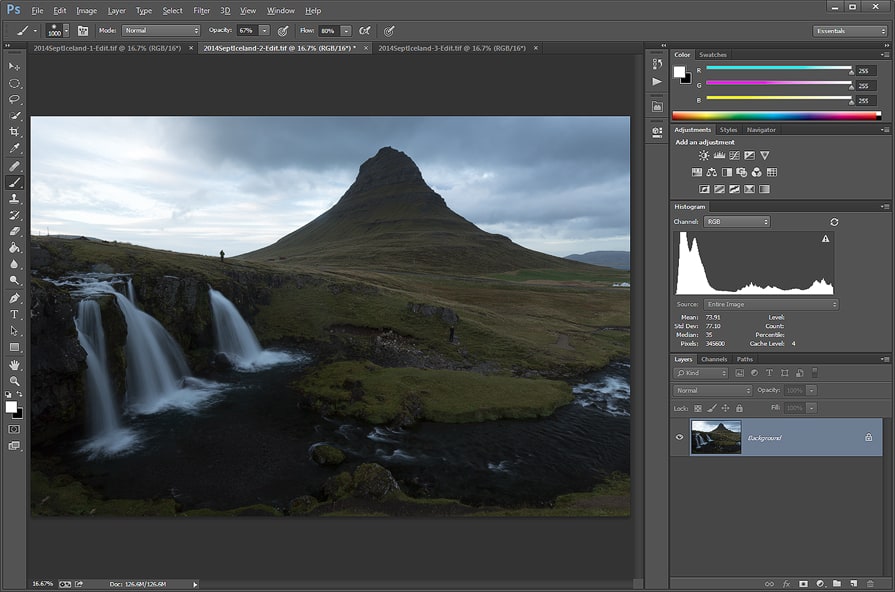
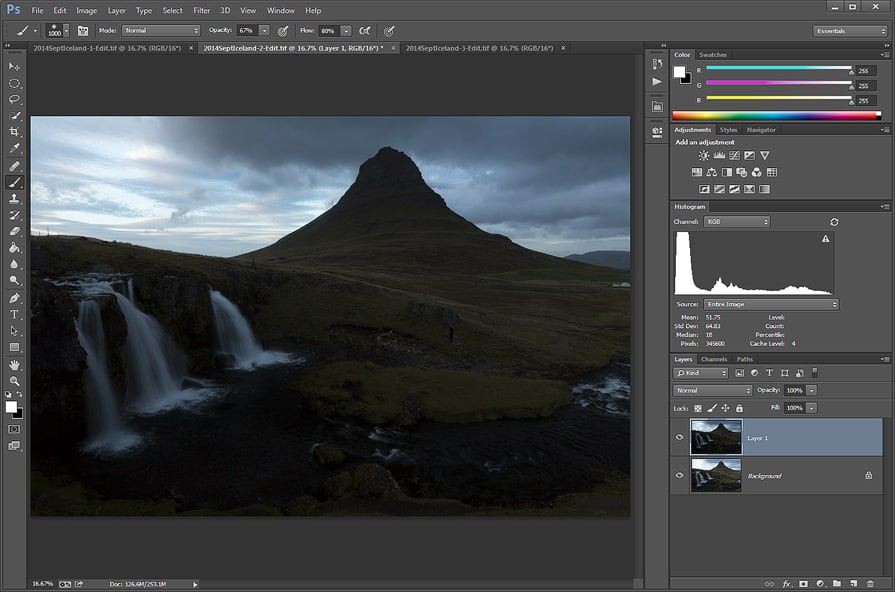
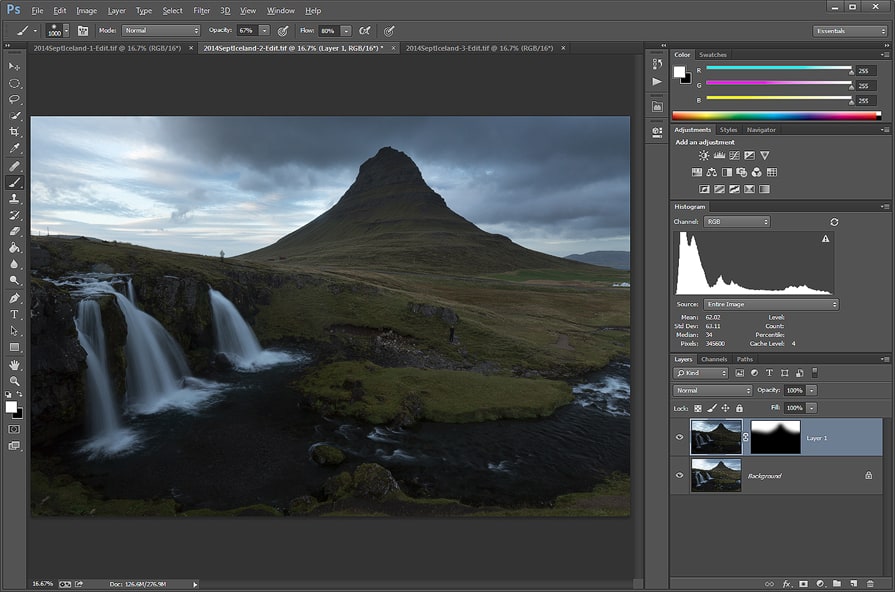
Hand blending images can pose some challenges when bringing together multiple files where there is an uneven horizon or complex lines from different exposures. Often in hand blending one must be conscious of any halo effect that will appear around the blending edges, even with the efforts in mask refining and a large pixel feathering. This is can be very distracting and gives the image an unnatural appearance. Typically using a small opacity during the hand blend and being meticulous in the attention to detail of the bend will avoid any haloing issues. One of the tools within Photoshop that can help counteract this issue is using the Refine Mask option and selectin the ‘Smart Radius’ box to pick up on defined edges within the image. In addition to this tool I often find myself working on the blend lines zoomed in at 200% magnification or closer to prevent a halo effect.
Advanced Blending Options
Hand Blending with the Help of RGB Color Channels
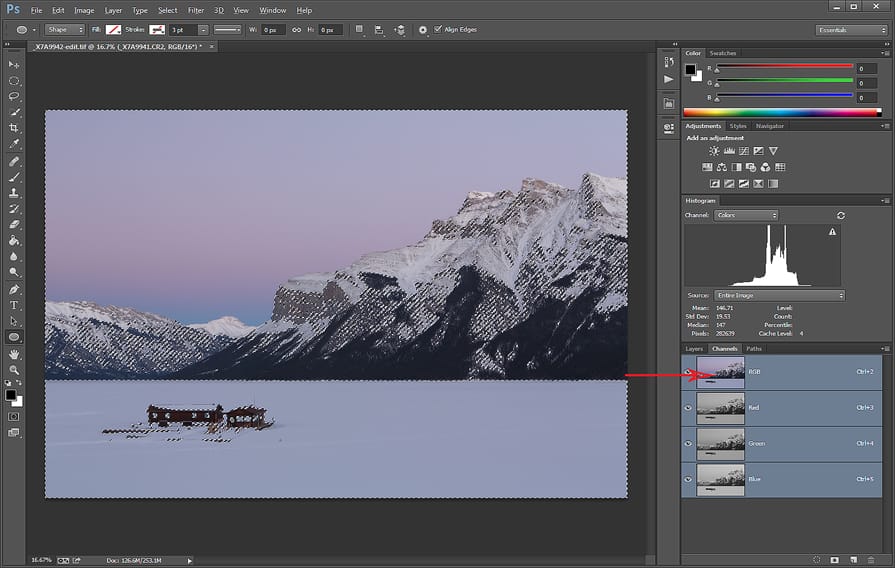
As we just mentioned, working with images that have complex horizons or areas of fine detail a basic hand blend won’t give you realistic results. I find in these scenarios I am looking at the various color channels to create a selection mask. Adjacent to the ‘Layers’ tab in Photoshop there is a tab called ‘Channels.’ This tab shows you four color channel selections – the complete RGB channel, the Red channel, the Green channel, and the Blue channel. As you click through each of these for an image, the grayscale (except for the RGB channel) represents a color filter in which the brightest areas are closely related to the color channel selected. So, if you have an image with a reddish sunset, the red color channel will have very bright tones showing through when selected. So, through clicking on each to preview, you can select the color channel that represents the greatest separation between the parts of the image you want to blend into your final image. By Ctrl or Command + Click the layer mask from the color channel will be selected. Return to the Layers menu and select the overlaying image and then choose new layer mask. From here, Photoshop generates a mask overlay from the color channel selection. If needed, you can then paint in using a feathered brush to add or subtract to complete your blend. This is a harder concept to grasp from just text and screenshots, so I will provide recommended resources for understanding how to use color channels in the blending process.

Incorporating Luminosity Masks in Blending
Luminosity masks are layer masks generated by selecting a certain percentage of bright, dark or midtone tonal ranges within an image. Tony Kuyper has been the front runner for the luminosity mask development and these masks are available for purchase as a custom actions panel that can be installed within Photoshop. Tony has been working with and evolving his luminosity mask actions for many years and including additional useful tools like a one click actions such as a ‘burn/dodge layer’, web sharpening and many others.
The same general steps apply for using luminosity masks as mentioned in the previous section on hand blending layers in Photoshop. To start with I use the luminosity mask action panel to run the RGB channels for all of the ‘Lights’ masks, stacking them below the different standard color channels we just discussed. Just like using the RGB channels, once I have those selections loaded into the RGB panel I pick best option with the greatest contrast or separation between what I am trying to blend in and the underlying image. Once I find a luminosity selection that will work for those criteria I select that mask, CTRL or Command + Click to activate that selection and then return to the layers panel in Photoshop. In the layers panel I click on the layer I want to blend into the underlying layer, then select ‘New Layer Mask’ and apply it to that overlying layer.
With the variety of luminosity masks that can be applied through curves and channel selections, blending with the aid of these masks can be very fine-tuned and useful in creating fine art imagery. Learning how to use luminosity masks can be a lengthy time investment, and I’m still finding ways to apply them in my photography workflow. That being said, this is one of the most accurate ways of creating high dynamic range images out there and an extremely powerful tool for the editing process. I highly recommend looking into tutorials when considering the use of luminosity masks in the Photoshop workflow.
Pin This Post





There are no words to describe how boidacous this is.
I would say it binds strongly to money draining it all electrons and protons, before discarding it again. The true catalyst would be the element which appears in various impure forms, Democracium.
Jeff, I think the struggle is the balance of introspection and engagement. We all step back and take stock of what’s going on. . . . the important thing is we get back in the game. Insight for change, verses insight for snarky comment fodder. Could be a genetic thing with you and me.
Yeah, I wanted to address an inanimate object as a sponsor… But the more I think about it, Comrade just fits so much more. Thank you. It has the ought rhythm.I’ll change it ASAP.
LOVE FMF!!! I'm actually still waiting on my shipment of it. I preordered WAY back in Feb and because a million other people did too, I had to wait for the reorder. I'd feel bad about canceling and ordering it elsewhere, so let's just say…it should be here next month! 🙂