I think it’s fair to say that if I use the words “bad light”, most photographers will probably think of cloudy days with flat, dull light, or anything with harsh midday sunshine. Theres’s no doubt that those kinds of situations require quite a bit of thought and creativity to overcome, but there’s one other kind of bad light that I also hope I don’t encounter: Bluebird skies.
Cloudless bluebird skies can be difficult to deal with, no matter what time of the day you are shooting – there’s simply too much blue! Just as the eye can be drawn to the brightest part of an image, so it also gets drawn to the most saturated colours, particularly if there is a large unobstructed patch of it in an image. These kinds of skies carry a huge amount of visual weight to them if they’re included in an image, and the result is that the viewer is far less likely to really see and explore the actual landscape that you were trying to show them below the sky.
On a trip to Floe Lake in British Columbia I encountered this exact scenario, so in this post I’m going to show you the techniques that I used to overcome this issue.
1. Break The Sky Up
There’s nothing wrong with including some blue in the photo, but you’ll be able to take some of the focus off the sky if you can find surrounding objects that can break up that huge swath of blue. For this shot I was able to break things up by using a nearby tree with overhanging branches, as well as a more distant tree which I positioned in the patch of blue by shifting my tripod up and down until it was just right. You’ll also notice that in this image I tried to take some focus off the bright sun by hiding it behind the tree trunk as best I could. The result is a nice backlit image of the wonderful foliage, without being too distracted by the sun ball or the overly blue sky.
2. Make Your Focal Point Clear
We’ve established that deep blue skies can steal a lot of attention in an image, so it helps to use some other compositional tricks and tools to take back some control of your viewer’s eye lines. Essentially, try to fight the power of the blue with something that’s even stronger!
Two such tricks are: Using a frame around your subject , and using leading lines to point towards it. Both of these compositional tricks help to focus people’s attention where you would like it to be in an image. For this second image I was able to combine the two things together, and also make use of my previous tip about breaking up the blue sky with foreground objects. These golden larch branches were perfect, and the colour contrast between the blue and the yellow also turns this weather situation into a positive instead of a negative.

3. Use More Foreground
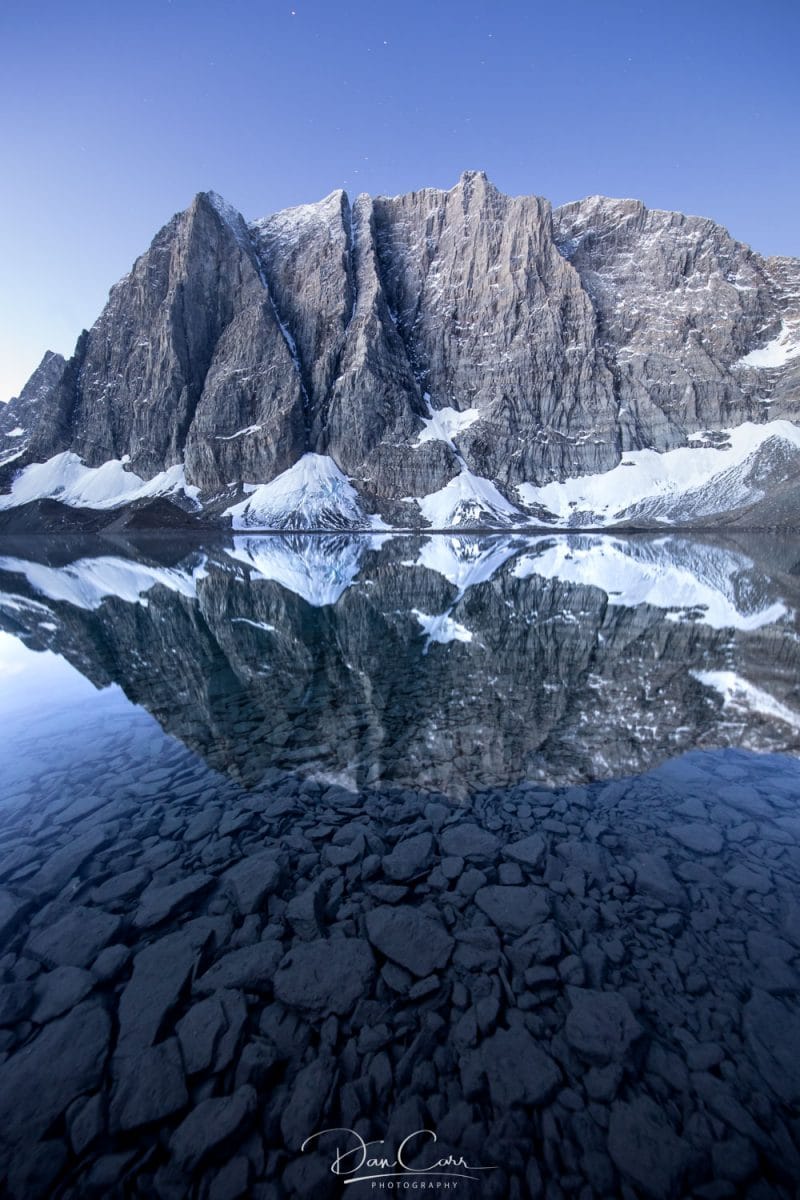
Your next option is to try to eliminate a lot of the sky by tilting the camera downwards and finding interesting foreground objects to fill the composition. In this case I was able to use the perfect reflection of the mountain in the lake, and luckily the reflection of the sky itself was broken up by the pebbles on the lakebed.
Remember, there’s nothing wrong with having some sky in the shot, perhaps even a fairly large chunk of it. What’s important is that you recognize how much of a distraction that can be, and then combat that by using other stronger compositional techniques to capture people’s attention instead, and steer their vision away from the distraction of the open blue sky.


