This weekend (May 22nd 2014) the earth will pass through the tail of Comet 209P/LINEAR which many people believe will give an excellent display of meteors on Friday night, with the peak coming between 2am and 4am. The Camelopardalis shower or “the giraffe,” will be located between Ursa Major (which includes the Big Dipper) and Cassiopeia.
This is actually the first time this shower will take place since the comet was, in astronomical terms, only discovered quite recently.
Usually when we talk about photographing meteor showers we’re talking about the Perseids in August, the Leonids in November and sometimes the Geminids in December. The new Camelopardalis is a bit of an unknown quantity but if the sky is clear then there’s always a great opportunity for some interesting photos.
10 Simple Tips That Will Improve Your Meteor Shower Photography
1 – Wrap Up
Yes I’m starting with a non-photographic tip because if you get this bit wrong you won’t be out there to take the photos. It’s easy to forget just how cold it gets at night so dress in what you think is going to be appropriate and then when you’ve done that, put another layer in your bag as I guarantee you will underestimate the cold, especially if you are shooting the summer Perseid shower that comes through the Northern Hemisphere every August. You might want to think about taking a pair of gloves as well.
2 – Get Away From It All
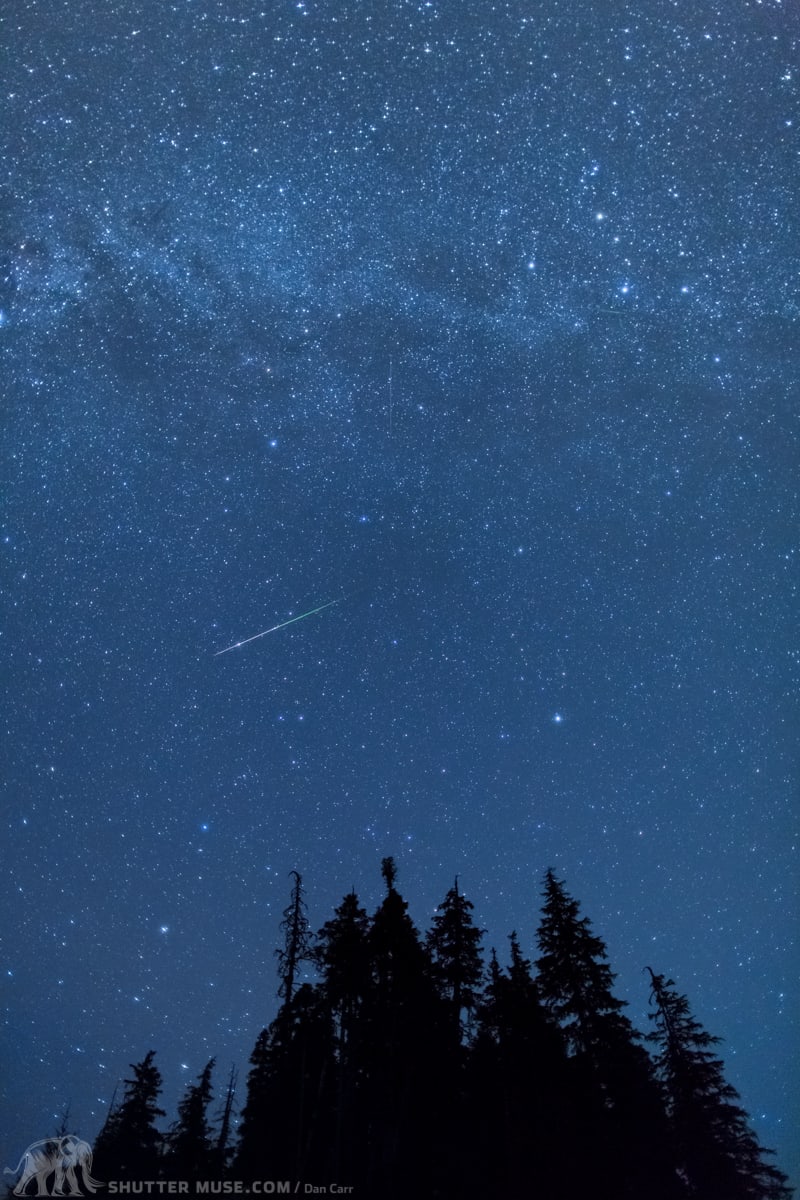
Light pollution is your number one enemy if you find yourself with a clear sky on the night of a shower. It is harder to judge with the naked eye than you think, but light pollution from even a small town can appear in your images from 30 miles away or more. Get yourself out to a secluded location if you can and point your camera in the opposite direction of civilization. If you live near the coast then you can shoot out to sea as there probably aren’t many street lamps out there. Now I know that this isn’t always possible for everyone and further down this page you’ll see an image that I took above my home town. In this instance I used a graduated neutral density filter to suppress the light from the town, using a 4×6 filter upside down in the filter holder.
3 – Foreground, Foreground, Foreground
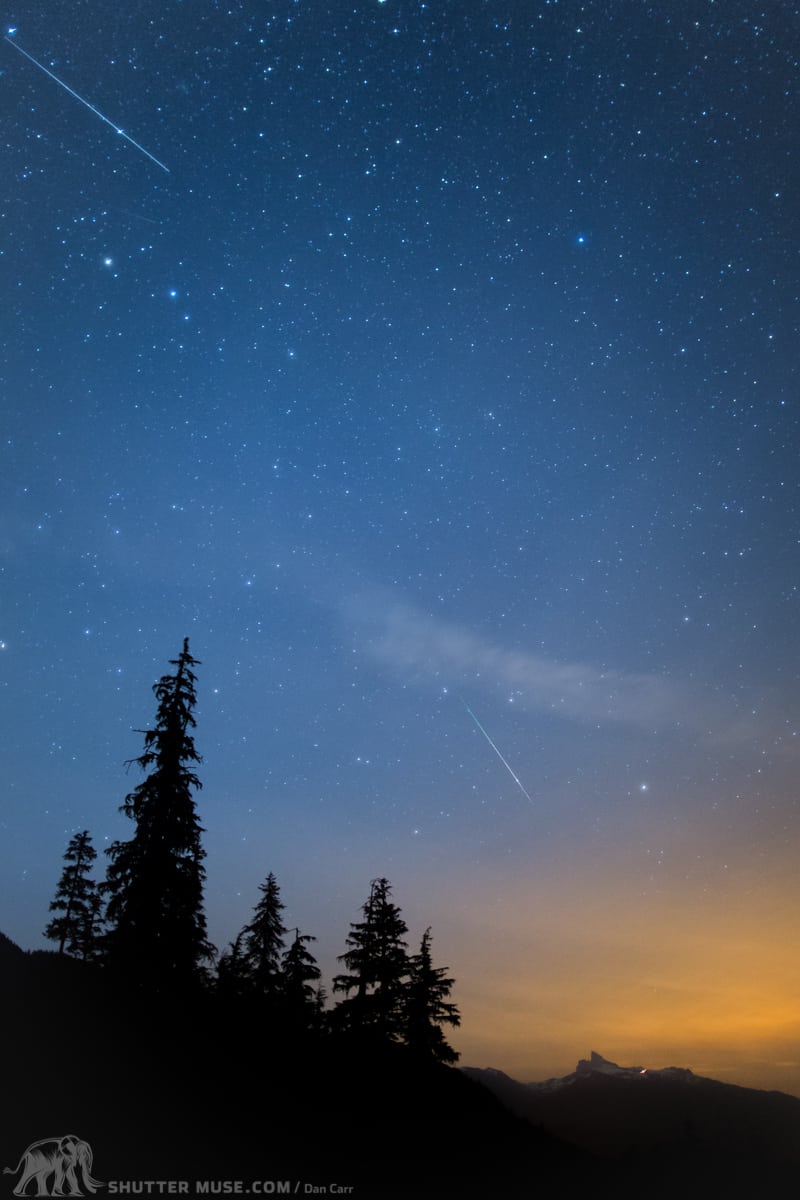
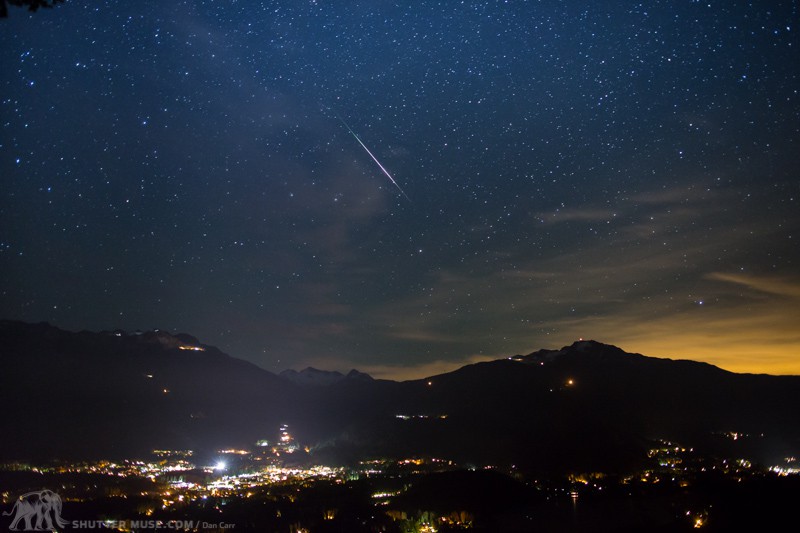
A shot of the night sky can be very beautiful but it will look much better with some interesting foreground elements to give it some scale on this planet and give you a clue as to where the image was taken, otherwise it could come from anywhere. If you have a famous natural sight near you, such as a famous mountain peak then try getting than in your image like my example at the top of the page with Black Tusk in it. Black Tusk is an extinct volcano in British Columbia and the inclusion of that makes it instantly useful for stock sales and print sales in this area.
4 -Torch Light
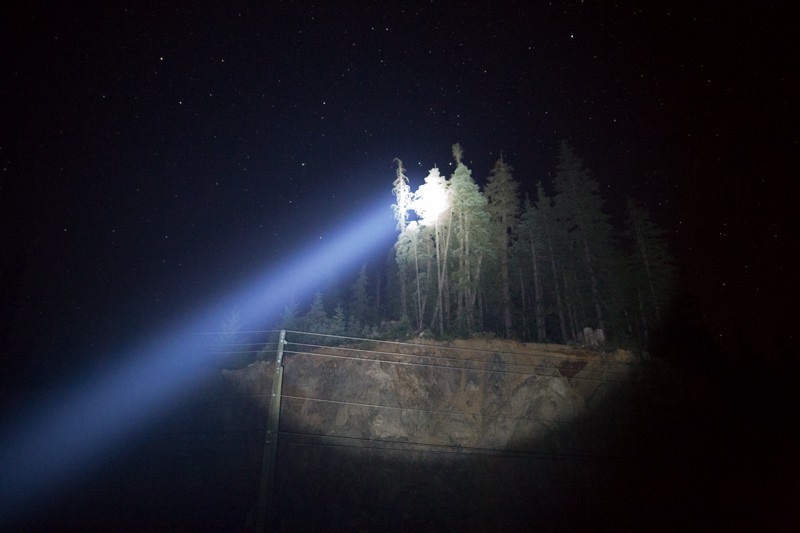
Take a high powered torch with you and use this to focus on your foreground subject. Many people suggest simply setting your lens’ focus ring to infinity but these days modern lenses focus way past infinity so that method will guarantee soft images. I prefer to focus on my foreground subject and in the dark this can be done by shining a high powered torch on your foreground and then using your cameras live view function to focus. Make sure you use the 5x or 10x zoom in feature and you’ll be able to get your focus spot on. You can also use your torch to light paint your foreground subject but be warned, to balance that with a typical night sky exposure you won’t want a bright torch for the painting so either bring two, or one with a variable power.
5 – Double Up
Good meteor showers only happen once or twice a year. Perseids in August and Leonids in November are the best but either of them could be covered by cloud or simply produce a mediocre number of shooting stars. This isn’t an exact science. You can double your success rate though by simply using two cameras! Many photographers have two cameras and a couple of tripods, or at least know someone who has a second they can borrow. With two cameras you are far more likely to come away with shots that you are pleased with and if you want to use an automated timer to trigger the cameras then two 3rd party timelapse controllers can be very easily purchased from ebay.
6 – Stop Those Stars
There are really two types of night sky photography, that in which the stars remain a point of light and that in which the stars are rendered as streaks or ‘trails’. There should be NO middle ground. Anything somewhere in between these two options and it just looks like you did either of the methods wrong! For meteor photography it is preferable to have the stars remain as points of light because this then allows the meteor’s streak of light to stand out from the rest of the sky. In order to do this your exposure time needs to be limited. To exactly what length it should be limited depends on the focal length you are using but there is a formula that can help and that is simply 600 / focal length.
In other words if you shoot with a 24mm lens (600/24=25) then you should limit your exposure to less than 25 seconds in order for the stars to remain as point light sources. In practice I prefer to go even a little less and with my 24mm f1.4 lens, I stick to 15 second exposures.
7 – Expose It
So you know what lens you are shooting with and you’ve used the formula to figure out what your shutter speed should be. Now you have to balance ISO and aperture to get the correct exposure. Experience tells me that at 15 seconds I’m going to need about f1.6 and iso3200 to get in the right ballpark. I’m using Canon’s excellent 24mm f1.4 lens so I have that ability to shoot at f1.6 and I prefer to do that as vignetting is reduced at that point. If you only have an f2.8 lens though you are going to have to get your ISO up pretty darned high and at that point I’d probably go to a 20 second exposure to help in that area. Using a full frame camera will keep your noise down though and using in-camera long exposure noise reduction will also be a benefit.
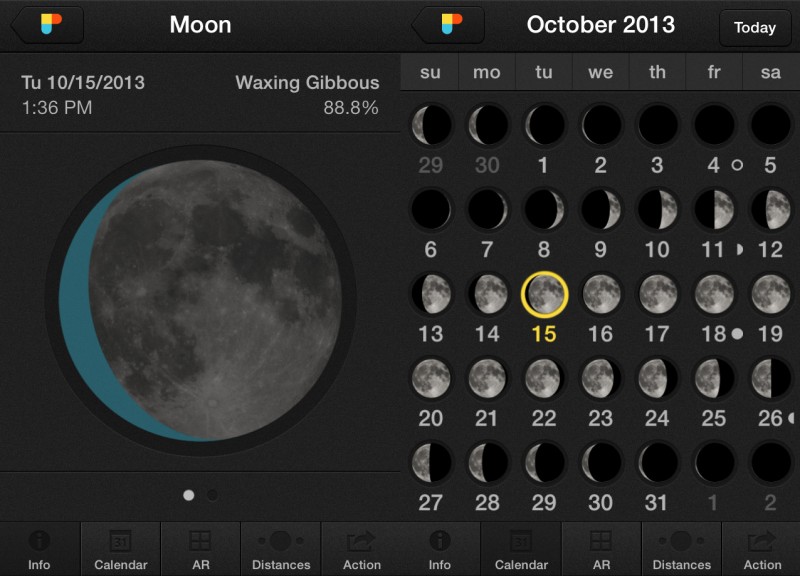
8 – Don’t Get Mooned
You’re going to need to know what time the moon will rise and where. If it’s rising early then aim your camera away from where it will rise as moonlight is even brighter than a lot of light pollution and it will soon make it impossible to see stars and meteors. If the moon is set to rise early, and big, then don’t waste time at night. Get out there and get shooting. If you are lucky and the moon is a mere crescent and set to rise late then you will have more time and can afford to wait until midnight when showers of meteors are often strongest.
The best way to check the moon’s cycle is to use an app like Photopills for iOS or The Photographers Ephemeris on Android.
9 – Remote Control

You know that little cable shutter release that you either hardly ever use or only get out for landscape shots ? Now is the time to dig it out from hibernation. If you manually set your exposure on camera then all you need do is engage the shutter release and lock the button down using the sliding lock. The camera will then sit there and make continual 15 second (or whatever you set) exposures one after another meaning that you’ll never miss the meteor as long as it falls into your lens’ filed of view. Then you can sit back in your camp chair and fix your eyes to the sky to take in natures magic. When you see a meteor stray into your camera’s vision you can get up and do a little dance of joy to warm yourself up.
10 – Know The Night Sky
Whether you have an Android phone or an iPhone there are plenty of augmented reality night sky apps that will show you exactly what is up there just by aiming it at a particular piece of sky. This is important for finding the center of the meteor shower which is different for each one, but the information is readily available on astronomy websites close to the events. It also lets you figure out where the Milky Way is or other elements that you might want to include within your image. For just a couple of dollars you can get all this figured out in a matter of seconds.