Peak Design are the undisputed kings of Kickstarter campaigns, having raised over $20million launching new products in the past few years. Initially they were known for their Camera Capture Clip, but the company quickly expanded their lineup with a series of camera straps before branching out further into camera bags of all shapes and sizes. Now the expansion continues with the launch the Peak Design Travel Line, which kicks things off with the 45L Travel Backpack and a series of travel and tech-friendly accessories.
The Kickstarter campaign for this bag raised over $5million and it is now available on their website here.
Now onto the review…
I was lucky enough to be sent a pre-production sample of the 45L Travel Backpack to test out, along with a pile of the new Travel Line accessories. In this review we will take a deep dive into everything these new products have to offer, as well as contemplating this bag’s functionality from both the perspective of a photographer, and a traveller. Even though these two things often go hand-in-hand, there hasn’t ever been a photography company that has really tried to make a product to perfectly suit the needs of both.
Whilst the new Travel Line is clearly aimed at a broader market than their usual photography accessories, Peak Design haven’t forgotten their roots and existing, loyal customer base. Using a series of three different sized Camera Cubes, the 45L Travel Backpack can be configured purely as a photography pack, or one that splits carrying capacity between cameras and other travel gear.
Uniquely amongst any camera bag that I’ve ever come across, it also allows access to the bag’s central compartment from zippered openings on either side of the bag, as well as both the front and back panel of the bag. On top of this it’ll hold a 15” laptop, adjust capacity from 30-45L, keep thieves at bay with unique security features and organize your smaller items in more than 10 additional pockets.
On paper this might be the most feature-packed bag I have ever come across, so I was excited to put it to the test and create this giant review to share with all of you!
45L Travel Backpack Features and Design
Im going to kick things off by talking about the backpack itself, and then further down the page there is a detailed discussion of the Camera Cubes and various other accessories.
Pack access redefined
As I mentioned in the introduction, you can get access to the contents of the Travel Backpack from the front, the back or either of the sides. At most I have seen a bag offer two of these options, but all four is extremely innovative!
I personally love to use back panel access packs because it means that when you lie the bag on the ground to get at all your gear, you aren’t putting the back panel and harness in the dirt. Side access does have merits though because it allows you to swing the bag off your shoulder and it doesn’t need to touch the ground at all. You’ll be limited as to exactly which gear you can reach through the side door, but it’s certainly a nice option to have for fast access to your favourite camera and lens combination.
Having side doors on both sides of the bag makes it comfortable for both left-handed and right-handed people to use, and also doubles the amount of gear that you can access through these smaller side doors. For example on one side you might have a body attached to a lens for regular use, and on the other side you might line up a pair of additional lenses behind the door.
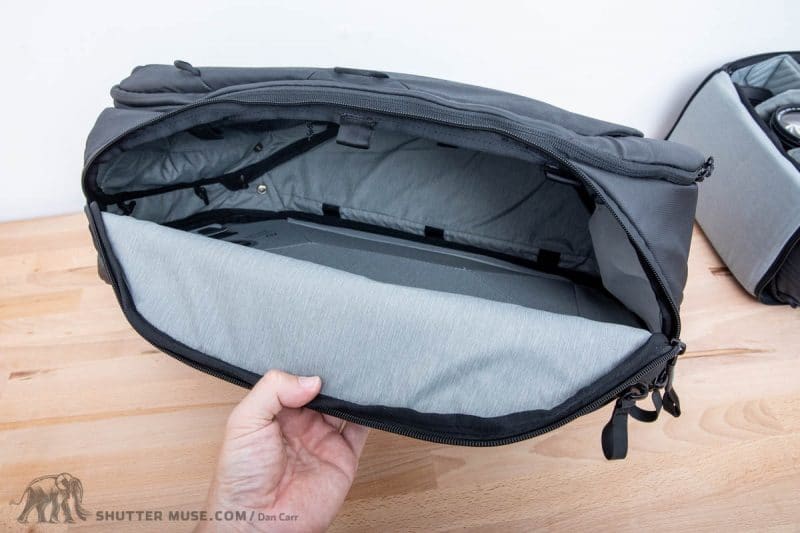
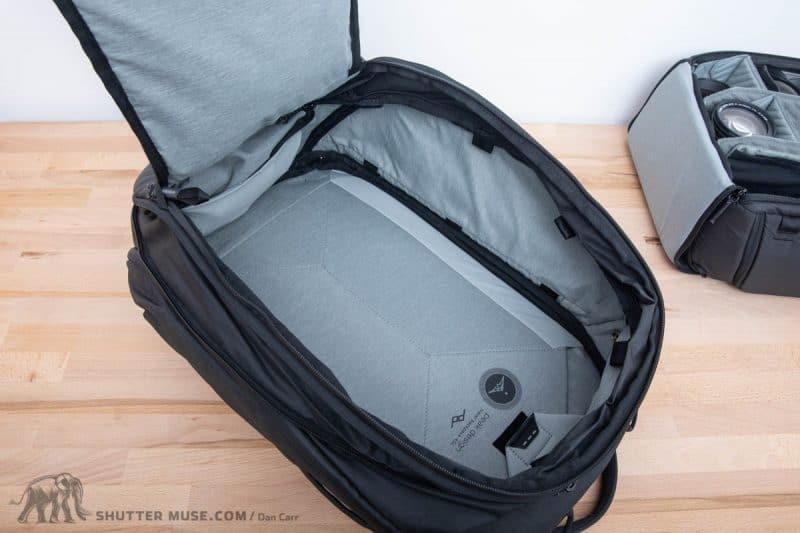
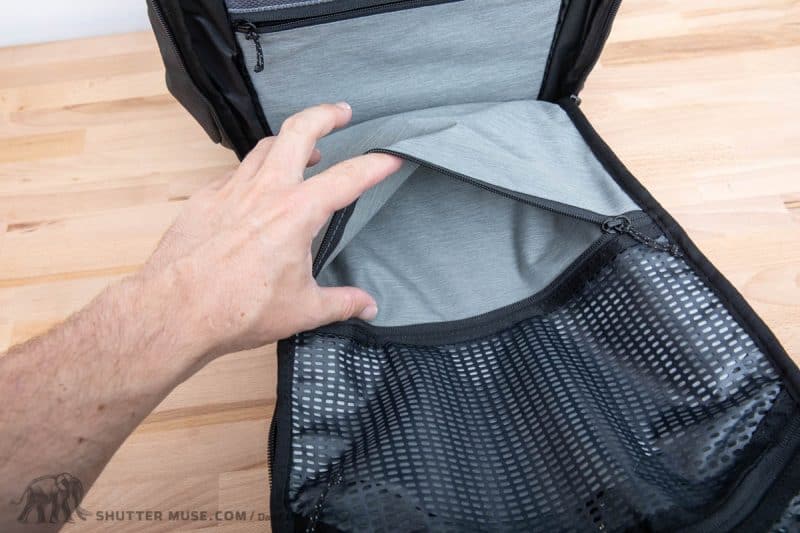
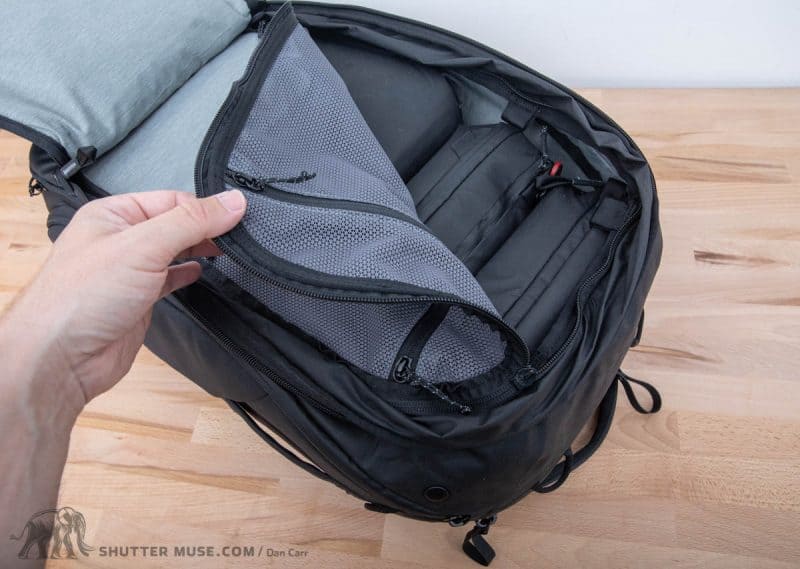
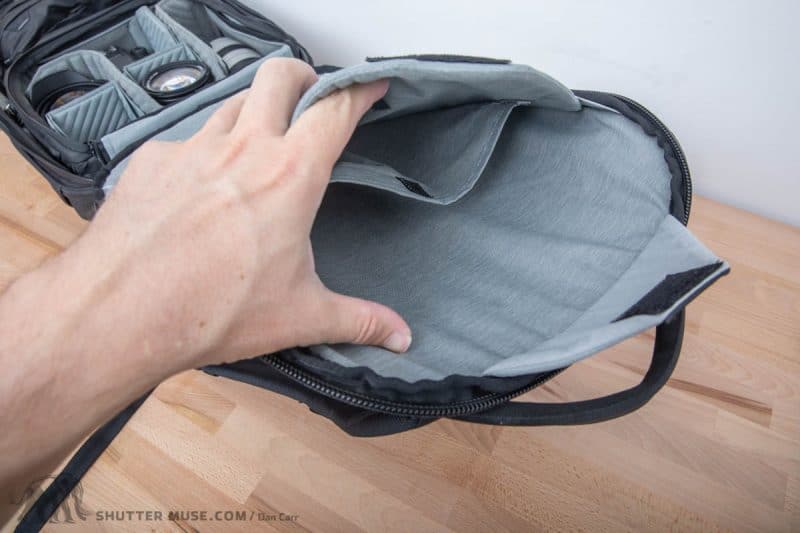
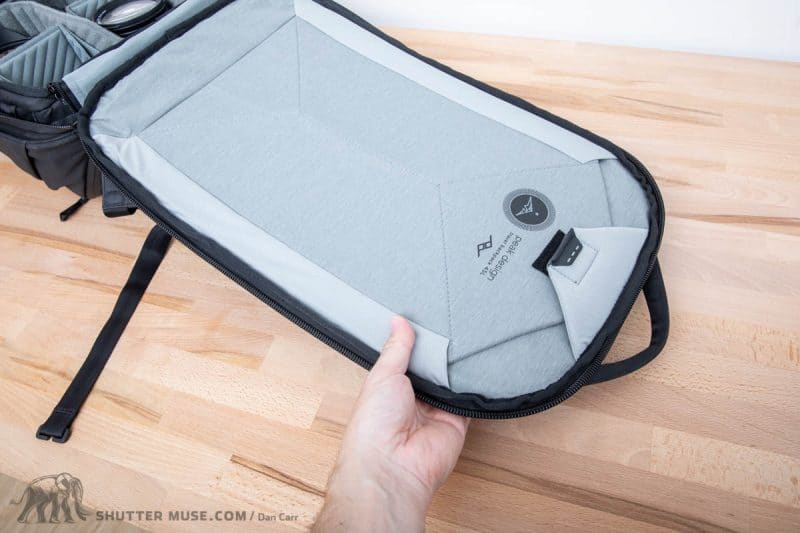
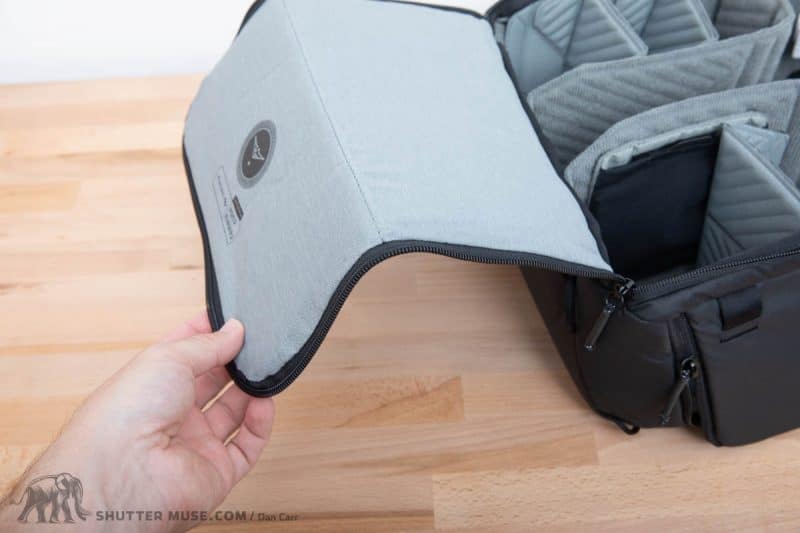
The front of the bag has a large zippered organization section full of smaller zippered pockets. It acts like a divider to the main section of the bag, but for the final way to access that main compartment you can unzip the organization panel and fold it away into pocket at the base of the bag. Now you have full access your gear from the front of the bag if you don’t like using the back panel or the side hatches. If you’re using Camera Cubes, these can be flipped around and secured to face the front of the bag instead of the back. Total camera access versatility!
Adjustable volume
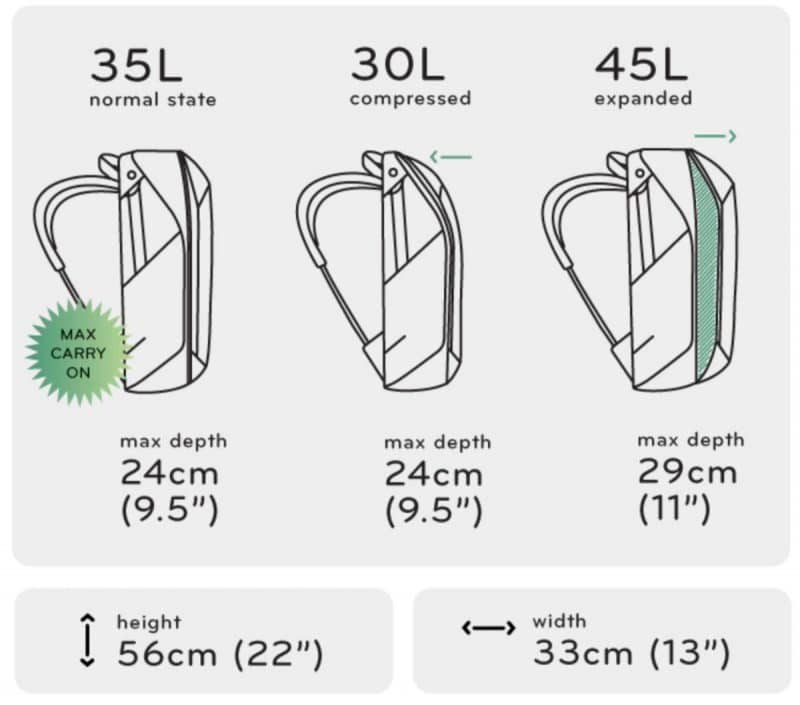
The 45L Travel Backpack has three available volumes to suit travel and daily use: 30L, 35L and 45L. The standard mode is 35L and the dimensions at this volume should fit most international carry-on regulations. If there’s a slight difference, the softness of the bag and lack of a framed back panel should allow you to squeeze it into the dreaded carry-on cage at the gate or check-in counter.
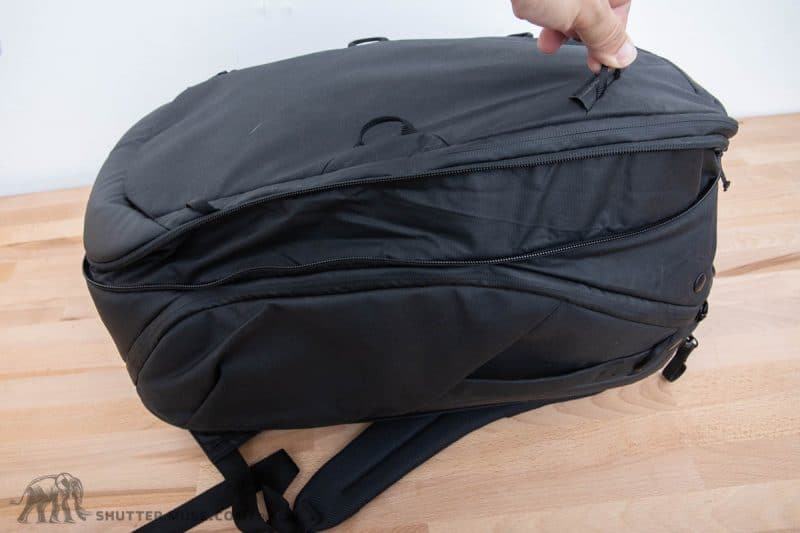
If you need a little extra volume, a pair of zippers on the front of the bag adds 10 litres of space to that front organizational section and really transforms it into a place where you can actually pack things like shoes, a towel or a packing cube full of shirts if you’re traveling. The transformation is quick, and the added volume is quite apparent.
If you’re primarily using the main compartment for your camera gear, outdoor photographers of all types will appreciate this added 10L of front volume for extra warmth layers, rain gear, food, other outdoor gear and supplies. Living in a mountain resort town as I do myself (Whistler, BC), these kinds of loads are my daily carry and the Travel Backpack took them like a champ.
It’s worth underlining that when you deploy that expansion section, you’re adding volume to the front of the bag in that organizational section, and not adding it to the bag’s central compartment where the Camera Cubes go. You could fold away that organizational panel entirely though, and then the front of the bag combines with the main section of the bag to create one big 45L duffle-style pack.
I like this a lot when you’re just packing for a weekend break that doesn’t involve air travel, because you can be a bit less frugal with your packing, and also just stuff things in without necessarily worrying about packing cubes and perfect folding technique. Sometimes a big duffle volume is just more practical when you’re in a hurry, and you still have the option of accessing that now combined volume from either the front or the back of the bag. You could even tuck the backpack straps away and attach a Peak Design Slide shoulder strap to the bag for the full duffle experience.
The third volume option, 30L, is achieved by quickly snapping together a pair of buttons to collapse the top of the bag. Since you’re only adjusting the top of the bag, not only does it shrink the internal volume, but it also tapers the top of the bag and gives it a noticeably different shape. From a travel perspective it might be useful if you’re trying to get the bag onto a smaller commuter aircraft without gate-checking it. The adjustment streamlines the bag enough that you could probably convince someone it’ll slide under the seat in front of you, instead of needing an overhead locker.
It’s a clever idea, and even though the 5L change of volume might seem slight on paper, the shape change of the bag somehow makes that change in volume appear to be much more. I can’t ever see myself shrinking the volume simply because I’m not using all that volume of the bag, but I can definitely see myself doing it when I’m trying to make my bag look small and less conspicuous.
Obviously one thing to consider is that shrinking to 30L mode does have an effect on the number of cubes you can fit into the bag’s main section. You’re not just compressing the front pocket of the bag, you’re also compressing that main volume so you’ll only be able to use a medium-sized packing cube, or a small or medium Camera Cube.
I was initially a bit skeptical about the usefulness of the adjustable volumes, but they’e actually very cleverly designed adjustments and I can definitely see people making use of them on a regular basis.
Internal organization
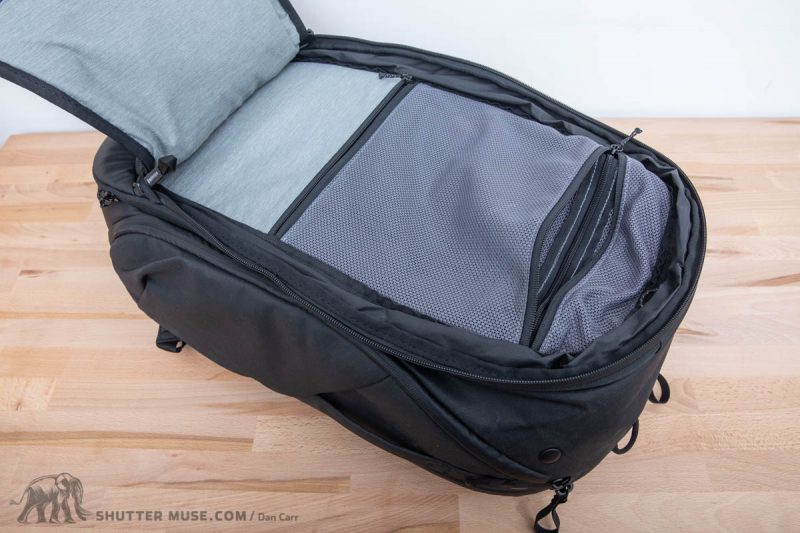
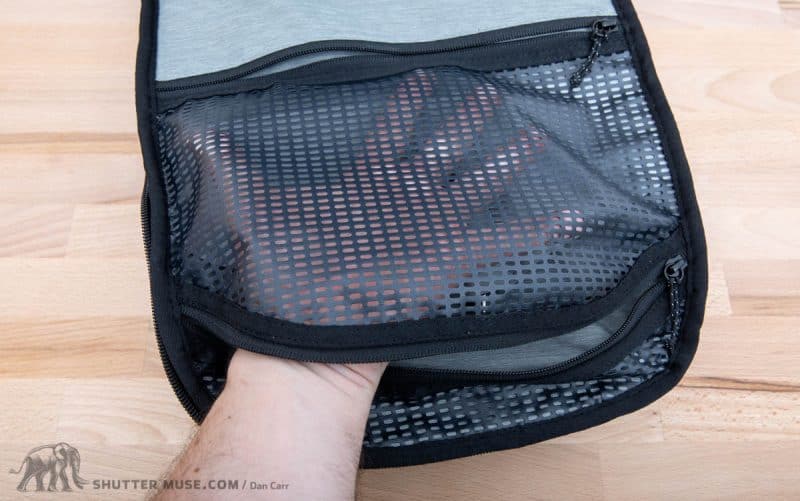
The front section of the bag has four large zippered pockets, two of which have double-sided zippers so that they can be accessed from the front of the bag, and from inside the main compartment. The uppermost internal pocket in the front organizer also has several additional slots for pens, notebooks, business cards and other miscellaneous small items.
Noticeably absent from the bag is a key clip of any kind. I personally use such clips all the time to secure SD card wallets, and indeed my house and car keys when I’m traveling away from home. Stranger still is the fact that a clip is included on other bags like the Everyday Messenger, and even sold as a separate accessory in the Peak Design store. I think they should have included this on the bag somewhere and I’ll be purchasing one of these spares from the store to try and find a good place to attach it.
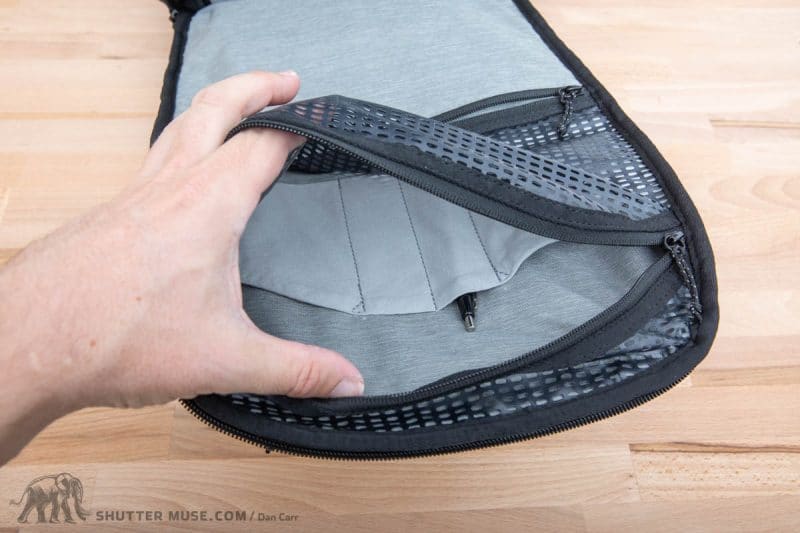
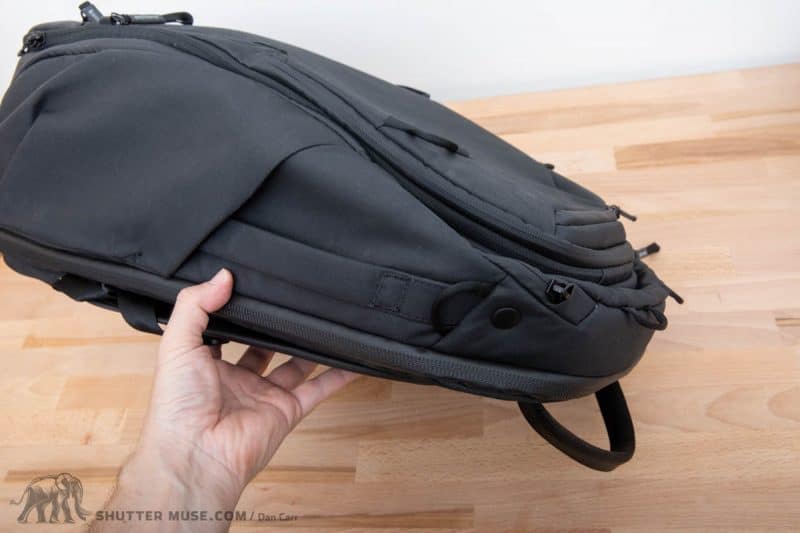
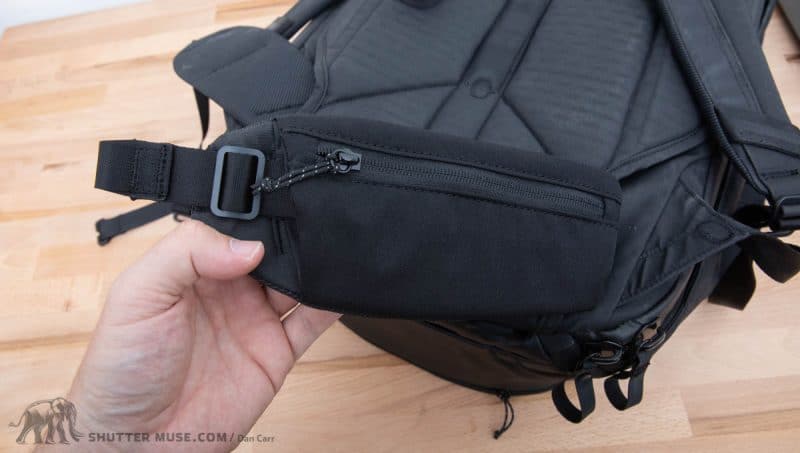
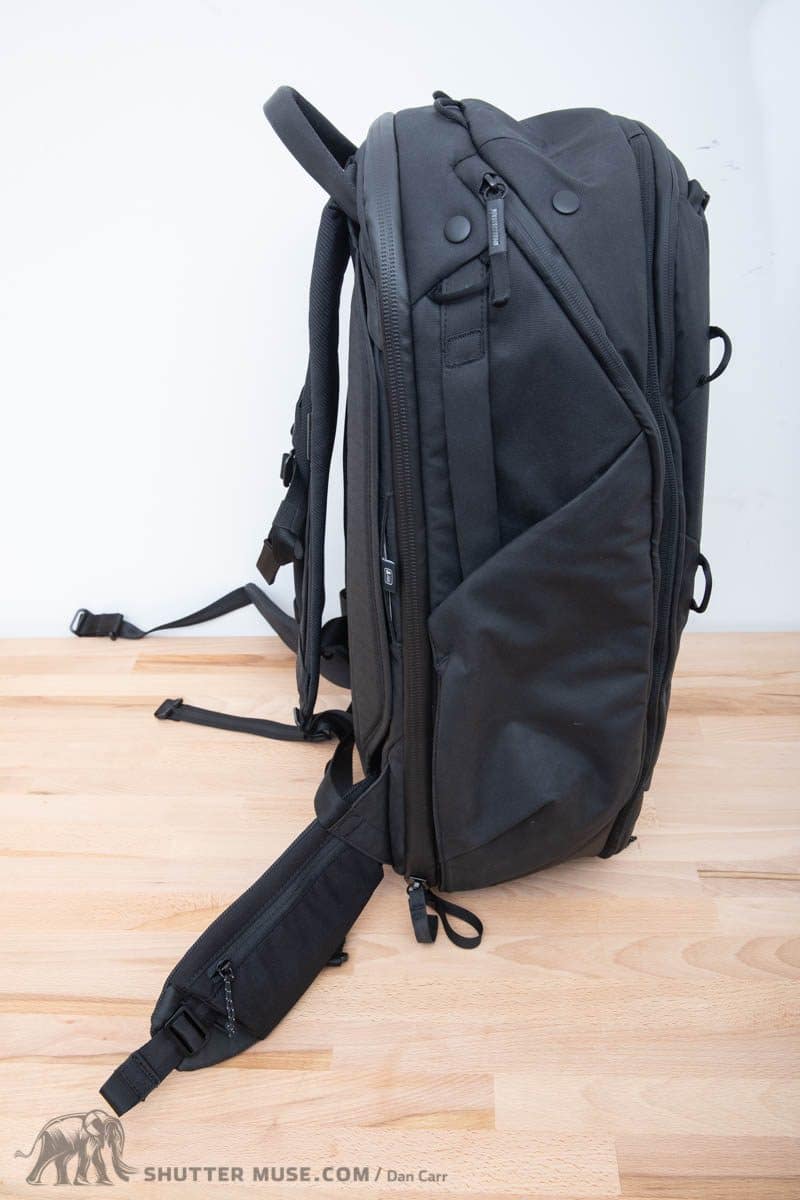
Outside of the main compartment and the pockets in the organizer section on the front, you’ll find three more zippered pockets, but only if you’re looking very hard! The small one on the waist belt is relatively obvious, but unless you know they are there, it would be impossible to spot the hidden zippered pockets that are on either size of the bag.
At first I thought these zippers accessed the same elasticated pocket that you might put your water bottle or tripod in, but further investigation showed me that these are actually separate pockets, and there’s actually a good amount of useable space in them as long as you don’t already have something hard or large in the elasticated pocket. You couldn’t, for example, expect to put a 1 litre water bottle into the elastic pocket, and then still hope to slide your cell phone easily into the secret zippered pocket on the same side of the bag. They may be separated, but you’re essentially still using the same area on the side of the bag.
I experimented with putting various things into these pockets and decided that they work best with softer items like a camera rain cover, a pair of gloves or a winter hat. With those kinds of items in there I was still able to make use of the elasticated side pocket.
Security features
The fact that I’m even dedicating a sub-section to security features is a new one on me, but this backpack has a couple of neat tricks up its sleeves to help deter pickpockets.
For good reason, back panel access camera bags are generally taken to be the safest kind of camera bag in a crowd, as long as you’re wearing the bag on your back. All the zippers on the bag have space for padlocks and cable locks, but the designers also thought hard about protecting the other points of access.
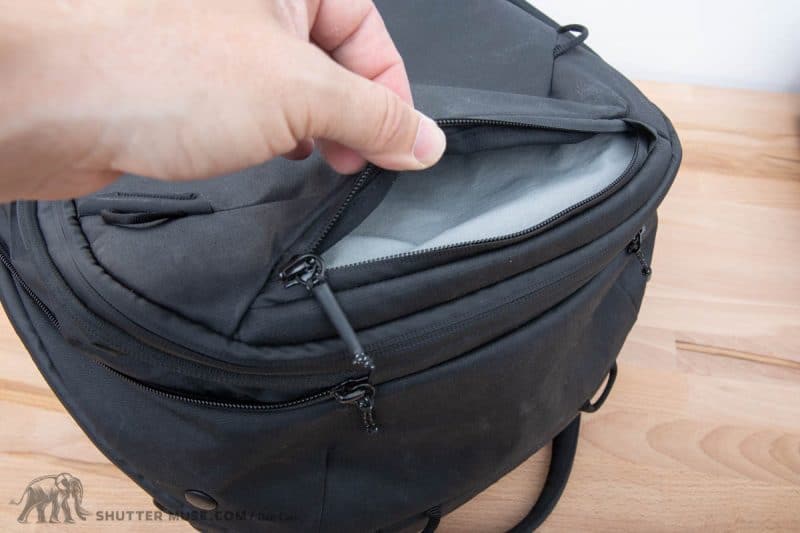
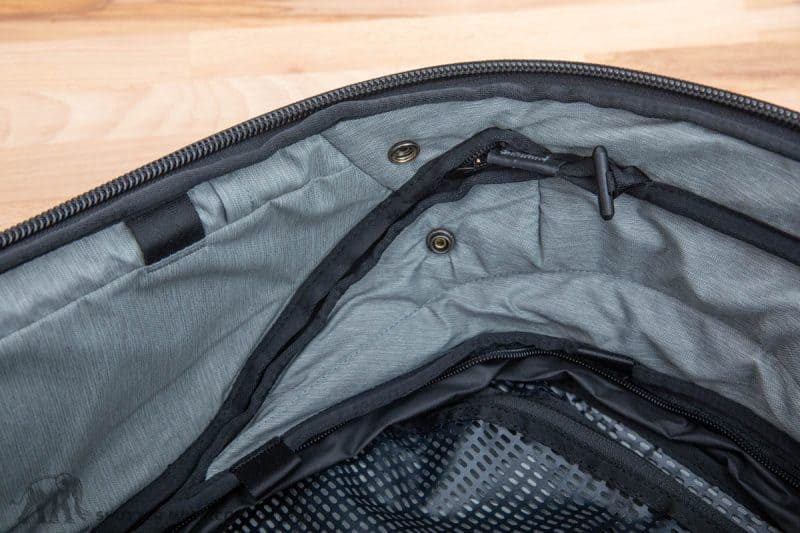
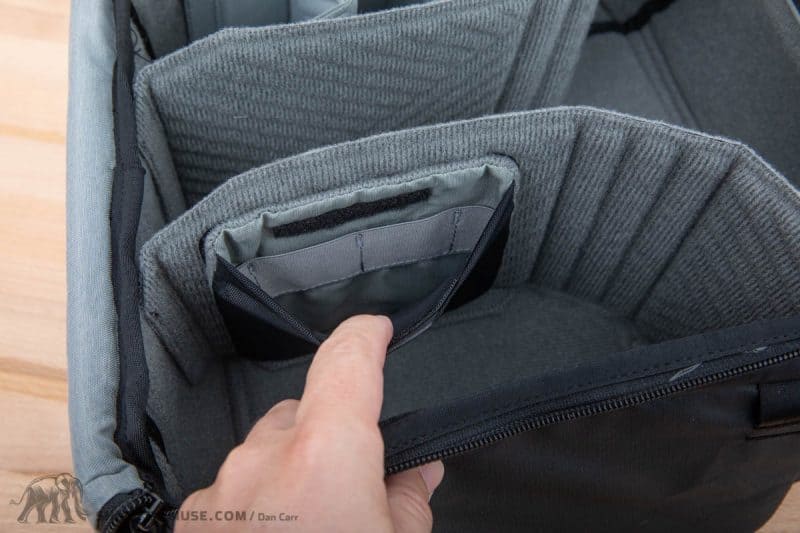
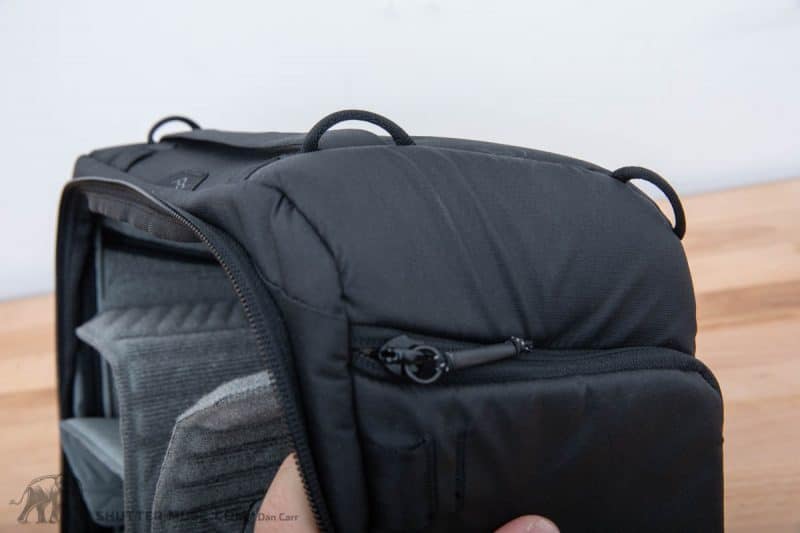
Since the Travel Backpack also has side access doors, they came up with an ingenious way to lock these closed without needing a padlock. Simply pass the zipper pulls through the top of the zip into the main compartment, and in there you’ll find a toggle to poke through the zipper loop. Once that’s in place you can’t open the side zipper of the bag from the outside at all, so your camera gear is safe from casual thieves in crowded public places.
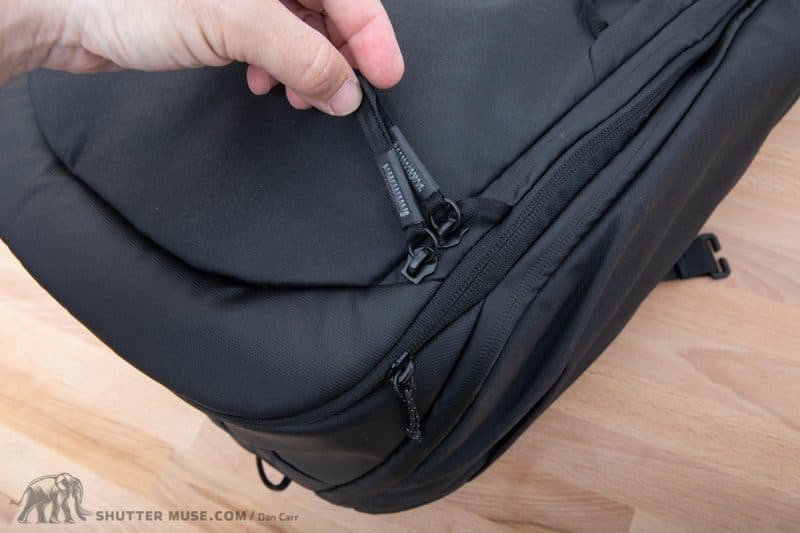
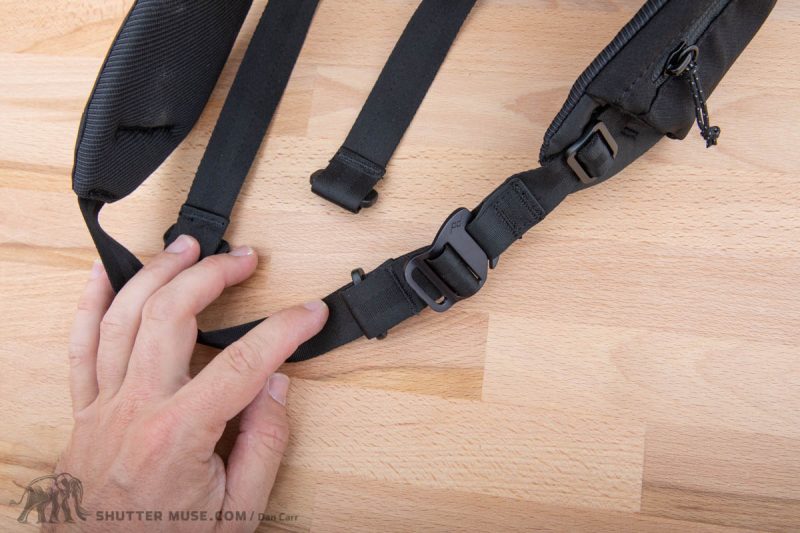
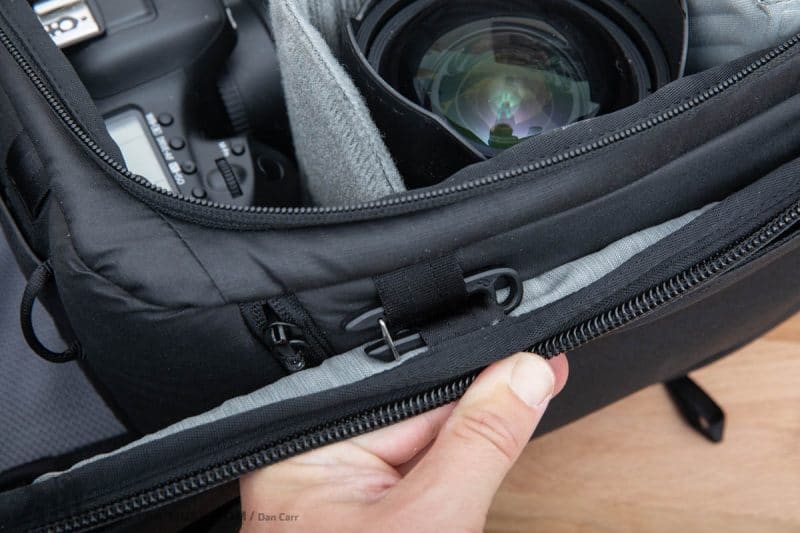
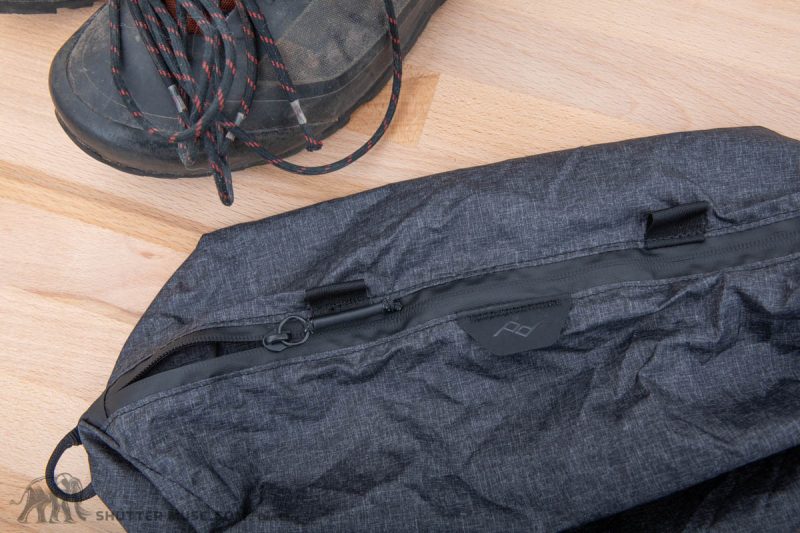
The next problem they had to solve was a way to deter the same kinds of casual thieves from accessing the front of the bag. Of course you could use a padlock here as well, but they also included a simple nylon loop to pass the zippers through at the end of the zipper track. Once the zippers are through this loop, it prevents someone from quickly and silently opening the zipper because it gets immediately blocked by the nylon loop. The only way to open it (without a sharp knife), is to pass the zippers back though the tight nylon loop.
Whilst it’s not hard to do yourself, with the bag on your lap, it would be nearly impossible for someone to discreetly do this in a crowd while you’re wearing the bag and moving around. In fact I daresay they would be so confused by it in the first place when the zipper jams right away, that they wouldn’t even bother trying to figure out what was going on. You’re never going to prevent a determined thief with tools, time or a sharp knife, so it’s only these kinds of opportunistic thieves that it’s worth trying to beat.
Golf clap to whoever designed this elegant, simple deterrent. It’s genius.
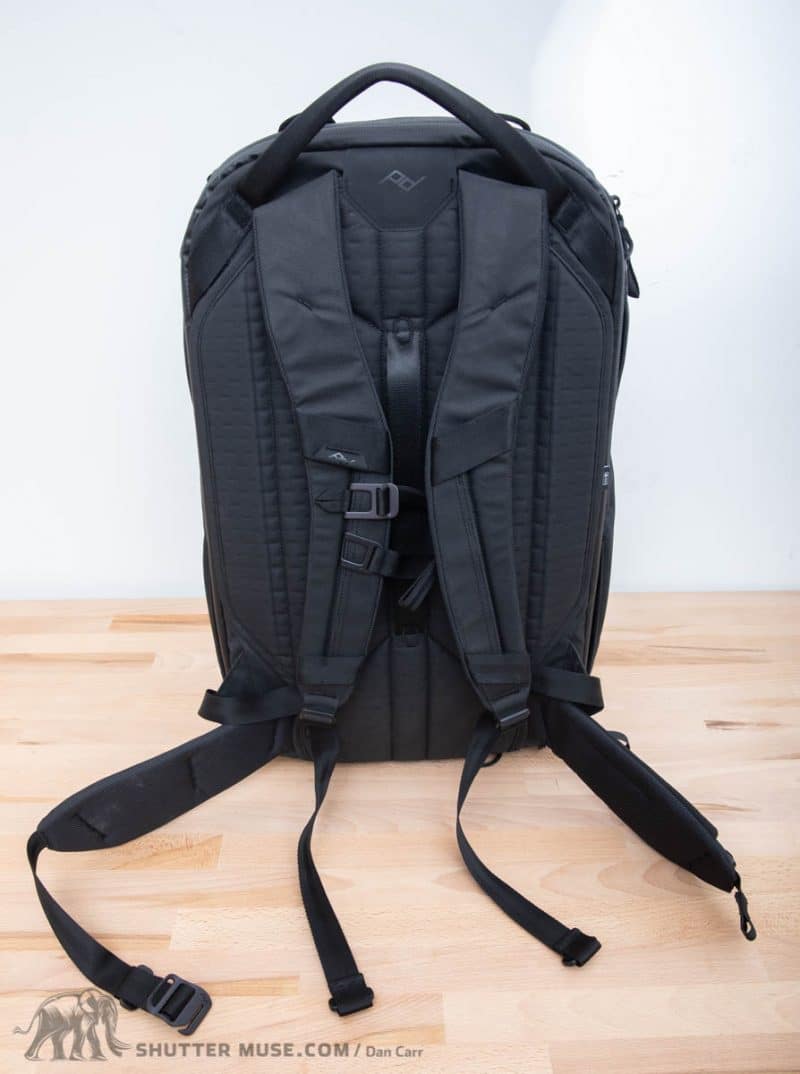
Carry system and comfort
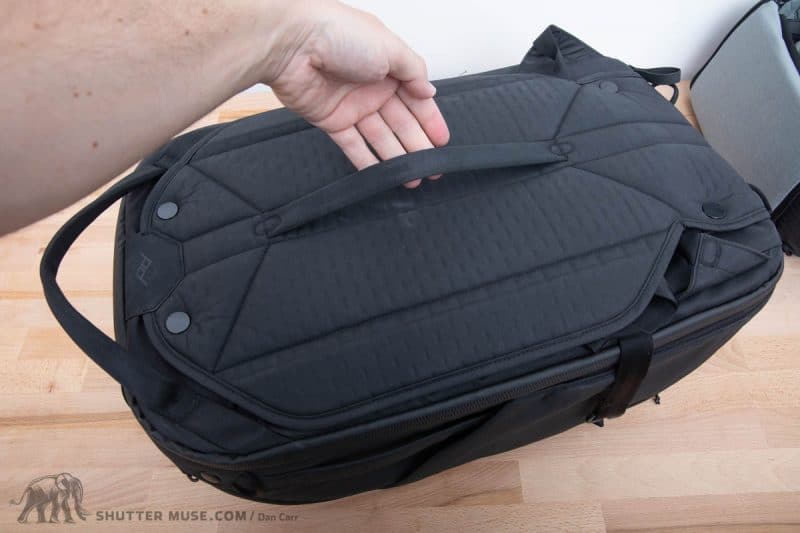
Carry handles are available on every edge of the bag, and even the centre of the back panel which is something I’ve never seen before. This makes the bag easy to pick up and load into the overhead locker on a plane, or simply onto the top shelf of your gear closet at home.
It also allows you to come up with many variations on a casual style of airport-specific carry that I like to call “this bag definitely isn’t as heavy as you think it is.” Seasoned traveling photographers, I know you know what I’m talking about! For about 20ft whilst passing the gate agent, I can go into a zen-like state and carry 40lbs of camera gear with just the tips of two fingers. 😉
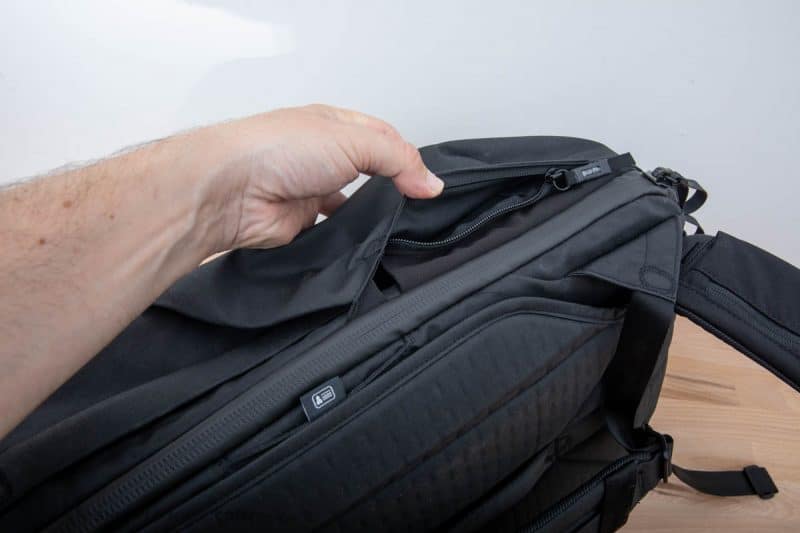
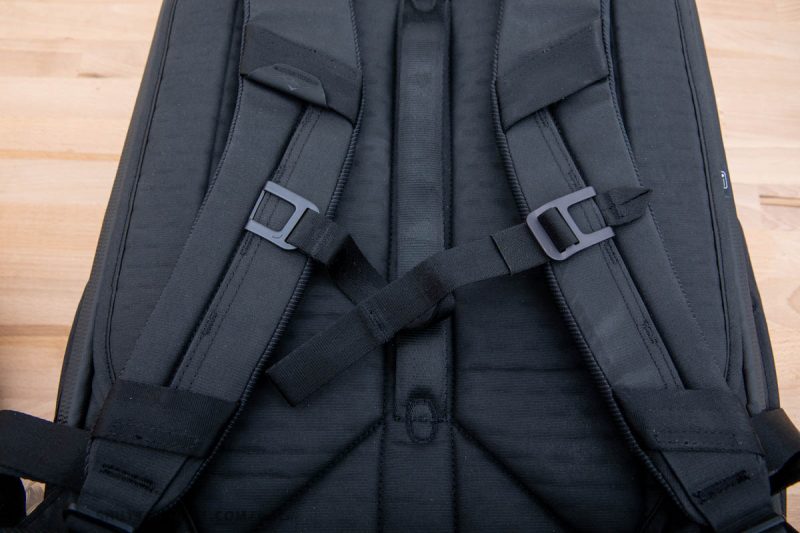
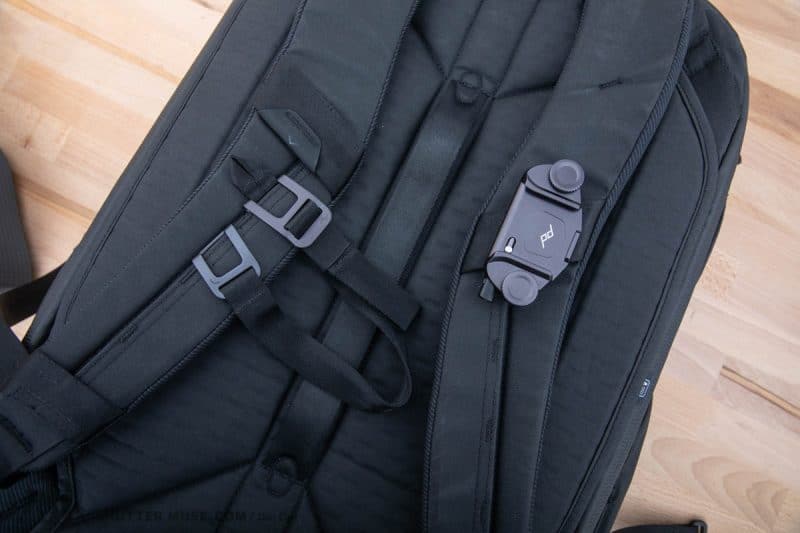
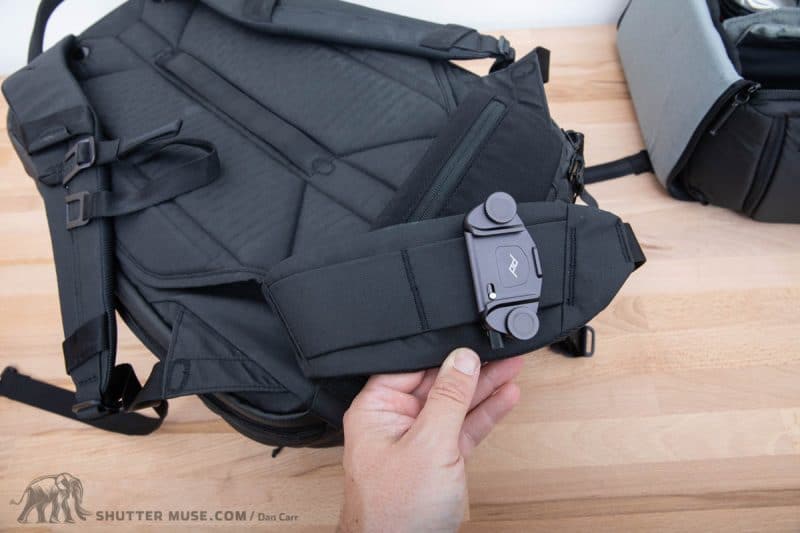
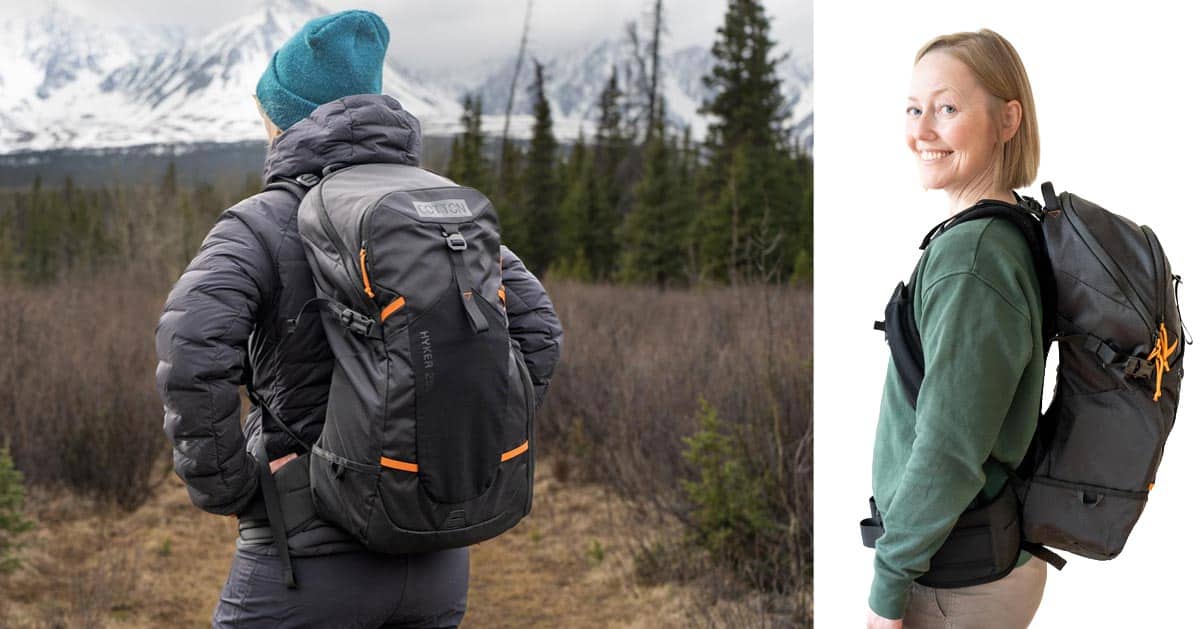
On the back of the bag you’ve got a nice chunky set of padded shoulder straps that are a huge improvement on the ones from the Everyday Backpack. When you don’t need the straps they can be quickly stowed behind a magnetized flap on the back of the bag, and whilst this makes it easier to fit into tight spaces like that overhead locker, it might again prove more useful in simply making the bag look smaller and lighter than it actually is while you’re moving amongst the people that care about those kinds of things.
I have a few other bags that allow you to stow the backpack straps for travel, but all these other bags use hook and loop to secure them. They work, but it’s a fiddly process to implement and it requires two hands to get things into the right place. The magnetic flap on the 45L Travel Backpack is much easier to work though, and it’s entirely possible to stow your shoulder straps away with one hand whilst walking down the gangway to board your plane. Now you get to walk down the aisle of the plane and quickly stow your bag without getting dangling straps caught on chairs, people and anxiety dogs. It’s the perfect implementation of this kind of feature.
The downside to the carry system is the small size of the waist belt padding, which is so often where camera bag manufacturers drop the ball. A waist belt isn’t just there to stabilize your load, it should also be there to shift weight onto your hips and take it off your shoulders. To do this effectively you need hip padding that is of a reasonable size, and for some reason this is something that is often neglected in bags outside of the hiking market. Now, I’ll concede that it was a tradeoff between being able to stow the carry system behind the back panel for simple travel, and offering that additional carry comfort, but it now means that you have to consider what is important from your point of view. I’ve certainly seen larger hip pads on the waist belts of 20L backpacks, let alone a 45L pack like this one that has the potential to carry 50lbs of camera gear.
By comparison, another outdoor photography specific camera pack that I’m currently testing has a hip belt that is not only more than three times as thickly padded, it’s also more than twice as wide and wraps twice as far around my hips. It allows me to load that bag to it’s absolute maximum and climb mountains with it all day long. The Travel Backpack on the other hand, simply can’t compete in the comfort stakes with long distances and super heavy loads. Hiking with a heavy load would be fine for a couple of hours, but after that you’d really start to feel the load on your shoulders without that adequate way to transfer load to your hips.
Of course I do realize that the majority of times this bag is used, it won’t be carried non-stop for several hours on someone’s back. In fact many of these bags won’t ever be used like that, because travel is generally a much more of a start-stop affair, and the majority of the bag’s features are designed around that. The only reason that I really bring this up is because the rugged materials and bomb-proof design of these bags is probably going to inspire a lot of people to drag them out into the wild, perhaps a little further than their designers intended them to be.
Also note that I’m not saying you can’t carry this bag as an outdoor photo pack for occasional day-long hikes, just that it would have been more comfortable to do so if it had a better waist belt. Only you can weigh up your own list of considerations to determine how important this factor will be to you, compared to the benefits that are offered by the better portability and lighter weight. I’d guess this question won’t trouble many people since waist belts are rarely used at all, but for those that are considering heavy loads and long hikes, there might be better options for you.
The question of tripod carry
Two attachment straps are provided with each backpack and these can be used to lash a tripod to the front of the pack, or into one of the side pockets. The system will work fine for small and medium-sized tripods, but falls short when it comes to large tripods because the single side strap means you are forced to use the elastic pocket to support the legs. My pre-production bag actually didn’t come with these straps, but I substituted in some other similar straps from a different bag and used the same attachment points for a quick test.
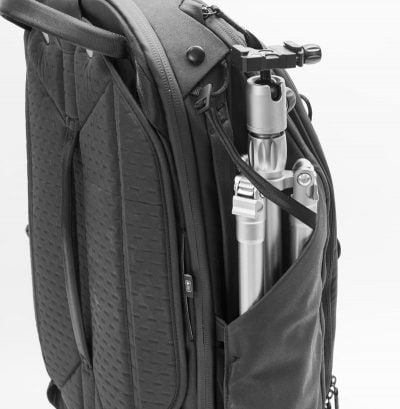
With the tripod feet in the side pocket, if you have a very tall tripod with a big heavy ball head it extends high above your head and feels unbalanced whilst walking. With such a large tripod it’s much better to carry the weight lower down by utilizing an attachment method that keeps the legs extended below the bottom of the bag.
A popular option with many manufacturers is a so-called tripod cup, which flips down on the front of many backpacks to hold the tripod feet. These tend to be on the front of the bag, though, and personally I prefer mounting a large tripod on the side so that it keeps the weight closer to my centre of gravity and doesn’t drag me backwards. On the Travel Backpack, your only side-mount tripod option is to use elasticated pocket as I described, because there is only a strap attachment point at the top. If you hang the tripod on that strap, with the feet out of the pocket and below the bag, there’s no second strap attachment point to stabilize the tripod while you move.
For most people this will be a non-issue. It’s extremely rare for me to come across beginners and enthusiast photographers who actually have what I would consider to be a large tripod. For pro landscape photographers who often do have large tripod setups, this deficiency is definitely one of the bag’s weaknesses.
Peak Design Camera Cubes
There are several other accessories for this bag which are detailed further down the page, but since this is primarily a photography website we’re going to take a really close look at these.
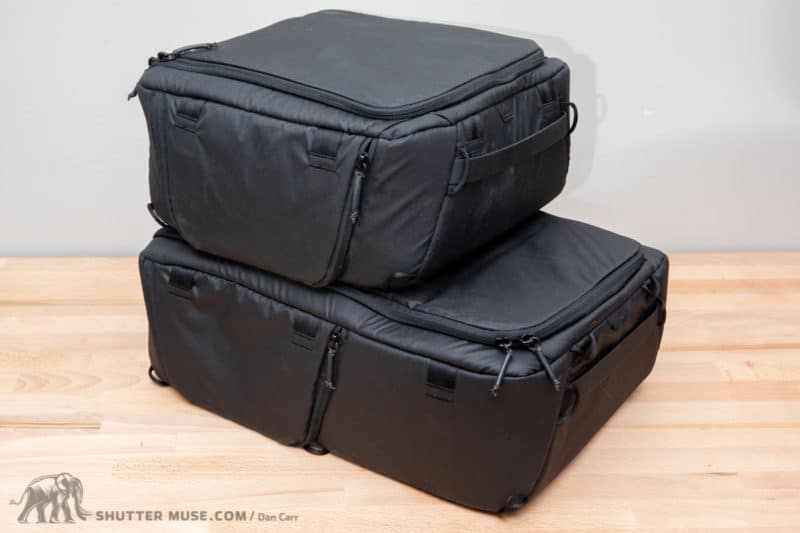
The Peak Design Camera Cubes are available in three different sizes: Small, medium and large. For my purposes (and probably most people) the small cube is just too small, so I concentrated on looking at the medium and the large cubes.

When considering which Camera Cube is right for you, you’ll need to think about how much camera gear you want to protect, and also how much other gear you want to be able to carry in the bag. The Camera Cube sizes do not match the packing cube sizes, so pay close attention to the photos in this section when making your decisions.
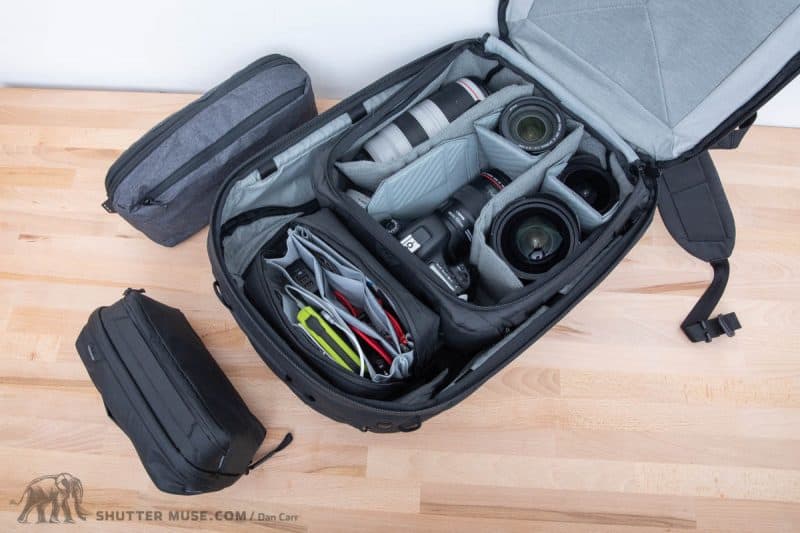
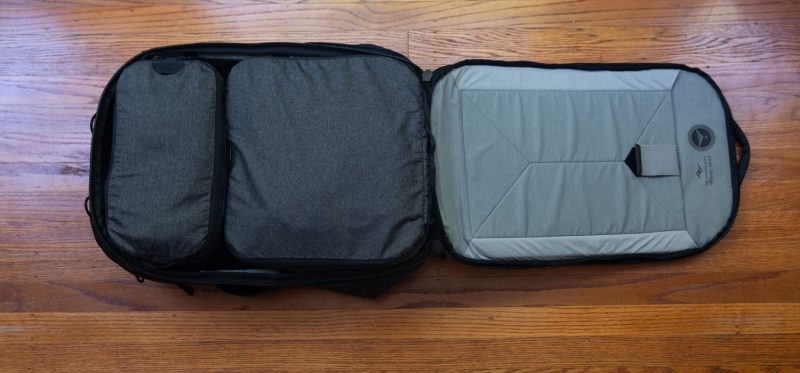
One thing that caught me by surprise, in a good way, is that even the large Camera Cube doesn’t actually fill the entire volume of the bag’s main section. With the large Cube in place, there’s still room at the top of the bag to slot in the Peak Design Tech Pouch. This Tech Pouch will be detailed further down the page, but for now jut trust me that this is great forethought from the design team, because photographers will definitely love the Tech Pouch and that’s really the only place in the bag that it would fit.
Camera Cube Features
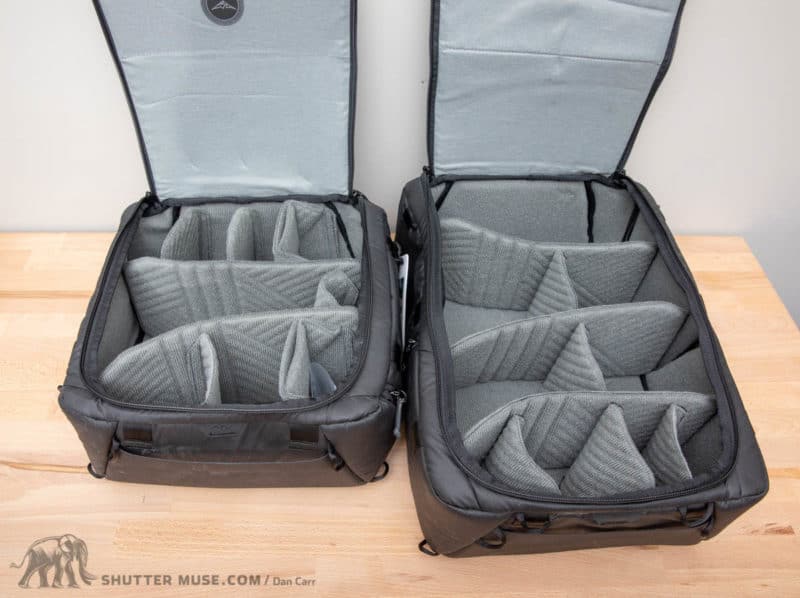
The dividers in the Camera Cubes are similar in style to those that were launched with the updated V2 Everyday Messenger Bag, in that they offer a few more origami options than Peak Design’s older dividers. This makes it easy to create a shelf-style divider in each lens section when you want to stack multiple smaller lenses or accessories on top of each other. It’s pretty rare to see anyone try to innovate at all when it comes to divider design, so the flexible nature of these is awesome. I think the photos of these speak for themselves really, there isn’t a better set of dividers on the camera bag market today. Simple as that.

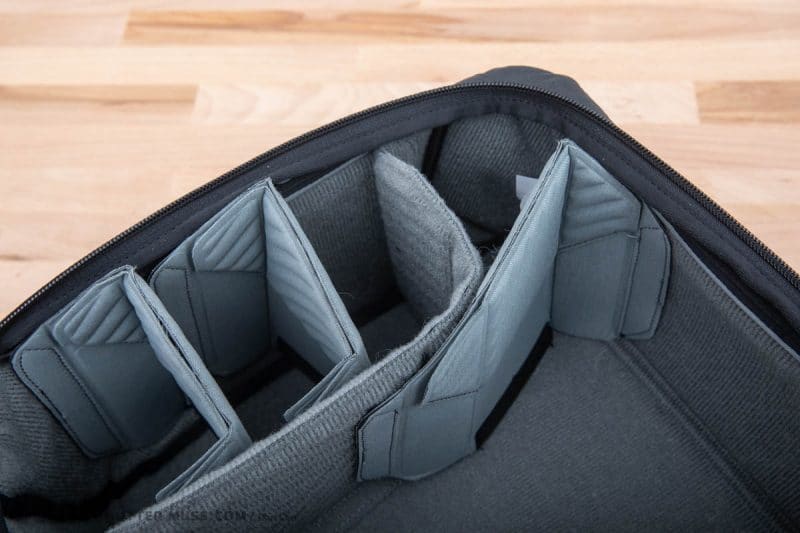
As well as the funky folding divider design, there’s also some neat little elasticated pockets that can be moved around amongst the dividers to hold batteries, filters and memory cards. Inside these little pockets are a couple of smaller SD card slots which may or may not be useful to people. Personally I want a little bit more security for my own several-hundred-dollar-per-card professional grade SD cards with thousands of photos on, but it doesn’t hurt to have the option. I’m much more likely to just stash my entire memory card wallet into the elastic pocket instead. Whilst this kind of pocket has been offered in the past by several other manufacturers, it’s definitely one of the better implementations of the idea because they are skinny enough that they don’t get in the way when they aren’t in use.
Taking a look around the outside of the Camera Cubes you’ll see side zippers on both sides, which of course is necessary for the pack’s side access doors, although it should be noted that this is only available on the medium and large Cubes. Side access is useable with a small Cube, but you mount it sideways in the bag to achieve that, and then simply use the main hatch on the Cube.
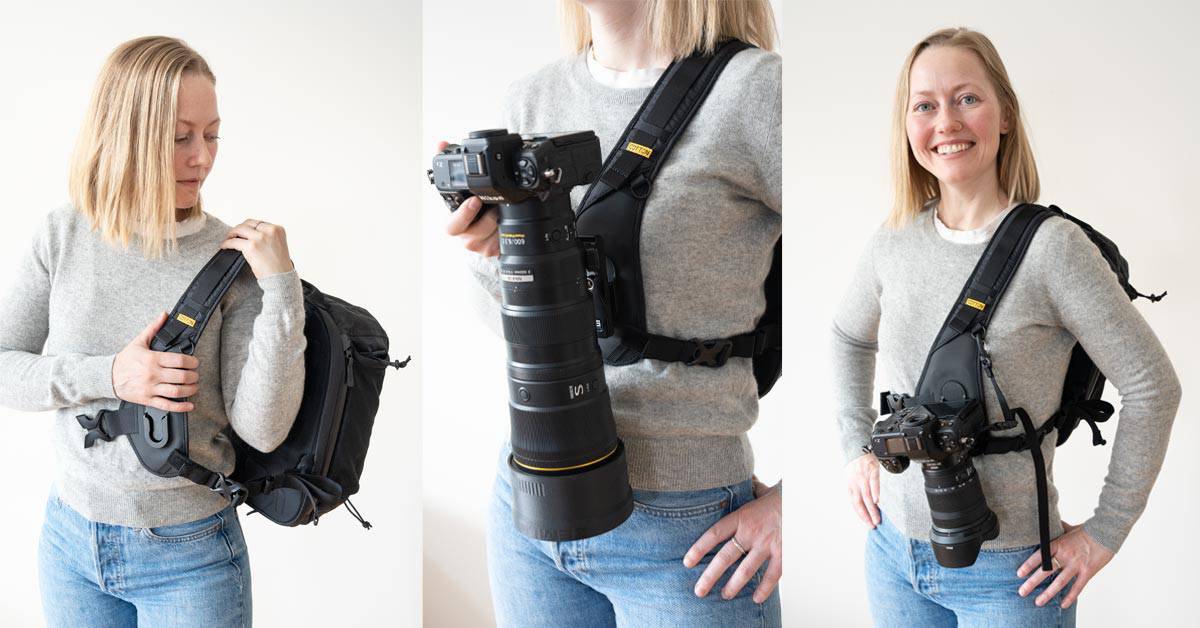
You’ll also notice attachment loops all over the Cube’s exterior, which allows you to attach the quick release Anchor system from Peak Design’s shoulder straps, thus turning any of the Cubes into a shoulder bag when you don’t need the full size of the pack. Given the potential weight of the Cube’s contents in “shoulder bag mode” I think the smallest Leash strap should be avoided. Much better to go with the Slide Lite for the small Camera Cube, and the regular Slide strap for the medium Cube. I think the large Cube would be cumbersome on a shoulder strap, and not all that much smaller than the backpack anyway so it’s probably not a useful configuration.
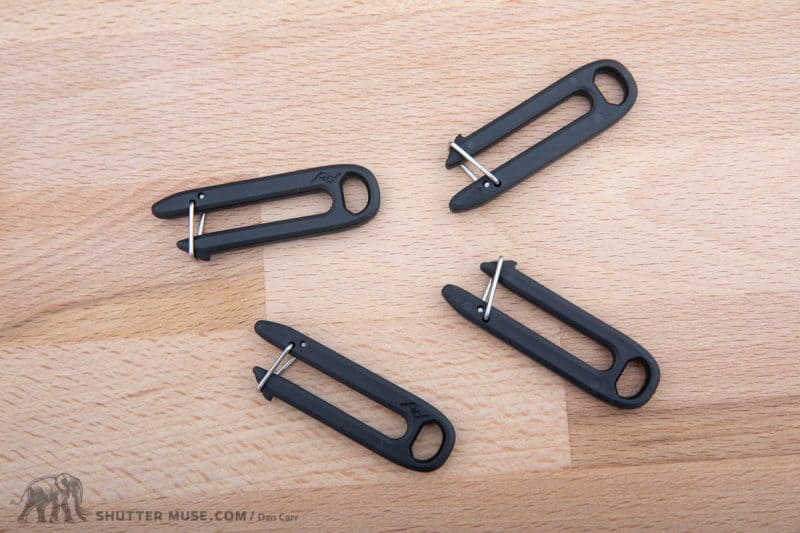
The other major design feature of the Camera Cubes is the way in which they attach to the backpack’s interior using the Cube Clip system. These u-shaped clips have a spring-loaded metal gate on the end for securing them, and they slide into a variety of matching loops inside the bag. They are quite fiddly to set up initially, but the plus side is that they really secure the Cube in place and make it feel like a solid piece of the bag. When I first read that the new backpack was targeted at both photographers and travellers, I was a little worried that the Camera Cubes would feel like they were just a tacked-on accessory to quickly appease their photography fanbase. I’m happy that’s not the case though, and this clever clip system really solidifies this as a great photography backpack, even if you never end up using it in its its second guise of “travel bag”. You can happily clip your Camera Cube into the main compartment to leave it there all its life and it’ll just feel like an integral part of a great camera bag.
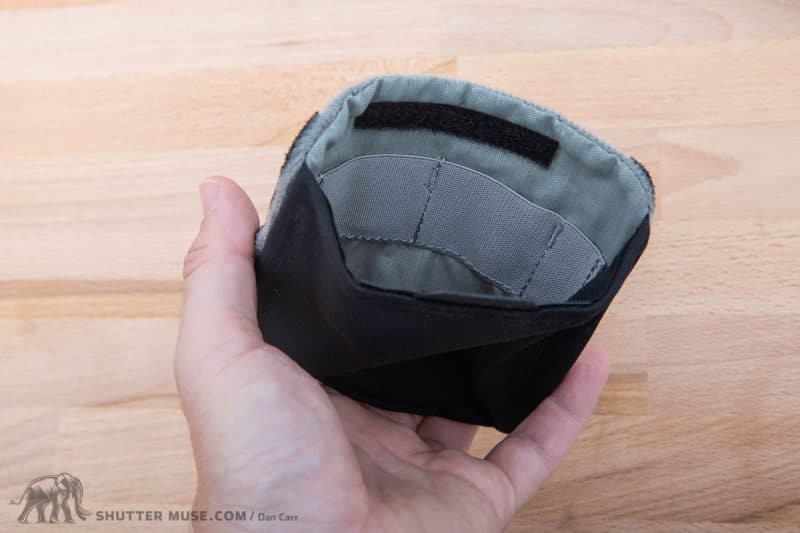
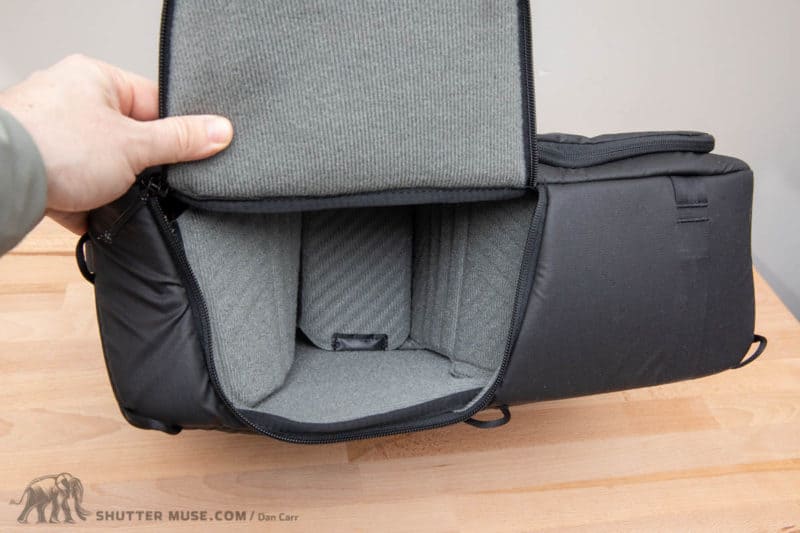
One final Cube feature of note is that the back panel of the Cubes have stitched folds in them that allow you to permanently fold them out of the way if you don’t need them. There’s little point having to open two different panels to get to your gear when you open the back panel of the pack, so this is a much appreciated feature that’s neatly executed.
Camera Cube Capacity


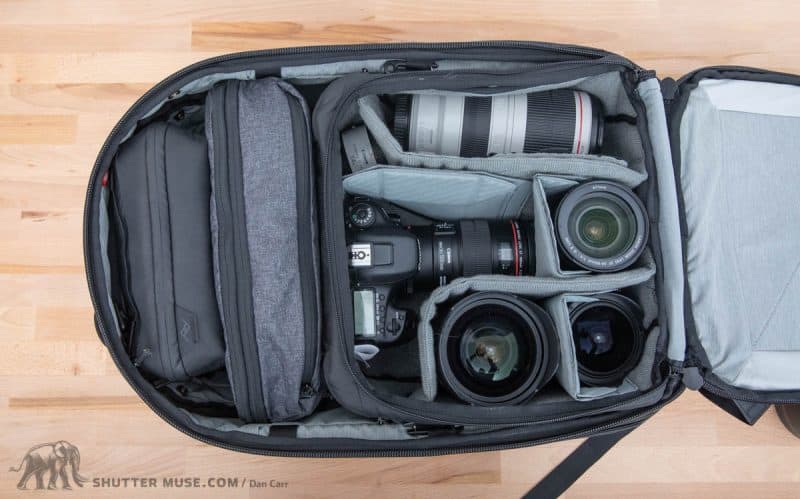
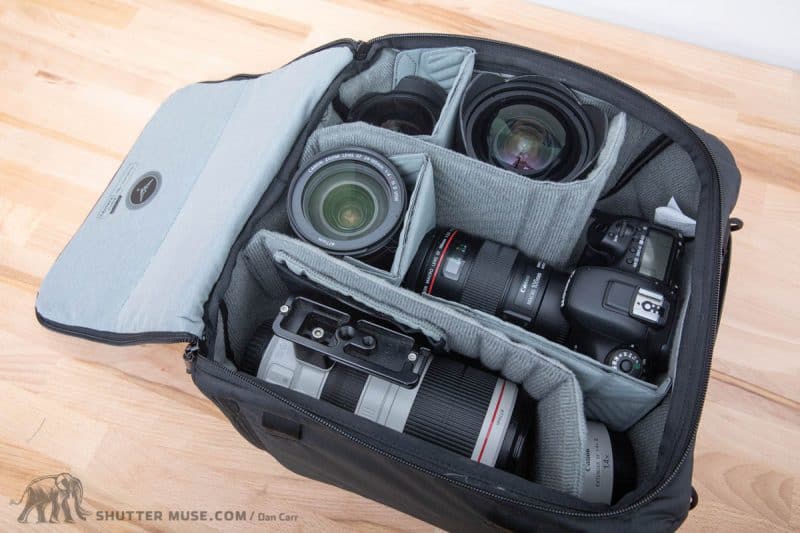
As you can see from the supplied configuration examples, most photographers are going to be covered by these various options and I suspect the majority of people will opt for the medium Camera Cube so that they have the option of carrying more than a couple of extra lenses with them. The medium cube will easily carry most lens trifectas such as 70-200, 24-70 and 16-35, with room to spare for a flash, an extender, a fourth lens or a second camera body. I really think that this will cover most photography enthusiasts perfectly – the sizing is just right.
One thing I was keen to try out was the use of tall professional camera bodies, or DSLRs with a battery grip. Peak Design didn’t specifically mention whether these would fit in the Camera Cubes, but I can confirm that I had no real issues when accessing my gear through the back panel. Yes the camera might be a little bit taller than the Cube, but not so much taller that you can’t close and zipper the lid. Due to the padding on the Cube lid and the back panel padding of the bag, I could not feel the protrusion of the camera’s top pressing into my back when carrying it. If you are carrying a second body that is also pro-sized, or using a battery grip, you can store that on its side in the Camera Cube and it will fit flush with the zipper due to these larger bodies being taller than they are wide.
Of course this also means that the Cube is deep enough to store any second body on its side like that, so a regular DSLR can stand up sideways and take up much less room. One thing that definitely is a no-go, is using taller camera bodies with the side access doors. The side door of the Camera Cube just isn’t big enough to extract those taller pro bodies or cameras with a battery grip when there is a lens attached. I’m sure this will be a bit of a bummer for some people, but at least you can use the back panel access instead so it’s not the end of the world.
Various combinations of Camera Cubes will fit in the bag. You could have three smalls, or a medium and a small or just a small, a medium or a large on their own. Three smalls seems like an unlikely combination, but a medium and a small could be useful for separating a flash kit that you don’t always need to bring with you, or for bringing a smaller drone like DJI Mavic as shown in one of the photos.
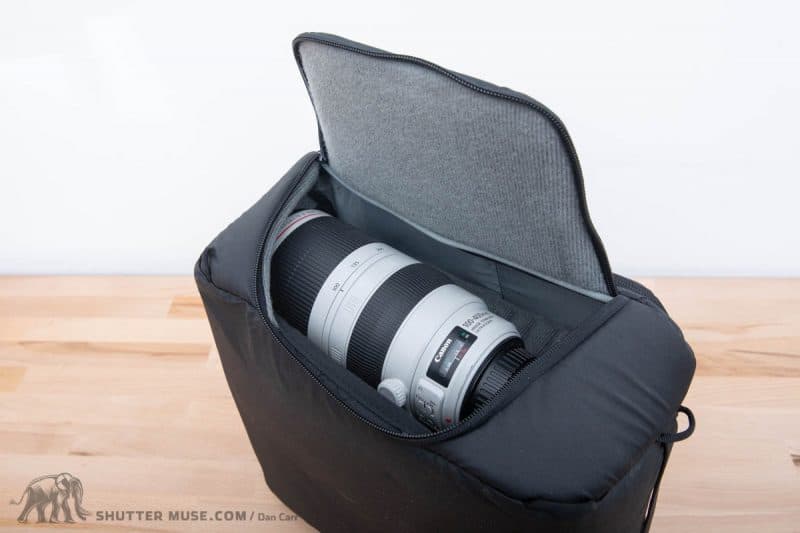
I still have some unanswered questions about the size and fit of the large camera cube, but unfortunately I haven’t yet been able to get my hands on one. In Peak Design’s press photos, the longest lens in the large Cube is a Nikon 200-400 VR2 which measures 366 mm (14.39″) in length. It appears in the photo as though this is pretty close to the maximum size of lens that you’d be able to fit into this pack. A closer study of a very high resolution version of the studio images leads me to believe that there’s about an extra inch of space available, so my best current guess for maximum lens length in the 45L Travel Backpack would be roughly 393mm (15.5″).
Clearly the Nikon 200-400mm fits fine, and so will a 300mm f/2.8 from all the major brands. The Nikon 200-500mm will also fit, as will the Canon 400mm f/4 DO and the newer Nikon 180-400mm f/4. In terms of length, a 400mm f/2.8 from all major brands will fit, but the issue there is doing to be lens hood diameter. The main pack should zip up fine, but I’m not sure you’d be able to zipper the actual Camera Cube because it’s not deep enough. If you’re dead set on using this bag with that lens, you might need to try using it with an Aquatech Soft Hood.
The Canon 200-400mm f/4 is going to be a tight squeeze. I own this lens myself so I’m keen to test it out, but my own measurements have this lens clocked at 15.2″ long – right on the edge of my maximum estimated lens length. There’s a slim change you’ll fit a 500mm f/4 but this would have to be tested more thoroughly, and you can forget about fitting a 600mm or an 800mm lens in there.

Of course most of these long lenses would need the camera body removed from the lens to make them fit anyway, so this will keep many wildlife photographers away from the bag in the first place. It’s often the case that with wildlife photography you need to have your gear ready at a moment’s notice, so that would be a big consideration for me if I was deciding on a pack for wildlife expedition or safari that required my longest glass. Sports photographers might still find a use for packing long lenses into this bag though, because the usual scenario for that kind of shooting involves transporting gear and then setting it all up for a few hours of use at one location.
I think Peak Design made the right decisions here with the Cube sizing. There’s definitely enough options here to suit 99% of photographers, and you can even fit a DJI Phantom in the large Cube if you don’t need to zip the cube up, which is great. That said, I’m sure a few folks would like to see an XL Camera Cube that did fill the entire volume of the bag so that a camera could remain attached to some of these larger lenses.
Bag Weight
When I quizzed my social media followers about what they really want to know about the bag, a couple of people mentioned the question of pack weight. The Everyday Backpack and Everyday Messenger bags are quite heavy for their useable volume, and I certainly had my own concerns in this area before I got the bag in my hands. The laundry list of features and pockets usually means a seriously heavy bag, but that didn’t turn out to be the case with the 45L Travel Backpack due to the array of high end ultralight materials that they went with.
The bag on its own is 2.05KG, which I think it fair considering it has a laptop sleeve and considerable additional padding for this. I also weighed the bag with the medium Camera Cube in it, which I think is going to be the most popular camera bag variation of the kit. This came in at 2.7KG which compares favourably to the 35L Lowepro Whistler 350AW pack at 2.9KG, The MindShift FirstLight 40L at 2.7KG, the MindShift BackLight 32L at 2.2KG and an F-Stop Tilopa at about 2.5KG as well.
Out of all these comparisons to other famously rugged photo backpacks, only the F-Stop Tilopa also has a padded laptop sleeve. In other words, the Travel Backpack is not the lightest bag in this corner of the market, but it’s also far from being a heavyweight when you consider the features that its packing. The Peak Design Everyday Backpack 30L actually has a “naked weight” ie. without any camera dividers, of 2.04KG, so I’d say this much larger and more fully featured 45L Travel Backpack is doing ok in that area.
Yes the bag could be lighter, but it would have been at the expense of features. I personally don’t think that the overall bag weight was neglected in the design process, as some other reviewers have suggested. I think they had a set of features that they wanted to offer, and they used light materials in as many places as it made sense to do so.
Peak Design Travel Line Accessories
During the Kickstarter campaign the 45L Travel Backpack is available for a considerable discount in a variety of bundles with the rest of the items in the new Peak Design Travel Line.
Peak Design Tech Pouch
I won’t lie, I’m leading off with this because it’s the most awesome one!
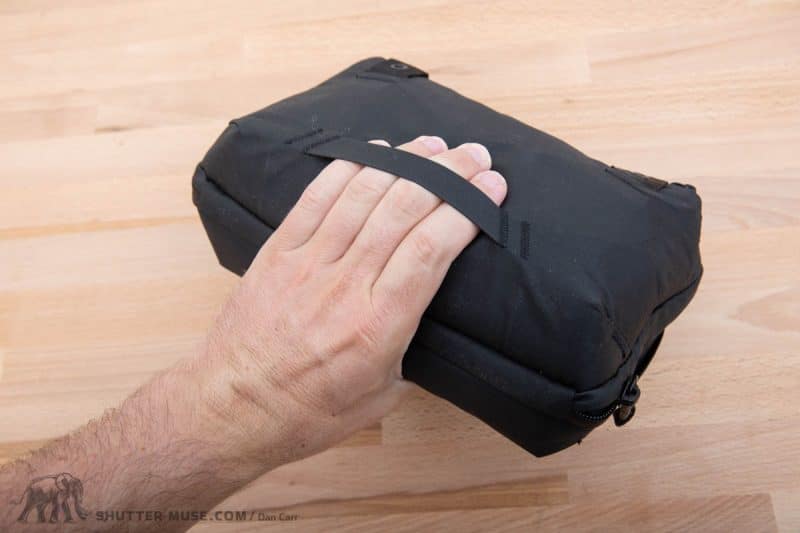
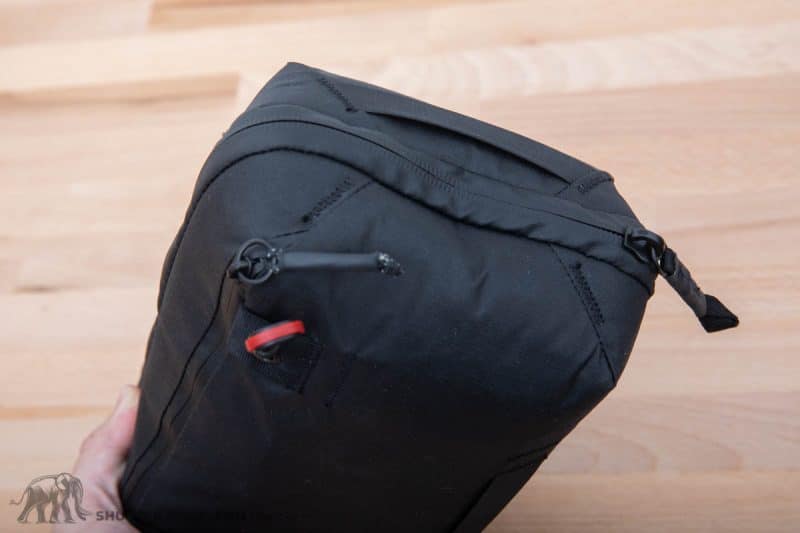
The Peak Design Tech Pouch is a cleverly designed cubic case with an accordion organizer and several zippered pockets. More of the intriguingly lightweight, thin materials from the main bag have been employed in the Pouch to make sure that there is actually room for your accessories in there amongst the array of organizational dividers.

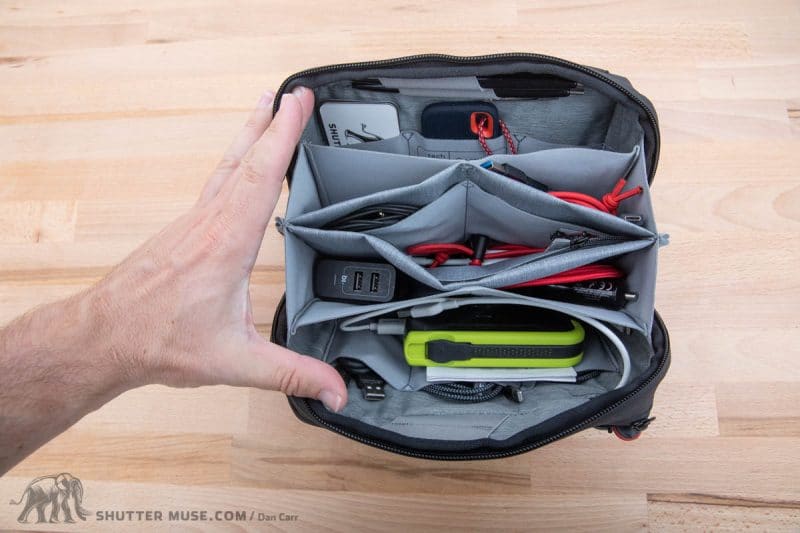
For photographers, the zippered pocket has some SD card slots inside it, and you’ll find plenty of room for your remote cables, batteries, chargers, camera cleaning kit and tripod related tools or parts.
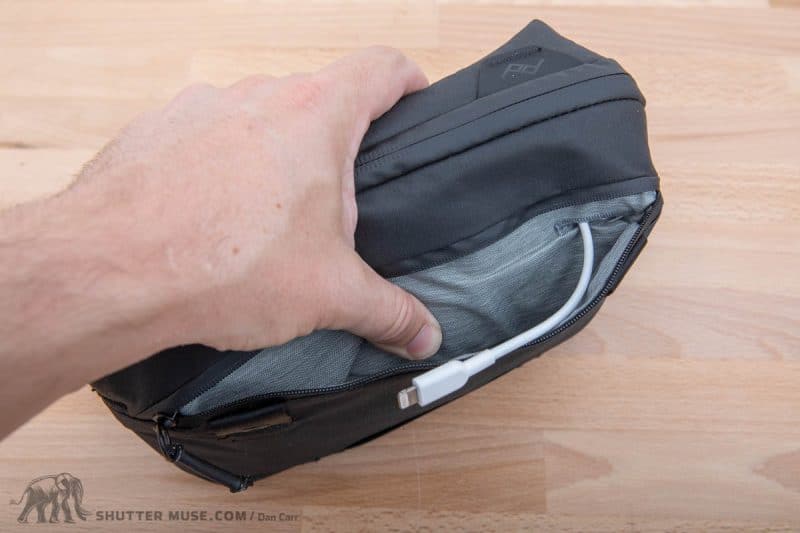
If you’re just using the backpack for traveling, you’ll likely want to use the Tech Pouch to organize your laptop chargers, phone chargers and maybe a hard drive with some USB cables. Cleverly, there’s also a cable pass-through for a charging cable to go into the Tech Pouch where you can store a battery for topping up your phone.
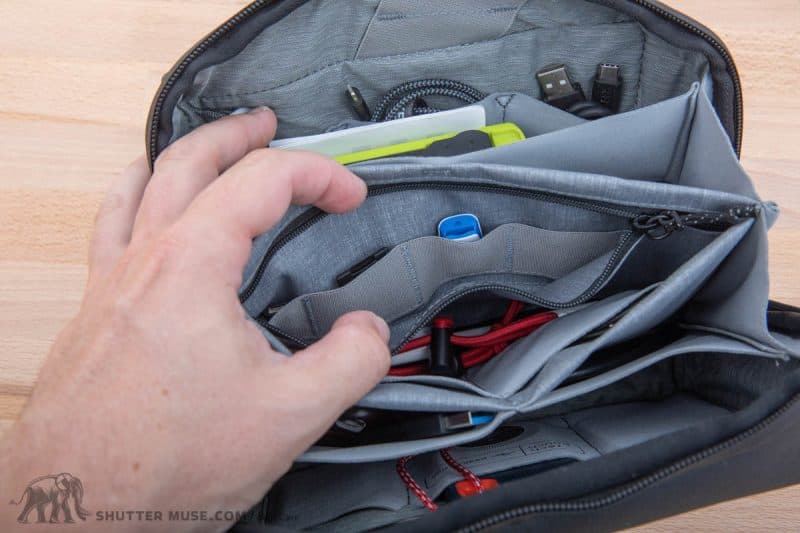
From a size point of view, the depth of the bag means that it’s definitely best if you can fit it into the main compartment of the bag instead of trying to get it into the front organizer section. Although you could of course use this with any other backpack or shoulder bag as well, and you can see that I have included a photo of it in the Peak Design Everyday Messenger.
I tend to move my camera gear between a few different camera bags, depending on the job at hand. With the Tech Pouch, I can organize all the small items that I would often otherwise bury in the corners of small pockets, and make it that much easier to quickly switch my kit from one bag to another. In fact, I’m sure I’ll buy another one or two of these when they hit the market so that I can put together some specific photo kits: Strobist Kit, Underwater Kit etc.
This thing is brilliant and I think it’s a worthwhile addition to a photographer’s bag, or anyone traveling with a laptop and the usual array of necessary dongles and cables.
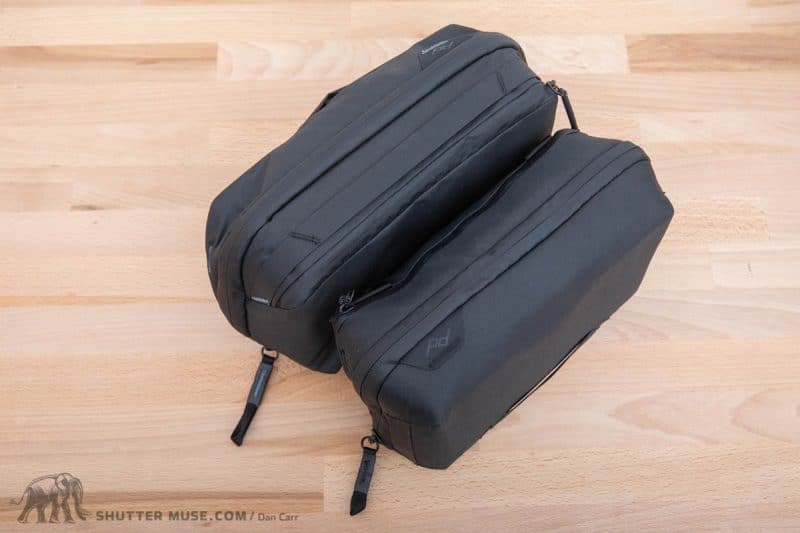
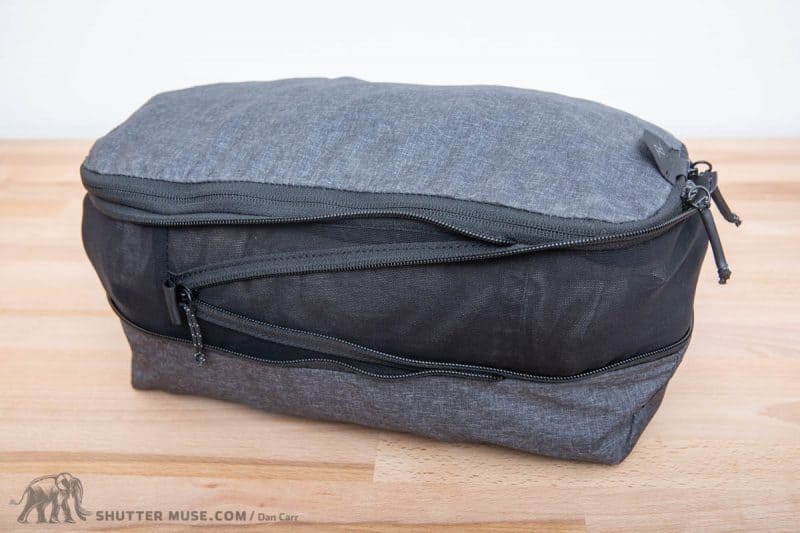
Peak Design Wash Pouch
The Wash Pouch is a similar size to the Tech Pouch, in fact at first glance they appear to be externally identical unless you are looking for the small details. When I saw this I immediately wished that they had thought to add some small flash of colour to both of these pouches to help you distinguish between the two more easily. It’s entirely possible that one day you might get your laptop out at a coffee shop and find that you have your toothbrush and razor with you instead of your laptop and charging cables.
Colour coded zipper pulls could have solved this issue quite easily, but I did find a way to fix this. The Wash Pouch doesn’t feature the small eyelets for adding Anchors for a shoulder strap, so my solution to this problem was to add an Anchor and hope that the small flash of red would be enough to catch my eye when packing in a hurry or in the dark. If you plan on purchasing both the Tech Pouch and the Wash Pouch, perhaps consider buying one of each colour.

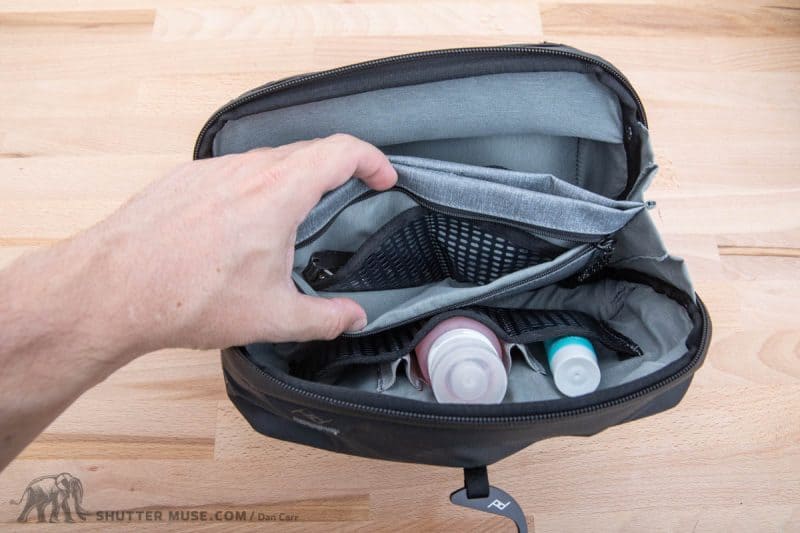
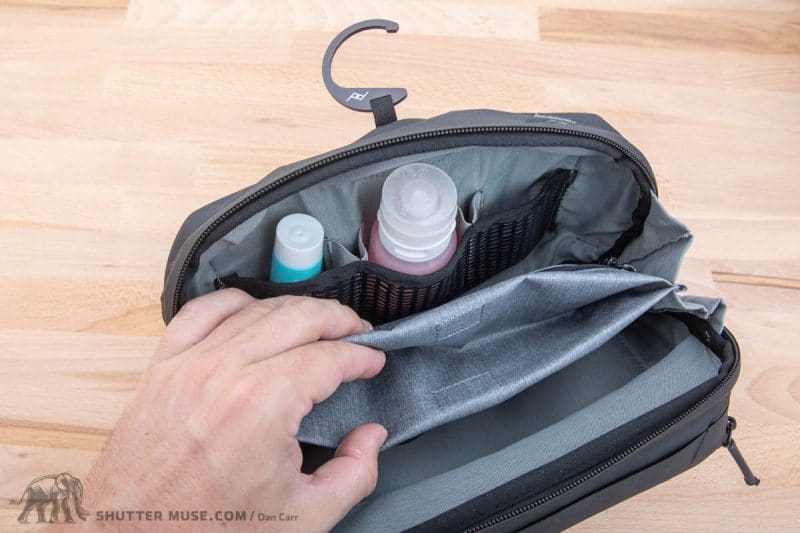
The accordion design hangs nicely when the hook is used, making all your toiletries easily visible, yet still secure. There’s also a toothbrush pocket that can be pulled out for easy cleaning, and a zippered pocket with more internal pocket to keep medication and smaller items tidied away. As you can see from the photos, the larger bottle holders also work really well with the popular style of reusable rubber bottles that are a popular travel accessory. It’s a shame however, that there isn’t some sort removable see-through pouch for your liquids when passing through airport security. For a system targeted at one-bag travellers, meaning you surely will have some liquids with you, it seems like am area where air travel could have been made easier.
So overall, what do I think of the Peak Design Wash Pouch? Well, I speak my mind freely so this post isn’t some sort of Peak Design love-in, even though many people might think it’s going to be because they supply me with pre-production gear to review. There’s no doubt that this is a stylish wash bag that is beautifully made, but out of all of the Travel Line accessories it’s the least compelling option. Since the size and shape of it don’t fit the standard “cube units” employed by the packing cubes and, to some extent the camera cubes, it doesn’t do a great job of fitting efficiently into the remaining space in the bag’s main compartment, and it’s too thick to comfortably fit into the front pocket.

At $59.95 it’s also one of the most expensive wash bags I’ve ever seen. I know that’s the same price as the Tech Pouch which I just praised so highly, but the fact is that I have had wash bags that do things just as well, if not better, for cheaper. Whereas with the Tech Pouch, I’ve never found an organizational accessory bag that work so well. In my opinion, perceived value comes not only from the quality of the materials and product, but also from the uniqueness of the product’s function.
Don’t get me wrong, it feels expensive when you use it, as do all of Peak Design’s products, but for something that will probably get covered in shampoo, toothpaste, beard trimmings and other bathroom-based gunk, this one feels like a bit of an extravagance. If you’re a completest and want the full set of PD Travel Line gear then I’m sure you’ll like it, but if you want to knock a few dollars off your current shopping cart total then this should be first to go. I personally love the Arc’Teryx DOPP kit which is nearly half the price, has a security-friendly liquids pouch and fits much better into the unused corners of the bag or the front organizer, due to its skinnier design and more flexible materials. If the Wash Bag and the Tech Pouch had both been half-cube sizes then that system as a whole would have made more sense to me and the pair of them would be more easily recommendable as a duo.
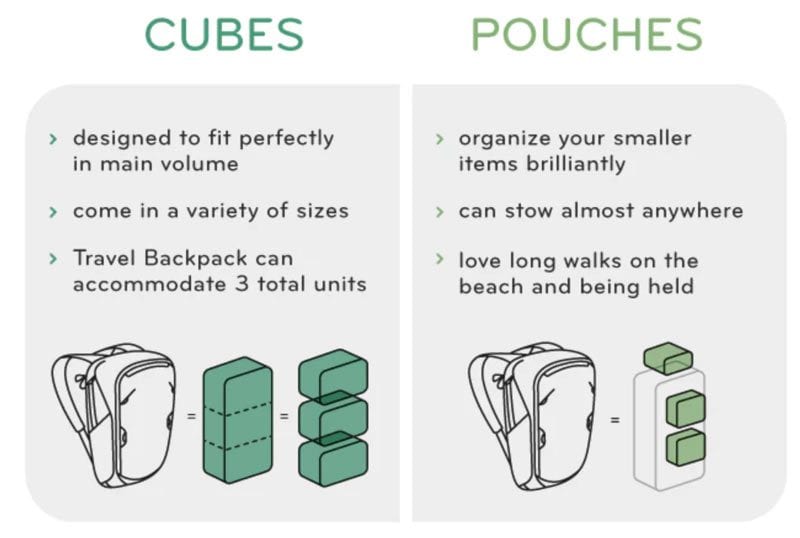
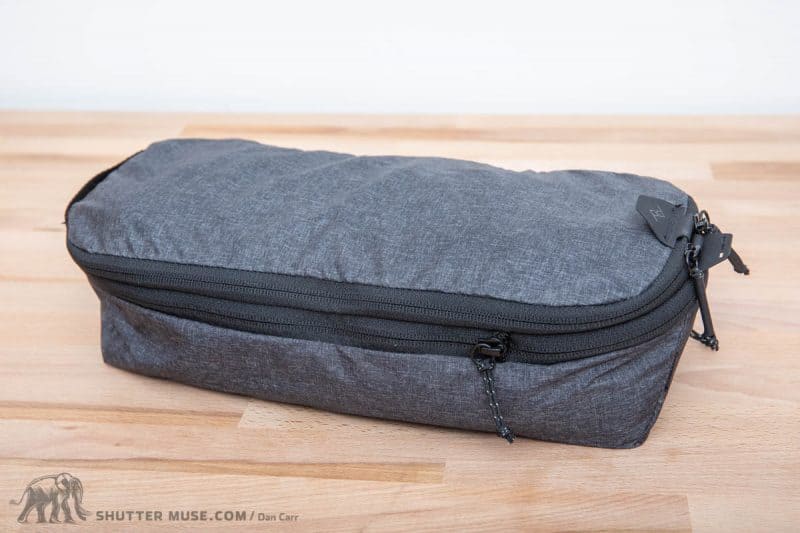
Peak Design Packing Cubes
The Packing Cubes come in two sizes. The one you see in my photos is the small one which is exactly half the size of the medium one, and takes up “one cube” of their packing space (the 45L holds up to three cubes). When I first saw photos of these I thought they might be quite heavy, due to the zipper hardware that allows them to expand and contract, as well as another zipper to segregate dirty gear from clean. When I got my hands on one I was pleasantly surprised though. These are way lighter than you think they should be, and clearly there has been some considerable effort made here in material and hardware choices, just as there was with the Travel Backpack itself.
I love the expanding design and I love the option to separate your dirty stuff, so these are a great choice for the Travel Backpack if you do want to travel with clothing and camera gear in the same bag. If I had to pick one possible improvement with them, it’s the overly rounded corners. As you can see in the photo, the rounded corners leave some dead space inside the pack which I think could have been minimized a little more. That said, I know zippers pull less easily around tight corners, so perhaps this was the trade-off that the designers had in mind. The zippers certainly do run very freely.
At $29.95 and $39.95, the price point also seems to compare very well with other options on the market, whilst offering a lot more flexibility. After years of travelling for my photo work I have quite a collection of packing cubes and cases, but these new ones are definitely a step up from anything else in my current collection. I’ll be buying a couple more of these as soon as I can!
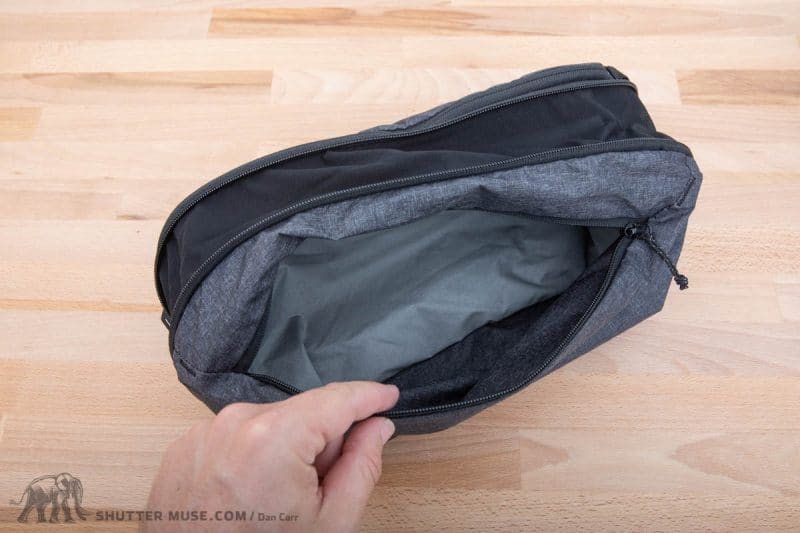
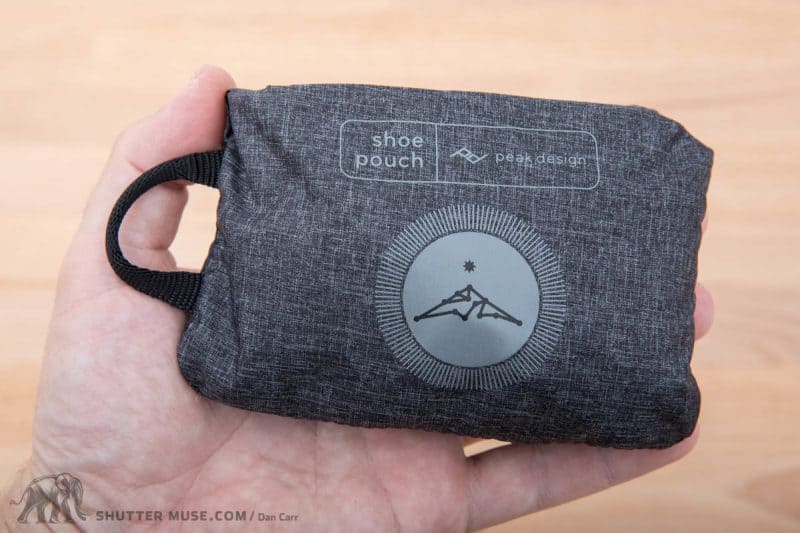
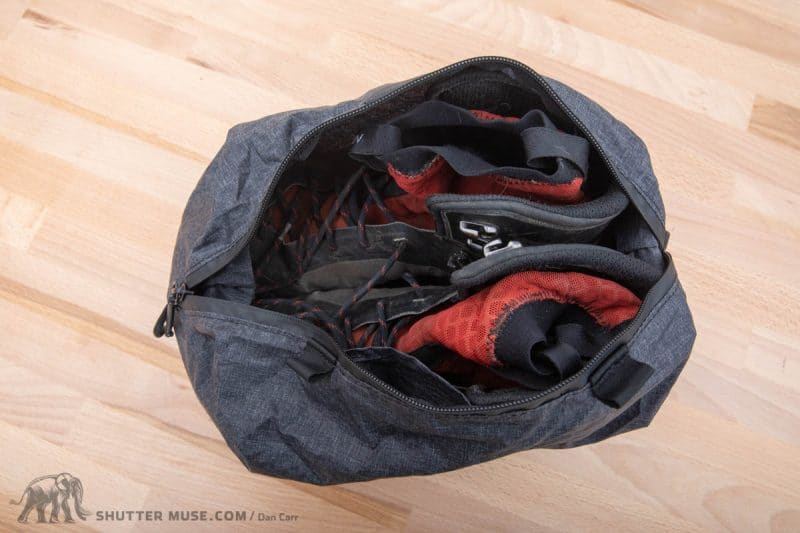
Peak Design Shoe Pouch
This Shoe Pouch uses insanely light 70D recycled nylon and folds into its own pocket. Whilst it’s called a shoe pouch, there’s no reason why you couldn’t also use this like an ultralight version of the Packing Cube if you needed to tidy up some bulkier clothing items like a down jacket or rain gear. If you want to pack some shoes into the Travel Backpack I think it’s a worthwhile addition to the kit, particularly if you have camera gear in the bag as well.
I’d only ever carry the larger packing cubes if I was sure I needed them, but I can see myself leaving the shoe pouch in the bag at all times as a sort of emergency organizer of sorts. It’s that small and light that you’d just never notice it anyway, and it might come in handy to separate some wet clothing from camera gear at some point.
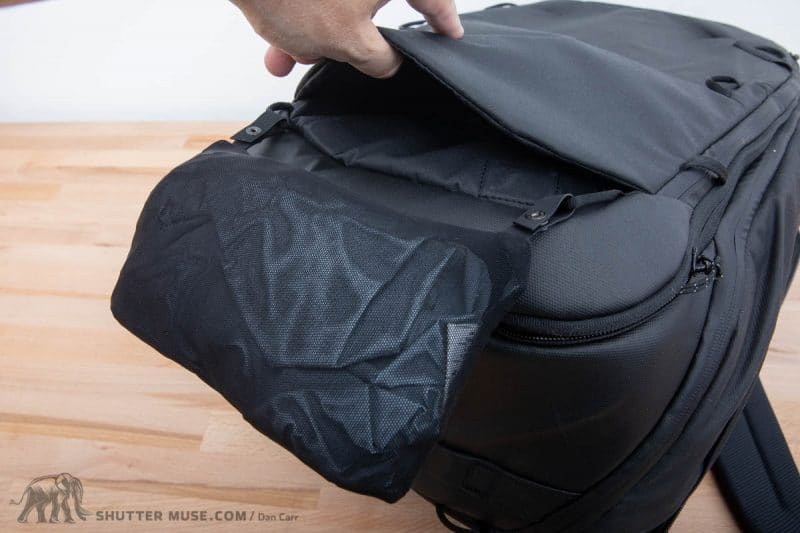
Rain Fly
For $29.95 you can add a silicone coated rain fly to your Travel Backpack. The Rain Fly packs into itself and there’s a clever little magnetized pocket on the front of the bag to store it in. Silicone coated covers are always nice and light, but they are more expensive than the cheaper ones that sometimes come with bags for free. When I compared the relative cost of a generic 45L silicone backpack cover from REI, the $30 price point seems fair. It’s a couple of dollars more than a generic one, but it fits the pack perfectly and has attachment points to secure it into the special front pocket of the bag. If you need a rain cover, there would be no point sourcing anything other than this one.
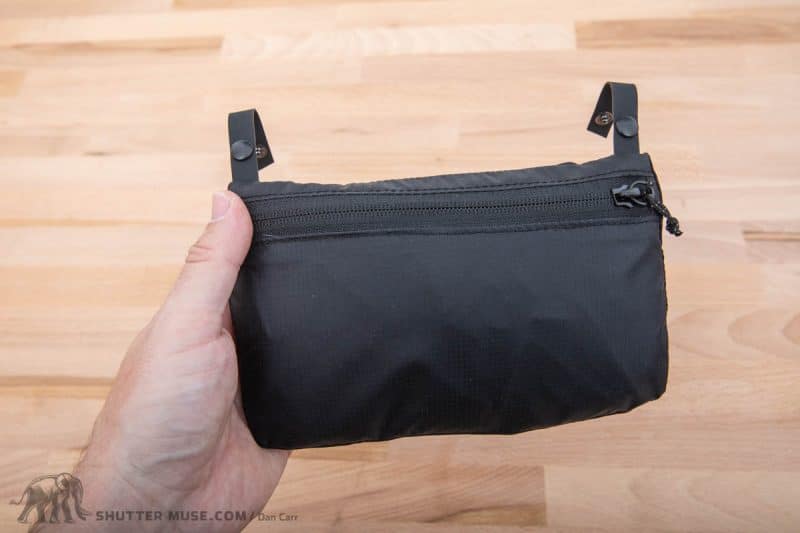
Do you need it though? The bag’s seam sealed zippers and generally water resistant materials (with a fully waterproof nylon base) are probably going to be more than enough protection for most people. If you plan on visiting parts of Asia that have regular daily rainfall at some points in the year, I’d definitely add one to your kit. Otherwise, I think the bag will hold up well to being caught in shower, or even prolonged periods of snow. If an extra $30 doesn’t bother you, for piece of mind, the great thing is that you can stash it away in the pocket and you’ll just forget its even there until you need it.
Pros and Cons
This review is long enough that I know some of you will just have skipped to the bottom to get the juicy details.
Pros
- Adjustable volume (30-45L) works incredibly well
- Material and zipper hardware quality is excellent
- Camera Cubes integrate very well into the bag
- Side access, back panel and front access offer unsurpassed flexibility
- Excellent set of travel accessories, particularly the Tech Pouch
- Innovative security features
- Stealthy design makes it look smaller than it is
- Top notch organization options with pockets everywhere
- Strap stowage is fast and easy (do it while boarding a plane for example)
- Extra durable, waterproof 900D nylon base
Cons
- Waist belt padding is very minimal
- No key clip in any of the pockets
- Limited options for comfortably carrying a large, heavy tripod
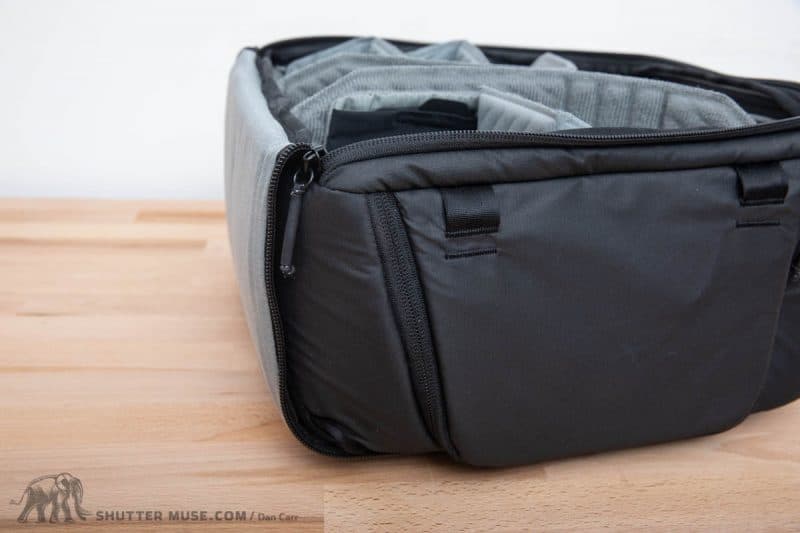
- The black material attracts dirt and dust
Pricing Note
I know some people will look at all this and tell me the price point is a negative as well, but I think that would be unfair. I’ve tested my fair share of $300+ camera bags over the years and this more than competitive with them on quality and features. I wouldn’t have been at all surprised to see a higher price point on this bag if it was just competing with other camera bags in the photography market because there are several that are more expensive. In fact, I think photographers can actually be thankful that Peak Design are targeting this bag at the broader travel bag market as well because the price of the competition in the one-bag travel market (Minaal Carry-On 2.0 for example) has probably kept the price of the 45L Travel Backpack a little lower than it otherwise could have been.
Minimum “Camera Bag” setup pricing:
- 45L Travel Backpack + Small Camera Cube $350
- 45L Travel Backpack + Medium Camera Cube $370
- 45L Travel Backpack + Large Camera Cube $390
- 45L Travel Backpack + Small Camera Cube + Medium Camera Cube $420
Conclusion
TL:DR? Peak Design have hit a home run with this one. I’ve ended up writing very positive reviews about their camera straps and camera accessories in the past, but their bags have always been a little bit more hit and miss. I know they are popular on the mass market, but in a few instances I’ve seen a little too much form over function on some bags. This started to change with their Everyday Sling bags which I liked a lot, and I’m pleased to say that the trend has continued with the design of the 45L Travel Backpack and most of the Travel Line accessories. This is, without question, an exceptional camera bag for a wide variety of uses and an equally exceptional travel bag on its own.
The number of features that have been packed into this bag is remarkable, and the material and hardware choices remind you that this is premium product every time you pick it up or open a zipper. I know I’ve mentioned the materials several times already, but it’s rare that they stick out quite so much in my mind when I’m collecting my thoughts about a new bag. They really are a key ingredient in how this bag all comes together. You simply wouldn’t be able to have such a feature-rich bag and keep the weight of the bag so reasonable without employing these kinds unusual high-end materials.
Creating a bag that is this versatile for both travel and photography, without constantly feeling like you are being compromised by the bag’s other intended use, is something that Peak Design should be very proud of.
Where to Buy
As always, we appreciate it when you use the links on this page to make your purchases. The Everyday Sling, along with other Peak Design camera bags, can be found through the links below. For Peak Design gear, I always recommend buying directly. They have free shipping to many places, and their customer service team is always on hand to help if you have any problems.
Travel Backpacks
- PD Travel Backpack 30L – Peak Design / B&H Photo / Amazon / Adorama / Moment / WEX (UK)
- PD Travel Backpack 45L – Peak Design / B&H Photo / Amazon / Adorama / Moment / WEX (UK)
- PD Camera Cube V2 – Peak Design / B&H Photo / Amazon / Adorama / Moment / WEX (UK)
- PD Travel Backpack Rain Fly – Peak Design / B&H Photo / Amazon / Adorama / WEX (UK)
Travel Accessories
- PD Wash Pouch – Peak Design / B&H Photo / Amazon / Adorama / Moment / WEX (UK)
- PD Small Wash Pouch – Peak Design / B&H Photo / Amazon / Adorama / Moment / WEX (UK)
- PD Tech Pouch – Peak Design / B&H Photo / Amazon / Adorama / Moment / WEX (UK)
- PD Small Tech Pouch – Peak Design / B&H Photo / Amazon
- PD Shoe Pouch – Peak Design / B&H Photo / Amazon / Adorama / Moment / WEX (UK)
- PD Packing Cubes – Peak Design / B&H Photo / Amazon / Adorama / Moment / WEX (UK)
- PD Ultralight Packing Cubes – Peak Design / B&H Photo / Amazon


Hi Dan, love your reviews as they’re so in-depth.
I was wondering if you’d consider reviewing the Shimoda Designs 60L (or 40L) since it’s an outdoor photography bag.
I am thinking of getting both of these (Peak Design and Travel Line) to serve different purposes and there’s not many or any video reviews of the 60L Shimoda Explorer.
Thanks for the kind words. Yes I’d love to. I just need to get in contact with the company. You’re not the only one that has asked for this so I’ll try and get that sorted.
Got the Shimoda 40L myself. I can see some things are better on the PD. As far as hip belt and comfort I think the Shimoda is a lot better though.
Yeah I would imagine the heavy load carry on the Shimoda is better. It should be because it’s designed specifically for outdoor photography. Hiking, biking, skiing etc. Peak Design didn’t design their back specifically for that market so there will be some compromises in that area to keep size and weight more friendly for travel.
Generally speaking, you like the Shimoda though?
Hey
Great review, did i notice you had a canon 100-400 in there? If so have 2 questions? 1) does this fit in the medium cube with a “pro” body attached? And 2 could you measure the inside of the medium cube and see what longest body + lens you could fit in. Website says 11.5″ but just curious as you have the real thing. And to add to that could you fit a longer body diagonally in the cube by re-arranging the internal dividers?
Thanks Phil! Yes that’s my 100-400. Yes it does fit in the medium cube with pro body. As I said in the review, a pro body does sit a few mm taller than the cube, but that’s quite common in a lot of bags and it doesn’t affect closing the bag. I’ll be using it in this way a lot myself.
I can confirm that the 11.5″ measurement is correct. Diagonal would not be useful because width is too limited in the corners, it wouldn’t have any benefit.
Thanks for the info atleast I know mine will fit!
I totally agree with you about the waist padding too, literally is the only downside I can see in this bag. Are you likely to do a follow up once you’ve been out and about with it a bit more?
Hey Phil,
I’m thinking of doing a specific article about one-bag travel with it. I’ll need to find the right trip to take it on where I pack cameras and clothes etc. into the same bag and then fly with it.
I’m not likely to test this bag on something like a multi-day hiking trip or anything too adventurous. I get the sense that some people would want me to try that and pass judgement, but I think it would be unfair because it wasn’t designed for that. Whilst it’s built tough, this is definitely more of a travel and generalist photography pack that can endure weather and rough travel conditions for a lifetime. It’s not quite the same as the F-Stops and Shimodas, and Lowepro Whistler or MindShift BackLight packs. I’d say they are all built equally tough, and the PD Travel Backpack will make a great bag for occasional hiking and landscape photography, but it’s less suitable for more active pursuits that would suit those other bags.
I wouldn’t hesitate to take the Travel Backpack on something like an Icelandic landscape photo road trip though. On something like that, there would be air travel, car travel, terrible weather, mud, sand, ice, snow… but the hikes aren’t day hikes. At most the bag is going to be on your back a few hours a day and landscape photo loads tend to be less anyway. That sort of trip, to me, is where this bag would shine.
Good review. I have most of the PD bags and backpacks.
I got the 10L sling, 15″ messenger, 30L backpack. And for longer hikes, I have a 62L F-stop backpack.
As you can see, there is a gap between 30L and 62L. So the travel line surely peaked my interest 🙂
What I really like about the 30L backpack is that it works well for non-photography stuff as well. That is also one thing that appeals to me about the travel line.
btw, I watched their latest live stream, and they said and showed that a phantom drone doesn’t fit that well in the camera cube.
Thanks for sharing that, Tor. I’m going to email my contact and clarify the drone thing. Since they provided a photo with a Phantom drone in the bag I assumed it must fit quite well! I would imagine that you might need to use the 45L mode though, and combine the front and back sections to use the full volume. I’m going to try and fine out, so thanks for bringing it to my attention.
at 39 minutes https://live.kickstarter.com/peak-design/live-stream/travel-line-hangout-3-part-2
yeah, they removed that photo as well 🙂
hmm. thought I commented …
anyways. check out at 39 mins https://www.youtube.com/watch?time_continue=542&v=X2kcBclF40M
You did, Tor, but comments with links have to be manually approved so that I can try and keep the spammers at bay 🙂
Thanks for posting the link, though. very helpful of you!
I believe they took it off their kickstarter campaign page as it didn’t fit the Large Camera Cube with the lid closed, however it does fit, it’s just too high for the cube with the lid closed.
If you were to leave the lid open and trust the protection of the rest of the bag it would be fine, it’s just not practical to pack it up in the large cube and move it around or store it in the large cube when you’re not droning with the lid closed.
Cheers for the reply above re: shimoda as well 🙂
Thanks for letting me know that. I’m going to adjust my article to make a note of that. This makes sense to me now I think about it, and personallyI think I’d be ok using it like that without the lid. I always fold the lid away with my cameras anyway, as you can see from my photos.
Wow, best review I have seen on the Internet! Thank you for sharing all the details and great pictures.
Thanks PetrS! Glad you found it useful, it did take me a long time haha 🙂
This is a great review. I am a backer and am now even more excited for this to get mass produced and into my hands. The value is clearly evident from the well designed Kickstarter info and videos. I’m wondering about your listed prices are those ‘a la carte’ prices. I don’t see a small+medium camera cube setup listed. Thanks again for the great review!!!
Hey Joel, those prices are me adding up the add-ons that you can piece together. So while they aren’t listed as actual packages, you’ll see at the bottom of the KS page that you will be able to add additional Cubes etc to your pledge. So my prices are based on buying the backpack, and then adding the Cubes as add-ons. Make sense? Thanks for the kind words!
I disn’t see any mention of a pocket for a hydration bladder. For a while I was very interested in this bag but I regularly do long hikes (up to 14 miles) so it dropped off my list. Also the less than positive comments about waist belt and tripod carrying ability was good to hear. I’ll keep my Shimoda 40 L pack for now which also is a lot lighter (at 2.20 Kg with insert). Thanks for a thorough review. Sigh….the search continues….
Yeah if you regularly do hikes of that length, this isn’t the bag for you. It’s just not designed for that. This is a fabulous bag if you are travelling around the world to first get to your location, but it’s not a hiking bag.
If you have a new Shimoda, why do you need a new bag? Are you not happy with that one? Lots of mention of the Shimoda so I’m keep to hear people’s thoughts.
Funny you would ask….it was the “travel” part that piqued my interest as I do fly to some locations, depending on which National park my daughter works at. So there is a compromise. Brought my 25 liter F-stop bag as my “personal bag” for inside the cabin (as well as a regular carry on) but that bag is very small and some NP my daughter works at has great wildlife to photograph, ie, I need to bring my 100-400. And some flights I have to take a smaller plane where I have to gate check my carry on. Like I said, search continues. But thanks for the comment earlier about it being a great bag for Iceland for example. So we’ll see….
Thanks for the additional info. Sounds like your daughter has a cool job! This particular compromise between harness size/thickness/padding/comfort and general ease of travel, is one that has been around for a long time and I think photographers will be be considering it for some time.
I found this article while researching the new travel line. I really enjoyed this review. I myself travel often for work and carry a very well stuffed Cinebag CB-25 with all my gear, as well as a laptop, power cords, etc. It’s easily 50-55lbs without a tripod. Getting it to fit in the overhead on a small regional jet often proves challenging, but it can be done.
I was wondering if you’ve tested the CB-25 before, and how this new travel line compares in terms of handling while fully stuffed and how easily it fits into an overhead compartment? I am very much considering backing the travel line, but obviously without being able to test one in person it’s hard to judge for these criteria. Unfortunately it matters for my job.
Hey Jason. I’m afraid that I have never tested the CB-25 so I can’t really comment on how they compare. I took a look at it on Google just now, and it certainly doesn’t look as sleek and easy to pack as the PD Travel Backpack. My gut says your travel would be easier with the PD bag, but that’s about all I can offer I’m afraid. This PD backpack, particularly with the traps tucked away, is really nice to slide easily in and out of an overhead.
Thanks Dan! Yeah, the Cinebag is anything but sleek. It’s burly and great for hiking gear all over town, but air travel is the worst! I’m definitely going to check out the PD bag. I think for versatility alone it’s going to be a better option.
You’re welcome, Jason. Enjoy the bag, and happy travels!
Hi Dan. Thanks so much for this detailed review and the reminder I just received from you regarding the last days of the Kickstarter for the PD travel bag. After much debate and with the help of your review, I finally pulled the trigger, last evening ordered the bag with the medium cube. I’m currently using the Backlight 26L to carry my gear when I travel, but I think the 45L bag will give me more flexibility of longer trips. I currently own the PD Messinger, Everyday Bkpk, and Sling, so the 45L is a nice compliment. Many thanks again, Dan!
You’re very welcome Bob! I’m sure you’ll love it.