There comes a point in every photographer’s journey when it is time to buy a tripod and a ball head to attach to it. Most people make the mistake of purchasing a cheap setup with flimsy legs and a ball head that doesn’t lock securely enough to support their equipment during long exposures. I made this mistake many years ago as well, so I understand the frustration that comes with broken tripod legs and sticky, unreliable ball heads.
As a result, you begin seeking higher-quality solutions because when the lighting conditions are just right or the animal you’ve been waiting for shows up, no one wants to deal with unreliable support gear instead of capturing that perfect shot. Many are willing to spend thousands on cameras and lenses for minor gains in sharpness, often overlooking how vital solid support can be in certain situations. Avoid wasting money on cheap support equipment that performs poorly and requires frequent replacement. Instead, invest once in a high-quality setup, and you’ll never have to worry about it again.
Table of Contents
Discovering Really Right Stuff Ball Heads
When you start researching high-quality ball heads, the name Really Right Stuff will likely come up quickly. This happened to me many years ago when I gave up on my cheap, low-quality setup and looked for something that could last the rest of my career. Mechanically, ball heads aren’t very complicated, so with proper care and quality, a well-made ball head can definitely last that long.
When I first discovered Really Right Stuff, it was the BH-40 head that grabbed my attention, especially after a review by Scott Kelby, who called it “the ball head of the gods.” Since my first RRS BH-40 purchase years ago, my career has evolved and taken me in many different directions. I’ve been fortunate to buy a variety of Really Right Stuff products to meet the specific needs of various photographic projects and interests.
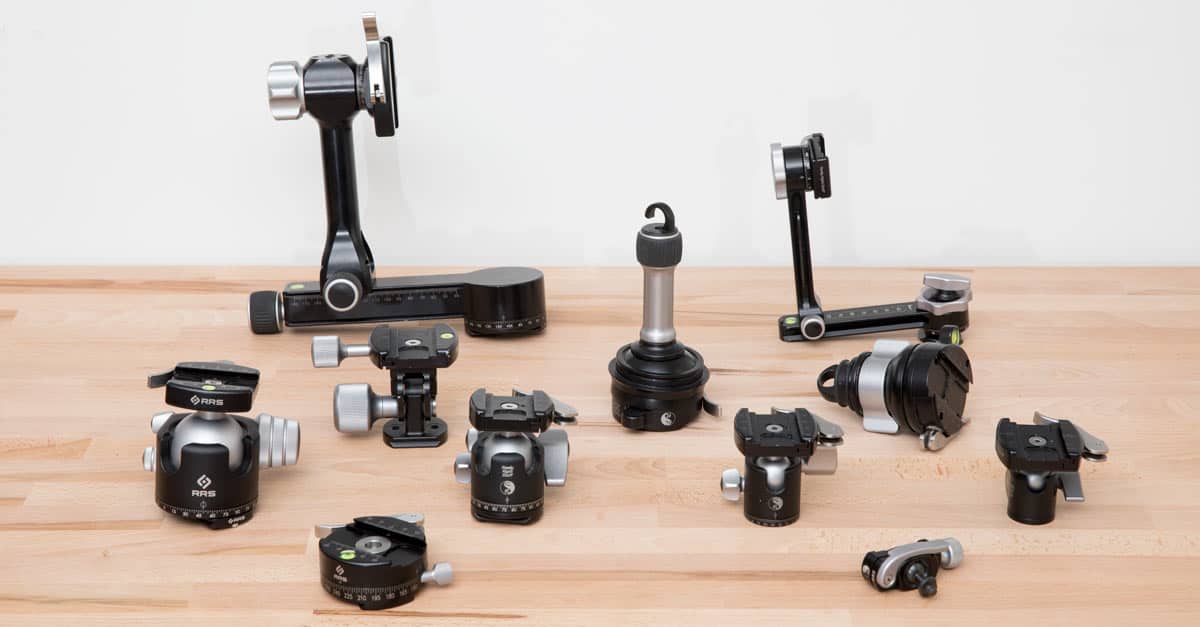
As it stands today, I own all of the available Really Right Stuff heads except for the video-specific fluid heads. With this collection, it seemed like the perfect opportunity to conduct a group test and thoroughly explain which heads are ideal for different types of photography or camera/lens setups. In this guide, I also plan to introduce what I call my “Frankenheads” — combinations of specific heads and RRS accessories that have resolved certain issues for me over the years.
This will be a long post, but having used this gear for many years, I’m in a unique position to compare many of its products. I trust RRS products completely, and while I’m friendly with several people at the company, have beta-tested pre-production gear, and contributed to their magazine, I have no obligation to create this content. What you’ll get are my honest opinions on both the positives and negatives.
More Megapixels
A sturdy support system (tripod + ball head) is becoming more essential as camera resolutions keep increasing. Achieving critical pixel-level image sharpness is much more difficult with cameras like the 100MP Fuji GFX-100 or even the 50MP Sony A1 Mark II. At these higher resolutions, every tiny camera movement or vibration is magnified. If you’re not careful, images that look soft at 100% zoom might be one of the first surprises you’ll encounter when upgrading to a high-megapixel camera.
Although the resolution of the average mirrorless camera has increased significantly in recent years, many people still haven’t adjusted their understanding of the stability needed for a sharp image. If you’re using a high megapixel camera, around 50MP or more, you might be missing out on some of that extra resolution if you don’t have proper support.
Really Right Stuff Ball Head and Gimbal Specifications
| Model | Price | Height | Base Diameter | Ball Diameter | Weight | Mount | Capacity |
|---|---|---|---|---|---|---|---|
| BH-55 | Check Price | 3.7 in / 9.4 cm | 2.9 in / 7.3 cm | 2.2 in / 5.5 cm | 1.96 lb / 0.89 kg | 3/8″-16 | 50 lb / 23 kg |
| BH-40 | Check Price | 3.1 in / 7.8 cm | 2.1 in / 5.3 cm | 1.6 in / 4.0 cm | 0.98 lb / 0.45 kg | 3/8″-16 | 18 lb / 8.1 kg |
| BH-30 | Check Price | 3.0 in / 7.5 cm | 1.6 in / 4.0 cm | 1.2 in / 3.0 cm | 0.70 lb / 0.32 kg | 3/8″-16 | 15 lb / 6.8 kg |
| BH-25 | Check Price | 2.6 in / 6.6 cm | 1.3 in / 3.4 cm | 1.0 in / 2.5 cm | 0.49 lb / 0.22 kg | 3/8″-16 | 8.8 lb / 4 kg |
| BPC-16 | Check Price | 2.0 in / 5.1 cm | N/A | 0.63 in / 1.6 cm | 0.28 lb / 0.13 kg | 1/4-20 thread & stud | 5 lb / 2.3 kg |
| BC-18 | Check Price | 1.8 in / 4.6 cm | N/A | 0.71 in / 1.8 cm | 0.23 lb / 0.11 kg | 1/4-20 stud | 10 lb / 4.5 kg |
| PG-01 with levelling base | Check Price | 7.75 in / 19.7 cm | 6.6 in / 16.9 cm | N/A | 1.20 lb / 0.53 kg | 3/8″-16 / Arca dovetail | 8 lb / 3.6 kg |
| PG-01 with flat base | Check Price | 7.5 in / 18.9 cm | 6.6 in / 16.9 cm | N/A | 1.10 lb / 0.49 kg | 3/8″-16 / Arca dovetail | 8 lb / 3.6 kg |
| PG-02 MK2 – Side Mount | Check Price | 9.5 in / 24.1 cm | 2.9 in / 7.4 cm | N/A | 2.5 lb / 1.14 kg | 3/8″-16 | 50 lb / 23 kg |
| PG-02 MK2 – Full Gimbal | Check Price | 9.5 in / 24.1 cm | 2.9 in / 7.4 cm | N/A | 3.23 lb / 1.46 kg | 3/8″-16 | 50 lb / 23 kg |
| MH-01 | Check Price | 3.8 in / 9.5 cm | 1.5 in / 3.8 cm | N/A | 0.83 lb / 0.38 kg | 3/8″-16 / Arca dovetail | 75 lb / 34 kg |
| MH-02 | Check Price | 3.6 in / 9.1 cm | 1.5 in / 3.8 cm | N/A | 1.01 lb / 0.46 kg | 3/8″-16 / Arca dovetail | 75 lb / 34 kg |
| TA-2U-LB | Check Price | 2.11 in / 5.36 cm | 3.83 in / 9.72 cm | N/A | 0.71 lb / 0.32 kg | 3/8″-16 thread / stud / Versa 2-series | 25 lb / 11 kg |
Discontinued Models
If you own an older model or have the opportunity to purchase one on the second-hand market, the specifications of discontinued Really Right Stuff heads might be useful.
| Model | Height | Base Diameter | Ball Diameter | Weight | Mount | Capacity |
|---|---|---|---|---|---|---|
| PG-02 | 9.7″ (24.6cm) | 2.9″ / 7.4 cm | N/A | 2.4lbs / 1.09kg | 3/8″-16 | 50 lb (23kg) |
| FG-02 | 9.5″ (24.1 cm) | Unknown | N/A | 3.3 lb / 1.5kg | 3/8″-16 / Arca dovetail | 50 lb (23kg) |
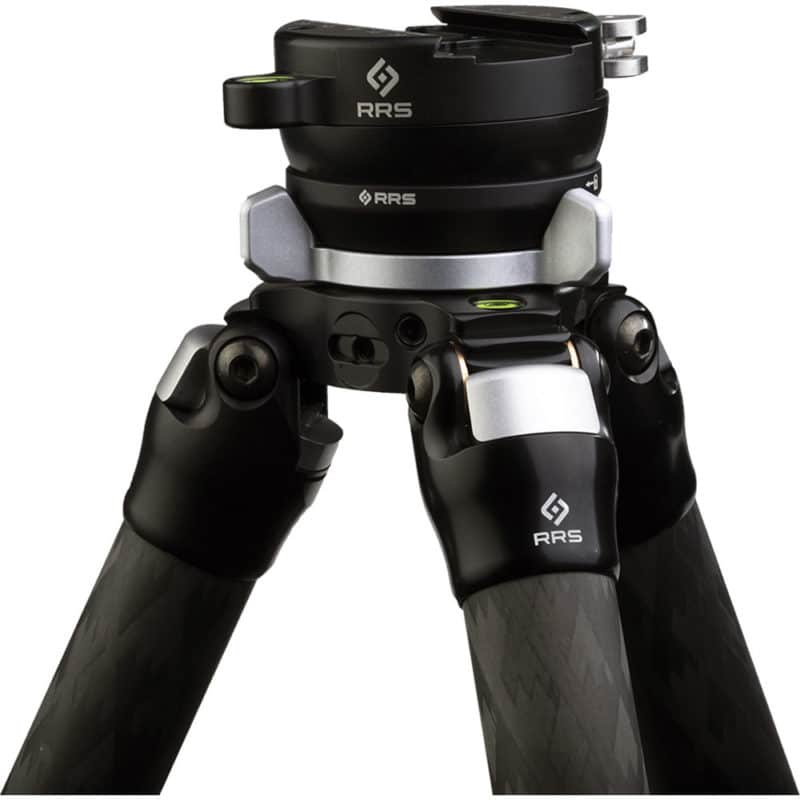
RRS R-Mount System – 2021 Update
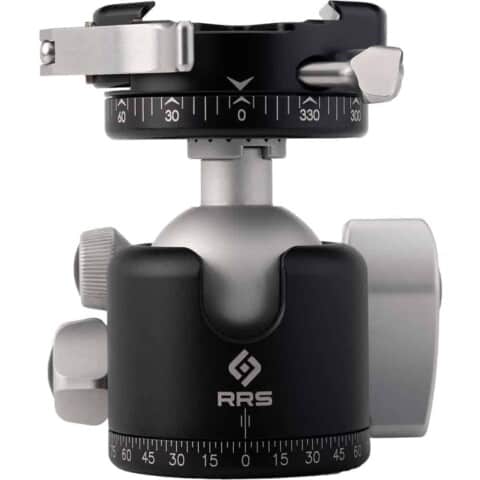
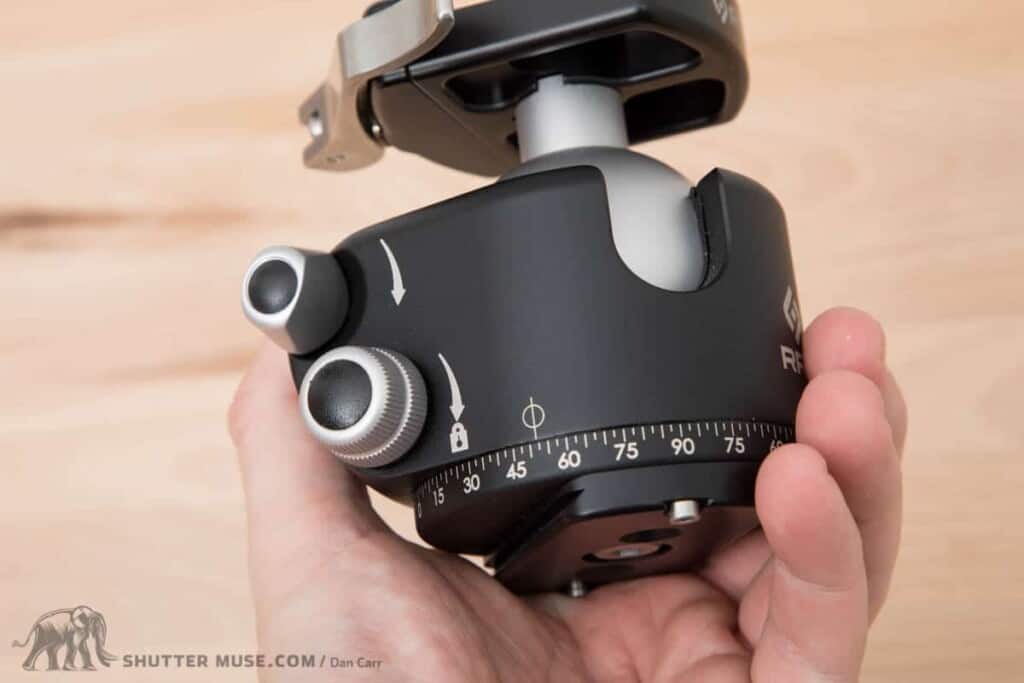
At the end of 2021, Really Right Stuff started rolling out a change to their ball heads and quick-release clamps. The update introduced a new way to attach the clamp to the ball head, which RRS calls the R-Mount. Where there used to be a tongue-and-groove design on the ball head’s stem and the underside of the quick-release clamp, this has now been replaced with a rosette design. Here’s what RRS says about the R-Mount:
The R-Mount’s rosette will prevent twisting at the coupling point between the two pieces of hardware over time, and will assist in eliminating “play” that results from regular use on the earlier tongue-and-groove designs.
People with older ball heads or quick-release clamps don’t need to worry that their gear is now outdated. In over ten years of using RRS heads, I have never seen any play in the old tongue-and-groove design. I’m sure there must have been some cases of this, or they wouldn’t have designed and patented the new rosette-style interface, but this isn’t a major change that would make you rush out and replace your old heads.
RRS has created simple adapters that you can add to your existing gear to convert it to the new R-Mount. These adapters come in two different versions:
- Ball Head Rosette Adapter – If you have a late-2021 or later ball head with the R-Mount rosette on top of the ball-stem, but you have an older quick-release clamp with the old tongue-and-groove clamp mounting, use this adapter. It has a tongue on the top that goes into the old-style clamp, and a rosette on the bottom to mate with the top of your ball-stem.
- Clamp Rosette Adapter – If you have a pre-late-2021 ball head with the tongue-and-groove mount on the stem, but you have a new quick-release clamp with the R-Mount rosette interface, use this adapter. It has a Goove on the bottom to mate with the ball-stem’s tongue, and a rosette on the top to mate with the R-Mount on the underside of your new clamp.
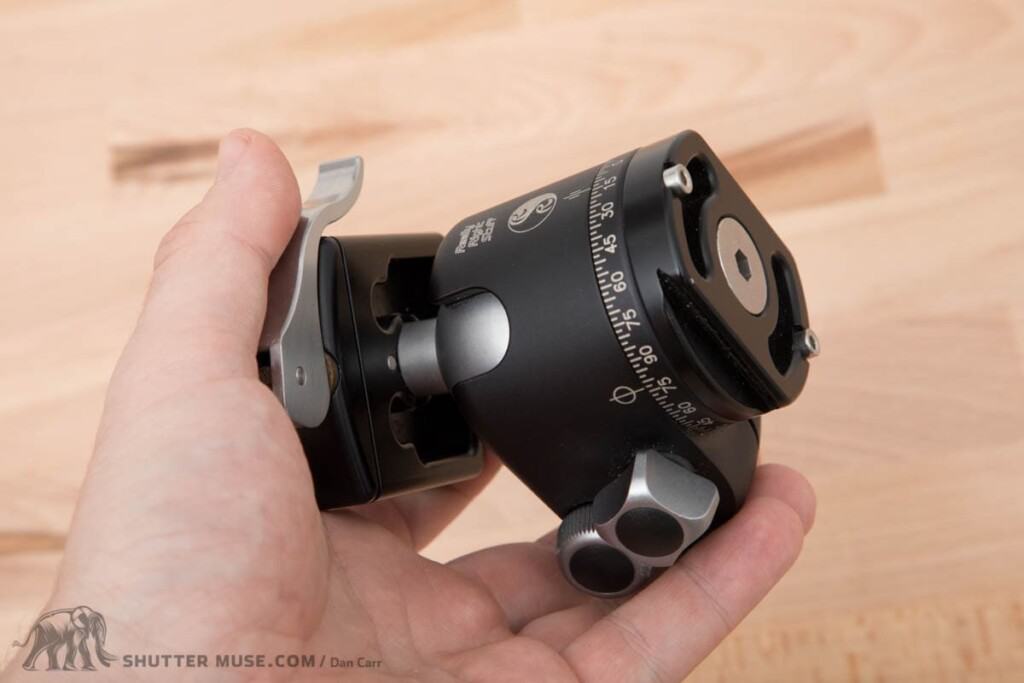
RRS Ball Head Models Explained
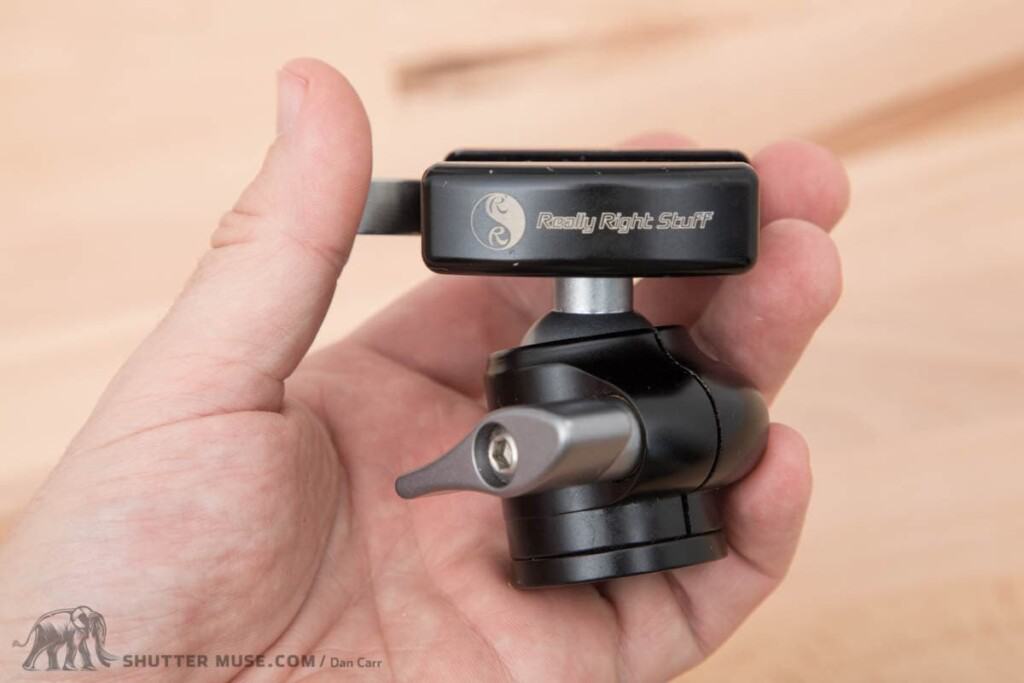
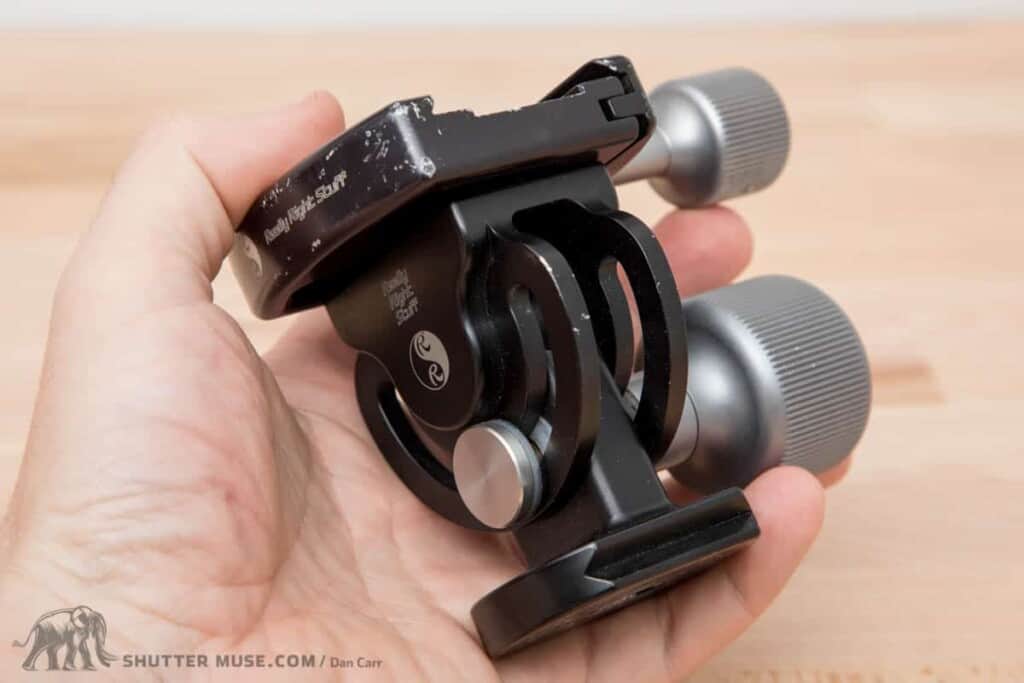
BC-18 Microball
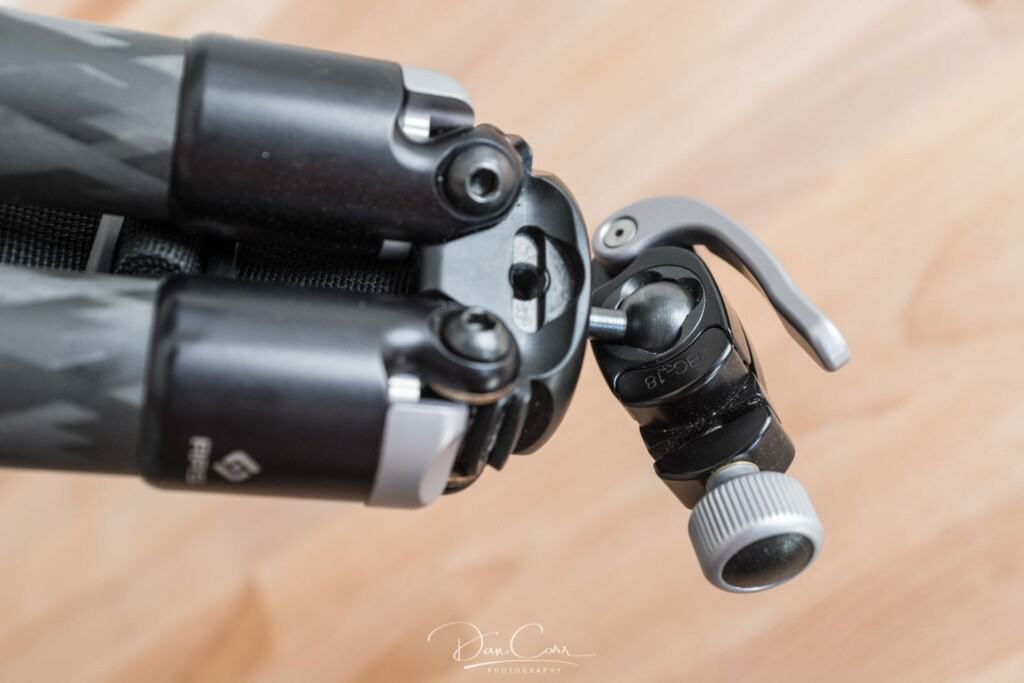
This small, somewhat odd-looking head is a tiny marvel. I believe it deserves more recognition! The BC-18 Microball has a lever to unlock the ball and a screw-knob clamp for securing the camera or lens. Unlike most tripod heads, it features a 1/4″-20 stud on the bottom rather than a 3/8″-16 socket, allowing you to mount it to the RRS TFA-01 Pocket Pod, the RRS Multi-Clamp, or any RRS TFC tripod (as detailed in my RRS tripod guide).

Instead of offering 90 degrees of movement in every direction, the BC-18 only provides 45 degrees. This means you really need to use an L bracket on your camera if you want to take portrait-oriented images. That said, I always recommend using an L bracket anyway, so I don’t think this is a major compromise.
The clamping force on the tiny ball is impressive. In terms of capacity, I consider the BC-18 much better than the BH-25 ball head. I used to use the BH-25 on my TFA-01 tabletop tripod, but it would often creep during long exposures with a load like a Canon R5 and 24-70mm lens. Not so with the BC-18. It’s solid as a rock.
I would not choose the BC-18 as my only tripod head. There are often times when a larger head is easier to use, or when you need a head with a dedicated panning control and tension adjustment. But if you have a dedicated ultralight travel tripod, a tabletop tripod, or a multi-clamp, this thing is simply brilliant.
BC-18 and BPC-16 Hands-On Video
For a detailed look at these first two heads in the RRS head lineup, check out this video from our YouTube channel. Subscribe to the channel and give the video a thumbs-up if you like it!
BPC-16 Microball

The BPC-16 Microball was introduced a few years after the BP-18. It features a 90-degree drop notch and full 360-degree panning for panoramic photography. Although I thought adding the drop-notch would eliminate the need for an L-bracket on the camera, my testing shows that’s not the case, as the head is so small that your camera bumps into the top of your tripod when using that notch.

The downside of this head is that it’s almost too small for its own good. The clamping force isn’t as strong as the BP-18’s, and the clamp locking knob for securing your camera is not only tiny but also has very fine knurling, which makes tightening it much harder than the larger knob on the BP-18. I also noticed that the knob would easily get stuck in cold temperatures. In almost every situation, I would recommend the simpler, cheaper BP-18 over the BPC-16. You can always add the Panning Clamp to the BP-18 anyway (see Frankenhead section further down the page), which is something I have been doing for years.
The only person I would recommend the BPC-16 to is someone using a very small mirrorless camera who is absolutely obsessed with panoramic images. If you only occasionally shoot panoramic photos, it’s just not worth dealing with the compromises of this small head. I wanted to love it; I used it for months trying to love it, but in the end, I went back to the BP-18 and am much happier for it.
BH-25
The honest truth is, I don’t have much love for the BH-25. The BC-18 Microball outperforms it in holding heavier weights while being smaller, lighter, and cheaper. If you didn’t have an L bracket to use with the BC-18 and felt forced to use a more traditional ball head with a 90-degree drop notch, I wouldn’t recommend using the BH-25 with anything larger than a medium-sized mirrorless setup and a small prime lens.
I’ve revisited this head many times over the 6 or 7 years it’s been in my kit, and each time I wish I’d chosen something else. Then it goes back in my closet for another couple of years until I forget why I didn’t like it last time. The price difference between the BH-25 and BH-30 is about $120, but the experience is completely different. The BH-30 isn’t just a little better than the BH-25; it’s in a whole other league.
I also feel that the BH-25 somewhat misses out on some of the RRS magic that most of their other products offer. All the other heads in this guide are unmistakably RRS. The beautiful machining and appearance of the products combine into a package that radiates quality and puts a smile on my face, despite the relatively high prices. With the BH-25, I get the sense that it could have any other brand name on it and it wouldn’t seem out of place. It just lacks that extra RRS sparkle that their other products provide.
Having read the positive reviews of this ball head on the RRS website recently, I know many people seem quite satisfied with it. All I can do is share my own opinion based on my experience with it compared to other RRS ball heads. I believe your money is better spent on the BH-30 or by using the BC-18 if ultralight gear is your goal.
BH-30
The RRS BH-30 head pairs perfectly with the RRS Series 1 tripod range, such as the Ascend 14 BH or the TFCX-14, and naturally with other similarly sized models from different brands. As we increase in size among ball heads, the BH-30 is the first to include a dedicated panning knob. This feature is especially useful if you want to do some simple panoramic photography without needing more specialized pano gear.
This head can easily support a professional mirrorless camera body or a large, gripped mirrorless body with wide-angle lenses for long exposure landscape photography. In fact, it can also handle longer focal-length lenses, but at that point, you’ll be more limited by the smaller tripod legs you’re likely to place it on.
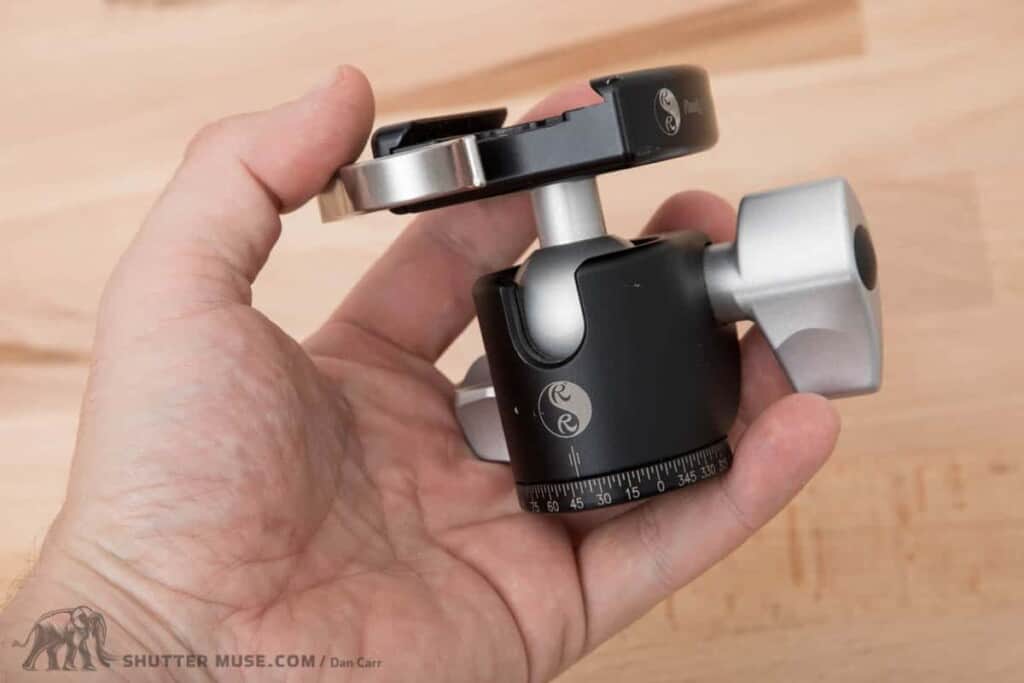
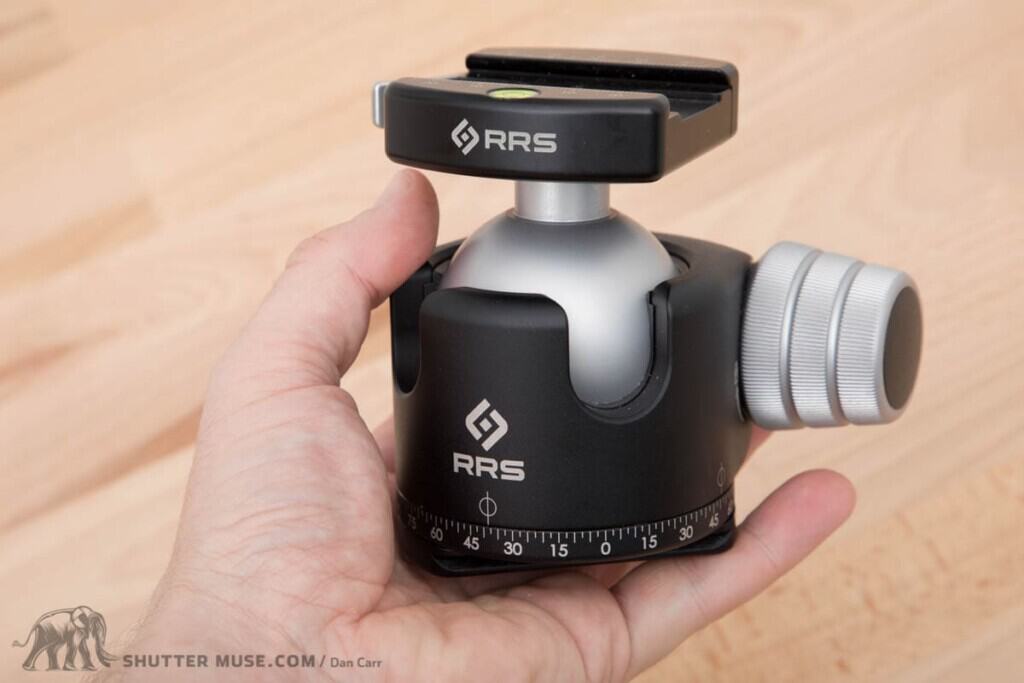
BH-40
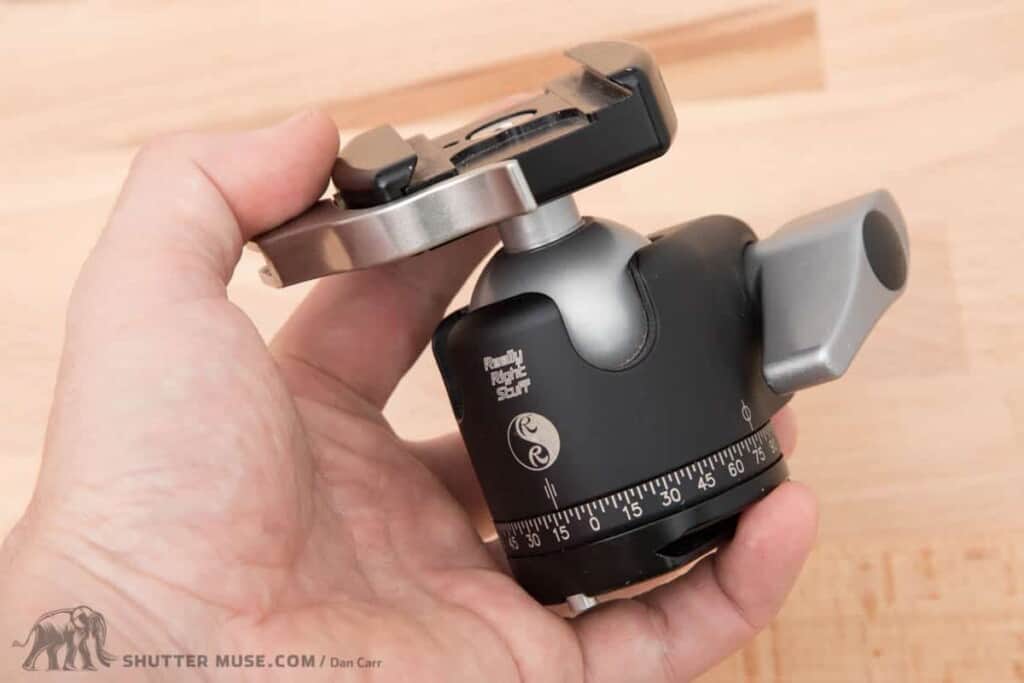
The BH-40 strikes a great balance between stability and size. It doesn’t feel too large for a mirrorless setup if you’re using longer telephoto lenses, and it doesn’t feel too lightweight for professional landscape photography with pro mirrorless bodies and medium format cameras. In short, it’s versatile, which is why it was the first RRS head I ever bought.
When I bought this head, I knew it would fit my current camera setup as well as any larger setup I might get in the future. If you want to buy just one ball head for your entire career or hobby, this is always going to be an excellent choice. While the BH-40 isn’t lightweight, I don’t think its weight would be too restrictive in most situations. You can definitely still hike and travel with this head, as I have done many times.
RRS recommends the BH-40 for lenses up to 300mm f/2.8, but I’ve used it with much heavier lenses and it remains solid. Most people will find that their tripod is the weak link in the support chain when using heavy setups like that. For long focal length landscape photography with a 100-400mm or even a 150-600mm, the BH-40 is an excellent choice.
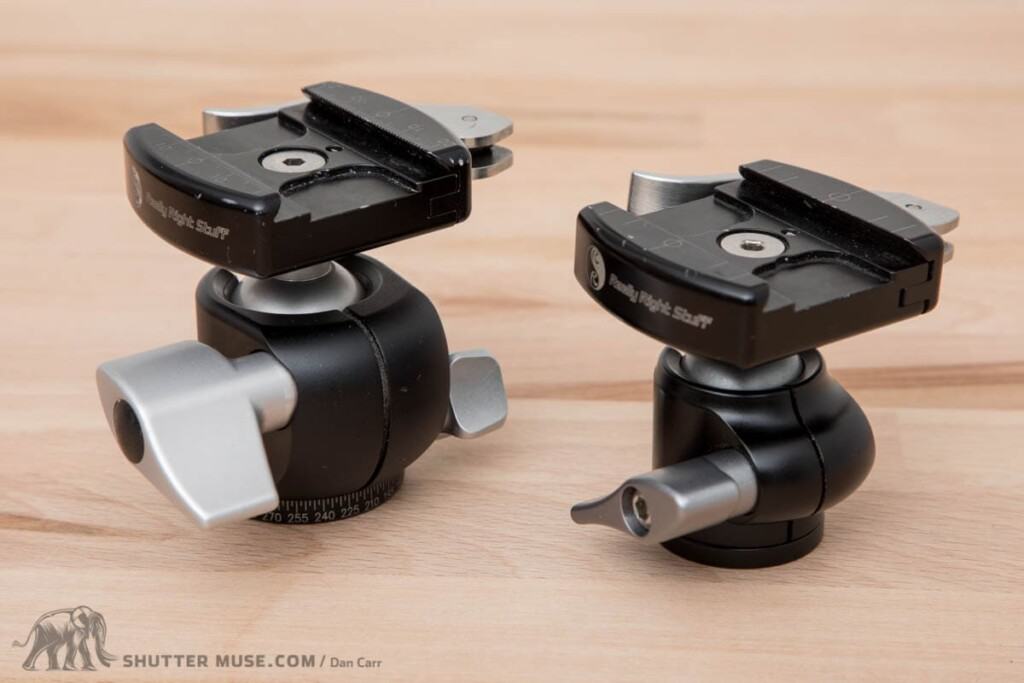
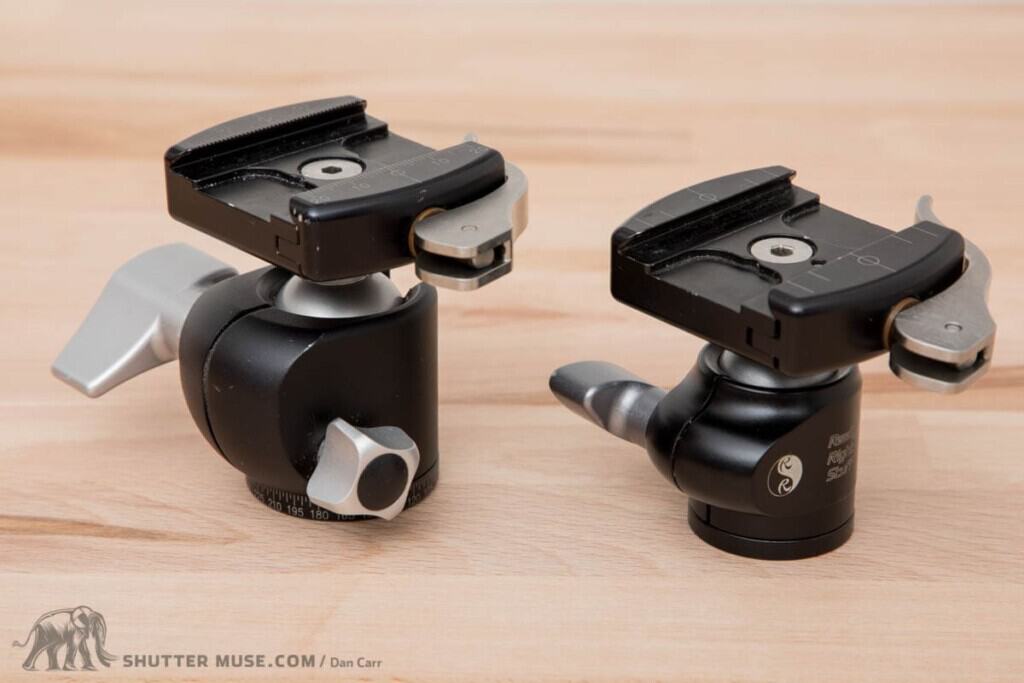
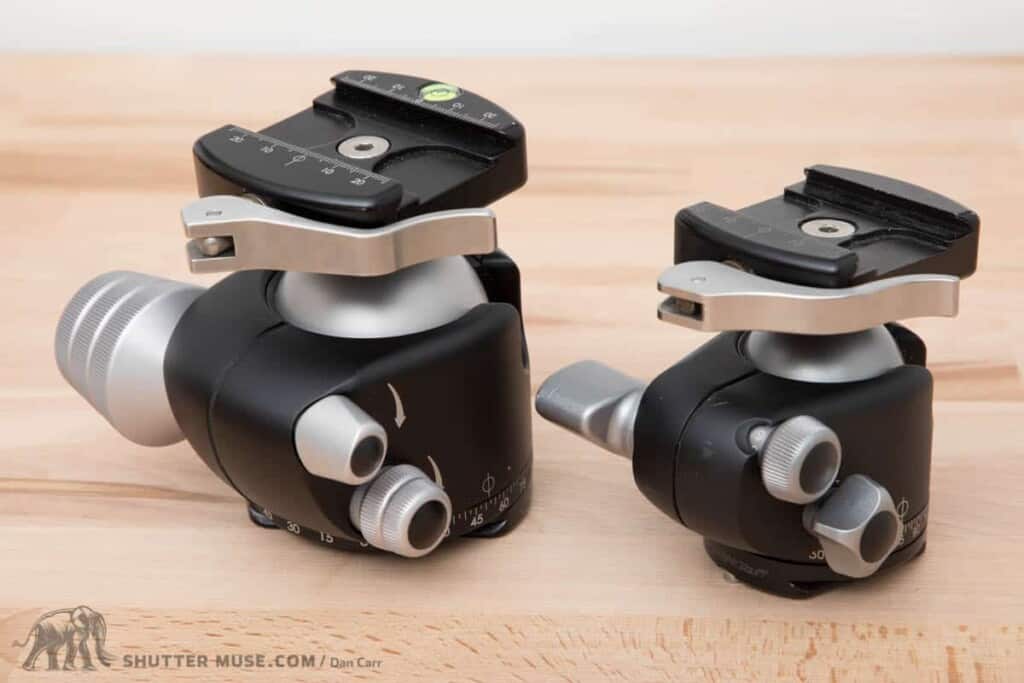
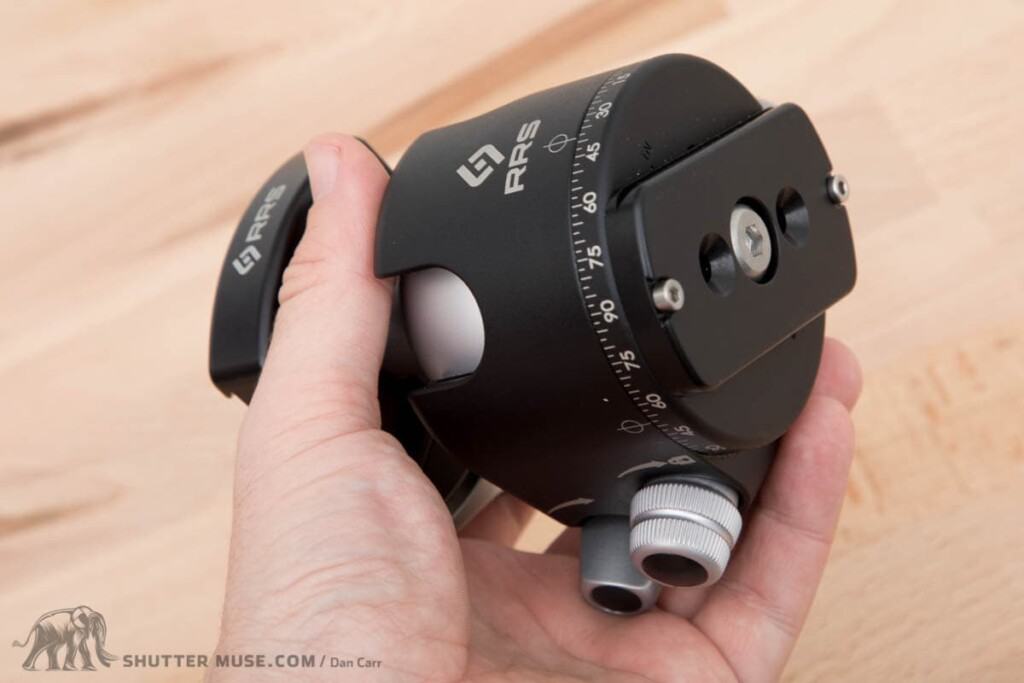
BH-55
Having used both the BH-40 and the BH-55 side by side, my conclusion is that the BH-40 is sufficient for most people. Upgrading to the BH-55 doesn’t provide any noticeable increase in stability, and given the specifications, that isn’t surprising. The BH-40 is rated to support an 18 lb load, and even a Canon 600mm f/4 weighs only 7 lb. In over ten years of using the BH-40, I don’t recall ever thinking, “This isn’t stable enough.”
Why did I buy the BH-55, then?
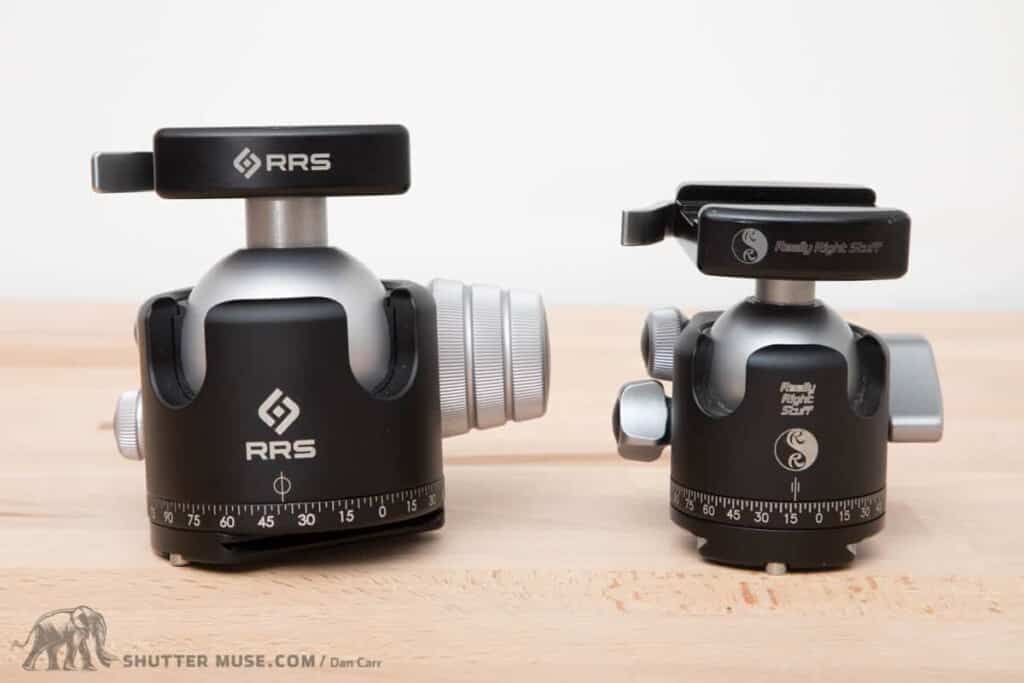
The BH-40 is a solid head, but the controls on the BH-55 are much easier to use. They are more evenly spaced around the head, and the large, main locking knob is a joy to operate. I find I have better precision in controlling the tension and drag of the ball head. The bigger, more spread-out controls are also much simpler to use while wearing gloves, and since I live just a short distance from the Arctic Circle, this is an important factor.
Now, I realize that some people might roll their eyes at this because none of what I said actually changes the photo I end up taking. But it does influence the overall experience of using the product. Deciding whether such effects justify the price premium over the BH-40 is up to you. It’s like choosing between a nice Mercedes and an Aston Martin for a trip to the supermarket: both will get you there comfortably and are excellent cars, but the Aston Martin might just leave you with a bigger smile. If you can afford the Aston Martin and it adds more enjoyment, then why not?
Another reason for buying the BH-55 was the reassurance that I had done everything reasonably possible to get the most out of my camera. I know that technically the BH-40 is rated to support even the heaviest of my camera setups, and I know that in all my use of that head I haven’t experienced any stability issues. But what if the first time I needed more stability was halfway through a photography expedition that had cost me ten thousand dollars to organize?
The BH-55 has a huge capacity of 50lb, providing ample overhead capacity for even the heaviest camera setups I can envision. With the BH-55, I never find myself wondering, “Would it have been sharper if I’d used a different head?” Maybe it’s just psychological, but it’s one less thing to worry about. I’ve come to value that, and over the years, I’ve grown to appreciate it.
The price gap between a BH-40 and a BH-55 is about $90, and when I’m mounting it on a $1000+ tripod and then placing over $10,000 worth of camera gear on top, you can start to see why these small comforts and reassurances might be worth the relatively small extra cost.
One thing we haven’t discussed yet is the weight of this head. At 1.6 lbs, it’s significantly heavier than the 13-oz BH-40. All the stability guarantees in the world don’t matter if you quit your hike early because you’re exhausted. That’s the only reason I don’t take this head everywhere.
RRS Pano-Gimbal Heads
RRS currently manufactures two Pano-Gimbal heads: the PG-02 Mk2 and the PG-01. Careful consideration has been given to these heads so they can be used for traditional gimbal shooting with a telephoto lens, as well as for single or multi-row panoramic photography. Most gimbal heads on the market can’t be used for multi-row panoramic shots because they lack the ability to adjust the camera’s horizontal position to ensure it rotates around the nodal point. If you need a gimbal for wildlife photography but also enjoy shooting panoramic images, this fact alone should make one of these heads a top choice for your list.
RRS Gimbals as Ball Head Replacements

The RRS gimbals can replace a ball head when used with an L Plate on your camera. This setup provides individual control of the horizontal and vertical axes, which some people prefer over a ball head’s all-at-once movement. With the PG-01, you can use the built-in leveling device to keep a level horizon. With the PG-02, you will need to adjust your tripod legs while paying close attention to the gimbal’s bubble level or pair the gimbal head with one of the RRS leveling heads. The latter option is, of course, simpler and quicker.
Really Right Stuff PG-02 Mk2
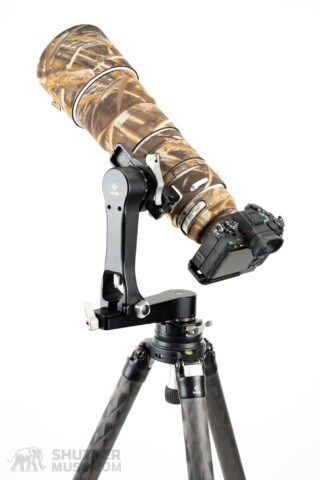


The PG-02 Mk2 Pano-Gimbal head is available as either a Side-Mount or a Full-Gimbal version with a Cradle Clamp. This gimbal was a revelation when I first bought one for my wildlife photography. It’s easy to get it balanced with super-telephoto lenses, making it effortless to swing them quickly in any direction while tracking moving animals. It also works exceptionally well instead of a large ball head like the BH-40 or BH-55, making it the perfect tripod head choice for trips involving both landscape and wildlife photography.


The new PG-02 Mk2 improves on the original by reducing its bulk and weight while keeping its capacity and rigidity. Along with its slightly more compact design, the RRS designers developed an innovative way to enable simultaneous locking and unlocking of the pan and tilt movements. These updates and others are thoroughly detailed in my extensive review of the PG-02 Mk2. The review also covers the advantages and disadvantages of the Side-Mount and Full-Gimbal versions to help you decide which is best for your photography.
Really Right Stuff PG-01

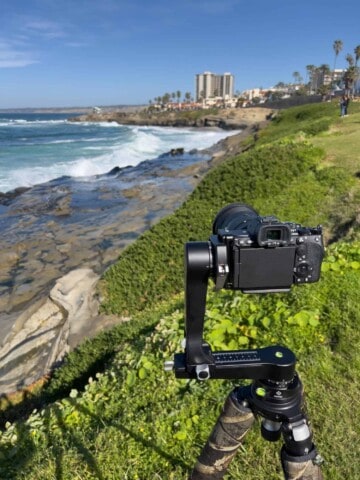
The PG-01 is a compact tripod head designed for multi-row panoramic photography. Although it is technically part of the gimbal lineup and called a Pano-Gimbal head, this head’s maximum capacity is not sufficient to replace the PG-02 Mk2 gimbal for wildlife shooting with super-telephoto lenses.

If you want both a pano head and a gimbal for everyday long lens use, the PG-02 is what you need. If you mainly want a multi-row panoramic head, have a camera that fits my weight recommendations for this head (more on this in a second), and plan to use the gimbal function only a few times a year with smaller lenses, then the PG-01 will work.
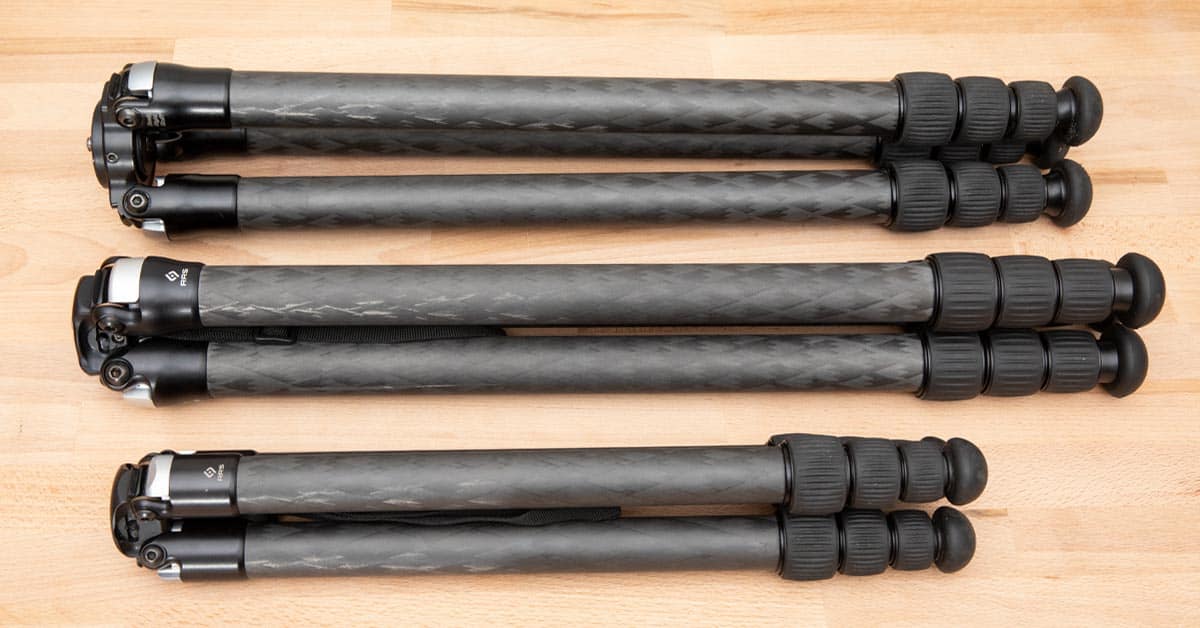
Just like the PG-02 Mk2, the PG-01 can be taken apart into a few different pieces for travel. As you can see from the photos, it is significantly smaller and lighter than the PG-02 Mk2, making it perfect for folks who enjoy hiking to their panoramic landscape spots.
Unlike the PG-02 Mk2, the PG-01 is also available with an option to have a leveling head built right into it. This is great because leveling heads on their own tend to be quite large and bulky, which would really negate the lightweight design of the head.
There’s one aspect of the PG-01 design I don’t like, and that’s the knobs used to tighten the panning base rotation and the vertical axis rotation. They are knurled to provide grip, but they don’t offer much leverage, making it difficult for me to tighten them under heavy load.
This head is ideal with a very lightweight mirrorless setup. I have been disappointed with its stability when used with larger full-frame mirrorless cameras, and you can absolutely forget about using it with pro-sized or gripped bodies. For the very occasional gimbal use possible with this head, the weight consideration is a little looser because you don’t actually lock the head. I have used it with a full-frame body and a 100-400mm lens in this mode, but such a setup would definitely not lock solidly for long exposure landscape photography.
Really Right Stuff FG-02
The FG-02 was a fluid-dampened version of the PG-02 designed for smooth panning and tilting during video recording. It has been discontinued for several years, but with the release of the PG-02 MK2, many wonder if we will see an FG-02 Mk2. I don’t have the answer, but I suspect we might see one eventually if enough people request it. That said, I don’t expect it soon; RRS is not known for quick product development. They take the time to do things right. Buy a PG-02 Mk2 now if you need a large-capacity gimbal head.
RRS Leveling Heads
A perfectly level tripod head is crucial for panoramic photography and when using a gimbal or video head. If the tripod isn’t level, the viewfinder image will shift up and down as you rotate the camera. A leveling head sits between your tripod and ball head to help you quickly and easily level it. Without one, it’s more difficult because you have to adjust each of the three tripod legs separately. While it’s possible, it takes more time.
Really Right Stuff offers several leveling heads designed for their range of tripods, and all of them can be equipped with a lever-release lamp on top to help quickly switch between different types of heads.
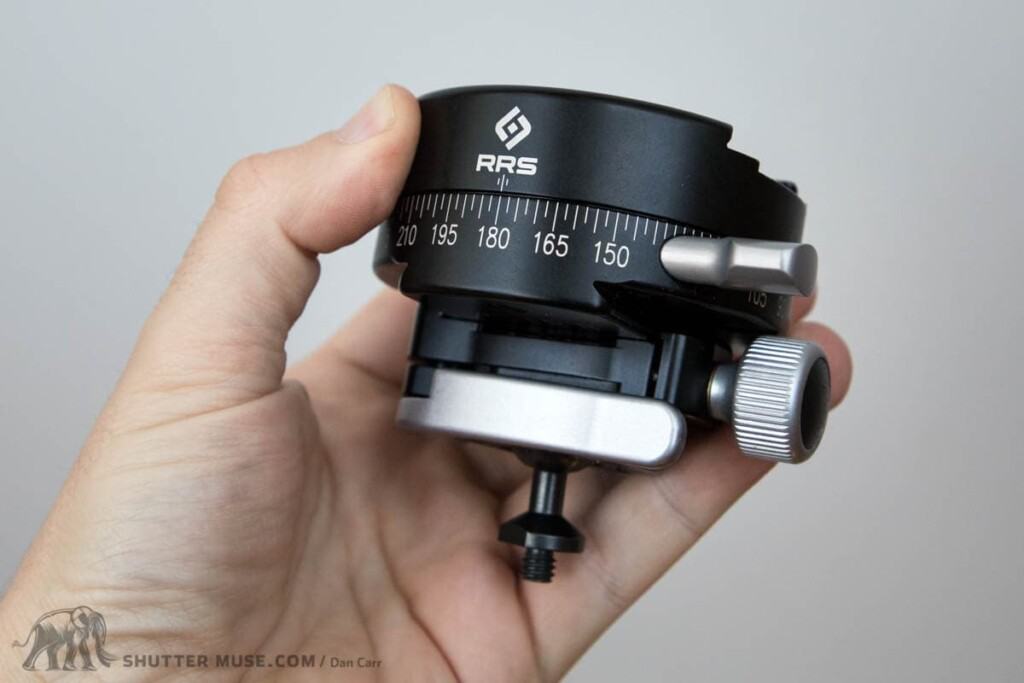
TA-2U Universal and Series-2 Leveling Head
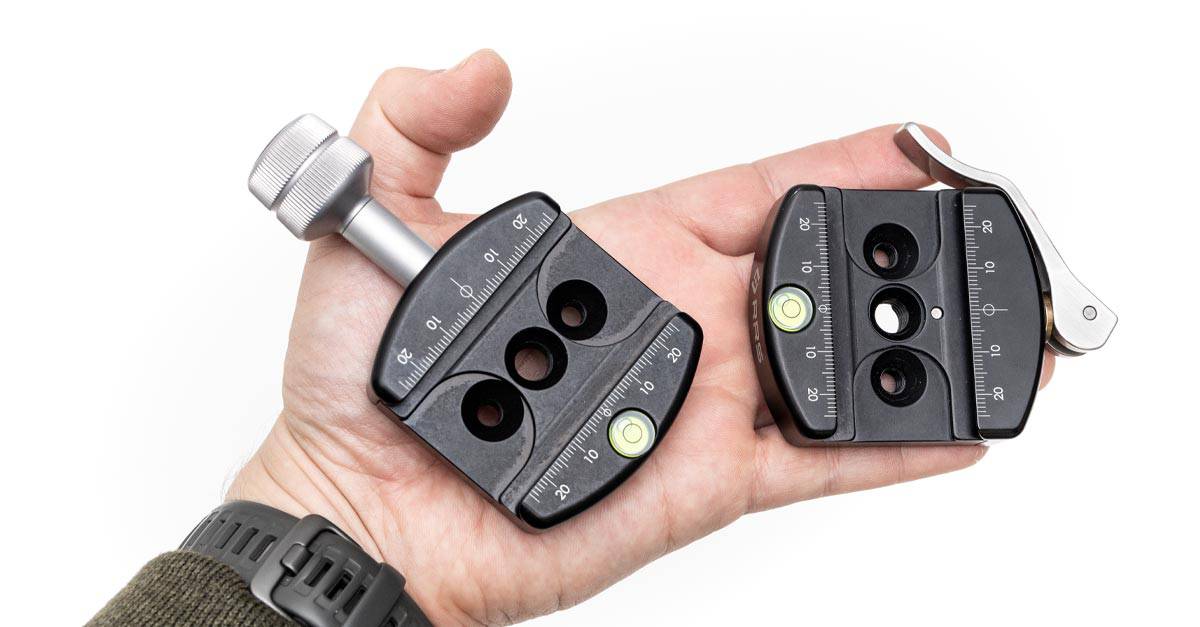
In 2016, RRS discontinued the TA-2 Series-2 leveling head and the Universal Leveling Head, merging both into a new product called the TA-2U Leveling Head. It has a much lighter and lower-profile design compared to the heads it replaces. This combined design allows it to be used on the apex of a Series-2 TVC tripod (see above photo), and it also features a 3/8″-16 thread at the bottom for universal attachment to other tripods.
RRS Series 3 Leveling Head TA-3
The TA-3 leveling head installs into the Versa SureGrip mount on an RRS TVC tripod. It allows 30 degrees of movement in all directions, with a locking handle located beneath the tripod. The drawback is that the tripod can’t sit flat on the ground, but RRS offers three handle lengths to help you work around this. It also features a standard 75mm video bowl as part of the design. If you have a video fluid head with a 75mm ball on it, you can slot it right into the TA-3’s bowl.
RRS Series 1 Leveling Head (sort of)
RRS doesn’t produce a specific leveling head for their Series 1 tripod, but you can use the BC-18 Microball for the same purpose. All you need is a dovetail plate on the bottom of the head you want to level. A great choice is to clamp the RRS Compact Panning Clamp into the BC-18, with a panoramic rail in the clamp. The BC-18 handles the leveling, and the panning clamp has a bubble level to check it. This setup allows for perfect panoramas in a lightweight package.
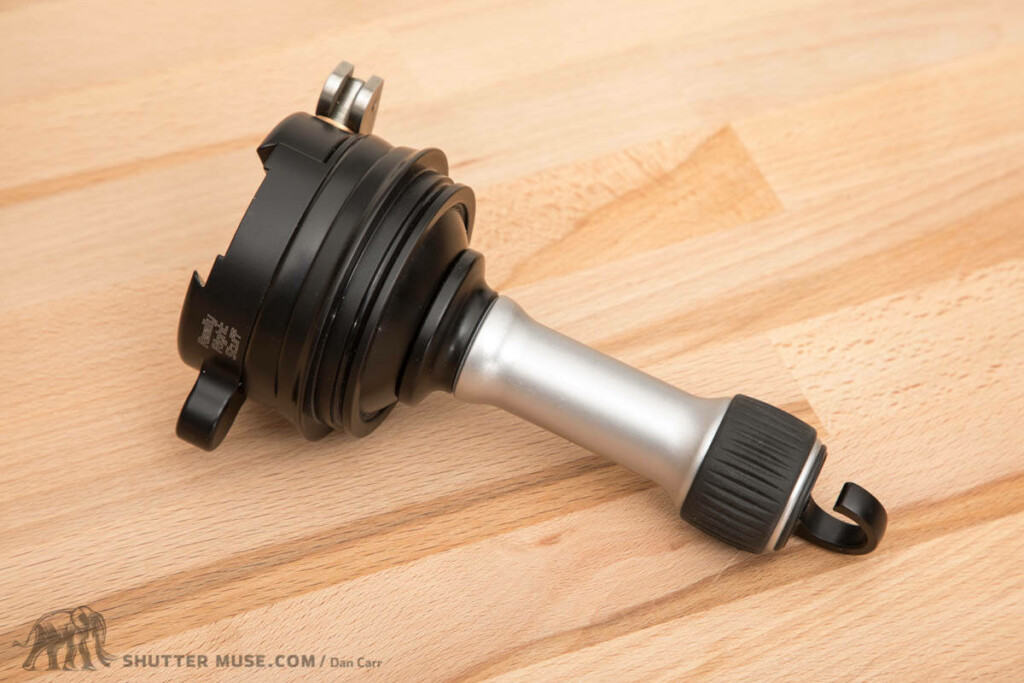
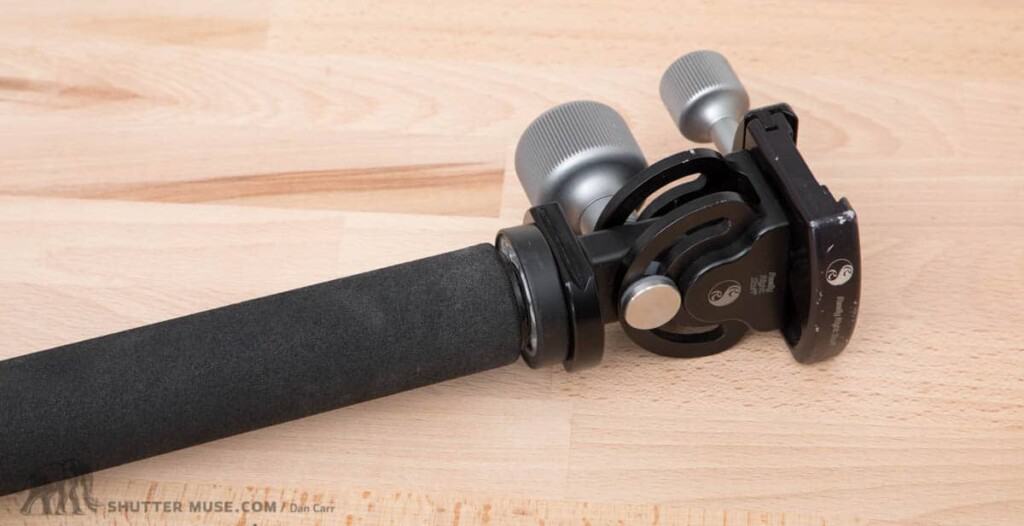
RRS Monopod Head
As you can see from the photos, my MH-01 monopod head has been through a lot. Unlike a ball head, this head only allows movement in one axis, but it works well with super telephoto lenses that have a tripod collar. The collar lets you rotate the camera between portrait and landscape modes, and the monopod head gives you more freedom when aiming at subjects that are much higher or lower than your shooting position. What’s great about the MH-01 head is that its base has an integrated Arca-Swiss dovetail. If you want to mount a quick-release clamp on your monopod, you can easily add and remove the head as needed. For a more permanent setup, it features a 3/8″-16 threaded hole on the bottom.
If you shoot field sports where you’re typically aiming at targets roughly at your level, there’s no good reason to buy this monopod head. However, if you’re photographing wildlife, you never really know where the subjects will be. Without a monopod head, tilting the lens up sharply requires an awkward crouch that can nullify the stabilization benefits you’re trying to achieve with a monopod. In this crouched position, smooth panning is especially difficult, so this head is very useful for photographing birds in flight with a monopod.
For the decade I photographed action sports professionally, I also found this head incredibly useful. When shooting skiing, snowboarding, and mountain biking, I was often positioned above or below the athlete to capture their next line. With the MH-01, I could track the vertical descent without having to shift my body or tilt the monopod.
MH-01 Vs. MH-02
The RRS monopod head comes in two versions. The MH-01 features a clamp that can be rotated 90 degrees with a hex wrench. Most users will prefer this version, and when used with collared lenses, you can simply position the clamp so the lens foot runs parallel to the tilt axis. The MH-02 is a slightly more expensive version of the head that lets you change the clamp orientation without tools. If you often need to switch between supporting a long collared lens and a shorter non-collared lens, the MH-02 speeds up that process.
The MH-01 has a simple design without fancy bearings or greased balls inside. This is a clear advantage because it means you can toss it around in the dirt without any worries. If it gets dirty, just rinse it under a tap for a few seconds, and it’ll be ready to use again.
For the work I’ve always done with it, that simplicity has been helpful. One minute, I’ll be using the monopod, then the next, I’ll be lying in the dirt trying to get a lower angle, having quickly tossed the monopod aside. This head has been muddy, sandy, frozen, and regularly submerged in water. After all that, it’s still as smooth as the day I got it, and I haven’t done any maintenance on it in over 10 years of use!
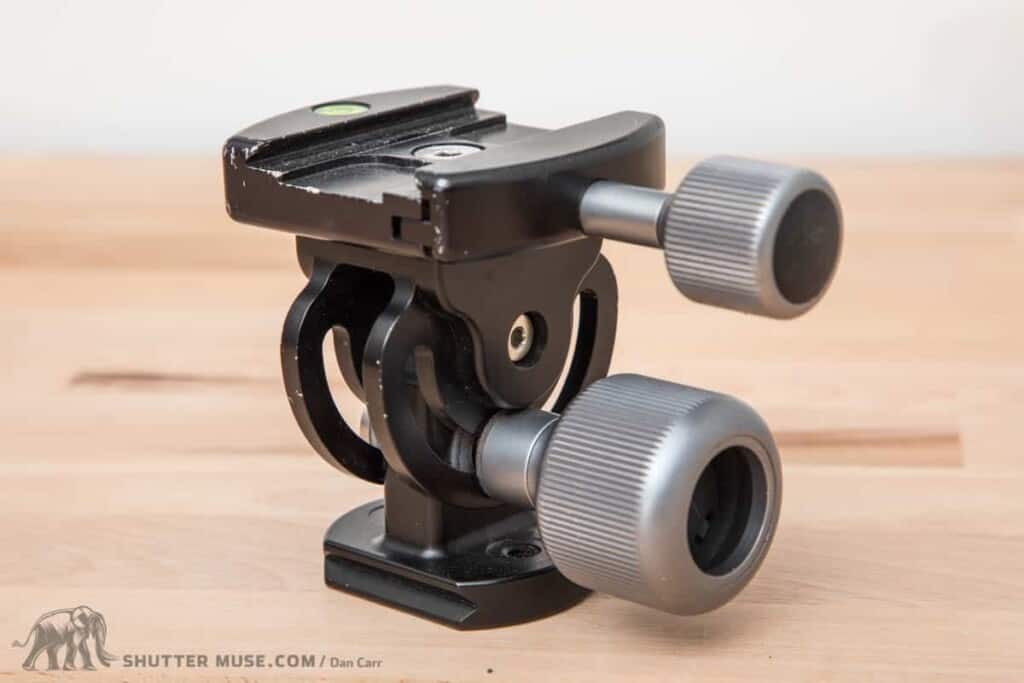
When buying an MH-01, you’ll have the option to choose between a lever-release clamp and a screw clamp. Unlike all my other RRS heads, I went with the screw clamp on this one. The reason is that the screw clamp, when tightened, is basically impossible to release accidentally. In regular use with a tripod, I don’t worry about accidentally releasing a lever clamp. However, my concern increases when I carry a monopod, especially with a super-telephoto lens attached. I often hang it over my shoulder while moving to a new spot. Most backpacks have nylon loops on shoulder straps, and if one catches on the quick-release lever, it could accidentally release and cause $20,000 worth of gear to fall. This is the only situation where I would worry about a lever-release clamp.
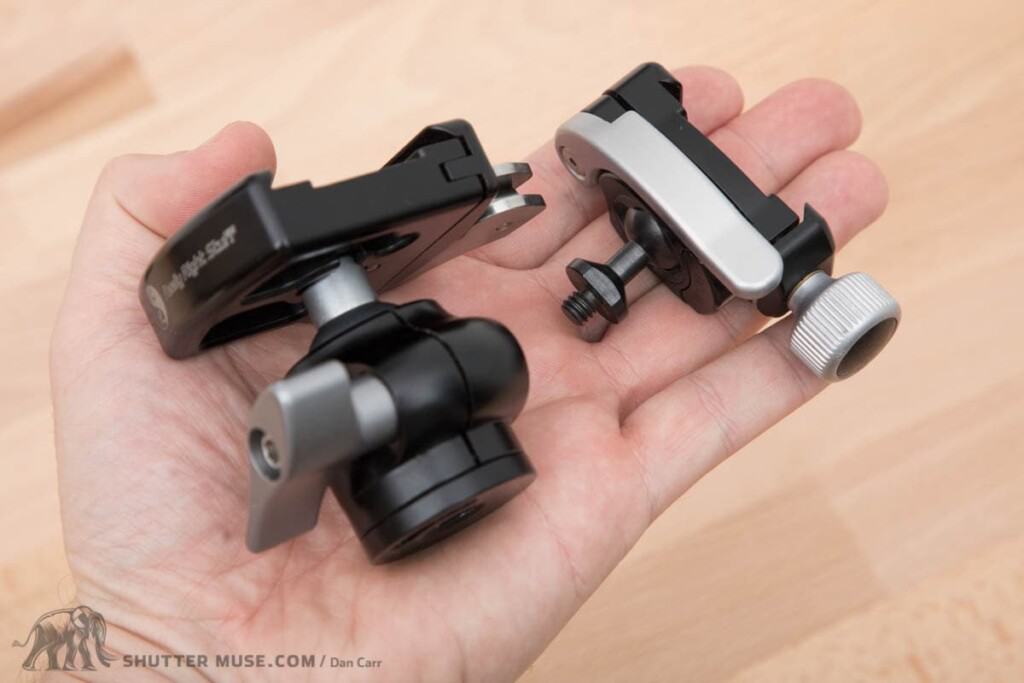
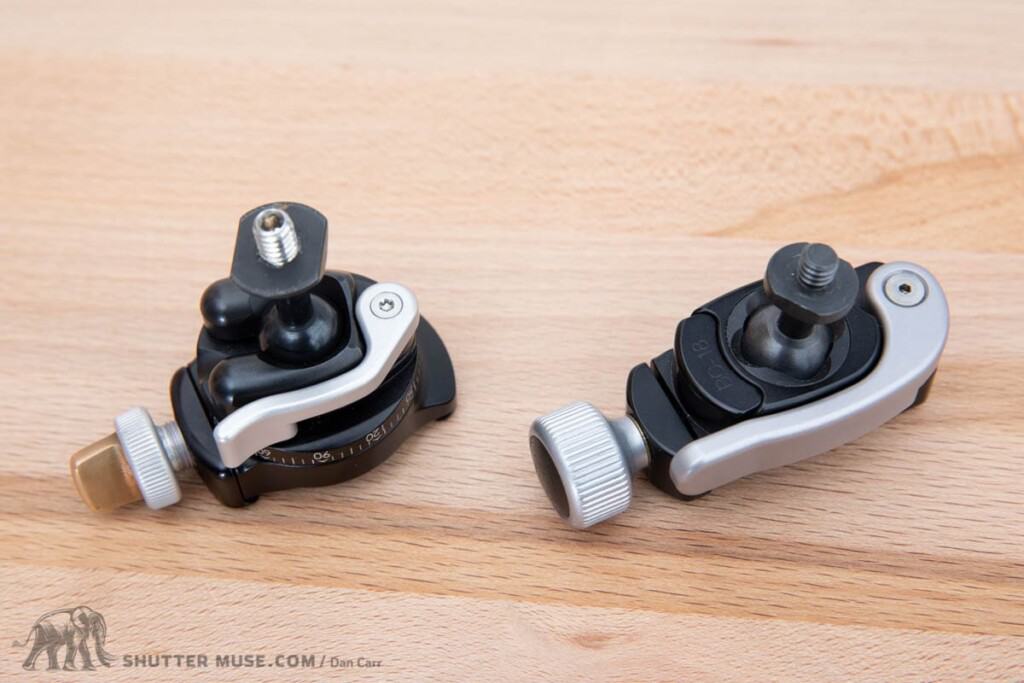
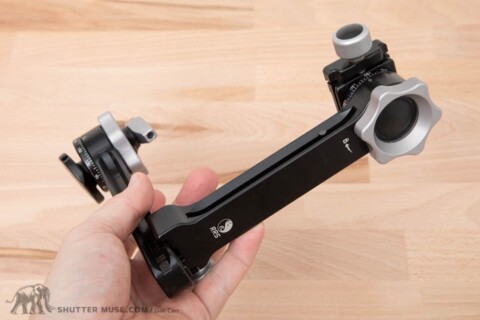
RRS Frankenheads

Over the years, I have solved various photographic puzzles using unique combinations of RRS heads and Arca-Swiss compatible dovetail accessories. Some of these have broad applications, so I’m sharing them with you here.
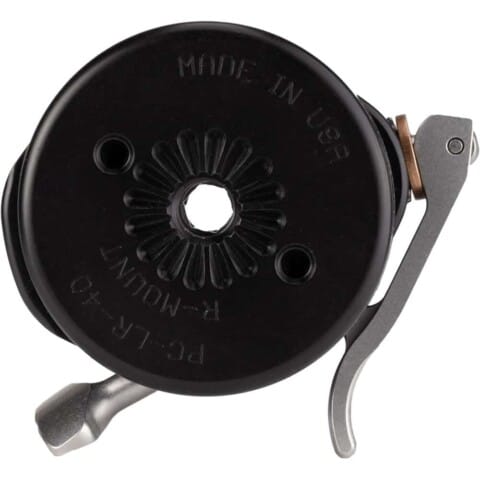
The Lightweight Pano Head
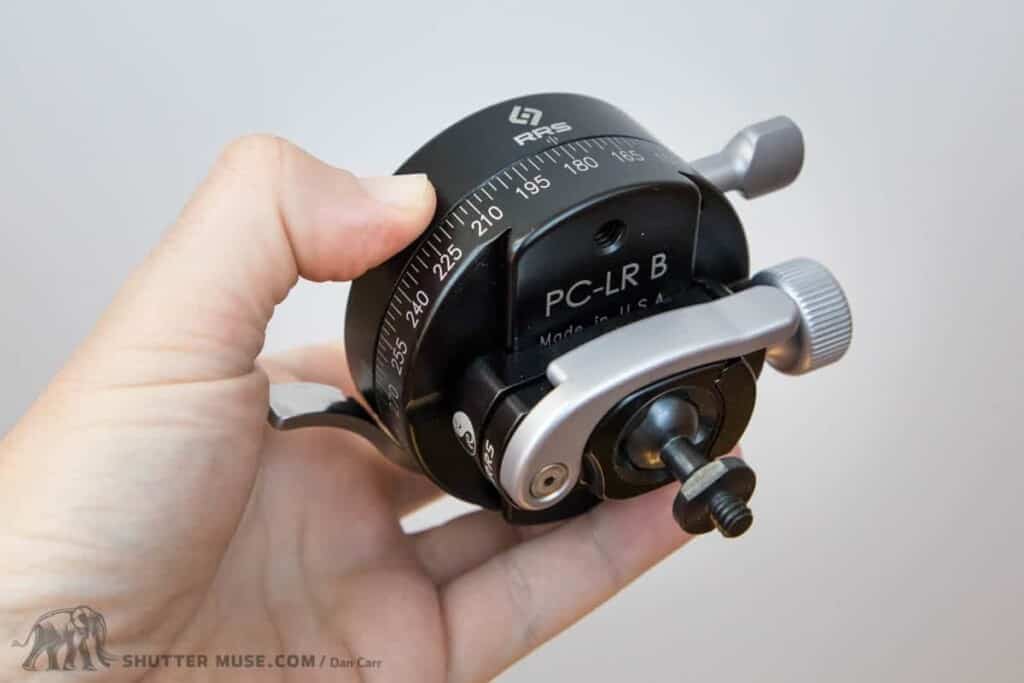
I use the BC-18 Microball on my Series 1 tripod when I need to travel light. Since there is no Series 1 leveling head option, I usually carry a PC-LR panning clamp or the smaller PC-LR-40 Compact Panning Clamp with me to create this mini pano head.
With a standard ball head, the panning base is located below the ball, which means you can’t use the ball to level the entire head and ensure a level pan. With this clever setup, the panning base is above the ball, allowing you to perfectly level the panning clamp using the ball, and then use it to rotate the camera for panoramic shots. If I’m shooting wide or with foreground objects, I add a nodal slide to this setup to help eliminate parallax and improve image stitching accuracy.
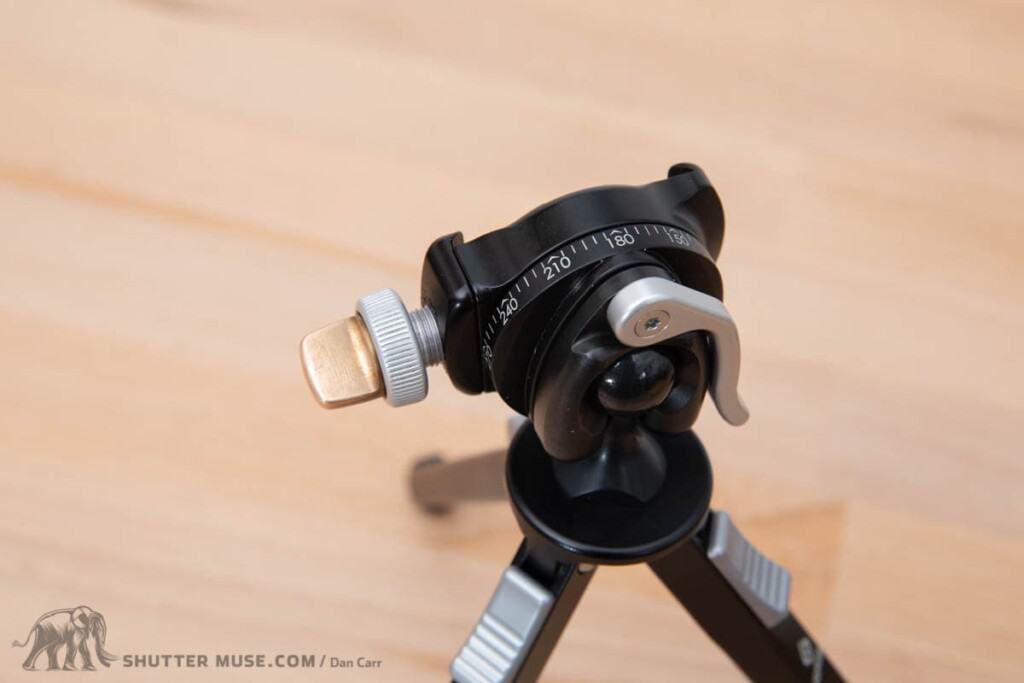
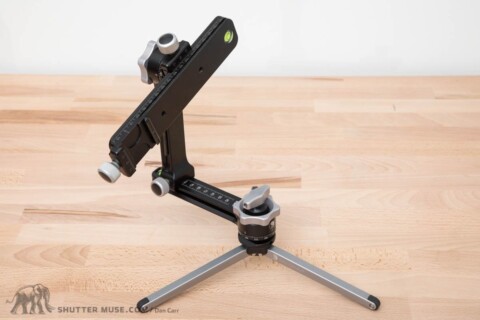
The RRS Frankengimbal (PG-OHWHAT?)
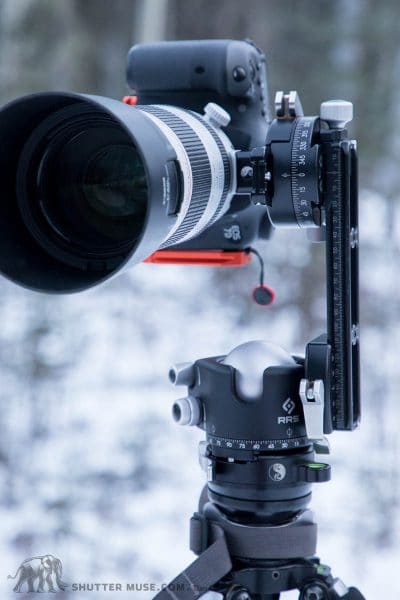

If you don’t have the funds to buy a separate gimbal head, or perhaps you are limited by weight when travelling, this is an interesting option that combines a ball head with an MPR-CL nodal slide and the PC-LR panning clamp. I wouldn’t use this with my big super-telephoto lenses, but it works really well for anything up to a 70-200 f/2.8 or a 100-400mm, as shown in the photo. In the setup above, I’m using a BH-55 ball head at the base, but you can use any ball head that has a separate panning base. Just flip the clamp of the ball head into the 90-degree notch and lock it there. Then loosen the panning base lock knob to allow free rotation.
RRS Frisbeepod

Sometimes, you need to get very close to the ground for wildlife photography, especially if you’re on a beach. Having a setup you can slide along the sand helps you approach subjects quietly. Some companies offer specific solutions for this, but you can also use a cheap $10 frisbee from Amazon and the RRS tabletop tripod with a BC-18 Microball. Believe it or not, both the tripod and the head are weight-rated for this super-telephoto setup with plenty of capacity.
Monotripod Head

If you combine the RRS monopod head with one of their panning clamps, you create a very versatile, multi-purpose setup, especially if you also have a leveling head on the tripod. The panning clamp replaces the panning base found in a typical ball head, and the monopod head can provide fore/aft tilt. Any minor left/right tilt and horizon leveling can be achieved with the leveling head. If you have an L bracket on your camera, there’s actually very little you can’t do with this simple setup. If you’re on a trip where weight matters but want to use both a tripod and a monopod, this is a very practical setup.
Wrapping it Up
I’m not going to talk about RRS alternatives, or pretend like these are all “reviews” of the products. I’ve purchased all of these with my own money, so clearly I think they must be pretty good. What I hope I’ve achieved is to help you guys figure out which of these products might be the one for you. Aside from RRS employees, I doubt there are many people out there who have as much experience with such a broad range of their products, so feel free to ask questions in the comments below.
Where to Buy
Really Right Stuff is an American company and fine folks to deal with directly from their own online store if you can. B&H Photo also stocks most of its products and may offer cheaper shipping options for people living outside the US. I’m in Canada, and B&H will ship any of these items to me for free and also let me pre-pay all taxes and duties. The same can be said for many other international destinations.
Very occasionally, RRS will also have a small amount of inventory available on Amazon. This seems to be a “greatest hits” collection of their most popular products, such as the BH-55, BH-40, and BH-30. I stress again, though, Amazon availability is rare.
If you decide to buy any RRS gear after reading this guide, I’d be grateful if you click the links on this page. I may earn a small commission when you do this, which allows me to dedicate so much time and effort to creating useful resources like this one. Here are all the links for your convenience:
- RRS BH-25 Ball Head – RRS / B&H Photo / Amazon / Adorama
- RRS BH-30 Ball Head – RRS / B&H Photo / Amazon / Adorama
- RRS BH-40 Ball Head – RRS / B&H Photo / Amazon / Adorama
- RRS BH-55 Ball Head – RRS / B&H Photo / Amazon / Adorama
- RRS BPC-16 Microball – RRS / B&H Photo / Amazon / Adorama
- RRS BC-18 Microball – RRS / B&H Photo / Amazon / Adorama
- RRS MH-01 Monopod Head – RRS / B&H Photo / Adorama
- RRS MH-02 Monopod Head – RRS / B&H Photo / Amazon / Adorama
- RRS PG-01 Compact Gimbal – RRS / B&H Photo / Adorama
- RRS PG-02 Mk2 Full Gimbal – RRS / B&H Photo
- RRS PG-02 Mk2 Side Mount Gimbal – RRS / B&H Photo
- RRS FH-720 Fluid Head – RRS / B&H Photo
- RRS Universal TA-2U Leveling Base – RRS / B&H Photo
- RRS Series 3 TA-3 Leveling Base – RRS / B&H Photo / Amazon / Adorama
Part 2: The RRS Tripod Guide

Not unsurprisingly, many people who buy RRS tripods heads are also considering RRS tripods. Not only out of brand loyalty, but because the tripods are designed to perfectly match the dimensions of the various RRS heads described on this page.
To help the tripod hunters out there, I have also written an extensive Really Right Stuff Tripod Guide. The tripod guide covers all of the many tripod options that are available from RRS, as well as offering my advice on topics such as how tall of a tripod you should buy, and how many leg sections your tripod should have.


One of your posts a few years back inspired me to spend a small fortune on an RRS TVC-24L w/ BH-45 and a buttload of accessories.
A couple of grand later my photos jumped several levels instantly…
The camera doesn’t make the photographer but good support goes a bloody long way, best investment I ever made
Regarding your picture of the BC-18 with the massive lens, did you take any pictures to confirm its stability?
Yeah I use it with the frisbee that is described lower down on the page. The thing is, with a setup like that you aren’t doing long exposures at 600mm. You just need it to hold tight for anything down to about 1/30 I would say. To be honest I often don’t even lock it, it’s just a support. But when you do lock it, it’s solid. I’ve used it with a heavy pro DSLR setup to do star trails and Milky Way photos and there’s no creep. The giant lens on that little tripod was really just to show how solid it is. You couldn’t do that with the BH-25 for example.
Thanks for a wonderful overview of heads and gimbals options from RRS.
How do you attach the BH-18 to any tripod?
Thanks!
Yeah that’s tricky! Unfortunately their decision to have a stud on the bottom means that it only works well with some of RRS’ own tripods. You can use a spigot like this though: https://www.bhphotovideo.com/c/product/546500-REG/Manfrotto_119_119_Short_16mm_Adapter.html/BI/7152/KBID/7700/DFF/d10-v21-t1-x275125/SID/DFF
It’s not a pretty solution! On the BPC-16 they solved this by making the stud removable, but sadly they haven’t gone back and updated the BC-18 in the same way.
Thank you for taking the time to respond.
I should not really be thankful because your reviews has diminished my net worth. 🙂
Haha. You’re welcome. And… sorry 😉
I really appreciate your comparison of all of the RRS heads. I am a RRS junky as well – not to the extent that you are but I’m working on catching up. I was researching the TFA-01 and BC-18 combination (my next must have accessory) and really like your Frisbee tip – does it have to be a black tournament model for maximum cool points? I’m also looking at exchanging my big Gitzo aluminum tripod for one of the new RRS Series 3 Mark 2 tripods. I have the BH-55 already – even though I always thought the BH-40 would work but I got it used for a good deal and I thought its better to have too much ball head instead of too little. I shoot a Canon 1Dx with the 70-200 f/2.8 as my biggest lens but am planning on getting the Canon EF 100-400mm f/4.5-5.6L IS II soon. My question is whether the BC-18 will work OK with the 1Dx and 70-200 2.8 for low level shooting angles (primarily automotive photography). I’ve never been disappointed with any of my Really Right Stuff equipment.
“does it have to be a black tournament model for maximum cool points” – Honestly, this was the cheapest one available on Amazon Prime. I didn’t know it was considered ‘cool’ so that’s just an added bonus 🙂
To your question, I would say the answer is yes, it will work. If you plan on longer shutter speeds then it might be prudent to use a proper ballhead, but if you’re using the setup as more of a weight support than a stability support for long exposure, you should be fine.
I’m intrigued by the new Mk2 tripods too… particularly the new models that do away with the big apex and allow you to save some more weight and bulk. I’ve no doubt that one or two will join my stable at some point. I was actually thinking of doing a tripod version of this post, given that I have owned Series 1,2 and 3 tripods. Keep an eye out for that some day!
Great review again. Thanks. Like many others I was particularly intrigued by the BC-18, albeit for another reason, I think. The concept reminds me of the Arca Swiss P0 ballhead. The „ball upside-down“ concept somehow appeals to me. Admittedly, it is odd to ask that question in a post about RRS supports, but do you happen to know someone who has got some experience with the P0?
I am using a Feisol carbon tripod with a pretty flimsy Tiltal ballhead, which a simply have not replaced so far because I did not really find the ultimate one yet. I am very happy with the Feisol tripod though, so, no need to swap to an RRS tripod despite these probably being much superior to the Feisol. The set-up needs to support my 5d Mk4 with 100-400 II or the same camera with a 24-70 f/2.8 and a Tascam 701D digital audio recorder attached between the ballhead plate and the camera plus some other audio equipment attached to a T-bar inserted to the cams hot shoe.
Thanks for the kind words. Not an odd question at all! Ask whatever you want, wherever you want! I think that maybe Michael Strickland uses a P0 head sometimes. I also know he has used the small RRS heads as well, so he might b a good person to send a note to: https://www.instagram.com/mstricklandimages/
Hi Dan, great post.
Great to hear your experience with the BPC-16. You have a picture posted here with the BPC-16 attached to the RSS table top tripod in the drop notch. Would this configuration still camera bump the tripod if using something small like the Fujifilm x100 attached with no L-plane?
I’m now drawn to the BP-18 after reading this post, however my x100 has no L-plate, for weight. Also, I want the BPC-16 for a Gorillapod with a 1/4″ stud. BP-18 attachment would be interesting.
Thanks for all.
You might get away with that, but it’s possible you will have to shift the camera upward to avoid contact with the tripod. This is ONLY with the RRS table tripod though where you might get away with it. If you are putting the BPC-16 on any other tripod with a wider base on the top, it won’t really work.
You might want to take a look in this post and then scroll down to the bottom to see a photo of a cool gadget called the iQuick Plate. It might be a good thing for an X100. https://shuttermuse.com/ultimate-guide-to-camera-l-plates/
A great and extensive overlook. Very many thanks for this comparison and time/effort you put into your site. Much love from Austria!
You’re very welcome! Always nice to find out people are reading from all over the world 🙂
Hi, This would be my first venture into a Gimbal. I have a Manfrotto 410 Junior Geared Head. I have a Canon 5d MkIII and the 5dSR. I use a variety of the Canon L lenses with my longest currently being the100-400mm. I like the idea of a slider for moving in and out of shots and having it hand held so I can follow or circle around my subjects. Is this possible with the RSS gear and what set up would you recommend? Would you suggest I get a new head or will my 410 work?
Cheers, Karen
Replied to your facebook message about this. In general, I’m good at replying to messages. No need to send them to me in multiple places, please. Thanks.
Dan,
Limited budget at 75yoa so can not make too many MISTAKES.What would you recommend for A D7200, 70-210 Nikon, (no collar) and a Tamron 200- 500 for mostly landscape pics.Ball head (which one) or gimbal (which one) Also are the cut outs in the ball heads to go vertical? Thanks you for your excellent columns and your help.
Ed
Yes, the cutouts are for you to go vertical. For your setup I would not say you need a gimbal, but for the 200-500 you should go with the BH-40. Cheers!
Hi Dan,
I am planning to get the PG-02 gimbal head and noticed the updated lever locking desing on the vertical arm. Do you also adjust the friction of the rotation through the lever position or is it literally just to lock/unlock the movement? Would the old knob design be aesier to handle especially when wearing gloves?
RRS still offers the old design but as it is discontinued, it will sell out soon. Which one (old or new design) would you recommend?
Thanks for your input.
Best wishes,
Thomas
Hey Thomas. I actually recently purchased the new version and did a comparison here: https://shuttermuse.com/really-right-stuff-updated-gimbal-design/
There isn’t really a need to adjust the friction since a gimbal is balanced anyway, so if you take your hands off the lens even when unlocked, it just sits there. The lever certainly is more of an on/off lock switch but I see that as an improvement. Either you are moving the camera or you are not, and the resistance they have dialled in at the “unlocked” position is perfect.
The old design would not be easier with gloves. The lever is extremely easy to operate, and this is coming from a guy that lives in the Yukon! I would definitely go with the new version.
Great review. How light of a kit do you think is needed to get the most out of the PG-01? I shoot with a Sony A7RIII and almost all of my lenses are manual focus primes except the Sony 24 1.4GM and Batis 135, neither of which are big or heavy. I do panos and am tossed between the PG-01 or the planning clamp. Cost is about the same but I get multi row functionality with the gimbal. I have never shot multi row before but I have never had the proper equipment to do so. My tripods are RRS series 1 and 2 as well as a TFA-01 Ultra with BC-18. What do you think? Thanks in advance.
That’s a good question. I think that the A7 and the 24mm would be about the limit I would personally want to go for. But are you really going to make those multi-row panos? You want to be very sure about that, otherwise I think the panning clamp is much stronger, robust, easier to set up. If you think maybe you are only going to make one or two multi-row panos a year then this would probably not be worth it in my opinion.
Awesome article and info, thank you!
I want to get the BH-30 to use on my slider with my Canon M50 and Átomos Ninja V (for b-roll video), but I see that there is a BH-30 version with a “compact lever release clamp” and a BH-30 version with the “full-size lever release clamp”.
My instinct says get the full-size lever, but what are your thoughts on that?
I believe the difference is that the full-size has a bubble level in the clamp. So if you need that, then you have your answer! There will be ZERO difference in stability and clamp force between the two.
Dan, thanks for the informative review. I own most of the items you do (or alternate versions) and I’ve used most of them a significant amount. Like with you, the BH-40 was my first RRS ballhead. Using it was a revelation after previously relying on crummy old tripods with built-in heads that I’d inherited.
I found the PG-02 to be an absolute dream to use once I got a good wildlife lens that justified purchasing it. I’ll have to try the side-mount method and see how it compares. Thanks for the tip on the new case – I tried to cobble something together from available cases but nothing was quite the right size for the various pieces plus padding. Now I can have a durable case for this item.
I also enjoyed your review of the Acratech heads. I used the GPSS as a gimbal head to shoot the 2013 America’s Cup races and it worked great, plus I enjoyed its light weight while using public transit to get to the site.
Keep up the good work!
Hi Dan,
I have another question about the PG-01 and weight. I’ll be shooting with a Fuji XT-3, 100-400mm, and 1.4 extender (with, if I’m inattentive or lazy, the RRS L-bracket still on the camera): call it 2100 grams or 4.63 lb. Do you think the PG-01 will be sturdy enough to be reliable and safe, or should I bite a very big bullet and get the PG-02 and the TA-2U leveler? (This is all to go on a TVC-24 mk. 2.)
Thanks again for this and all the other great reviews.
Dan, in your paragraph on the BH-55, I think you meant to refer to the Canon 600mm/f4 – there is no 60mm/f4, and it would scarcely weigh that ,much anyway.
Thanks. Fixed.
FYI:
It appears that the FG-02 is no longer available from B&H, and it does not seem to have all the proper associated pages at Really Right Stuff’s own website.
I had seen some time ago on the RRS site an indicator that the product was being redesigned, but I cannot seem to find that page at this moment.
I had heard the same thing. If there is a redesigned version available at some point I will either buy it or purchase it and update this guide with the info.
Hey Dan! Long time, hope you are well. Didn’t realize you’d moved north, very cool. Just wanted to say thanks for your various RRS reviews/guides, I have found them super helpful. Just purchased a BH-30 via your link. May end up with a tripod too when I’ve contemplated more. Take care! -Jordan