
The TourBox Lite is an affordable, sub-$100 editing controller designed to improve your photo and video editing workflow. Customizable buttons and dials can be mapped to the most-used functions and settings in your chosen editing software, allowing one-handed adjustment while using a mouse or pen tablet in the other hand.
In this review, I’ll explain the features of the TourBox Lite and compare it to the more expensive TourBox Neo and TourBox Elite. If you’re in the market for a photo or video editing controller, but not sure which model to choose, this review will answer your questions.
Disclaimer: TourBox provided the controller for this review but had no input into its content and was not allowed to see it before publication.
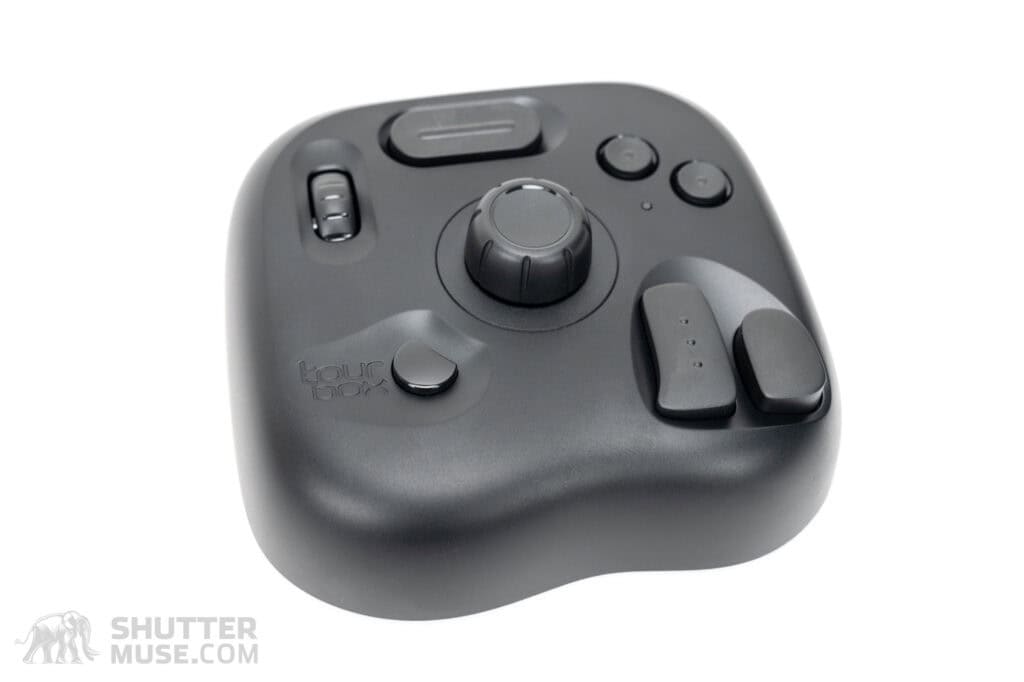
Table of Contents
TourBox Lite Specifications
- Dimension: 111 x 106 x 39 mm
- Weigh: 329g (without batteries); batteries weigh 48g
- Surface Material: PC+ABS
- Connection: Type-C interface (USB 2.0 and above)
- Power Supply: DC 5V 30mA
In The Box
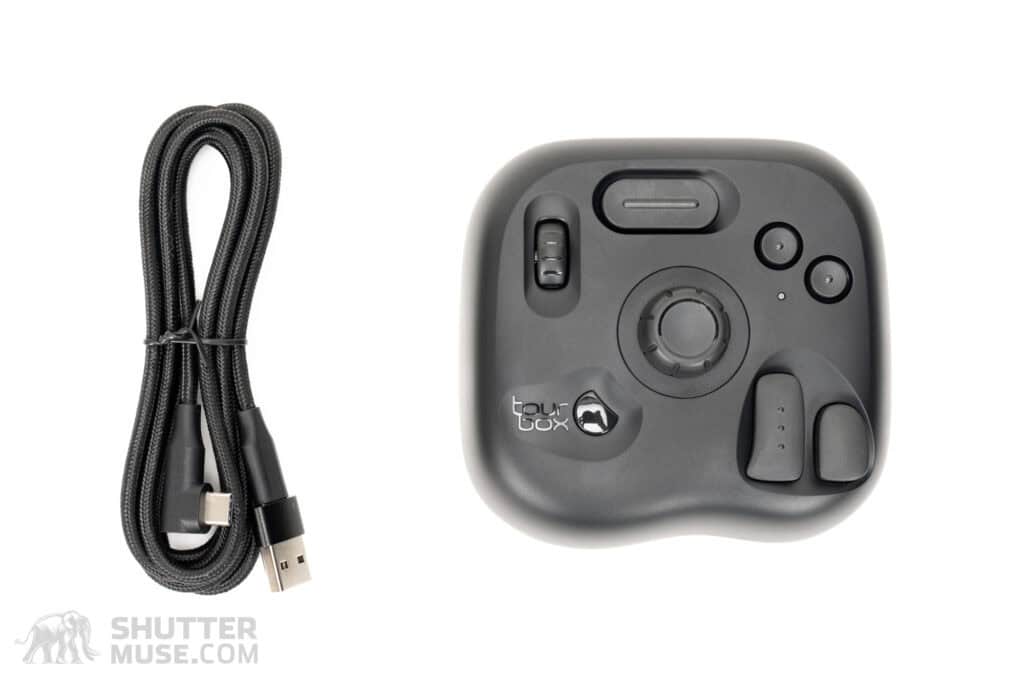
The TourBox Lite comes with a high-quality, braided USB-C cable. One end features a right-angled connection, while the other is straight. A USB-C to USB-A adapter is also included. This is the same cable that comes with the TourBox Neo and is sold as a $12 optional add-on for the TourBox Elite. It’s a nice cable. It is far nicer than the junk you usually get with USB-connected devices these days, and though I do not need it, I appreciate the C-to-A adapter inclusion.
TourBox Models Compared
| Spec | TourBox Lite | TourBox Neo | TourBox Elite |
|---|---|---|---|
| Connection Type | USB-C | USB-C | USB-C / Bluetooth |
| Haptic Feedback | No | No | Yes |
| Included USB Cable? | Yes | Yes | No |
| Control Inputs | 10 | 16 | 14 |
| Dimensions | 111 x 106 x 39 mm | 116 x 101 x 44mm | 116 x 101 x 44mm |
| Weight | 329 g | 370 g | 376 g |
| Color | Black | Black | Black/White/Smoke |
| Price | $94.99 | $169.99 | $268.99 |
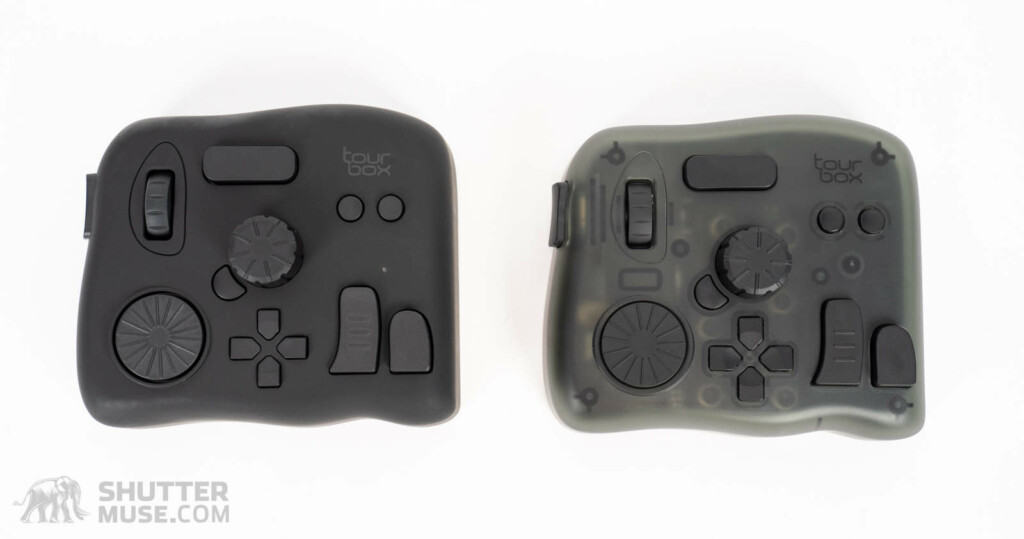
TourBox offers three versions of its editing controller at three different price points. The TourBox Lite is the cheapest model, offering one fewer dial and five fewer buttons than the mid-priced TourBox Neo. The Lite and Neo models connect to your computer using a supplied USB-C cable. The TourBox Elite shares its control layout with the TourBox Neo and can be connected to your computer using Bluetooth.
While the TourBox Elite’s Bluetooth connection is a fantastic feature, its price is nearly 2.5 times that of the TourBox Lite. Whether that difference is worth it is something only you can answer. Some will happily pay that much more for what amounts to convenience, and others will shy away from it. In that case, the mid-tier TourBox Neo might be a better option. This gets you the complete control layout minus the Bluetooth connection option.
When making this choice, some may wonder whether you need the 16 different control inputs of the Neo and Elite models or whether the ten inputs on the Lite will do the job. Again, it all comes down to convenience. It’s perfectly possible to edit photos or videos using the more limited control selection on the TourBox Lite. When you combine these buttons with the powerful TourBox Console software, you can access customized lists of functions at the press of a button or create custom button and dial combinations, essentially triggering multiple functions from each button.
In other words, there are ways around the diminished control availability on the TourBox Lite, but it might take a little more work to get things set up in the software and a button press or two to access the desired function. This would take longer than it would have if the function had been assigned directly to the button or rotary controller. If your reasons for looking at a TourBox purchase are about speed, you’ll appreciate the additional buttons on the Neo or Elite. Conversely, if you’re purely looking for a device to add tactility and ease to the editing process, the TourBox Lite can absolutely do the job if you don’t mind the USB-C cable running across your desk.
Related Content
TourBox Lite Features and Design
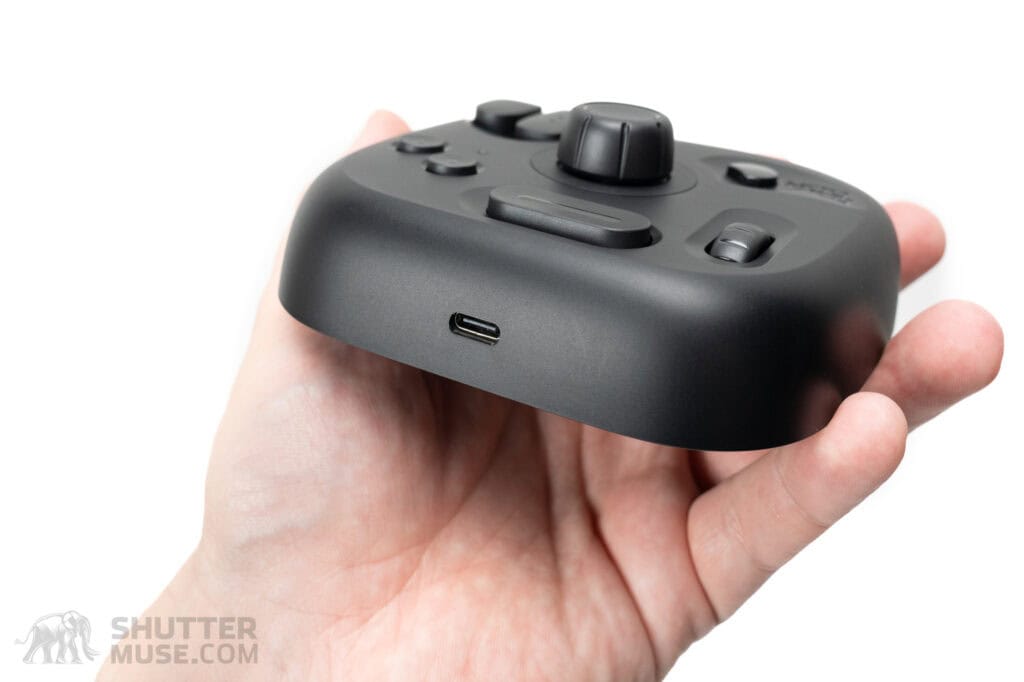
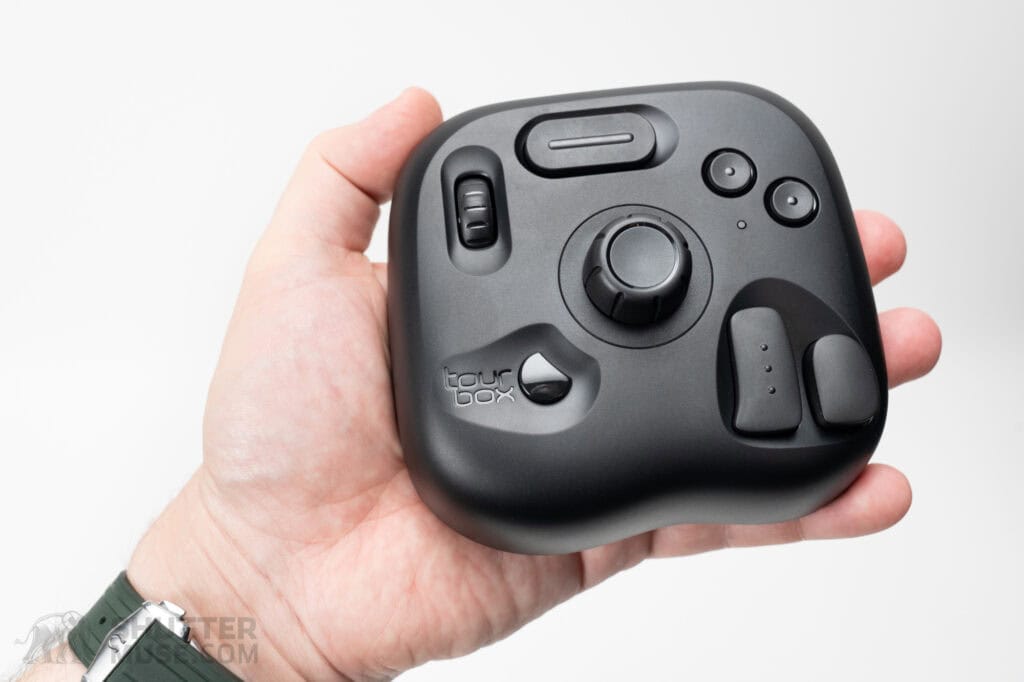
The TourBox Lite is a little larger than palm-sized and much heavier than you’d expect from looking at the photos. This is mainly because the weight isn’t from the components but a metal plate within the case. Combined with the rubber feet on the bottom of the device, this added weight stops the TourBox from moving around on your desk.
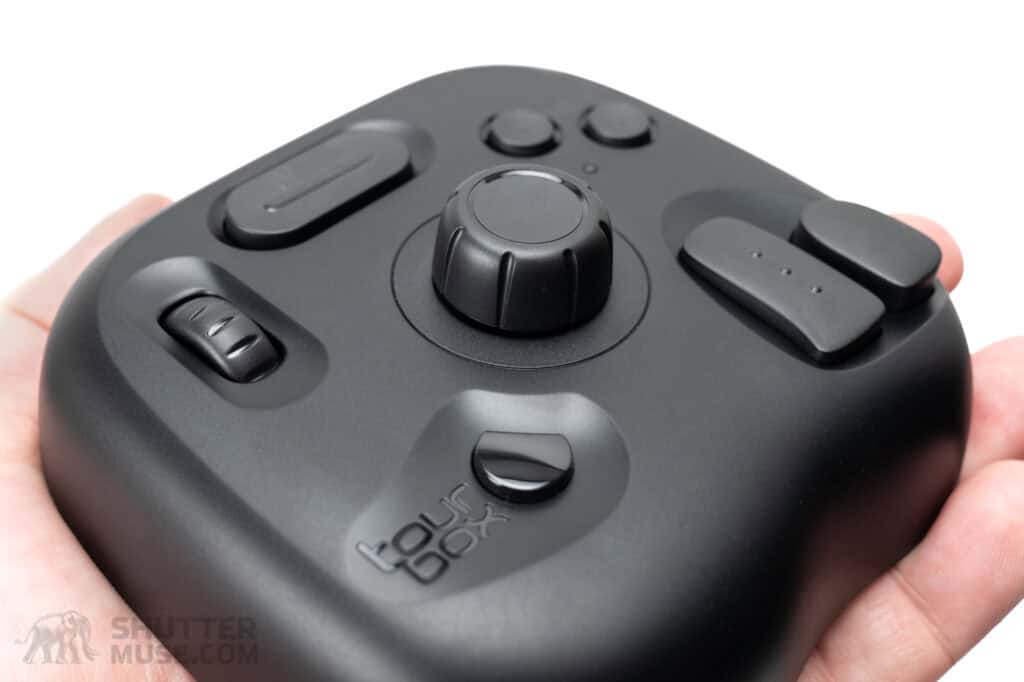
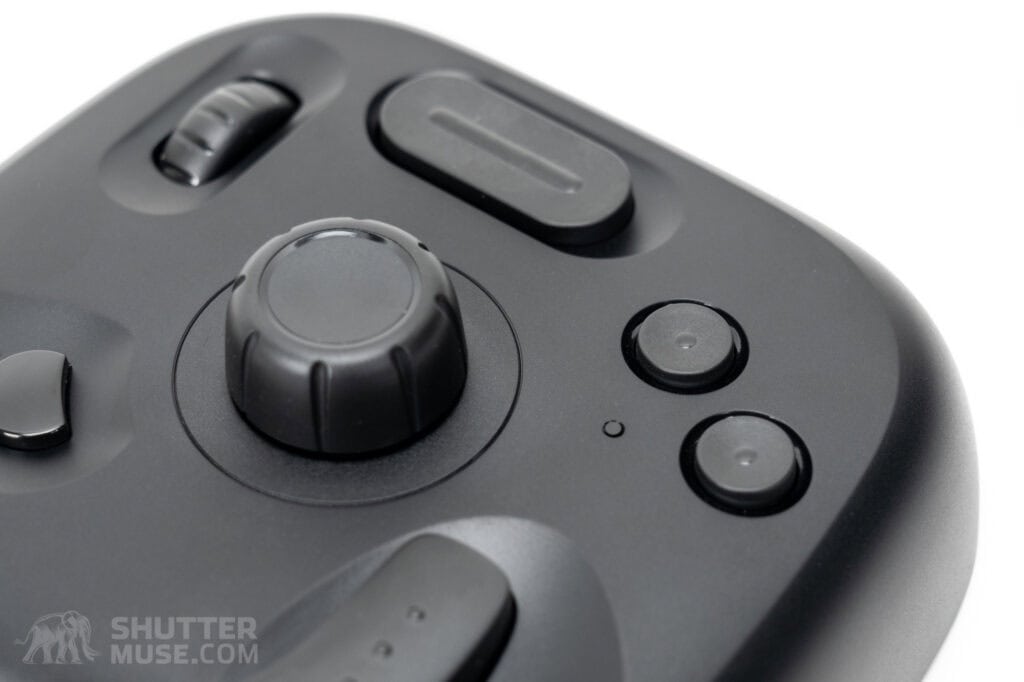
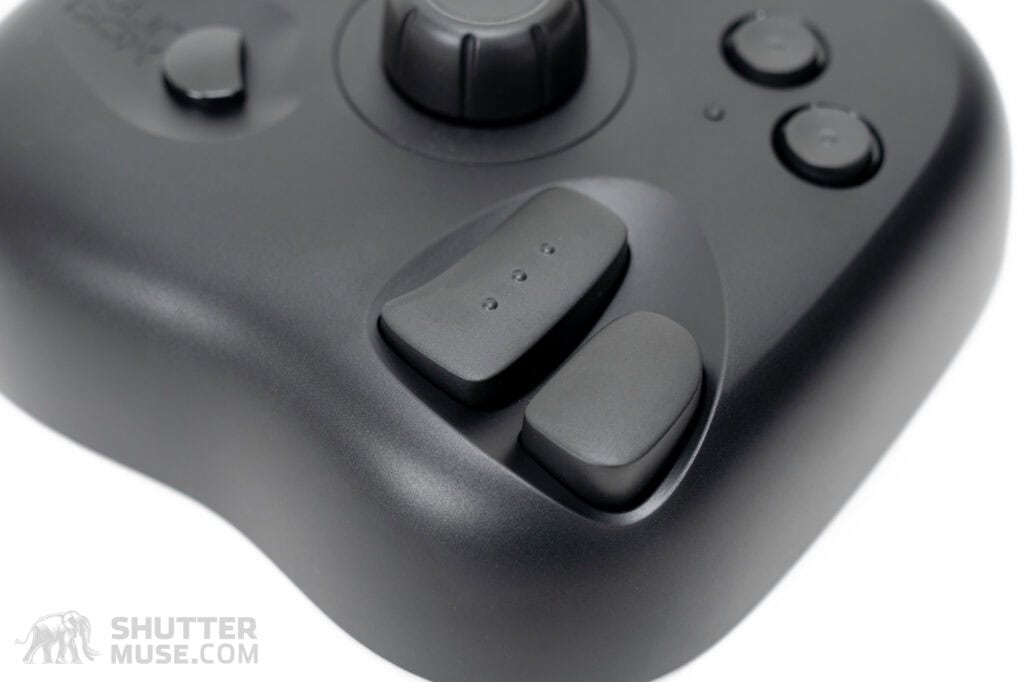
The TourBox Lite has ten assignable controls. Six of these are standard buttons of different sizes and shapes. Two more rotational controls are helpful for scrolling, zooming, adjusting sliders, or modifying brush sizes and characteristics. Finally, the left-hand scroll wheel and the primary central dial are “clicky,” providing the remaining two assignable controls.
The buttons’ different sizes, shapes, and tactile bumps are a deliberate choice that helps you feel where your hand and fingers are. It works remarkably well. As the cheapest controller in the TourBox lineup, it shouldn’t be surprising that the buttons and dials don’t have an ultimate premium feel. While the wheel and dial are silent, the buttons are pretty noisy, though no more so than those on my Logitech mouse. Still, despite these nitpicks–which are to be expected when you make a cheaper version of an existing product–the TourBox feels like an overall solid, well-made device. I can’t fault it at this price.
Portability – Editing On the Road?
When I first heard the name TourBox Lite and heard it contained fewer control surfaces than the Neo and Elite models, I pictured something highly portable and perfect for travel. I was, therefore, a little disappointed to see that the TourBox Lite is almost identical in size to its larger siblings and a mere 41g lighter than the TourBox Neo.
I think this is a bit of a missed opportunity for TourBox. While packing for a photo trip, I constantly try to save weight. I start with a massive pile of stuff I’d like to bring, and I whittle it down throughout my packing day until I have the essentials in as few bags as possible. My TourBox always starts in the “stuff I want to bring” pile but has yet to make it through the final round and get packed for a trip.
While these devices are helpful for editing and culling, I can never justify the space and weight. Instead, I wait until I get home to do the heavy lifting with my culling and editing, partly because I don’t have room for a controller in my travel bag. The TourBox Lite doesn’t need to be as big as it is. It could have made a case for inclusion in my usual travel kit if it had been smaller and lighter. I’d love to see something like a TourBox Mini in the future, designed purely for on-the-go photo culling and basic editing.
TourBox Console Software
When using a TourBox, the hardware is only half the story. A capable software companion is needed; here, no corners are cut. The TourBox Lite is compatible with the same software that powers the more expensive Neo and Elite models. Once you have downloaded the latest version of TourBox Console from the TourBox website, connect the TourBox Lite to your computer, and you’ll see it appear in the bottom-left panel. The software is available for both Mac and Windows systems and is easily installed.
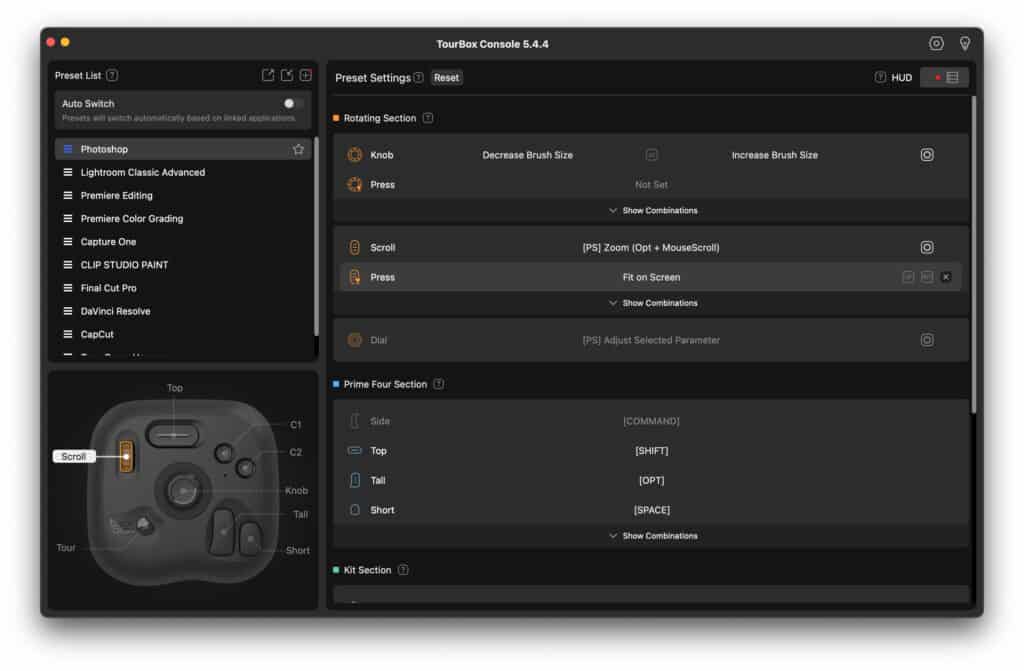
Control Customization
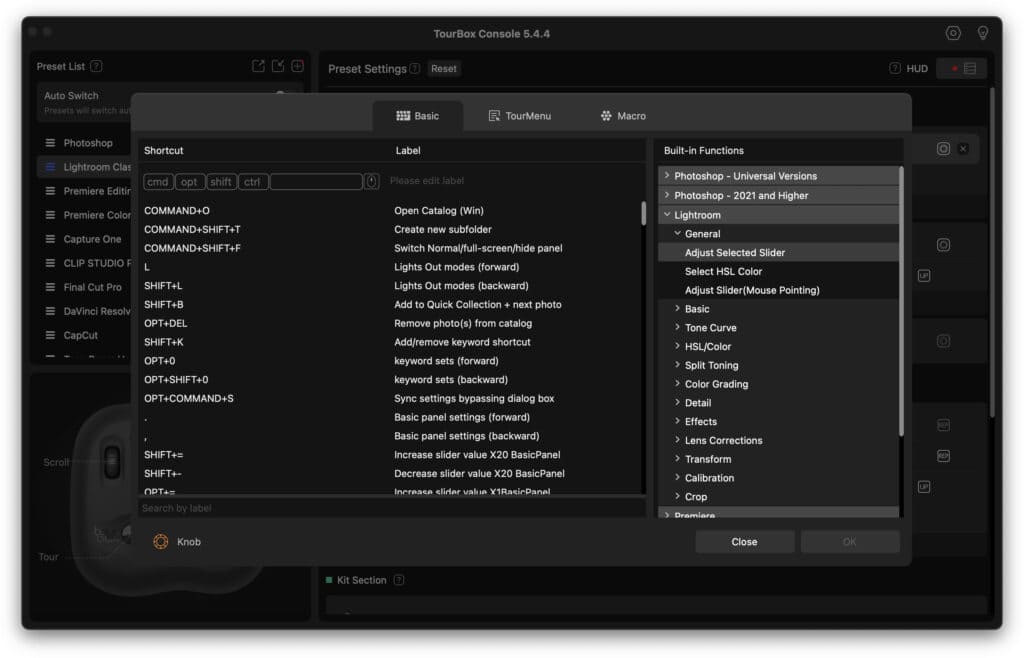
When TourBox Console is opened, pressing a button or rotating a dial on the device highlights it and scrolls you to the menu options for that button. From here, you can assign a function to that button or dial by choosing from a list of shortcuts for specific applications or entering your own shortcuts. I love that all major editing applications’ shortcuts are already stored in the application. There is no need to dig around on the web to find them.
Photoshop, Lightroom, Affinity Photo, Capture One, Premiere, Final Cut, Clip Studio Paint, DaVinci Resolve, Chrome, Vegas, CorelDRAW, Illustrator, PowerPoint, Exposure X6, Zbrush, Easy Paint Tool SAI, After Effects, Camera Raw, VRoid Studio and Audition are all currently available as presets, with more added every year.
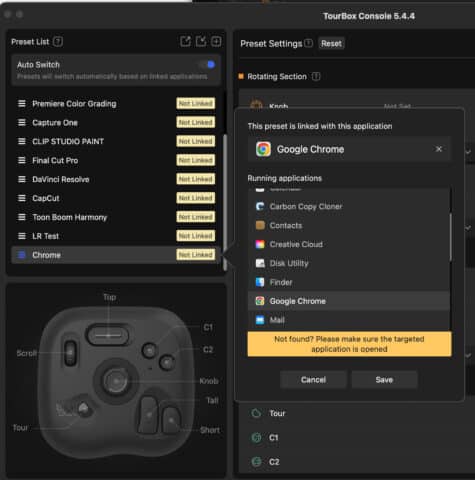
Of course, all your assigned controls are specific to a particular application. You create one set of controls for Lightroom, one for Photoshop, and others for further applications in your workflow. Once you have defined your controls, you can use the TourBox Console to switch between them manually or turn on Auto Switch to apply them automatically when you open a specific application. I prefer to use Auto Switch so I don’t have to constantly re-open the application.
While most people gravitate toward using a TourBox with photo and video editing applications, there’s no reason you can’t use it for other apps that are part of your daily routine. I use a custom profile for Google Chrome with buttons for opening new tabs, bookmarking, and scrolling through currently active tabs and windows. The longer you use one of these devices, the more you will find yourself tinkering with the possibilities beyond just using it as a creative editing controller.
Custom Macros
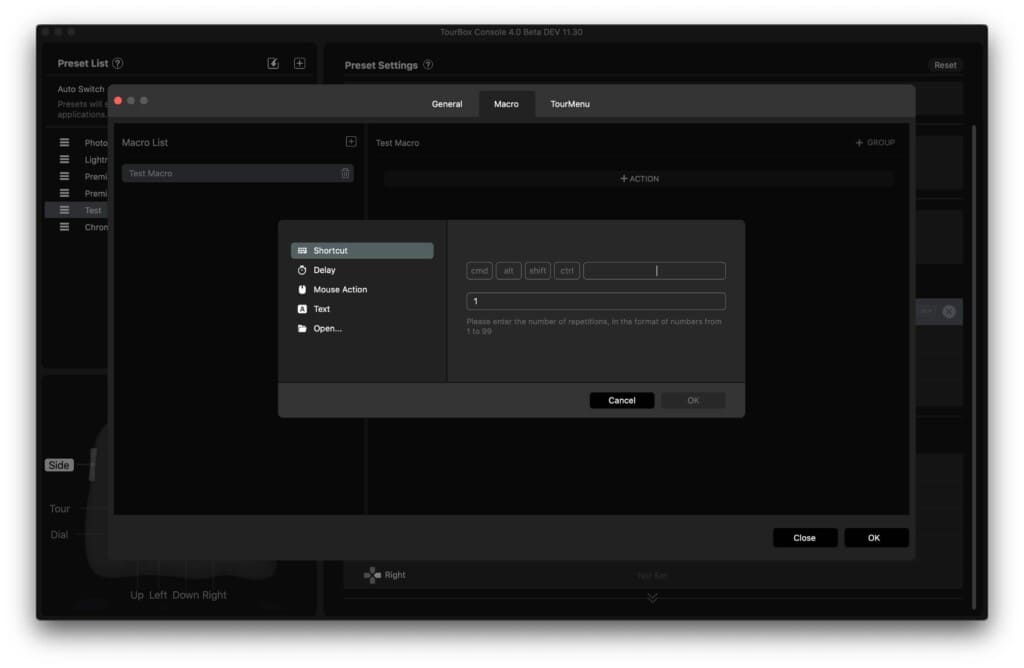
In addition to allocating single actions to a button or dial, you can use TourBox Console to create custom macros that trigger with a single click. Creating a macro is easy. Select the button you want to use as the trigger and choose the macro option from the menu. Now, work through each action you want to perform as a new step in the macro. A mouse action can include a single click, a double click, wheel scrolling, dragging, or even the movement of the mouse pointer to a specific location on the screen.
With custom macros, you are only really limited by your imagination, especially when you factor in Macro Groups. A regular macro will execute a string of commands at the push of a button. In my case, it is useful for creating custom image exports with specific file types and sizes. Macro Groups, on the other hand, are like macros that run sequentially, with the next macro in line triggered by another push of your chosen macro trigger button.
For example, you could create a macro that sends an image from Lightroom to Photoshop. Once in Photoshop, you can perform your necessary editing tasks before pushing the same macro button again to trigger a custom export process. Macro Groups can also be run as a loop, cycling back to perform the first command again once you have completed the chain. Powerful stuff!
The TourMenu
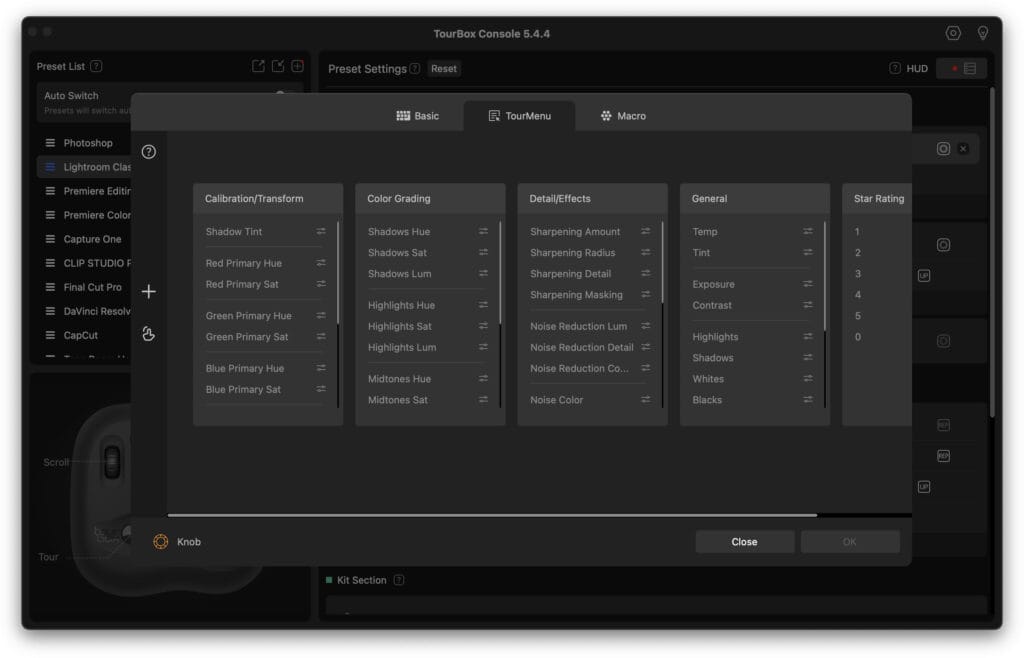
Aside from allocating button and dial functions, TourBox Console also allows you to create customized function menus for specific applications. These are called TourMenus, and they can be called up on screen with the press of a button. Within these menus, you can list additional functions you did not have space for through direct button actions on the device. In this way, the number of available buttons on the TourBox Lite becomes much less of an issue. Simply assign a custom menu to one of your buttons and then call it up as an overlay in your application.
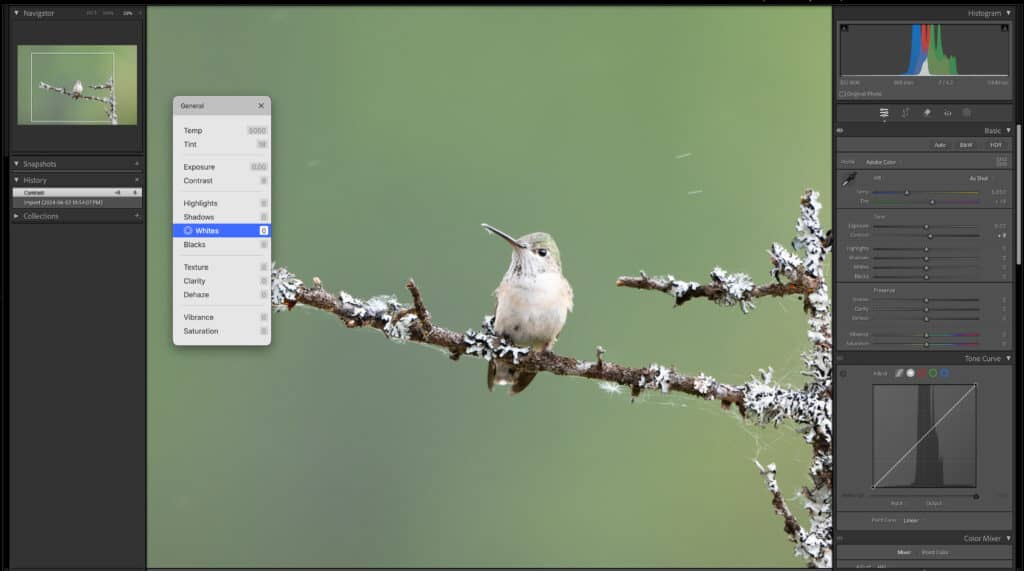
Once the menu is on the screen, you can use the wheel and dial to select different functions and make adjustments. I find this particularly useful with Lightroom’s basic editing controls such as exposure, highlights, shadows, white level, and black level. Instead of allocating each function to a different button, I can have a single menu triggered by one button and adjust it with the two dials.
TourBox has seemingly thought of everything regarding customization options. Still, you must understand that creating presets designed around your needs is critical to getting the most out of this product. Yes, TourBox offers a set of pre-built presets for all major applications, but most of these apps have hundreds of possible controls, and the built-in presets are selecting just a handful. They are good starting points to remind you what is possible, but it’s extremely unlikely that one of these presets will set up your TourBox most efficiently for your needs.
You can’t fault TourBox for making their product too customizable, but you need to know that there is some necessary setup required for the learning curve to really deliver an improved workflow. If you need more inspiration about the possibilities, TourBox has a great page that demonstrates various photo culling and editing tasks performed with one of its devices.
Conclusion
Introducing the cheaper Lite model into the TourBox lineup makes a lot of sense. A sub-$100 editing controller is an eye-catching prospect for many photographers. TourBox has delivered much of the functionality from its more expensive devices in a significantly cheaper package. If the price of the previous models kept you on the fence, this is the device for you.
As with the previous TourBox models I’ve reviewed on this site, successfully improving your editing workflow with the TourBox Lite requires a commitment on two fronts. First, you’ll need to make time to understand the TourBox Console software and create control profiles for your most-used software. The presets are good starting points, but real workflow improvements come when you take the time to tweak things to your needs. Do not expect to get the best out of this device right out of the box.
Secondly, you need to really use the controller. It’s no good using it to edit a photo and then putting it in a cupboard again for a few months. There is a learning curve; for an effective workflow improvement, you need some of your actions on the controls to become second nature. This muscle memory can be lost if you aren’t using the device consistently. If you commit, you’ll be rewarded.
Overall, I was happy with the TourBox Lite’s performance. It feels like using one of their more expensive models, just with fewer buttons. With careful thought on how you set up TourMenus and button combinations, I was surprised how much control you can get on a device with far fewer buttons than the Neo and Elite models.


