
The TourBox photo editing controllers are designed to speed up your photo or video editing workflow in my office. I used the original TourBox Tech and later the upgraded TourBox Neo. Now, the new TourBox Elite is here, and it delivers the feature that I always wanted: Wireless control. But that’s not all that is new, so let’s take a closer look.
In this review, I’ll walk you through the new features of the TourBox Elite and compare it to the TourBox Neo. Although there are some significant differences, namely wireless control, there are also many similarities. As such, my in-depth review of the TourBox Neo still contains much relevant information.
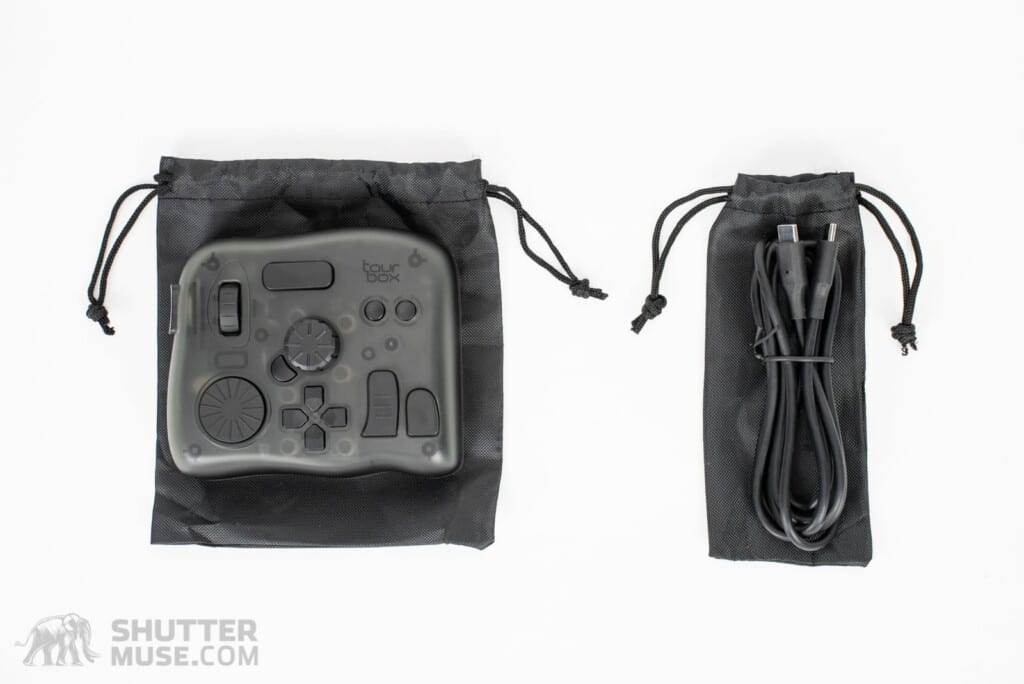
Table of Contents
TourBox Elite Specifications
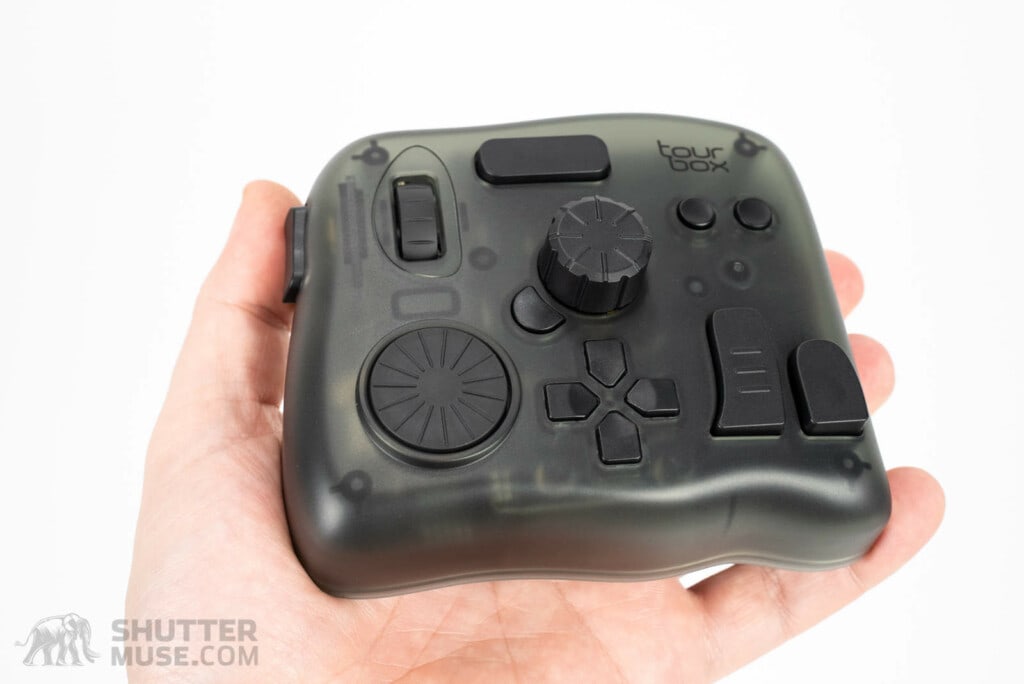
- Dimension: 116 X 101 X 44mm
- Weigh: 376g (without batteries); batteries weigh 48g
- Outer Material: ABS
- Button Material: PC
- Dial & Wheel Material: PC & TPU Double Injection Molding
- Surface Material (Translucent): No Extra Coating
- Surface Material (Black & White): UV Anti-fingerprint Coating
- Connection: Dual-Channel BLE5.1 & USB Type-C Cable
- Power Supply: Wired: 5V DC, 50mA; Wireless: 3V DC, 50mA
- Operating Systems: macOS 10.10 or higher/Windows 7 or higher
- Battery life: Approximately 2 months – see note on this in later section.
TourBox Elite Vs TourBox Neo
| Spec | TourBox Lite | TourBox Neo | TourBox Elite |
|---|---|---|---|
| Connection Type | USB-C | USB-C | USB-C / Bluetooth |
| Haptic Feedback | No | No | Yes |
| Included USB Cable? | Yes | Yes | No |
| Control Inputs | 8 | 14 | 14 |
| Dimensions | 111 x 106 x 39 mm | 116 x 101 x 44mm | 116 x 101 x 44mm |
| Weight | 329 g | 370 g | 376 g |
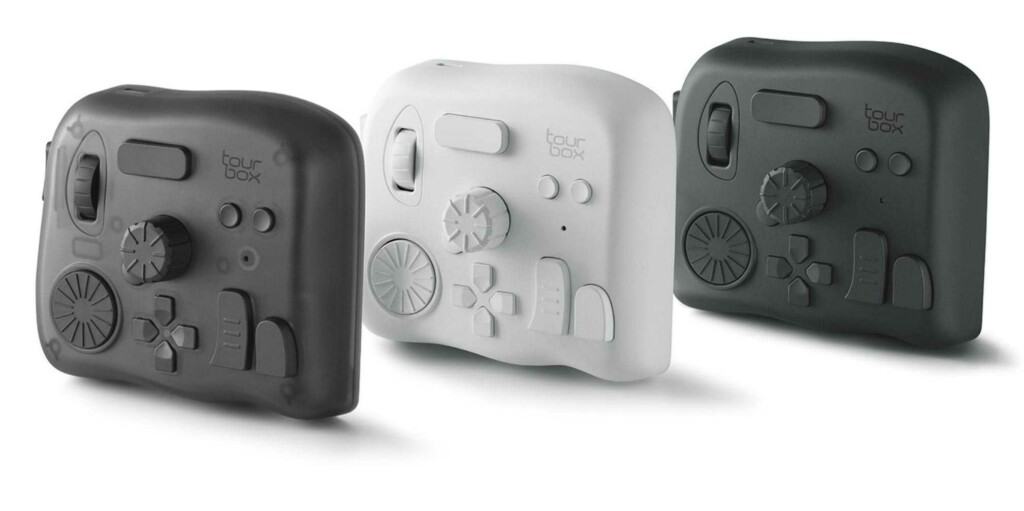
| Color | Black | Black | Black/White/Smoke |
| Price | $94.99 | $169.99 | $268.99 |
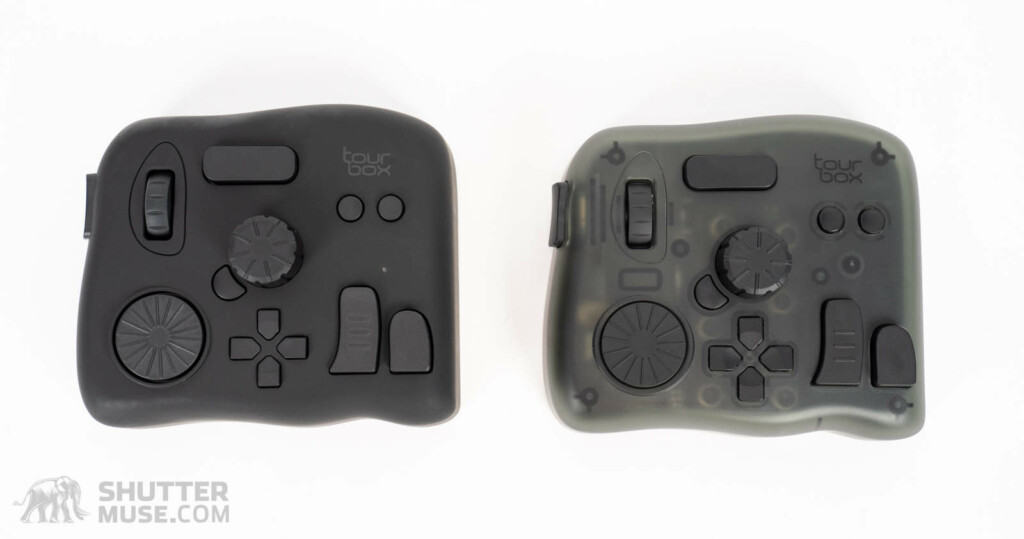
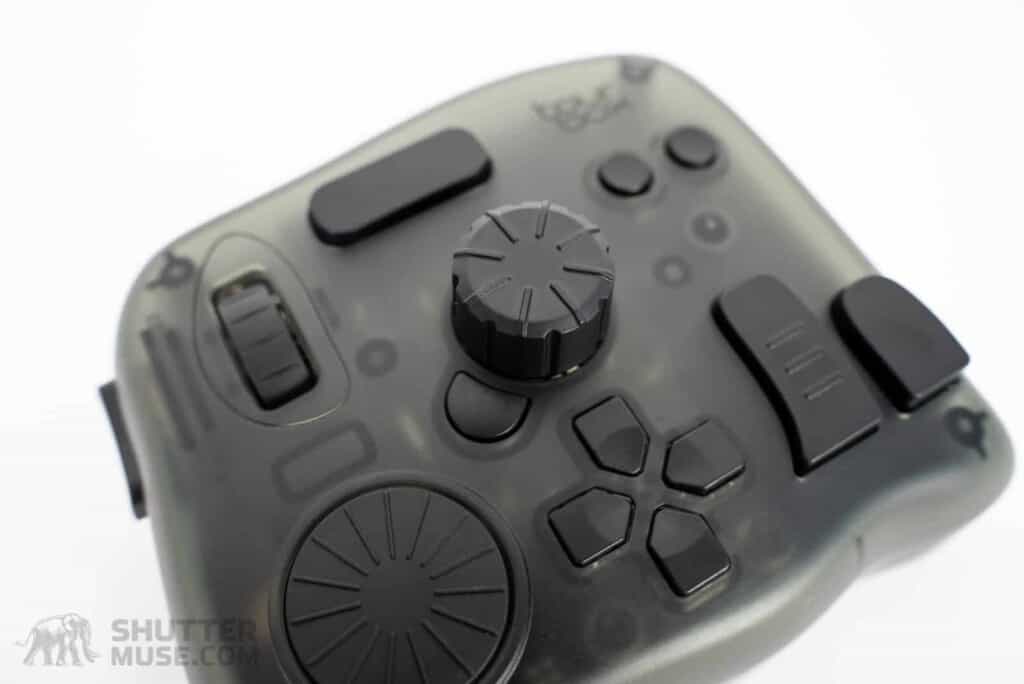
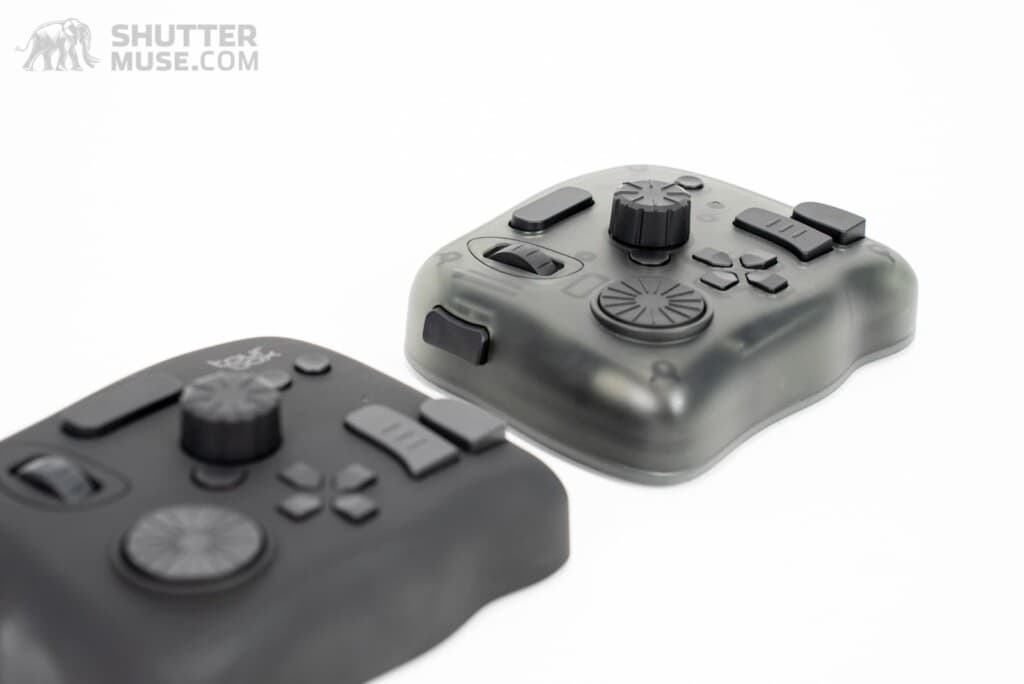
The TourBox Elite is essentially a wireless version of the TourBox Neo with a few more subtle tweaks. The button layout is identical on both models, but the feel of a few of the buttons has been improved. Notably, the side button now has a much longer travel and a more satisfying click at the end of its motion. Scroll and Knob controls also feature haptic feedback using a high-frequency internal motor.
Related Posts
The Neo and the Elite can be connected to your computer using the supplied USB-C cable. Still, the headline difference is the TourBox Elite’s inclusion of Bluetooth for a fully wireless editing experience. For wireless connectivity, you pay a little more money. The UCB-C connected TourBox Neo retails for $179, while the Elite retails for $268.
TourBox Elite Bluetooth Connection
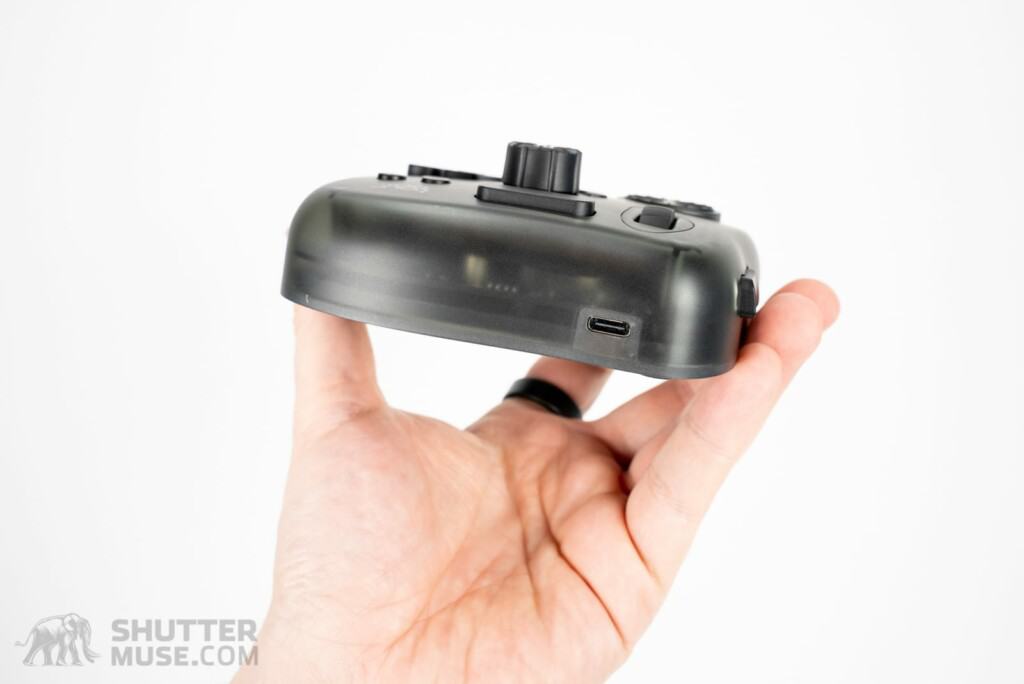
The TourBox Elite has a dual-channel Bluetooth module, meaning it can be paired with two different computers. This is perfect for photographers and filmmakers that edit with a desktop machine in their office but use a laptop on the road. Pressing the small Bluetooth button on the base of the controller switches between your two connected computers and the colour of the LED on the front of the unit will switch between red and green to indicate which channel is being used.
How to Connect the TourBox Elite Over Bluetooth
After installing the TourBox Console software, connecting the Elite controller over Bluetooth was a breeze. On my Mac, I was surprised to find that I did not have to go into my Mac’s System preferences and delve into the often-slow Bluetooth connection section.
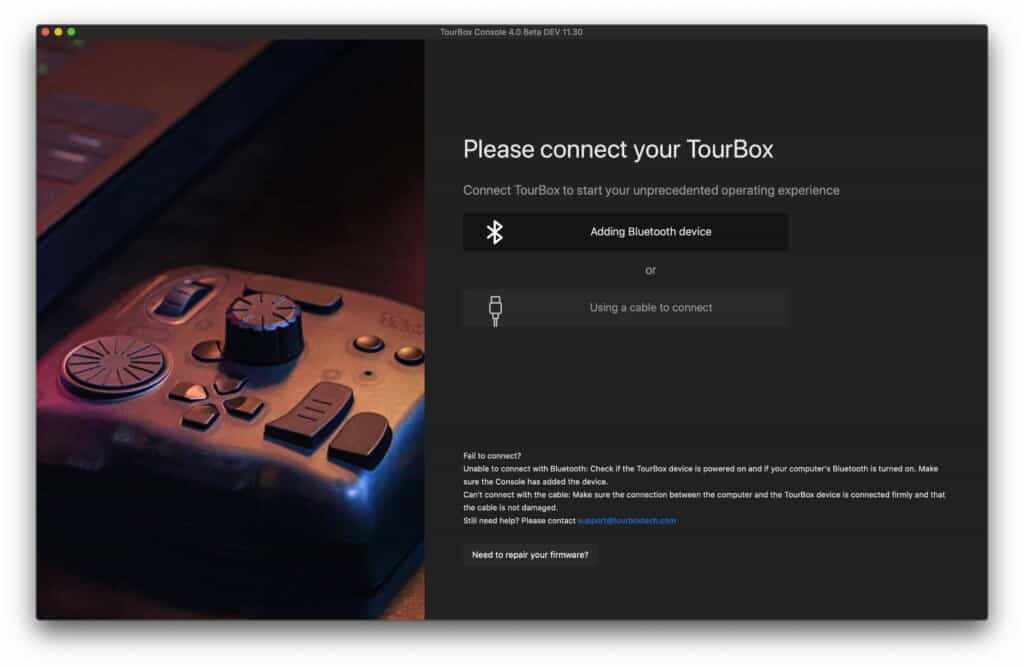
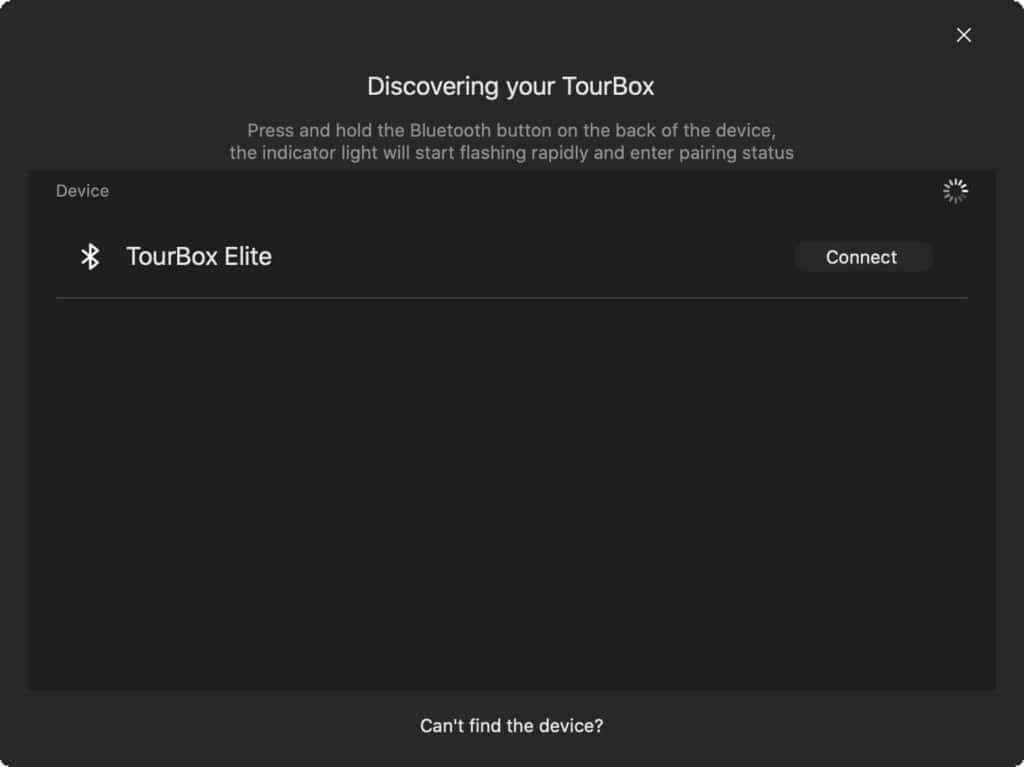
Instead, I pressed the Bluetooth button on the base of the Elite for a couple of seconds until the front LED flashed green a couple of times. This indicates the controller is in Bluetooth pairing mode. Then I opened the TourBox Console software and pressed the “Adding Bluetooth device” button. A new Bluetooth discovery box opened, and I clicked the connect button next to my Elite. The whole process was completed in just a few seconds.
Responsiveness Over Bluetooth
Wireless connections are convenient, but they can introduce a lag that makes accurate control very difficult. Although I have experienced input lag on some pen-based photo editing tablets, I saw nothing like that with the TourBox Elite.
You can connect the TourBox Elite to your computer using the supplied USB-C cable (or any other you have lying around). I assume that this option is provided for emergencies. If you run out of battery power and don’t have spares to hand, you can get back to work right away. Or perhaps some people would purchase the Elite model over the cheaper USB-C TourBox Neo model just for the haptic feedback and slightly improved button feel, but that doesn’t have a way to connect to it over Bluetooth.
Regardless of the reason, connecting the controlled over USB-C gave me a chance to compare responsiveness over both a wireless and wired connection. I saw no difference, which is great news.
TourBox Elite Customization
For those that haven’t read my previous TourBox Neo review which went into great detail on this topic, we need to do a quick dive into the TourBox Console software. With 14 different controls on the TourBox Elite, three of which can be clicked and rotated, for a total of 17 assignable controls, there needs to be a solid software platform behind the hardware.
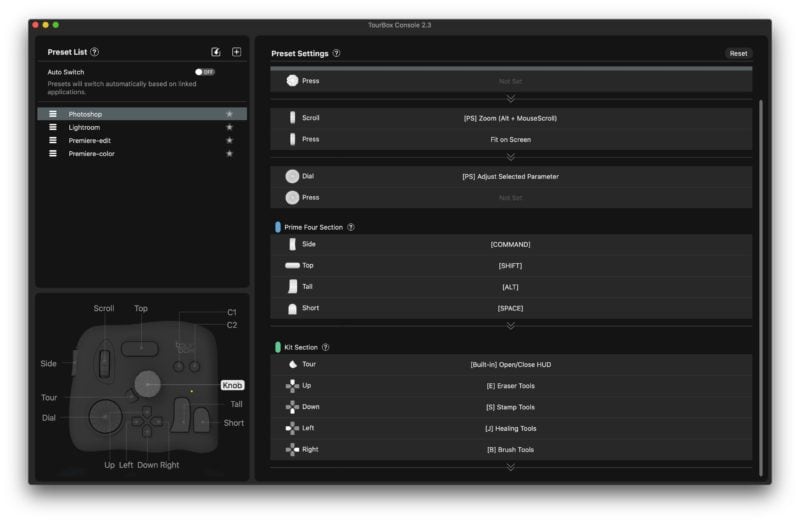
TourBox Console allows complete customization of every control for every piece of software on your computer. You can create your own control profiles for your favourite applications, or you can download pre-made control templates from the template repository on the TourBox website.
Photoshop, Lightroom, Affinity Photo, Capture One, Premiere, Final Cut, Clip Studio Paint, DaVinci Resolve, Chrome, Vegas, CorelDRAW, Illustrator, PowerPoint, Exposure X6, Zbrush, Easy Paint Tool SAI, After Effects, Camera Raw, VRoid Studio and Audition are all currently available as presets.
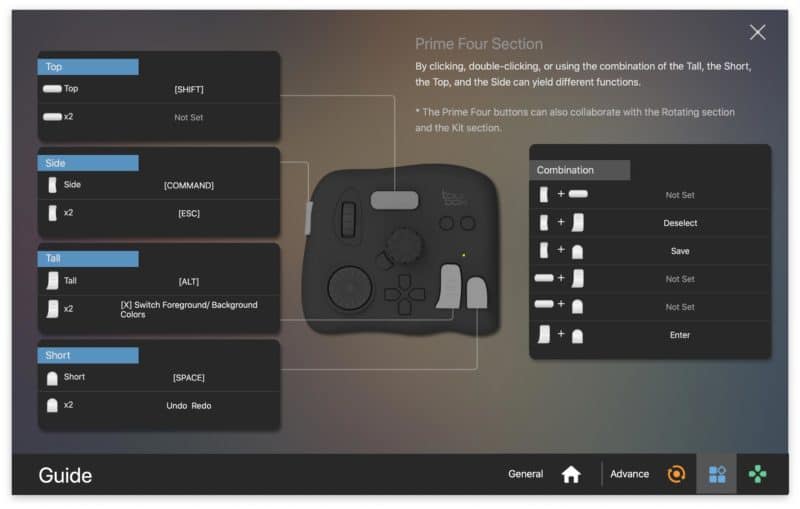
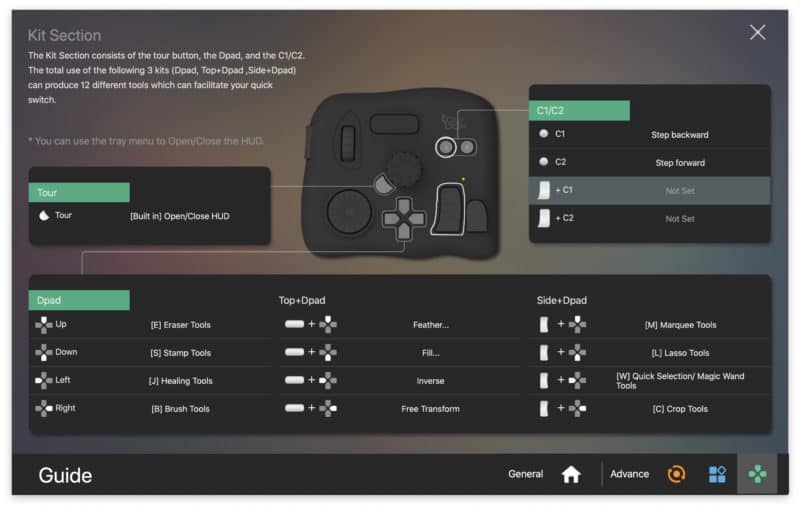
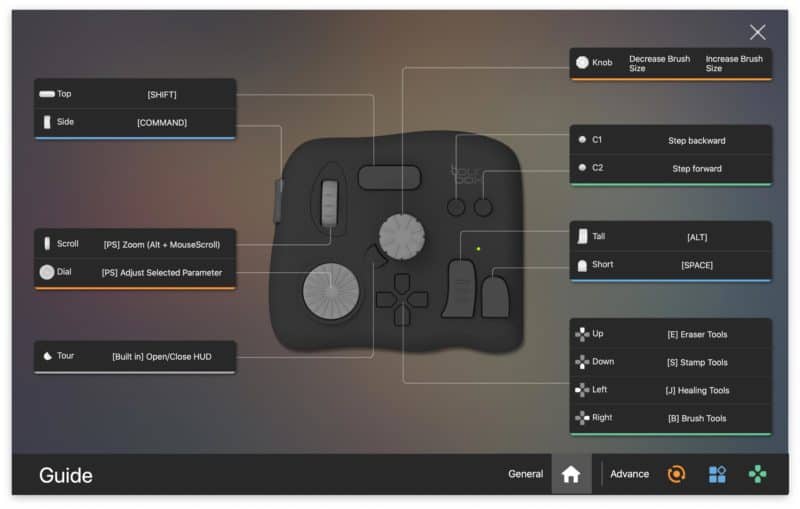
Once you have loaded a template or created one yourself, you’ll come to rely on the Guide until you have learned the layout and function of your controls. The guide can be accessed through the taskbar icon, or you can assign it to one of the TourBox buttons.

Macros In TourBox Console
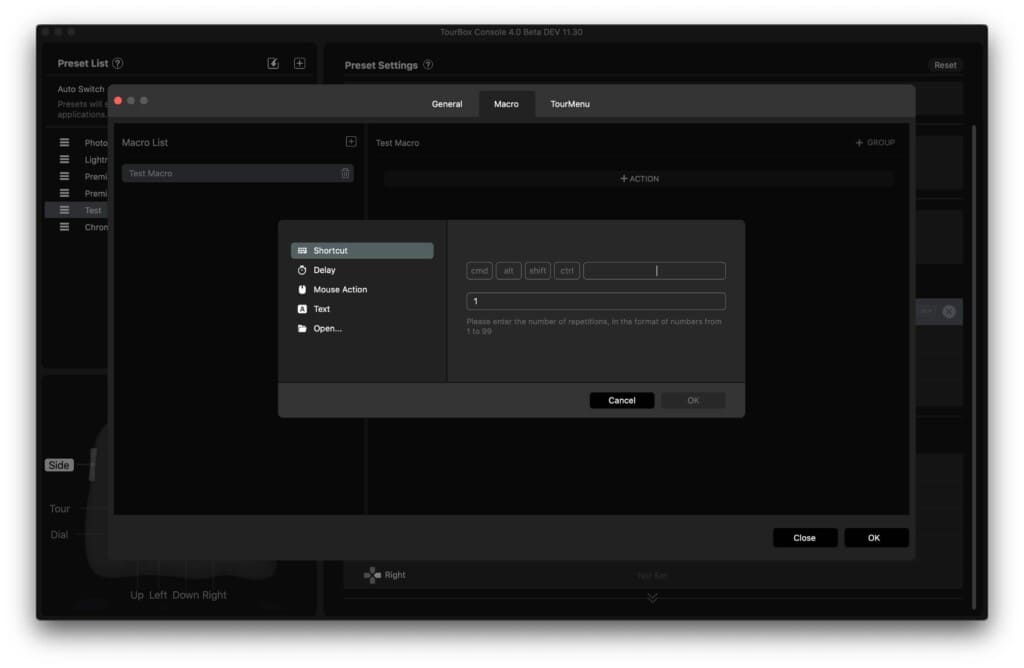
A new feature in the TourBox Console is creating macros and assigning them to a button. Instead of performing a single command or function, a macro is a series of commands triggered with a single push. Macros can include keyboard shortcuts, mouse actions, delays, text inputs and file/folder opening commands.
Creating a macro is easy. Simply select the button that you want to use as the trigger, and choose the macro option from the menu. Now work through each individual action that you want to perform as a new step in the macro. A mouse action can include a single click, a double click, wheel scrolling, dragging or even the movement of the mouse pointer to a specific location on the screen.
Macros are incredibly powerful, but it takes some time to think about the kind of repetitive actions you often perform in your workflow. Here’s an example that I came up with: For my reviews, I’m often using the Mac screenshot command. This creates a large PNG file that is saved to my Desktop. I then open that large PNG file in Photoshop and downsize it to something more web-friendly, before compressing the file size and saving it to a specific “reviews” folder. Using the macro command in TourBox Console, I can automate that entire process to the press of a single button!
What if you didn’t want the entire process to fire instantly on a single press? This is where the macro Groups function comes in. Groups allow you to split your macro actions into different sub-macros triggered by consecutive presses of the same button.
For example, you might use Group 1 to perform the commands to take a screenshot and open the image in Photoshop. At that point, you might want to take control and do some manual editing of the picture. Once you are done, you press the same button again, and this would trigger it to fire the macro actions in Group 2, which, in our case, might be to save that edited image to a specific folder. You can have as many groups as you like within a macro, and the actions will run sequentially with every click of the button. Brilliantly powerful!
The TourMenu
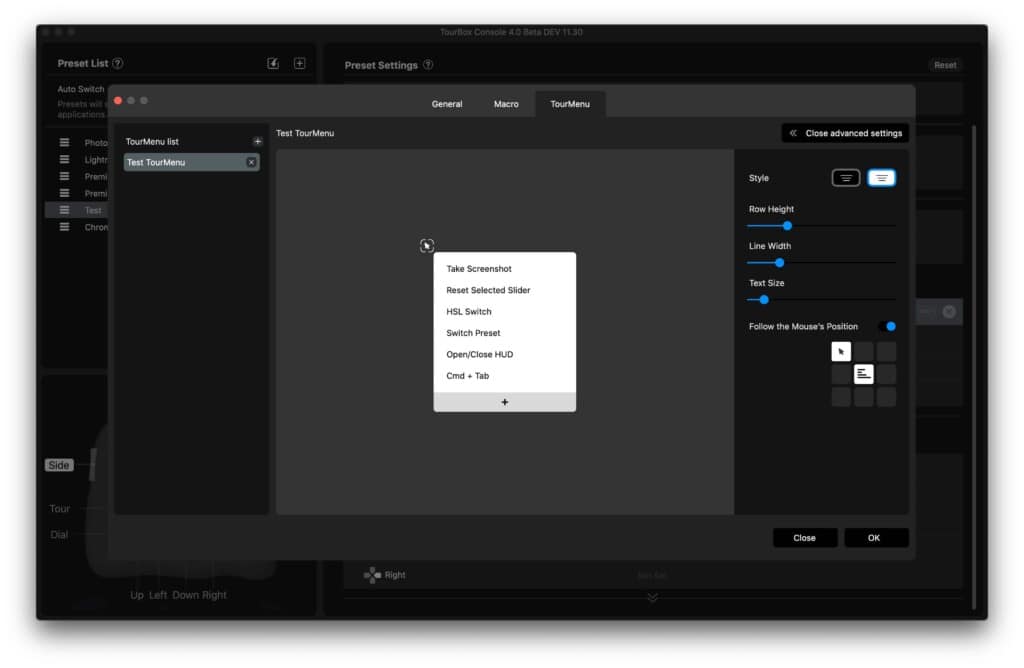
The software developers at TourBox Tech have been busy. As well as the macro function, a new TourMenu feature is also available. The TourMenu is yet another way to expand the number of commands at your fingertips, effectively allowing you to assign up to ten different commands to a single button on the console. This is done by creating an on-screen menu that is assigned to each button.
Instead of choosing a single action or a macro for your button, you create a TourMenu. Within that menu, you can add up to ten single actions, or even ten macros! When you press the button on the TourBox, the TourMenu for that button opens on the screen. You can then choose an action or a macro from the menu using your mouse, or the wheel on the TourBox.
If you’re doing the math, that means that your 17 different controls are now each capable of triggering ten separate commands. But any of those 170 commands could be macros, each themselves containing a nearly-infinite number of sequential actions. In other words, with macro capability and the new TourMenu feature, TourBox Tech just EXPLODED the possibilities for this controller! I am going to have so much fun exploring this feature to speed up my daily workflow.
Haptic Feedback
Scroll and Knob controls on the TourBox Elite now feature haptic feedback. An audible click is heard when rotating either of these controls, and vibration can be felt through your fingers to mimic physical detents in a rotary dial. Using the TourBox Console software, TourBox claims that users will be able to select from three levels of haptic feedback strength – Vib1, Vib2 and Off.
While haptic feedback was enabled on my prototype Elite model, I’m told that this feature has not yet been refined into its final form. I was able to select the different levels, but there was no difference between Vib1 and Vib2 mode in the current beta software. The Off selector did work, and when the haptic system is set to the Off position, this also silences the audible click that occurs at each virtual haptic position.
I have high hopes for the haptic feedback system. Still, final judgement on that feature will have to wait until I can evaluate a production model, along with finalized software. Primarily, I’d like to see the volume and severity of the audible click lowered in the final model. In its current state, the sound is coupled to the haptic feedback. You cannot have one without the other, yet the sound is too loud to be left on in many situations. I am passing this feedback on to the TourBox team.
Batteries and Battery Life
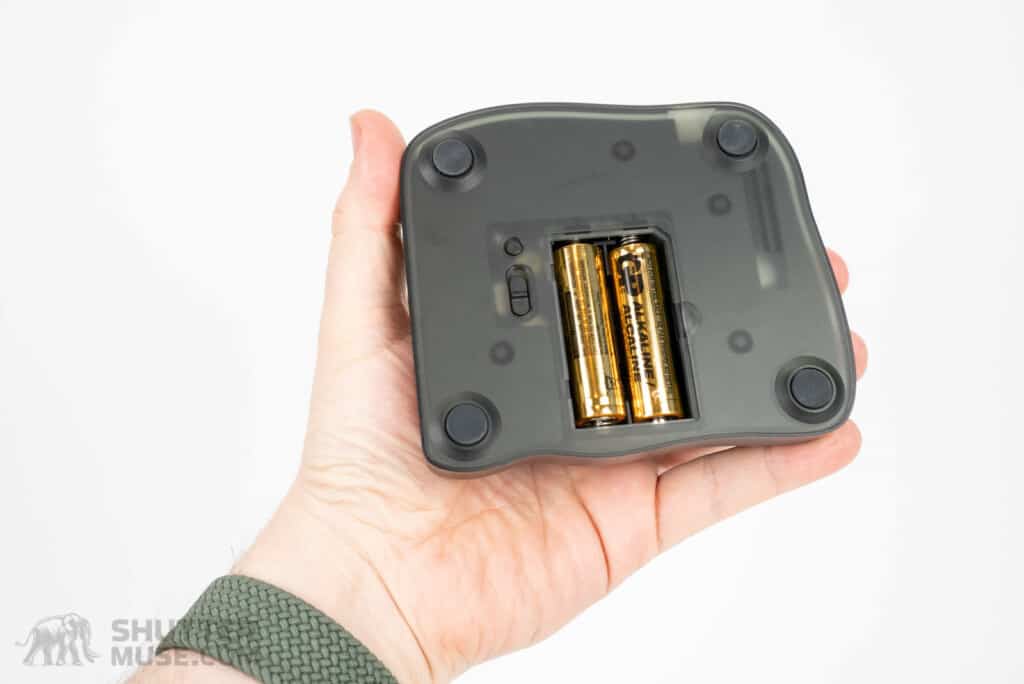
A pair of AA batteries power the TourBox Elite. TourBox claims that the current battery life is around two months, and they are looking to increase that with future firmware updates. Having had the TourBox Elite prototype for just a few days, I have no way of confirming the battery life claims at the moment. However, I will continue to use the TourBox Elite daily and update this post with more findings in the coming months.
At first, I was surprised that AA batteries powered the TourBox Elite. My other daily-use Bluetooth peripherals – Logitech Mouse and Keyboard, Wacom Intuos Pro tablet, Blackmagic DaVinci Resolve Speed Editor – all have a built-in battery charged by USB-C as needed. However, if the TourBox’s claims about battery life turn out to be true – and I have no reason to suspect that they won’t – the choice isn’t a big deal. Two months of battery life is much longer than I get from my other input peripherals, so the longevity outweighs the inconvenience of changing batteries.
The TourBox Elite is supplied with a pair of Alkaline AA batteries, but I’m sure that most people will switch these to a couple of good NiMH batteries such as Eneloops once the supplied Alkalines expire. Although you can use rechargeable batteries in the TourBox Elite, they cannot be recharged in the TourBox using the USB-C cable. They must be removed and charged in a AA battery charger.
While we’re talking about power, I’ll also point out the TourBox Elite’s On/Off switch on the unit’s base. In the photo above, you can see it just to the left-hand side of the battery compartment. Currently, at least on this prototype model, the switch is not labelled. The UP position corresponds to OFF, which is the opposite of what most people expect in North America and most parts of Europe. I found myself caught out by it a few times and will likely create a label for it.
Conclusion
When I first heard about the existence of the TourBox Elite, I was excited. I love the USB-C connected TourBox Neo model, but when I reviewed it, I pointed out that every other peripheral for my computer is wireless. What I really wanted, I said, was a wireless TourBox. And now I have it.
Honestly, if all they had done were add a stable, lag-free Bluetooth connection to the TourBox Neo and call it the Elite, I would have been happy. Instead, they surprised me with a few additional positive tweaks to the tactility of buttons and rotary dials. I also have hopes for the haptic feedback system, but it’s too early to pass judgement on that aspect as it was not fully operational on my prototype test unit.
Another surprise was the additional features added to the TourBox Console companion software. The ability to run macros at the push of a button is a massive productivity hack, and the interface they created for macro creation is smart and intuitive. The TourMenu system, effectively giving you the ability to add ten possible actions to every button, opens a mind-boggling array of possibilities.
The great news for owners of the original TourBox Tech, or the TourBox Neo, is that these new software features will not be limited to the TourBox Elite. Once the software moves out of Beta for the retail launch of the Elite, everyone will have access to the new Macro and TourMenu features.

The question is, should you get the TourBox Neo or the TourBox Elite? The price difference will be around $80. That’s not insignificant, but the wireless feature is a big deal, especially for those traveling. Being able to pull the Elite out of your bag and get to work wirelessly without taking up one of your laptop’s USB-C ports is fantastic.
I also feel that the added ease of use with the wireless TourBox Elite model will see it getting used more often, and thus the price difference will equalize with time saved. As a long-time user of the previous two USB models, I know that the cable would often get in my way, and I would sometimes end up tucking it away behind my monitor. I would pull it out for extensive batch editing, but there were more than a few times when I was doing more minor edits or quick editing sessions, and it got left behind. I don’t see that happening with the wireless model because there is no reason to not have it sit next to my keyboard.
Overall, I’m thrilled with the TourBox Elite. It’s exactly what I hoped it would be and more. Moreover, I’m also pleased to see a company closely listening to user demand and iterating its hardware and software to match customer needs. It would have been easy for TourBox to stick Bluetooth in the previous model and call it a day. But they didn’t. They refined the product further and continued developing an already impressive software package to add even more features.


Another great tech review! You are the number one ‘go-to’ when it comes to photographic tech. Answers so many questions – now I would like to add this tool to my workflow.
Thank-you for the informative, practical, and relevant details.