
The TourBox Neo is a physical controller designed to speed up your photo and video editing workflow. By assigning application-specific functions to the dials, wheels and buttons on the device, you can operate most of the functions in your favourite creative applications using one hand, while using a mouse or Wacom tablet in the other.
In this review we will be taking an in-depth look at the functionality of the TourBox Neo, as well as the customization options and application presets that are available. There will also be a comparison to the TourBox Neo’s predecessor, the original TourBox.
Disclaimer: This product was provided for review at no charge. No money changed hands, and TourBox Tech did not have any input or get to see the review before it was published.
Table of Contents
TourBox Vs. TourBox Neo
| Spec | TourBox Lite | TourBox Neo | TourBox Elite |
|---|---|---|---|
| Connection Type | USB-C | USB-C | USB-C / Bluetooth |
| Haptic Feedback | No | No | Yes |
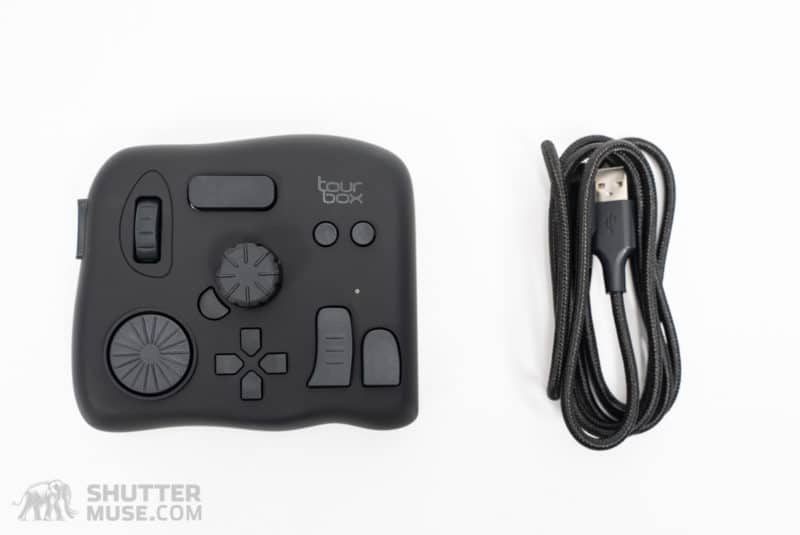
| Included USB Cable? | Yes | Yes | No |
| Control Inputs | 8 | 14 | 14 |
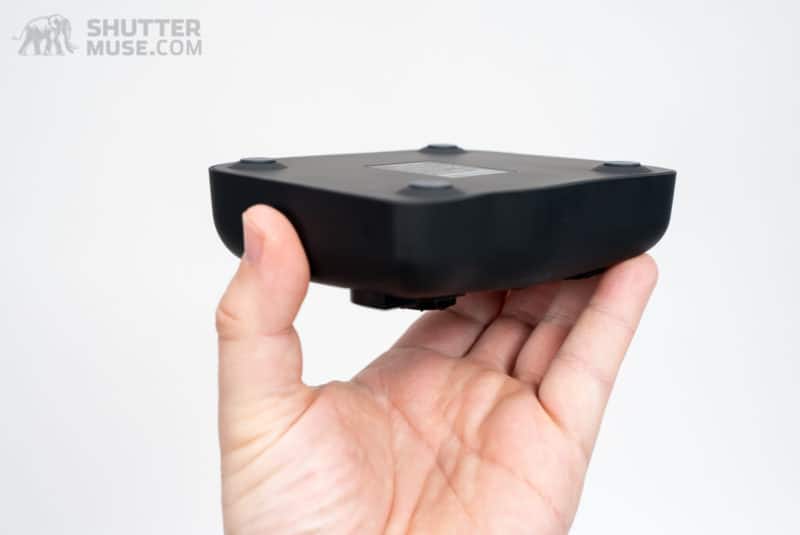
| Dimensions | 111 x 106 x 39 mm | 116 x 101 x 44mm | 116 x 101 x 44mm |
| Weight | 329 g | 370 g | 376 g |
| Color | Black | Black | Black/White/Smoke |
| Price | $94.99 | $169.99 | $268.99 |
The TourBox Neo is a minor update to the original TourBox product, with only two changes to note. Firstly, click functions have been added to the main rotary knob and the low-profile wheel. As well as rotating, these two controls can now be clicked as buttons. This adds two more controls to the TourBox Neo and also changes the tactile feel of those two controls for the better.
Related Posts
The second difference is that the USB-A pass-through port has been removed from the device. This port was available on the very first version of the TourBox but was subsequently removed mid-way through the original’s lifecycle. Depending on whether you are comparing the new Neo version to the original 1.0 version, or the later 1.1 version (my version naming), this may or may not be a change. Either way, I do not consider these changes to be a reason for any TourBox version 1 or 1.1 owners to upgrade to the new TourBox Neo. This is a minor refinement to what was already an excellent product.
Installation and Setup
Before using the TourBox Neo, you’ll need to head to the TourBox Tech website and download the latest version of the TourBox Console. The software is available for both Mac and Windows systems. Installation takes just a couple of minutes and I had no problems along the way.
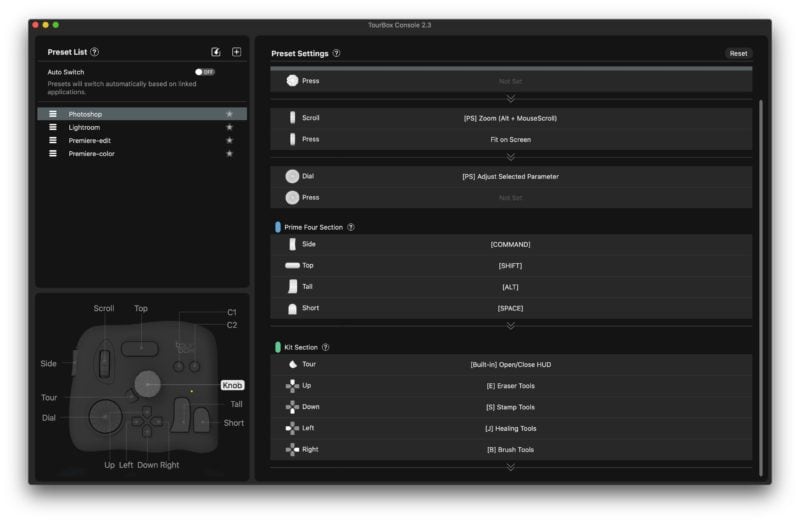
The TourBox Console helper application allows you to edit the function of every button and dial on the TourBox Neo when used with specific applications. These functions can then be saved as application-specific presets to be recalled at a later date.
When you first start up the Console you’ll see presets for Lightroom, Photoshop and Premiere are pre-loaded. The majority of people using a TourBox Neo are going to be spending most of their time in one of these applications, so for many users, this is all they will need. For the more adventurous, these presets can be used as a starting point and you can tweak them to create a version that better conform to your preferred editing workflow.
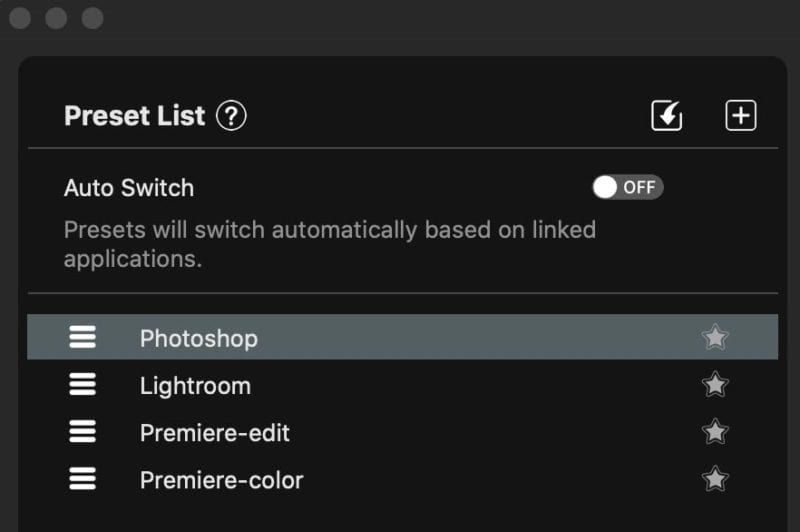
The Console can also be used to create presets for other applications in addition to Photoshop, Premiere and Lightroom. Once a new preset has been created, you can select the “Auto Switch” option and assign a specific application to that preset. When you open that application on your computer, the TourBox will automatically switch to the correct preset for the tools in that app.
By default, the Auto Switch option is disabled, which can cause some considerable confusion if you start by opening Lightroom, without realizing that the Photoshop preset is pre-selected by your controller. I would recommend turning Auto Switch to the ON position right away.
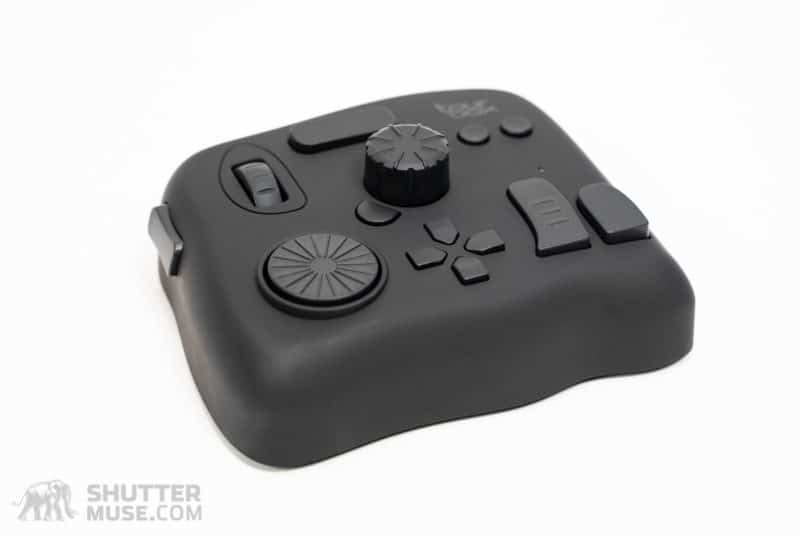
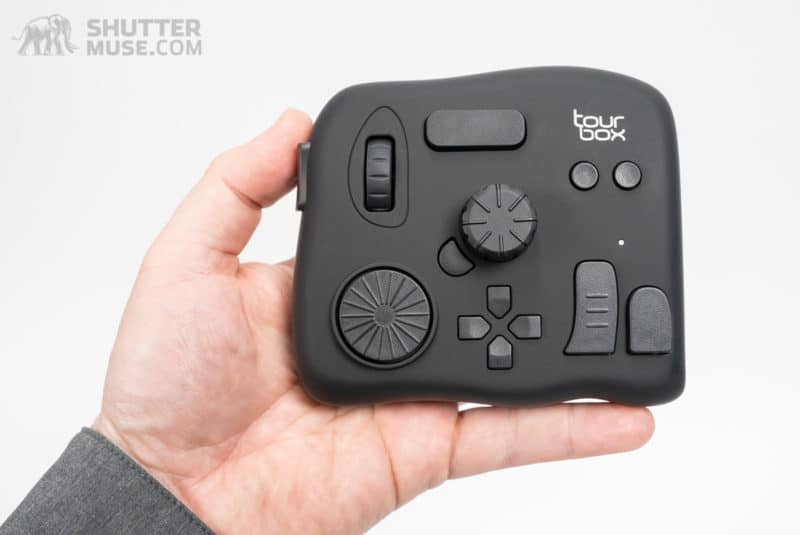
TourBox Neo Design and Controls
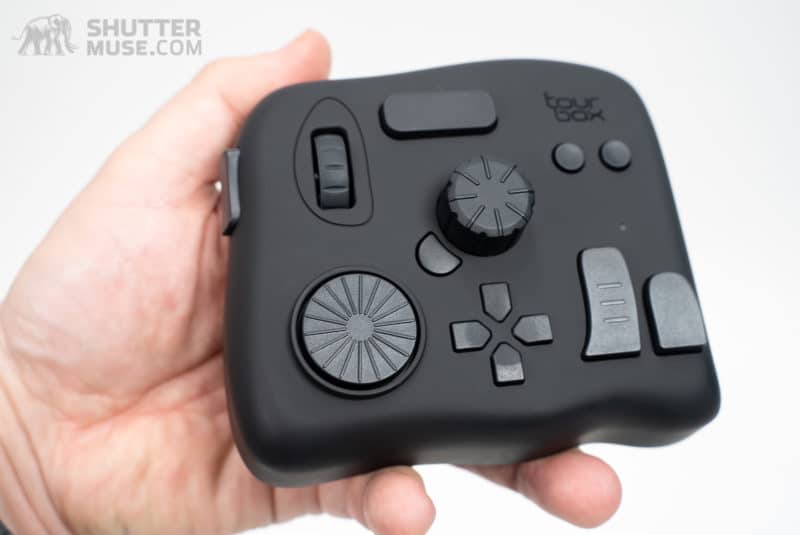
In total there are 14 controls on the TourBox Neo, three of which are simultaneously rotary devices and clickable buttons, giving you a total of 17 assignable controls. When I first saw photos of the TourBox Neo, I didn’t yet appreciate its clever design. It’s only when you get one in your hands, and on your desk, that you see how small it is, and what great job they have done with the layout control design.
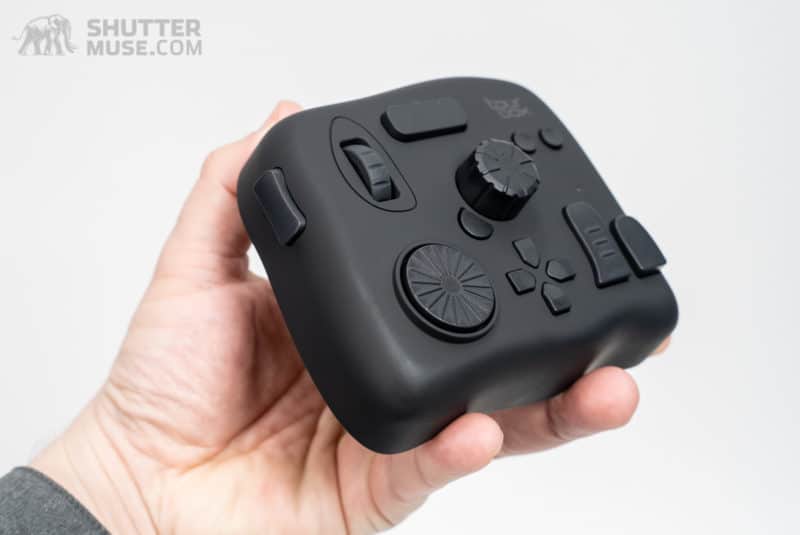
Every button and dial on the device has a different shape and texture. Some are smooth and flat, some are smooth and curved. Others are rubber coated and some have raised bumps on them. This allows you to differentiate every control option without needing to take your eyes off your monitor. Although it does take a little time to memorize the controls that have been assigned to these shaped and textured buttons, knobs or wheels, once that memory has developed, it quickly becomes second nature to operate.
Controller Combinations
During my time with the TourBox Neo, I have experimented with several control combinations by combining it with a keyboard, a mouse and a Wacom tablet. What I discovered is that there is probably no single combination that works perfectly for all applications. When I used it with Photoshop, I enjoyed using the Wacom in my right hand for precision brush strokes, while changing things like tools and brush sizes with my left hand on the TourBox.
In Lightroom, however, I preferred to use the TourBox Neo in my dominant right hand to perform all the slider edits, and occasionally switching to my mouse, also on my right, when I needed to drag a graduated edit point across an image.
Although much can be handled solely with the TourBox controller, there will inevitably be times when you need some sort of pointing device (mouse or Wacom), or times when you need to type a file name or add metadata to an image. This means you will need to keep multiple control devices on your desk at the same time. Thankfully, the small footprint of the TourBox makes this possible without too much fuss.
My only real gripe with this multi-device setup is the lack of Bluetooth connectivity in the TourBox Neo (an issue now remedied with the introduction of the TourBox Elite). My mouse, keyboard, and Wacom tablet have wireless BlueTooth connections, as does my BlackMagic Speed Editor for use with DaVinci Resolve. Having a USB cable trailing across my desk is something I thought I had long since left behind.
On-Screen HUD and a Recommended Setting
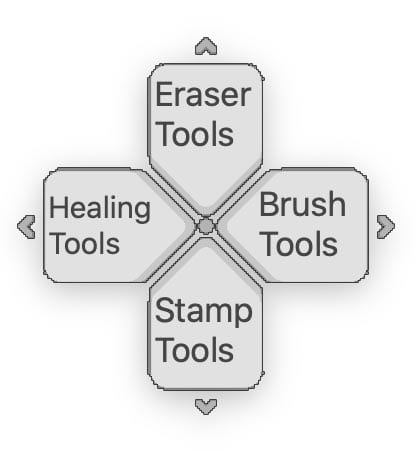
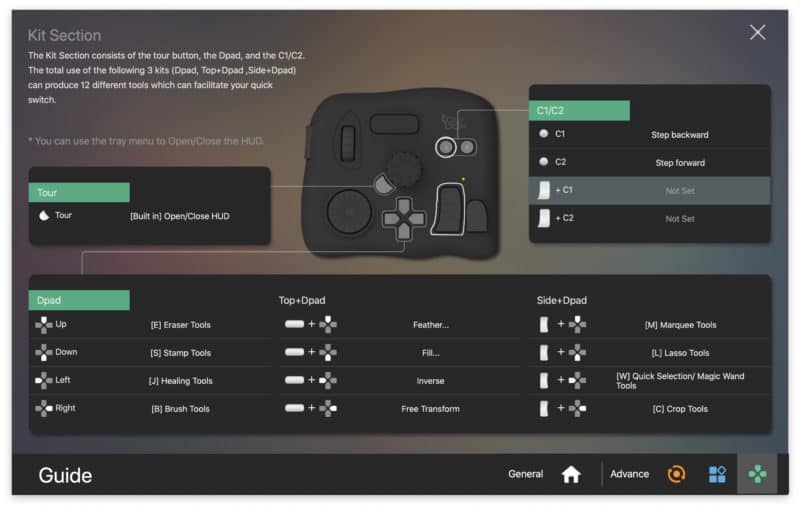
Button and control customization runs deep with the TourBox, particularly with the 4-way button which can be set to work in combination with the left or top button to produce a total of 12 different options. For this reason, the TourBox New has an on-screen HUD that appears as soon as the TourBox Console is launched in the background.
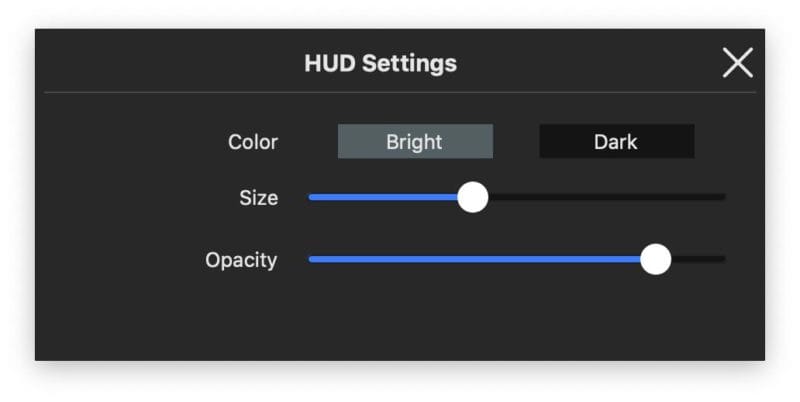
You can use your mouse to drag the HUD to a new location, and by right-clicking on it, you can set its brightness and opacity, or close the HUD entirely. Once closed, you can re-open the HUD using the “tray menu”, which means clicking on the small TourBox icon in the menu bar at the top of your screen.

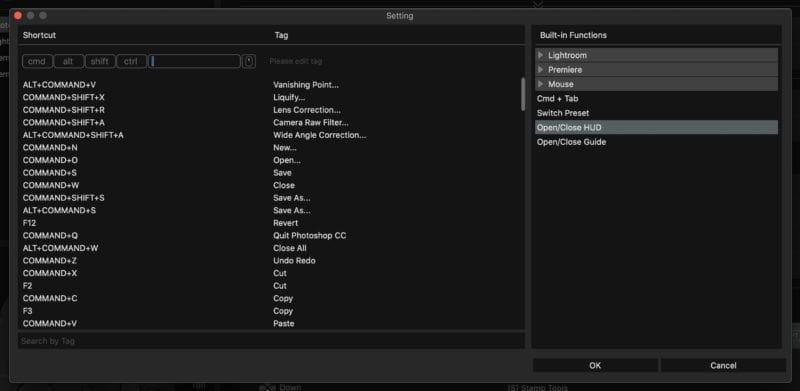
Another alternative is to assign one of the TourBox buttons to open and close the HUD. While this is easy enough to do, and they do provide a built-in function for this in the customizer, it does take away one of your buttons. I’d like to see TourBox Tech figure out a way to display and hide the HUD based on your own actions or tools in use. For example, it could be set so that the first press on any one of the four 4-way buttons first brings up the HUD on the screen to remind you of their options, and a second press on the desired button actually initiates the chosen function. How about it, TourBox Tech?
TourBox Guide Screen
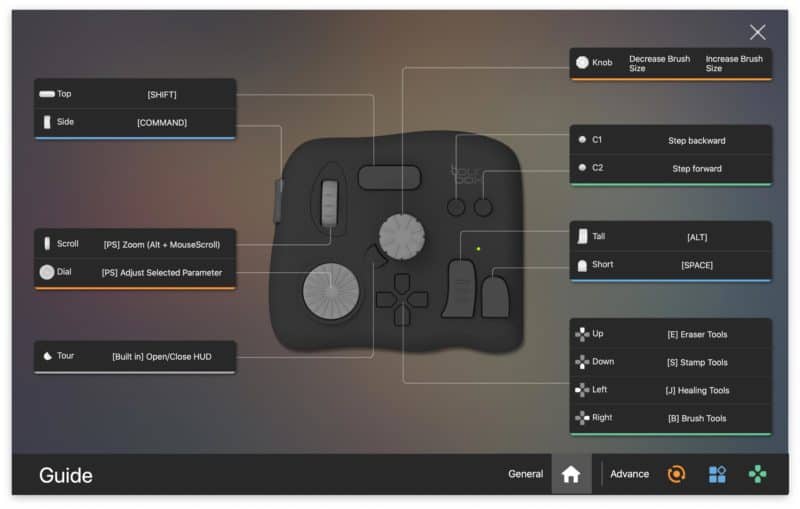
The HUD feature is handy, but when you’re first getting used to using the TourBox Neo you are going to rely on the Guide. The Guide can be accessed through the TourBox icon in your top toolbar, or you can assign it to a button on the controller. At least for the first few weeks, I would highly recommend assigning its appearance to one of the buttons.
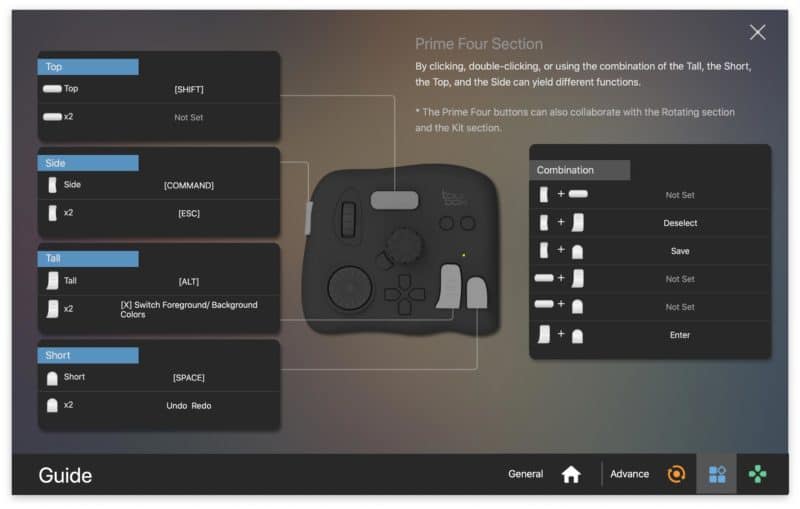
When it first opens, you get an overview of the primary controls, but using the buttons on the lower-right of the screen you can access more detailed screens for each of the three control sections: Kit, Prime Four and Rotating. Those detail screens will show you the additional controls that you can enable by using a combination of button presses. For example, holding down the left-hand side button while simultaneously pressing the C1 or C2 button.

The Guide is very well thought out and extremely intuitive. Not having this feature would have made it ten times harder to get to grips with the TourBox Neo.
Creating TourBox Presets for Other Applications
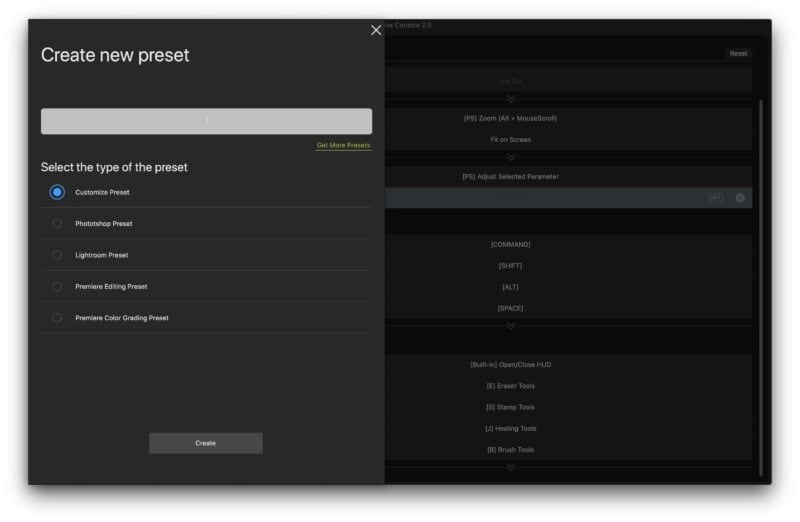
When you create a new preset, you have the option of starting with a completely blank preset that has no controls assigned to any of the TourBox Neo buttons, or you can start the preset with default controls for Photoshop, Lightroom or Premiere.
Tag Manager
Once a preset has been selected, you can right-click on the preset name in the preset list to display what TourBox rather confusingly calls the Tag Manager. The Tag Manager is, in fact, simply a list of labelled shortcuts for the application you currently want to set up. I have no idea why it is not more intuitively called Shortcut Manager.
If your new preset was started from a Photoshop, Premiere or Lightroom preset, your tag manager will be pre-populated with all the available keyboard shortcuts for those applications. If you chose to start your new preset from the Customize Preset option, the Tag Manager will start blank.
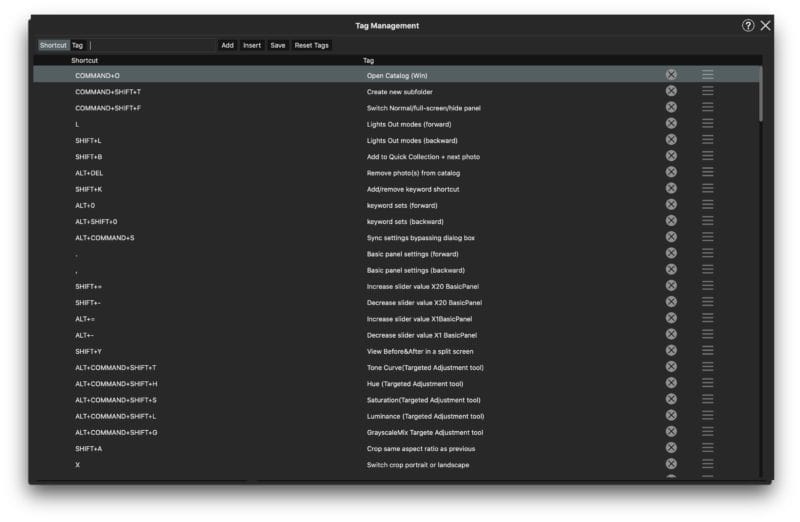
The purpose of the Tag Manager is to store and organize all the possible shortcuts for an application that you might want to pair up with your TourBox Neo controller. You can store a list of hundreds of keyboard shortcuts here, and simply pick and choose the ones you want to assign to buttons when you need them.
Although I don’t think they got the naming right by calling it Tag Manager, it is a darn good idea! Each set of tags lives within the preset, so you won’t find any Lightroom shortcuts in your Tag Manager if you are currently editing your Photoshop preset. Once you understand the Tag Manager’s purpose and how it works, it’s an immensely useful way to organize the possible customization options for any given application.
Built-In Functions
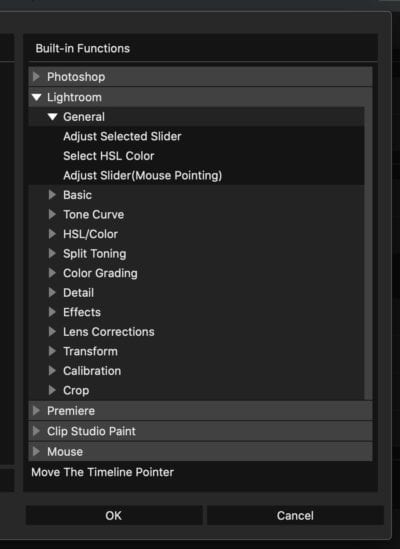
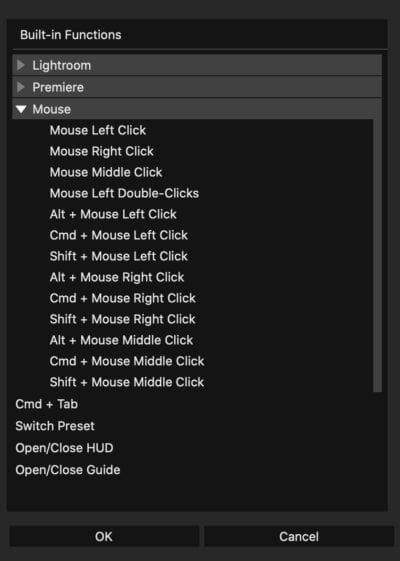
When you click on a control in the preset dashboard, the settings menu will open and allow you to assign either a Tag (shortcut) or a built-in function to that control (button, wheel or dial). Think of built-in functions as actions you want to perform in an application, that doesn’t have a keyboard shortcut.
For example, in Lightroom, you can enter fullscreen mode by pressing the keyboard shortcut “F”. But there is no keyboard shortcut for increasing or decreasing the value of the currently selected editing slider such as contrast, exposure, highlights or clarity. To solve this, TourBox has several built-in functions that take care of these, but they are only available for Lightroom, Photoshop, Premiere, and a lesser-known-to-me application called Clip Studio Paint.
If you are creating a preset for an application other than these four, you will have to rely entirely on existing keyboard shortcuts for those applications, and the variety of mouse-click options that are also available in the built-in function list. In most cases, this should be fine to accomplish the most widely used tasks within an application, but it’s something to keep in mind. You might not be able to create a preset that feels like it has such a tight integration as you get with those four applications.
I suspect that the vast majority of people will be thinking of using TourBox Neo with Lightroom and Photoshop, but it would be nice to see some additionally supported applications in this function list. Final Cut Pro being absent from that list is a surprise to me in particular.
TourBox Downloadable Presets
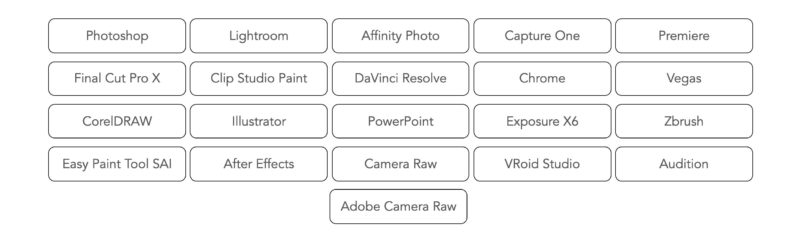
Although you can completely customize the function of each button or dial yourself, it’s still useful to have a good starting point. As mentioned before, the TourBox comes loaded with presets for Lightroom, Photoshop and Premiere. User-submitted presets are also available to download from the TourBox website for most of the other major photo, video and design applications.
Photoshop, Lightroom, Affinity Photo, Capture One, Premiere, Final Cut, Clip Studio Paint, DaVinci Resolve, Chrome, Vegas, CorelDRAW, Illustrator, PowerPoint, Exposure X6, Zbrush, Easy Paint Tool SAI, After Effects, Camera Raw, VRoid Studio and Audition are all currently available as presets. For now, notable presets missing from the list are Luminar, On1 RAW, Photo Mechanic, Affinity Publisher and Affinity Designer.
Alternative Photo Editing Controllers
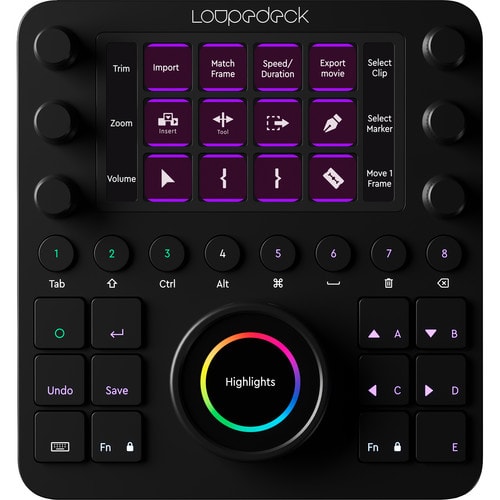
Loupedeck
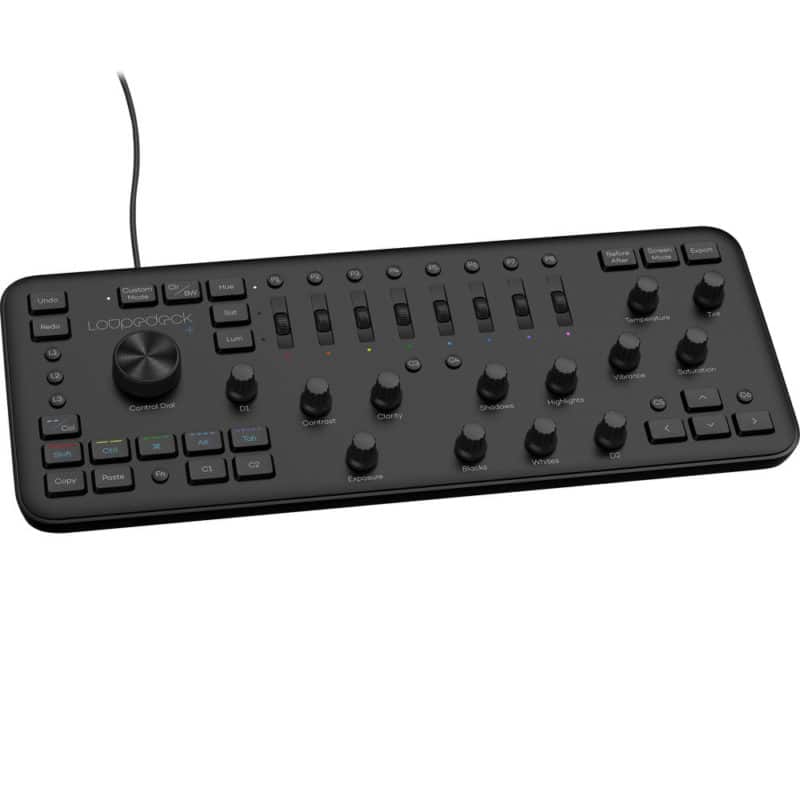
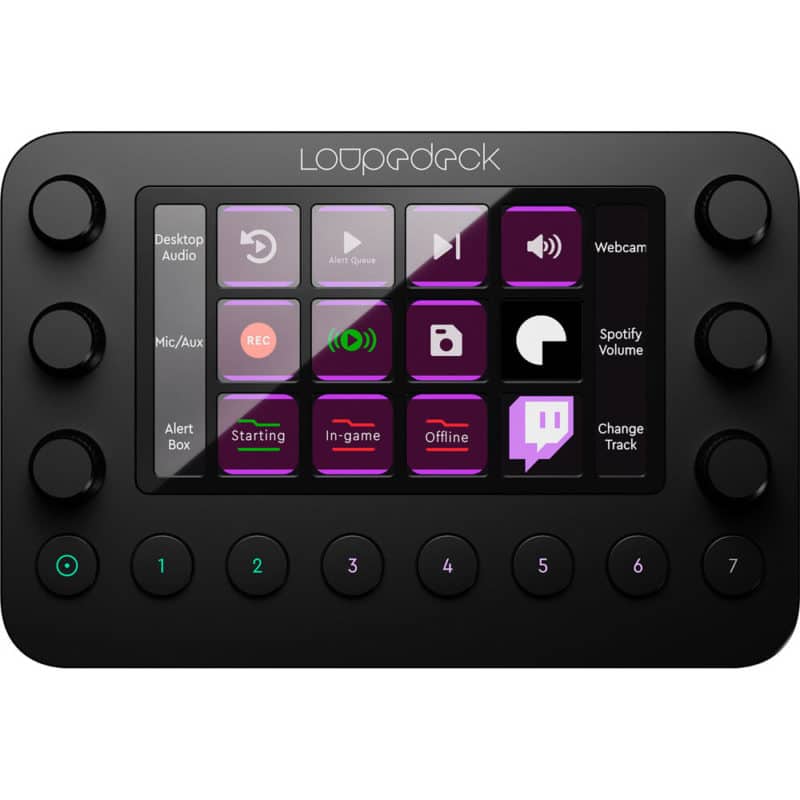
Loupedeck’s range of editing controllers is likely to be the most often considered alternative to the TourBox Neo controller. They currently have three models: The $249 Loupedeck+, the $269 Loupedeck Live Console and the $549 Loupedeck Creative Tool.
Out of these three models, the Loupedeck+ is going to be the closest in function to the TourBox Neo. This model is custom-built to enhance the Adobe Lightroom, Adobe Premiere Pro CC, Adobe Photoshop and Final Cut Pro X editing experiences.
This specialization has its pros and cons. On the plus side, there are specifically labelled buttons on the Loupedeck+ that correspond to common editing controls such as exposure, contrast, clarity and saturation. This means you don’t have to remember which function you programmed each button or dial to perform. The downside is that the Loupedeck+ lacks the total customization of the TourBox Neo. You can’t reconfigure it to work with other editing applications, so it’s not a good option unless you are using one (or more) of those four applications. Of course, there is also the price difference to consider. Loupedeck+ costs $249, whereas TourBox Neo costs $169.
Monogram (formerly Palette)
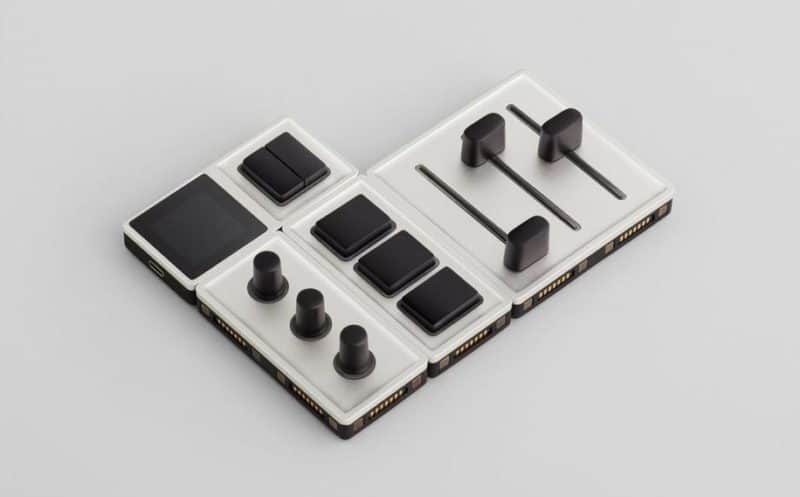
Monogram takes a modular approach to photo editing controllers and allows you to piece together a console that contains the knobs, sliders and buttons that you need. Modules are available as kits, or individually, but even the basic Traveller Console (1 Core module, 1 Dial module, 1 Slider module and 1 Essential Keys module) will set you back $399, with additional modules costing between $99 and $149.
Considering the cost of the Monogram setups, I only consider this a partial alternative to the TourBox Neo. Yes, technically they are tools that were built for the same purpose, but with a minimum cost of more than twice the TourBox, it’s hard to imagine these products targeting the same audience.
Conclusion
The TourBox Neo is a powerful, well-priced and well-designed editing controller that can, with a little practice, significantly speed up your editing workflow. What’s also noteworthy is that it can also improve your editing by more easily allowing finer adjustments to slider-based editing tools, particularly in Adobe Lightroom.
Where once you might heavy-handedly apply +10 to your clarity slider because that’s simply the number it went to when you clicked on it, now you can easily rotate the TourBox dial to achieve exactly the desired amount while monitoring the result on your screen.
Although an excellent device, I don’t recommend it for everyone. It is important to be aware that there is a learning curve to using the TourBox, as there is with any other editing controller. It takes time to set things up in a way that compliments your workflow, and it takes time to learn your chosen controls. You will be rewarded for this time spent, but it is an initial necessity.
For this reason, the TourBox Neo is best purchased by people that are going to use it often. I’m not saying you have to be a professional photographer or photo editor by any means, but it’s not going to be a useful product if you only get it out of the cupboard once or twice a month, and then spend half an hour trying to regain that muscle memory again.
The lack of wireless BlueTooth connectivity is my only real gripe with this otherwise excellent device. My Wacom tablet, keyboard, mouse and DaVinci Resolve Speed Editor all connect wirelessly to my computer and help to keep my desk clutter-free. While not a deal-breaker, I’d definitely like to see TourBox Tech adopt this for any possible future versions of the device. UPDATE: The new TourBox Elite now features Bluetooth!


Dan, great review. The point about this being a productivity tool with a learning curve is really important – you have to have a need for this kind of kit to make it worth the price, but more importantly the time to learn to use it.
I love the Loupedeck+, but even with labels it’s a solid effort to learn and use efficiently – with limited return unless you have a very effective, and repetitive manual process which will benefit from the dedicated controls.
I like this device much more in design, price-point and flexibility – but cannot justify replacing the Loupedeck I already have sunk time and money into … if it dies, I’ll know where to look first.
Thanks for the kind words, and thanks for taking the time to share your thoughts on this, Nigel. I do think the small form-factor of the TourBox is a big benefit over the Loupedeck+.
Wow! Another erudite recommendation from Dan Carr!! It looks like this tool will be excellent for large-batch processing or am I hoping for too much?
Thanks, again, for the details.
It would be particularly good for batch processing. Especially if you assigned some buttons to do your rating/flagging for a first pass edit.
You could even create two presets. The first preset could have all the controls set up for tagging, rating, flagging for a first pass. Then you could switch up to a second preset where the buttons are all set for editing with the sliders.
I can’t decide if this would help with PhotoMechanic editing pitchside or not. I can see how it will work well at your desk but for live sports photography, I’m not sure… Which could be why they have not got a template for PM.
I’m actually planning on making a Photo Mechanic preset for it which I will then make available to download here.
I think it can be extremely powerful for PM in a media room where you have a desk. There have previously been people who hacked up old Playstation controllers to work with Photo Mechanic, and this would essentially be a more refined off-the-shelf solution.
As for pitchside… I would say it’s probably doable, but the downside is the fact that the controller is designed to sit on a desk. That said, it can easily rest in a palm while a second hand works the controls. When I create a Photo Mechanic reset, I’ll make a video of it in operation, too.
Hi Dan – great review and great article! The Tourbox was featured for sale this week for Prime Days, I use Photo Mechanic for initial intake and review and your review convinced me to order one and give it a try. I’m just starting to put together a preset myself and think about the best way to set it up to speed up culling. Have you made any more progress on a Photo Mechanic preset or do you have any screenshots of your PM configuration you could share? Appreciate the help!
Glad you got one, Rob. I’m afraid I haven’t got this all figured out for PM yet. Life is a whirlwind right now.
hmm i have a Tourbox v1.0 that I purchased from their kickstarter campaign. Does anyone know if the sliders and knobs feel more precise with the neo version? or is it the same/similar?
Hi Dan,
thank you for your helpful review. I’ve also bought it 🙂 I’m curious if you finished your preset for PhotoMechanic – if so, it would be nice if you could share it with us 🙂
All the best 🙂
Abhijit
I’m sorry, I never got around to doing this. I think at this point, if I’m honest, it might not happen. I’m just too busy.