

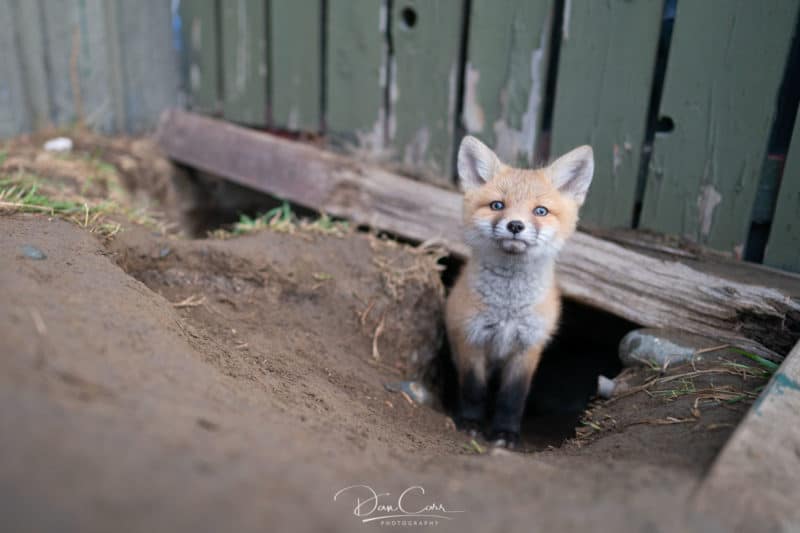
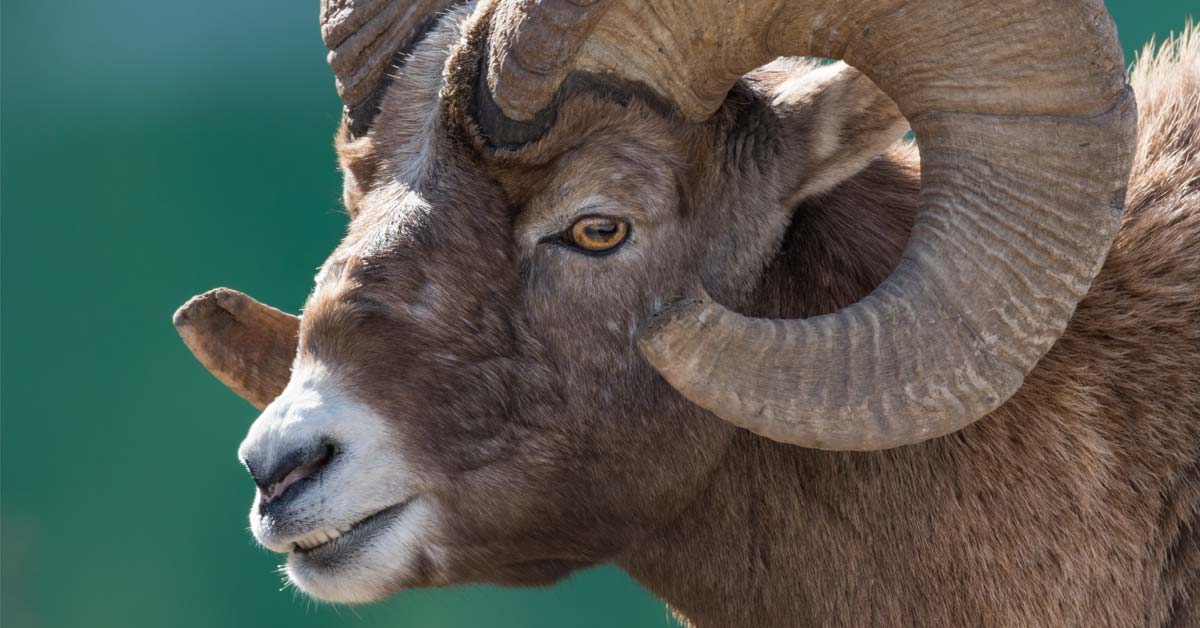
Today I wanted to share a tip with you that can help you create some truly incredible wildlife photos. Of course, the title of the post has already given away the tip, and I’m pretty sure the header image proves that this tip works!
Yes I shot that photo, and the others ones on this page, using a simple, cheap Bluetooth remote control.
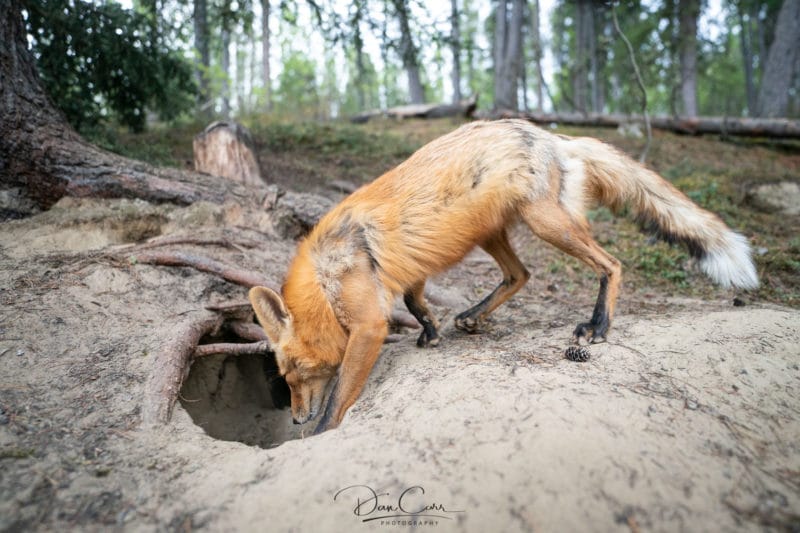
Most wildlife photos are shot from a distance with telephoto lenses so that you don’t spook the animals, but the problem with this is that the images often look very similar and have a familiar feeling. If you suddenly throw a wide-angle wildlife shot into your portfolio such as the ones I’ll teach you to get on this page, it’s really going to stand out in a good way.
Remote Control

There are many ways to remotely control a camera, but today we are concentrating on Bluetooth. It used to be the case that cameras with built-in remote control capabilities all relied on infrared remote controls. The biggest problem with infrared control is that the remote needs to be in line-of-sight with the IR receiver on the front of the camera. The range is also incredibly short, and it gets shortened even further in bright light.
If you have to be pointing the remote control at the front of the camera, this makes infrared control useless for the purposes of close-up wildlife photography. On the other hand, Bluetooth has a much longer range and doesn’t need line-of-site with the camera. In fact, you can even trigger a camera with Bluetooth when the camera is inside a protective case… but we’ll get to that in one of the next sections.
For my shots in this article, I used the Sony a9 II and the Sony RMT-P1BT remote, but somewhat similar remotes are available for Canon and Nikon as well. I have a lot of experience with the Sony and Canon Bluetooth remotes, but none with the Nikon at the moment. The Sony remote is excellent, has several customizable buttons and a range that easily exceeds the stated 16.4ft in the manual. In fact, I have used it with no problem past 50ft when the camera is out in the open, and past 40ft when the camera is inside a plastic box. In fact, I haven’t yet found a scenario where it does not trigger when I need it to, it’s quite remarkable.
Another great feature of the Sony remote is a light on it that confirms that the camera has received a signal. This means that if your camera isn’t firing for some reason, you’ll know because the light will not turn on when you press the trigger button. Additionally, when Sony cameras are in Bluetooth remote mode, they do not go to sleep so they will be ready to take the shot at a moments notice.
The Canon BR-E1 remote has a lesser useable range than the Sony remote, but with careful concealment of yourself inside a Tragopan photography blind, or under a LensCoat LensHide, you would still be able to get within a useful range to put this plan into action with some wildlife subjects. Unlike the Sony cameras, Canon cameras will go to sleep in remote control mode, so you should consider manually disabling any sleep function to keep it ready.
If anyone has experience of the Nikon ML-L7 Bluetooth remote, please leave a comment and help me fill in the knowledge gap.
Camera Disguise/Protection

It would be unwise to put your camera out unprotected and undisguised. You might still spook your chosen subject, and there’s also a very real chance they will come and investigate it… with their mouth. At a minimum, I would say that you should wrap your camera in some rubber armour of the kind that can be easily purchased on Amazon. Even better would be to place it into a modified Pelican case, or use a Camtraptions Camera Housing. These housings are specifically designed for wildlife photography with remotely triggered cameras. I have a pair of them, and they do a good job.
You’ll need a small tripod, too. At this point, I would usually point you in the direction of a suggested product, but I’m hesitant in this case. You see I did find a nice, low-profile tripod for the job, but it wasn’t that cheap and one of the feet got immediately gnawed on and destroyed by foxes. So I learnt a lesson there! Yes, you’ll need a tripod, but your best bet is probably to find a cheap second-hand one on your local buy-and-sell forum. Even if your camera is well protected, you should definitely be prepared for your tripod to suffer some damage. You have been warned – don’t go using your fancy Really Right Stuff tripod!
Planning the Shot
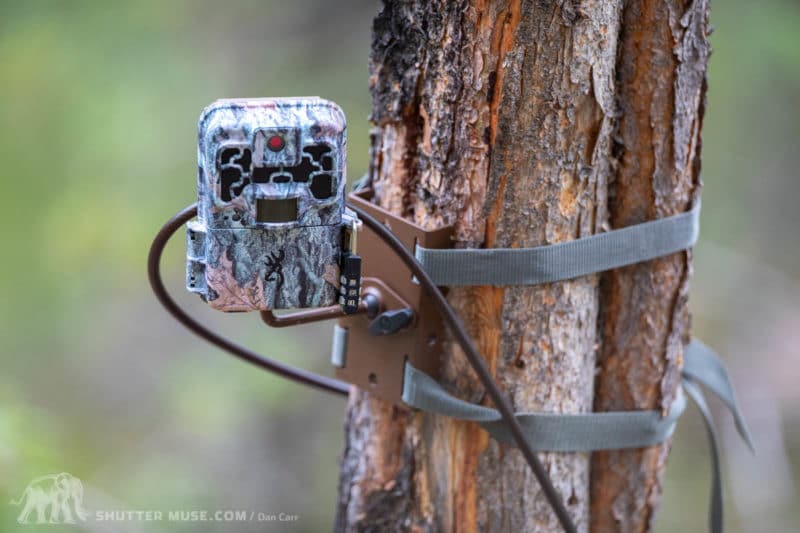
These kinds of shots need some planning and I do this using relatively cheap trail cameras to monitor wildlife long before I go to make the actual image. I have written about my use of these tools before, and they continue to be invaluable for my wildlife work. With a few days of footage from your location, you can usually use the timestamps on the video to figure out a pattern for the animal’s presence, and even predict their movement around specific locations. Armed with this knowledge you’ll have a better chance of heading to your location at the right time, and placing the camera in a place that will capture a great shot.
In fact, you’ll want to get to your location long before the right time, because you need to get the camera set up and get yourself hidden away before the animals show up. After that, it’s a waiting game! Take some good audiobooks or podcasts to listen to, because you’ll have to sit with your eyes on the camera. No scrolling Instagram while you wait, or I promise you’ll miss something 🙂
Lens Choice
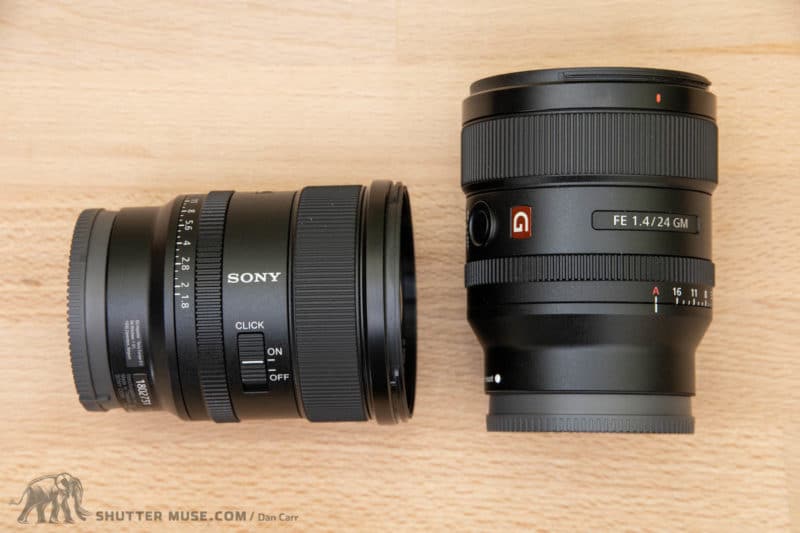
This technique will produce the most compelling images with a wide-angle lens, and this can be further improved if it’s a really fast lens that can create nice bokeh behind the animal to make it pop from the surroundings. The images on this page were taken with the Sony 24mm f/1.4 GM and the Sony 20mm f/1.8, and they were all shot at their widest apertures.
After playing around with various remote techniques for a while, I think something in the range of 20-30mm produces the best results with medium-small animals when you are trying to get the camera in close. Obviously, you might have to adjust these expectations if you are going to try and photograph elephants.
If you go for an ultra-wide shot with a 16mm or even 14mm focal length, the animal has to get much closer to the lens in order to achieve that intimate feeling, just a couple of inches away, and if they are getting that close you inevitably just end up with a shot of their snout as they sniff the lens.
Camera Settings
You don’t want to be constantly returning to the camera to make adjustments, so I recommend letting the camera take control of more than a few of your settings. For exposure control, I set my camera to Auto ISO and I define an upper limit to the ISO value that I’m comfortable with – a generally available feature of all cameras that have an Auto IS function. On the Sony a9 II, this limit is ISO6400 for my own tastes, but you will probably have a different value for your camera.
Next, I put the camera in shutter speed priority, and choose a relatively fast shutter value that will freeze motion in a moving animal. I have no interest in getting a blurry image, so this is the part of the exposure triangle that I’m going to take control over. It’s the one element of this triangle that can truly make or break the shot in this specific situation.
At this point, I will usually dial in some exposure compensation based on my own deep understanding of how my specific camera handles different lighting situations. In particular, you would want to consider whether the shot will be backlit, whether there are large bright objects in the frame like the white fence in my opening image, and even the colour of the animal’s fur. Understanding how your camera will react is something you simply have to learn ahead of time.
With most wildlife photography taking place in low light conditions, it’s probable that the camera will choose to shoot at a wide-open aperture when set in shutter priority mode. This means you will have a very shallow depth of field, particularly if you are using a fast lens with an aperture of f/2.8 or wider. In this case, I would recommend using autofocus and turning on Animal Eye Detect if that is a feature you have on your camera. Canon, Nikon and Sony are all getting much better with this feature, and certainly, with my Sony cameras, it does a truly remarkable job, as demonstrated by the photos on this page. This is partly down to Sony’s generally incredible AF system, and partly camera-specific. The a9 II is a purpose-built autofocus machine. But Canon and Nikon are catching up with these features.
The reason that I’m drawing specific attention to my use of autofocus here, is that it used to be the case that a setup like this would have worked better by manually focussing on one specific place in the frame, and then simply triggering the photo when the animal was on that “mark”. While this is still how it gets done when using wildlife camera traps that are left out in the field for months at a time, due to battery usage concerns, I think certainly with mirrorless cameras from the few years, this isn’t something that is necessary anymore for a Bluetooth triggered setup. Autofocus has come a long way with the mirrorless revolution, and the fact that mirrorless cameras now have AF points covering a much wider portion of the frame means you stand a great chance of getting the shot by letting the camera do the work.
That also means that I recommend setting your AF point selection to a nice widespread that covers as much of the frame as possible. Not only can you not control exactly where the animal will be in the frame, but it’s also quite tricky to imagine that frame, and the animal within it, when you are looking at the camera from a side angle several feet away. A broad AF point spread will give you some leeway.
Wrap Up
This tip is for all the people that don’t do wildlife photography because they can’t afford an expensive telephoto lens! Although you need to put some time in with the planning of a shot like this, and some patience during the actual shooting, what’s cool about it is that it doesn’t require a lot of additional financial expenditure. Bluetooth remotes are not expensive, and most people already have a wide-angle lens of some sort. If you are on a budget, pick up a cheap tripod, a Tupperware box for your camera and a can of green spray paint to help it blend in.
Hopefully, it inspires some of you to get out there and give it a go. I want to see the photos you get, so email them to me or tag me in your social media posts 🙂


Thanks for the informative article, but you didn’t mention how you ensure your subject’s eyes are in focus. I assume you are autofocusing, but with that narrow depth of field, it seems like getting the eyes in focus would be very hit or miss. Or is there another method you are using to ensure that? Or does the A9 do eye detection/focusing for animals?
Good point, in my haste, I forgot to paste in a paragraph. I have fixed this.
Great article Dan. It would have been good to see a photo of your camera as it was set up in the field with camo and protection in place to get the shot (or from a similar shoot).
Totally agree. I forgot to get that shot!
A similar technique I have used with success is to control my camera (Canon 80D) from my phone. This allows me to use live view so I don’t even need to be able to see the subject (especially useful when trying to catch a bird feeding it’s young in a nest in the brush).