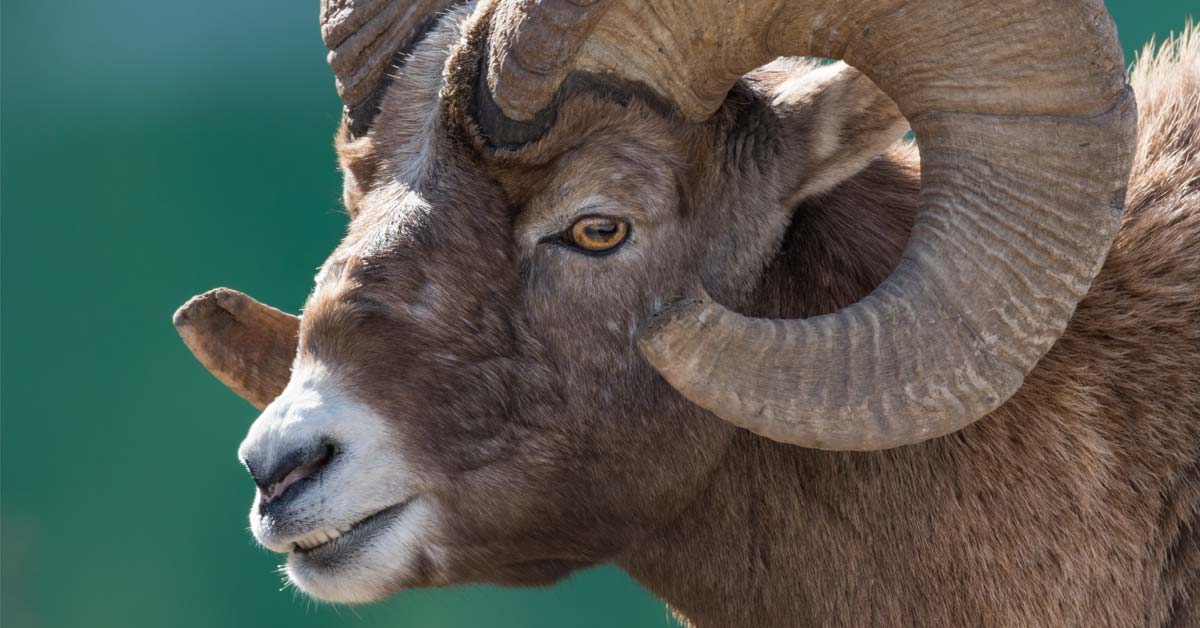
Sometimes getting too far off the beaten track is unnecessary to see wildlife up close. A well-planned car journey through a wildlife-rich environment can produce great opportunities. Still, there are a few things you need to remember if you want to maximize those often-fleeting roadside moments.
Be Ready At All Times

To stand a chance of capturing these unpredictable moments, you must have a lens mounted to your camera and within arm’s reach at all times. There might not be time to get out of your car to retrieve your camera from the back seat or the trunk, which might also be unsafe. You will miss shots if you don’t keep your camera next to you. I guarantee it.
I keep my camera on the passenger seat if I’m traveling alone. Either in a Think Tank Digital Holster 150 or a LensCoat Xpandable lens bag. The Think Tank Digital Holster 150 is great for 100-400mm lenses, the Canon 100-500 mm lens, 200-600mm lenses, and the Nikon Z 400mm f/4.5. The LensCoat Xpandable bag is excellent for bigger super-telephoto prime lenses and big zooms like the Canon 200-500mm f/4. If there’s somebody in the passenger seat, I tuck the bag between the two seats on the armrest. This keeps my camera protected yet instantly reachable.
A Smaller Lens Is Probably Better
Over the last couple of years, I’ve worked with a variety of lenses from my car, and it has become clear to me that bigger is not always better. For a long time, my main wildlife lens was the monster Canon 200-400 f/4 L IS 1.4 ext. Although not quite as large as a 600mm, it is as big as a 500mm and even a little heavier due to all the zoom optics inside it.
The size and weight of the lens made s it hard to handle in a vehicle, particularly if the steering wheel in front of me. The weight of it also made additional support (detailed later) a necessity in low light, and that adds time to the setup process. Alongside this lens, I’ve also shot extensively with the Canon 100-400 f/4-5.6 L IS II, the Tamron 150-600 f/4.5-5.6 and since my switch to Sony, the stunning Sony 200-600mm. All of these lenses are much smaller and lighter, and far more manageable from the driver’s seat.
Bring Binoculars
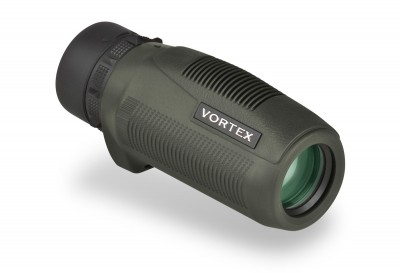
If you’re shooting with a long lens then you’re going to find it pretty cumbersome to wave it around in all directions while looking for your next subject. Windows, rear-view mirrors and headrests get in the way. Having a pair of binoculars or a monocular is going to make life a lot easier, and if you don’t already have something,
I keep a proper set of binoculars in my camera bag, but I often use the Vortex 10×36 monocular in the car because it’s small enough to keep in the glove box. If you’d prefer to use the more traditional binocular style, it’s very hard to beat the quality of Nikon’s offerings, with the Monarch series being particularly popular. If the Monarchs are a little out of your price range, the Aculon series also offer great value for money.
Prepare Your Windows
I have been making notes for this article in a notebook for some time. I always write from my own experiences, and a couple of weeks ago I added another scribble in my Field Notes book that just said “WINDOWS!!”. Yep, I even capitalized it in frustration.
I had been scouring the prairies of Alberta for quite some time in search of great grey owls for many days. Having finally found a likely location, I returned to the same spot for several consecutive days and finally had my first sightings exactly where I had predicted them to be.
As I attempted to get closer to one of the two owls that appeared, I pulled into a small side track that ran alongside the field they were hunting in. As I did this, one of the birds flew right in front of my car, not 20 feet from the windshield, and landed on a fence post next to my car. I thought for one brief moment that I was going to get the shot I had been envisaging for so many months. But I was wrong.

Unfortunately, I had my windows up and it dawned on me pretty quickly that I had screwed up this opportunity. When trying to photograph such skittish animals, the sound of electric windows is likely to scare them away and that’s exactly what happened on that day There I was, just feet from this beautiful bird, and as soon as I gently touched the window button it was gone.
Learn from my mistake. Once you have found your intended subject, if you need to move your car closer, make sure you wind the windows down before you position your vehicle closer, just in case you inadvertently find yourself so close that the noise will scare them off.
Supporting Your Lens
Most wildlife is going to be active at the beginning and end of the day when light levels are low. Usually, that means using relatively low shutter speeds, even if you crank your ISO up pretty high. Combine that with a long focal length, and you’ll want to have some kind of support for your gear if you’re going to get sharp photos.
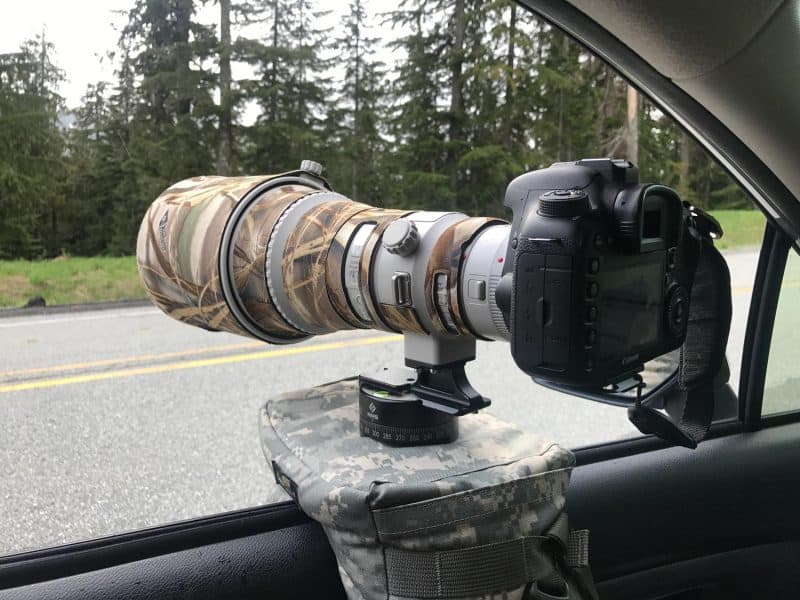
The simplest solution is a photography bean bag or lens sack. They come in a variety of sizes, and most of them are designed to straddle the two sides of your door. If you want something easy to travel with, these simple bags are a great and cost-effective solution that can be packed easily in a suitcase when emptied of their filler. I’ve used bags from several brands over the years, but my favorite these days is the LensSack from LensCoat. I like to use the RRS Panning Clamp with it so that I have a perfectly smooth panning motion and a quick way to mount the camera.
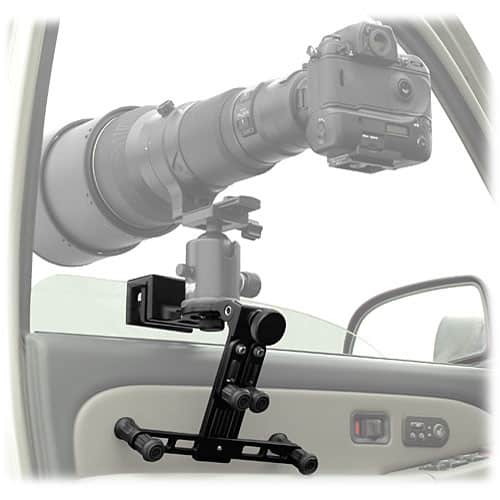
The second option is the Kirk Window Mount that’s pictured below. This is expensive at $250, but it’s easy to set up, and relatively small to travel with.
Turn off the Engine
This one is quick and simple: Turn your engine off so that vibrations are not transmitted to the camera. Your photos will be much sharper, and of course, this also has the added benefit of causing less disturbance to the animals if they are close to the road.


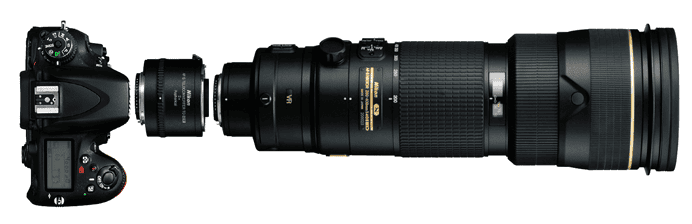
Embrace the Extender
Extenders, sometimes called teleconverters, multiply the focal length of your lens and allow you to fill much more of your frame with your subject. The optical quality of modern extenders has been greatly improved and I have used them constantly throughout my career.
I previously wrote an extensive guide to extenders, and I don’t want to repeat all of that here, so if you have any specific questions about the advantages and disadvantages of them, or want to see lots of examples, take a look at that previous guide, as well as this previous article about why extenders have been a critical part of my kit for so many years.
In relation to wildlife photography from a car, extenders help us to solve the lack of flexibility you can be stuck with when it comes to shooting from a static position. If you haven’t managed to get your vehicle close enough to the wildlife for the perfect shot, an extender might make the difference.
The longer focal length of your lens+extender combination can also help to further blur distractions that are in the background of your shot. If you were on your feet in a normal shooting situation then you could probably just change position to overcome this problem, but in a car, you are much more limited.
Prepare Your External Support
Once you’ve got some shots from inside the vehicle, there might be an opportunity to get out and set up for a different angle. Of course, this depends greatly on the type of animal you are photographing, and also the position that you have been able to park your car in. Safety first!
If you’re shooting with a long focal length then you’ll need to support your camera once you get out of your car. Usually, that would mean setting up a tripod, but it can be problematic in this situation. If you have a big tripod, possibly with a gimbal head on it, then it’s unlikely that you would have space for it in the front of your car. That means when you get out, not only do you have to open your door, but you’re going to need to head to the trunk, or open another door to retrieve the tripod.
All of this extra movement and noise, plus time to set up the tripod, will often scare the animal away or at very least move them on a little further away from where you had wanted to photograph them. One way you can combat this is to use a monopod instead of a tripod. A monopod can often provide you with enough support for a situation like this, and usually, you can fit them down the side of the driver’s seat, making them easy to retrieve. They are also much quicker to set up than a tripod.

The second option is to keep your tripod set up and ready to go so that you can grab it from the trunk and splay the legs out instantly without having to extend them all individually. If your trunk isn’t big enough to hold a tripod with legs extended, you can also use a roof box like the one on my car in the photo below. This is actually designed to hold skis but if I lay a blanket inside it, I can keep my tripod and gimbal in it all ready to go. The roof box is quieter to open than my trunk, and also requires less movement since it can be opened directly from the driver’s door, rather than having to move to the back of the car. I have never seen anyone else use a roof box in this way before, so I’m letting you in on a little secret of mine here 🙂

Wrap Up
Sometimes it’s impossible to head to far-off lands in search of hard-to-find critters, but that doesn’t mean you can’t get good wildlife photos. With some research and simple preparation, you can still capture great images and maybe even take some friends and family along for the ride.


Hi Dan, very nice tips. I like the idea of setup of camera on the car windows. And, your wild clicks are really nice. I’m a beginner, and learning photography, and most of what I capture is around nature and wild only. Cheers.
Thanks for the kind words Manu! Glad you found them useful 🙂
Howdy Dan.
Enjoyed reading all your tips & information, been int photography for a while now but not to serious , but lately been bitten by the bug, and are getting a little more serious, with wildlife & now trying some landscapes using Canon eos 700D & 100 to 400 mark 11, let me know if you are ever coming to Australia as I am an outback tour operator, have lots of opertunites for photography. Cheers Trevor.
Thanks Trevor! That’s very kind of you. I’d LOVE to come to Australia one of these days.