
Photographing wildlife from a boat, whether on a lake or the open ocean, is one of my favorite ways to spend a day with my camera. Large bodies of water always provide a rich, diverse environment, and the fact that you are silently floating through it often means that you can get closer to many species than you’d ever be able to if you approached by foot or by a vehicle on land. This kind of photography is not without its challenges, so this guide draws from my experiences, and I’ll share ten tips to help you safely get the shots you’ve always dreamt of from the water.

Choose your Boat Wisely

In many places, you’ll have a choice between different tour companies with different styles of boats. Some larger companies will have two types of boats to accommodate all customers’ requirements. This might not be true if you’re floating around amongst icebergs in Greenland or somewhere similarly remote, but if there’s ever a choice of boat captain/tour operator, you can be sure there will be a choice of boat.
From a purely photographic point of view, the smaller the boat, the better, especially regarding wildlife photography. Smaller boats are lower to the water, and for land-based animals, the resulting images are often at eye level, which gives them a much more intimate feel.

Suppose you’re looking for whales, dolphins, or other ocean-based creatures. In that case, a lower boat will get your lens nearly perpendicular to the water, giving you more of an opportunity to get an interesting background in the photo. If the boat is too tall, all your photos will look down on the subject with a bland water backdrop that provides no environmental or geographical context.

Small boats do have their downsides, though. Besides the obvious fact that you can’t escape the natural elements if the weather turns on you, a smaller boat is much less stable in choppy seas. A larger boat is better for you if the water isn’t calm and seasickness might be an issue. In very rough water, the added stability of a larger boat also gives you a better chance at getting sharp photos if you’re working in lower light levels with slower shutter speeds.
I’m very thankful that I have never suffered from seasickness, and at least at this stage in my life, with my current level of fitness, I’m happy to take my chances and fight the roll of the ocean to try and get a sharp shot on a rough day from a small boat. You have to be prepared for your keeper rate to drop a little, though, and if you’re working with a very large lens, it can be quite a physical activity.

On a rough day in a RIB or smaller Zodiac, you’ll also have to pay close attention to the water protection you give your camera equipment. While it might seem like it offers the best view, the front seat will also be the one that gets the wettest as your captain battles through the swell.
By comparison, a larger boat will be a much more comfortable experience, offering you shelter from the spray and the rain. At the same time, you travel greater distances and have a more stable viewing platform once you find what you’re looking for. Those with a history of seasickness should also note that larger boats will have a washroom, whereas smaller boats usually do not, so your only option is to feed the fish directly.
Choosing the Right Telephoto Lens

In the cramped confines of a small boat, I find it easier to work with slightly smaller and lighter lenses than you might choose if you were working out of a safari vehicle somewhere like Africa. With no room to set up a tripod, you must hand-hold any lens you choose and do it in unstable conditions. For this reason, a lens with image stabilization is a must.
For photographers using a Canon mirrorless camera, the RF 100-500mm f/4.5-7.1 L IS lens is the perfect choice. If your budget doesn’t quite stretch that far, the RF 100-400mm f/5.6-8 IS is also a great option, or the old Canon EF 100-400mm f/4.5-5.6 L IS II, adapted to use on your mirrorless camera with one of Canon’s EF to RF mount adapters. If you’re lucky enough to own the RF 100-300mm f/2.8 L IS lens and feel strong enough to handhold its 5.7lb weight, sticking the RF 1.4x extender on it to create a 140-420mm zoom gets it into what I find to be the right sort of range for this kind of photography.
Nikon mirrorless users have many lens choices for wildlife photography. Still, the Nikon Z 100-400mm f/4.5-5.6 VR S and the Nikon Z 180-600mm f/5.6-6.3 VR are standout solutions for most people in an aquatic environment. The Nikon Z 400mm f/4.5 VR S lens is a third great option. This incredibly lightweight prime lens is sharper than Nikon’s zoom lenses and works much better with the 1.4x teleconverter. However, you do give up the flexibility of a zoom lens. The older F-Mount Nikon 500mm f/5.6 PF is one final lens that always deserves mention. You can adapt this to a modern Nikon mirrorless camera with Nikon’s FTZ II adapter to get another stunningly sharp but compact long lens solution.

Sony shooters don’t have as many telephoto lens options, but that almost doesn’t matter because they have the exceptional Sony 200-600mm f/5.6-6.3 G in the Sony lens lineup. This is the best-value wildlife photography lens on the market, and I prefer it over the more expensive Sony 100-400mm GM lens. Another great option for Sony shooters is the 70-200mm f/2.8 GM II lens with an attached 2x teleconverter. I typically don’t recommend 2x teleconverter usage; however, the GM II version of the Sony 70-200mm f/2.8 performs better with a 2x teleconverter than any other 70-200mm lens, and I’ve made some fantastic wildlife images with that combination.
With any of these lenses, the zooms or the lightweight primes, you’ll also find them great for photographing any birds that might fly past your boat. Wildly pointing a huge 600mm prime lens at the sky and trying to track fast-moving birds, handheld, from a bobbing boat is an exercise in frustration.

What About Those Big Super Telephoto Lenses?
If you own a 400mm f2.8, 600mm f/4, or 800mm prime lens, you might be disappointed that I haven’t recommended them yet in this guide. I also own these lenses but usually find the unpredictability of wildlife positioning in an aquatic environment makes zooms a better choice. Of course, if you have two cameras, you can use a zoom on one and your big prime lens on another, but check with your boat captain first to ensure there’s enough room for you to do this.
The lenses mentioned in this section aren’t an exhaustive list, but hopefully, it gives you some clues as to what might be best for your camera system. If you don’t have quite the right lens, I recommend renting one from LensRentals.com if you embark on a once-in-a-lifetime trip.
Trading Focal Length in Rough Waters

If conditions look a little rough and the boat will be rolling about on the waves, you should consider the question of focal length vs. keeper rate. On a rolling ocean, it’s incredibly hard to point a long focal length at a specific point because the angular velocity of your view is increased along with that focal length. Every tiny motion from the boat is exaggerated through the viewfinder, and the entire frame is constantly changing.
Photographing anything specific at 600mm on a rough day is almost impossible, but you might get something by shooting in the 200-400mm range if you work hard and don’t get yourself too frustrated by the challenge. For wildlife photography, this might mean you must shift your focus from close-up portraits to environmental portraits.
At the same time, you also want to leave a little room in the frame to crop and rotate images once you get them onto your computer. A level horizon is essential if the land is included in the image, but keeping it level while your rock and roll over the waves is an added challenge. It’s more than likely you’ll have to rotate the image when you edit. Including compositional elements close to the edge of the frame will likely result in problems this way, so it’s a good idea to shoot 10-15% wider.
If you’re on the water for landscape photography opportunities with a wider lens, this won’t be such an issue for you, although you’ll want to make sure that you increase your shutter speeds to combat that motion and get lovely sharp images. Remember from the exposure triangle basics that you’ll have to increase your ISO to increase your shutter speed and maintain the same aperture (and hence depth of field).
Stabilization Techniques
Keeping your camera steady on a boat is very important, but you can’t rely on a tripod or a monopod as you would on land. Not only is it unlikely that there will be space for those things, but they also directly transfer the boat’s movement and engine vibrations to your camera, likely resulting in a softer image.
With a bit of practice, though, the human body can do a remarkable job of dampening out the movement of a boat. The most important thing to remember is to remain supple, not rigid. On land, when hand-holding a big lens, the best technique is to lock up and turn yourself into a solid tripod or, technically, a bipod. On a boat, though, you need to try to feel the water’s rhythm beneath you and absorb that motion from the bottom of your body upwards. Counteracting the motion first with the lower extremities of your body, then your core and torso, and then your arms.
If you have a choice and aren’t shooting a surprise peak-action moment, it’s also best to take the photo as your boat is on the crest of a wave or at the bottom of the trough. At these two points in the boat’s oscillation, it will move much slower in the vertical direction, and you’ll have a much better chance of getting a tack-sharp shot.
It might seem counterintuitive, but if it’s safe, I prefer to stand up in the boat to use my legs to absorb a lot of the motion before it gets to my camera. You need to be sure it’s not so rough that you’re going to topple out of the boat, and you also need to ensure that this doesn’t ruin the view of your fellow passengers.

If the water isn’t calm, you don’t want to use a monopod traditionally because it will transfer the boat’s motion to your camera. However, if you’re working with a very heavy lens, a monopod can be useful to take the weight off your arms and shoulders between shots. Wildlife photography is always a waiting game, and if space is limited on the boat, it might not be possible to put the camera and lens down anywhere safe between shoots. With a monopod, you can use it between your legs to take the weight of the camera while on the search for your next wildlife opportunity.
When the time to shoot comes, your arms, back, and shoulders will be fresh, and you can lift the monopod off the deck to isolate the camera from the boat’s movement. This is the point where your core strength comes into play, and you put into practice the technique that I mentioned earlier. I don’t bother with this when using a shorter zoom lens, but I have used it on longer days with larger lenses. I’ll take any advantage I can give myself!
Talk to Your Captain

Having a pre-trip chat with your boat captain wouldn’t be necessary if you were on a dedicated multi-day photographic workshop–that’s up to your tour leader–but if you’re jumping on a smaller boat for a one-off trip, then it’s worth having a chat to let him know that your primary goal is photography. Once you encounter the landscape or wildlife that you’re looking for, they might be able to position the boat in a way that offers you some additional benefit. You might also find that they have suggestions about where to sit in their boat to get the smoothest or driest ride.

In my experience, I have found that if you approach a boat holding a huge super-telephoto lens, these conversations happen naturally. As long as it doesn’t negatively impact the experience of other guests, most captains will be more than happy to try to help you get what you need. After all, they would love you to come back again!
Don’t Leave your Wide Angle Lens at Home

If your primary goal is wildlife photography, consider still carrying a lens as wide as 24mm. A zoom like a 24-105mm or a 16-35 is a great choice. Wildlife is unpredictable; the image above is a great example. On a whale watching tour in Canada, I was happily photographing more distant grey whales with a telephoto lens when another suddenly surfaced next to our small boat and began to rub itself along the hull! Getting a close-up shot of a barnacle-covered whale like this is a once-in-a-lifetime experience that would have been photographically wasted if I hadn’t had a wide-angle lens in my bag.

A wide lens is also great for storytelling images with your boat within the frame. If I publish a series of wildlife images taken from a boat, I like to include at least one or two shots that give the viewer more of the story from that adventure and a sense of the surrounding environment.

Use the Water to Help your Story

If the wildlife you photograph is on land, don’t just focus on tight portrait shots that hide the coastal or lakeside environment around them. Shimmering water, waves, and reflections are just a few of the exciting elements that can be added to the foreground of your photos when working from a boat.

Best Ways to Carry Your Camera Gear on a Small Boat
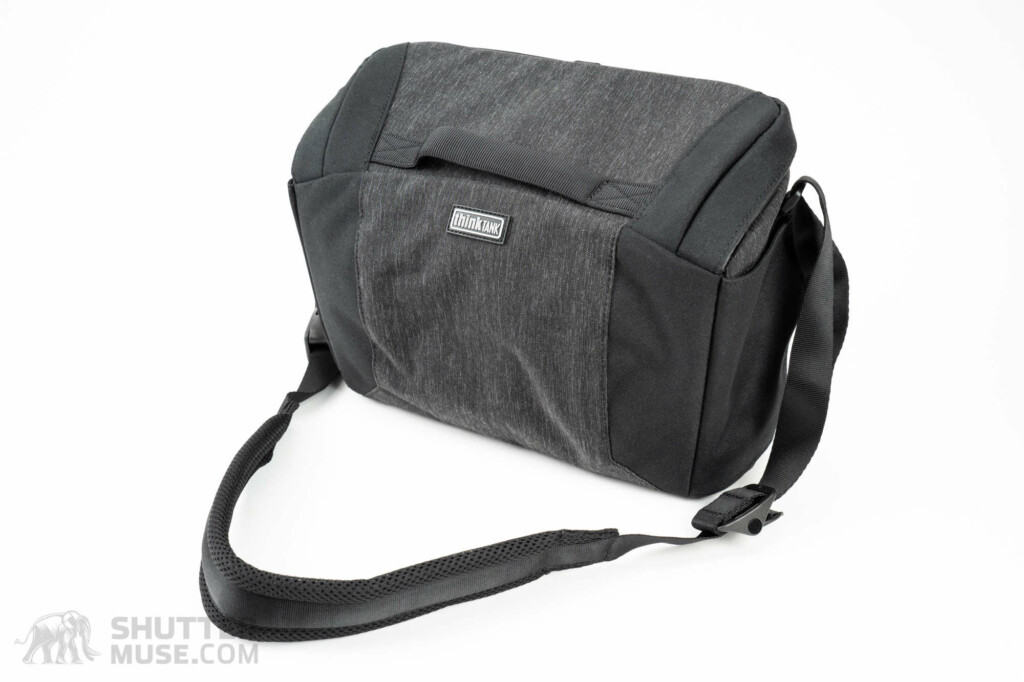

Choosing the right camera bag for your aquatic adventure depends on your boat size. A tightly-packed zodiac might not have room for a large backpack. When this is the case, I hand carry my camera with my telephoto lens attached, then pack a waist pack with my additional essentials: batteries, memory cards, sunglasses, sunscreen, wide angle lens, 1.4x teleconverter, and a lens cloth. Any smallish shoulder bag or medium-sized waist pack will do, but I like the Think Tank SpeedTop Crossbody 15. It uses magnets to secure the lid, which is much more convenient to open and close with one hand while bobbing about in the ocean and holding your camera with your other hand.
Related Post: Think Tank SpeedTop Crossbody Review

Importantly, I also take an empty 30-liter ultralight dry bag with me stuffed into my jacket pocket. This dry bag from Sealline is large enough to protect my camera and my small camera bag if weather and waves start to make things wet. You might find that your boat tour provider has a collection of dry bags for customer use, but I still prefer to carry one with me, just in case.

Camera Weather Protection
While I have the 30-liter dry bag to wrap everything up if the ocean is too rough, it’s also a good idea to have a cover for your camera to keep shooting in rainy weather. Having tested many camera rain covers here on Shutter Muse over the past years, I’ve narrowed the choice to two covers that should fit anyone’s budget. Both options are from Think Tank Photo.
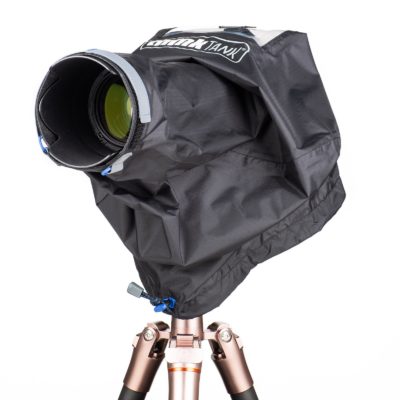
First up is the Think Tank Emergency Rain Cover, available in Small, Medium, and Large. This is the cheaper of the two options and is a waterproof sleeve that fits over your camera, with a clear plastic back for viewing the LCD screen and camera controls. What sets this rain cover apart from other simple covers is a small plastic attachment that slots into your camera’s hot shoe. This clever addition ensures the cover stays in place, and the compact size of the folded cover makes it a great option to keep in your bag at all times for, as the name suggests… emergencies. These are a huge step up from using a garbage bag.
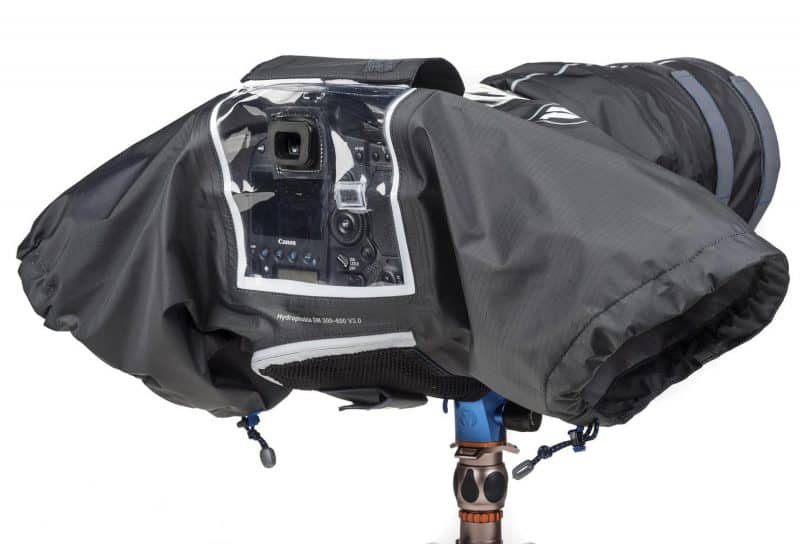
The second option is the Think Tank Hydrophobia Rain Covers. Again, these are available in three sizes, but this time are labeled 24-70, 70-200, and 300-600 to give you some idea of the lens size they are designed to cover. These covers are built from slightly tougher material and have armholes and a built-in shoulder strap. They require a camera-specific eyepiece, but this does allow you to look through the viewfinder without lifting the cover. Its bulkier folded size makes it less suitable for everyday carry in your camera bag, so I choose this cover when I’m sure I will encounter heavy rain.
Personal Protection

Suppose you’re on a commercially organized wildlife tour. In that case, most companies will give you a PFD (personal flotation device = lifejacket) or a flotation suit if you’re in an open RIB. At the same time, larger commercial boats will have lifejackets stowed away for emergencies. If you’re out on your own boat and want a PFD that works well for photographers, I suggest you check out PFDs designed for specifically for fishing.
My preference is those made by NRS and Kokatat. I use these in my kayaks and packraft because they have many pockets perfect for storing my 1.4x extender, a wide-angle lens, some batteries, my phone, by InReach Mini, a marine radio, and my memory card holder.
When I’m on the water, I also pay close attention to how much sun I’m getting, and I always carry sunscreen with me in my camera bag. It amazes me how many people pay no attention to this and even stubbornly decline the sunscreen I offer them, only to show up the next day with scorched faces. Water reflects the sunlight at you and drastically increases its effect on your skin! If the sun is intense and you plan to be out for prolonged periods, consider getting a fishing sun mask that offers 50+ SPF protection from someone like Buff.
Wrap Up
If you plan on shooting from a boat in the near future, I hope this article has fully prepared you to make the most out of your aquatic adventure. Getting out into such a different environment can be eye-opening, and it’ll undoubtedly help you broaden your portfolio if you’re well-prepared.


Excellent article! I do a bit of shooting from a canoe and use a pelican case rather than the bag type which is hard to handle in tight spaces.
Thanks! Yeah there’s pros and cons. I’ll be kayaking tomorrow and then I’ll certainly use a Pelican case.
Hi Dan
Enjoying the very practical and no nonsense hands on articles and reviews— I find them clear and to the point.
I’m traveling to Tofino-Ucluelet BC and will be hitting the water for a wildlife tour on Monday/Tuesday as a learning exercise with my new d500.
Do you have any recommendations for tour companies for good wildlife photography?
We currently have one kayak excursion booked and I’m considering a second day out.
I’m also struggling over how much gear to take on the tandem kayak and what to leave behind.
Kit I have available to choose from.
Nikon 16-85mm f6.3
Nikon 70-200mm f2.8 (+generation 1 TC1.4)
Nikon 200-500mm f5.6, rented — still learning about this one.
I’m planning on stowing these in their padded holsters in a 30 liter Raptor dry-bag pack while on the water.
Is this a practical setup in your opinion, and are there any other items you’d recommend as necessary?
I’ve spent a little time shooting from a canoe, but never a kayak.
I realize this is short notice for a question — so no worries if you’re not able to reply.
Cheers and thanks
Tom
Sorry Tom, I was in the Arctic when you posted your message so I didn’t get it for a couple of weeks. I hope you enjoyed your time in Tofino and were able to get out with some great tour companies. For future, my tours in Tofino were always with Adventure Tofino.
Let me know how it all went!
Hey Dan
No worries!
I did what I usually do — jumped in and learned from my mistakes.
I ended up carrying everything — Nikon d500, Nikon 200-500, Nikon 70-200 f2.8 + TC-14EII, Nikon 16-85mm f3.5-6.3
That turned out to be a good kit for me.
I did 3 tours — 1 kayak, 1 small covered powered boat, 1 large whale watching boat.
On the bigger boats, I carried the lenses in a small day-pack.
For the kayak, I lashed an MEC Raptor drybag to the deck.
The biggest change I’d make in future is to go with a tour specifically aimed at photographers — I found the general tours were a lot of “run here and there” for proof of sighting, then run back to shore for the next mob. Lots of great photo opps were missed.
(I did have the foresight to talk to the tour folks ahead of time about my goals.)
Still — I had a lot of fun and got some good images and learned a lot.
Your run-down formed a great starting point — I went fairly well prepared.
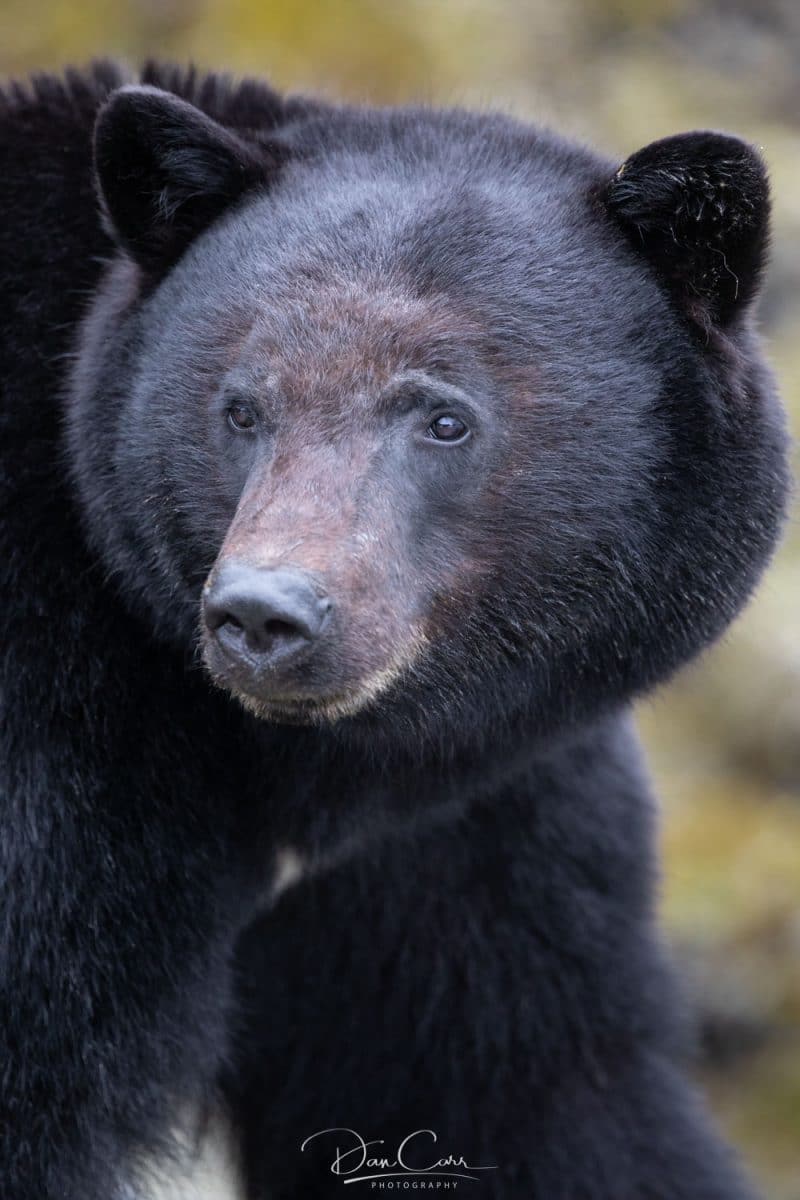
One thing – the rented Nikon 200-500 seemed to produce images that lacked the detail of my 70-200, even when distance was accounted for. I’d love to send you a sample of a shot I got of a mother bear off Tofino. I love the shot, but I feel like my 70-200 would have done a better job with the 1.4 teleconverter. Maybe you could tell me if I’m crazy (or just inexperienced).
Cheers and thanks for the advice — hope the new location is providing lots of fantastic shooting opportunities!
Tom
Hey Tom, thanks for the trip report. I’d like to see the shot with your 200-500. Shoot me a message in the contact page to say hi and I’ll reply with muy email address.
The 200-500 can’t be expected to be as detailed as the 70-200 as the 200-500 is not a pro-grade lens, so I would expect some different, but lets’s see what you got!
Dry bag packs and holsters provide protection against water that comes from any direction and even a tumble into the blue stuff.
I’m a fan of OverBoard gear. (Note: no financial interest).
https://www.over-board.com/
Thanks! Never heard of them but I’ll check it out.
Another Nikon equivalent of the Canon DO lenses is the 300/4 PF. That’s the little brother to the 500/5.6 PF.
On a D500 you can shoot one-handed, and that’s very useful if you’re hanging on with the other.
Good point. That’s a lovely little lens.