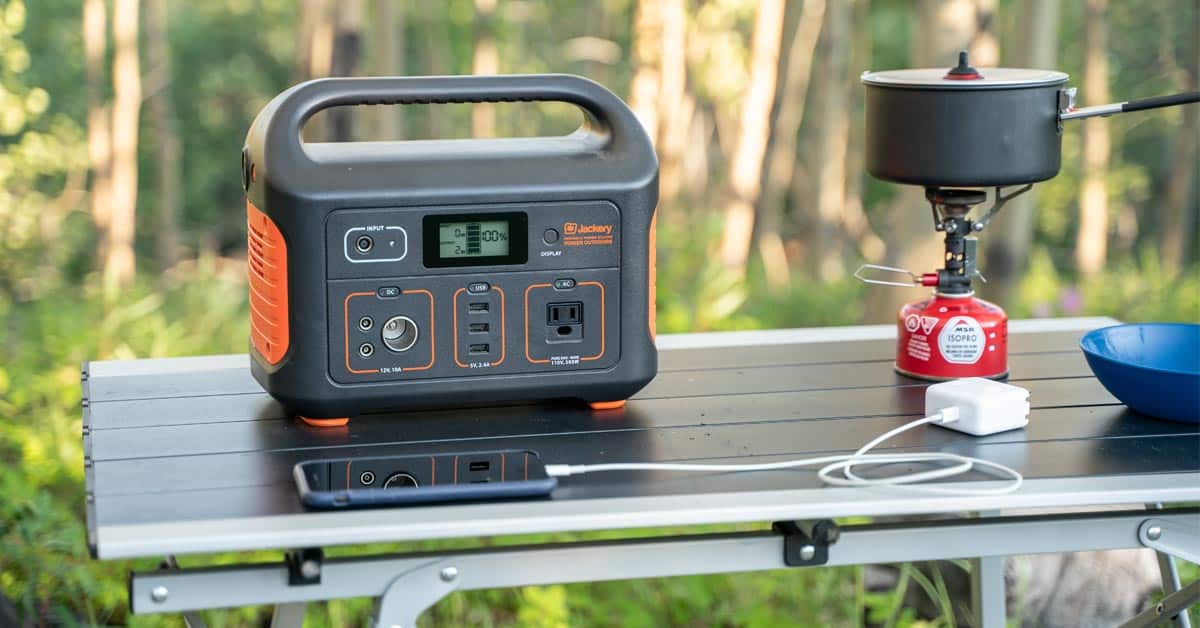
As a wildlife and outdoor photographer, I spend several days a week on the road. In recent years I have rarely left home without some form of lithium power station in the trunk of my car. These portable battery systems are a complete charging station all in one, offering multiple AC outlets, 12V DC outlets and an array of USB ports. Wherever I go, I always have a way to charge my camera gear, my lighting equipment or my drone. If I need to film something using LED lights, I can run my entire studio setup outdoors for hours.
For the past couple of years, I have been using power stations made by Jackery. Regular readers might remember reviews of the Explorer 500 and the Explorer 1000, as well as the Jackery solar panel that I have been using with them for off-the-grid charging. In the summer of 2021, the brand expanded its range by introducing the Explorer 1500 and Explorer 2000, featuring the largest battery capacities yet in the Explorer range.
Jackery provided me with one of the new Explorer 1500 models to test for this review. They were not allowed to read the content before it was published, and the opinions expressed on the page are my honest thoughts about the product.
Table of Contents
Jackery Explorer 1500 Specifications

General
- Weight: 35.2 lbs (15.5 kg)
- Dimensions (LxWxD): 14 x 10.4 x 12.7 in (35.6 x 26.4 x 32.3 cm)
- Operating Temperature: 14-104F (-10-40℃)
- Lifespan: 500 cycles to 80%+ capacity
- Warranty: 24 Months
Ports
- AC Output: 110VAC, 60Hz, 1800W (3600W Peak)
- USB-A Output: 5V, 2.4A
- Quickcharge 3.0 Output: 18W, 5-6.5V, 3A / 6.5-9V, 3A / 9-12V, 1.5A
- USB-C Output: PD60W, (5V, 9V, 12V, 15V, 20V up to 3A)
- Car Output: 12V,10A (regulated)
- DC Input: 24V, 10.5A
Charging the Explorer 1500


AC Charging
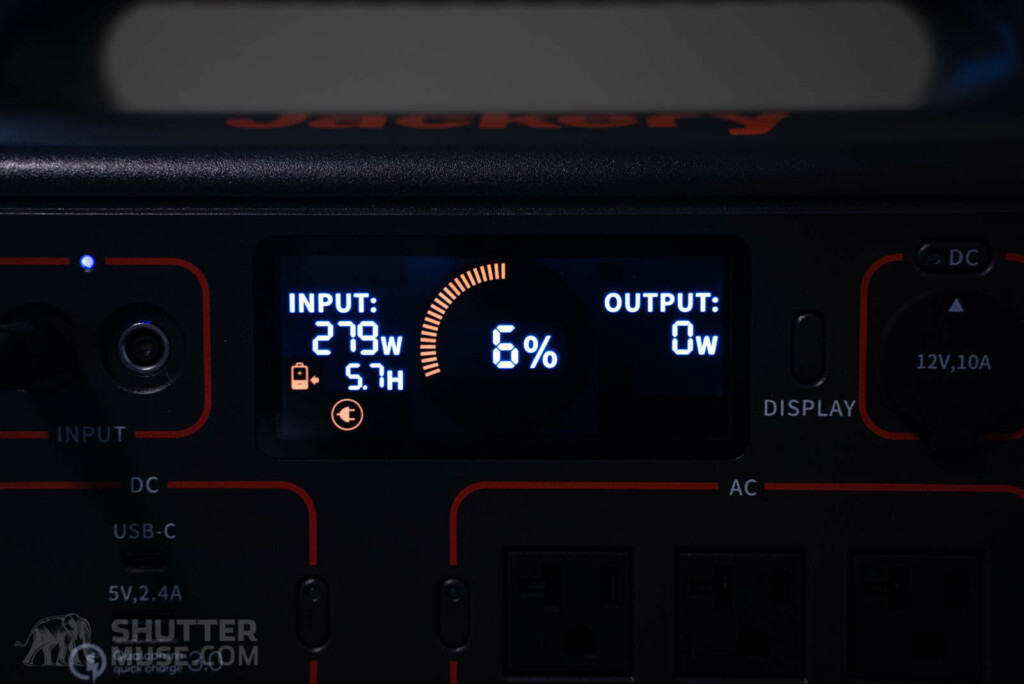
The Explorer 1500 comes with a 300W AC charger and a 12V DC charger. When using the AC charger, the battery will charge in around 6 hours, and in my testing generally registered an actual input of around 279W. The AC charger is plugged into the DC input, so I expect this slight loss in power comes from the need to convert the AC to DC. A process that will never be 100% efficient.
6 hours is already a relatively fast charging time for a battery of this size, but if you wanted it to be even faster, you could buy a second AC charger and use it simultaneously in the second DC input. My understanding is that it would not be quite twice as fast, as the total input would be limited to 500W, but it should cut charging time to under 4 hours.
12V DC Charging
Using the 12V charger in your car is not as fast. A full charge with that charger takes somewhere in the region of 13 hours. Although this is much longer, I still find that in most situations the car charger can replenish the battery faster than I am using it. Even if I’m running my Dometic 12V fridge and charging a couple of cameras and a drone, on a long drive I’ll usually arrive at my destination to find that Explorer 1500 is still fully charged.
Incidentally, this is a common question. Can you use the battery while it is being charged? The answer is yes.
Solar Charging
When it comes to solar charging times, I take the manufacturer’s charge times with a huge grain of salt. They are always calculated using best-case solar conditions which are very rare in the real world. To achieve the perfect charge you must have a cloudless sky, and you must also rotate your solar panels to ensure the optimum angle to the sun throughout the charge. Really, who is going to do that?
In theory, if you used 4x Jackery SolarSaga 100W panels in perfect conditions you could fully charge the Explorer 1500 in 5 hours. From there I’m sure you can all do the math to figure out how long it would take if you had fewer than four 100W panels.
What you must remember is that no solar panel and charge controller is 100% efficient. Not even close. Using a 100W panel does not mean you will not see 100W at the input, even if you did have perfectly solar conditions. Though the Explorer 1500 does use the latest MPPT controller, you’re doing well if you see more than 65W of actual input from a 100W solar panel on a sunny day.
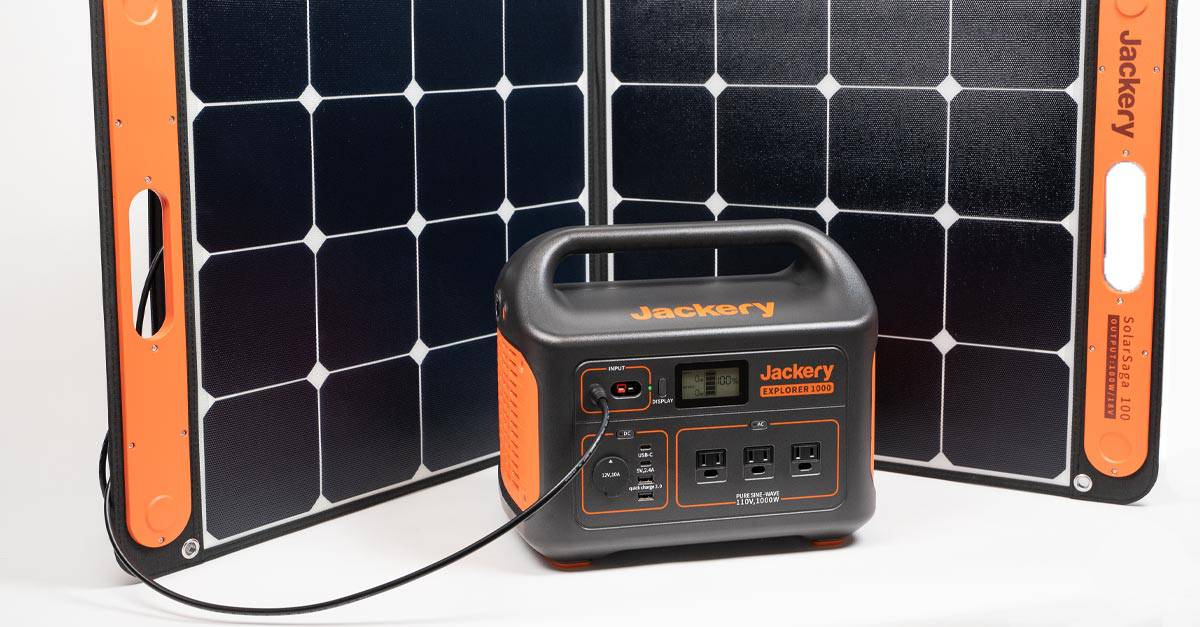
Using the Explorer 1500 With Jackery SolarSaga Panels

The Explorer 1500 is available as a kit with four of Jackery’s SolarSaga 100W (review) portable solar panels. Jackery calls these kits the Solar Generator Kits, so this particular one is listed under the name Jackery Solar Generator 1500. The name of the kit is perhaps a little confusing. This is not a different product, simply a kit that includes an Explorer 1500 and 4x SolarSaga 100W panels. Buying the kit saves you $97 compared to buying all of the pieces individually.


Jackery does make a SolarSaga 60W panel and a SolarSaga 200W panel, too. For the Explorer 1500, the small 60W panel isn’t going to be ideal. That panel is better suited to being paired with the smaller Explorer 240 or Explorer 160. As for the SolarSaga 200W panel, I have yet to get my hands on one but it appears to be simply a double-long version of the SolarSaga 100W. I’m a bit surprised that the Solar Generator kit doesn’t just include 2x SolarSaga 200W panels, instead of 4x SolarSaga 100W panels.
This may be simply due to product availability. At the time of publishing this Explorer 1500 review, I have yet to see the SolarSaga 200W in stock on Amazon or Jackery’s online store. Whereas the SolarSaga 100W panel seems to be in plentiful supply.
It’s also possible that Jackery simply feels that the slightly smaller 100W panels are a better fit, in terms of physical size, for the Explorer 1500. If you are packing your truck or van for a getaway, in many cases it’s easier to find 4 smaller spaces for 4 smaller panels, rather than two larger spaces for two bulkier 200W panels.
Jackery Solar Panel Parallel Adapter
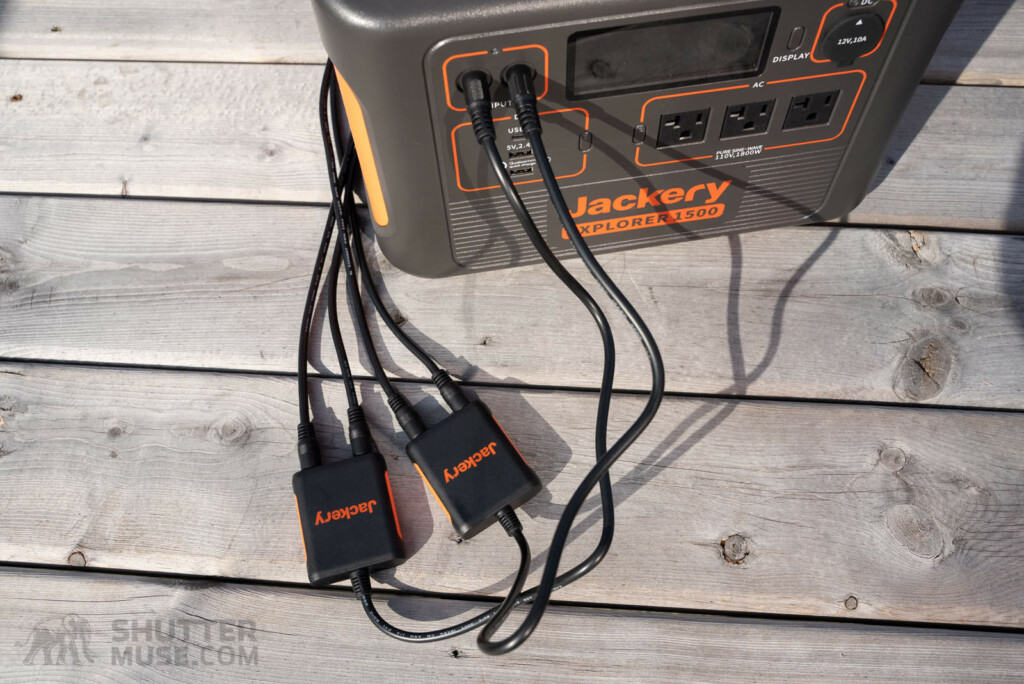
To use four solar panels with the two 8mm DC input jacks on the Explorer 1500, Jackery includes a pair of parallel panel adapters. These adapters come with the Explorer 1500 when purchased both as a kit with the 4x SolarSaga panels, and when purchased on its own, allowing you to add the SolarSaga panels at a later date.
You must have two solar panels plugged into the adapter for it to work. If you just use one panel, the battery will not charge.

Using the Non-Jackery Solar Panels With Explorer 1500 and Explorer 2000


I have previously used and reviewed the Jackery Explorer 500 and the Explorer 1000. When using those products I mostly used them with a Jackery SolarSaga 100W panel, but I was also pleasantly surprised to find that they worked easily with some existing Goal Zero panels that I had lying around.
Several solar panel manufacturers, Goal Zero included, use DC barrel plugs with dimensions of 7.9mm x 5.5mm x 0.9mm on their solar panels. All of Jackery’s SolarSaga panels also use this same dimension of DC plug, and all of Jackery’s Power Stations before the launch of the Explorer 1500 and Explorer 2000 have female DC inputs to accept this plug.
With the Explorer 1500 and Explorer 2000, this has changed. The DC inputs on these new larger Power Stations use a barrel connector sized at 8.1mm x 5.5mm x 3.5mm. This means that you can no longer plug Goal Zero (and other) solar panels directly into these Jackery batteries. It also means that you cannot plug Jackery’s own SolarSaga solar panels directly into the Explorer 1500 or Explorer 2000. Instead, you must use an adapter.
8mm Thin to Thick Adapter – Major Confusion

When I first unboxed the Explorer 1500 I was very confused by this. There I was sitting with a Jackery solar panel, and a new Jackery battery, and one would not plug into the other. For a while, I sat there scratching my head until I noticed a small diagram in the user manual that showed some sort of “DC interface adapter”. Next to those words on the diagram were the words “(included)”.
I thought there must be some sort of solar panel DC adapter in the box that I had missed. But after shaking the box upside down and rummaging around in the packaging, there was nothing. At this point, I took to Google to search for a quick answer and discovered several forums where other confused customers had gathered to discuss this conundrum.
A few people in the forums mentioned that when they’d spoken to Jackery about this, they were told that there is indeed an adapter that converts the old standard of plugs used by everyone else (and their SolarSaga panels) to the new plugs. When requested, they were sent one by the Jackery customer service team.
To try and get to the bottom of this issue, I exchanged several emails with my marketing contact at Jackery. I was told by them that the adapter should have been included in the box with the Explorer 1500, but they were not yet available when some of the Explorers were packaged, and so they were omitted from the box. That is my best understanding of the situation from the reply that I received.
In other words, if your Explorer 1500 or Explorer 2000 comes with this so-called “8mm thin to thick adapter” in the box, great! It should do. If you cannot find one in your box, contact Jackery immediately via their website and they will send you one right away, for free. I would ask them for two since there are two DC inputs on the battery pack.
To test this out, I independently contacted the customer service team, circumventing my media contact for fear of special treatment, and was indeed told that they would be happy to send me a couple of adapters. Although I’m glad this seems to be an easy fix, I think it could have been handled better with a note in the box explaining the situation.
Why Has Jackery Done This?
One post on a solar power forum said that they were told by Jackery that the change to this new style of plug was made so that they can handle a higher charging current. I was not able to confirm this answer. Whatever the reason, it’s clear that the Jackery product line is in the midst of a change that has yet to be explained and completed.
Will all Jackery Power Stations in the future move to this new style of 8mm plug? Will it only be needed on more powerful Power Stations? We don’t yet know. Will the SolarSaga panels adopt this style of plug, or will this adapter always be needed when plugging them into the larger, more powerful Explorer packs? Again, we don’t yet know.
Functionally, none of this makes a lot of difference. The adapters are well-built, and with them, everything works as you would expect it to. But I hope Jackery takes some time to document these changes, explain them and fix the supply issue that lead to them not being included in the Explorer packaging. It is a poor experience for a customer when they unbox an expensive product to find that a piece of it has been knowingly omitted from the box with zero explanation.
Long-Term Changes
As for compatibility with third-party solar panels, it’s too early to say whether this will have any meaningful effect. If Jackery starts including the adapter in the box with the Explorer and continues to do so forever, then there is no real effect. You can simply use the adapter with your Goal Zero panel, or whatever other brand of solar panel you have that uses the regular 8mm (actually 7.9mm) plugs. I hope this is what they do.
I suspect, however, that in the long term we will see Jackery move all of their Explorer products over to use this new style of larger 8mm (actually 8.1mm) plug. Then they will also switch the plugs on their SolarSaga panels to match. At which point, the adapter will become unnecessary in the Jackery ecosystem and likely not included in the box. If that happens, we can just hope that it will be offered as an optional accessory for those that want to easily use non-Jackery panels.
Explorer 1500 Vs Explorer 1000

I suspect that many people considering the Explorer 1500 will also be considering the Explorer 1000. The Explorer 1000 is $600 cheaper than the Explorer 1500 and would be a good option for people who are car camping for one or two nights and looking to power their phones, cameras and a small 12V fridge. I have used my Explorer 1000 in that way many times and always found it to have enough capacity for a weekend trip.
For those that want to run 12v appliances for 3-4 days without the need to recharge, the Explorer 1500 would be a better option. As well as having 1/3 more capacity compared to the E1000, the E1500 also features a greatly improved LCD screen that can show more information without the need to scroll through different options.
For those looking to run power tools or power-hungry 120v appliances with an Explorer, the important factor will be the maximum output wattage. The E1000 can provide 1000W with a 2000W surge, but the E1500 steps up considerably to 1800W with a 3600W surge.
If you’re looking to power a laptop off the grid, of course, you can use the AC plugs and your laptop’s regular power adapter with any of the Explorer Power Stations. With the Explorer 1500, you also have the option to use the USB-C output with its 60W Power Delivery compatibility. The USB-C port on the Explorer 1000 maxes out at 18W, which is not enough to power an average laptop.
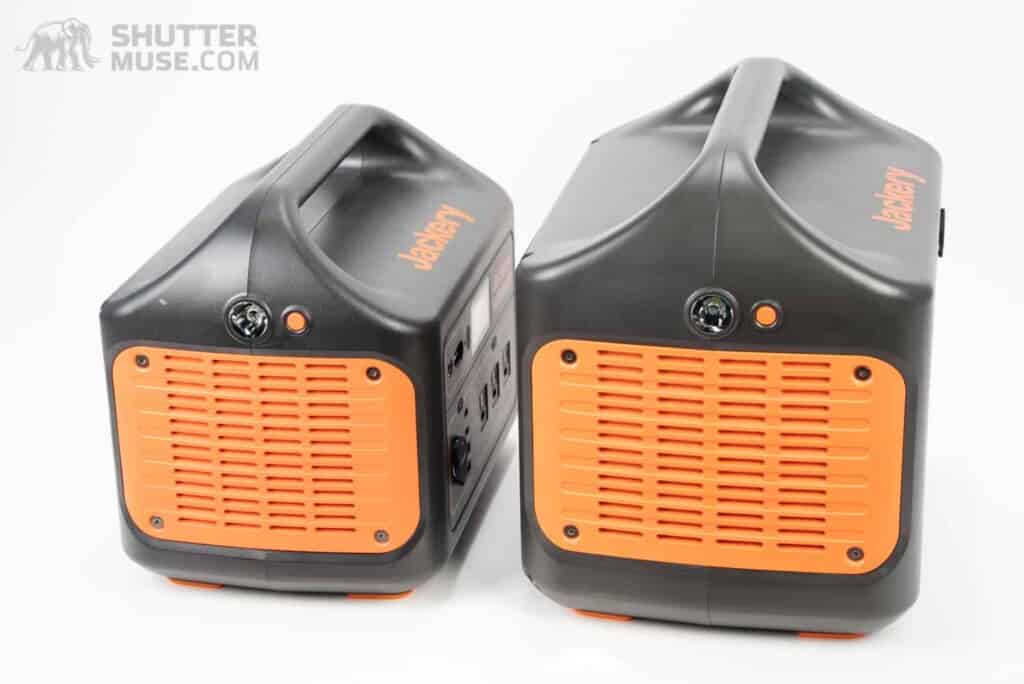
Explorer 1500 Vs Explorer 2000

The Explorer 1500 and Explorer 2000 share a very similar design, with both using the larger upgraded LCD screen. Aside from the obvious capacity difference, the most significant difference between the two products is the way that they can be recharged.
Where the Explorer 1500 uses the typical AC power brick that converts to DC for charging via the DC input on the front of the Power Station, the Explorer 2000 charges directly via AC using a dedicated AC input on the back of the pack. This dramatically reduces charging times by allowing the battery to be charged at up to 1164W, compared to the 300W maximum that you get with the Explorer 1500.
All of this means the Explorer 1500 takes about 6 hours to fully charge, but the Explorer 2000, despite having a considerably larger capacity, only takes 2.5 hours to charge. For this convenience, the larger Explorer 2000 costs $500 more than the Explorer 1500.
Conclusion

The Jackery Explorer 1500 Power Station is another impressive product in their expanding Power Station lineup. I love the new, much larger LCD screen, and the 60W USB-C output was extremely convenient when I wanted to power my laptop for photo editing on the road. A full charge in 6 hours is also a great feature, and this time can be nearly halved if you buy a second power adapter.
What I’m not so keen on is the removal of the Anderson Powerpole input that was found on the Explorer 1000, and the change in DC input connector size. The Powerpole connectors are a useful input type for people who want to build these types of battery stations into van conversion, and the new non-standard DC barrel connection size will force people to use an adapter, even when using Jackery’s own SolarSaga panels. I find that strange, and the lack of clear information about it on their website, and in the manual, is an oversight.
Despite these input-related shortcomings, I still find the Explorer 1500 to be an overall excellent product. The 1500Wh capacity is a real sweet spot for portable power stations. It is, capacity-wise, large enough to power many of your household electronics during prolonged power outages, while remaining, physically speaking, small enough to easily move around and put into your vehicle for the next family camping trip.
Where to Buy
- Jackery Explorer 1500 – Check price at Jackery.com, B&H Photo, Amazon.
- Jackery Solar Generator 1500 Kit (Explorer 1500 + 4 100W Panels) – Check Price at Jackery.com, and Amazon.
- Jackery SolarSaga 100W – Check price at Jackery.com, B&H Photo, Amazon.
- Jackery SolarSaga 200W – Check price at Jackery.com.