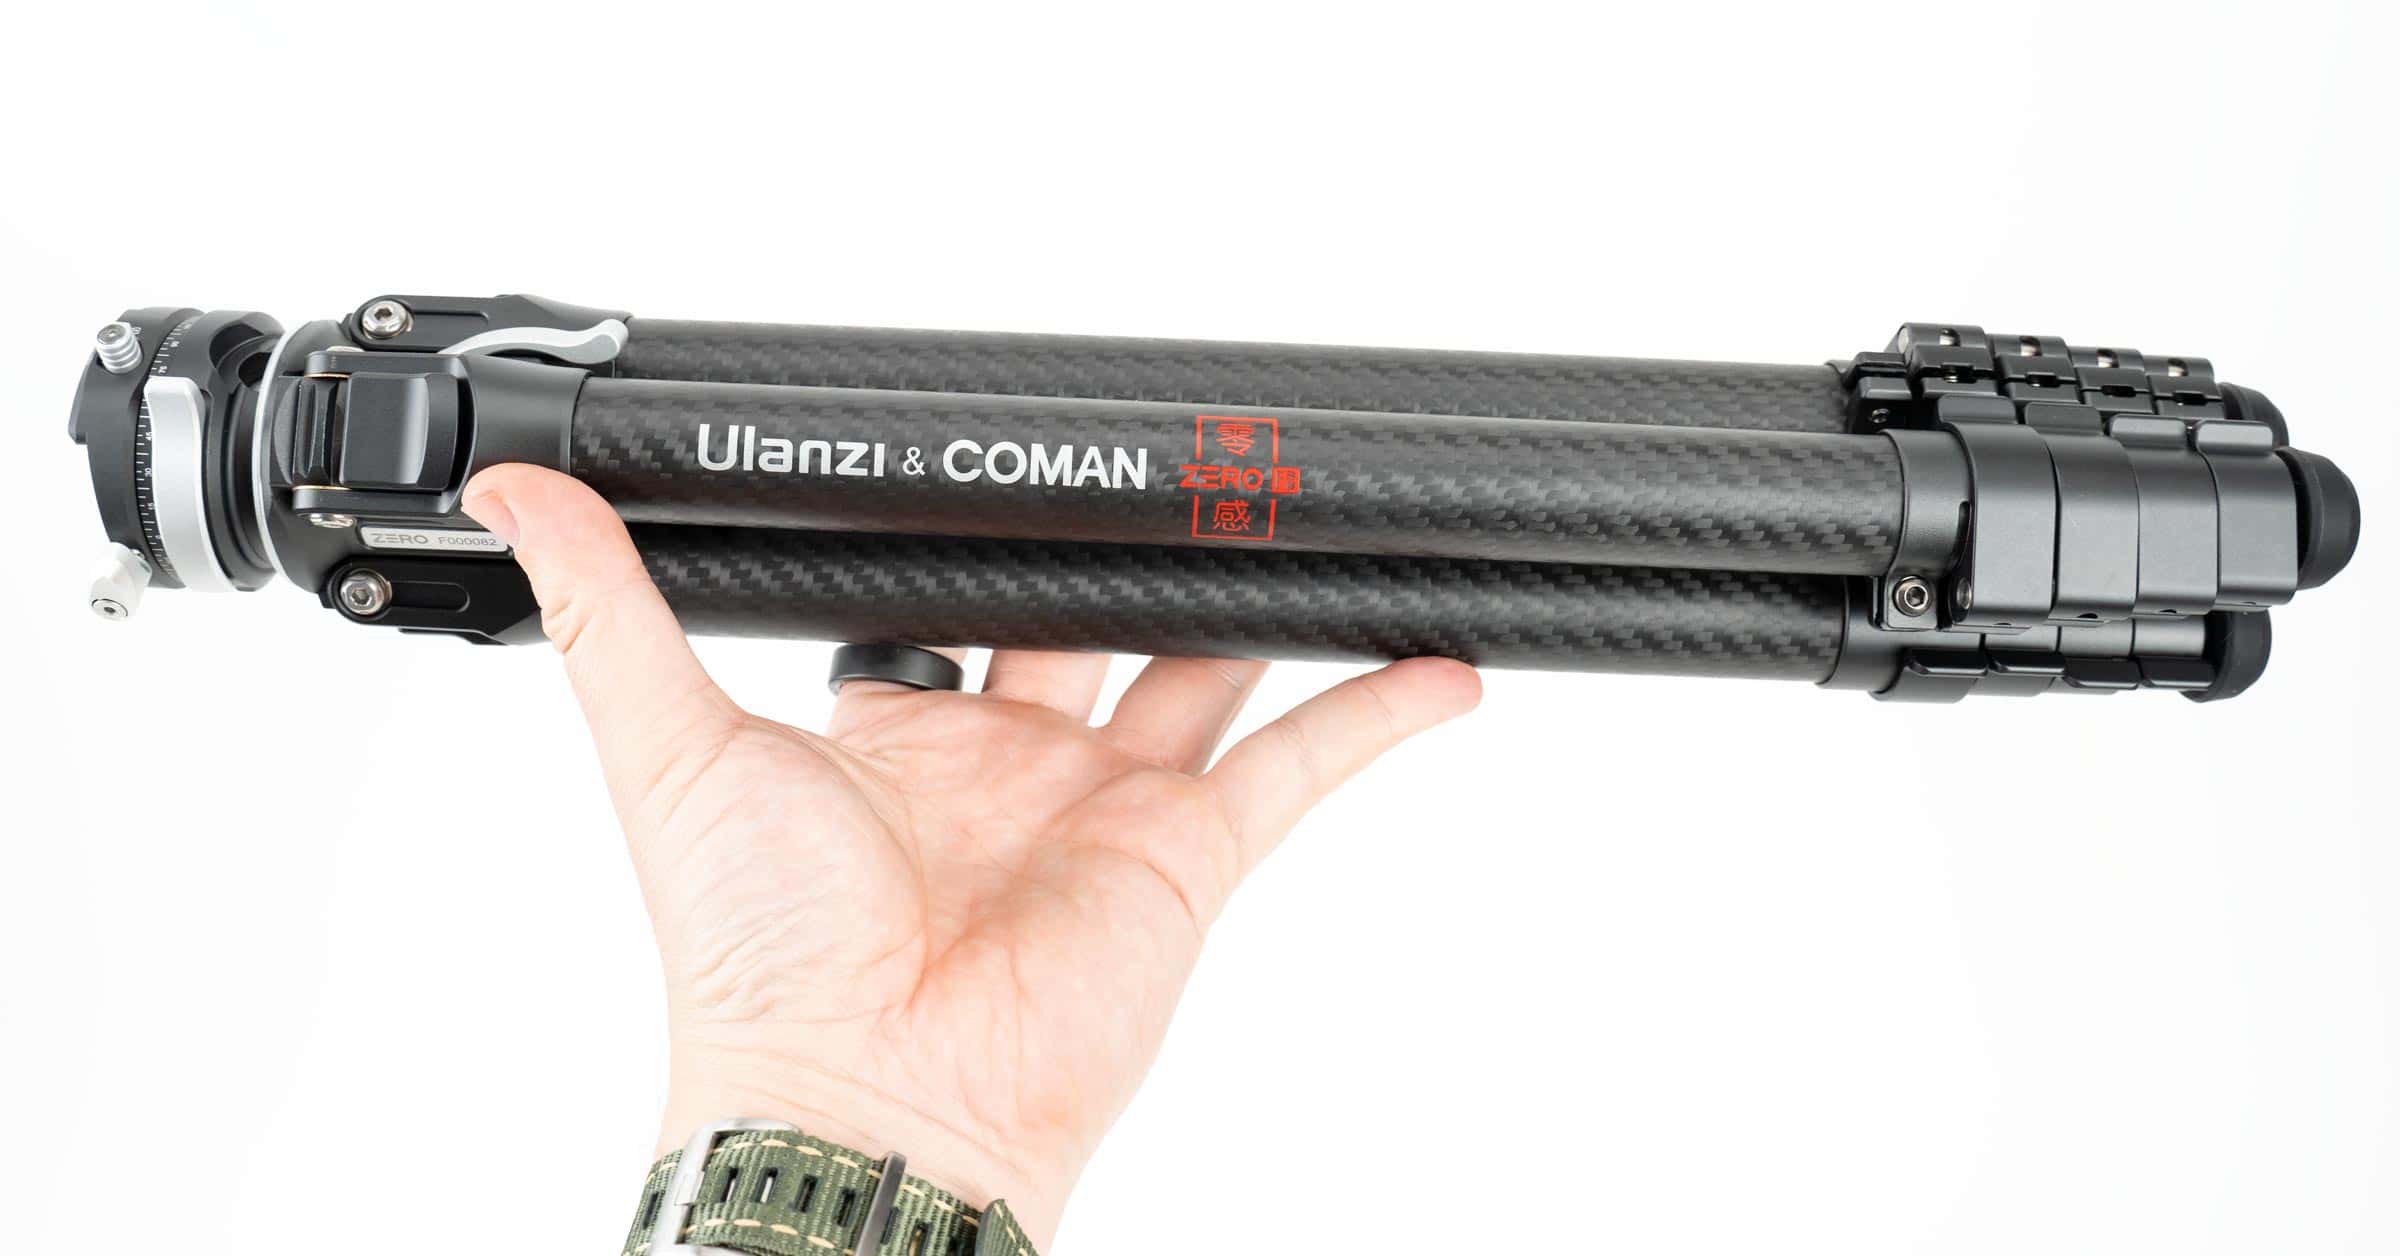
Just before the public launch of the Capture V3 I polled my social media followers to see how many people were using one of the existing models, and I was staggered to see how many people already owned a Capture, or knew exactly what the product was. I knew these were quite popular products, but I hadn’t appreciated how widespread their usage had become – at least amongst the kind of outdoorsy folks that generally tend to follow my work on social channels.

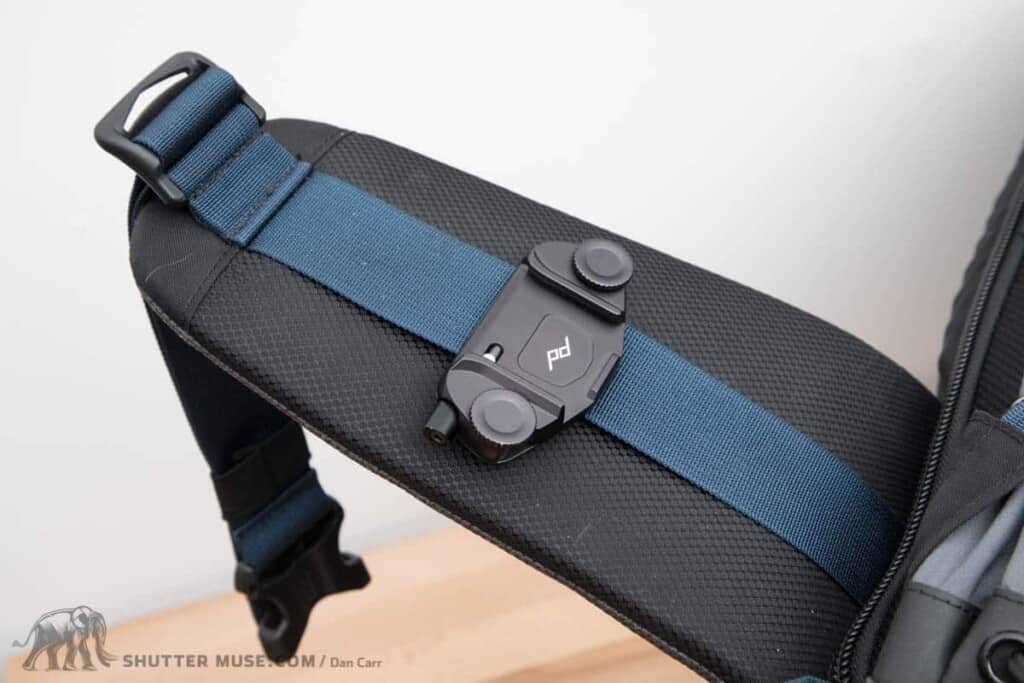
For those that haven’t come across the product before, the Capture is a quick-release camera carrying device that can be attached to a strap or belt. By using the dedicated camera plate that comes with the Capture, you can clip your camera in and out of it with the press of a lockable button. During the same polling to my social followers, I also asked those who already own one of the previous versions, how they use them. The overwhelming majority of people came back to me to tell me that they are using it attached to the shoulder strap of their backpack while they are out hiking. This is exactly how I use mine as well, and it gives you great way to have instant access to your camera.


The fact is, you simply take more photos when you use a Capture in this way! There are so many missed moments when you’re out hiking with a camera fully buried inside your backpack. Some of these are missed because they are fleeting, some of these are missed because you’re in a hurry and you don’t want to be that person that slows your group down by stopping to take off your backpack, and some are missed due to laziness. Hey, I’m guilty of this too! A long day, a tough climb, cold weather, not enough snacks… any combination of these things can lessen the desire to go through the backpack removal process. Capture can help you with all of these, and makes sure that your camera is always to hand.

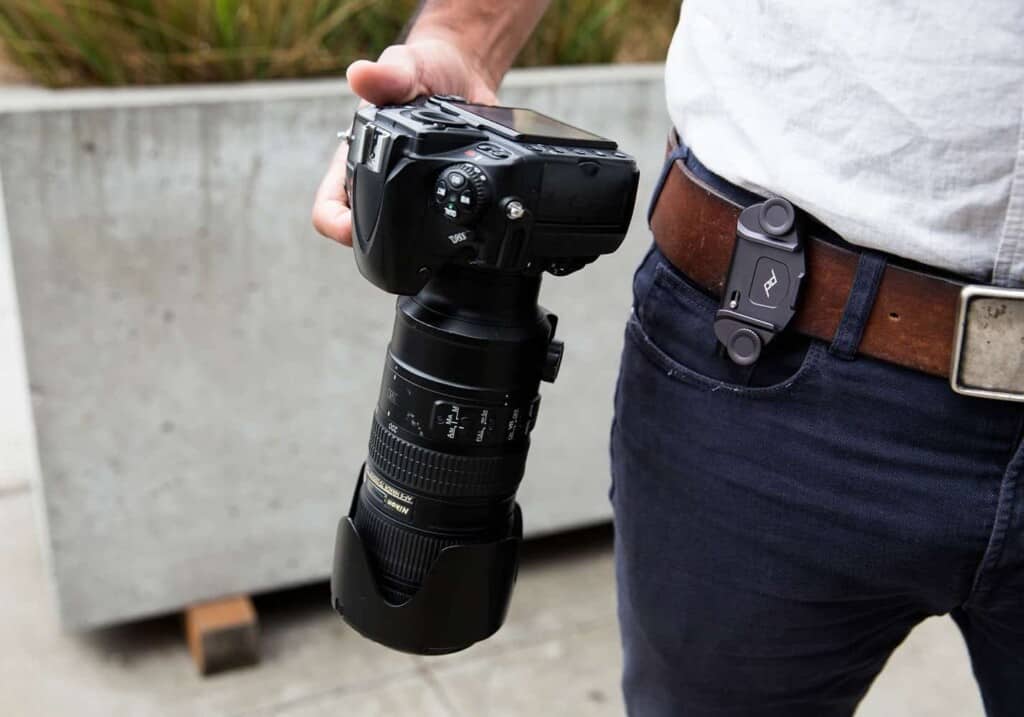
The second most popular way to carry a camera with a Capture, seems to be for event and wedding photographers to use one on a belt either for their primary camera, their backup camera or to carry an additional lens when combined with the Capture Lens which I’ve reviewed previously.
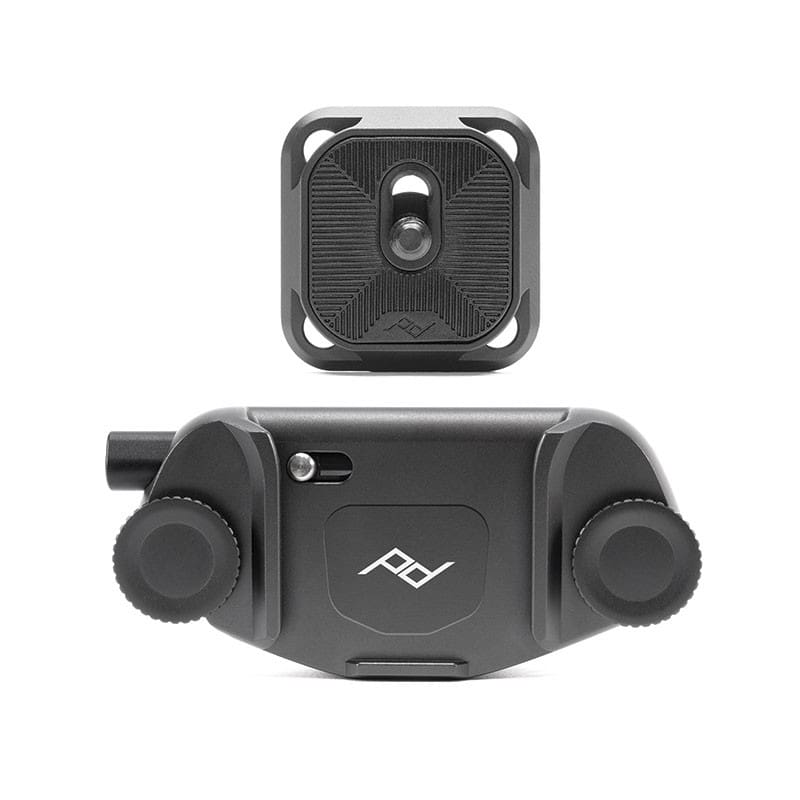
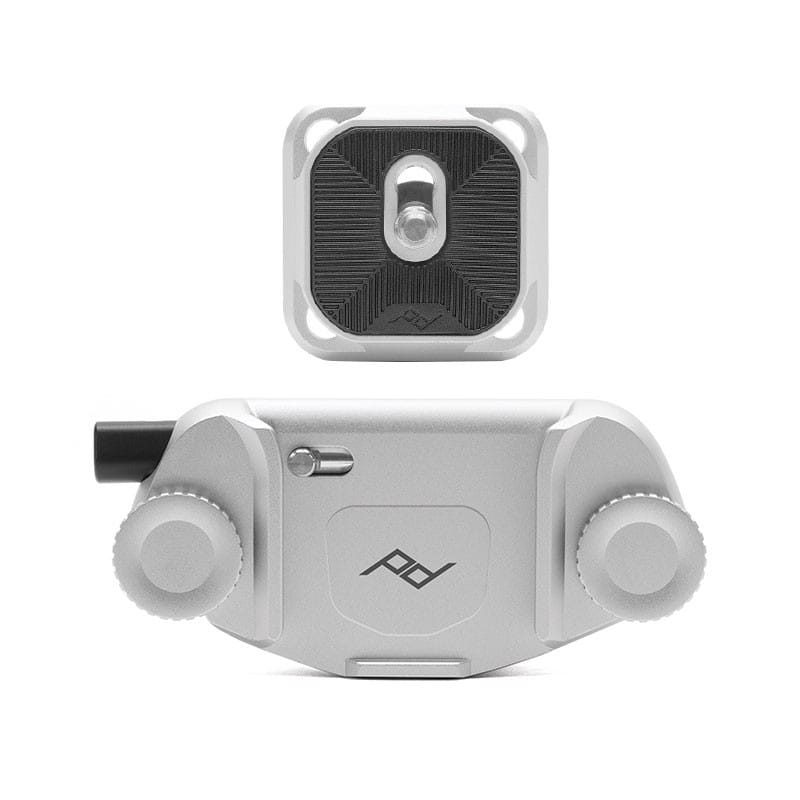
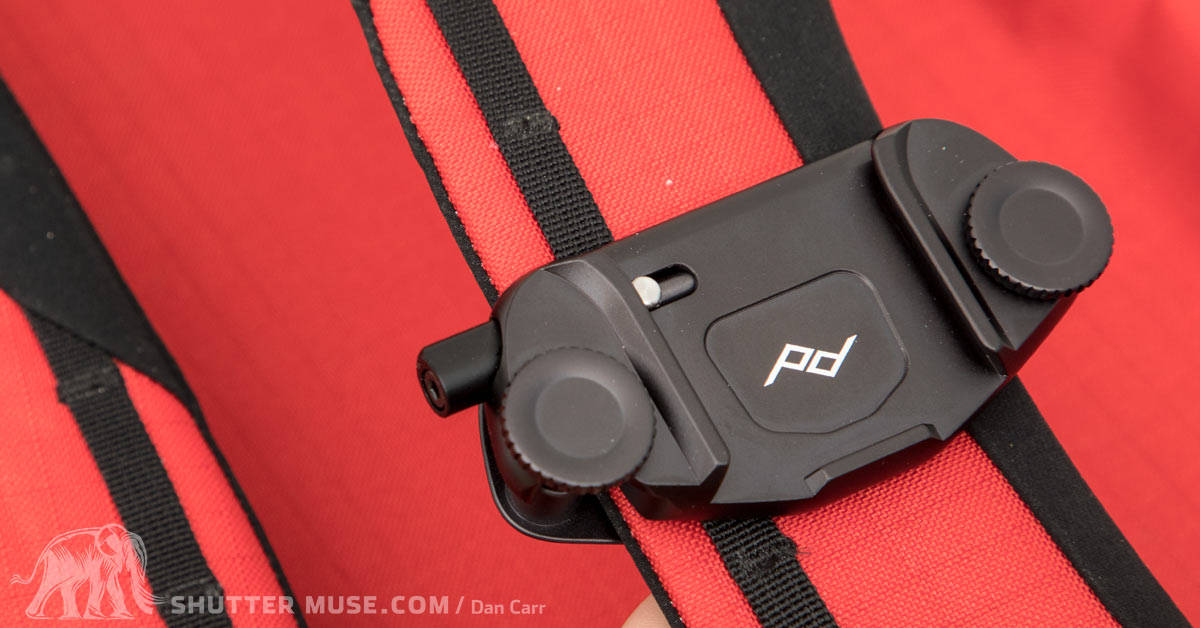
Capture V3 comes in either black or silver, and is made from beautifully machined and anodized aluminum. They look and feel fantastic, and the plates slide very smoothly into the clips, and lock securely with the spring-loaded pin. For added security, the camera release button can be rotated 90 degrees to completely lock it and prevent accidental release of the camera. From a safety point of view this is great, as is the nice audible CLICK that you get when the camera engages into the clip. I never found that there was a question as to whether or not my gear was secure.

When you loosen the two bolts to secure the Capture to a strap, you’ll find the back plate is coated in rubber to make sure it doesn’t move around on your strap or belt. With good tightening pressure on the bolts, I certainly felt the Capture gripped solidly to everything I tried it with, and that’s while using a relatively heavy Canon 5D Mark IV with a 24-70.
Camera Sizing
From a mechanical standpoint there’s no camera/lens combination that the Capture can’t carry, but from a practical point of view people will have different opinions. Camera and lens weight will play a part, as will lens length and your choice of where to carry the camera (belt, strap etc.) If you use a mirrorless camera setup then I don’t think you need worry about sizing at all. With a DSLR there’s definitely a range of opinions. Personally I don’t mind carrying something as big as a 5D Mark IV and a 24-70 on the shoulder strap of my backpack, but a few people have mentioned to me in the past that they feel it can swing around a bit too much up there when you reach that size and weight. If that’s how you feel, the second best option is to place the Capture on the waist belt of your backpack where a lot of bags have a strap or rail on them. This means the camera’s weight is supported on the pack straps and not the belt of your pants. If you don’t have a backpack with a compatible waits belt, you’d have to try the belt on your pants. Generally speaking this provides a good mounting point and the camera does stay in place really well, but you have to be mindful of your added width when passing through small gaps.
But what about gripped or pro-sized DSLR bodies? It’s doable, but at that point I think I would be looking to use either my belt or the backpack waist belt.
What’s New with V3?

I had a Capture V2 and my girlfriend recently unearthed an original Capture V1 from their first Kickstarter campaign so I was able to show this cool photo of the progression.
Clearly the biggest difference with the new V3 is the significant size reduction – about 30% smaller and lighter. In fact, having used the new Capture for a couple of months now I can confidently say that the change in size is actually enough to alter the way I use the product. With the older Capture V2 I found that it would be one of those items that I would always question the need for on a particular day of photography, or when packing for a trip. Not that it wasn’t a useful product before, but it was just big enough and heavy enough that I would always ask the question “Does this need to come with me today?”. That’s not the case with the V3.
The new one is small enough that I have mostly left it clipped to the shoulder strap of my primary backpack since the day I got it. It’s a more discreet design, and I’ve never felt like it’s getting in the way. When I have removed it from the shoulder strap of the bag, the thinner, shorter dimensions of it make it considerably easier to slip into a small pocket and forget it’s even there until you need it. There’s a very short list of photography items that come with me on every single shoot, but the Capture V3 has now made it onto that list.

Simplified Lineup
For Capture V3, Peak Design have done away with the confusing split products of Capture and CapturePRO. From my experience just telling people about the V2, this always caused confusion with those who were aware of it, and many people didn’t even know there were two versions. Now there is simply Capture V3.
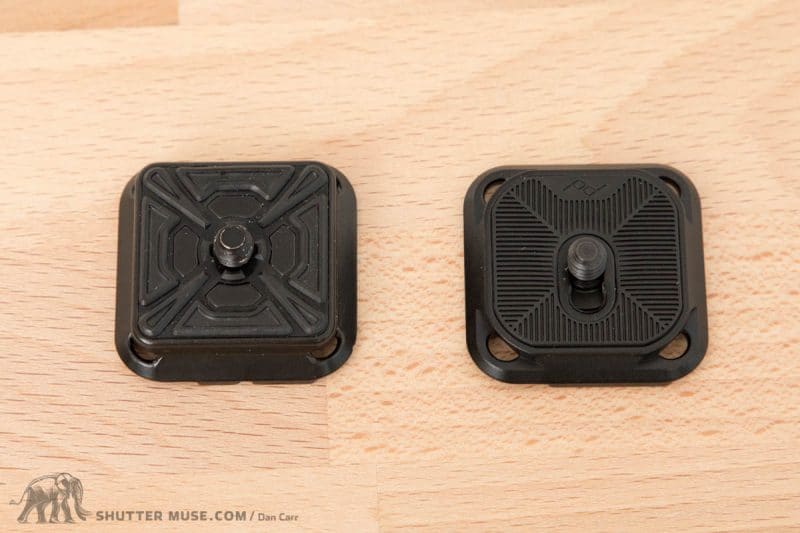
CapturePRO V2 used to come with a larger Manfrotto-compatible baseplate, and a slightly different back plate that frankly made no difference at all. If you want compatibility with Manfrotto quick-releases you can still get that, but now the baseplate is called the Dual Plate, and it’s available separately for $25. You’ll notice that the Dual Plate is also a little bit wider than the standard plate, and has more positioning adjustability due to a bigger slot for the 1/4 20 threaded stud on it. If you’re experiencing issues positioning your plate so that it doesn’t interfere with flip out screens or battery door this might help you.

As for the increased size of the plate, I can’t really say I felt the need for that. The standard plate has been just fine with my combination of 5D Mark IV and 24-70. Peak Design do suggest that it offers more resistance to twisting when used with heavy professional lenses, but I think you’d have to be using something like a 70-200 to really need that added surface area.
The old Capture V2 was powder-coated cast aluminum, with the CapturePRO V2 being much tougher anodized machined aluminum. For Capture V3, since there is now just a single product, the Capture is anodized machined aluminum – a definite upgrade over the base Capture model from the old V2 lineup.
Added Hex Bolts

Capture V3 ships with two sets of bolts. A pair of standard bolts with grip on them for finger tightening, and a second pair of long bolts with a hex head on them. These longer hex bolts are designed to be used with backpack shoulder straps that are a little thicker, and it creates a more semi-permanent setup setup on your pack. The hex head allows you to really tighten the Capture down, and also further reduces the bulk of the setup. Whilst you could get long bolts for the old V2, they didn’t have the hex head, and they were also an additional $10 purchase so this is another great upgrade. I would definitely recommend using the hex bolts on your backpack.
Not As Wide
I know I already mentioned the decreased dimensions, but it’s worth noting that the decreased width may prevent the Capture V3 from clamping onto some wider bag straps. Officially the V3 fits any strap up to 6.4cm (2.5”) wide, which is down from the 7.6cm (3″) maximum width of the V2. If you have a V2 and things are pretty tight already, you probably won’t get the V3 to work.
I tested the V3 on 5 different backpacks that I have in my office and it fitted on every one of them, but I’m sure there are some out there that won’t fit, because a couple of people left comments to that effect when I first previewed the V3 prior to the Kickstarter launch. Just something to be aware of. I think that overall, the decreased compatibility with a small number of packs is outweighed by the increased usefulness of the product now that it is smaller.
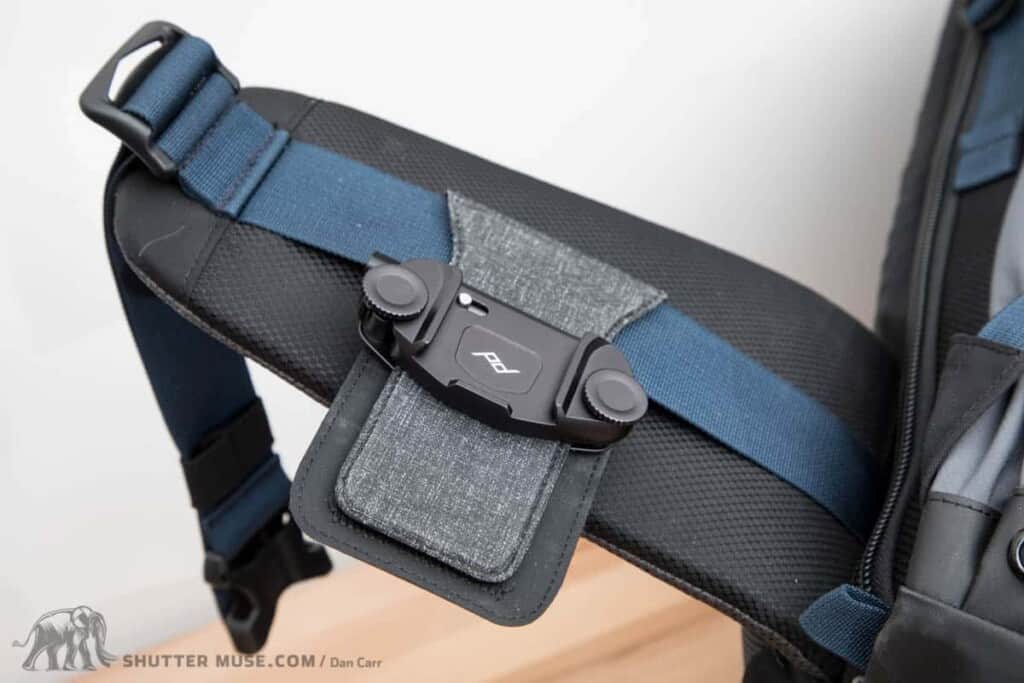
Pro Pad V2
Capture V3 launched alongside the Pro Pad V2. I’m including a photo here, but I have also done a separate Pro Pad V2 review. The Pro Pad can be a useful accessory if you plan to carry a heavy setup on your Capture for extended periods of time. A situation where this might be relevant is if you have two cameras for an event or wedding shoot and rotate between the two, always keeping one in your hand and one on your belt. This means that you’d have one on your belt at all times, and the Pro Pad can add some comfort in that scenario.
Dealing With Bad Weather

When a camera is on a Capture, it’s exposed to the elements and you might want to consider protecting it with some kind of rain cover. Peak Design makes a Shell cover that’s designed for this exact purpose. The thing about the Peak Design camera covers is that they are designed to be removed from the camera in order to take the photo. The reason I’m underlining this is because I’ve had several recent interactions with people who didn’t understand this, and weren’t expecting this to be the case. The Peak Design covers are a cheap solution to keep rain off the camera while you’re hiking, but they aren’t great when it comes to actually shooting in bad weather because you have to remove the cover. A rain cover that can’t be used in the rain… yeah, I kind of see why that is confusing to some people.
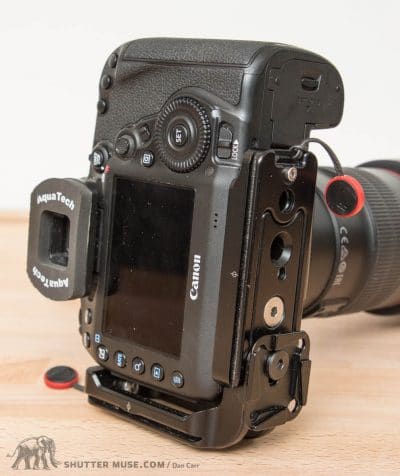
Personally, if the weather is bad then my preference is to put the camera back in my bag anyway, so this only really becomes a problem for those people who have no space in their bag. The Peak Design Shell covers will keep the rain off while you hike, but if you also want to be able to shoot in the rain, with the cover on, then my current recommendation is the Aquatech Sport Shield Cover (Medium). The medium size of this cover has an elongated zipper on the bottom that allows you to access the bottom of your camera and still clip it into the Capture. This is a heavy duty, totally waterproof cover that would allow you access to the camera controls, and a view of the LCD and viewfinder. With this, you could shoot all day in the rain if you had to, but you do pay for the versatility and high-end waterproof hardware and materials. You simply can’t compare this Aquatech cover to the Peak Design covers – totally different kinds of products and therefore price points.

Using The Capture With An L Bracket or Other Tripod Plate
The plate that comes with the Capture is compatible with the Arca-Swiss standard tripod quick release system that is used by the majority of ball head manufacturers. If your ball head is Manfrotto, you’ll want to purchase the optional Dual Plate to make it work with your head.
But what if you’re using an L bracket with your camera? There are many good reasons to use an L bracket, and with companies such as 3LeggedThing producing more and more affordable L bracket options for people, I think their usage is going to be on the rise. The problem then is that you have used up the 1/4 20′ thead on the base of your camera, so how do you attach the small plate for the Capture?
I have a couple of solutions…
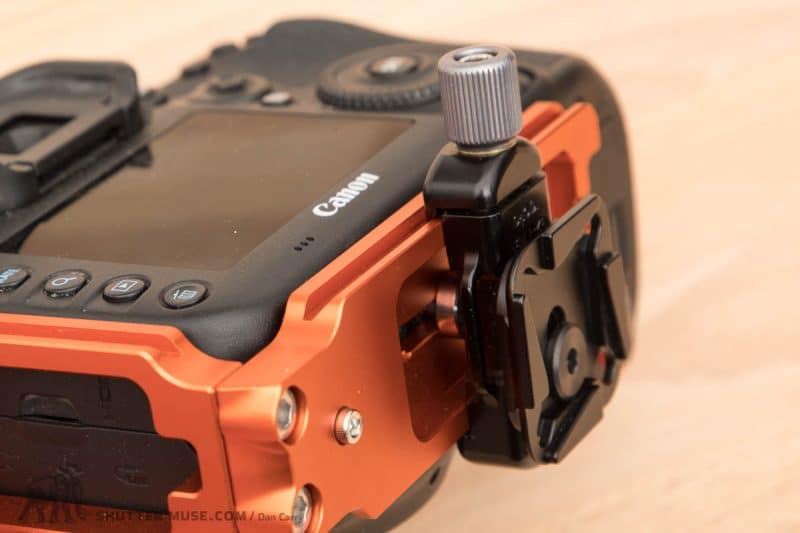
Firstly, you might find that your L bracket actually has an additional 1/4 20 threaded socket on its base. That’s exactly what I found when I got my RRS L bracket for the 5D Mark IV. You can see in this photo that the socket is actually offset from the centre a little ways, so I clamp my tripod head to the L bracket in the centre, and just use the Capture Plate for slotting into Capture V3. It works great!
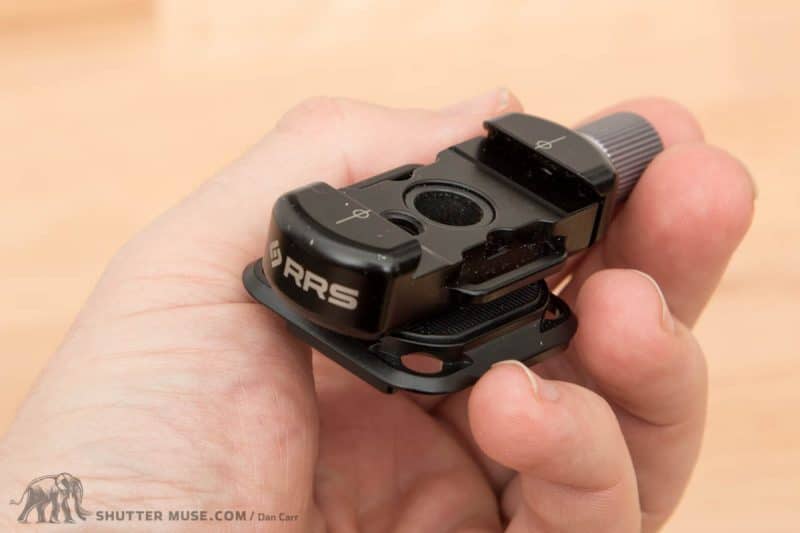
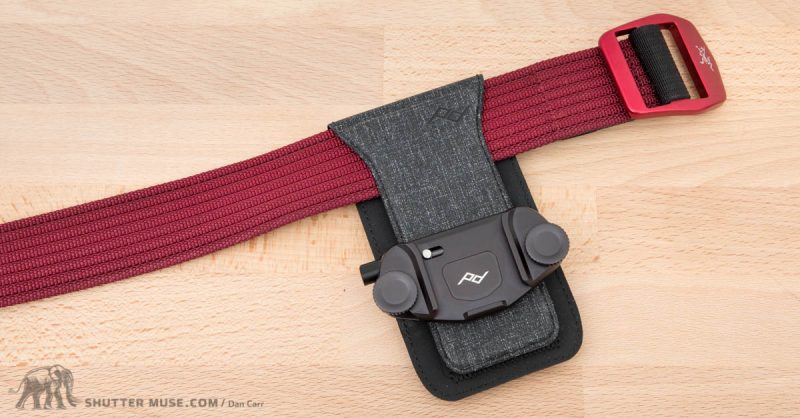
If you don’t have a 1/4 20 on bottom of your L bracket, the solution is to use a super small Arca-compatible clamp that does have a 1/4 20 on it. RRS makes a tiny Arca clamp called the B2-FABN Micro which you can see in the photo below. By combining this clamp with the Capture Plate, you can quickly set your camera up for use with the Capture, without having the hassle of removing the L bracket.
Conclusion
I liked the Capture V2, but I love the Capture V3. It just feels like a much more refined product, and I’d even go so far as to say that it’s worth the upgrade if you have an older version that gets regular use. I don’t always say that, in fact I said the opposite when I reviewed the Slide strap that they updated at the same time as the Capture launch, but in this instance I feel it’s warranted. I think the $69 price point is also totally fair, and I think you will too when you see and feel how sleek and well made the Capture V3 is. This is not a gimmick, which I’ll admit to thinking when I first saw the Capture V1 way back in the day. This V3 version is a useful accessory to almost every photographer out there. If you’ve been on the fence in the past, this is the version of Capture that you’ve been waiting for. Whilst I was originally sent the Capture for purposes of review and testing, I immediately purchased a second one as soon as they became publicly available, so that tells you exactly what I think of this!
Where to Buy
As always, we appreciate it when you use the links on this page to make your purchases. For Peak Design gear I always recommend buying directly. They have free shipping to many places and their customer service team are always on hand to help if you have any problems.


Hey Dan I loved the review. I have the capture v3 already and was looking for a l bracket. Couldn’t find much about using both together until I found your review. I am going to purchase the RRS L bracket for my camera. How do you find the weight of the camera + L bracket hanging on the capture clip?
Thanks Sean. Really depends on the lens and camera… with a DSLR I wouldn’t go beyond a 24-70. Mirrorless… different story.