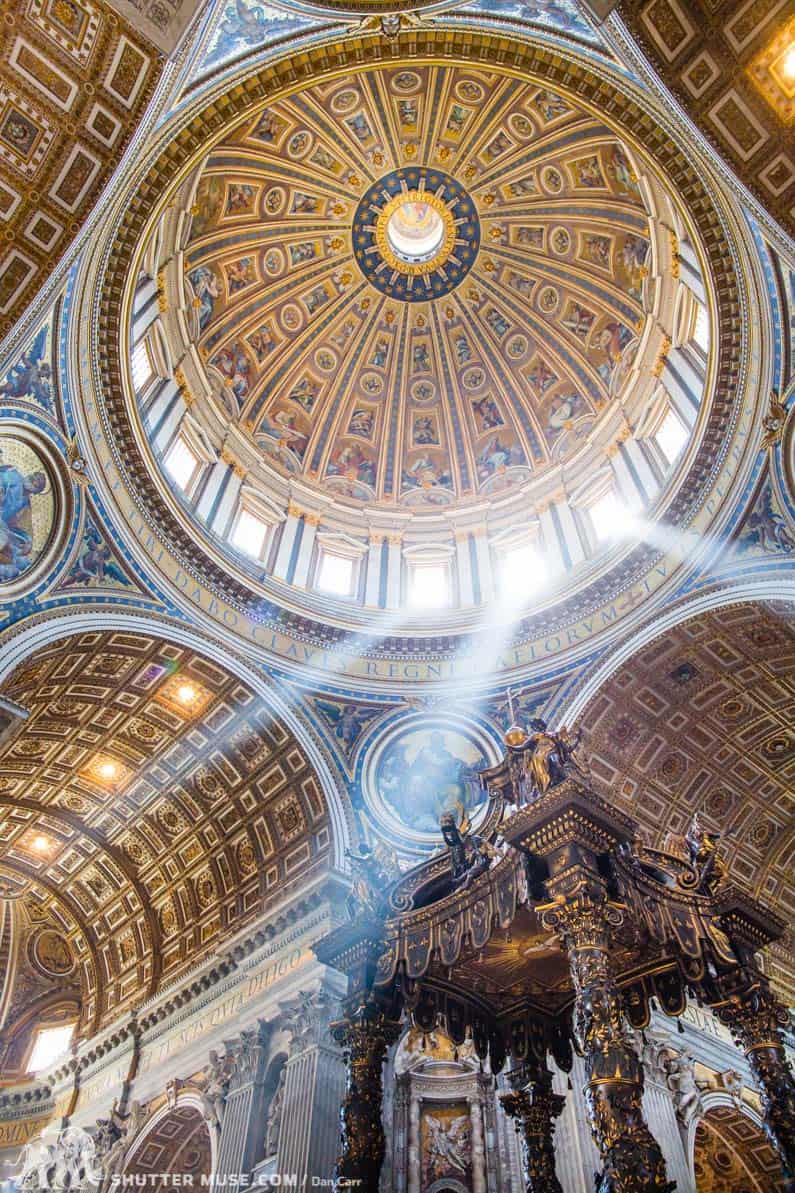
St Peter’s Basilica, Rome – ISO 3200
What Is ISO?
In the earlier days of film, ISO was used to indicate how sensitive to light a particular type of film was, and back then was called ASA. These days we use ISO as a way to measure the light sensitivity of a camera’s digital sensor. Varying the ISO of your camera can have a dramatic effect on the look of your photo and along with shutter speed and aperture, it’s also part of our exposure triangle. A standardized set of numbers is used as a scale, like 100, 200, 400 & 800 (also see full table further down this article). The lower the number, the less sensitive your film, or digital camera is to light. In the days of film, you would need to change your roll of film to use a different ISO. With digital cameras though, we have the distinct advantage of being able to control the ISO of our photos from shot to shot if we want to. As the ISO number doubles, so too does the amount of light being recorded by the camera’s sensor. ISO 400 is twice as sensitive as ISO 200 and just as with shutter speed and aperture, when we double the light to the sensor, we refer to this as one ‘stop’ of light. ISO 400 is one stop brighter than ISO 200 and that means it would take half as much time to record the same amount of light at the sensor. If we used a constant aperture, then for every stop we increase ISO, we can halve the shutter speed that’s required to get the same overall exposure.
Digital Noise
If you’ve read the corresponding articles about shutter speed and aperture, the two other sides to our exposure triangle, you’ll know there’s always a trade-off to be made when trying to get more light into your camera. With aperture you get a shallower depth of field as you open up the aperture to let in more light. With shutter speed, as your exposure time increases to let in more light, it becomes harder to get sharp images of moving objects. The tradeoff for ISO is that as you increase the camera’s sensitivity to light, your images get noisier, sometimes described as ‘grainier’. It starts off almost imperceptible at lower values, usually between 100 and 400, but builds to the point where people might begin to find it unacceptable for the image quality they desire. Whilst the ISO numbers are standardized, the amount of noise that corresponds to them is not. This means that different cameras produce different amounts of noise at different ISO settings and there are several reasons for this which are discussed later in this article. If you have a point-and-shoot camera, as well as a DSLR for example, they will display different amounts of noise in their images at ISO 1000, although their exposures will be the same given the same aperture and shutter speed settings.
Bright lighting, like outdoors in the sunshine, will require a lower ISO setting and therefore gives a cleaner image with less noise. Poor lighting, like in a forest under cloudy skies, would require a higher ISO and typically result in noisier images. You can always use a tripod though if you want to maintain a low ISO and keep your photos noise free. Using a tripod allows you to use a longer shutter speed to get that precious light to your sensor, rather than having a more sensitive ISO setting. The caveat for this is that your subject must be static, because a long shutter speed will not be able to stop motion. The world around your subject would be sharp, but it would be blurry. We often think of using high ISOs in dark places, but as long as your subject is static, there’s no reason why you can’t shoot at ISO 100 in the dark so long as you have a tripod.
NB. A camera’s ‘base’ ISO is the lowest ISO that you can select. or most Canon cameras it is ISO 100, and for most Nikon cameras it is ISO 100 as well, though some older models were ISO 200 and the newer D810 is ISO 64. This base ISO will produce the least amount of digital noise.
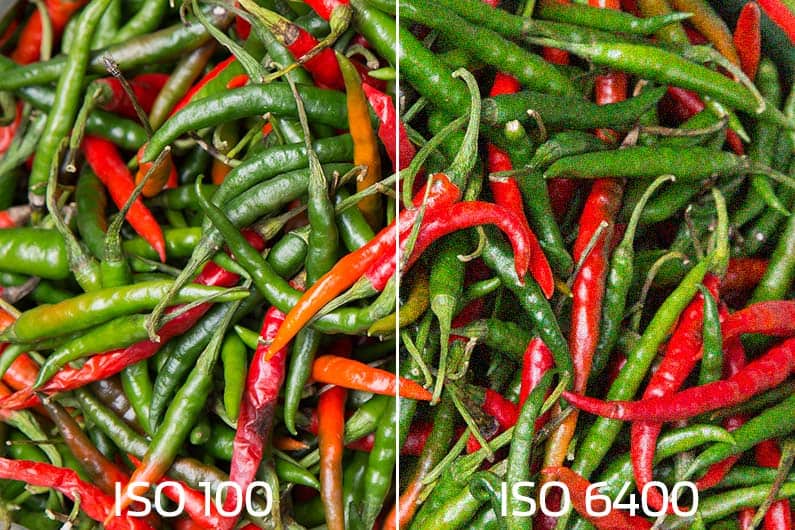
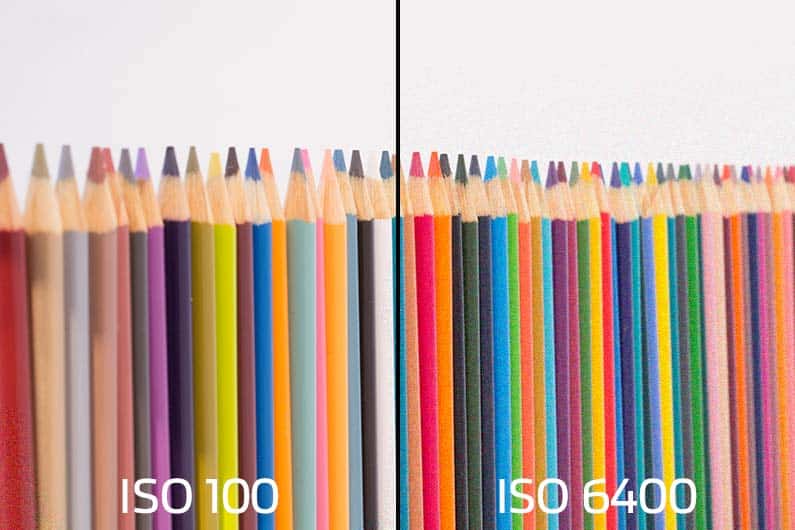
Do you know what your ISO setting is?
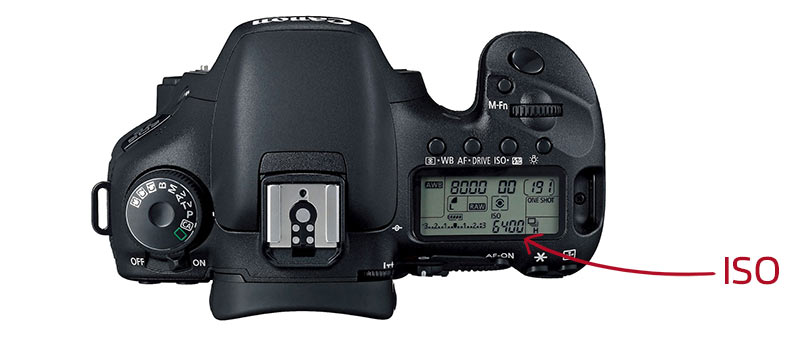
Your ISO setting is a key ingredient of your exposure so it’s displayed prominently on all cameras. On a DSLR you’ll typically find it in the LCD on the top right-hand side of the camera, as well as displayed beneath the image within the viewfinder. If you are using a point and shoot camera, or a DSLR with liveview, then the aperture setting will usually be displayed somewhere around the extremity of the image on your main LCD. If you can’t see it, press the ‘info’ button to cycle through various on-screen displays until you see all the exposure information.
Whilst it is always possible to manually select your ISO, many people also prefer to have the camera choose a suitable setting. ISO is just as important as aperture and shutter speed is to your image’s exposure, but it doesn’t have quite such a perceivable effect on the look of the image, especially with a DSLR in good lighting conditions. If you are still in the early stages of understanding shutter speed and aperture, using shutter priority and aperture priority exposure modes, then you can certainly simplify things by switching ISO to auto. Usually this is just a case cycling through the ISO settings until you get to the end, then one more click will probably put it into ‘A’ mode. Refer to your camera’s manual it that doesn’t do the trick!
Even if you do put ISO into auto mode, you should still be very aware of the purpose and effect that it has on your photos. Cameras don’t always choose the perfect settings when placed in automatic modes so even then, you should keep an eye on it. Of course if you want to shoot in full manual mode then you’ll definitely need to know it all!
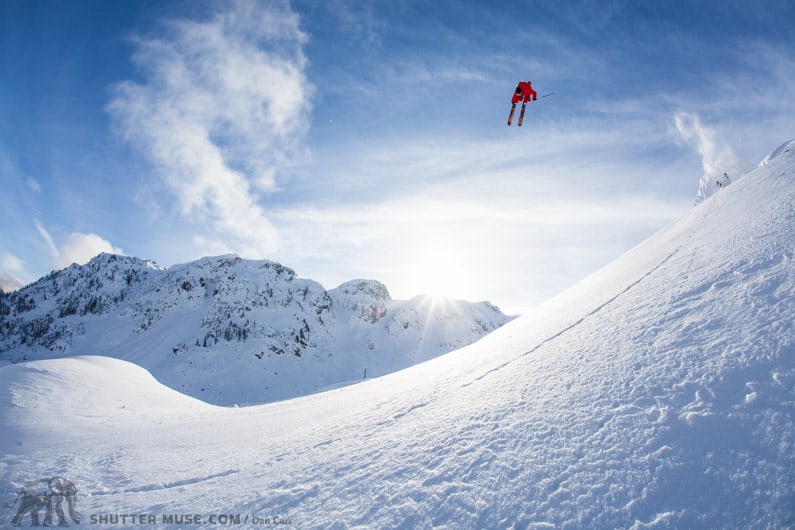
Flying skier – ISO 320
When To Use High ISO
Since ISO is part of our exposure triangle, it affects your image’s exposure in the same way as shutter speed and aperture. If we increase ISO by one stop, we’ll have to make a one stop change with aperture and shutter speed to compensate. A common scenario for using high ISO is when you are shooting indoors and don’t want to use a flash. At low ISOs, you’ll struggle to get a fast enough shutter speed to allow sharp photos. If you increase your ISO though, you’ll be able to increase your shutter speed and still maintain the same overall exposure. Increasing your ISO by three stops would allow you to increase your shutter speed by three stops. Pretty simple right?!
Another common reason to increase your ISO is to allow you to shoot with a greater depth of field, perhaps when taking a hand-held landscape photo. In this case we might increase our ISO by a few stops in order to be able to use a smaller aperture which will give a greater DOF. If you increase your ISO by three stops, you can increase your f-stop by three stops as well and still maintain the same overall exposure.
For the most part, people are usually concerned with the usage of higher ISOs, but sometimes you might find that your exposure is requiring an aperture that is too small to get that nice shallow depth of field look for a portrait. In this case we would want to lower the ISO. By lowering your ISO, you can lower your f-stop by the corresponding amount and still maintain the same exposure, but you’ll benefit from a shallower DOF that comes from using lower f-stop. (see the animation in this article if you aren’t sure about this)
ISO Chart
Note that unlike f-stop and shutter speed, ISO values are never provided in half-stop increments. Your camera will either allow you to choose ISO in one-stop, or third-stop increments. Also note that towards the bottom of the chart, some of the third-stop options are listed as n/a. Currently there are no cameras on the market that allow the selection of those n/a options.
Remember: Each step along the full stop scale equates to a doubling (or halving) of the light that reaches your camera’s sensor. In the case of ISO, this means that your camera’s sensitivity to light is doubling with each stop.

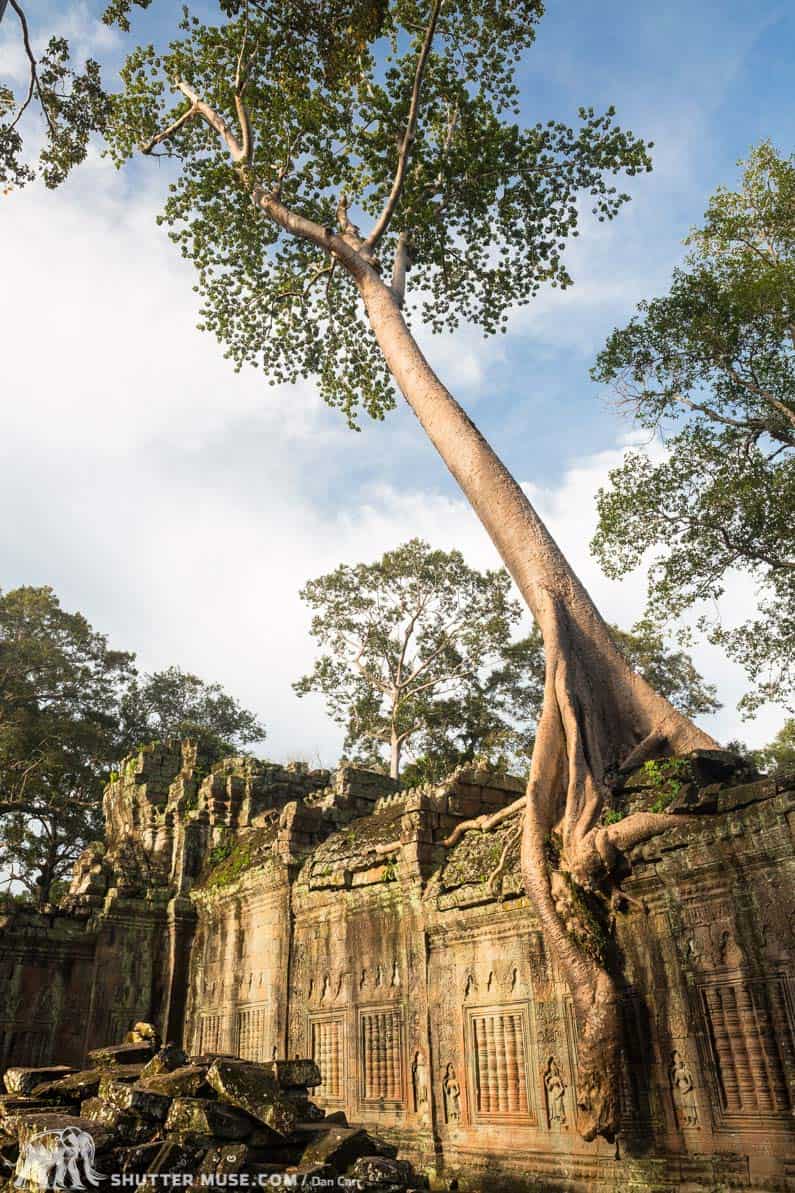
Cambodian Temple – ISO 200
ISO Quality VS. Sensor Size & Megapixel Count
We now know what ISO is and how it affects the noise in our image for a particular camera. There’s a couple of other things that also affect noise though and since they’re often mentioned in similar conversations I thought we should touch on that here as well. Generally speaking, the more room a pixel on your sensor has around it, the less noise is generated in your image. This means that a camera with a higher megapixel count than another of similar sensor size, will have a noisier image at a given ISO (all other technology being equal). Your camera’s megapixel count is simply the number of pixels that are on the sensor, so the more there are, the closer together they have to be. This is the reason that full-frame cameras tend to be much better at higher ISOs. They have a much larger sensor (50% larger in fact) in which to spread out their pixels! Conversely, point-and-shoot cameras have very small sensors so they are really tightly packed together and therefore noisier. If you cram a huge number of megapixels onto a full frame sensor though (Nikon D810 for example), it’s entirely possible that you could end up with them being more tightly packed together than a lesser megapixel count on a camera with a crop APS-C sensor.
NB. The distance between pixels on a camera’s sensor is called pixel pitch and it’s usually expressed in microns, measured from the centre of one pixel, to the centre of an adjacent pixel.
This explains why images at ISO 800 on your point-and-shoot camera look much noisier than ISO 800 images from your DSLR with its much larger sensor.
Cleaning Up The Noise
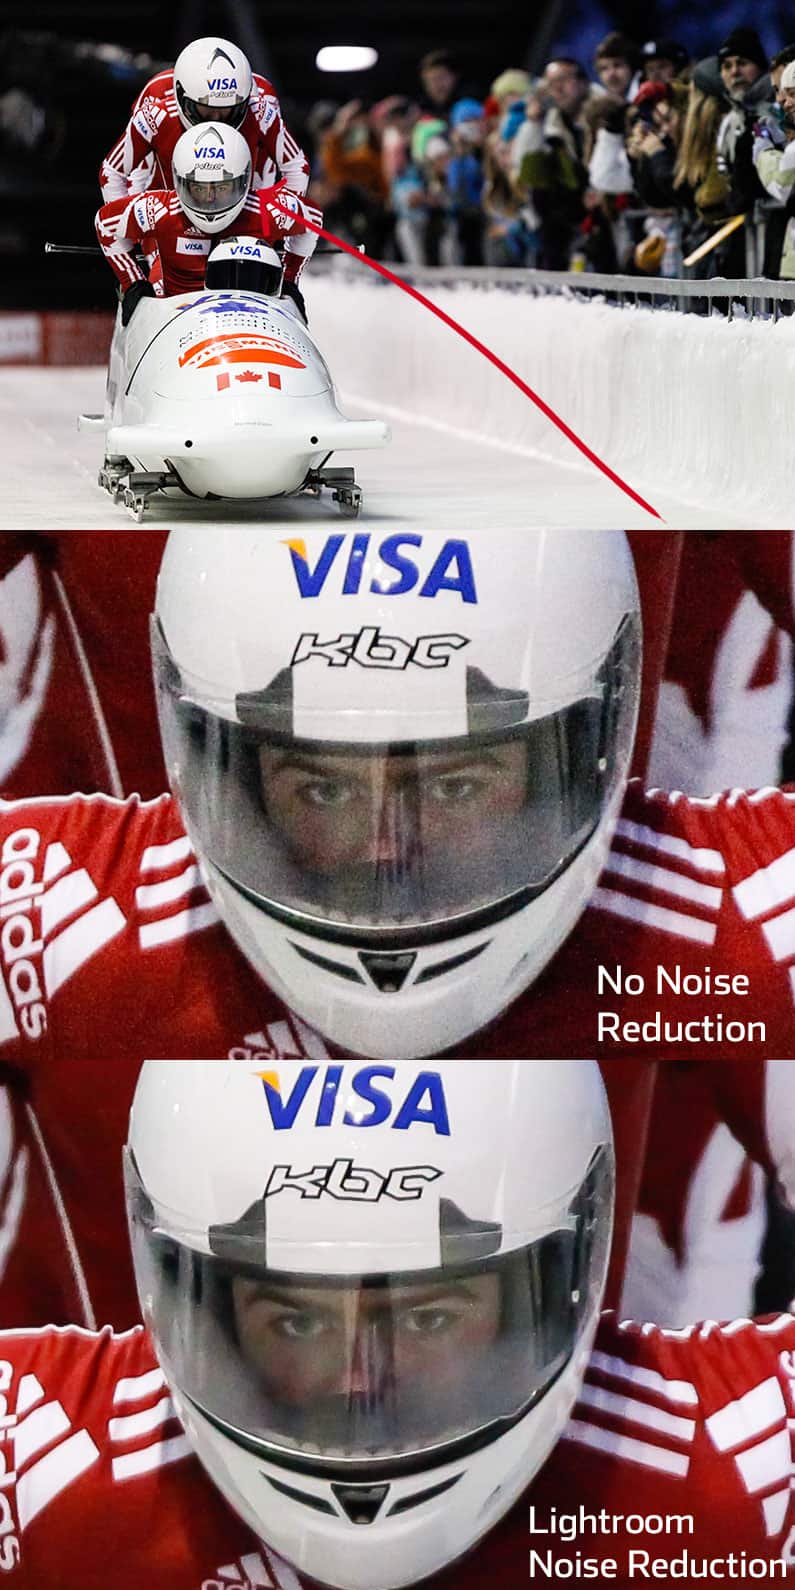
There’s a number of excellent ways to clean up your images that were shot with higher ISOs. The first is to experiment with in-camera noise reduction. Settings are specific to your camera and manufacturer, but all of them offer options to clean up high ISO noise if you are shooting JPEG. An even better way to deal with it is to shoot RAW, if your camera allows that, and then process that file using software on your computer. Adobe Lightroom does an incredible job at cleaning up noise. Take a look at the example below! If you don’t want to buy Lightroom, or pay for Adobe’s Creative Cloud subscription, you can use noise reduction in your camera manufacturer’s included RAW editing software. Capture NX for Nikon or Digital Photo Professional from Canon. Since I know what kind of results Lightroom can get, I’d say these free options only do a mediocre job, but they are still a step up from letting your camera do it internally to a JPEG file. Another couple of options, which are a little less costly than Lightroom, are Perfect Photo Suite from OnOne Software, or Topaz DeNoise from Topaz Labs. Noise reduction is always a fine balance between removing the noise, and preserving the fine detail in the image, but today’s software can do truly remarkable things!
A Note On Technology Advancements
Advancements in the quality of high ISO images is probably the most rapidly improving sector of camera design. Within the last 5 years I’ve owned cameras that I would not want to push past ISO 800, right through to cameras that are almost noiseless at ISO 2500. It’s possible (even probable) that by the time you read this post, things will have changed yet again. The so-called “Megapixel Race” isn’t over, but I’m seeing more and more people concerned over quality of pixels and not quantity, which is pushing manufacturers to concentrate on reducing digital noise.
Test Your Knowledge! Are You Ready For Manual Mode?
If you’ve read the posts about understanding shutter speed, aperture, ISO and the exposure triangle, you should have a solid foundation for your photography. We’ve designed a quick quiz with 12 questions that will bring everything together and make sure you are ready to move onwards.





Hi, I got a question about ISO settings.
A friend came to me with a very weird idea… I have not yet tested it and have not found any article about it.
He sais that the picture quality suffers in between the Full ISO stops. Meaning you get better picture quality at Full-Stop ISO Steps. e.g ISO 50-100-200-400-800 and so on.
Compared to the 1/3 Stops in betwee the fulls stops:
e.g. ISO 125-160- 250 etc
And that was supposed to have to do with the sensor size and the issue of pixels not completly read, and hence the camera would interpolate stuff in some of the pixel lines….
Have you every heard of something like that?
It does not make any sense to me….
Perhaps he was referring to JPG compression or Cropping in Camera such as the 5DS is doing?
Thanx for an answer if you have any 🙂
Great question! This has been debated for quite some time actually. The theory is that the full stop settings are the real settings and the 1/3 increments are “pushed” by software, similar to adjusting the slider in Lightroom to increase exposure. Whilst this may be true, and tests about 7 years ago proved it quite plausible, today there’s nothing to be worried about. When this was first hypothesized, there was a huge difference in ISO performance for even a 1/3 stop difference. It’s simply not the case these days. I struggle to tell iso100 from iso800 with my camera. In actual usage you would not be able to tell the difference at all. Many people actually say that the true base values are 160-250-320 and that the “full stop” values are the ones that are pushed. The fact that people can’t agree on this just goes to show you how much it’s visible in real world usage!! Haha. Don’t worry about it, just go and shoot!
I have an Olympus E620. when I look at my photos, I am not sure if the quality is good enough to display in a book I am trying to put together. How can I tell if my photos have the quality enough?
It all comes down to how big they will be in the book, but there are no “rules” for this kind of thing. The best thing is to have the printed at the size you think they will be in the book, and then examine them to see if you are happy!
Nice clear explanation, but–
Please show side by side images showing effect of iso of the SAME subject, not similar ones.
Thanks for the suggestion.
Always a pleasure to read your content, seems you really do have a talent for creating great content!
It is best to participate in a contest for probably the greatest blogs on the web. I will suggest this site!
IT je definitvno buducnost, hvala na pomoci!
Hello there, this is a fantastic go through. I find you really have got a way with words and phrases. Keep up to date the excellent operate. In the mean time, peruse this participation.