
Aquatech underwater housings were primarily designed for surf photography, but I’ve found many photographers using them for other purposes. These housings are built to be tumbled around in the surf so they are extremely tough. This also makes them excellent candidates for camera protection in a remote wildlife camera setup around powerful animals such as bears, and there are also many other water sports that can benefit from an in-the-water angle.
The further potential use of these housings is landscape photography that gives you a glimpse of the scene both above and below the water. Using a camera in a water housing for under/over style landscape images is definitely no easy task, and this won’t be the only challenge to overcome. There’s also the issue of tripod vibration caused by running water, and the extreme depth of field that’s needed to have a sharp focus on the underwater foreground and the overwater background.
This latter issue will likely be best solved by focus stacking. Two images being taken at two different focal points to capture each piece of the puzzle, and then merged together in Photoshop or some other similar piece of software. For best results, this requires a tripod to make sure the two frames can be easily merged, and it also makes it easy to bracket the exposure so that an underwater exposure can be blended with an overwater background exposure that’s likely to be much brighter.
Important Update in 2020
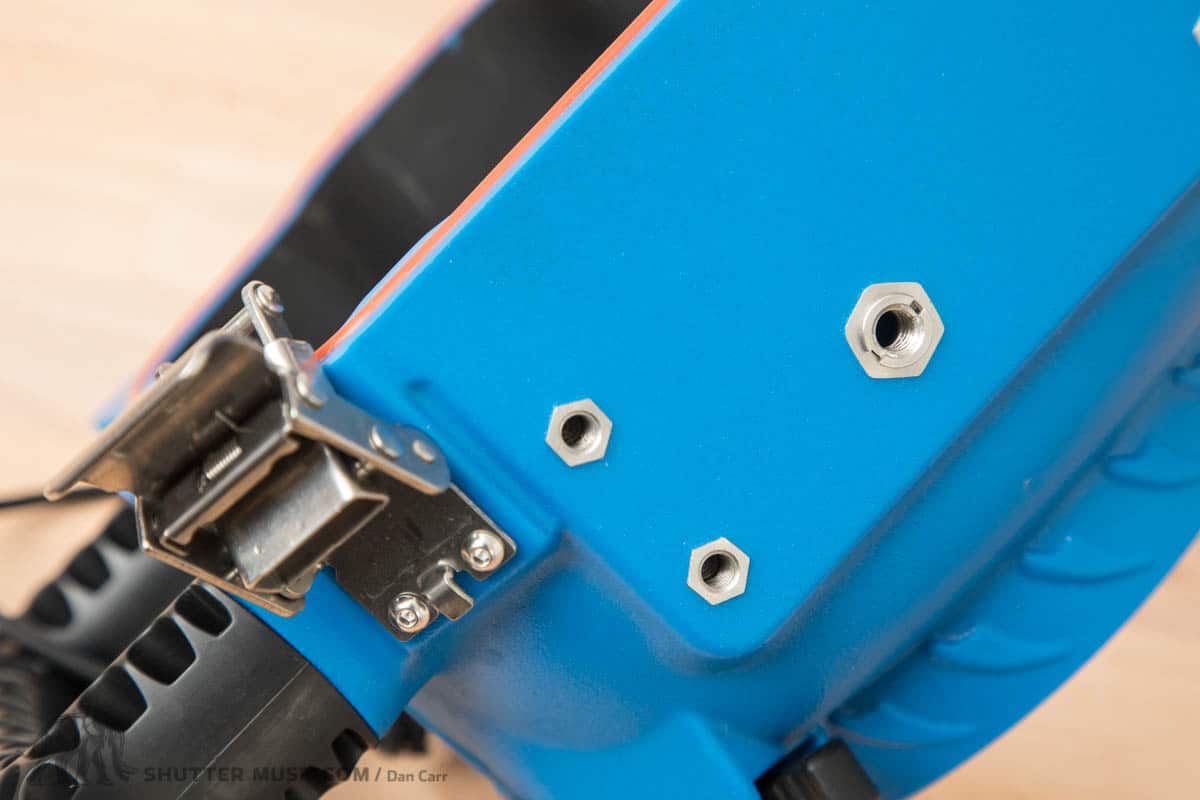
This tutorial was originally created using my Aquatech Elite housing. As you can see in the photos, it came with a 3/8″ 16 threaded hole on the bottom of it which made it possible to easily adapt it for use on a tripod. I subsequently learnt from a comment on this post that at some point in the production life of the Elite housing, Aquatech stopped including the 3/8″ 16 hole. I have no idea why they did this, and several people contacted me to express disappointment that this was the case.
Once the Elite reached EOL, the Elite II and Base II models were launched in late 2019. These new models actually have several 1/4″ 20 threaded holes on the bottom that serve as both the mounting points for the optional M3 pistol grip and also a way to attach a tripod plate. This is a welcome improvement!
Initial setup instructions are therefore split into two parts:
Initial Setup Instructions for original Elite/Base Housings With 3/8″ Hole
The first thing you need to do is convert the 3/8 16 threaded socket on the bottom into 1/4″ 20 using a reducer bushing like this one. Some tripods have 3/8″ 16 studs, but 1/4″ 20 is much more common for stills cameras.
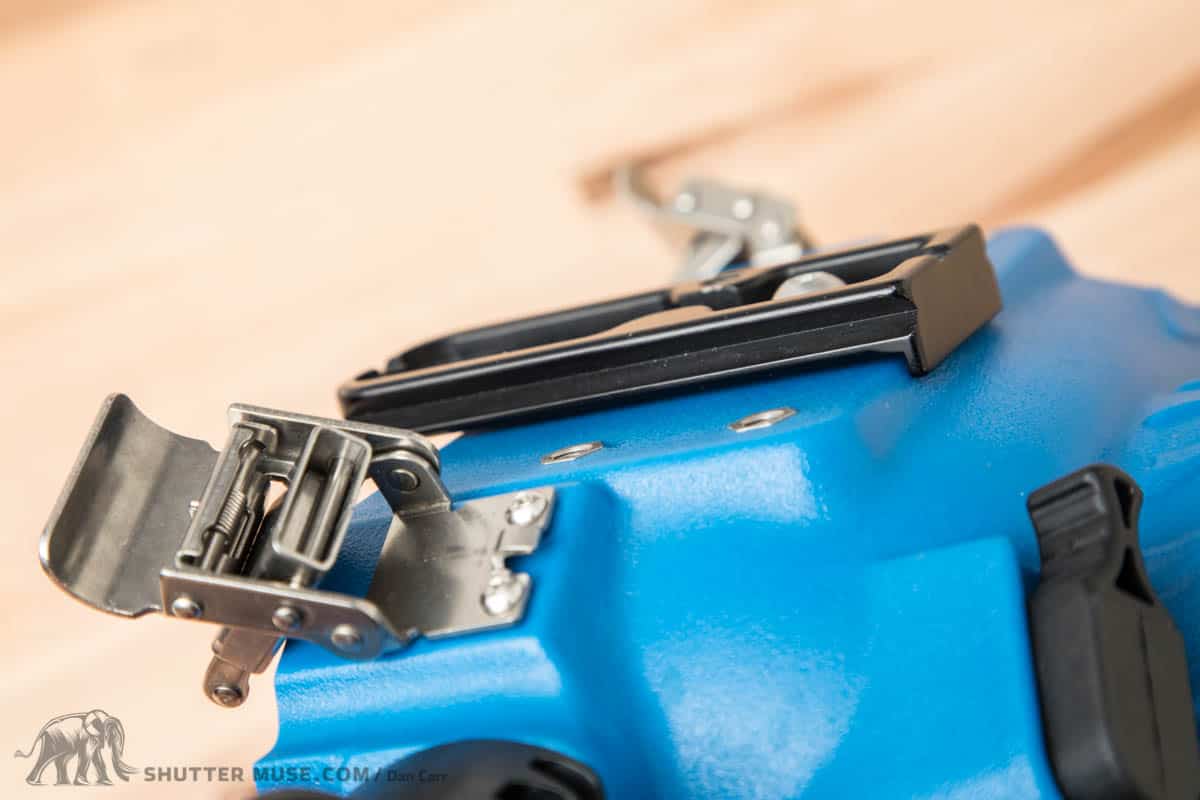
At this point you could screw it directly to a tripod, but I’m going to guess that the vast majority of people who are forking out for an underwater housing, also have some sort of quick-release clamp on their tripod. This means you’ll want a compatible plate on the housing as well. Due to the overall weight of the housing and camera combination, I found that smaller standard plates with rubberized anti-spin pads on them just didn’t cut it. I use ball heads that have Arca-Swiss compatible clamps, and I found that I needed to get a plate with an anti-twist flange on the end of it. This particular one in the photos is the RRS L85. You might also want to apply some Loctite if you don’t plan to remove the plate very often.
The addition of a tripod plate covers using the housing in landscape orientation, but I ran into issues when flopping the camera into a ball head drop-notch to put it into portrait orientation. The heavyweight of the setup really unbalances the tripod, and in some situations, you might find that the housing fouls on the tripod, limiting the range of motion. A gigantic custom L-bracket would solve the problem, but no such thing exists without building it yourself.
Below you will find several solutions for overcoming this problem.
Initial Setup Instructions for Newer Housings With 1/4″ 20 Holes

In some ways, the addition of the 1/4″ 20 threaded holes on the bottom of the newer Elite II and Base II housings has solved some problems, and in other ways, you still have the same challenge of bulk and weight to overcome.
If you want to shoot a photo in landscape orientation you can now simply screw a tripod plate onto the bottom of the housing and then mount it onto a ball head as you would with any camera. Again, I do still recommend using a large plate with an anti-twist flange like the RRS L85. But you still run into the same issues of instability when flopping the setup over at 90 degrees into the ball head drop-notch, and you’ll again find that the housing will probably contact the tripod, limiting its range of motion and your potential angles.
The Gimbal Solution
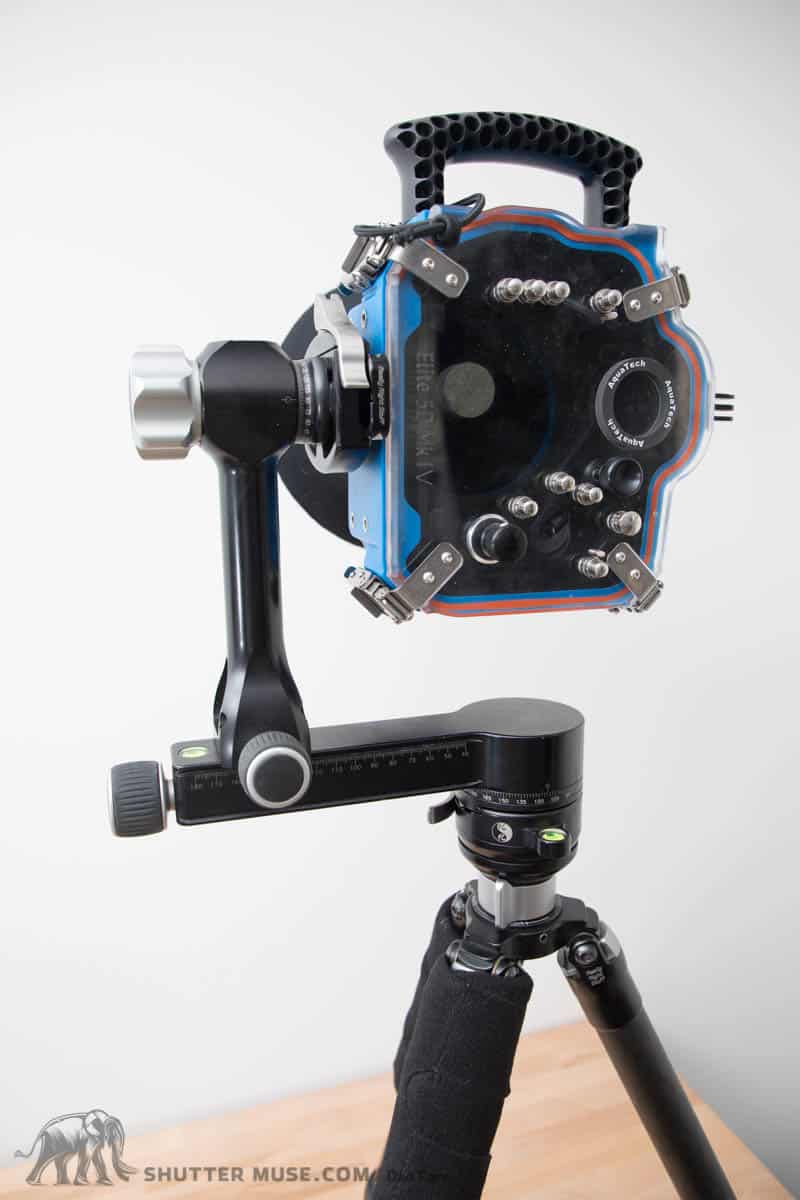
The best solution for getting the camera into a vertical orientation is to use a side-mount gimbal head such as the ProMediaGear Katana Junior Side Mount, or the RRS PG-02 (the PG-01 is simply not strong enough to handle the housing weight, trust me, I tried it). This might be seen as a costly option for such a niche purpose, but quite a few people might already own a gimbal and perhaps simply hadn’t considered this specific application. Using the gimbal keeps the weight of the camera setup centred over the middle of the tripod, which greatly increases stability.
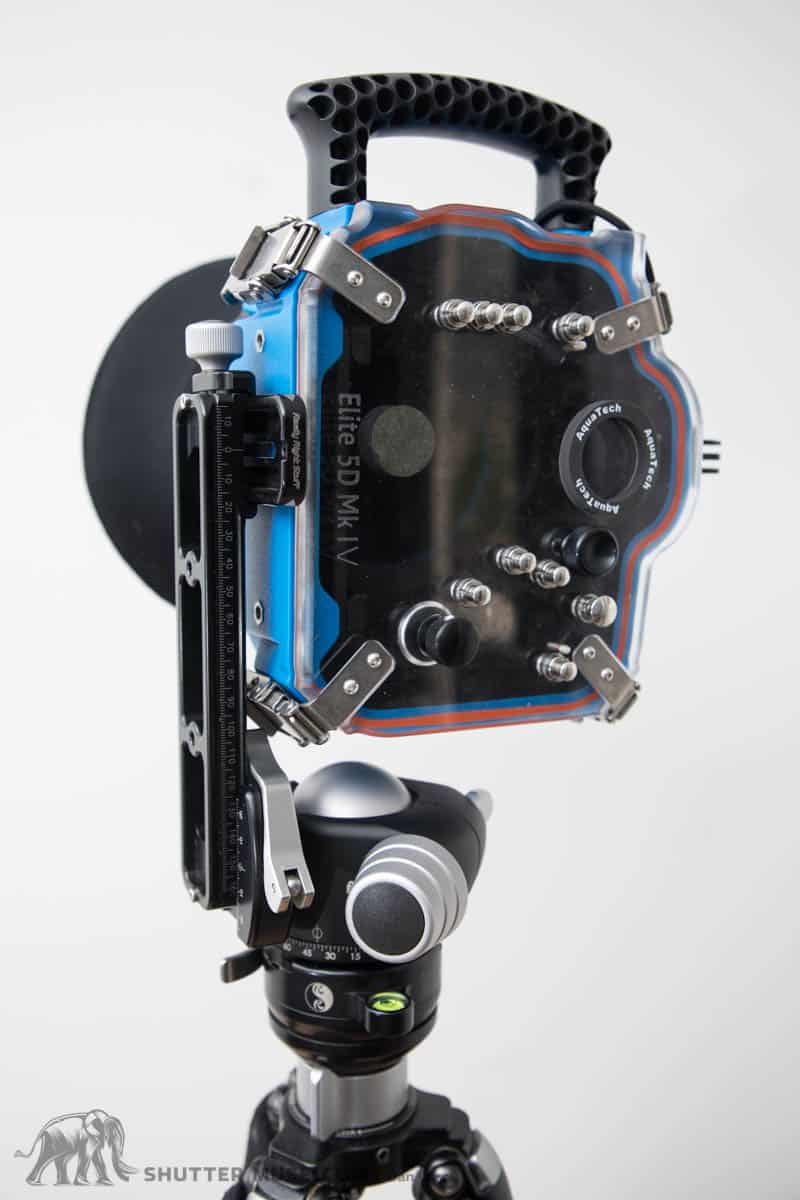
The Pano Rail Solution
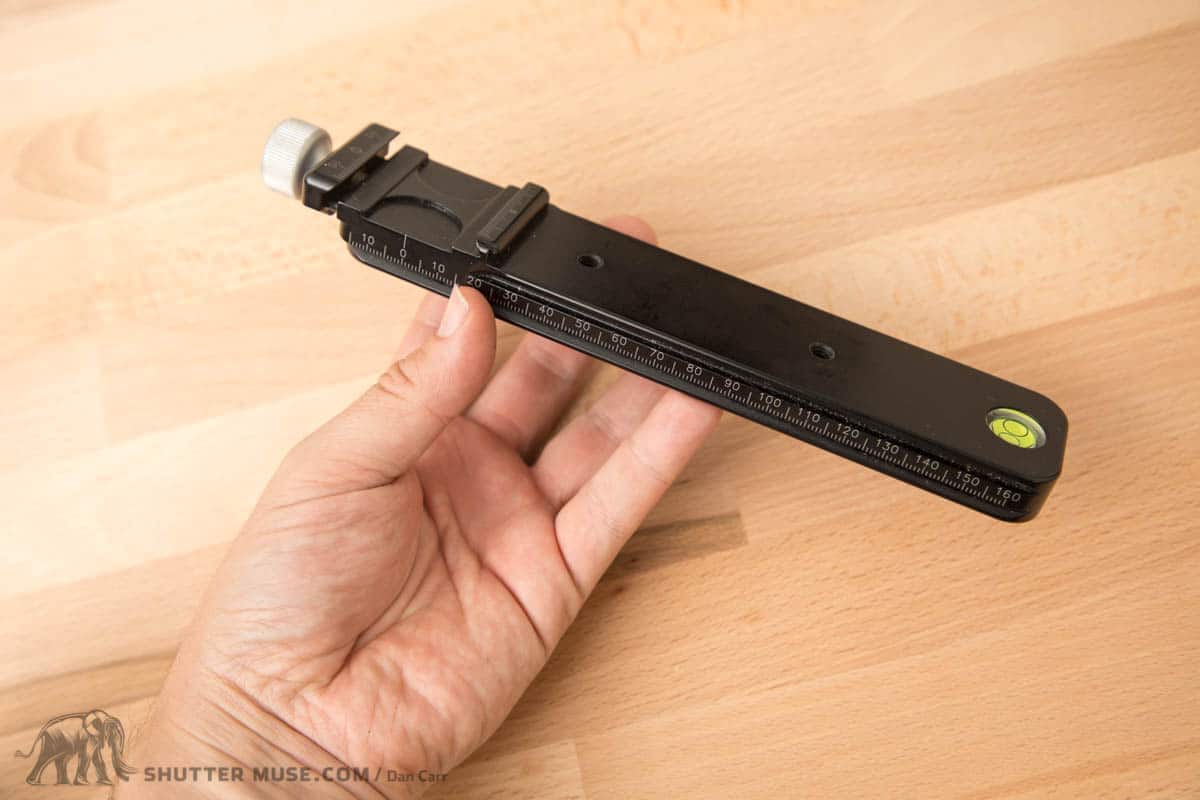
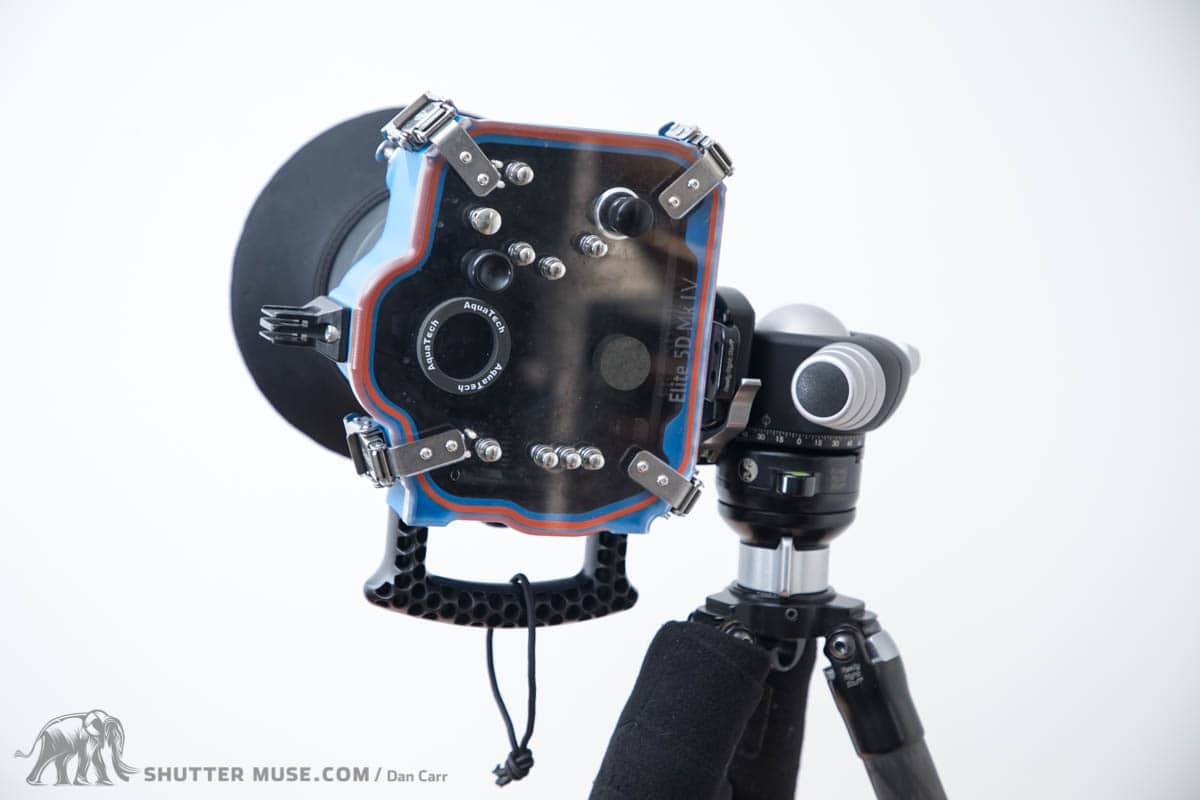
The second solution was to use a panoramic photography rail that I also had already. The rail is about 8 inches long, and it has a built-in clamp on the end of it. With the ball head in the drop-notch, the rail is simply used to raise the housing up, keeping the weight of the setup over the top of the tripod. If you don’t already own a gimbal, a pano rail like this one is going to be the cheapest solution to purchase. You can get them from various people, but mine is the RRS MPR-CL II.
Manfrotto Magic Arm Solution
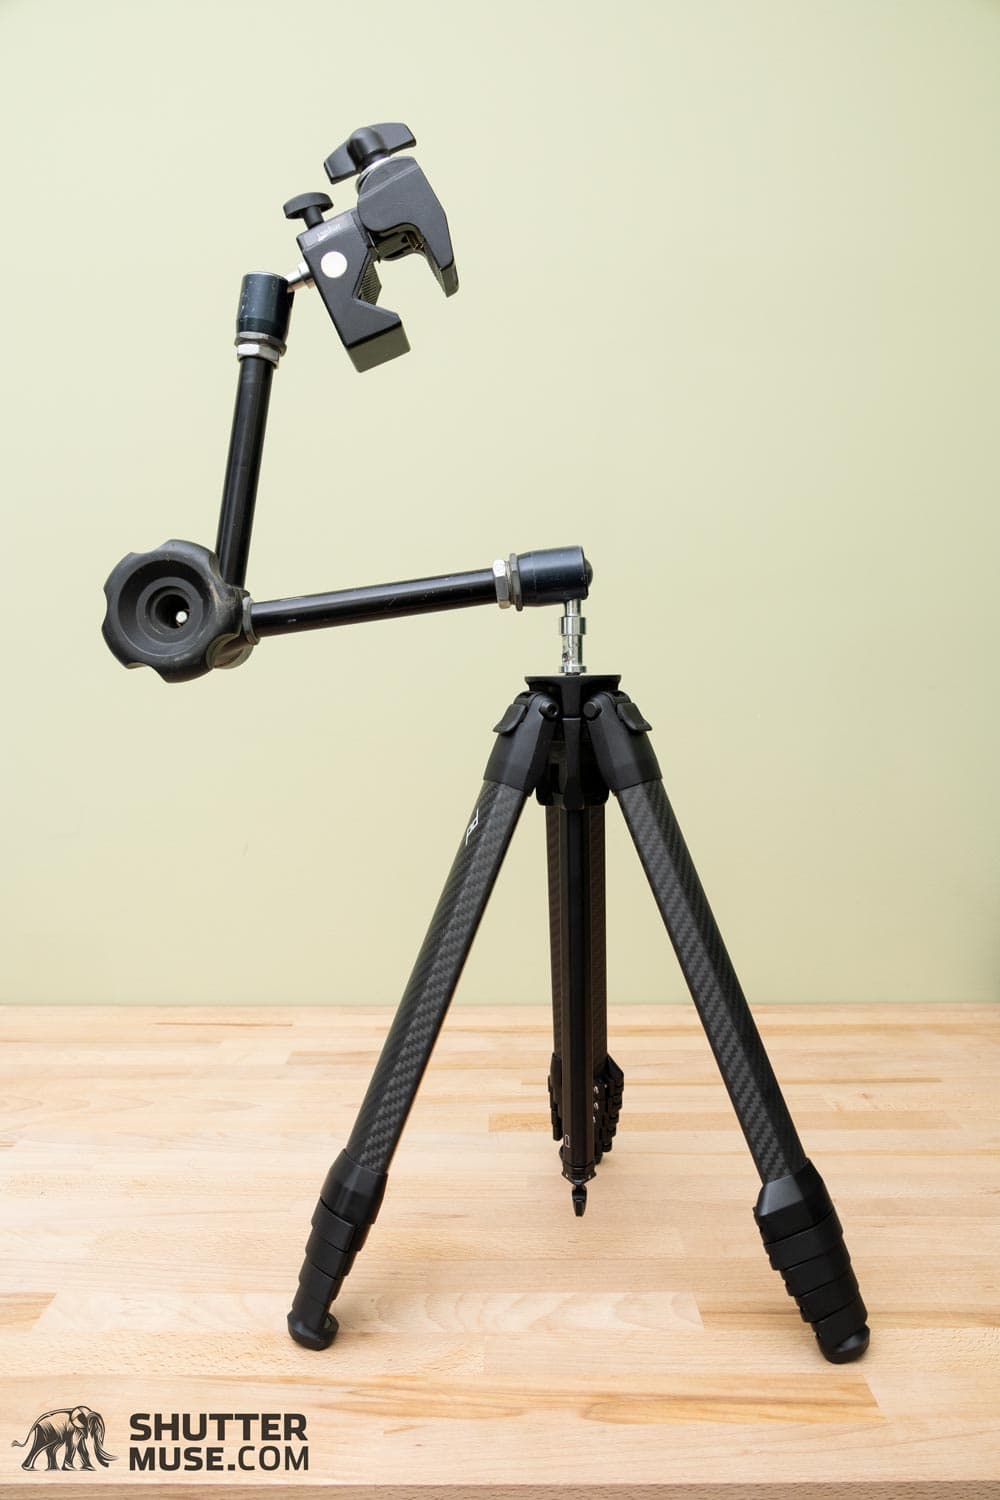
This solution has slightly limited stability compared to direct ball head mounting, but it’s still an improvement over hand-holding.
The setup requires you to purchase the Impact Pivot Arm and Super Clamp kit. Once you have that, the setup is self-explanatory when you look at the photo. One end of the pivot arm has a 3/8″ threaded hole in it so it can be screwed directly to the top of a tripod. In my case, I have it on top of my awesome Peak Design Travel Tripod in this photo, though in reality, I would use a heavier tripod in the water.
The Super Clamp on the other end of the pivot arm can be pivoted to any angle and is incredibly strong. It will easily grip the handle of your Aquatech housing, just be careful that you don’t clamp it so hard that you crush the handle.
With the Pivot Arm friction knob loosened a little, you can then reposition the arm and the camera however you like. One benefit of this setup is that you can switch from portrait to landscape orientations quickly and easily. Another benefit is that you can use the arm to very carefully adjust the vertical position of the camera while doing under/over shots. In this way, the arm is much easier than using a tripod and ball head which would usually require adjustment of all three legs to change the vertical position. Anyone who has tried under/overs will know that a tiny change in vertical position can make a dramatic difference in the image.
Conclusion
As you can see, I found a couple of solutions amongst the gear that I already owned, and I could probably MacGyver a few more together if I had a rummage in my toy box. I’m definitely not calling this the definitive list of ideas, merely divulging my own options in the hope that it sparks some inspiration for your own solution. Like I said earlier, if you do have your own solution, I’d love to hear about it in the comments below!
Gear Maintenance
It goes without saying that most ball heads are not meant to be submerged in water. Do this at your own risk, and make sure you understand they need to be thoroughly dried out afterwards, and you might need to re-lubricate them. It’s possible that you’ll end up with some water trapped in the ball of the head because they are often hollow… you have been warned! Proceed with caution, and maybe use an old ball head if you have major concerns.
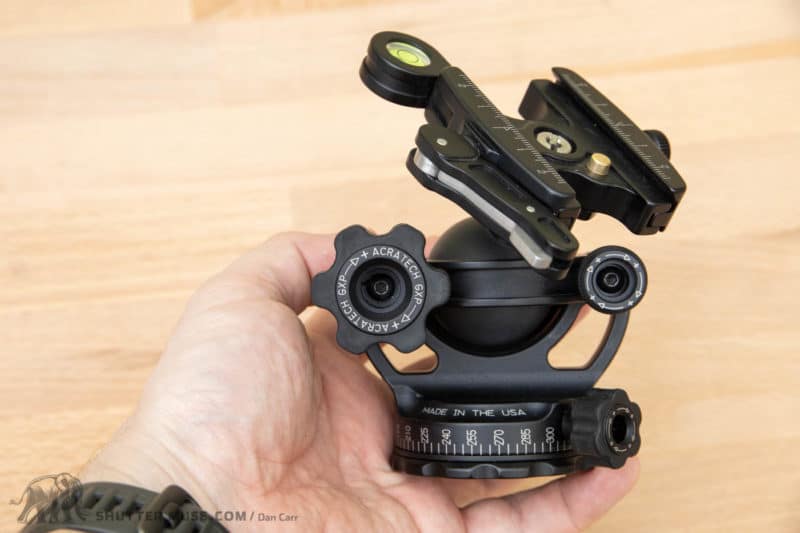
The best ball head on the market for this kind of usage is the Acratech GXP. This is the only head that I know of that has been designed to be ok getting it dunked in water, and easily cleaned by simply running it under a tap. You can read my Acratech GXP review for more info.


Just an FYI. Even after talking with Aquatech support and confirming a tripod setup was possible, I received my elite housing today and they no longer have the center socket on the bottom.
Really?? There’s literally no 1/4 20″ hole on it at all now? Did you call them? Maybe you got an oddball one?
I can send you a photo. It’s a smooth flat bottom.
Pre-sale, the customer service agent on chat told me I just needed the reducer bushing as you described in this post. After sale and receiving the housing with a flat bottom without any holes, customer service now informs me that all new housings only have the 4 m5 sized holes in the corners for the pistol grip.
They also gave me an Allen key in the box for a flat head slotted screw used on the camera plate… so there seems to be some confusion and transitions with the product design?
Yikes. I wonder why they would remove the tripod mount option. Maybe they could create a tripod mount adapter that uses the 4 grip screw holes.
B&H has exactly that but discontinued.
Just came across this looking for a base plate screw for my housing and you are a legend.
Haha, thanks Justin. Glad you found it useful.