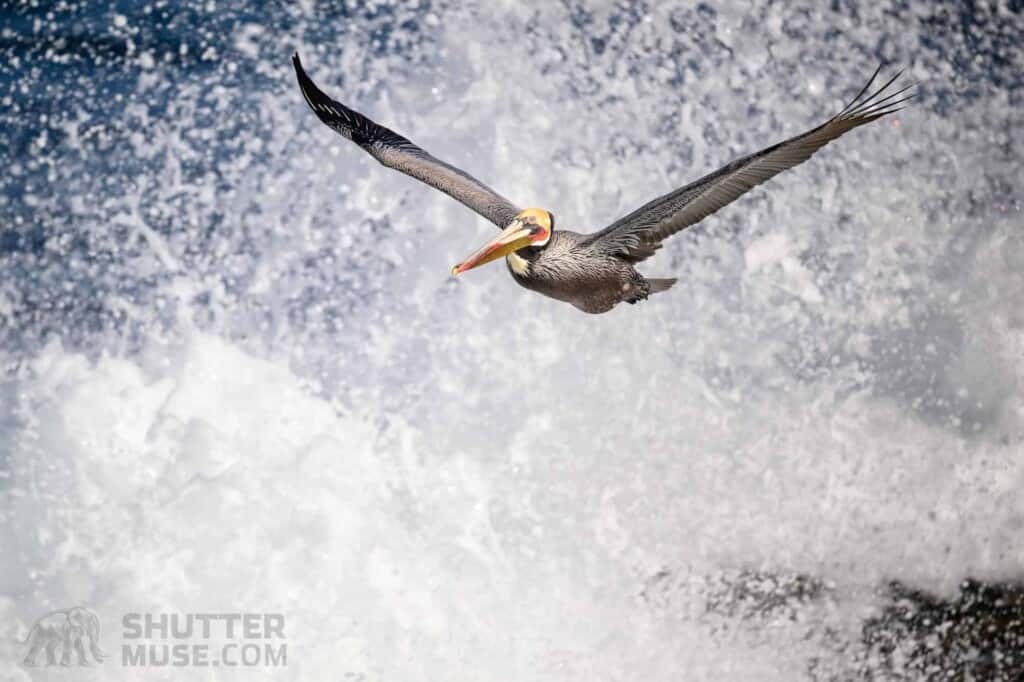
La Jolla is a seaside town on the Southern Californian coast just north of San Diego. Many bird species call this place home throughout the year, and in the winter months, the Californian brown pelicans look fantastic in their breeding plumage. If you catch just the right combination of weather, swell, and wind, the bird photography in La Jolla rivals almost anywhere else in the world.
Though you can easily get great pelican photos with a 100-400mm lens in La Jolla, those with a longer focal length telephoto lens will still find opportunities to use it. On this warm SoCal winter’s day, I switched back and forth between the Nikon Z 100-400mm f/4.5-5.6 and the incredible Nikon Z 800mm f/6.3 VR S lens attached to a Nikon Z9.
I had expected to use the 100-400mm for flight photos and the 800mm for pelican portraits and detail shots. However, on this particular day, I was also testing the new MK2 version of Really Right Stuff’s PG-02 gimbal head for review. To get a sense of how smooth the new gimbal was, I started using it to track the soaring and swooping pelicans with the 800mm, and before I knew it, an hour had been well spent and there were a few new keepers in my archive. The icing on an enjoyable flight photography session was to finally get a pelican flying past when a wave crashed on the rocks behind it.
The combination of the Z9 and the Z 800mm lens continues to impress. It’s a remarkable lens for an unheard-of price. Sure, it’s a little less flexible than the Nikon Z 600mm with its built-in 1.4x extender, but the 800mm is well under half the price and lacks nothing in the sharpness department. To put real numbers on that for more perspective, the Z 800mm currently sells for $6499, while the Z 600mm is $15499. I never thought I’d see the day where $6499 could be considered affordable, but I think this lens will tempt many people.
As I often do when shooting wildlife, I used manual exposure with Auto ISO. This allowed me to set my aperture to its widest option with my front dial and then alter my shutter speed as necessary with the camera’s rear dial, with the camera handling the choice of ISO between my specified upper and lower parameters. This setup is particularly useful in locations where you constantly switch from action (flying) shots to static portraits. When something lands nearby, you don’t want to shoot a portrait at the shutter speed you used for your flying shots. That would cause an unnecessarily high ISO to be used. With this exposure setup, you rotate your shutter speed dial to make the adjustment, and the aperture setting will remain untouched. Auto ISO takes care of the rest.


really enjoy your staff Dan, intending to invest more and more in photography gear, I would like to become full time photographer but I don’t know what would be the steps for it… any material in this direction pls?
Thanks for the kind words. This isn’t a topic I have covered in great detail on the site. Perhaps something for the future. I base a lot of my content off questions people ask me, so I will keep this in mind.
Hi Dan: what were your specified upper and lower ISO parameters for the Californian brown pelican? Thanks, Loch
Lower would have been ISO 100. The lower the better, without going into expanded ISO values. For the Z9 I would have set ISO 12,800. But this is a very personal choice. Every camera I use is different. On the Z9, 12,800 is the top of my comfort level. Of course, in bright sunlight, the camera isn’t going to come anywhere near 12,800 anyway, but I don’t tend to change these things once they have been set. That’s the beauty of manual exposure with Auto ISO.