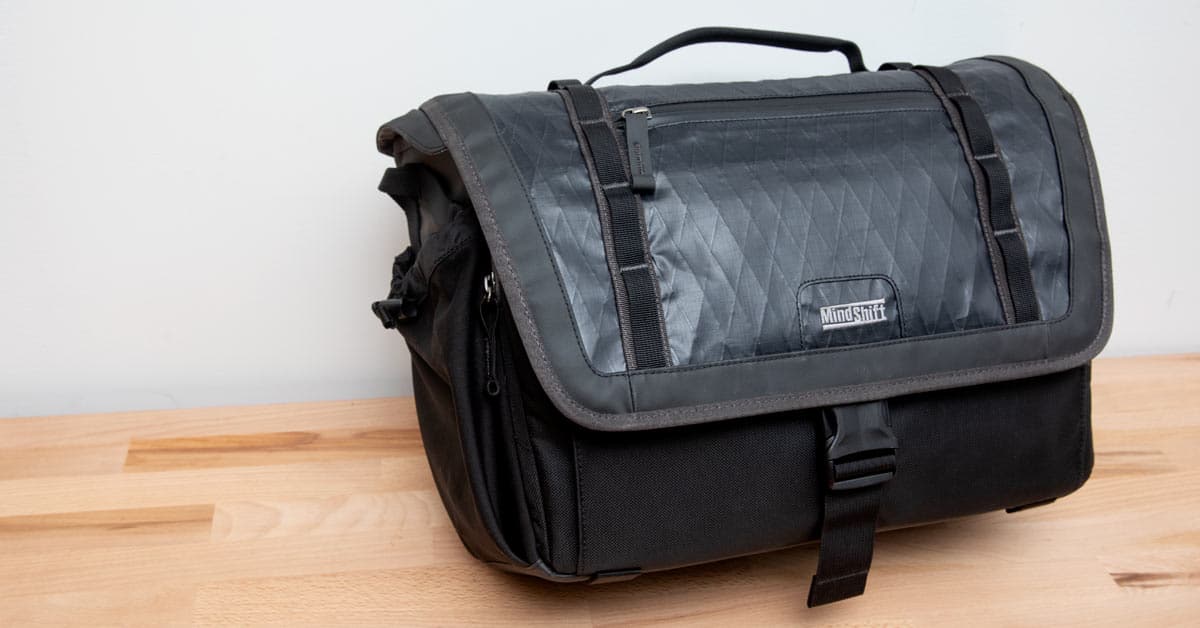
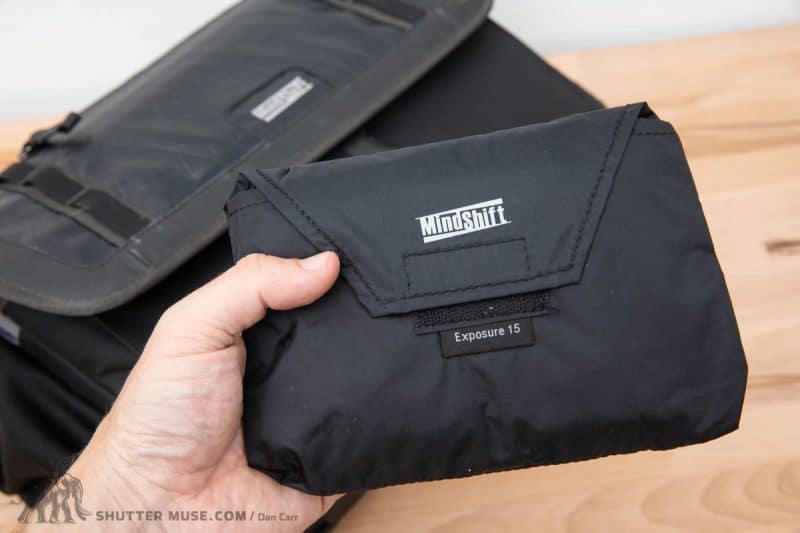
The MindShift Gear Exposure shoulder bag is a rugged camera or laptop bag for outdoor photographers that’s available in two sizes, designed to hold up to a 13″ or 15″ laptop. The Exposure is the first shoulder bag to come out of Think Tank Photo’s MindShift sister company, and the rugged styling and waterproof materials immediately flag this as a bag for the more adventurous photographer. If you already own one of MindShift’s popular outdoor photography backpacks, the Exposure might just be the companion bag you’ve been waiting for.
Table of Contents
MindShift Gear Exposure Bag Specifications
MindShift Gear Exposure 13
Exterior Dimensions:
16.1” W x 10.6” H x 6.5” D
(41 x 27 x 16.5 cm)
Interior Dimensions:
13.8” W x 9.1” H x 4.9” D
(35 x 23 x 12.5 cm)
Weight:
2.6 lbs. (1.2 kg) – With all accessories included
MindShift Gear Exposure 15
Exterior Dimensions:
17.3” W x 12.2” H x 7.1” D (44 x 31 x 18cm)
Interior Dimensions:
15.7” W x 10.4” H x 5.1” D (40 x 26.5 x 13cm)
Weight:
3.0 lbs (1.4 kg) – With all accessories included
Thoughts On Carrying Capacity
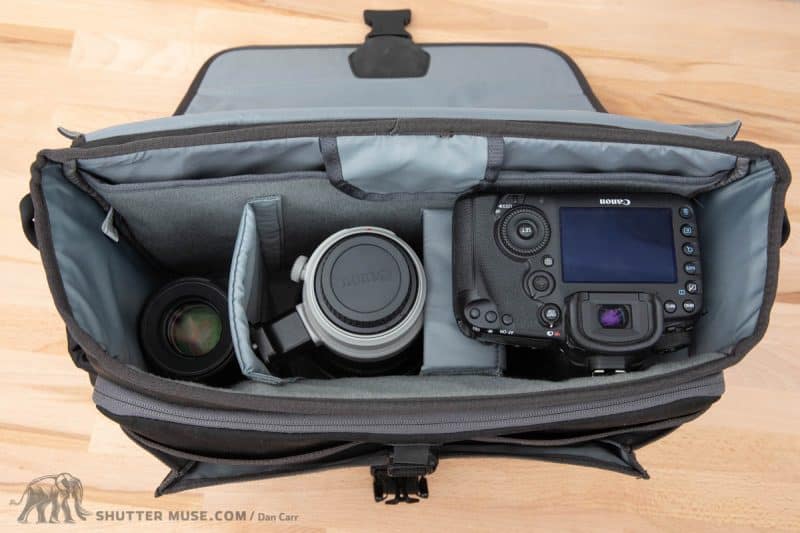
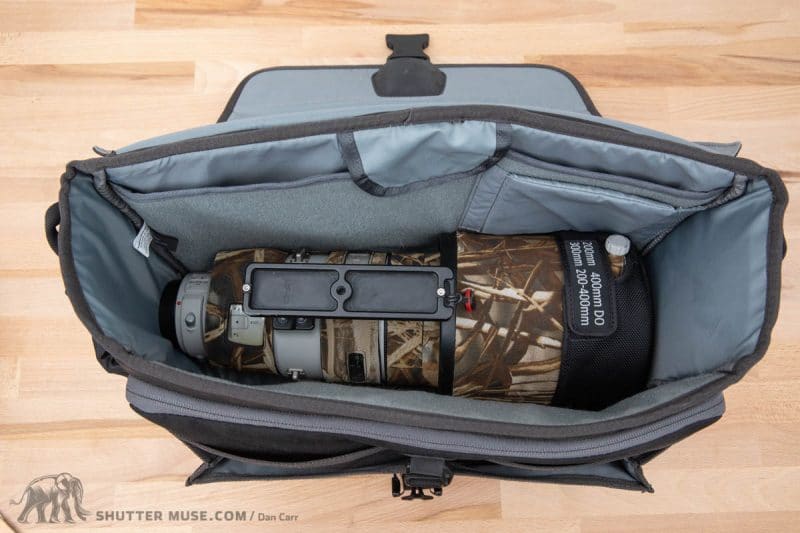
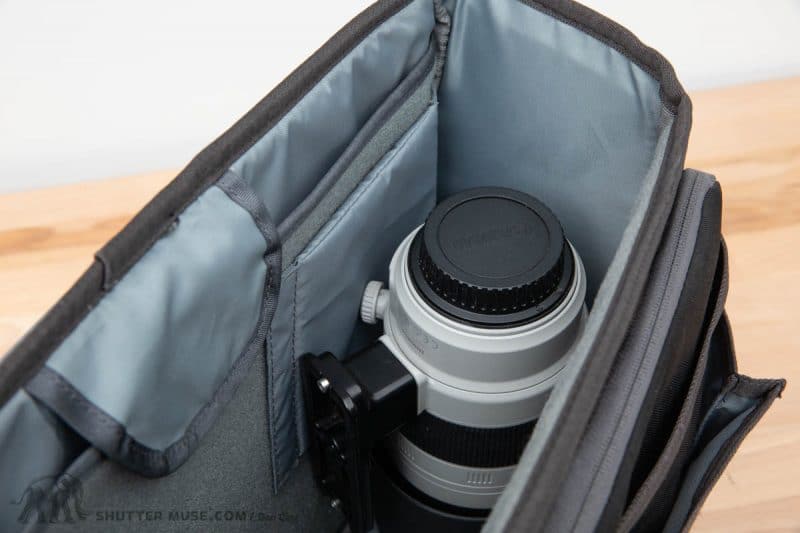
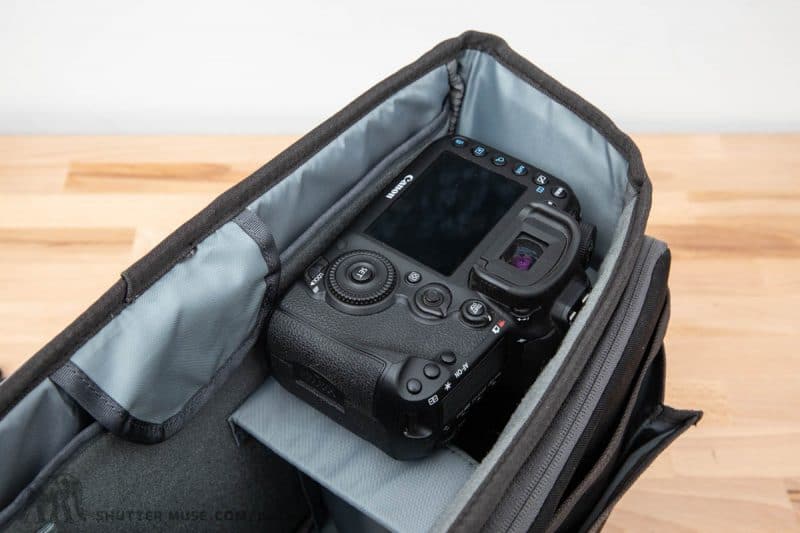
The bag that I tested was the larger Exposure 15, so keep that in mind when you are examining the photos on this page. The Exposure 15 is designed to fit one ungripped body with a 70-200 f/2.8 attached, and then 2-5 additional lenses plus accessories, a tablet and a 15″ laptop. The smaller Exposure 13 will hold an ungripped body with a 24-70 f/2.8 and 2-3 extra lenses, a tablet, accessories and a 13″ laptop. The Exposure 13 is tall enough to stand a 70-200 or a 100-400 up in it vertically when it’s not attached to a camera.
When you use this bag it’s immediately clear that this is a camera bag with a slot for a laptop, rather than being a laptop bag that can also carry some camera gear. The vast majority of the bag’s useable internal space is concentrated in the central camera section, with very little additional volume available in the front pockets or the rear sleeve. This is great if your primary goal is to carry a camera and lenses, but not so great if you want to carry a lot of smaller camera, laptop and travel accessories. During my testing period with the Exposure 15 I took it on about 8 flights where I used it as my ‘personal item’ alongside a larger backpack that was my main carry-on. My cameras and lenses went into the backpack, and smaller accessories, hard drives and laptop related gear went in the Exposure 15. What I found was that I really needed to make use of several smaller cable organizer bags to keep things better organized internally. If I didn’t do that, I just ended up having to dig through everything to find things that had sunk to the bottom because accessory organization in the Exposure bags feels a little limited.
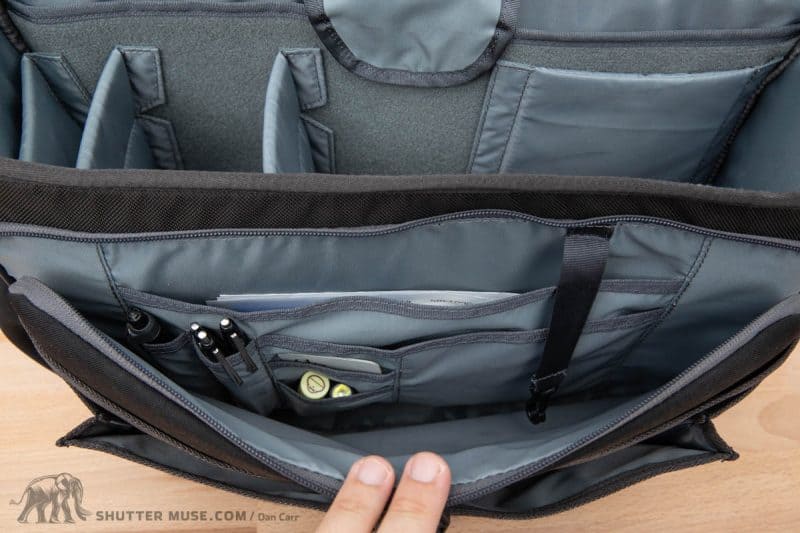
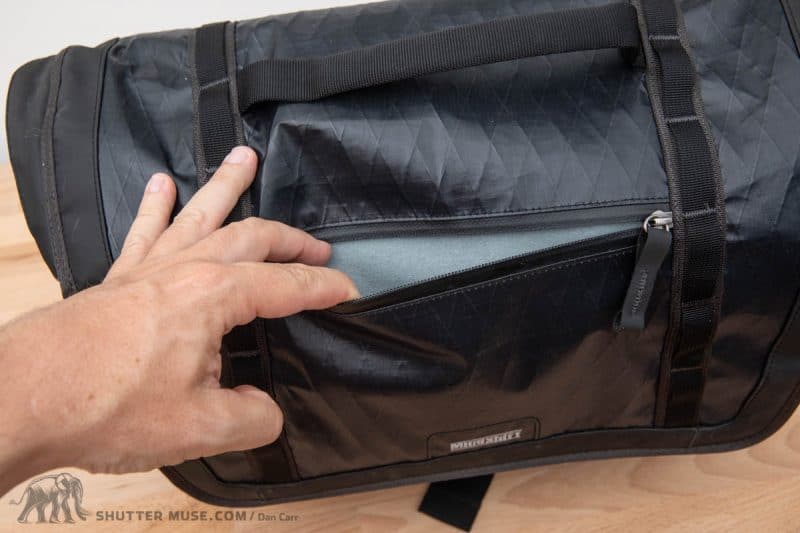
Whilst there is a front zippered pocket with little sleeves for a few pens, a tablet and a notebook, the zippers on the side of that pocket don’t reach down far enough to really open the pocket up to see deep inside. Small items have a tendency to get lost in the bottom there, and there’s very little room at all in the front pocket for anything more than those few flat items and a couple of USB cables. Frankly, I kept wishing it was bigger and gusseted in some way to allow it to expand with some bulkier items that I felt needed to be zipped away for safety.
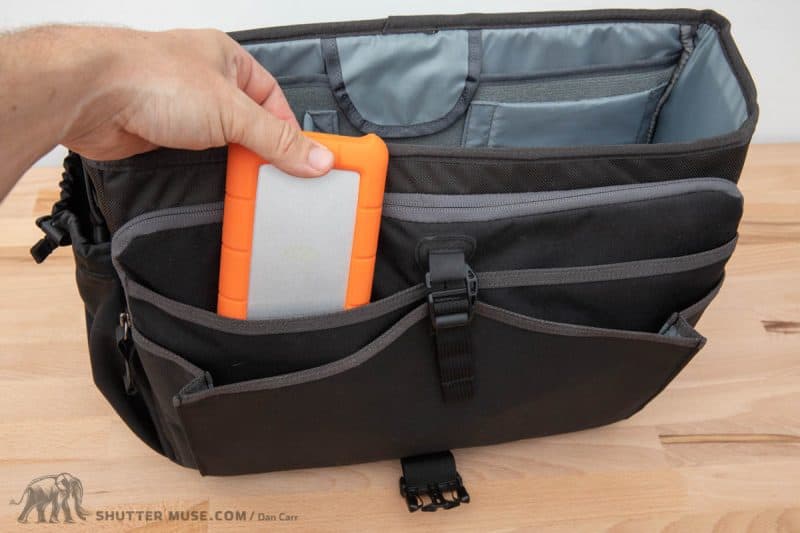
Moving forward from the zippered pocket, there’s a pair of simple sleeves that don’t have a zipper. These are sized to hold a couple of hard drives, and they’ll comfortably fit even the bulkiest rugged-style drives like the LaCie Rugged series. Whilst it’s nice to have these pockets, their usage is somewhat limited to big bulky items that are either a hard drive or something similar in shape. Due to their depth, and the dark material, anything smaller that you put in there will be tough to find. I would have preferred it if these pockets had been combined with the zippered pocket to allow more security for the drives.
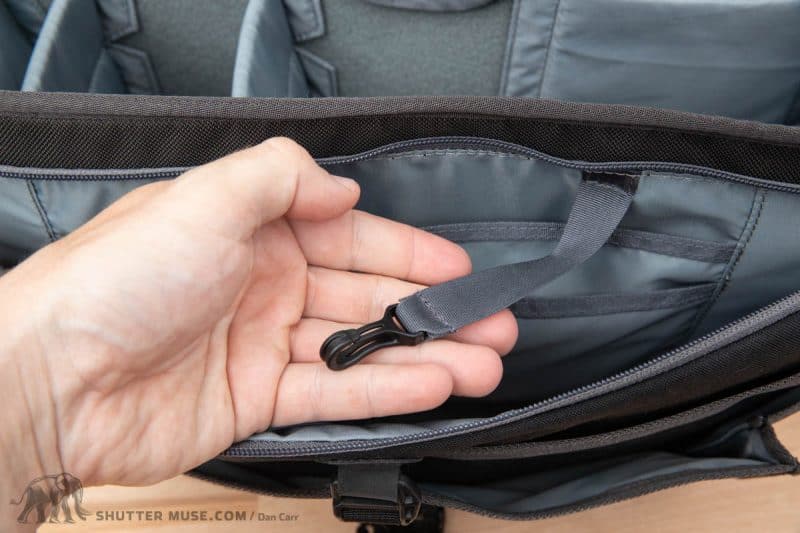
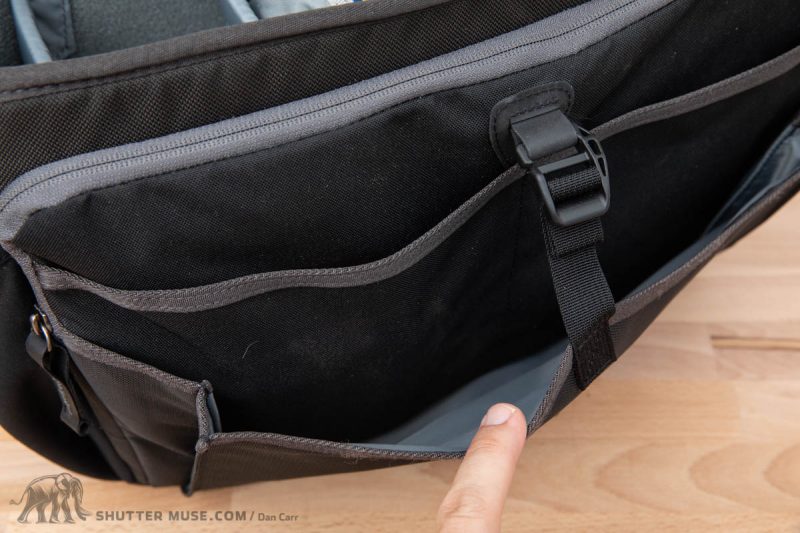
Moving forward from the two sleeves there is a further expandable pocket that can be used for chunky items such as a flash, a filter case or a rain jacket. This pocket has a clever strap on it that you can cinch down to compress things and keep the contents held firmly in place.
One thing that you should be aware of when considering how you might use this bag, is the fact that it is rather large for a shoulder bag – especially the Exposure 15. If you plan on flying with the bag as your personal item, you’re going to need to limit how much gear you put in these front pockets otherwise you’ll surely push past the dimensional limits that are allowed by airlines for the personal item. In the process of this review I checked a few airlines and the bag barely sneaks under the dimensional threshold when there’s nothing in the front pockets whatsoever. If you put some hard drives in those front sleeves, and a flash in that expandable front pocket you can forget about being able to squeeze it in the the personal item cage at the check-in counter, or under the seat in front of you on the plane. Of course, it does fall well within the limits for your main carry-on item, so if that is your plan then go right ahead and load it up! Just be aware that if it’s your personal item, you’re going to want to tighten everything up and make it look small.
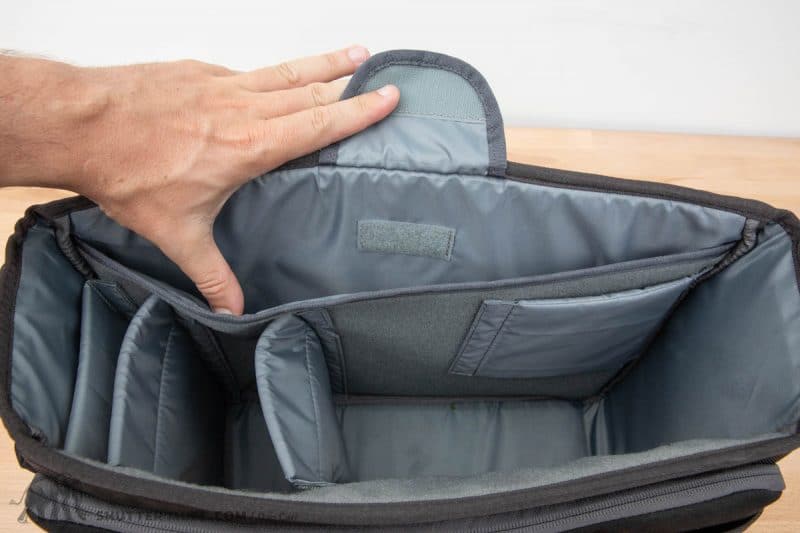
Whilst there are some organizational limitations with the bag and smaller items, it really shines when you just want to use if for the big stuff like camera and lenses. Once I reached my destinations with the bag, I’d often throw some lenses in it and a camera body when I didn’t want to use my large primary backpack. When you do that, the huge central section of the bag just swallows things up, and the generous collection of internal dividers allows a lot of options for separating and organizing lenses. After my first trip with this bag I realized that I almost always travel with a laptop bag as my personal item, and that bag stays as a laptop bag for the whole trip. What was new for me with Exposure 15, was that I suddenly found myself on location with a second camera bag! When I didn’t want the large backpack, I now had an excellent shoulder bag that was built just as tough as my MindShift backpacks. One day I’d be using it to take my laptop to a local coffee shop to do some emailing, and the next day I’d be using it to carry a 400mm lens through the snowy wilderness of Canada’s Yukon territory. That versatility was a real revelation for me, and I hadn’t expected to use the bag in that way. When I was first shown a prototype of the bag many months before its public release, I thought it looked like an awesome and welcome addition to the MindShift lineup, but I really just had it pegged as a laptop bag and it turns out I was very wrong about that.
More Features and Details
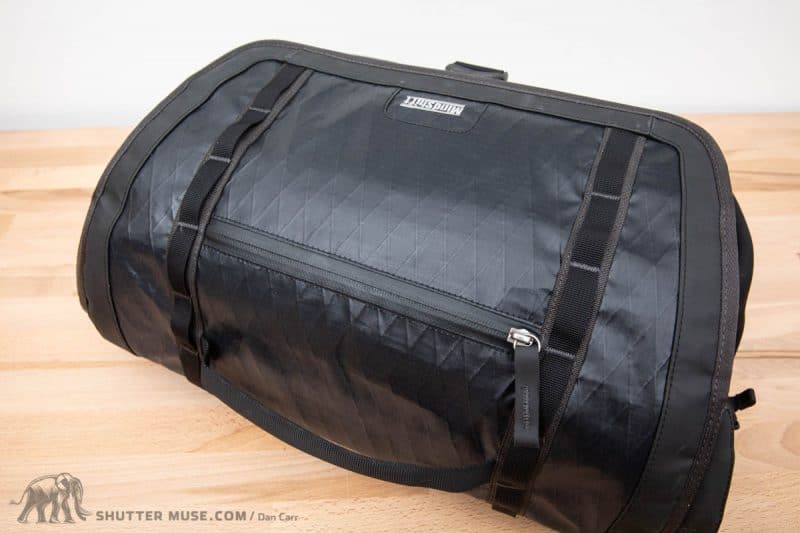
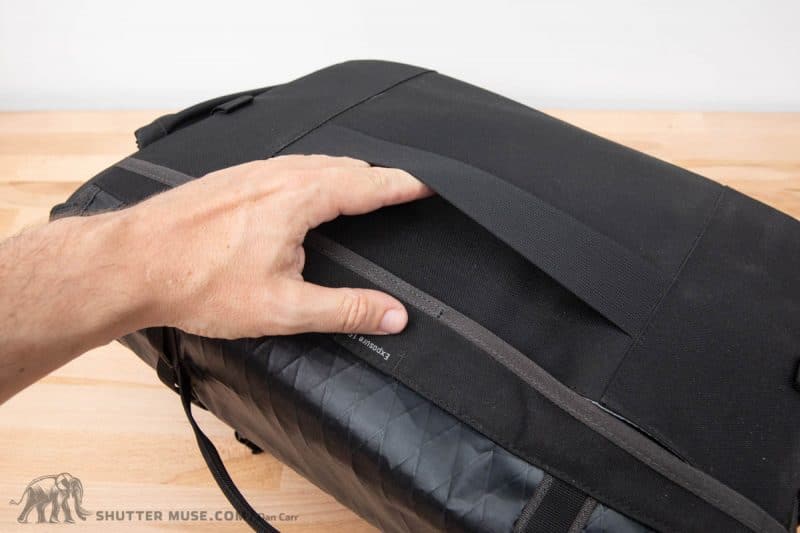
The style and design of the bag is dominated by the huge flap that covers the top and front of the bag. This flap is made from waterproof sailcloth material which is also extremely abrasion and tear resistant. This rugged design is continued throughout the bag, with a couple of small flaps on the side of the lid that prevent water from getting into the bag’s main compartment, a waterproof TPU base and a seam-sealed zipper on the front accessory pocket. If you still don’t feel confident in a downpour, like all MindSift bags, the Exposure comes with a fully waterproof rain cover.

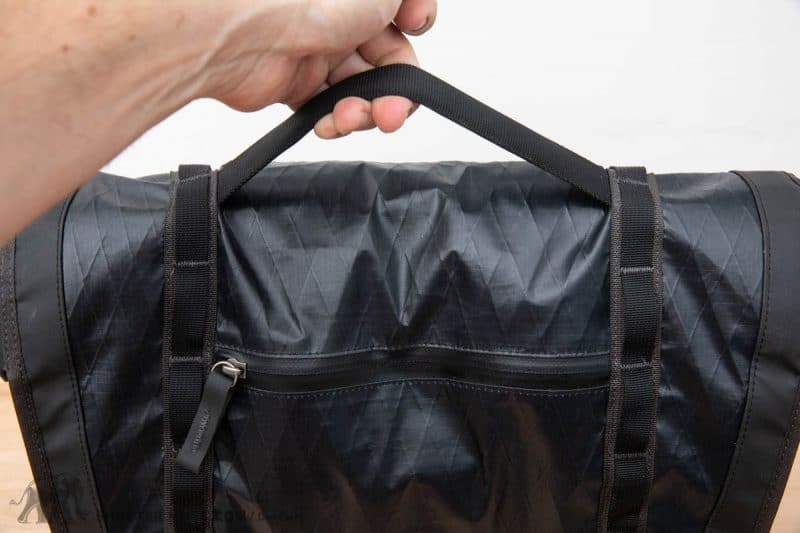
On the back of the bag there’s a passthrough for the handle of a roller bag, and also a pocket that’s suitable for relatively flat items such as a magazine or documents. In keeping with the overall theme of the bag, this document pocket has a flap over the top of it to give its contents some protection from the elements. I mostly ended up using this pocket to store the bag’s included rain cover, and maybe some reading material for my flights. Coming back around to the front of the bag, the zippered pocket on the lid is lined with a soft material to protect your phone, although for me the most natural thing to want to put into that pocket was my passport and boarding passes while I was travelling. For that purpose, the pocket really could have done with being an inch wider as I always ended up bending and sometimes tearing my boarding passes while I was constantly getting them in and out of the pocket as you work your way through the endless security checks. The other negative aspect that I found with that front pocket was that it can’t really be opened if you are holding the bag by what I would call the “briefcase handle”. It’s fine if the bag is over your shoulder with the shoulder strap, but if you are carrying it like a briefcase with the top handle, the whole top flap of the bag gets distorted in a way that prevents the zipper from being opened. When constantly picking the bag up, and putting it down again while travelling, I often grabbed it by the top handle only to have to put it down on the floor to open that zippered pocket. A zippered pocket on the flap is no doubt useful, but I feel this is an area of the bag where the functionality could have been improved.

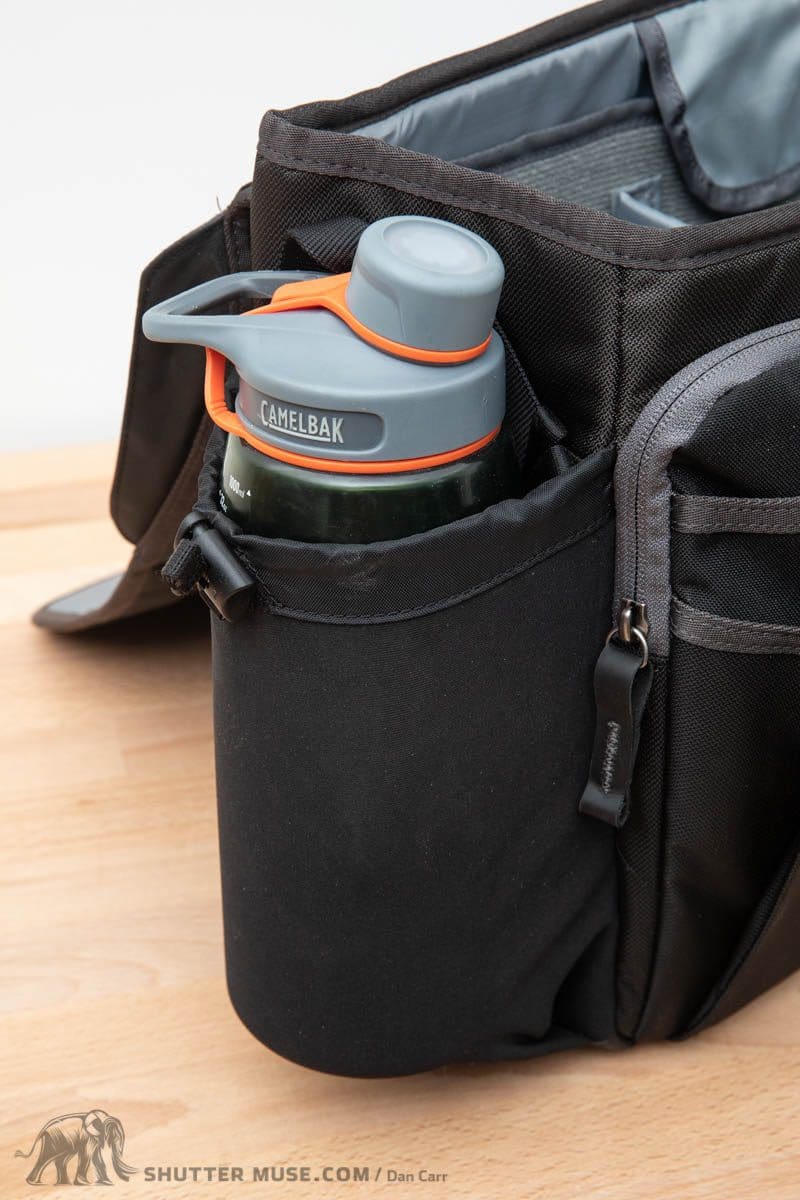
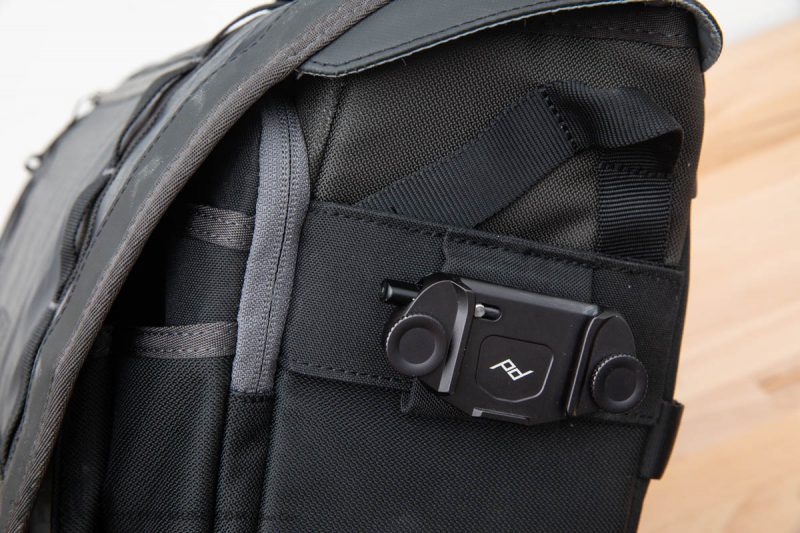
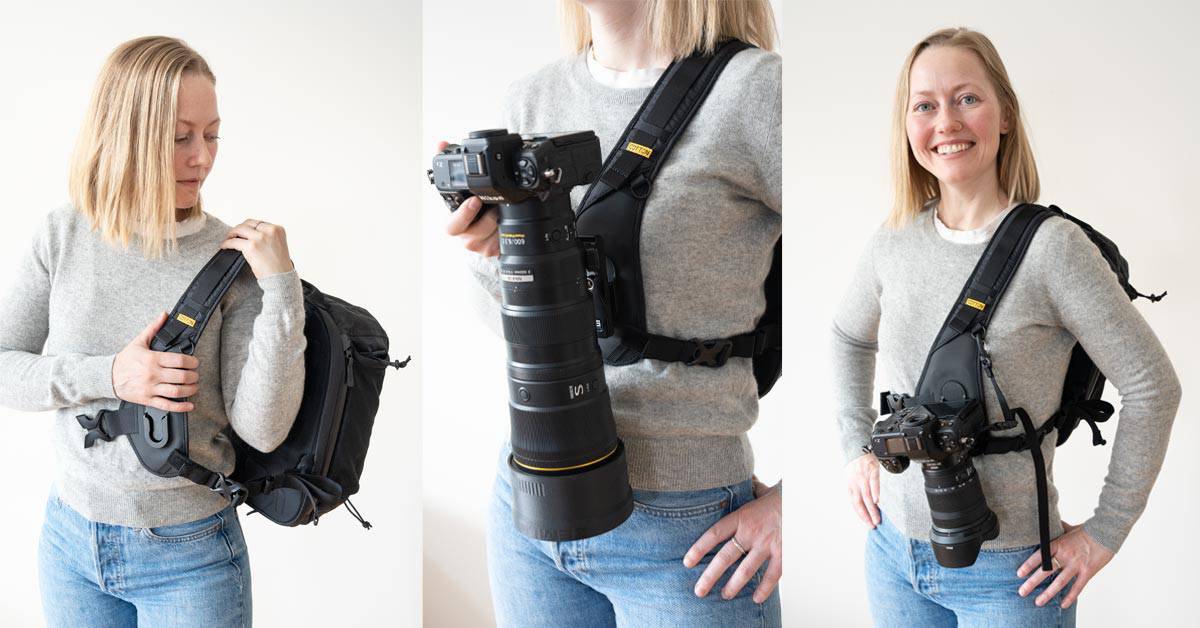
Moving around to the sides of the bag you have a very generously sized water bottle pocket, and a clever rail on the opposite side that can be used with a Peak Design Camera Capture Clip (read my review) or a SpiderLight Camera Holster. I’m a pretty big fan of the Capture Clips so I really love this feature. Peak Design include the same feature on their own shoulder bags, but I thought it was cool to see MindShift embracing that and providing it for their customers as well. When I tested it out, one thing I did find is that you have to think about the bag’s overall balance when choosing what gear you can put comfortably on the Capture Clip. It’s likely non-issue for lightweight mirrorless users, but if you hang a bigger DSLR on the clip while the rest of the bag is relatively empty, it unbalances things in an awkward way. You need a bit of weight in the main part of the bag itself to keep things balanced, whether that’s a laptop or another couple of lenses.
For carrying a tripod the Exposure comes with a pair of accessory straps that can be used on the bottom of the bag. I’ve seen this offered on many bags before and I’ve never used them once. I personally don’t want to put my expensive carbon tripod on the base of my bag where it would get scuffed up and covered in dirt every time I put the bag on the ground. I don’t think any shoulder bag has ever offered a genuinely good way to carry a tripod, so this isn’t really a negative against the Exposure bag itself. If that’s the kind of bag I’m choosing to use then I simply accept that the tripod is going to be carried in my hand or not at all.
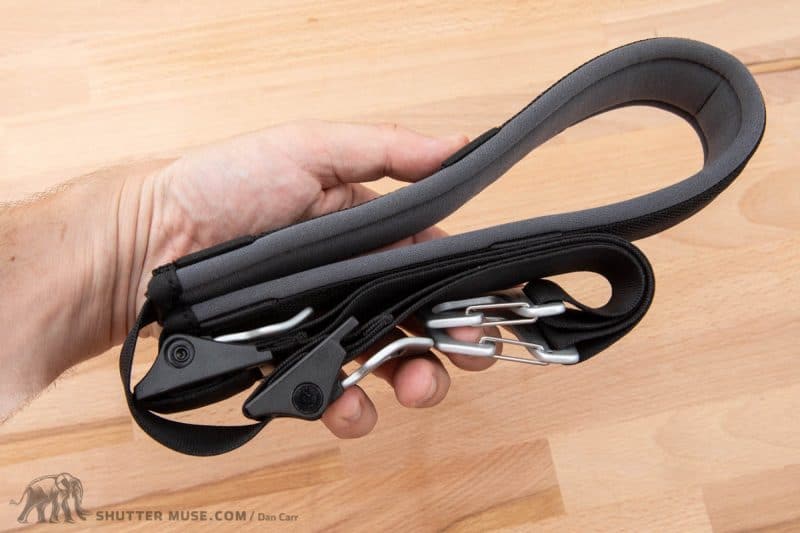
Now we get onto the carrying system for the Exposure, and I think I saved the best thing for last. The strap for this bag is, in my opinion, as perfect as you can make a strap for a shoulder bag. As I have mentioned on a couple of occasions, this is a big bag, so it’s capable of carrying a lot of weight. You need a well padded shoulder strap, but you also need one that isn’t too big and bulky because those are tough to move around when carrying the bag in a messenger style and trying to swing the bag around to access gear. It also needs to offer grip, but not so much grip that it twists all your clothes around when you move it around your body. And finally, it needs to be quickly adjustable, and the adjustment mechanism needs to be strong enough to deal with the weight of a potentially very heavy bag. With this shoulder strap you can check all those boxes, and you can also add to it the fact that there’s an included cross- body stabilizer strap. The stabilizer can be completely removed if you don’t need it, but if you’re using the bag on a more active adventure then it helps to stop the bag moving around.
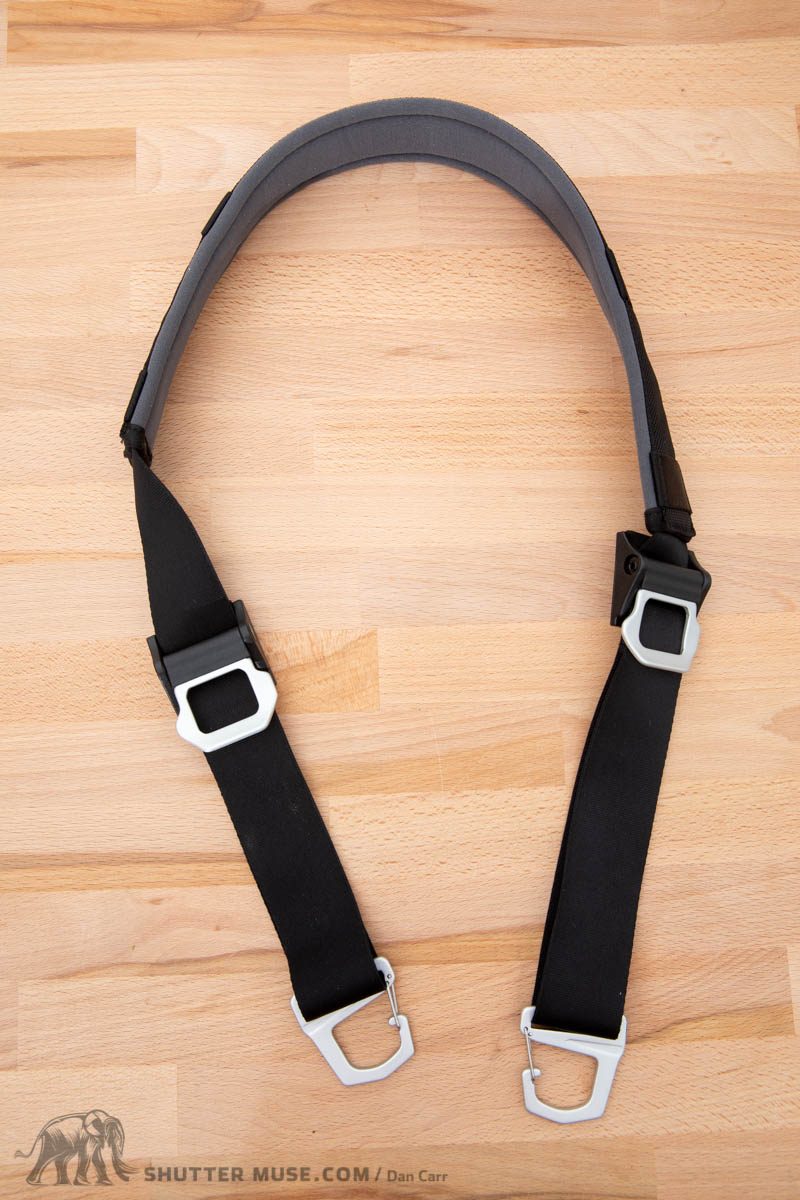
To adjust the length of the strap and reposition the bag, just grab the silver spring loaded buckle and give it a good pull upwards to shorten it. The teeth from the buckle disengage from the strap once you get it to about 90 degrees, so lengthening it is simply a case of holding the buckle outwards away from your body and letting the bag pull itself down. There are two of these buckles, so it doesn’t matter whether you wear the bag on your left or right shoulder, there will be one at the front. When you play around with this to lengthen and shorten it, you’ll find that it carries best when the strap is a little shorter, but it’s easier to work from when the strap is lengthened. You’ll also notice the other awesome feature of this shoulder strap as you do that, and this is the huge length of the neoprene padding on the strap. Unlike most shoulder bags that have a small padded section, the padding on this strap is about 16 inches long. It means that it really doesn’t matter how you carry the bag, there’s always padding in contact with your shoulder. I’ve never seen such a large padded area before! The final detail of the strap is the metal carabiner style clips that attach it to the bag. I think they look awesome, and really tie in nicely with the rugged styling of the bag. It also means that you can remove it and put it on other things that don’t have such a great strap! Seriously, it’s that comfortable that you will want to do that.
Alternative Options
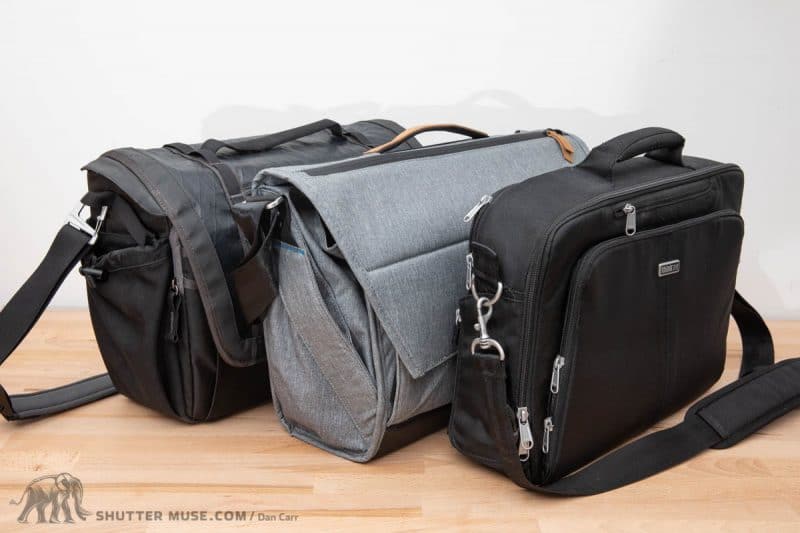
Before the Exposure 15 arrived, my go-to laptop bag was the My Second Brain Briefcase 15″ from Think Tank Photo, but this has sadly been discontinued. If you want a Think Tank laptop/camera shoulder bag, the best options now are the Retrospective 30 for 15″ laptops, and the Retrospective 7 for 13″ laptops. They have a roughly comparable internal volume to the Exposure series bags.
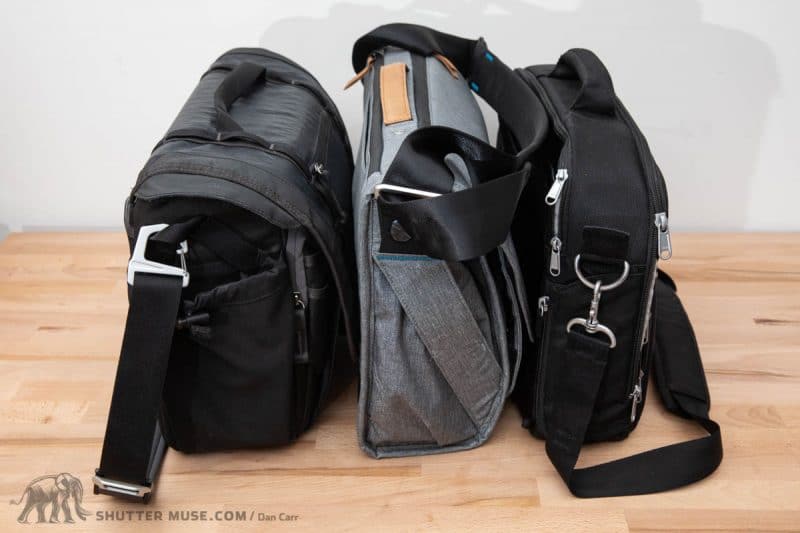
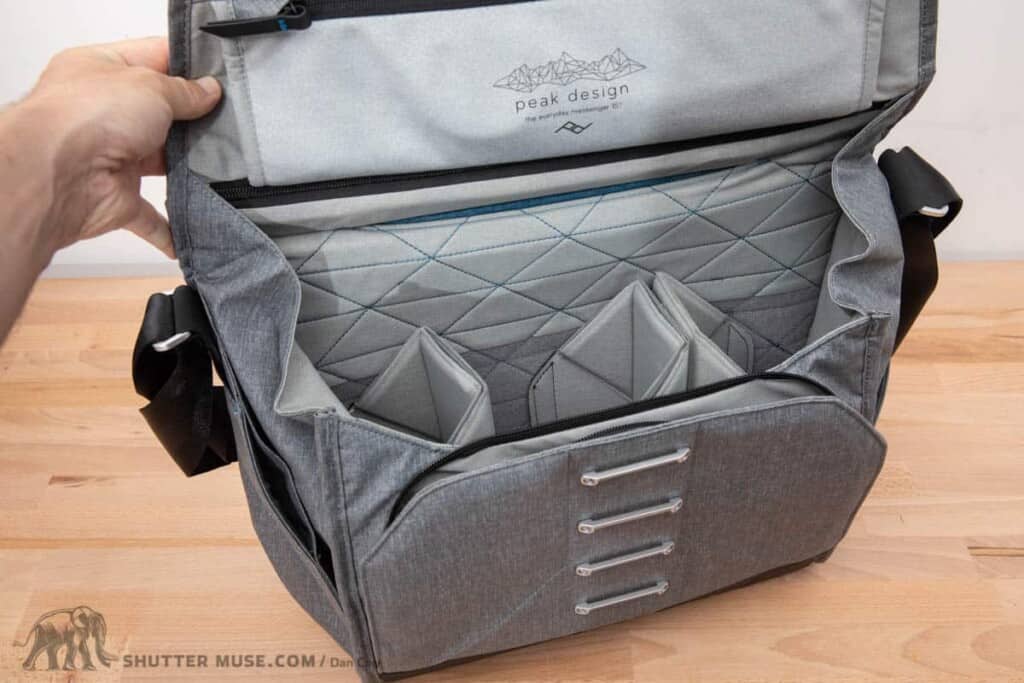
Another great option you can take a look at is the Peak Design Everyday Messenger. In terms of camera capacity, it’s a little smaller than the Exposure bags and at $220 it’s also a lot more expensive than the MindShift option. The materials and internally quilted construction of the Peak Design bag feel more luxurious and expensive, but the design is also more eye catching and that isn’t always a good thing if you travel to some parts of the world. Personally I do love the smart look of this bag though, and they are incredibly well constructed which gives you the feeling that it will be with you for a lifetime of adventures. In terms of carrying comfort, if you really fill this bag up with heavy camera gear it’s definitely not as comfortable to carry as the MindShift Exposure bag, so I’d recommend the Everyday Messenger for lighter camera carrying duty such as lightweight DSLRs and mirrorless systems.


Conclusion
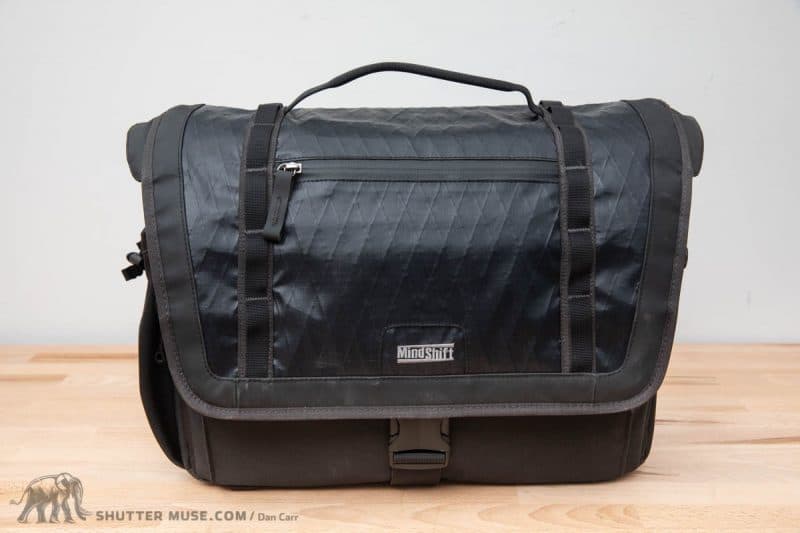
If you’re looking for a rugged shoulder bag that can pull double duty as a camera bag or a laptop bag, you wont be disappointed in the MindShift Gear Exposure. Thanks in large part to the fantastic shoulder strap that they have chosen for this bag, it’s incredibly comfortable when loaded up to the maximum capacity. Whilst I’m not a big fan of the lack of space in the front organizational pocket, there’s so much room in the bag’s main compartment that the front pocket’s shortcomings are forgotten quite quickly. If the styling of the bag suits your tastes as much as it does mine, you’ll find yourself looking for reasons to take this bag everywhere you go. The black version in particular looks just as much at home walking into a client meeting as a briefcase, as it does holding a 400mm prime lens on a wildlife photo mission (both things that I have put to the test). Aside from that, it’s also just great to see Think Tank round out the MindShift product line so that loyal fans of these bags can now travel with a second bag that matches the style and durability of their backpack. In my few months of testing the bag before writing this, I have really come to appreciate the versatility of the Exposure while I’m traveling. I can get it onto the plane as my personal item alongside my main camera bag, but easily switch things up on location when I want to use the Exposure as my camera bag, while leaving the larger primary bag back at base. In short, an excellent and versatile addition to the MindShift lineup.
Where to Buy
US Customers spending over $50 in Think Tank Photo’s online store can get a free gift at checkout after following one of the links to the store from this review–like this one. If you have any issues, please follow the instructions on this page.
Unfortunately, the Think Tank MindShift Exposure bags have been discontinued. Still, Think Tank Photo continues to sell an incredible range of camera bags and photo accessories, including various outdoor photography bags in its MindShift range.
It’s always appreciated when you use my links for your purchases, so I’m including links to the latest Think Tank and MindShift products below. You’ll also find a huge range of Think Tank and MindShift reviews in the site’s archive, including their latest camera bags, backpacks, and accessories.
- Latest Think Tank Photo products (all categories) – Think Tank / B&H Photo / Amazon / Adorama / WEX (UK)
- Latest Think Tank MindShift products – Think Tank / B&H Photo / Amazon / Adorama / WEX (UK)


You do a lot of flying. I would like to use the Exposure 13 as my personal item on international flights. It is a little smaller than the Retrospective 15 you said you have used as your personal item. Would you expect that I would have any problems with the Exposure 13?
Thanks,
I think you meant the My Second Brain 15 – that was my previous bag. The Exposure 13 isn’t as wide, but it is thicker. Overall the volume of the Exposure 13 is more than the My 2nd Brain 15 but you won’t have any issues with it being your personal item. As I said in the review, I have flown a lot with the Exposure 15 and had no issue, to the smaller 13 would be fine.
For my photos at the seaside (stichelbaut.com) this is the bag that I have been waiting for many years ! Thank you for your review
You’re welcome!
Things i have seen in terms of pc memory is always that there are specific features such as SDRAM, DDR and many others, that must match the specs of the motherboard. If the computer’s motherboard is rather current and there are no operating system issues, updating the memory literally normally requires under a couple of hours. It’s one of several easiest laptop or computer upgrade techniques one can envision. Thanks for sharing your ideas.