
Birds are one of the most abundant types of wildlife, and for that reason, bird photography is incredibly popular with nature enthusiasts. With a bit of careful planning, anyone with a yard or even just a local green space can get incredible close-up photos of birds.
The real beauty of photographing birds close to home is that it gives you more chances to practice what can be a very challenging type of photography. You don’t have to find an entire day or weekend in your schedule to get out and practice with your camera. When you have a setup like mine in your backyard, you can simply duck outside for an hour or two and get right to it!
In this guide, I’m going to go through my backyard bird photography setup step by step. I’ll show you how to attract more birds, attract different birds, photograph the birds against different backgrounds and how to make yourself invisible. We’ll also talk about the gear you will need, and some suggested camera settings.
Learn How To Get These Shots
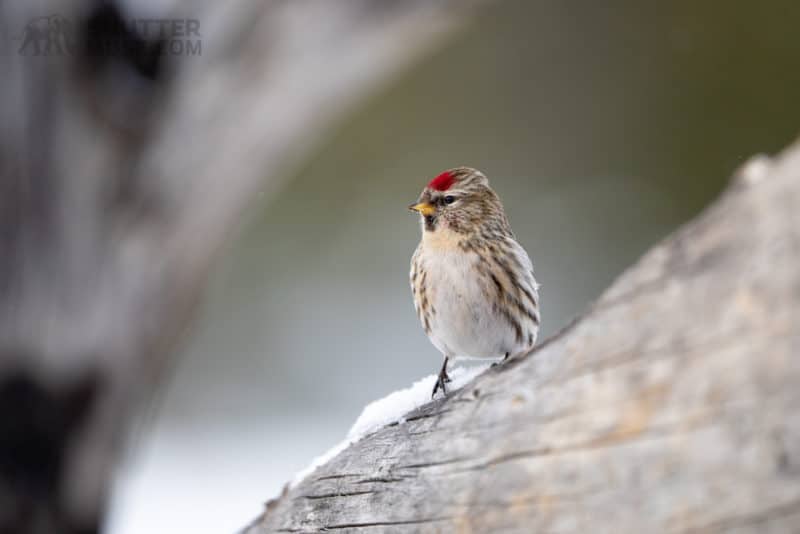
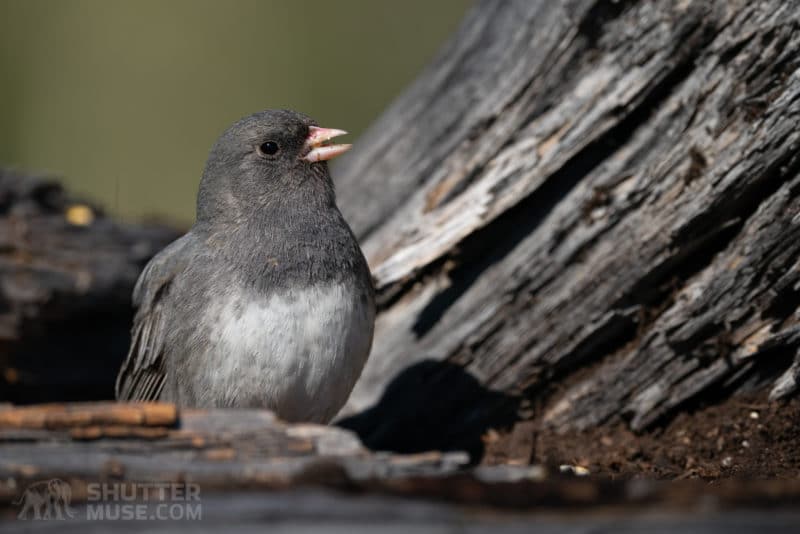
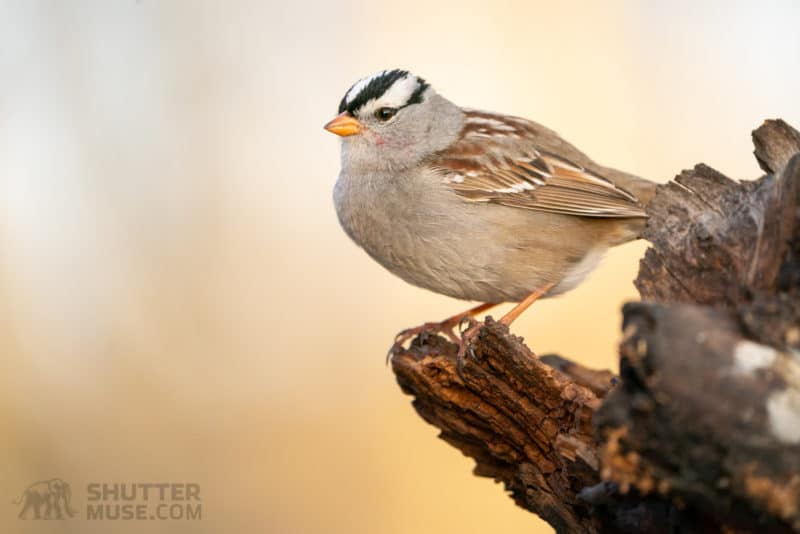
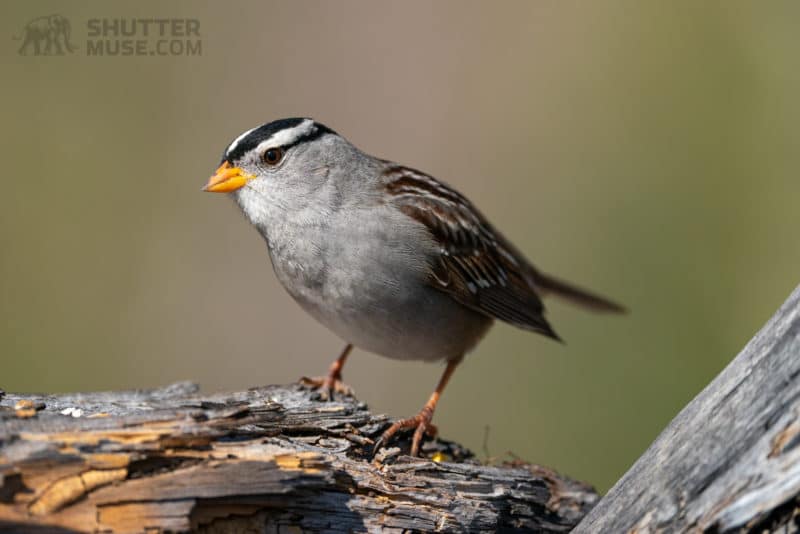
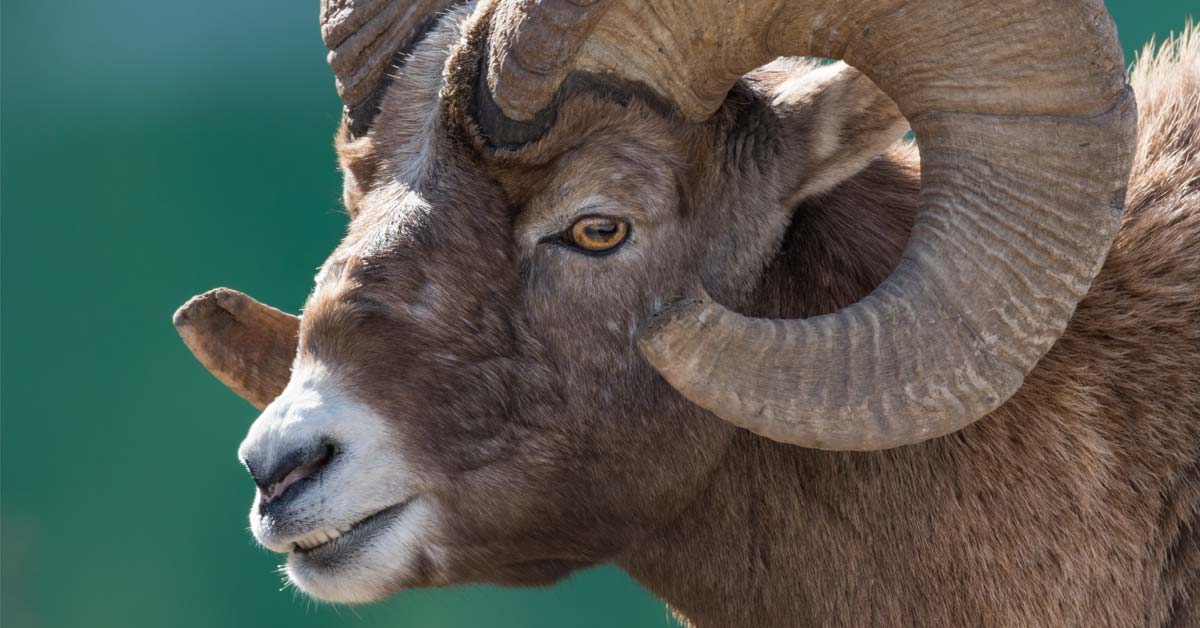
Below are a few examples of photos created in my yard using the techniques that I’m going to teach you today. If you find this guide helpful, it would really help me out if you could use the social sharing buttons at the top of the post, or simply send the link to your birding buddies.
As always, the photos in this article are taken by me. Not like some other photography blogs where an article is written by a writer that has just Googled a topic and cobbled together some basic points, using stock photos for illustration. I spent many days getting these photos and creating this guide for you.
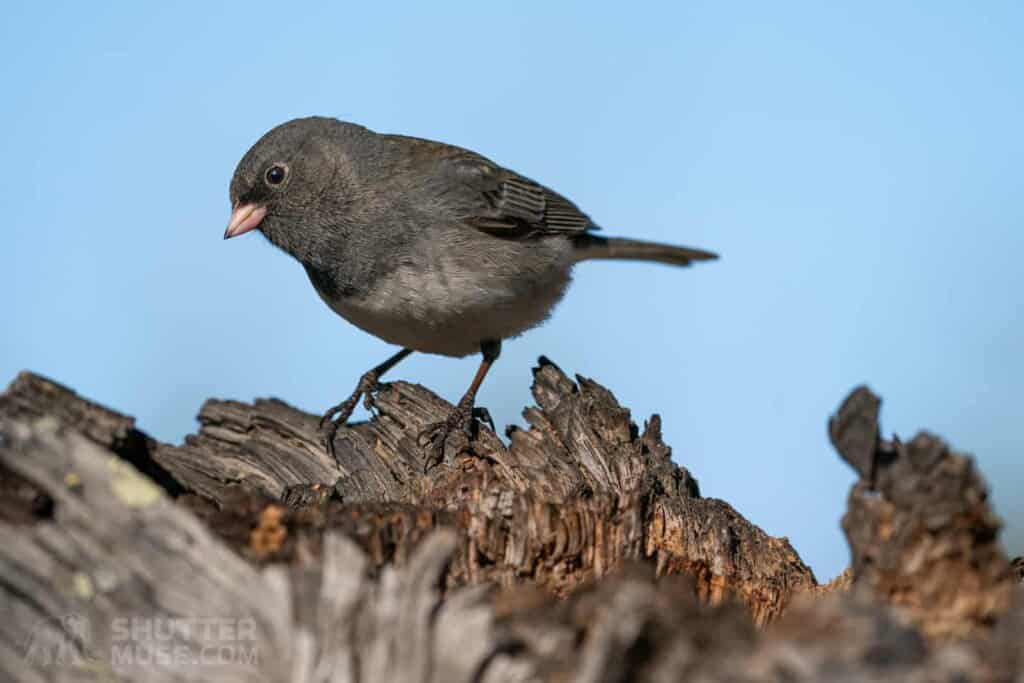

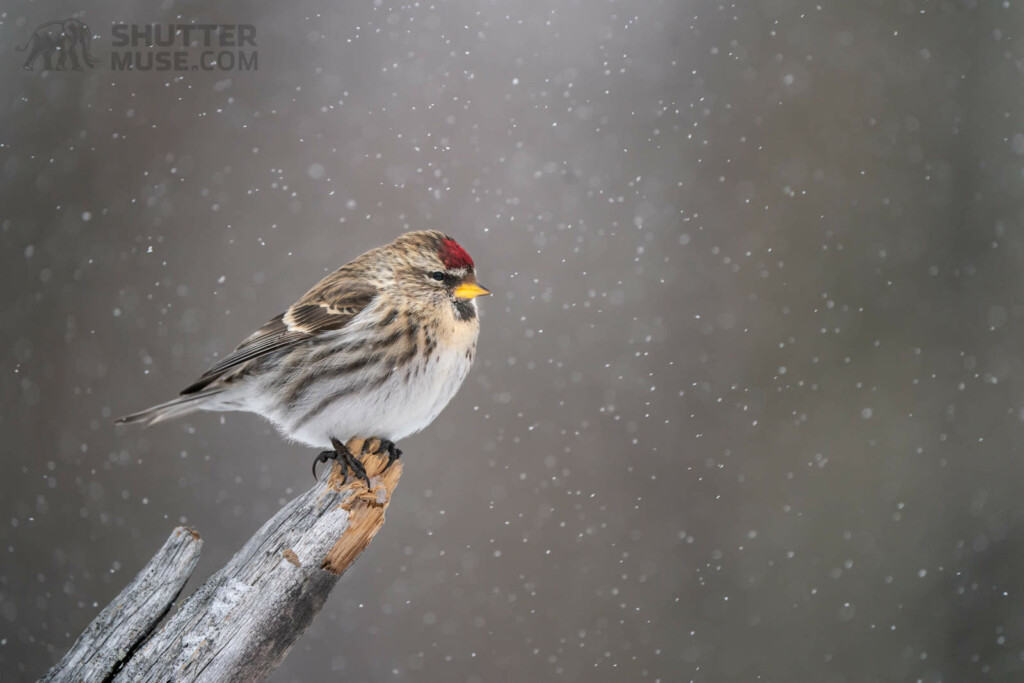
Table of Contents
Attracting the Birds
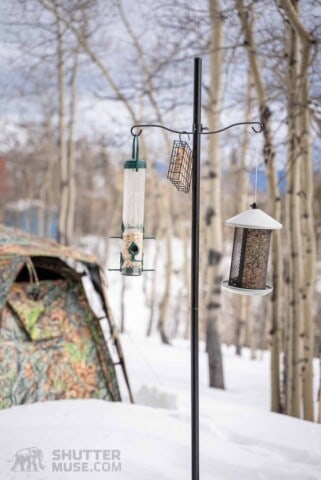
To start with, you’re going to need to pick up at least one bird feeder and a couple of types of birdseed. You’ll find that different types of seed will attract different types of birds, and usually, the seed packaging will give you some indication of the likely species that it will attract. I like to use a couple of different seed holders with different types of seed in each one, and a suet holder for birds that prefer to peck away at their food source.
As well as all the feeders and seeds, I also picked up a metal feeder holder from my local garden store. This simple hanger has a spike on the bottom of it that can be pushed into the ground. As you can see, it holds quite a selection! I like this kind of movable feeder holder because it allows me to place it in different parts of my yard when I want to change my shooting setup.
You will likely need to experiment with seeds and suet to figure out what your local birds are enjoying. You’ll also want to make a note of exactly which birds are enjoying which seeds, and at what time of year. Remember, you will often get different species migrating through your yard at different times of the year. These birds may enjoy something entirely different, so it’s a good idea to create a feed schedule that adapts to this throughout the year. You may even find that one species will prefer a different type of seed at a different time of year, depending on whether they are settling in for a local stay, or about to set off a long, energy-intensive flight to a new seasonal location.
Protecting the Birds
When attracting birds close to any building, it is your responsibility to consider the potential consequences. You must take some steps to make the windows of your house clearly visible to the birds. Without this, you will almost certainly end up with birds misunderstanding the reflection in the window, and, following a sickening thud, quickly becoming ex-birds.
The simplest solution is to buy packs of bird-shaped anti-collision stickers that go on your windows. They are readily available from Amazon. If you feel like these might take up too much of your window, another effective trick that I use is to tape a 10-inch strip of reflective parcel ribbon to the windows so that it flaps around in the breeze.
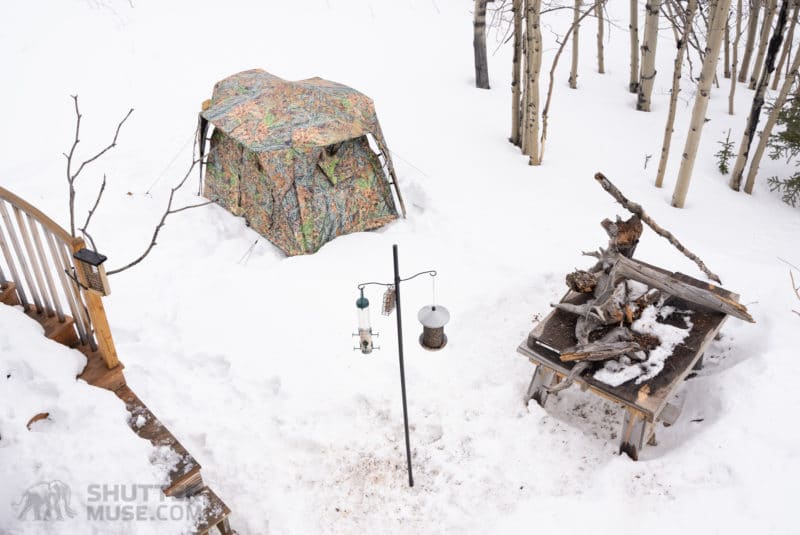
Creating Your Bird Stage

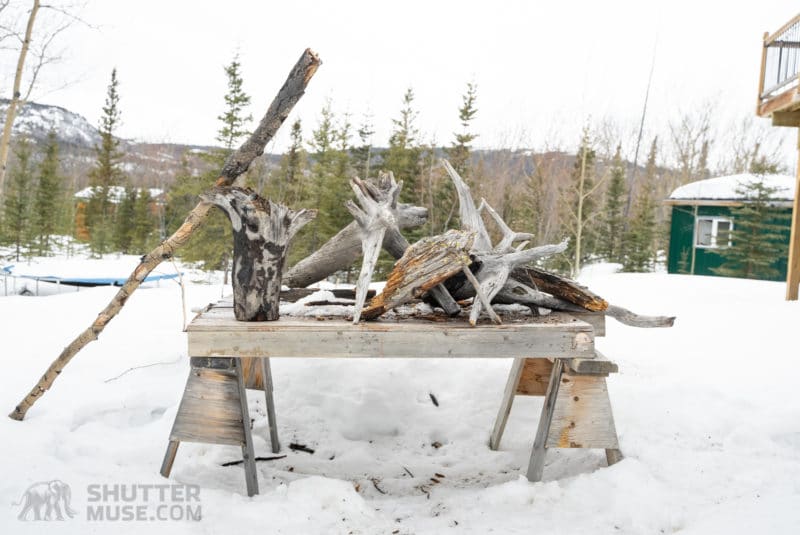
The bird stage is the name I have given to a wooden table that sits in my yard near the bird feeder. Well, perhaps the word “table” is giving it too much credit. It’s made from a couple of saw horses and some wooden planks that were previously rotting behind the shed.
The bird stage serves two purposes. Firstly, it holds a variety of photographically interesting perches that I have scavenged from the woodland behind my house. Secondly, it raises them off the ground so that they are level with my camera.
This elevation is really important because it gives me complete control over the background. It allows me to change the colour of the background by repositioning the stage to different places around the yard, and it also gives me that beautiful bokeh (out-of-focus blur) behind the birds. With bokeh behind the birds, you have subject separation and a much stronger image.
Choosing Your Perches
The more variety you have in your perches, the more variety you will get in your photos. Some of my stumps are hardwood, which is perfect for perching. Some of them are rotten softwood, which is great for birds that like to look for insects within the bark.
When choosing features for your own bird stage, make sure you spend some time watching what your local birds are naturally using while they go about their daily business. If you have larger birds in your yard, such as ravens, you aren’t going to have a lot of luck getting them on your stage if you only provide them with spindly, wobbly, thin branches that won’t hold their weight. Build your stage to meet the needs of your local avian population, but also take the time to find branches and logs that offer interesting textures and colours.
Once my stage has been created, I generally leave it as-is for at least a few weeks. The birds get used to the design and are more confident at exploring all the nooks and crannies. If I’m going to change things up, I’ll do a complete reset with an entirely different set of branches and colours. For example, the stage you see in the photos above is a wood-heavy end-of-winter scene. Once the spring comes, I’ll scavenge some evergreen branches from recently fallen trees and create a much greener looking stage that will bring a very different vibe to the photos.
Adding Dirt
Once the snow has stopped falling, I cover the top of the table with dirt. This allows me to hide some nuts and seeds in the “ground” for the birds that don’t like to eat from a hanging feeder. Of course, you could scatter seed directly onto the real ground, but remember, the whole purpose of this bird stage is to elevate the scene up to the level of your camera so that you have greater control over the background.
Adding a Water Feature
Once winter has passed and the nights stop dipping below freezing level, I add a small water container to my stage. Water is an excellent bird attractant and is often visible to them from the air when light reflects off its surface. To increase the visibility of the water from a distance, you should place a few rocks in the container so that they break the surface. When a breeze blows, the rocks will cause ripples, and your water will be more easily seen from the air by passing birds.
If you just plan to use the water as an attractant, you don’t need anything fancy. I usually use an upturned lid from a Tupperware container, and I top it up with water when I re-fill the birdseed in the feeders.
If you actually want to get photos of birds drinking or bathing in the water, you will have to put a little more effort into your setup to make it photogenic. My plan in the future is to put build a new stage (table) that has a 3-inch lip around the edge. This will allow me to put up to 3 inches of dirt on the stage, and within that, I will create a small bathing pond, surrounded by some moss.
Positioning Your Bird Stage
Background
Choosing the perfect backdrop for your bird stage is important. The most important thing is to find a background that doesn’t have any unnatural colours in it. Greens, greys and blues are going to look the most natural, and with a bit of luck you can give an orange tint to those by shooting in the early morning or late evening. Avoid placing the stage in front of things like a red-roofed shed, or a shiny yellow sportscar. Not only do those colours look unnatural, but they also compete for your viewer’s attention, drawing eyes away from the avian subjects.
This distance between your bird stage and your background is also important. The greater the distance between stage and background, the greater the background blur will be. In this way, you can “cheat” slightly, by giving an f/6.3 lens the look of an f/4 telephoto or faster. This added background blur helps the bird to stand out more in the photo.
Position Relative to Your Feeder
If you look closer at the photos of my backyard setup, you’ll see that the stage is positioned directly between the feeder and a larger group of trees. Generally, smaller birds will feed briefly before retreating to the safe confines of a larger tree to chew on their food and scout for potential predators.

By placing your stage between the feeder and the bird’s usual point of retreat, you create a staging area where many birds will stop off on their way to, or from the feeder. The longer you leave your stage in the same place, with the same setup, the longer the birds will feel safe stopping at the stage on their way to the feeder.
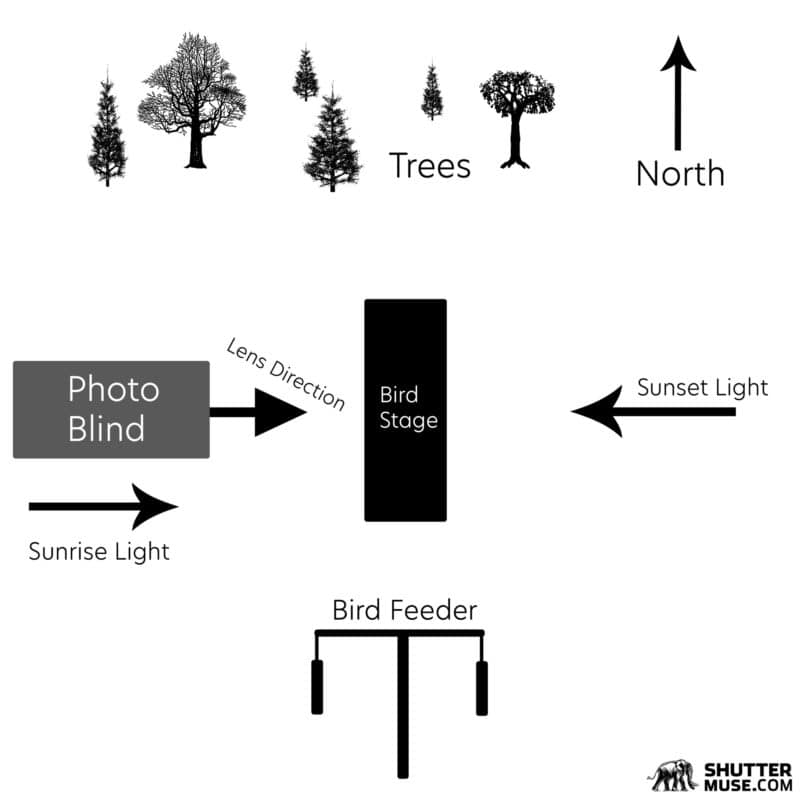
Position Relative to the Sun Angle
The third piece of the positioning puzzle is the sun angle. Ideally, you want to find a location that has your bird stage on a North/South line. This means that when you are shooting the table with your lens perpendicular to it, you are either facing East or West, depending on which side of the table you are shooting from. In the morning you should face West, with the rising sun behind you. In the evening you can approach from the opposite side with the setting sun behind you. As well as those direct sunrise and sunset angles, you can also shoot in the opposite directions to get nice warm backlighting.
With these things in mind, you can see that the ideal space for a setup like this is a relatively open piece of land, with the table in the middle. This gives you a good background distance no matter which way you approach it.
Shooting Distance
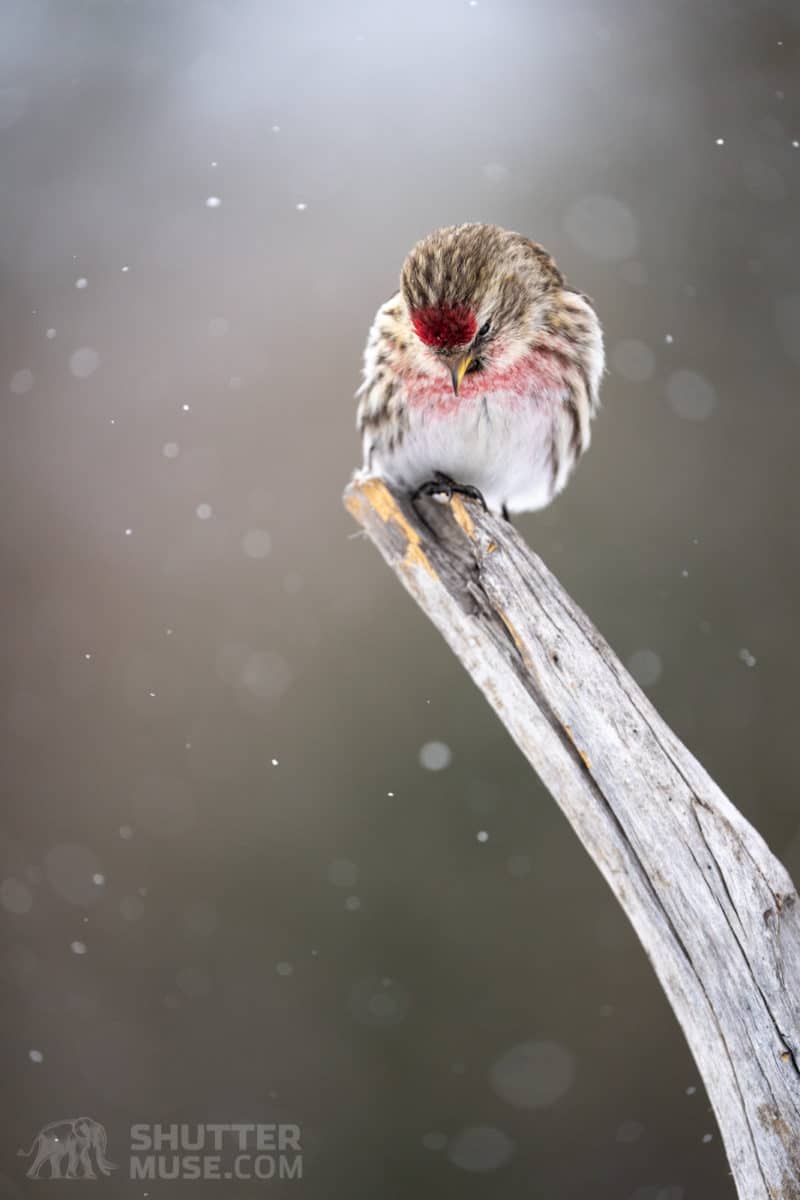
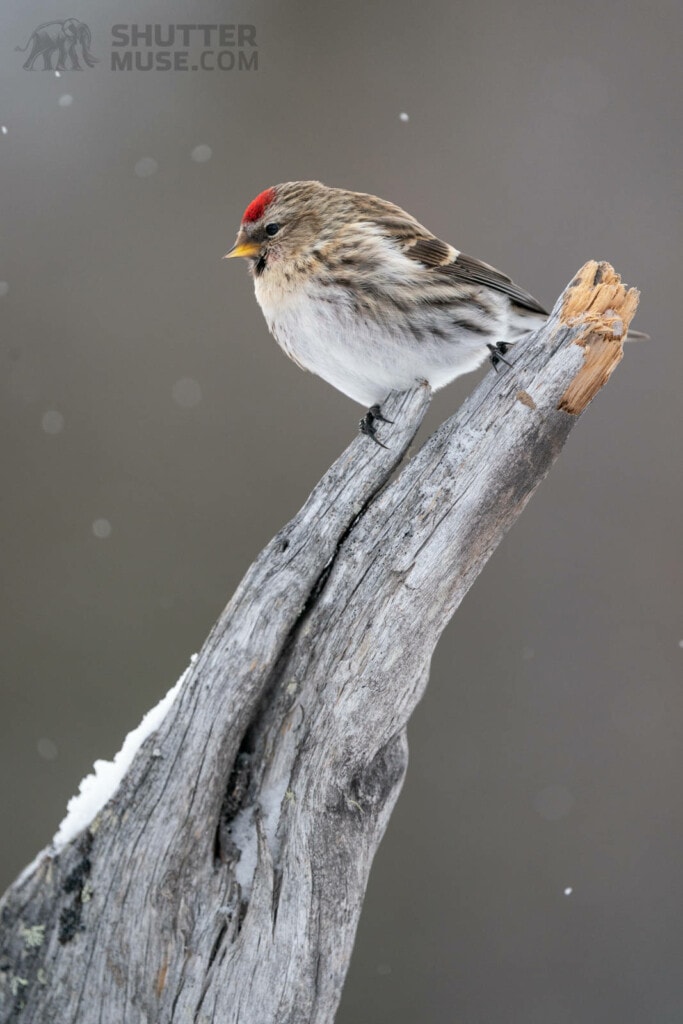
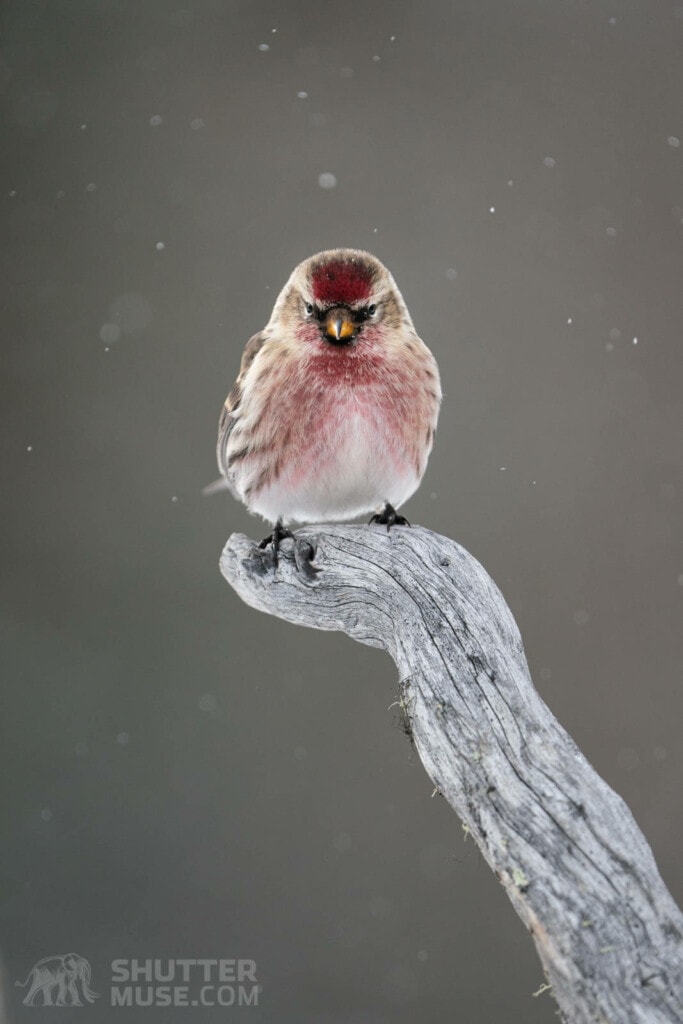
The birds in most people’s backyards are going to be very small. This means you have to get incredibly close to them if you’d like them to occupy a relatively large portion of your frame. Quite how close, often surprises people who have not attempted this kind of photography before! Even with a 600mm lens, and me sitting a mere 7ft from my stage, a small bird doesn’t even nearly fill the frame.
The image below, of a common redpoll, is a perfect example. While I’m perfectly happy with this frame, and its composition, inexperienced photographers would not have guessed that I was so close to the bird while using a 600mm lens.
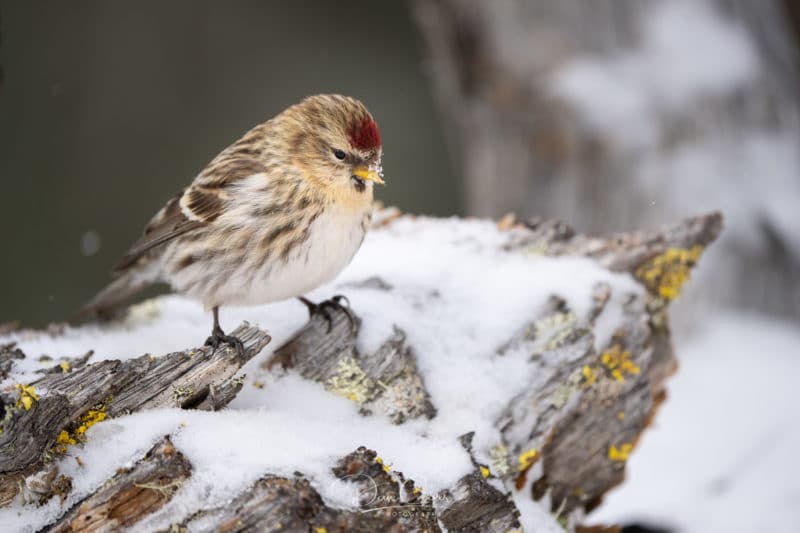
In general, when planning your backyard bird photography setup, you should plan to be a lot closer than you initially think. If you do find yourself too close, when perhaps some larger birds show up, it’s usually easier to move back away from your setup, than to get closer. Something which will become even clearer in the next section when we talk about concealment.
Recommended Photo Gear

Lens Choice
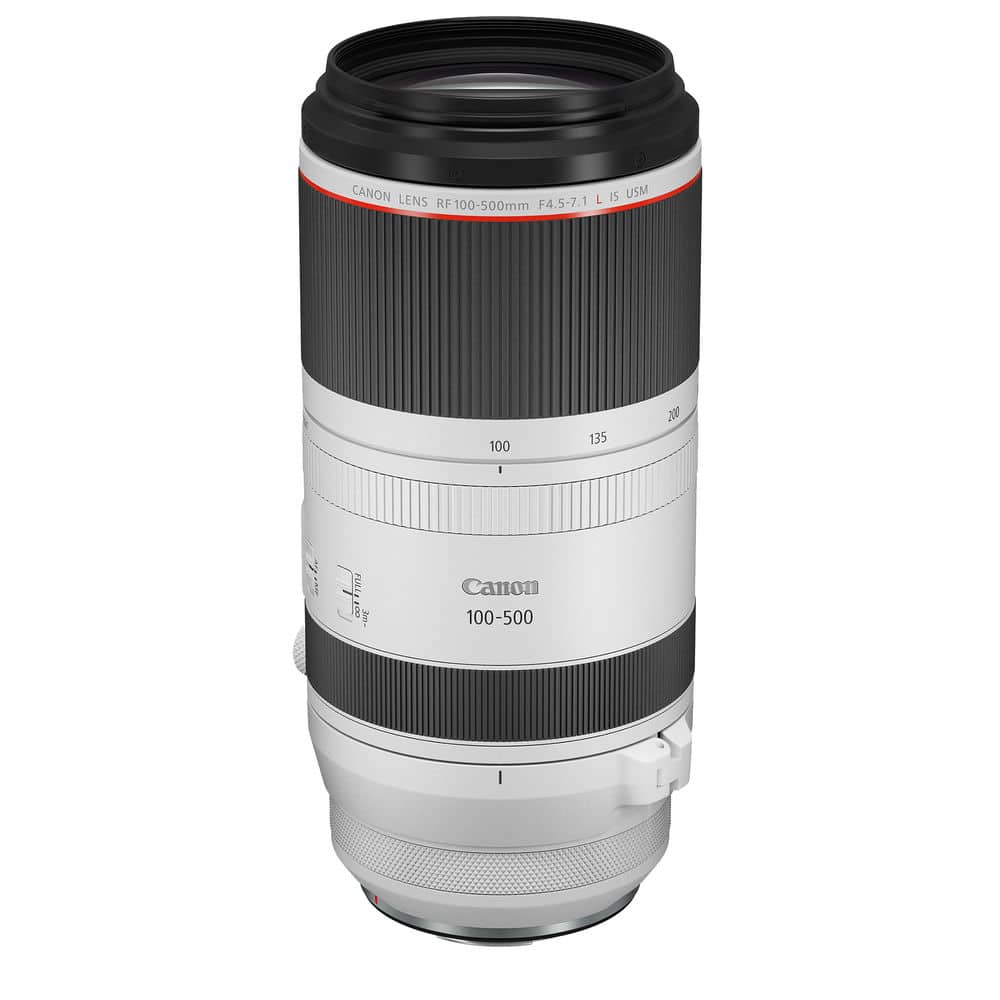
For best results, you are going to want a focal length that gives you at least a field of view equivalent to a 500mm or 600mm lens. If you are shooting with a full-frame camera, a 200-600mm lens like the Sony 200-600G is perfect, or a Tamron 150-600mm or Canon RF 100-500mm. If you are using a crop-frame camera, a 100-400mm lens will get you a field of view equivalent to 150-600mm on a full-frame camera. Of course, if you’re lucky enough to own a 500mm f/4 or a 600mm f/4 prime, those are going to be great options.
It’s also possible to use a full-frame camera with a 100-400mm lens and then use a 1.4x teleconverter to get you to 560mm. I have written in-depth about teleconverter usage in the past, so I won’t repeat all of that here. But you should be aware that teleconverters of all types do slightly degrade image quality and autofocus performance, so you should always start with a very high-quality lens to minimize those effects.
Although it’s possible to use a 2x teleconverter, the image and AF degradation is often not worth it unless you are putting it on a $15,000 lens. Given the nature of the backyard setup that has been described in this article, it would be better to move closer to your bird stage than use a 2x. The one possible exception to this rule is using a 2x teleconverter on a 300mm f/2.8 lens. A 300mm f/2.8 is usually so sharp on its own, that it can be used with a 2x extender and still produce reasonable results.
Camera Choice
Honestly, camera choice is much less important than lens choice for a setup like this. If you have patience and the right focal length, you can get these photos on anything from a pro-level full-frame camera that shoots 30fps, to a consumer APS-C camera that shoots 2fps. The beauty of this setup is that most shots are repeatable. If you sit there long enough, another bird will come and sit on your perch.
If you’re shooting in the early or late hours of the day, your biggest concern should be high ISO quality. Small birds are very jittery, and you’ll be surprised at how fast a shutter speed will be necessary just to get a sharp shot of them standing on a branch. This means your ISO will probably get pushed up above 2000. A good post workflow, incorporating Topaz DeNoise AI, can help with this, but it’s good to start with a camera that is proven to be capable in reasonably high ISO situations. For this, full-frame is indeed technically better, but many crop-frame cameras are more than capable.
Tripod + Gimbal

A tripod with a gimbal is by far the best support solution for a scenario such as this. A gimbal allows your camera to be perfectly balanced and ready to go at a moment’s notice, without the need to unlock various knobs every time you want to take a shot. This site has an in-depth guide to the best gimbals on the market, and I would definitely recommend taking a look at that if you don’t already have one.
A compatible tripod should be chosen, with a suggested capacity that is capable of easily holding your gimbal, camera and telephoto lens. Don’t push the capacity limits, make sure you have some headroom. There is a difference between capacity and stable capacity. It’s no good if your tripod is capable of holding the camera setup, but can’t do it without wobbling like crazy every time you touch it.
Becoming Invisible
For the best chance at getting great photos, you’re going to need to conceal yourself. At my current home in the Yukon, I have experimented with various methods which I will describe below.
Shooting From the Window of Your House or Shed
For those on a very tight budget, using an existing building for concealment is a good place to start. The problem with using a window is that they are usually much higher than you’d want them to be. The best wildlife images are almost always created when you are down at eye level with your subject. Unless you can create a very tall table for your bird stage, you will likely end up looking down on the birds, thereby removing the possibility of getting that nice out-of-focus background that provides subject separation.
Shooting From the Door of Your House or Shed
You can solve the height problem of using windows, by setting up your tripod on the inside of a door. A sliding door is best, if you have one, as this allows you to open just enough of the door to poke the lens out. If there are windows on the door, use some gaffer tape to stick some black paper, or a black plastic bag on the inside of the glass to help conceal your movement. Black works best for this, as it will cause the glass to reflect your backyard.
The problem with using a door (and this goes for windows, too), is that your house or shed will cast a shadow over your bird stage when the sun is getting close to being parallel with your lens. I have already demonstrated just how close you need to be to your stage, so it’s almost impossible to avoid that shadow. Unfortunately, if the sun is out, bird feather detail looks best when your lens is at that same angle as the sun.
Using a Dedicated Portable Photography Blind

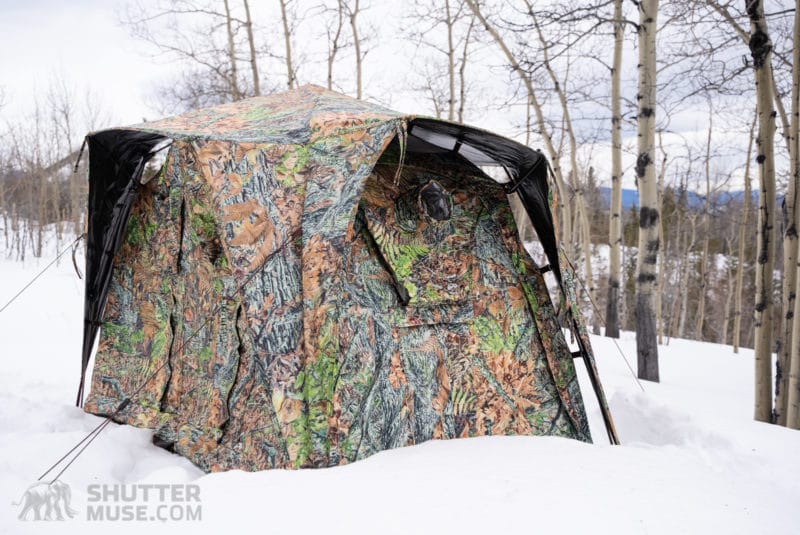
My own preferred option is to use a soft-sided photography blind. These are portable, camouflage tents with openings in the sides for a telephoto lens. Usually, they will have openings on all sides, as well as ground-level openings for use when you are lying down.
The most popular brand of photo blinds is Tragopan. Their blinds are available in several different sizes to suit different environments and different numbers of photographers. The one in the photos is my very own Tragopan Monal V2. Technically this is a 2-person blind, but I usually use it on my own, and appreciate the additional internal space to spread out all my gear. I have written a guide to all of the available Tragopan photography blinds if you need help in choosing.
Once inside the blind, I have plenty of space to set up a chair and position my camera on its tripod so that it rests comfortably in front of me. I always make sure to enter my blind with an empty bladder, a good audiobook, a thermos of coffee and some snacks. You don’t want to be coming and going all the time as this will disturb the birds.
If you can, it’s best to set up your chair and your tripod in the blind the night before you plan to use it. That way you can quietly sneak into it early in the morning with the minimum of fuss and noise. I would also recommend setting up the blind several days before that, and leaving it out as much as possible so the birds get used to it. If my yard is anything to go by, eventually the birds will just start sitting on the blind!
Using the LensCoat LensHide
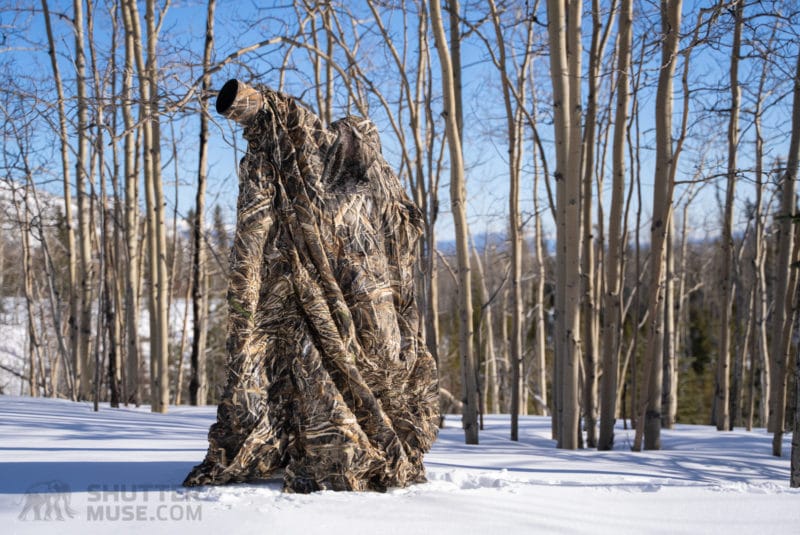
If you’re serious about your wildlife photography, dedicated photo blinds are a great investment. If your budget doesn’t stretch that far, though, the LensCoat LensHide is a reasonable solution that starts at around $130. I have previously written about using one of these in the woods for photographing fox kits in the spring.
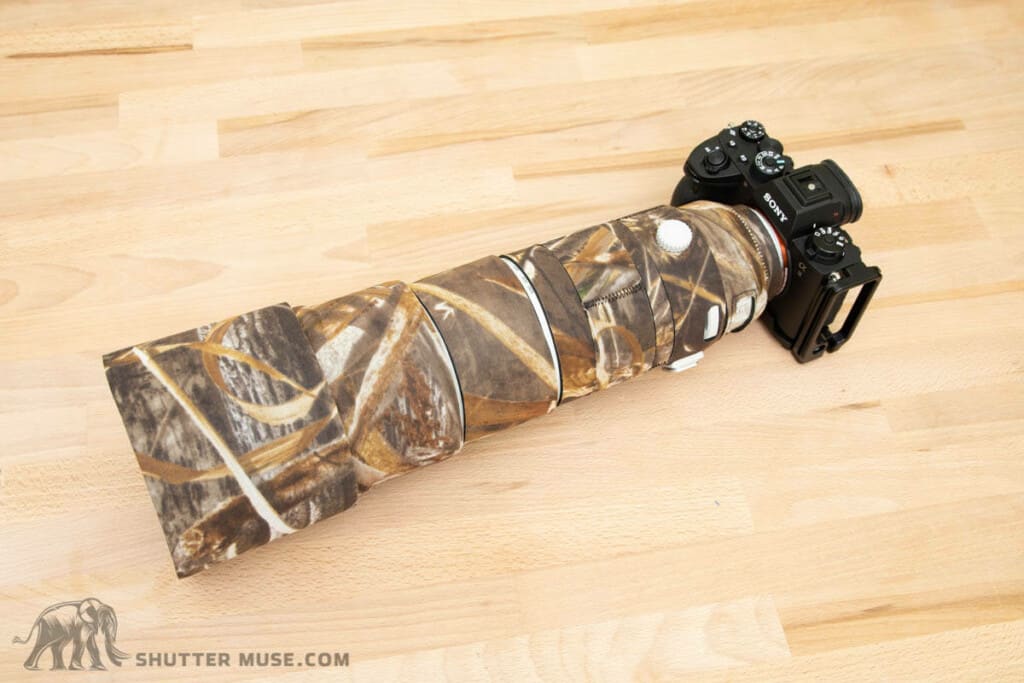
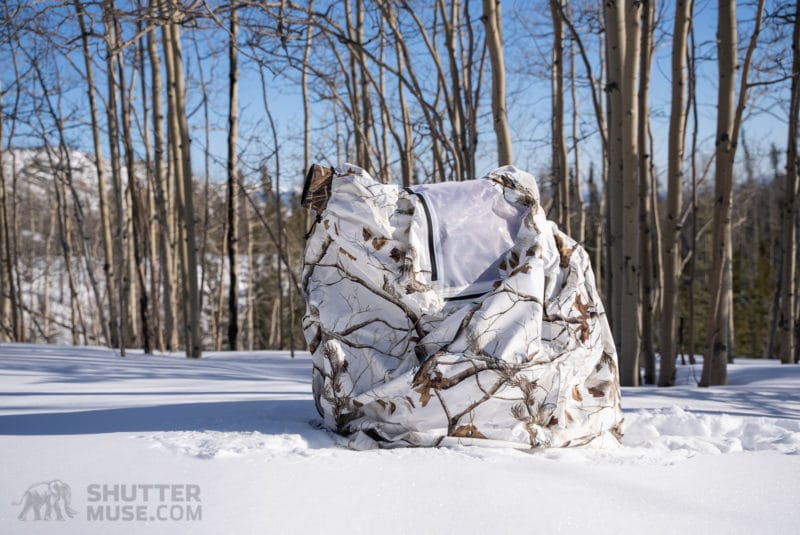
Think of the LensHide as a camouflage blanket with a hole for your telephoto lens, and a mesh window for you to look through. The whole thing folds up into its own pocket, and they are available in an array of different camouflage patterns to suit different environments and seasons. As you can see, I have a snowy winter camo one and a Realtree Max5 for other seasons.
The downside to the LensHide is that you have to remain entirely still for the duration of your shoot. If you can, I definitely recommend setting up a chair beneath the cover, but you’re still going to have to sit there, as motionless as you can be, for perhaps an hour or two.
In a photo blind, I’ll happily spend 6-8 hours in there before needing to get out for a stretch. And of course, I have the option to rummage in a bag to pull out some food and pour myself a coffee. In short, the LensHide is a good middle ground between shooting from inside your house and using a more expensive photo blind. But it does come with some significant downsides if you plan on sitting in the same spot for a long period of time.
Where the LensHide is a real winner, is the weight department. The Tragopan blinds are heavy and I wouldn’t want to hike too far with one. But the LensHide can be easily attached to your camera bag and won’t give you too much grief. Of course for backyard bird photography, that benefit isn’t of much use. If you want to read more about this solution, please refer to my LensCoat LensHide review.
Wrap Up
Hopefully, the images I have captured for this tutorial will serve as a reminder that you don’t always have to travel far afield to get great bird photos. With a bit of careful planning, there is a wealth of opportunity right in your own backyard. Add some ingenuity to that planning, and you can create a new stage, and a different backdrop every season as new species migrate through your area.


Loved the article. Living in the Chicago metro area its not quite this simple to make an urban backyard into a stage for birds. Sorta kinda works shooting at F4 but its certainly a different challenge than the steps you showed. But the concept is great, just need to adapt it a bit since nature and urban structures have a bit of a different interface.
There are people who do “workshops” with less material than this – what a great, inspirational article. Love the stage idea. I have a couple of acres of rural yard, and had never thought of doing this. Also access to larger space, which would still benefit from a stage potentially (though it has a lot of natural options).
Thanks for the inspiration to make better use of what is right here!
(The list arrows look
reversed to me and we’re both in the northern hemisphere – where did I get confused?)
OIC, reread article. The arrow is your position facing light … got it 🙂
A terrific article Dan as I have been wanting to try bird photography for a long time and just this week took my first shots with my R5 and Sigma 150-600. Inspired by your article I am going to make a bird table and possibly a photo tent for my very small city garden! Thanks for taking the time to create this article.
Cheers
Mike
Great article! Excellent suggestions! We live in an urban setting and the front yard is well-treed – conifers, deciduous, and shrub variety. Lots of bird activities but am pretty sure someone would call the authorities if I set up a camouflage blind. Sometimes, I will ‘hide’ behind a tree-trunk and stay behind some branches. Better than being in the open but not an all-day outing. However, we have made ‘friends’ with some of the birds and have learned a lot about their patterns and behaviours. Due to the urban setting, I only put feeders out during the harshest months of winter. Water/bird bath is a must, always! Occasionally, I do get a few nice shots but obviously I NEED that 300mm lens!! (For an Olympus OM-D) A month ago, we had a mating pair of sharp-shinned hawks!
Really appreciate the advice re: positioning for the same angle as the sun!
One question: Do you use or recommend a ‘silent’ (?stealth) mode? I try to sometimes but I think it affects the frame rate, so by default silent is off.
Frances, if your camera is an E-M4 mark3 or E-M1 mark 2 or 3, silent mode will have much faster frame rate than mechanical shutter mode, but shooting posing birds doesn’t require fast frame rate anyways. You can also get the 100-400mm for much less than the 300mm/4 Pro.
loved the photos of the birds , cant wait to try to get some myself
Thank you for a most interesting article and photographs. As mentioned by others living in a built up area is rather restricted but the feeders that I have set up attract birds. The natural rock bird bath is also regularly visited and topped up with fresh water on a daily basis.
Always find your articles a great attraction covering such a vast amount of photographic information.