
The Wandrd Route Pack is a camera holster that can be mounted to your chest by attaching it to the shoulder straps of your camera backpack. Although this was originally launched alongside the Wandrd Fernweh pack (our review), you can attach it to any camera backpack.

In this review, I will talk about the features and build quality of the Wandrd Route Pack, as well as explaining how to correctly attach it to your camera bag, how to use the (slightly unintuitive) shoulder strap that comes with it and what other, similar camera holster bags you might consider.
Table of Contents
What Is a Camera Holster?
A camera holster is a specific style of camera bag that is designed to hold a single camera body with a lens attached to it. With a holster bag, the camera is always extracted from the top of the bag. Most camera holsters are designed to hold a camera body with a medium-sized zoom lens attached, like a 24-70mm. Some holsters, like the Route Pack in this review, also have an expandable bottom that allows the bag to swallow a camera with a 70-200mm lens attached.

Holsters are a very flexible style of camera bag when it comes to choosing your carrying method. They can all be worn on a belt or camera bag waist strap, but many also have options for wearing them as a chest bag, and some also come with shoulder straps.
The main reason for choosing a holster over any other kind of camera bag is that they give you very quick access to a camera with an attached lens. This makes them particularly popular with people who are carrying the bulk of their camera gear in a camera backpack while hiking. Without the holster, it’s a real chore to access your camera (unless you are using a MindShift Rotation backpack), and the result is that people often don’t stop to take as many photos as they later wish they had. Thus, a camera with a general-purpose zoom lens attached is a great quick-access companion to ensure that you keep taking photos all day.
Route Pack Specifications
- Exterior Dimensions: 10” X 7.5“ X 5.5” (25 X 19 X 13 cm)
- Exterior Extended Dimensions: 14” X 7.5“ X 5.5” (35.5 X 19 X 13 cm)
- Weight: 0.73lbs (0.33KG)
- Materials: 420D Robic Nylon 5PM Coating, 630D Nylon
- Included: Chest harness straps + shoulder strap extension
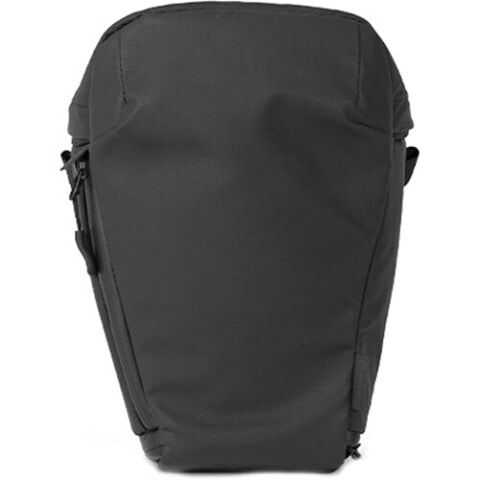
- Available Colours: Black, Gobi Tan
- Price: $69

Video Review
If you would prefer to watch a video, check it out below. If you find it useful, please give it a thumbs up and subscribe to the channel! It really helps us out.
Design and Materials
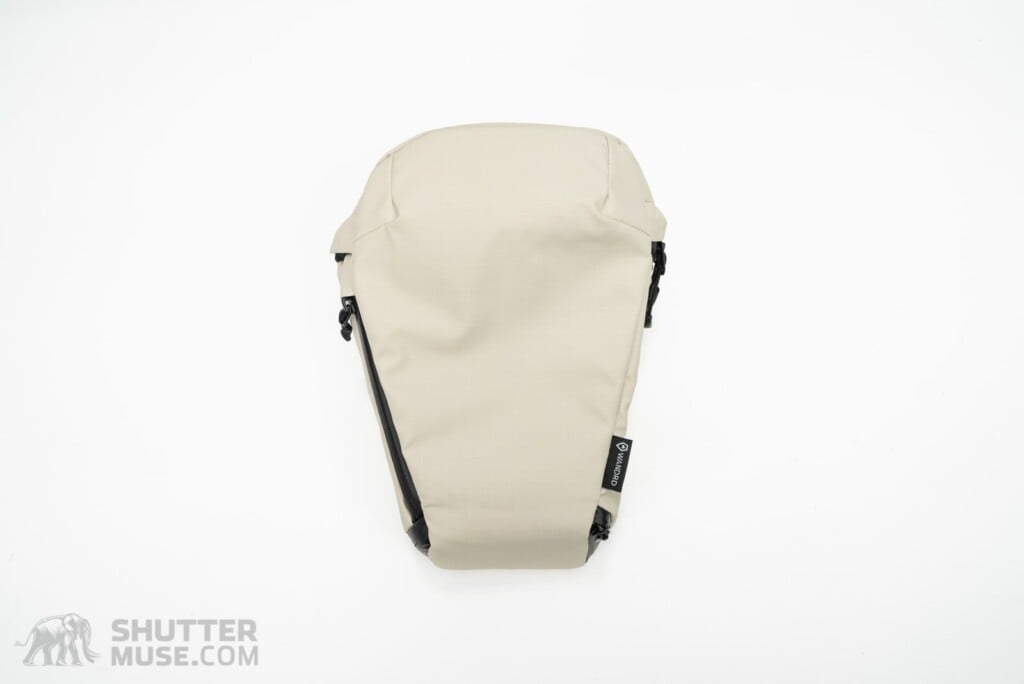
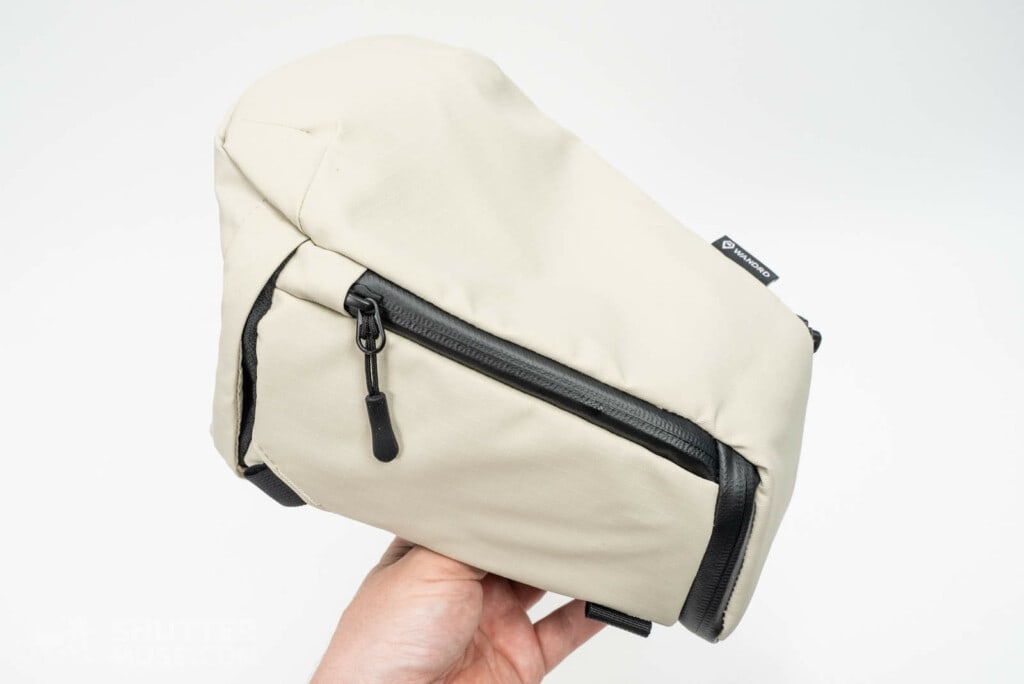
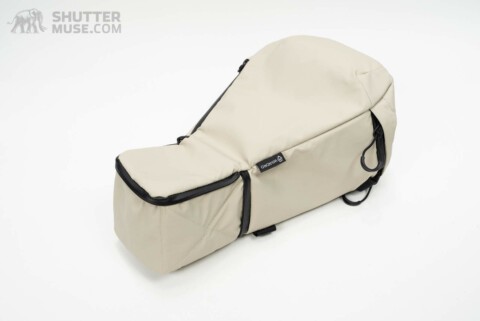
The Route Pack is a simple camera bag that doesn’t hold a lot of surprises. A single zippered pocket on the front of the bag is large enough for a small memory card wallet and one or two spare batteries. If you really squeeze, you might also fit a polarizing filter in there.
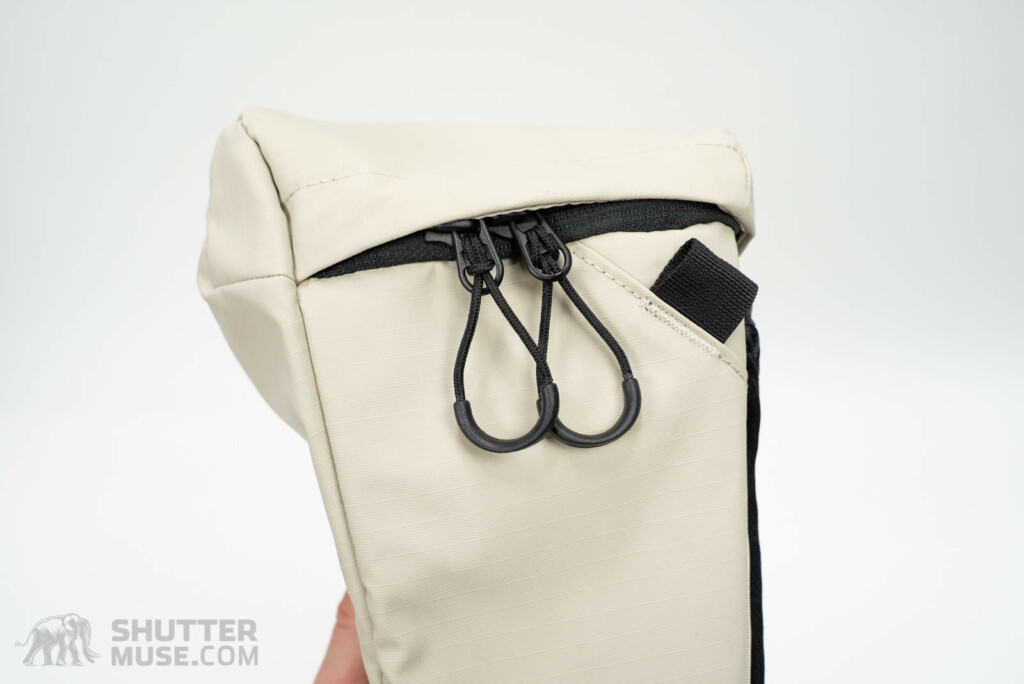
The main camera compartment has a large top zipper with a pair of chunky zipper pulls. Living in Yukon Territory, I’m always appreciative of big zipper pulls so that I can use them easily while wearing my winter photography gloves. I was also pleased to see that the zipper is well hidden beneath a good-sized fold of the coated nylon. When done right, as this has been, a well-protected zipper can actually be far more user friendly than a tough-to-open waterproof zipper.
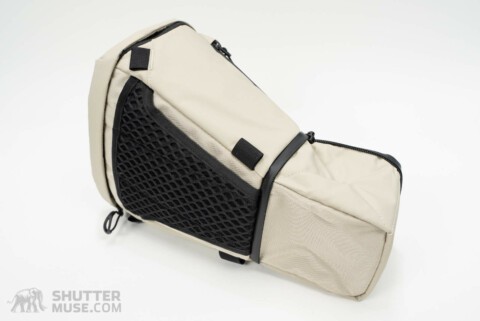
The bag uses the same Robic Nylon that was first used by Wandrd on the Fernweh backpack. This isn’t the same as the smoother material used on most parts of the Prvke backpacks. Instead, it has a slight texture to it that makes it feel both tougher and higher-end. This is tough stuff, and it will give you confidence in your purchase.

In terms of camera protection, I would say that it falls in the low to medium part of the spectrum. There are definitely many other holsters that offer far more padding than the Route Pack, but they pay the price in weight. The Route Pack is the lightest camera holster I have ever tested, so you’ll want to evaluate your priorities. Do you value a lighter weight, but still durable and water-resistant bag over one that has more padding? Do you really need half-inch thick padding on a bag like this?
Despite the relatively thin padding, I never felt like my camera wasn’t protected enough for hiking, and it’s certainly a darn-sight better protected than just having the camera slung across my body, bare, on a camera strap. The other upside to the thinner padding is the compactness of the bag when not in use. If you decide that you don’t need the bag on the return leg of your day hike, you can simply flatten it and fold it into the top pocket of your camera bag. The same cannot be said for any of the other, much more rigid camera holsters I have tested in recent years from Think Tank, Shimoda, MindShift, Lowepro etc.
What Fits In the Wandrd Route Pack?

When I first received the Route Pack from Wandrd for this review, the first surprise to me was the camera capacity. Most camera holsters are designed for un-gripped camera bodies, but my Sony mirrorless cameras easily fitted into the bag with their battery grips still attached. I had seen no mention of this on the Wandrd website or in any of their other marketing material. I’m not sure why, because this will be a big deal for some people. I was certainly pleased to discover it!
In the standard compact mode, the Route Pack fits a body with a medium-sized zoom lens such as a 24-105mm f/4 or a 24-70mm f/2.8. Of course, standard and wide prime lenses will fit, as will short telephoto primes lenses such as a 135mm or 100mm macro.
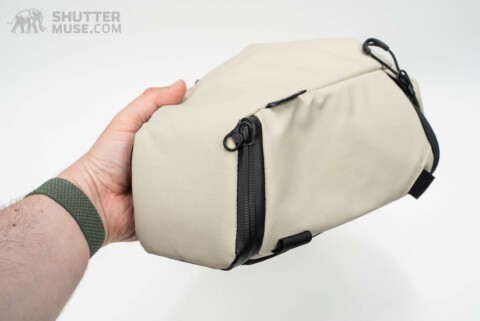
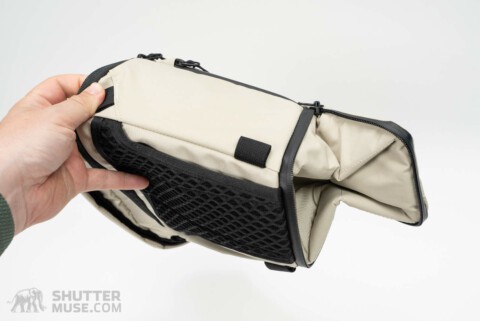
If you want to carry anything larger, a small zipper on the bottom of the bag allows you to unfold an expansion section to carry up to a 70-200mm f/2.8. If you need to carry a longer lens than that, you’ll have to look at the Think Tank Digital Holster 150, with its capacity of up to a 150-600mm lens.

How to Carry the Route Pack Holster
Chest Harness

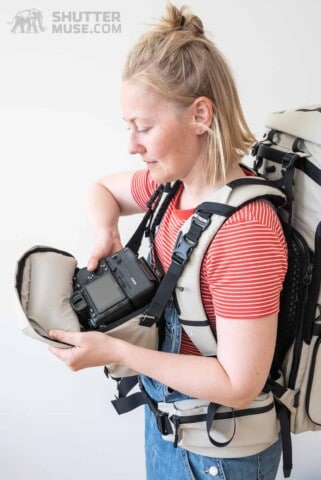
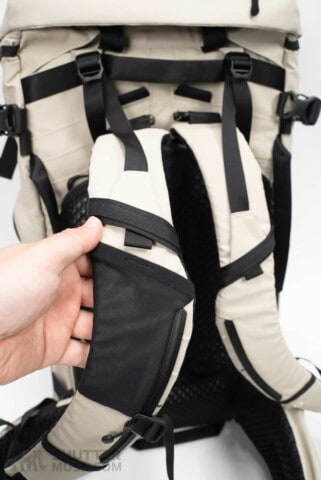
Mounting a camera holster as a chest pack is a popular way to get fast access to a camera while hiking. To achieve this, the Route Pack comes with a pair of webbing straps that can be attached to all Wandrd backpacks and most other third-party packs.
The holster actually has four attachment points on it, even though only two straps are provided. I find that when I’m using two straps in the default setup, it works just fine for hiking over most terrain. If you are looking to carry the bag on your chest for a more active day, including gentle jogging or a large amount of rock scrambling, you should consider picking up an additional pair of straps to stabilize the bottom of the bag.

While a chest pack does give you excellent access to your gear, for many people it will obscure the view of their feet. Again, for a regular day of hiking on easy to moderate terrain, this isn’t a problem. But If I’m doing anything more technical with my feet, such as scrambling along coastal rocks or dealing with narrow river crossings, I prefer to carry a holster on the waist belt of my backpack.
Waist Belt

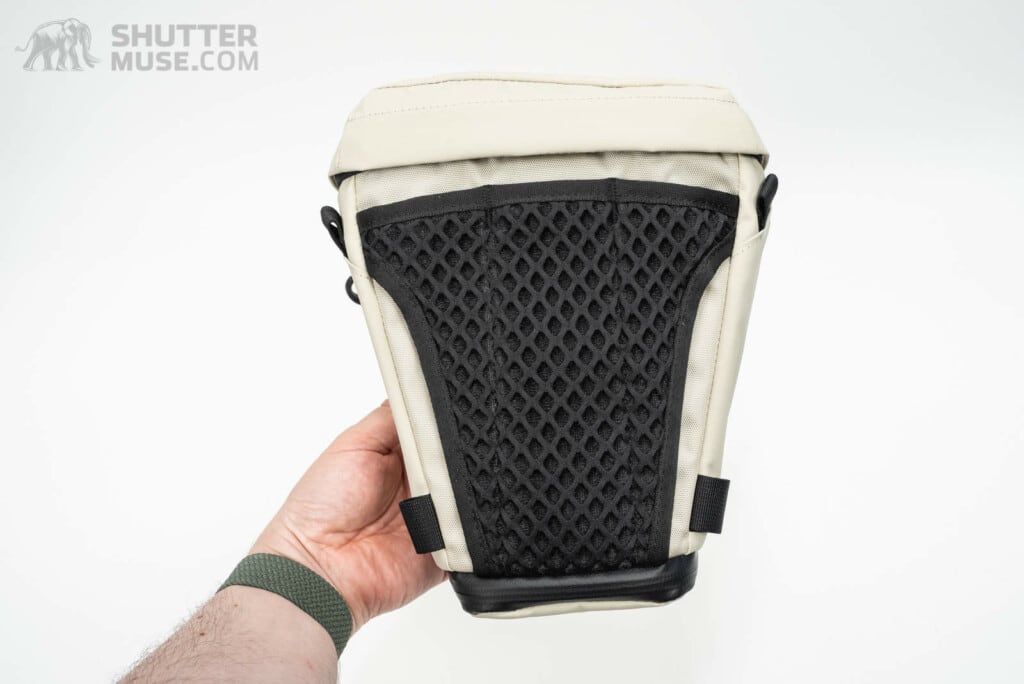
The Route Pack has a generously sized belt loop on the back which will work with any regular belt, and many waits belts from larger camera backpacks. The sizing of the padded pass-through is unsurprisingly a perfect match for the Fernweh backpack, but it’ll also fit nicely on a PRVKE.

As for off-brand bags, that’s a tricky one. I doubt you would have any issues with any backpack from a camera bag brand, but it’s possible you might have some trouble with some of the larger 70L+ backpack bags that are not meant specifically for photography. The slot that the waist belt has to pass through is 5.25″ (133mm) in width. If in doubt, get your ruler out.
Shoulder Strap
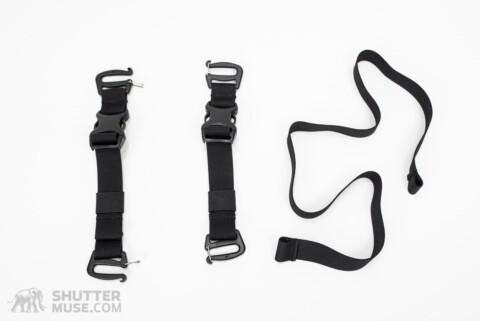
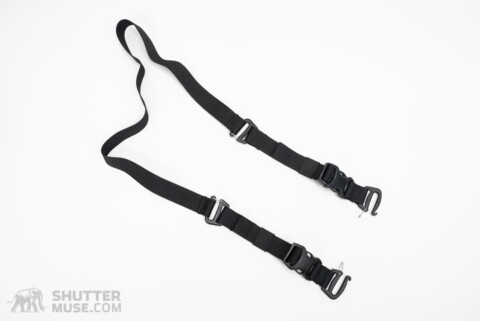
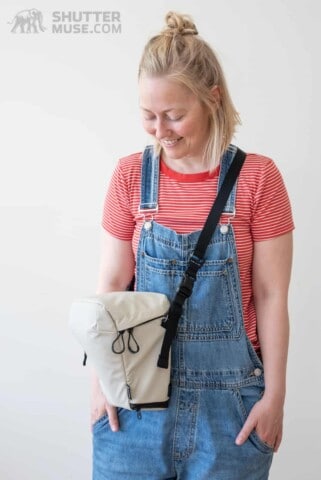
Along with the pair of chest harness straps, the Route Pack also comes with an additional piece of nylon webbing that can be used to create a shoulder strap. I must admit that when I first saw this strap in the bag I was a little confused. On its own, it’s far too short to be a shoulder strap, but the intention is that you combine it with the chest straps to get that longer length.
This is the weakest feature of the Route Pack. Firstly, the bare nylon webbing offers no padding whatsoever. Secondly, Wandrd failed to add any anti-slip rubber grip to the webbing, of the type found on the Wandrd Sling camera strap, so the strap slides off your shoulder easily unless you wear it right across your body. I used it for a while, because, well, it’s part of my job. But once I felt like I’d given it a go, I experimented with using various other straps that I had lying around the office, including the aforementioned Wadnrd camera strap. All were much better options.
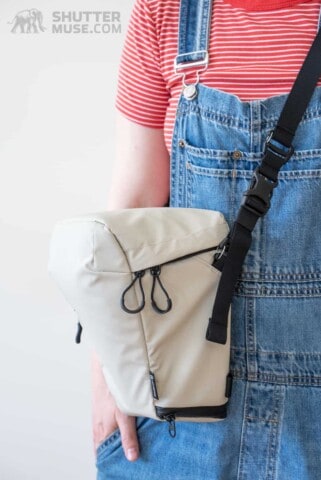

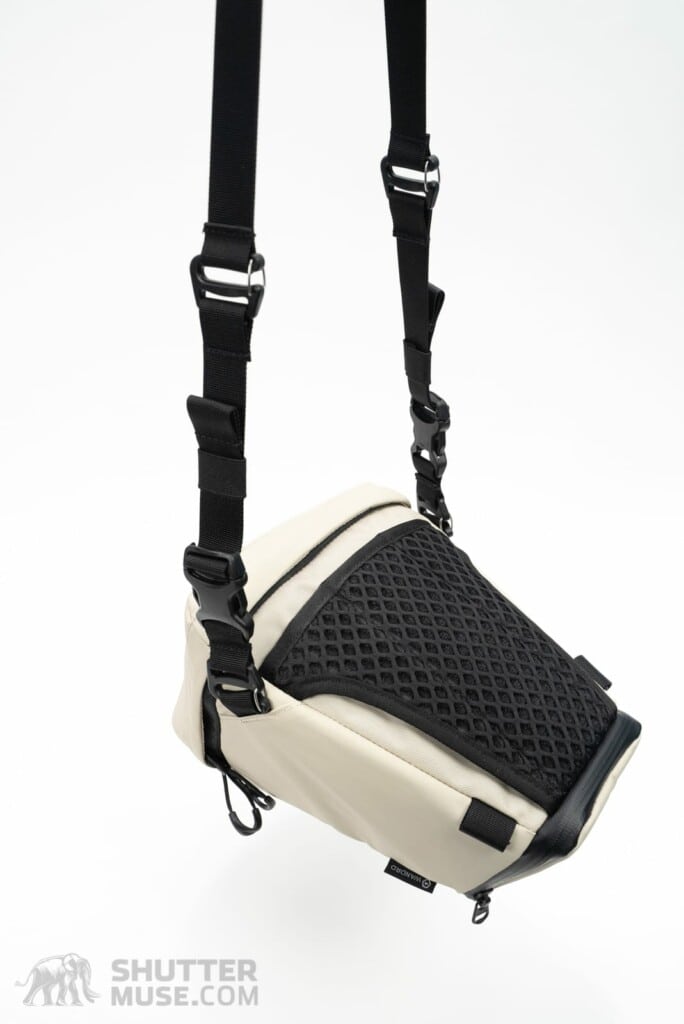
The other issue I have with this shoulder strap idea is that you have to remove the straps from the bag in order to construct the shoulder strap every time you want to use it. Anyone that has used a chest pack camera holster will know that these straps can be fiddly to install, and the best thing is to leave them attached to your bag all the time. You can also see from the above photo that the bag hands very strangely from the strap. It’s fine if you wear it cross-body, but doesn’t sit well against the body if you do try and wear it on one shoulder.
All that said, I’m still calling this a minor infraction. Yes, I think the shoulder strap could have been done better. But this is never going to be the main way in which this bag is used. Or at least, it shouldn’t be. If you want a shoulder bag, buy a shoulder bag. This is a holster, and its main purpose is to sit on your belt or your chest.
Wandrd Route Pack Alternatives
If you headed to any online camera retailer and searched for a camera holster, you’d see a ton of options. However, the Wandrd Route Pack has two stand-out features: Its svelte weight and its rugged materials. If we assume that you would only be interested in other similarly light and/or rugged camera holsters, the available options shrink dramatically. In fact, I can only think of one other comparable option.
The Shimoda Toploader camera holster, like the Wandrd Route Pack, is produced by a company that focuses heavily on products for outdoor photographers. In my Top Loader review, I praised its solid build quality and the excellent protection that it offers a camera due to the thick padding used on all sides.
Compared side-by-side with the Wandrd Route Pack, features appear similar at first glance. Both camera holsters are relatively simple, offering one expandable compartment and a single zippered accessory pocket on the front. Both holsters also come with a shoulder strap so that the bag can be converted to a shoulder bag.
The Wandrd Route Pack is $69, where the Shimoda Top Loader is $64. However, the Top Loader doesn’t come with the necessary straps to attach the holster to the front of your pack. Those are an additional $10 if we are going to compare apples to apples. So, in the end, the Shimoda Top Loader is about $5 more expensive.
Both of these camera holsters are great. The Shimoda offers more protection for your camera with its thicker padding, but it can really only fit an un-gripped mirrorless camera. The Wandrd Route Pack will work with a much larger DSLR, and even a mirrorless camera with a battery grip attached.
Conclusion

The Route Pack camera holster is another great camera bag from Wandrd. The simple design keeps the weight to a minimum and the roomy top section of the bag makes it easy to get even larger cameras in and out while you’re still on the move.
Although the Route Pack comes with a very basic shoulder strap, the real strength of this bag is when it is used as a camera holster. Used in this way, attached to the waist belt or shoulder straps of a backpack such as the Wandrd Fernweh or Prvke, you’ll be able to access a camera with a lens incredibly quickly. Ease of camera access always leads to more photos from your day outdoors, and that’s never a bad thing.
Where to Buy
As always, I appreciate your using my links for your purchases. The WANDRD Route Pack is available through the links below. Buying directly from the manufacturer is always recommended, but other options are available.


