The PRVKE backpack (pronounced “Provoke”) from WANDRD became an instant classic when the first version was launched in 2016. The rugged yet stylish design makes it one of the most versatile camera bags on the market. If you’re a person that always steals a glace at another photographer’s camera bag as they pass by, chances are you have come across PRVKE backpacks being used for travel, everyday carry, street photography and even landscape photography in “we don’t need roads where we’re going” kinds of places.
Judging by what I have seen (yes, I’m am one of those glace-at-your-bag photographers), this is one of the most popular camera bags out there. In 2021, the PRVKE backpacks were updated with some brand new features, and some tweaks, based on feedback gathered from customers over the preceding years. As well as these additions and tweaks, two new sizes of the bag were added to the lineup in the PRVKE Lite 11L and the PRVKE 41L.

In this WANDRD PRVKE review, I’ll walk you through all of the updates available on the new version of the bags and take a deep dive into the overall function of the PRVKE backpack lineup. For those who aren’t sure which size is right for them, we will then look at the difference between each size to make sure you get it just right.
Table of Contents
What’s New With the New PRVKE
WANDRD is calling the new 2021 updated PRVKE backpacks simply the New PRVKE. Although for additional clarity, I have seen some retailers calling them variously PRVKE V2, 2021 PRVKE or PRVKE Second Edition. I prefer any of the retailer-chosen options because they give room for further expansion in years to come when perhaps we might see a third iteration of the bag. They can hardly call that the New New PRVKE when (if) it ever comes.
If you’re buying directly from WANDRD (recommended), you can be sure you are getting the updated 2021 version of the bag. If you plan to find it at another retailer, make doubly sure you are in fact getting the new version. At first glance, in-person or via an online image, it’s quite tricky to tell the difference between the old and the new. That is unless you are getting a PRVKE Lite or a PRVKE 41, which were not available in the first version.
New for the New PRVKE (V2) Features
- Updated back panel and shoulder straps with new shapes and better padding for enhanced breathability and a better fit on a broader range of body shapes and sizes.
- Hidden passport pocket is larger and more discreet.
- Luggage pass-through strap added.
- Stronger magnets in the tote handles.
- Better zipper pulls.
- Easier-to-use key hook.
- New fleece lined pocket positioning.
- 3 new pockets added to laptop sleeve.
- Liner flap that covered camera cube has been removed.
WANDRD PRVKE Specifications
PRVKE Lite
- Dimensions: 16″H X 11″W X 5.5″D
- Volume: 11L to 16L
- Weight: 2.5 LBS
PRVKE 21
- Dimensions: 19″H X 11″W X 6.5″D
- Volume: 21L to 26L
- Weight: 2.8 LBS
PRVKE 31
- Dimensions: 21″H X 12″W X 7″D
- Volume: 31L to 36L
- Weight: 3.4 LBS
PRVKE 41
- Dimensions: 21H” X 12″ W X 9″D
- Volume: 41L to 46L
- Weight: 3.7 LBS
Where are WANDRD Backpacks Made?
WANDRD bags are made in Vietnam and designed in Utah, USA.
PRVKE Sizing

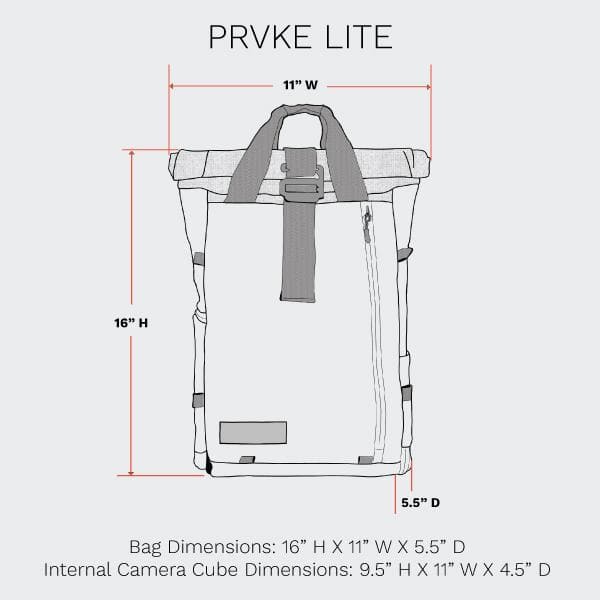

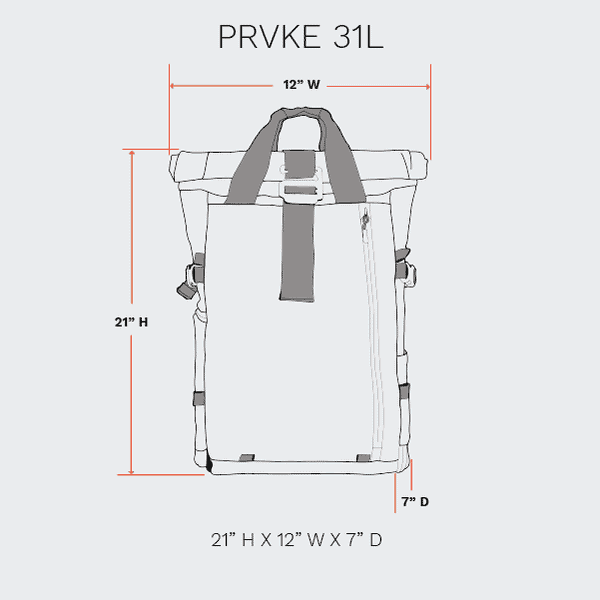
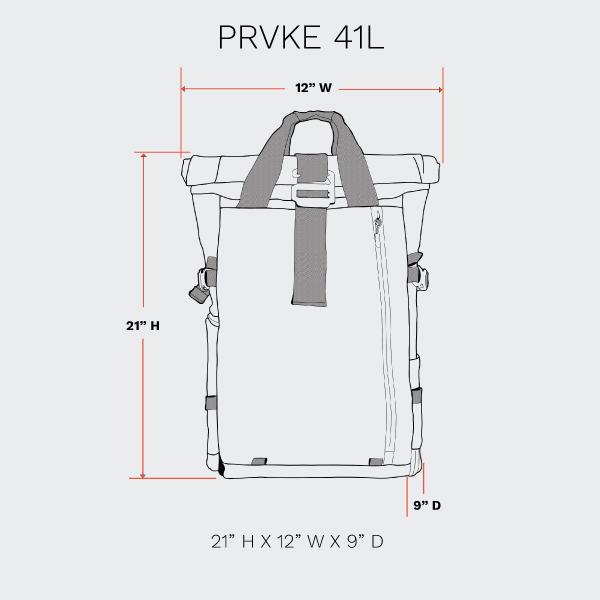
The PRVKE backpack is available in four-four sizes: 11L (PRVKE Lite),21L, 31L, and 41L. With these four sizes, WANDRD covers the full gamut of photography backpack uses, from quick city trips to all-day backcountry hikes. For this review, I tested the PRVKE 41L. However, the features, hardware and materials of the PRVKE lineup are identical across all bags. From my experience with the larger PRVKE 41L, we can easily extrapolate thoughts on the PRVKE backpack lineup as a whole. All you need to do, if you decide to buy one, is figure out which size is best for you. And of course, I’ll make some recommendations about that as we go through the review.
PRVKE Vs. PRVKE Lite
When the “all-new” PRVKE was launched in 2021, WANDRD introduced two new sizes to the lineup, sitting at each end of the sizing spectrum. The new largest PRVKE, the PRVKE 41L, is named in the same self-explanatory way as previous versions of the backpack. However, for some reason, WANDRD decided to give the new smallest PRVKE a new name. Instead of calling it the PRVKE 11L, they called it the PRVKE Lite.
I’m sure this will confuse people when they browse the WANDRD store. Aside from the maximum capacity of the bag, there is noting “Lite” about the PRVKE Lite. It is made from the same waterproof Tarpaulin and Robic 1680D Ballistic Nylon as the other PRVKE backpacks. It has the same roll-top, the same side access, the same back panel access and the same hardware as the three larger models.
The only minor difference between the PRVKE Lite and the larger PRVKE backpacks is that the padded camera compartment is not removable on the Lite version. Personally, I don’t think this small tweak warranted a new product name. To all intents and purposes, the PRVKE Lite is just a PRVKE 11L.
When choosing the PRVKE that is right for you, all you need to do is analyze what it is you want to carry. Then match that with the recommendations above. If it looks like the PRVKE Lite is the right one for you, do not worry that you are getting some sort of low-end, bottom-of-the-rung version of the PRVKE. This is absolutely not the case. The PRVKE Lite is simply the smallest PRVKE. It looks, feels and acts just like its bigger siblings.
PRVKE 21 Vs. 31
A common question regarding the PRVKE is whether to choose the 21 or the 31. Despite there now being two additional sizes in the lineup, I still expect the 21 and 31 to be the most popular. Looking at the dimensions from the specification section, you can see that the PRVKE 31 is larger in every way, but never by a huge amount. One important dimension, though, is depth.
The PRVKE 31 is very slightly deeper than the 21, and this means that when you pick the camera cube to match the bag, you will be picking from the deeper “Plus” size of the cube. In the next section of the review, I will go into much more detail about the camera cube choices, but the quick thing to note is that the deeper depth of the 31 is designed to accommodate DSLR camera bodies that are typically slightly taller than mirrorless bodies. For DSLR shooters, this makes the decision easier: Go with the PRVKE 31.
Mirrorless users have more choices and the decision will largely come down to how much non-photographic gear you want to carry in your bag. While the PRVKE 31 uses a deeper camera cube than the PRVKE 21, the other dimensions are the same, which means you can’t necessarily carry more camera gear in the 31 unless you are stacking small prime lenses vertically. The real difference will be felt in the size of the bag’s top section above the camera cube.
My 2 cents on this decision? If you are planning to travel extensively with the bag, and also do some hiking for occasional landscape photography, go with the PRVKE 31. There will be days that you’ll appreciate the extra room up top, and when you don’t need it, the rolltop keeps it all nice and tight anyway. On the other hand, if you just want a smart looking backpack for everyday city carry of your camera, laptop and a couple or three lenses, the PRVKE 21 has plenty of space.
WANDRD Camera Cube
Aside from the PRVKE Lite which contains a built-in camera compartment, the rest of the PRVKE backpacks are available either as “bag only” options or bundled with a compatible WANDRD camera cube. These camera cubes are very nicely made but continue with my pet peeve of an all-black interior design, making it unnecessarily hard to find small dark objects. I’ll beat the dead horse again: WANDRD, can we please at least move to a shade of grey?
If you already own a camera cube from another camera bag brand, you could use it in the PRVKE if the dimensions are similar to the recommended size of the WANDRD camera cube. This works fine if you plan to use the back panel access for retrieving your camera. However, it’s unlikely that the side hatch access is going to work well as the side hatch in-camera cubes are cut specifically to fit a brand’s own bag. In some cases, such as with F-Stop’s popular camera ICU cubes, they don’t even have a side hatch.
Essential Cube Vs. Pro Cube
The Essential Cubes are smaller than the Pro Cubes. An Essential Cube only takes up the bottom 2/3rds of the bag, leaving the top section of the bag available to store other daily-use items that can then be accessed from the bag’s roll-top access. If you like the idea of using the roll-top access for items such as a jacket or a WANDRD tech bag, you should try to get all of your camera gear into an Essential Camera Cube.


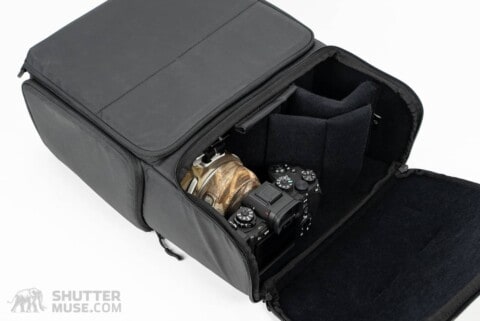


The Pro Camera Cubes are useful when you need to carry a large variety of cameras and lenses, or a selection of photo accessories such as multiple speedlights. They are also perfect for carrying longer lenses such as a Sony 200-600mm. The bag’s roll-top access can still be used with a Pro Camera Cube, but you will now be accessing the camera gear that is in the top part of the cube. This can be useful for extracting a long lens like the Sony 200-600mm with a camera body attached.
WANDRD Camera Cube Dimensions
Here are the dimensions of the various cubes so that you can determine which cube you need to hold all your camera gear. The size of the cube you need will determine which of the PRVKE backpacks is right for you since each cube is designed for a specific size of the bag.
Essential Camera Cubes
- Essential: 9.5″H X 11″W X 4.5″
- Essential Plus: 11″H X 12.5″W X 5″
- Essential Deep: 12″H X 11″W X 6.75″D
Pro Camera Cubes
- Pro: 16.5″H X 11″W X 4.5″D
- Pro Plus: 18.5″H X 12.5″W X 5″D
- Pro Deep: 17″H X 12″W X 6.75″D
Reguar, Plus Or Deep?
Once you have chosen whether you are going to go with the Essential or Pro size cube, you need to make sure you get the right depth for the bag you will be buying with it. There are three depths, and each one is designed for a different PRVKE backpack.
- Regular Essential or Regular Pro -> PRVKE 21
- Essential Plus or Pro Plus -> PRVKE 31
- Essential Deep or Pro Deep -> PRVKE 41
- Mirrorless camera body -> PRVKE Lite or PRVKE 21
- DSLR camera body -> PRVKE 31
- Gripped mirrorless/DSLR or pro-sized body -> PRVKE 41
While you could buy a camera cube that is shallower than the maximum that will fit in your bag, I would not recommend it. For example, I would not recommend putting a Regular or a Plus camera cube in the PRVKE 41. You should go with the Deep camera cube. Using a cube that is too shallow will allow the gear in the cube to move around too much in the bag and potentially fall out of the padded part of the bag.

As you can see from the dimensions of the various camera cubes, there is very little difference between the Regular depth and the Plus depth. Just 0.5 inches. If you are shooting with a mirrorless camera you can choose to use either the Regular depth or the Plus depth. This is also the same as choosing between the PRVKE 21 and PRVKE 31 since those are the bags designed for those depths of the cube.
If you are shooting with a DSLR, that 0.5 inch of extra depth in the Plus cube makes things a little more comfortable to pack. As I’m recommending using the cube that is designed for the correct size of the bag, this essentially means the PRVKE 31 is a better choice for people who are using a DSLR.
If you are using a gripped mirrorless camera, a gripped DSLR or a pro-sized camera body such as the Canon R3 or Nikon Z9, you will need to move up to the PRVKE 41 to use either the Essential Deep or Pro Deep camera cube. You cannot use a gripped or pro-sized body in the PRVKE Lite, PRVKE 21 or PRVKE 31.
PRVKE Feature Review
Harness and Comfort


The new harness on the PRVKE adds some curvature that makes it more comfortable. The designers have done a good job of maximising the comfort available from a relatively simplistic harness. There are no load-lifter straps and no waist belt, though the latter is available as an option $20 upgrade. There is a very nice sternum strap and some extremely squishy back panel padding made from aerated foam.
I would probably not bother adding a waist strap to the three smaller sizes of this bag, but I would definitely consider it on the PRVKE 41 if I was really loading it up with camera gear. With a 40+ litre bag, you can definitely reach a weight where it would be helpful to spread some of that load directly to your hips.


In terms of overall carrying comfort, the PRVKE falls exactly where I would expect it to based on its multiple intended uses. It is not as comfortable as a dedicated and more expensive outdoor photo backpack such as the Shimoda Designs Explore, WANDRD’s own Fernweh or a MindShift Rotation 34. But it does stack up very well against other do-it-all camera backpacks such as those from Think Tank and Lowepro. It also beats the comfort of dedicated “city packs” such as the Peak Design Everyday Backpack.
In this area I am impressed. You simply cannot have the same kind of complex harness found on dedicated photo hiking packs when you are targeting a much broader day-to-day usage. Such things are cumbersome in city use and travel. WANDRD’s designers have done a great job at cutting it down to the bare necessities and then doing those things very well.
Fleece Lined Pocket


Above the back panel is another small zippered pocket. This one is lined with a fleece material so that it can be used to safely store your phone or your glasses. The available volume of this pocket is impacted by the use of the larger Pro Camera Cube. When this larger cube is used, the pocket becomes more suitable for flat objects like a phone and less suitable for oddly shaped items like a pair of glasses.
Tote Handles


The tote handles are as much a part of the PRVKE’s design language as they are a useful feature. They are one of the many features of this bag that makes it a great crossover bag that can go from daily city commuter use to weekender day hiker use. When you bring the tote handles together, they snap onto each other with a satisfying click.
Key Garage


On one side of the bag, you’ll find another weather-resistant zipper that gives you access to what WANDRD calls the key garage. A plastic clip inside it will secure your keys while keeping their rough metal edges away from your tech and camera gear. This pocket is larger than you might think, and I was easily able to it for my In-Reach GPS messenger and my wallet while hiking with the pack.
Camera Accesss
Back Panel Access

The easiest way to get at your camera gear is through the zippered back panel. This style of access will always be my favourite, particularly when compared to the front panel access found on many other bags. With back access like the PRVKE, it keeps the backpack harness nice and clean so that you don’t get dirt on your jacket.
Side Access
Side access is not a feature I typically use, but I guess it must be popular with some people because it appears on so many photography backpacks these days. This side hatch will allow you to grab a camera body with a lens attached, without taking the bag off and putting it on the ground.


If you find yourself shooting with one lens a lot of the time, like a 24-70mm, this might be useful for you. If you’re the kind of photographer that likes to switch lenses often while covering a scene, you might as well take the bag off and use the back access. With the PRVKE 41, the side hatch is quite a lot larger than the other models. A little clever internal divider organization
Rolltop Access
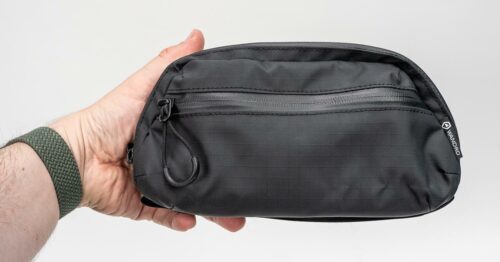
The PRVKE’s rolltop access has always been a major feature of the bag’s design and functionality. When a PRVKE is paired with the Essential size of the camera cube, the rolltop gives you access to a section of the bag that is perfectly sized for storing your daily-use non-photographic items. A jacket, some snacks and a WANDRD Tech Bag are just right in a PRVKE 21 or PRVKE 31. When a Pro Camera Cube is used, you can use the rolltop to access the cameras and lenses store at the top of the cube.
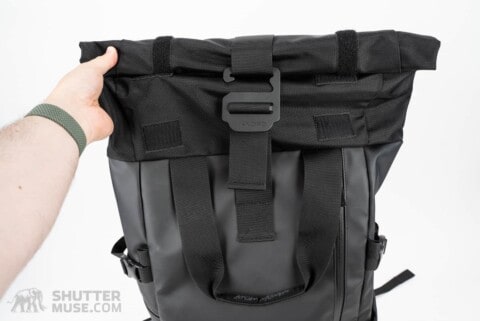

The added depth in the PRVKE 41 means the top section feels significantly larger. If you are heading out for a longer hike with this bag, you can easily fit a pair of top layers in there, along with rain pants, binoculars, In-Reach or GPS device and food and water for a long day.
One of the great things about the rolltop on all of the PRVKE backpack sizes is the adjustable volume that is created by the large metal hook and the daisy chain. This expandable design can add up to 5L in volume to each bag, raising the maximum volumes of the PRVKE backpack lineup to 16L, 26L, 36L and 46L.
Hidden Passport Pocket


The PRVKE’s passport pocket is hidden behind the luggage pass-through strap, making it incredibly discreet. In addition to this updated location, the size of the pocket has also been increased. There is plenty of room in this pocket for your boarding passes, emergency cash, drivers licence and passport, but it should be noted that its position within the back panel means that it is only suitable for flat objects.
Tripod Carry


The best way to carry a tripod on a PRVKE backpack is to use the expandable side pocket. If this pocket is already in use by a water bottle or coffee thermos, you can mount a tripod on the opposite side of the bag using the built-in cinch strap. The downside to this is that it prevents you from using the side hatch to access your gear. Secondly, there is only a single strap on that side, which leaves the lower part of your tripod swinging around while you walk.

If you are not carrying the tripod in the side pocket, a better option is to purchase a pair of WANDRD’s accessory straps. These straps can be attached to the front of the backpack, giving you ample space to secure even the largest of tripods. The straps are available in two varieties: Basic straps for $15, or Premium straps, with magnetic hardware and fun colour options for $39.
Laptop/Tablet Carry
All of the PRVKE backpacks can hold up to a 16″ laptop and a 12.9″ tablet using a split sleeve on the inside of the clamshell opening. This laptop section has also been updated to include three zippered organizational pockets that are useful for smaller items such as memory card readers or skinny SSDs. These pockets are not large enough for your laptop’s power adapter, but you could certainly store several USB cables in them.


Water or Drinks Bottle Carry
The simplest way to carry a water bottle in the PRVKE is to use the expandable side pocket. If you are dead set on using that side pocket for a tripod, you’ll have to put your bottle on the inside of the backpack. The location that would make the most sense is the top section of the bag, accessible via the rolltop.
Front Pocket


On the front of the bag, there is a flat zippered pocket. It contains no organizational features but would be a good place to store flatter objects such as books, magazines or papers.
Optional Accessories
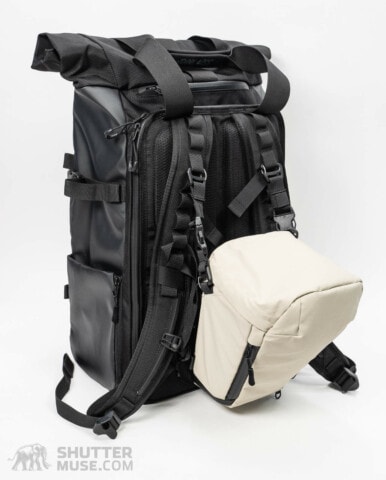
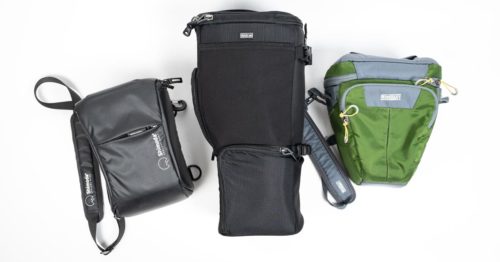
I have already mentioned the optional hip belt and the optional accessory straps. Two other items worth considering are the WANDRD Route Pack camera holster, and the PRVKE rain cover. The camera holster is useful for hikers that want fast access to a camera. I prefer using a holster to using the bag’s side access, which always requires a certain amount of unbuckling. You can read more about this in my review of the Route Pack.
The PRVKE rain cover is available for $20. Most people are not going to need this. The bag is extremely water-resistant without it. The only time I would consider buying the rain cover is if I was headed to a place that was known for extremely heavy downpours, and thought I might get caught in one with no way to shelter. If you do purchase the rain cover, there is a small zippered pocket in the base of the bag to hold it.

WANDRD PRVKE 41 Vs. Fernweh
The PRVKE 41 is expandable to 46L using the rolltop. This puts it close enough to the 50L volume of WANDRD’s Fenweh backpack that I’m sure a few people might be weighing up both options. I have both of these backpacks at my office and have used them extensively for this PRVKE review and my detailed Fernweh review.


While the volume specifications might seem to place these two bags in a similar space, putting them side-by-side shows some immediate and considerable differences. The Fernweh is a much more technical bag with a more comfortable harness that makes it suitable for long hikes with heavier loads. The harness also has adjustable torso sizing and comes with a contoured hip belt as standard. This difference in technicality is reflected in the price points, with the Fernweh coming in at $100 more expensive than the PRVKE 41.
The PRVKE is a jack of all trades. It’s able to blend seamlessly into city life, despite its large size, while still performing admirably for travel and occasional outdoor photography. The Fernweh on the other hand is like a precision instrument that has been designed to comfortably carry heavy loads into mountains anywhere in the world. But good luck trying to blend in while using it for everyday carry on the way to the office.
Conclusion
The PRVKE photography backpack is an excellent all-rounder that’s available in enough different sizes for anyone to find one that is “just right”. The key to loving this bag is to make sure you’re buying the right bag for your needs in the first place. If you want a dedicated travel bag, or a dedicated outdoor photo pack, or even a dedicated everyday city traveller, there are hyper-focused camera bags on the market that cover those needs. But if you want one bag, a quiver killer photo bag, that ticks all of those boxes to at least a very good degree, the PRVKE backpack is very hard to beat. I can see why they sell them in such large numbers.
Where to Buy
WANDRD bags are available directly from their own online store, with free shipping in most cases. I always recommend buying directly if you can. Should you have any problems, they can then be easily solved directly with their own (great) customer service. However, if you can’t buy directly for some reason, I have also included links to other major online retailers. For international buyers, note that B&H has free shipping to Canada, and Moment has free shipping to many places.
- WANDRD PRVKE Lite – WANDRD / B&H Photo / Moment / Amazon / Adorama / WEX (UK)
- WANDRD PRVKE 21 – WANDRD / B&H Photo / Moment / Amazon / Adorama / WEX (UK)
- WANDRD PRVKE 31 – WANDRD / B&H Photo / Moment / Amazon / Adorama / WEX (UK)
- WANDRD PRVKE 41 – WANDRD / B&H Photo / Moment / Amazon / Adorama / WEX (UK)
- WANDRD Essential Camera Cubes – WANDRD / B&H Photo / Moment / Amazon / Adorama / WEX (UK)
- WANDRD Pro Camera Cubes – WANDRD / B&H Photo / Moment / Amazon / Adorama / WEX (UK)





Do you know if the Wandrd PRVKE LITE with its in built dividers can be re arranged to accommodate a Sony 200-600 + A1 (hood reversed)?
Thank you so much and would be great if you get to see this question and if I get answer would help me buy while its on sale right now
No, the LITE is too small for that lens/camera combination.