
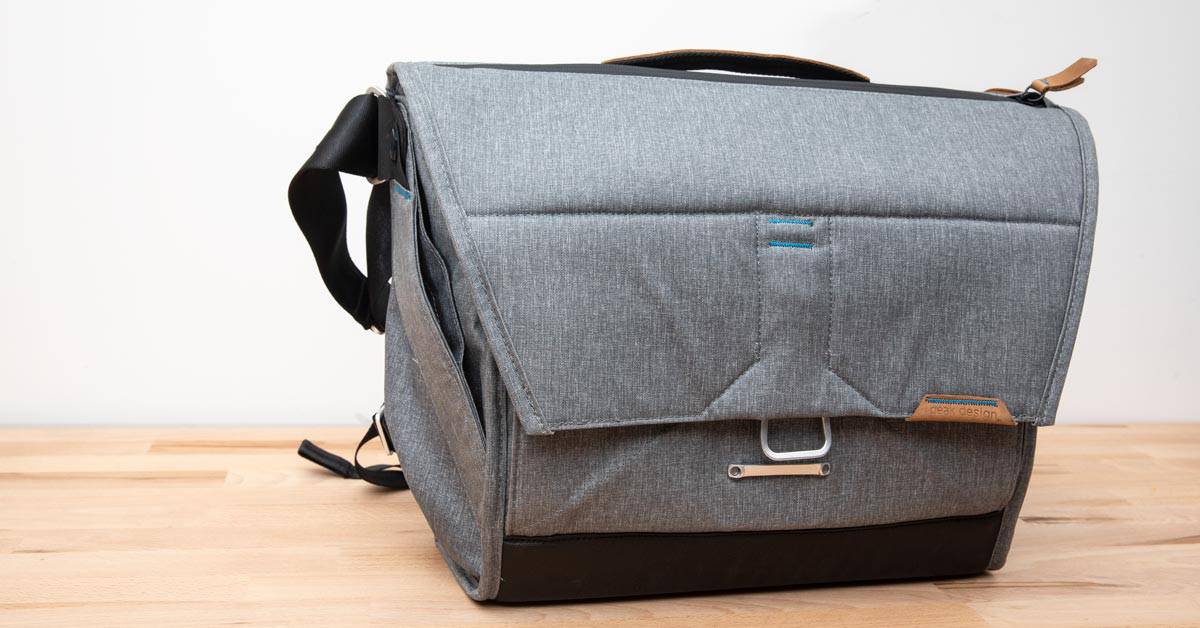
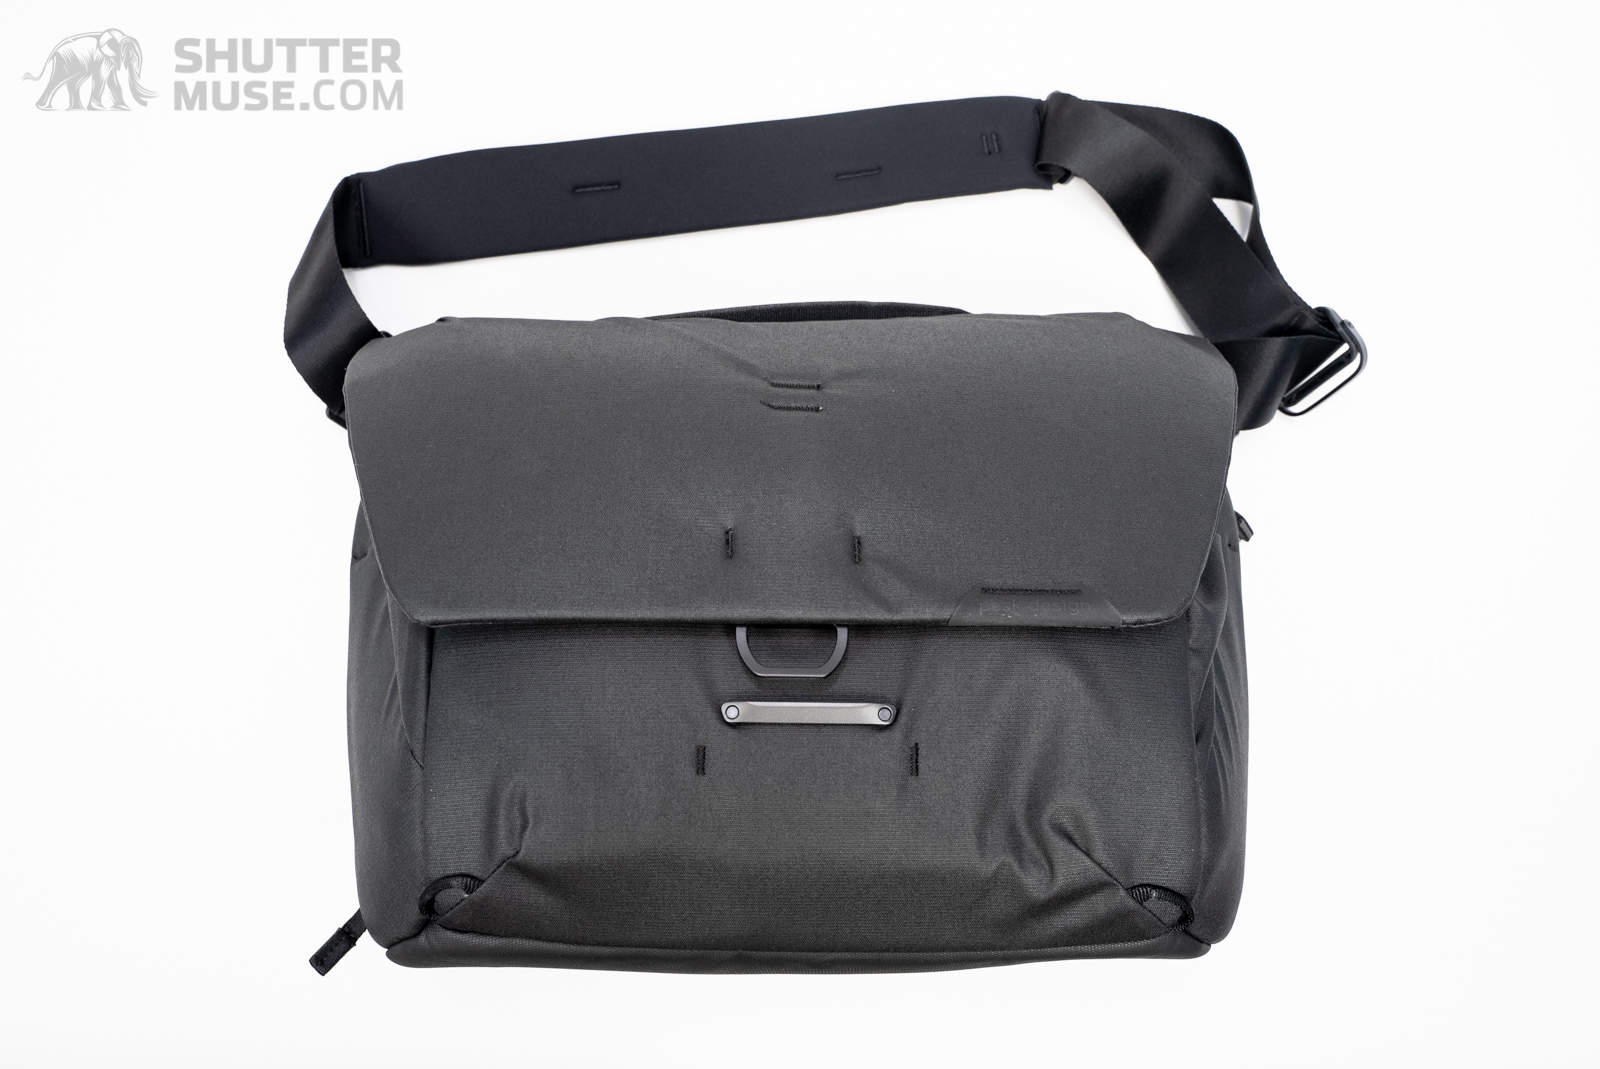
The Peak Design Everyday Messenger bag became an instant classic when the first version, launched on Kickstarter, raised millions of dollars. Walking the line between a smart city-style camera bag and a rugged outdoor companion, the Everyday Messenger can be found practically anywhere you find a gathering of photographers. For the Everyday Messenger V2, Peak Design gave the bag a nip and a tuck to address a few minor complaints about the original. Have they messed too much with a good thing? Or have they managed to improve upon a crowd-favourite?
In this review, we will address these questions by taking a deep dive into the new design of this bag. Of course, there is my customary huge selection of detailed images, as well as a comparison to the previous version of the bag, and some suggestions of comparable alternative options from other brands. You’ll also find a detailed hand-on video.
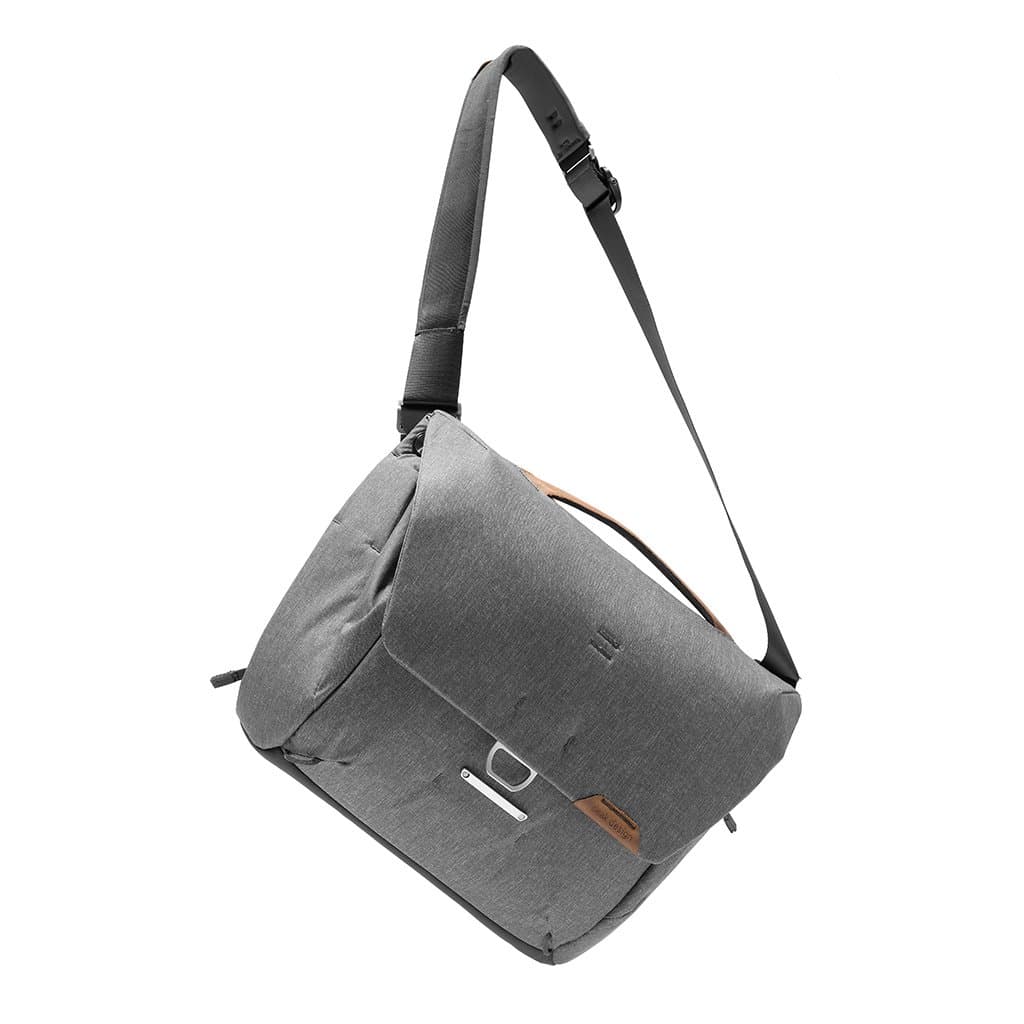
Table of Contents
Features and Specifications
Specifications
- Capacity: 13L min, 16L max
- Max Laptop: 22.9cm x 2.5cm x 33cm (9″ x 1″ x 13″) Holds 13” Macbook Pro
- Max Tablet: 30.6cm x 22.1cm x .7 cm (12″ x 8.7″ x 0.3″) Holds 12.9″ iPad Pro
- Weight Without Dividers: 1.01kg (2.21lb)
- Weight With Dividers: 1.21kg (2.67lb)
- 400D double poly-coated DWR-impregnated nylon canvas shell
- 900D waterproof bottom liner
- 100% recycled post-consumer material
- SKU: BEDM-13-BK-2 / BEDM-13-AS-2
Features
- Luggage pass-through
- Padded briefcase carry handle
- 3 liters of internal expansion provided by MagLatch hardware
- Protective 13” laptop sleeve with pockets for tablets and documents
- 2 side external zipper pockets for phone, keys, wallet
- Stretchy internal pockets for small items (cards, batteries) and larger items (water bottles, lenses)
- UltraZip external zippers
- Removable quick-adjusting padded shoulder strap for cross-body or single shoulder carry
Example Load
- Mirrorless camera body/lens + 1-2 extra lenses & accessories
- DJI Mavic drone + controller, batteries, charger
- Crop-sensor DSLR/lens + 1-2 extra lenses & accessories
- DLSR camera body/lens + 1-2 extra lens
- Fits a full-frame DSLR + 70-200 pro lens
Everyday Messenger V1 vs. Everyday Messenger V2
- Aesthetic refinements, giving it a sleeker profile
- Less bulk and more efficient construction, making it 24% lighter
- Added external carry strap system with Cord Hook connectors
- Overhauled shoulder strap design for better comfort + adjustment, & elimination of slippage
- More functional organization via new internal and external storage pockets
- Increased laptop and document carry capacity (although now only available in 13″ size)
- Removed outer access zips and front access panel in favour of cleaner profile and MagLatch access
- New UltraZip external zippers, vastly more durable than conventional zips
- New outer fabric is 100% recycled and Bluesign certified (all colours except Black)
Everyday Messenger V2 Video Review
If you prefer to watch a video, or simply appreciate getting a sense of the bag’s size by seeing it handled, I have created a detailed video review.
If you enjoy the video, please like, comment and subscribe to the channel. It really helps us out!
Detailed Hands-On Review
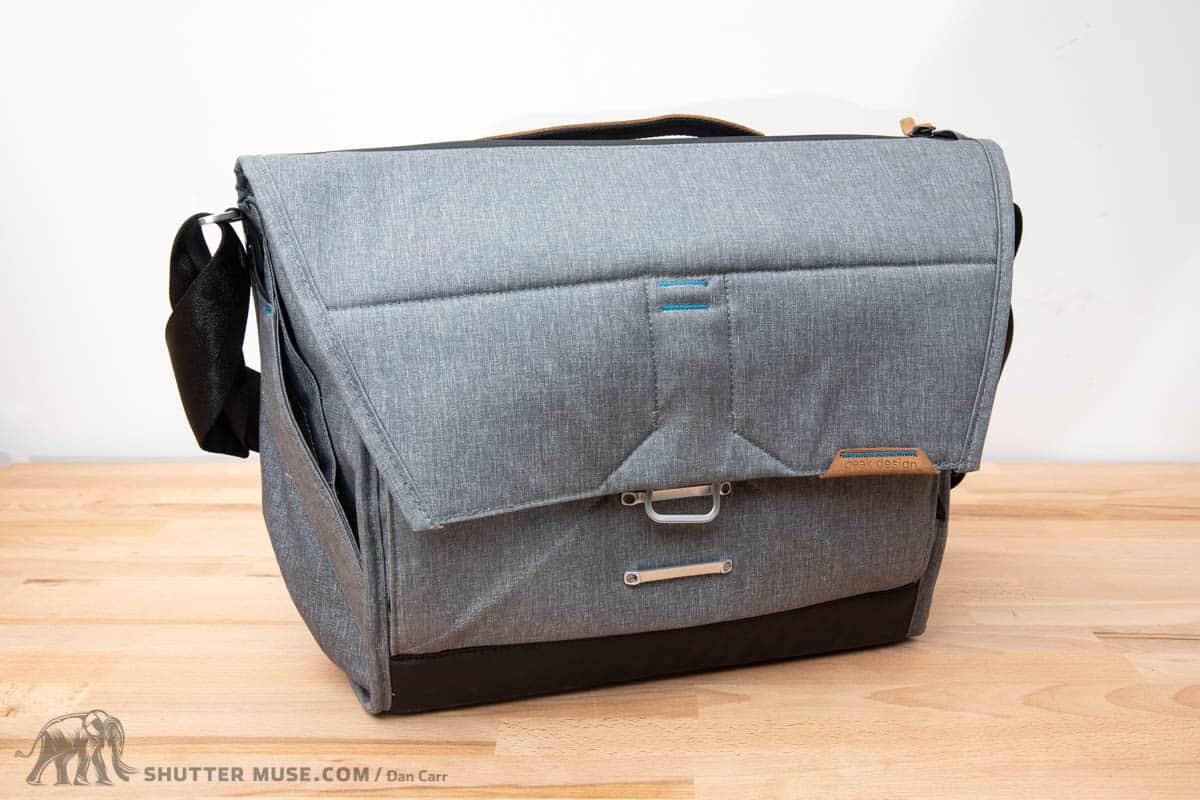
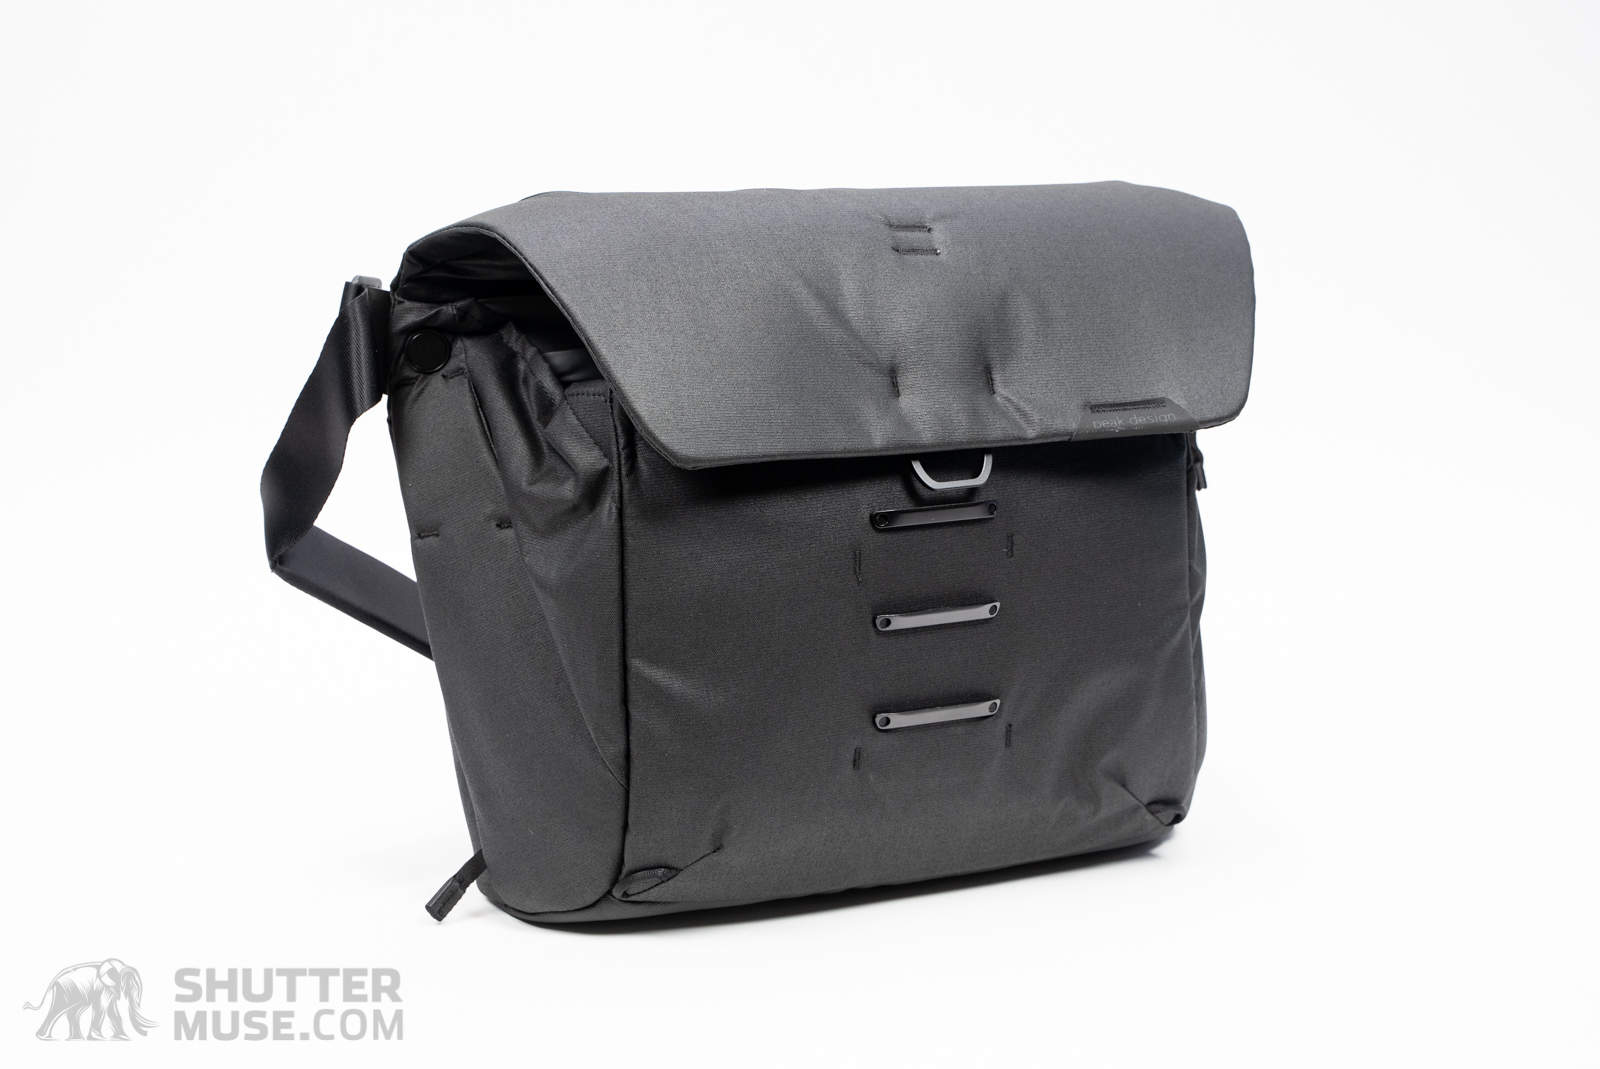
Latch and Adjustable Volume
The Everyday Messenger V2 uses a metal spring-loaded latch to close the bag with four different volumes. At its smallest, the bag has a 13L volume. At its largest, the volume increases to 16L. Once the latch is hooked onto the metal bars on the bag, it feels very secure, requiring a downward pull to unhook it from the bars. When you first get your hands on the bag, this system might not feel intuitive and fast, but all it takes is a little practice for it to become second nature.
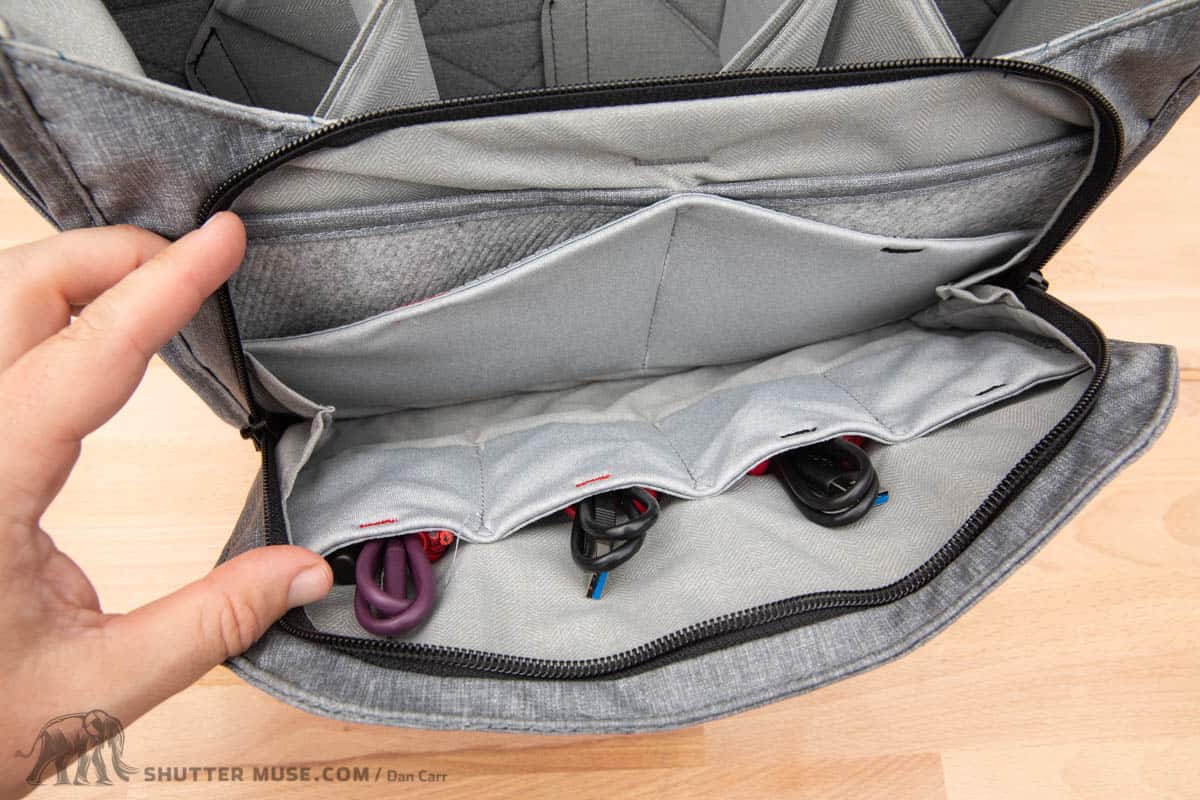
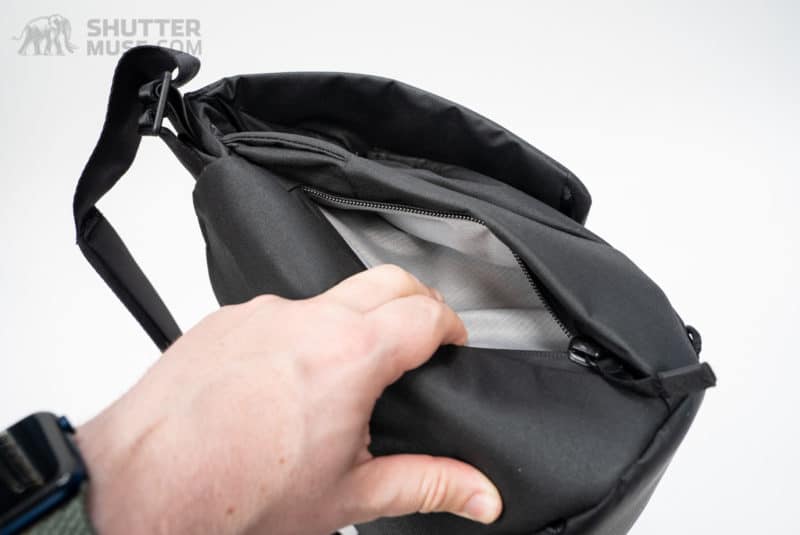
Front “Secret” Pocket
For V2, the design of the front accessory pocket has been altered. Peak Design has referred to this as a “secret” pocket, but that’s a bit of an exaggeration. It’s slightly more discreet than the previous version, but the chunky zipper really gives away its location if you actually wanted it to be a secret.
This pocket is good for small items such as an SD card holder, a few spare batteries and perhaps a USB battery bank for your phone. It feels like a very secure location for precious, smaller items because the zipper only opens on the top, and to access this you would need to open the main flap of the bag. This makes it a good location for a passport and travel documents, safe from the sticky fingers of pickpockets.
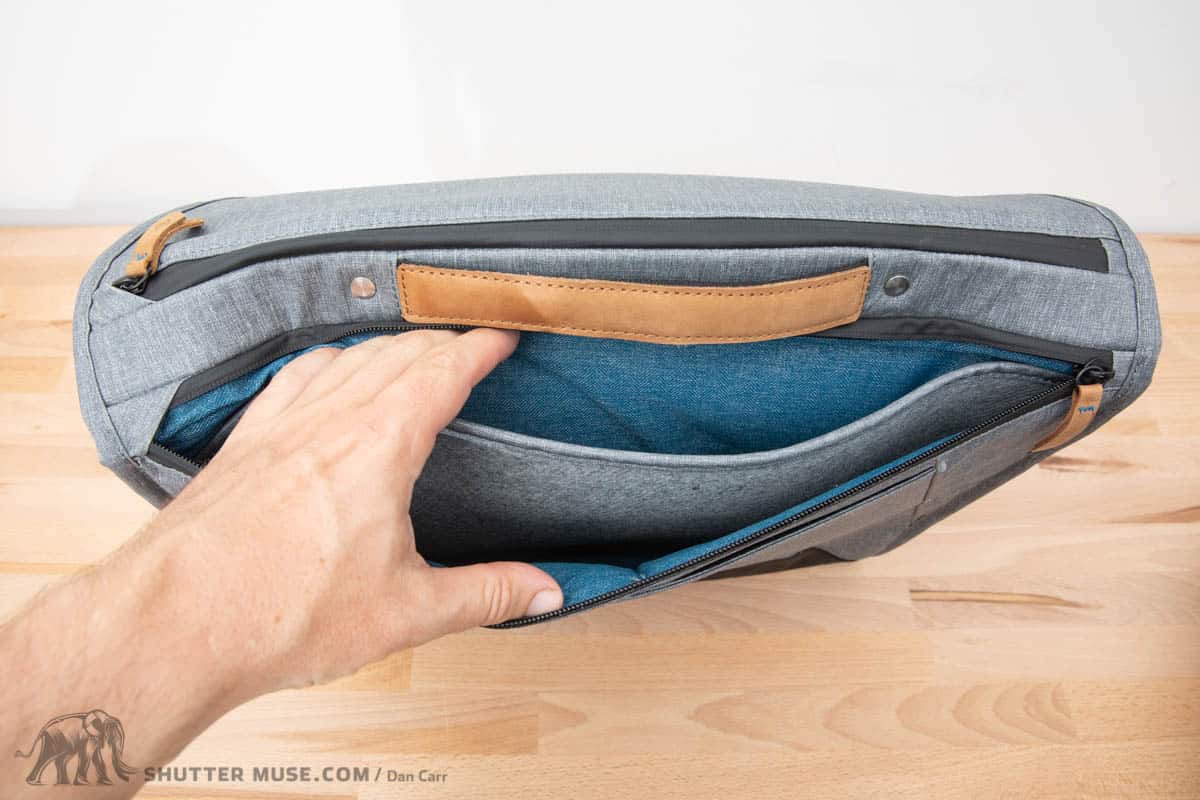
Lid Pocket

Inside the lid of the bag, you’ll find a small zippered pocket that works well for sunglasses, a phone or skinny long items such as pens. Just like the front pocket, there is a certain amount of inbuilt security to this pocket as it cannot be accessed without opening the main flap of the bag. Something which even a skilled pickpocket isn’t going to manage without you realizing.
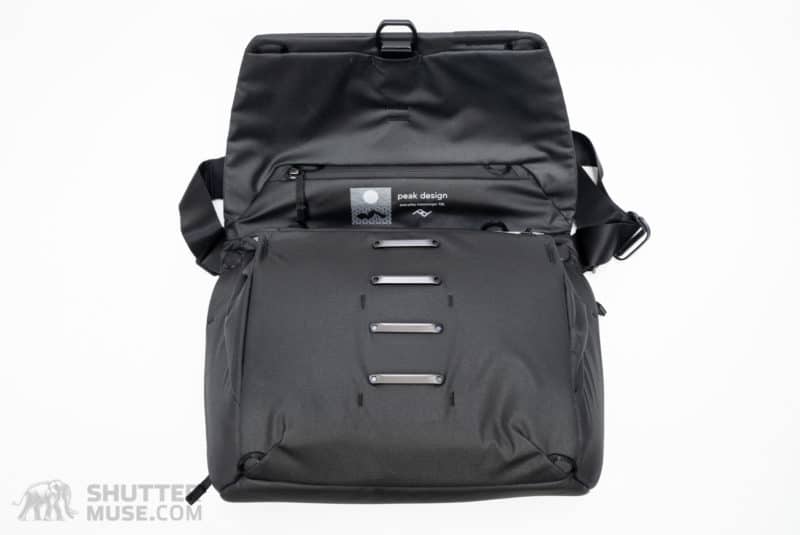
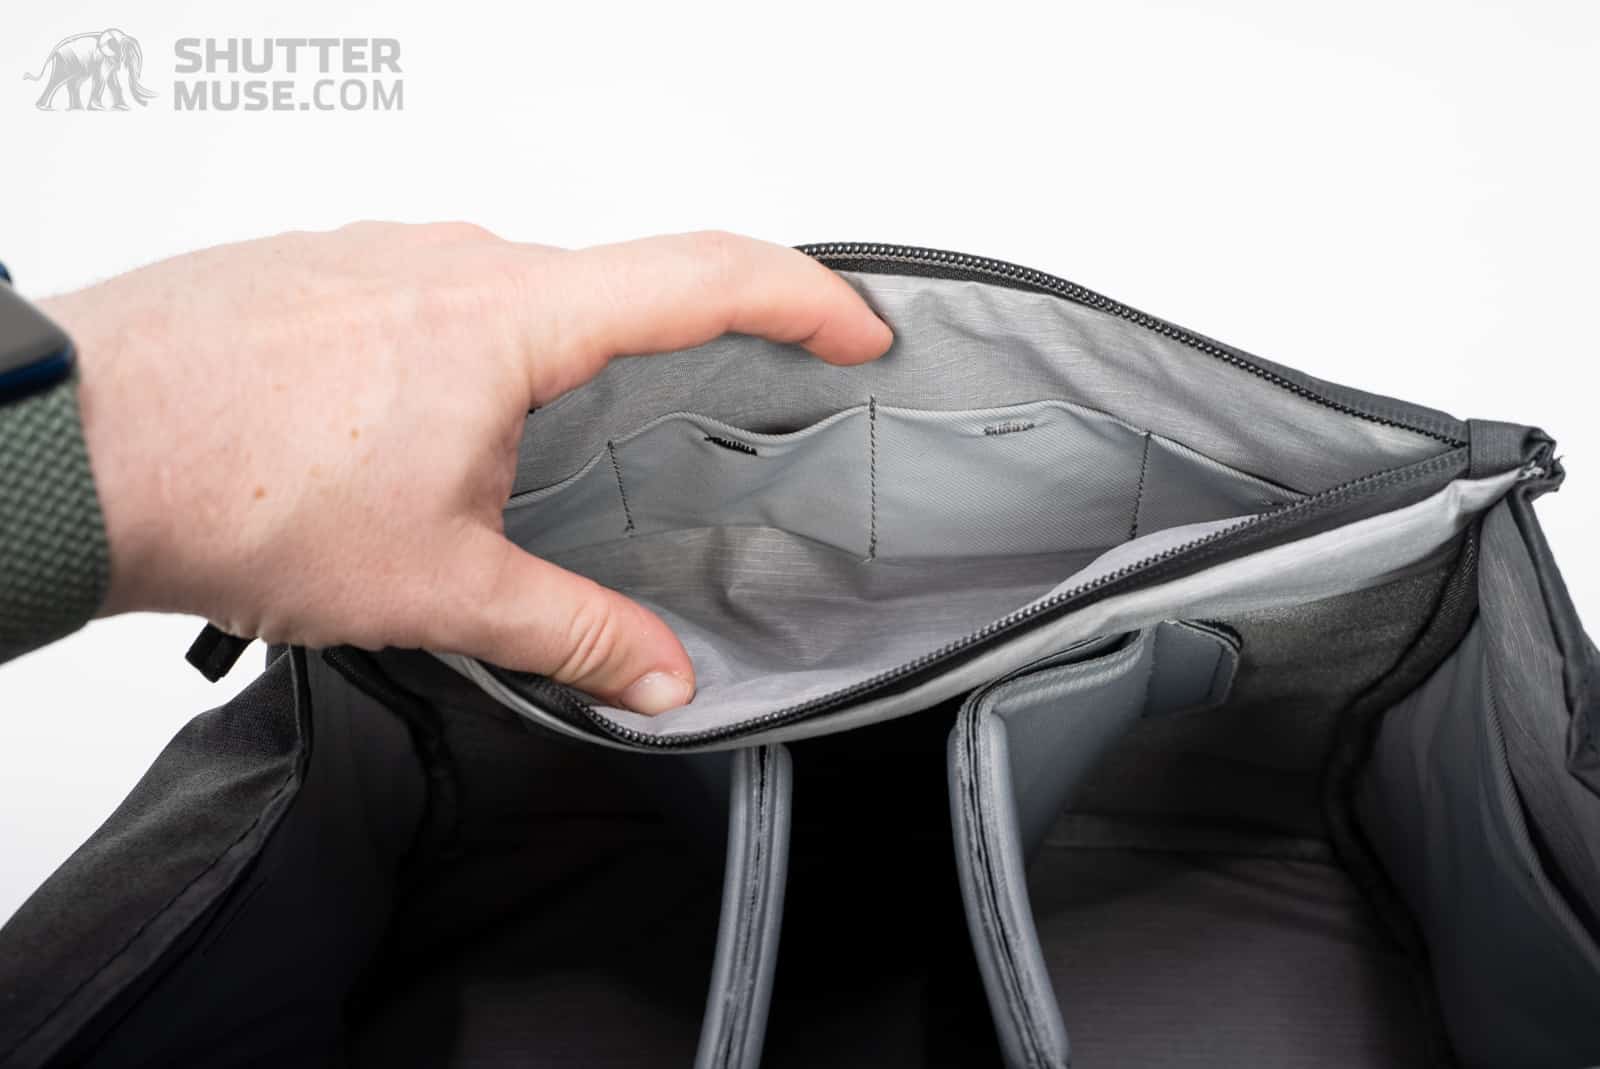
Laptop + Tablet Pockets
Once inside the main compartment of the bag, you’ll find a rear section that is divided into two halves to accommodate both a laptop and a tablet. A set of magnets holds the two sections closed. I’m glad that this section is divided into two. If I’m carrying a laptop, there are usually at least a few documents in my bag and this keeps them nicely separated.
The most important thing to note is that this bag will only hold up to a 13″ laptop. While previous versions of this bag were also available in a 15″ sizing, that is not the case with the Everyday Messenger V2. This was a surprise to me, and I’m sure a few people will wish to have a larger version for a 15″ or 16″ laptop. Peak Design must have made this decision based on the sales numbers for the two sizes of the original bag, but it still comes as a surprise to me that the 15″ version must have sold in much smaller numbers.
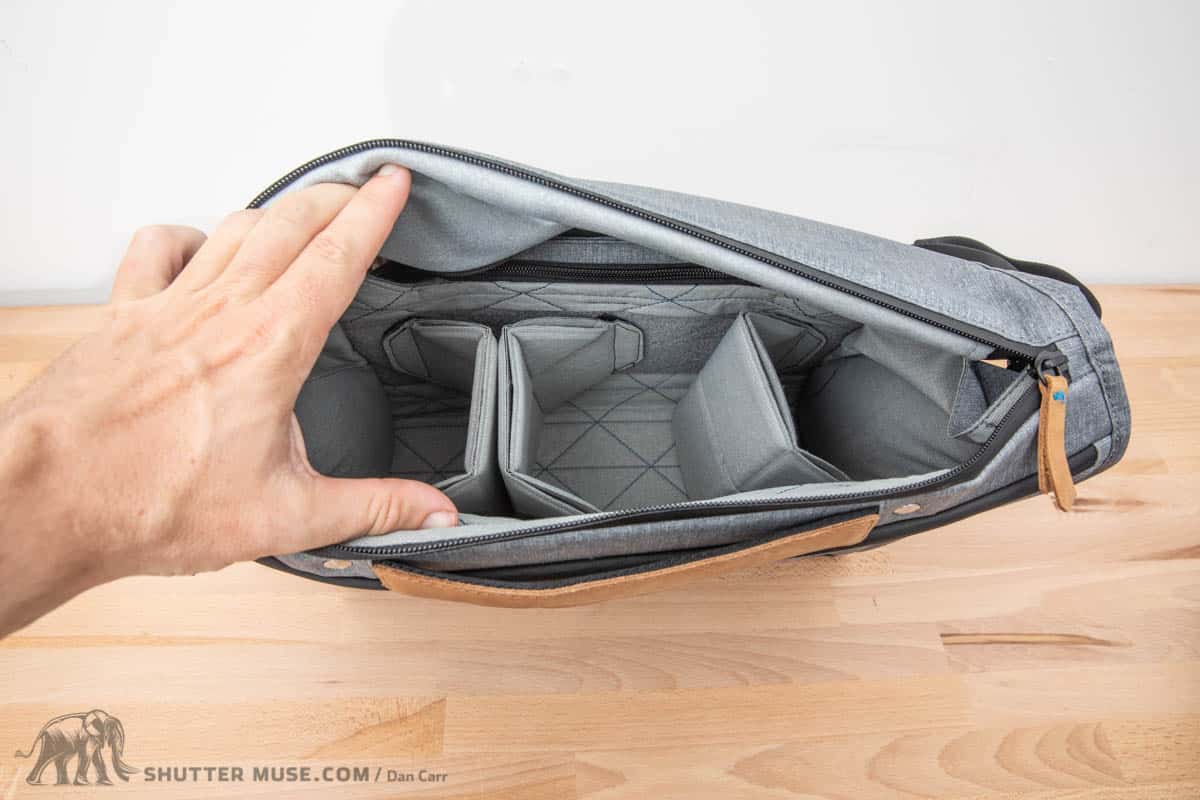
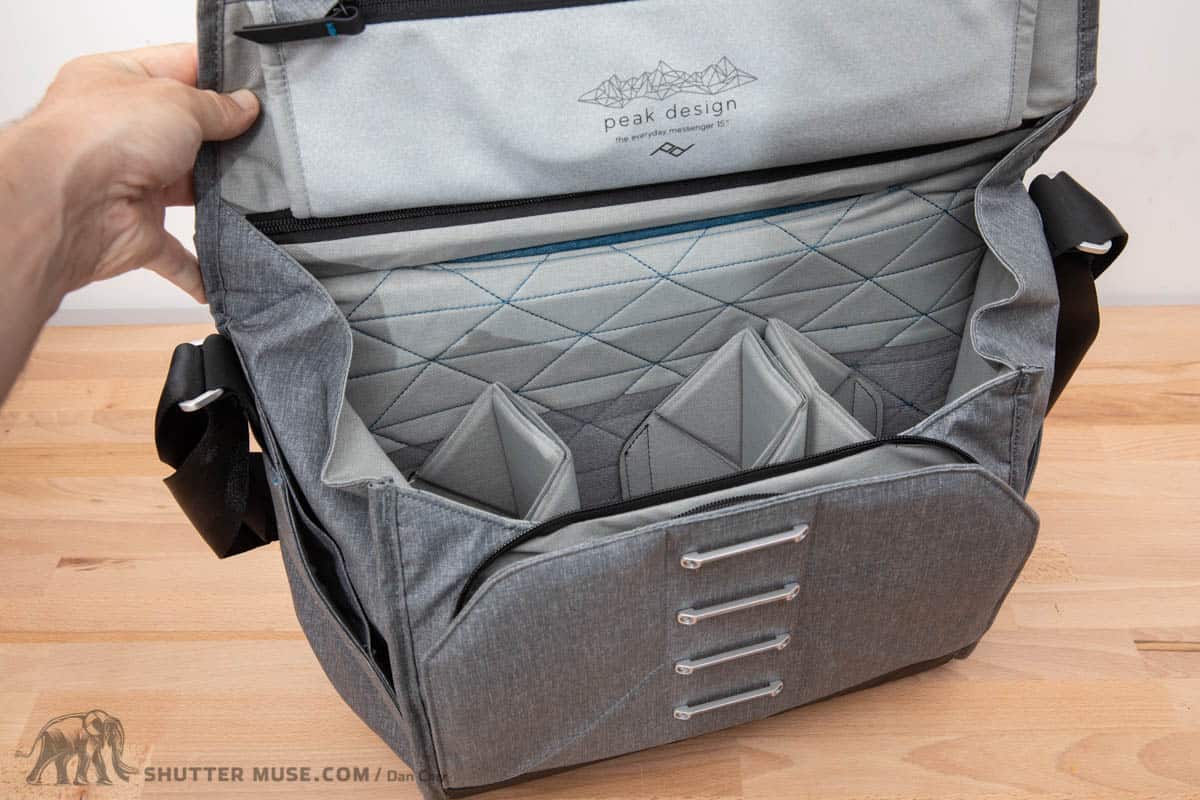
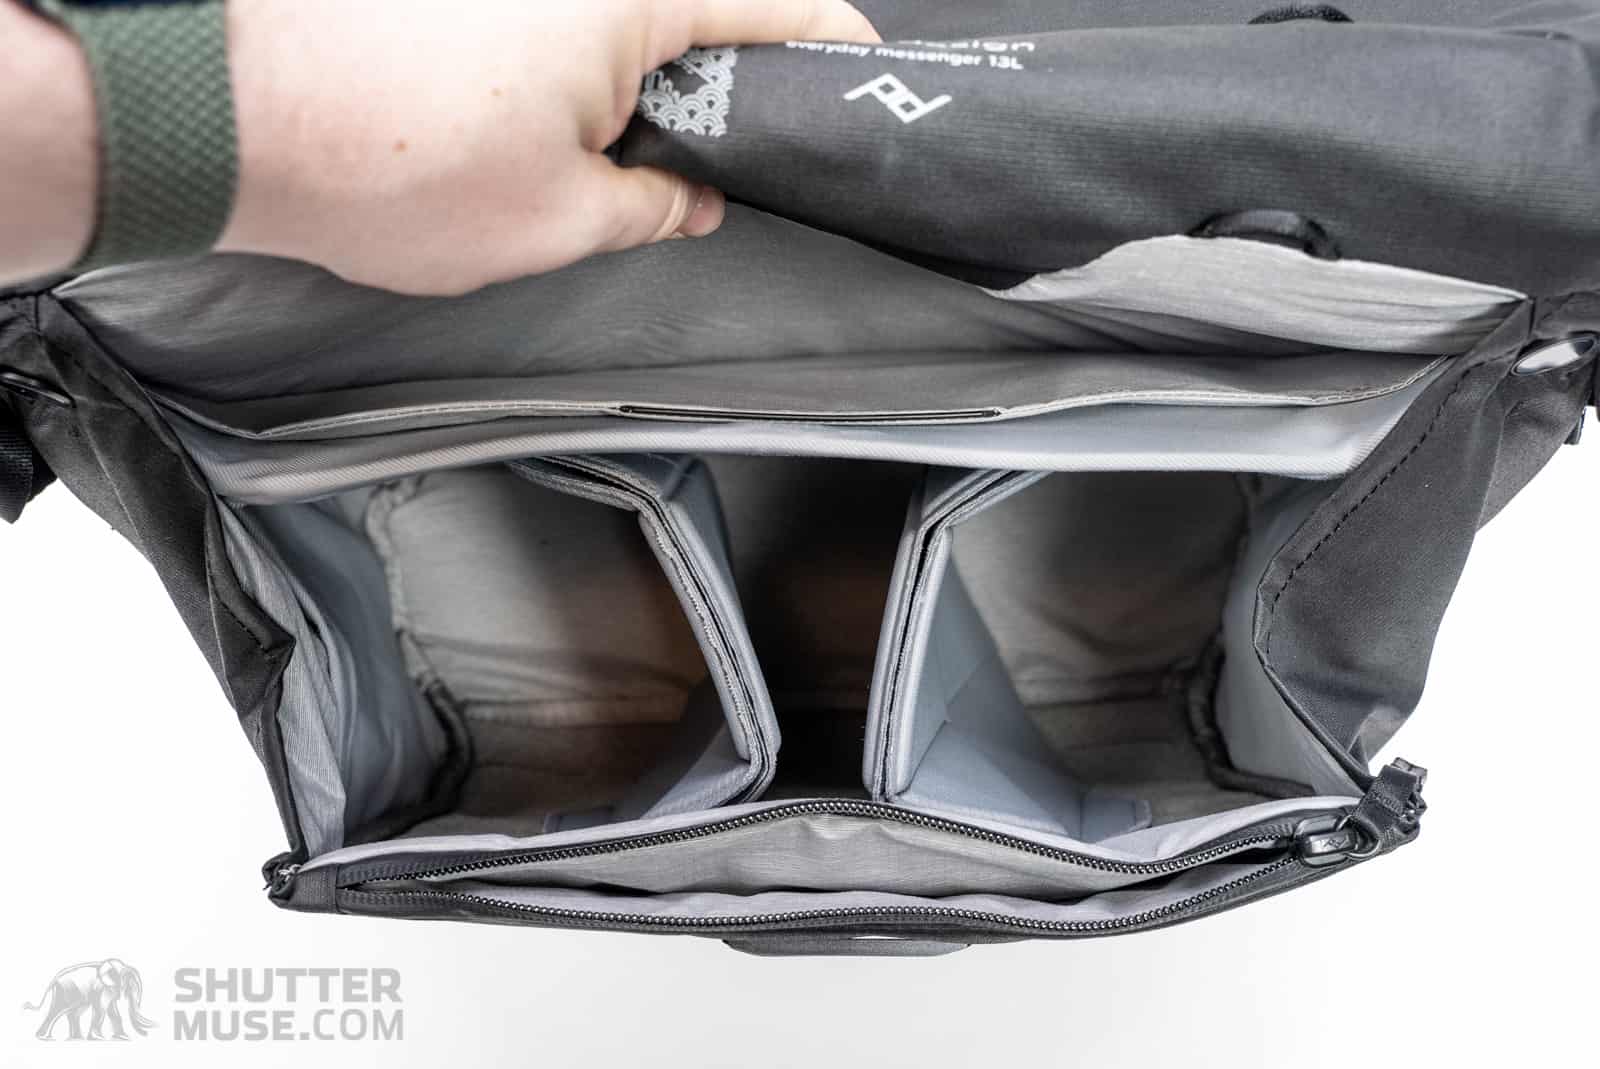
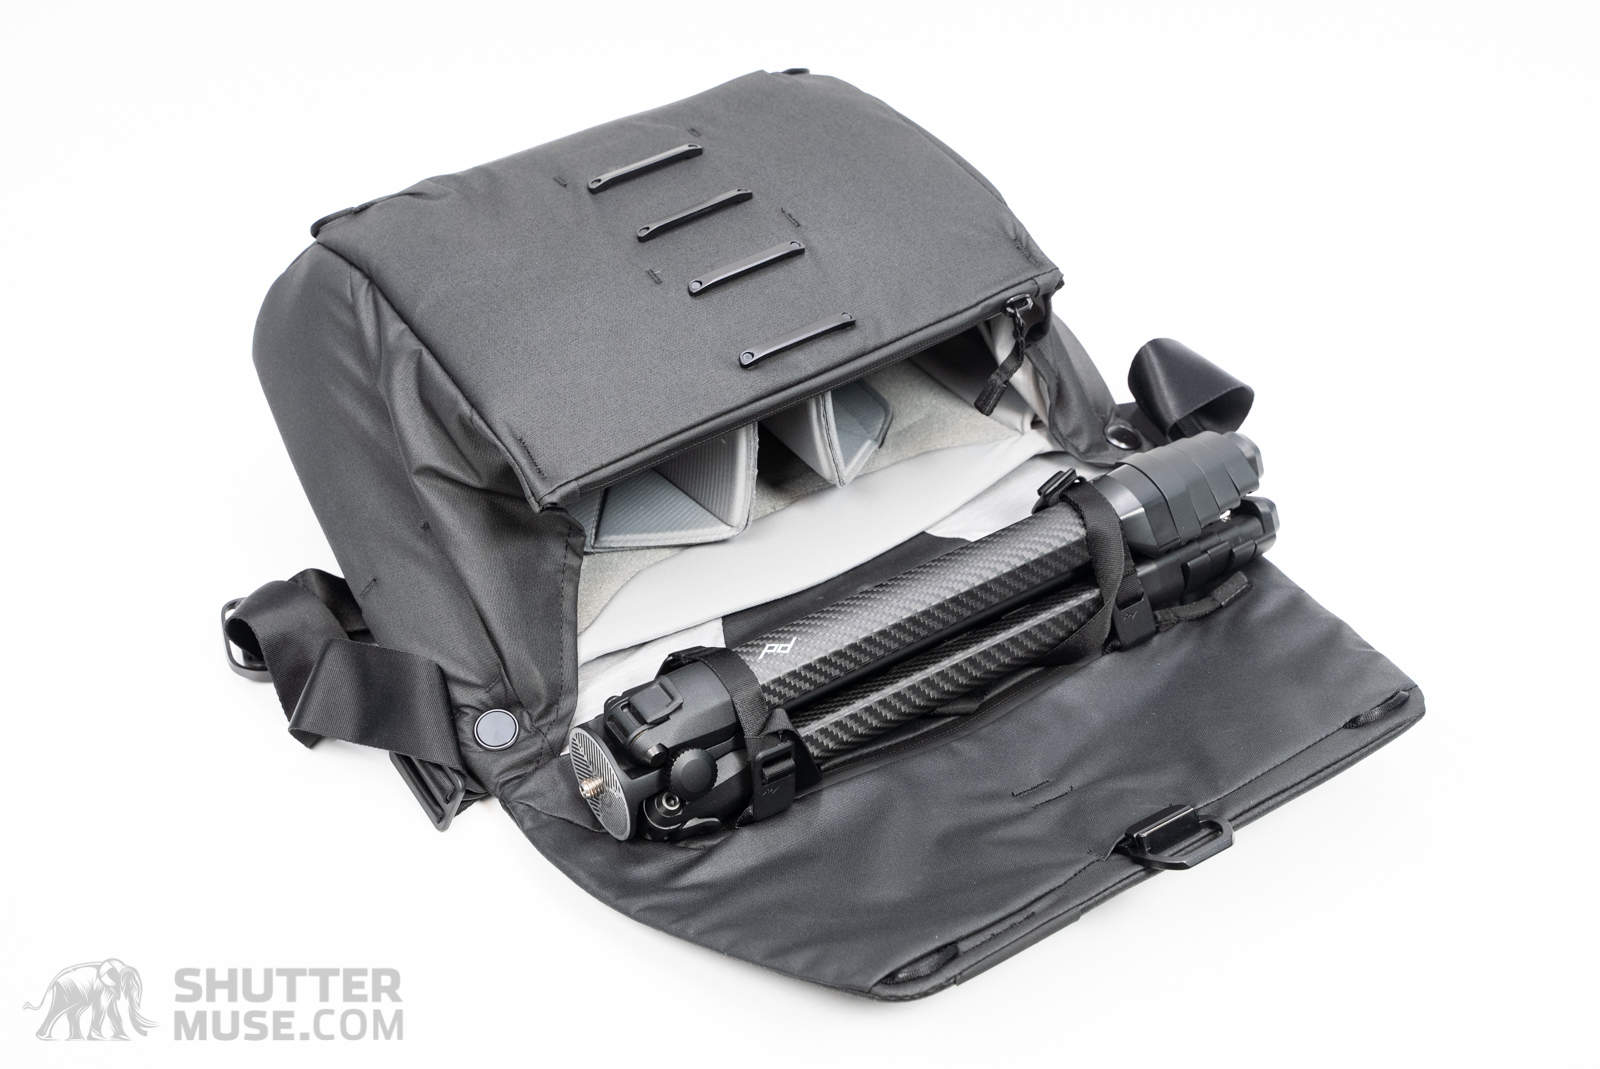
Main Section

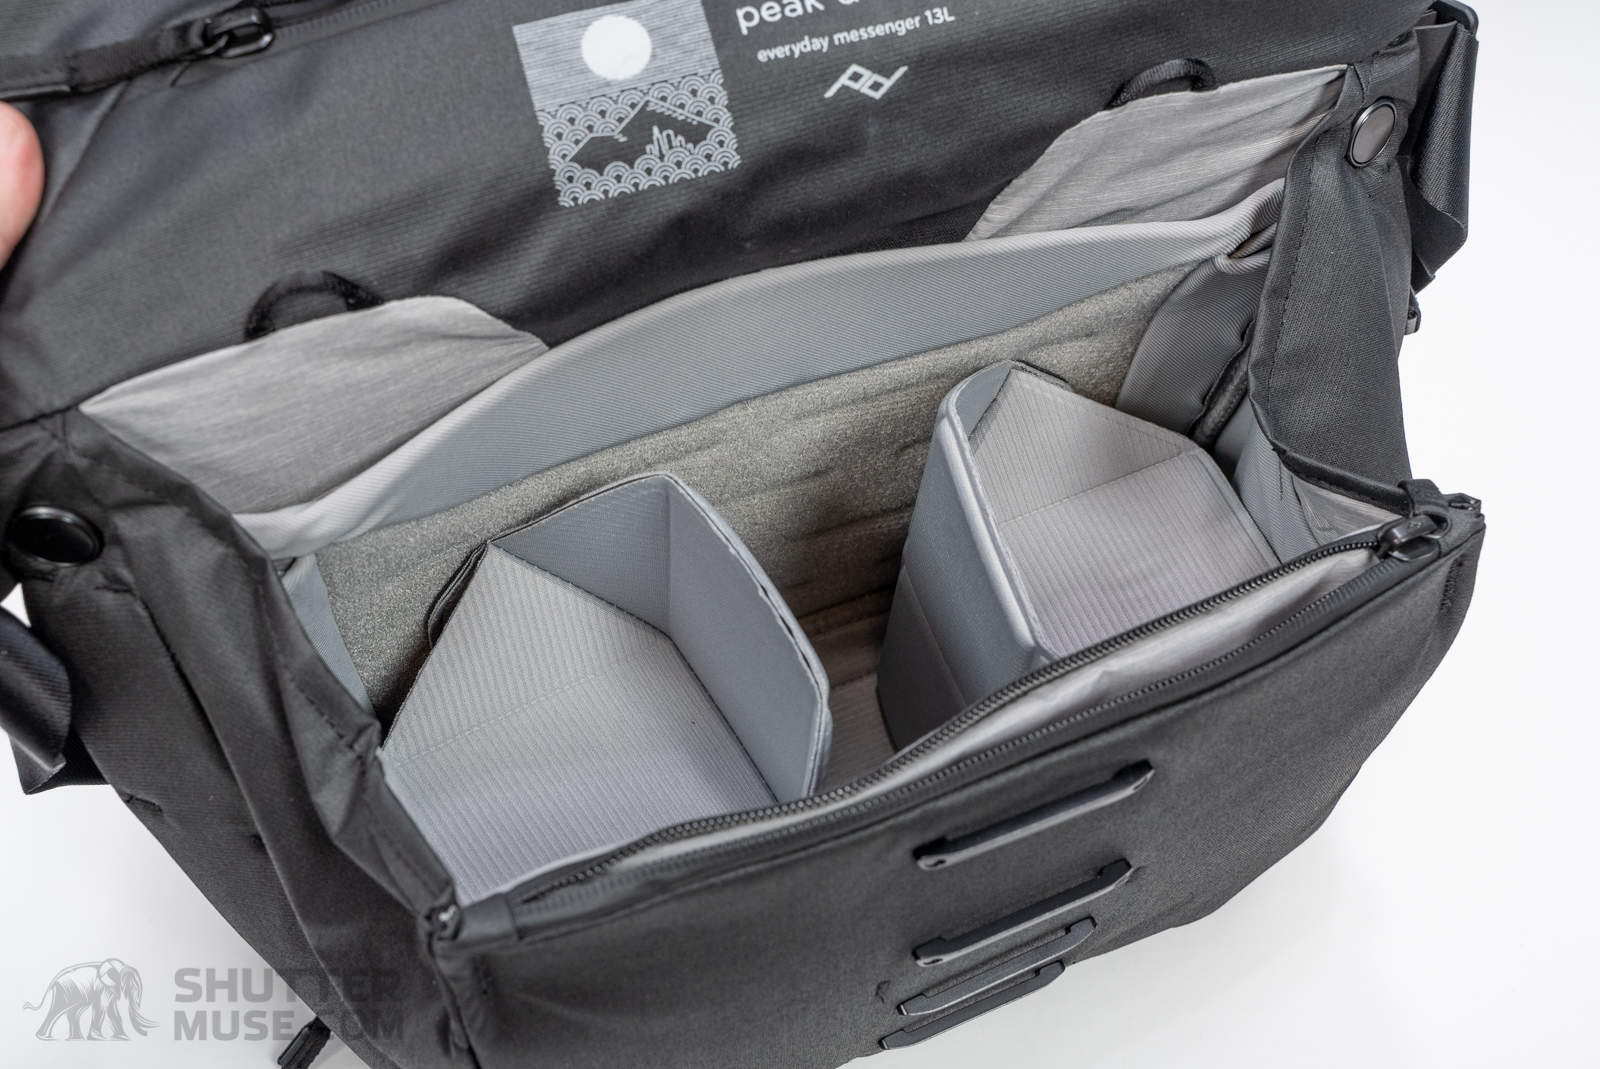
The main section of the bag features Peak Design’s excellent FlexFold dividers. These can be used vertically to divide the bag into three sections, or either can be folded to create a shelf. With the shelf in place, you can safely stack multiple smaller lenses, or support a camera with a lens already attached. Bag dividers don’t come better than this.
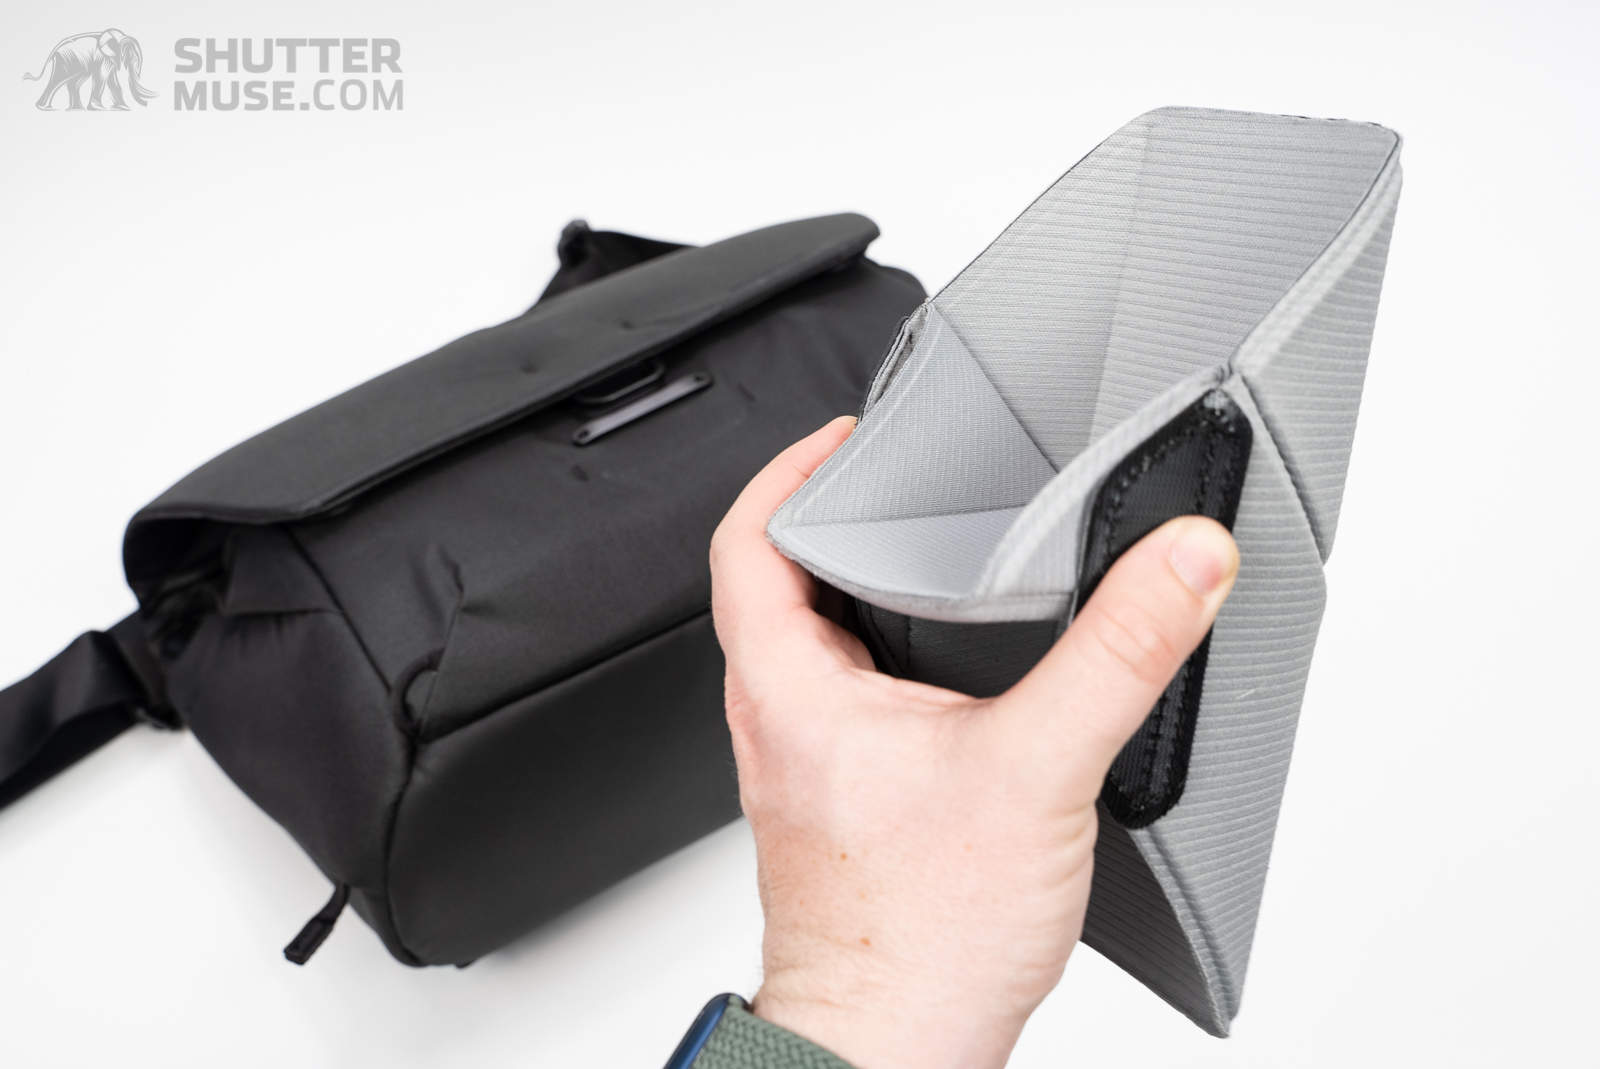


On the inside of the main section, you’ll find a stretchy pocket on both sides of the bag. The stretch material is nice and soft, making this another good spot for sunglasses or a phone. If you don’t mind having a water bottle on the inside of your bag, this is also an option for something in the 500ml to 750ml range.
If you’re wanting to use it to divide up your camera gear, these internal side pocket are also useful for items such as small flashes, extension tubes, teleconverters or camera batteries. I particularly like the fact that they don’t take up any of your internal room if you aren’t using them. They’re just there if you need them.
Side Pockets


Both sides of the bag have a small zippered pocket. The pocket is tight, and rather awkward to use, just as it was on the first version of the bag. Although it has been redesigned, it is no more useful, which is a shame. This is technically now the third version of the bag I have reviewed (V1, V1.5, V2) and in all my time using them, I have never once found anything that fits in the side pocket in a useful and easily accessible way. Thankfully, the pockets are streamlined with the design, so if you don’t use them, you will quickly forget they are there.
The pockets are identical on both sides, apart from the addition of an elastic key tether in one of them. As I said in my review of the first version of the bag, I wish that one of these side pockets was capable of holding a water bottle. I don’t want to put any liquid containers on the inside of my bag with my camera gear.
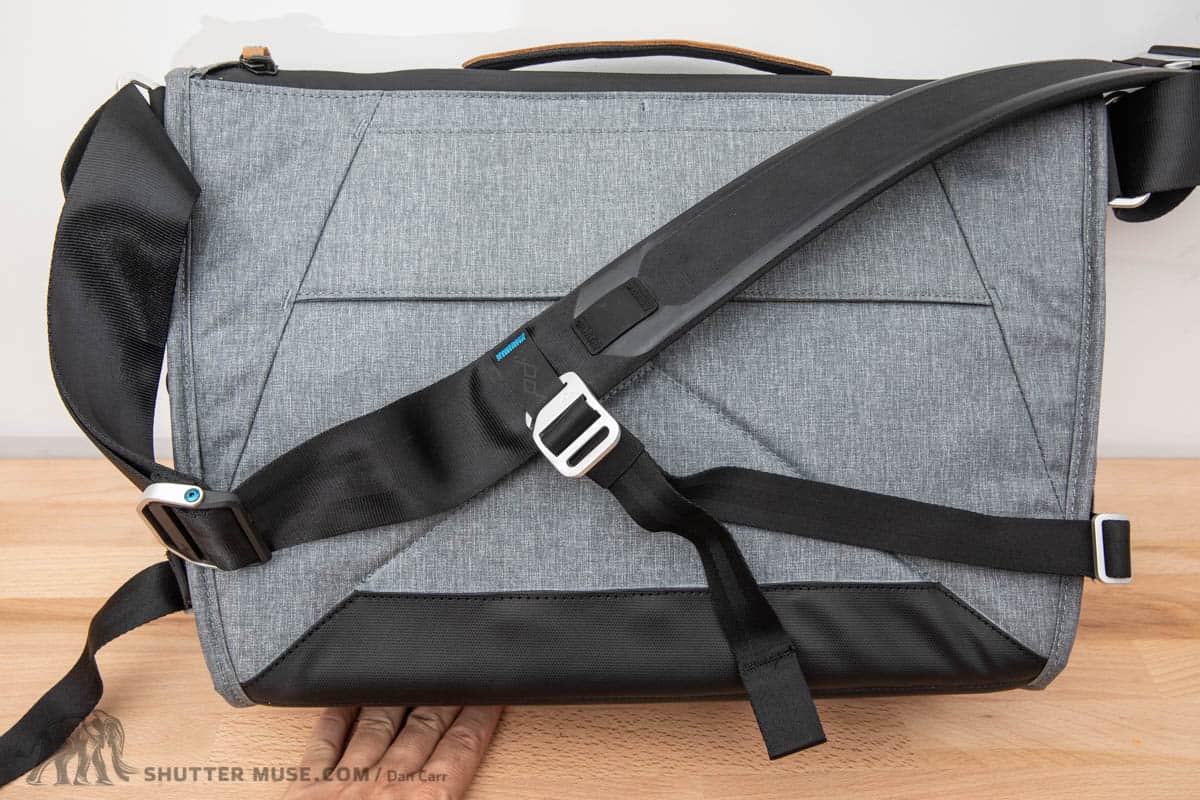
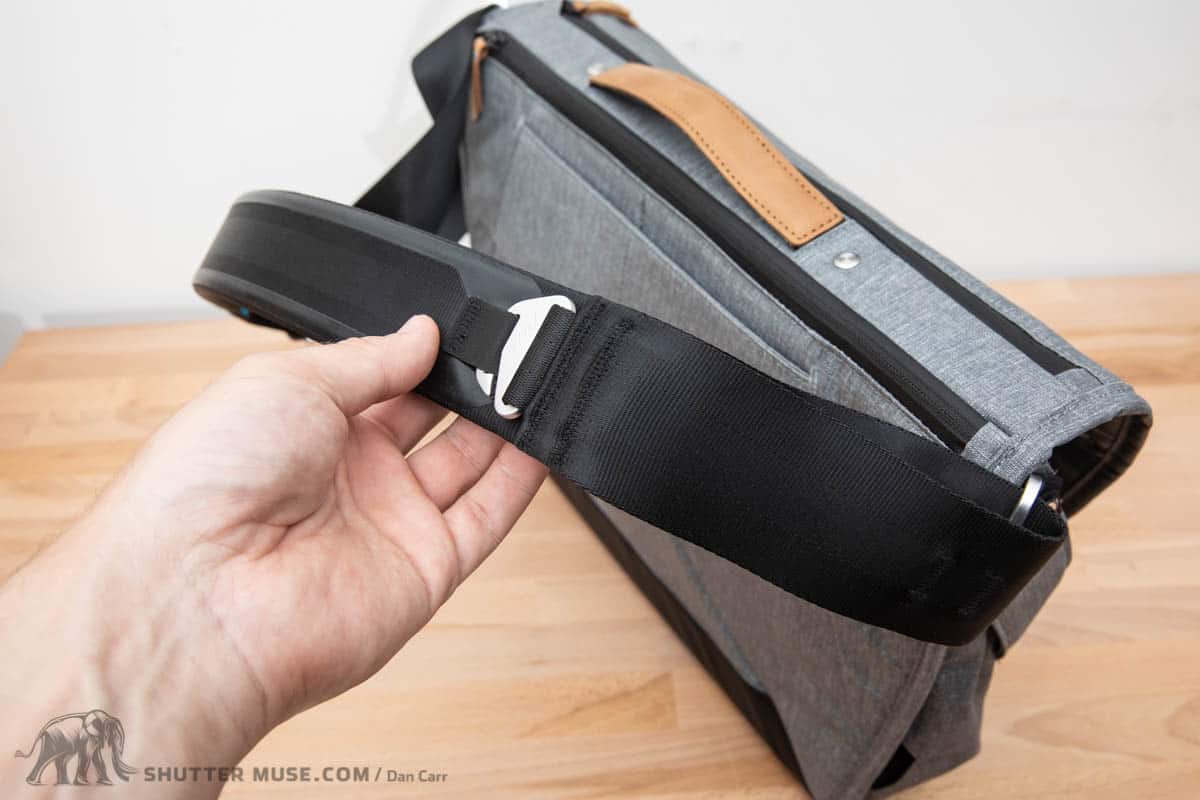
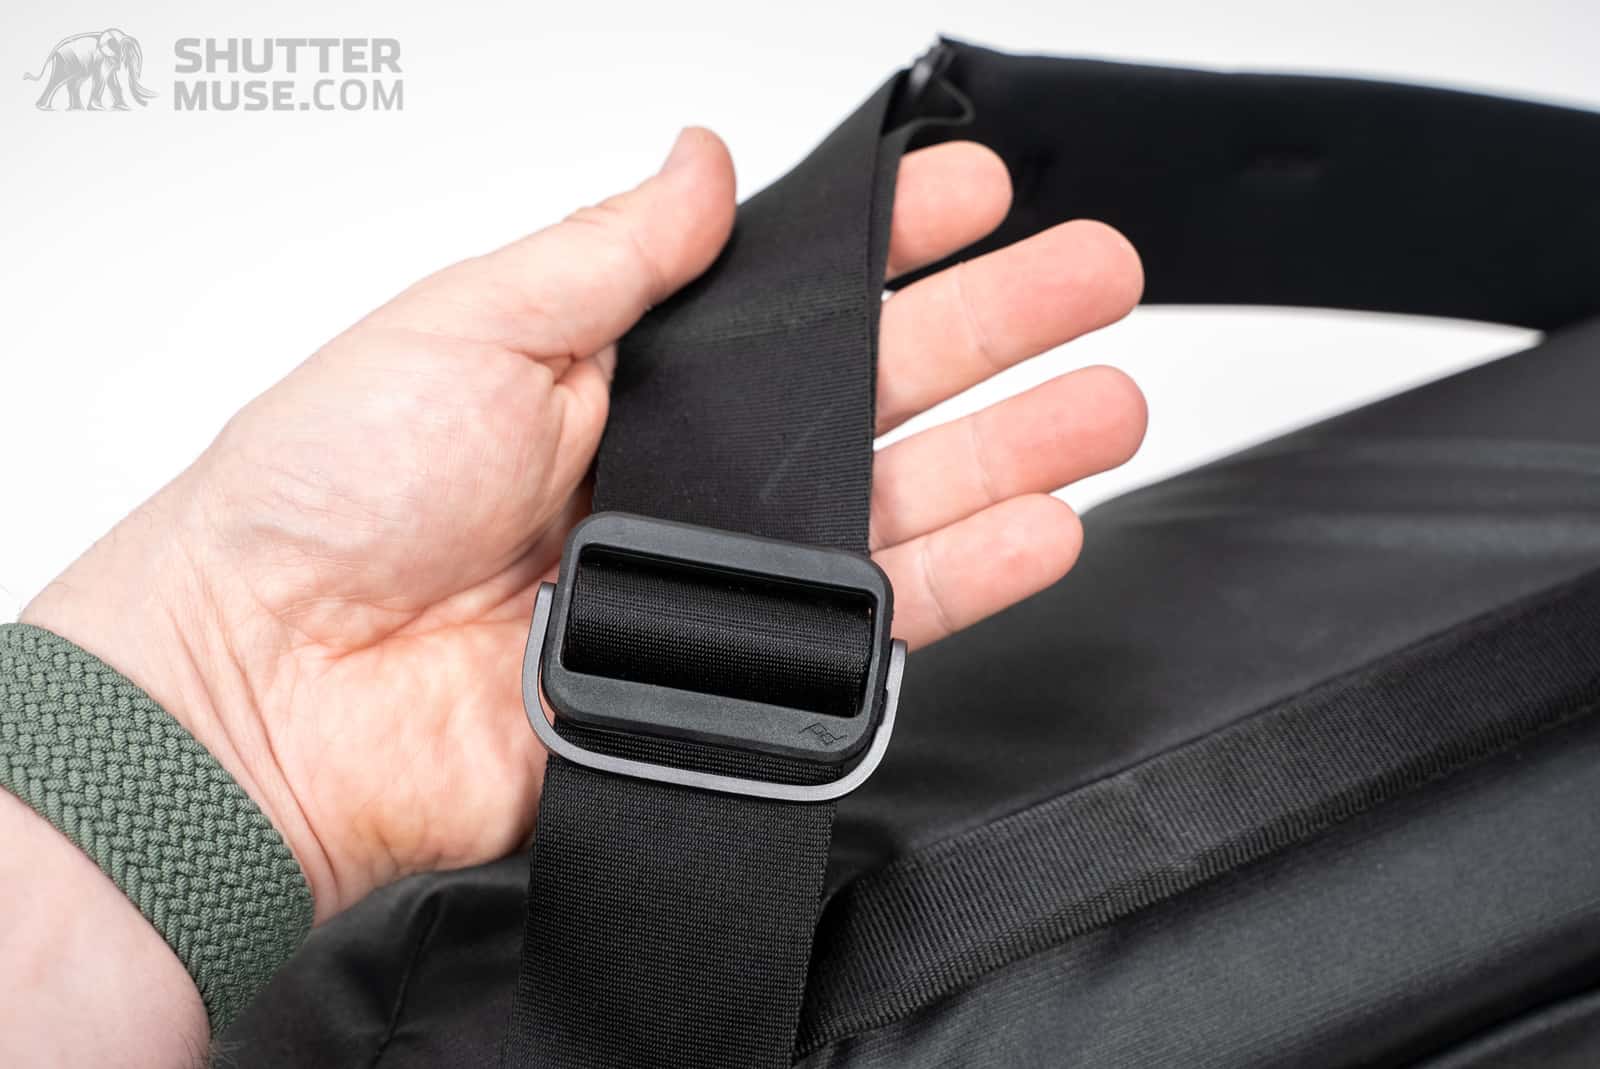
Shoulder Strap
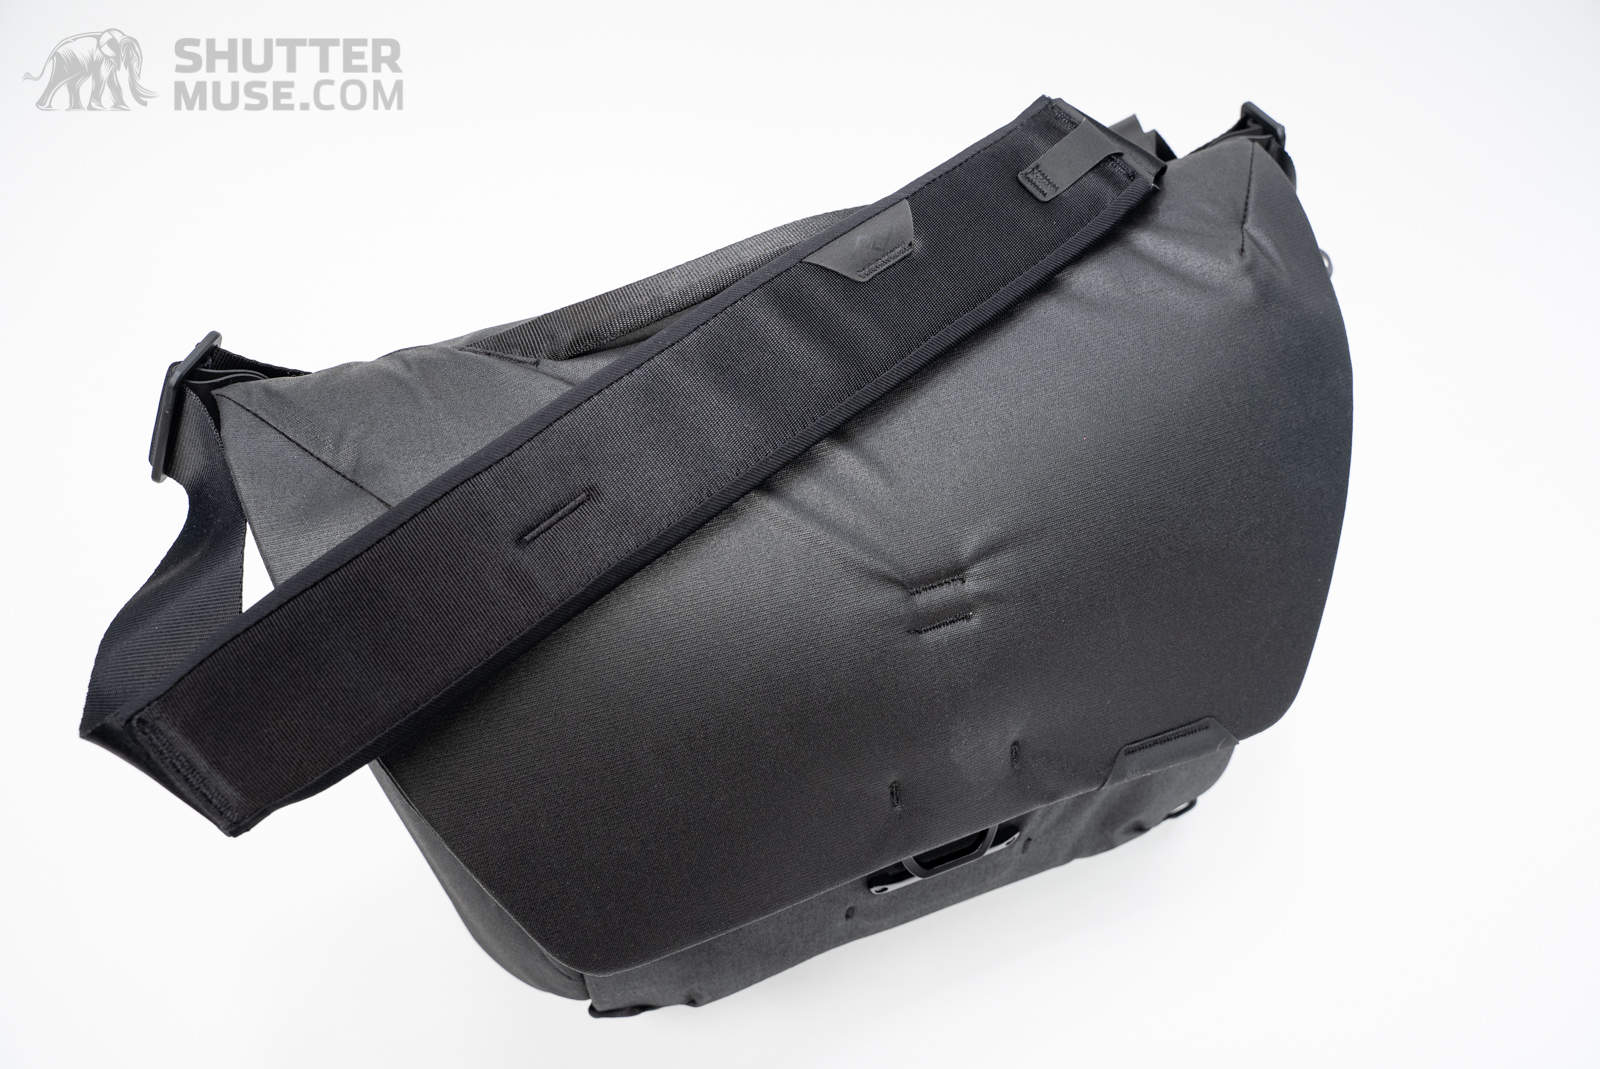
Peak Design are well known for their camera straps, so it won’t come as a surprise that the bag features an excellent shoulder strap. The width of the strap is wide enough to shoulder the load of a fully laden bag, and the length adjustment is performed by the tried and tested buckle from their Slide camera strap. The strap can be removed entirely, and can also be flipped from one side to the other to suit both left and right shoulder carriers.
Tripod Carry

A pair of nylon straps are provided with the bag so that you can attach a tripod. The attachment points for these straps are located on the base of the bag or inside the main opening. These two tripod carrying locations are fairly standard in the camera bag design world, and as always, I question the usefulness of at least one of them


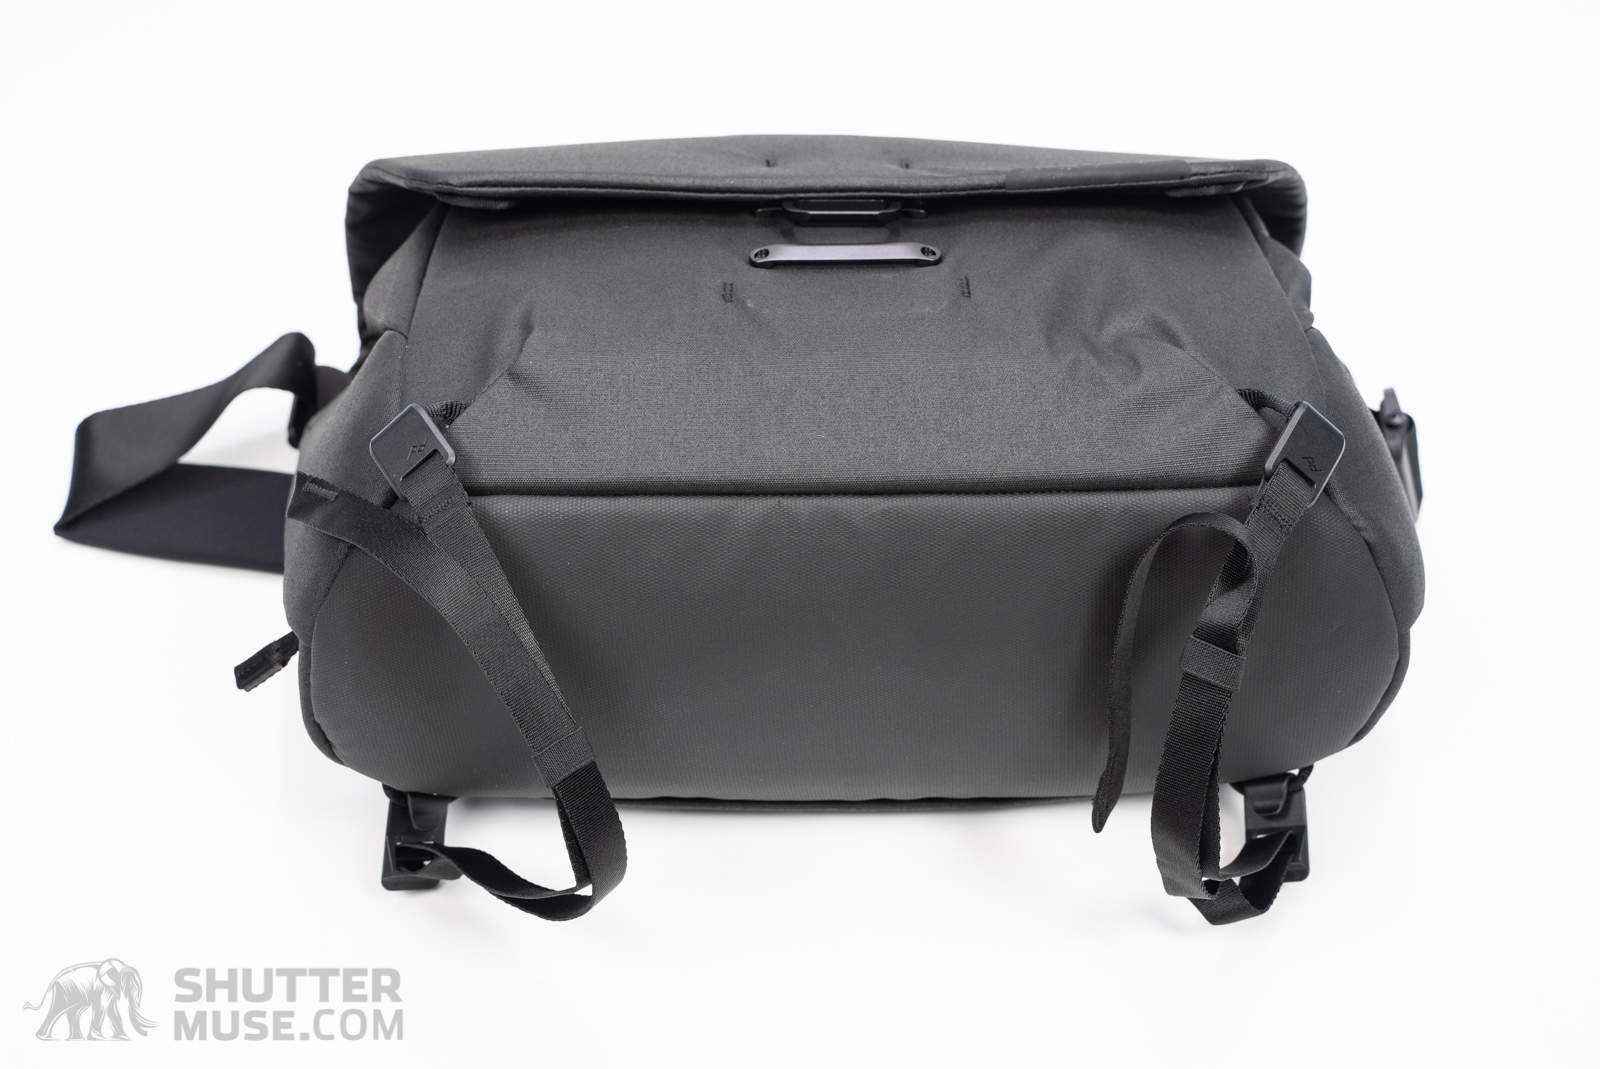
Are you really going to strap a tripod to the base of your bag so that it contacts the ground as soon as you take the bag off your shoulder? I doubt it. I have never actually seen a photographer carry a tripod that way in the real world. Peak Design might argue that you could strap other items to the base of the bag, not just a tripod. But what else would it be? Your jacket? I don’t really want to drag that around on the floor, either.
The second carry point inside the main opening has a little more potential but depends heavily on the size of your tripod. As you can see in the photos, it’s a perfect match for the Peak Design Travel Tripod (review), but anything larger and it starts to get awkward. It makes handling the bag somewhat cumbersome with any size of a tripod when one is strapped in this location, as the whole thing becomes top-heavy and easily falls over if stood on its base. With a tripod in this location, you also lose access to the zippered pocket in the lid.
If your style of photography relies heavily on carrying a tripod everywhere you go, a shoulder bag really isn’t the best solution. You would be much better off using a backpack, such as the Peak Design Everyday Backpack. If you only occasionally need to carry a very small tripod, the Everyday Messenger V2 will work in a pinch.
Luggage Pass-Though

The original V1 bag didn’t have a luggage pass-through. A V1.5 was later launched that did include this feature and was the only real change between V1 and V1.5. For V2, of course, the pass-through has been included. For those travelling with a roller bag as their main carry-on bag, this is always a welcome feature. They have done a great job with this feature of the bag. You’d hardly even know it was there until you need it.
Capture Clip Compatibility
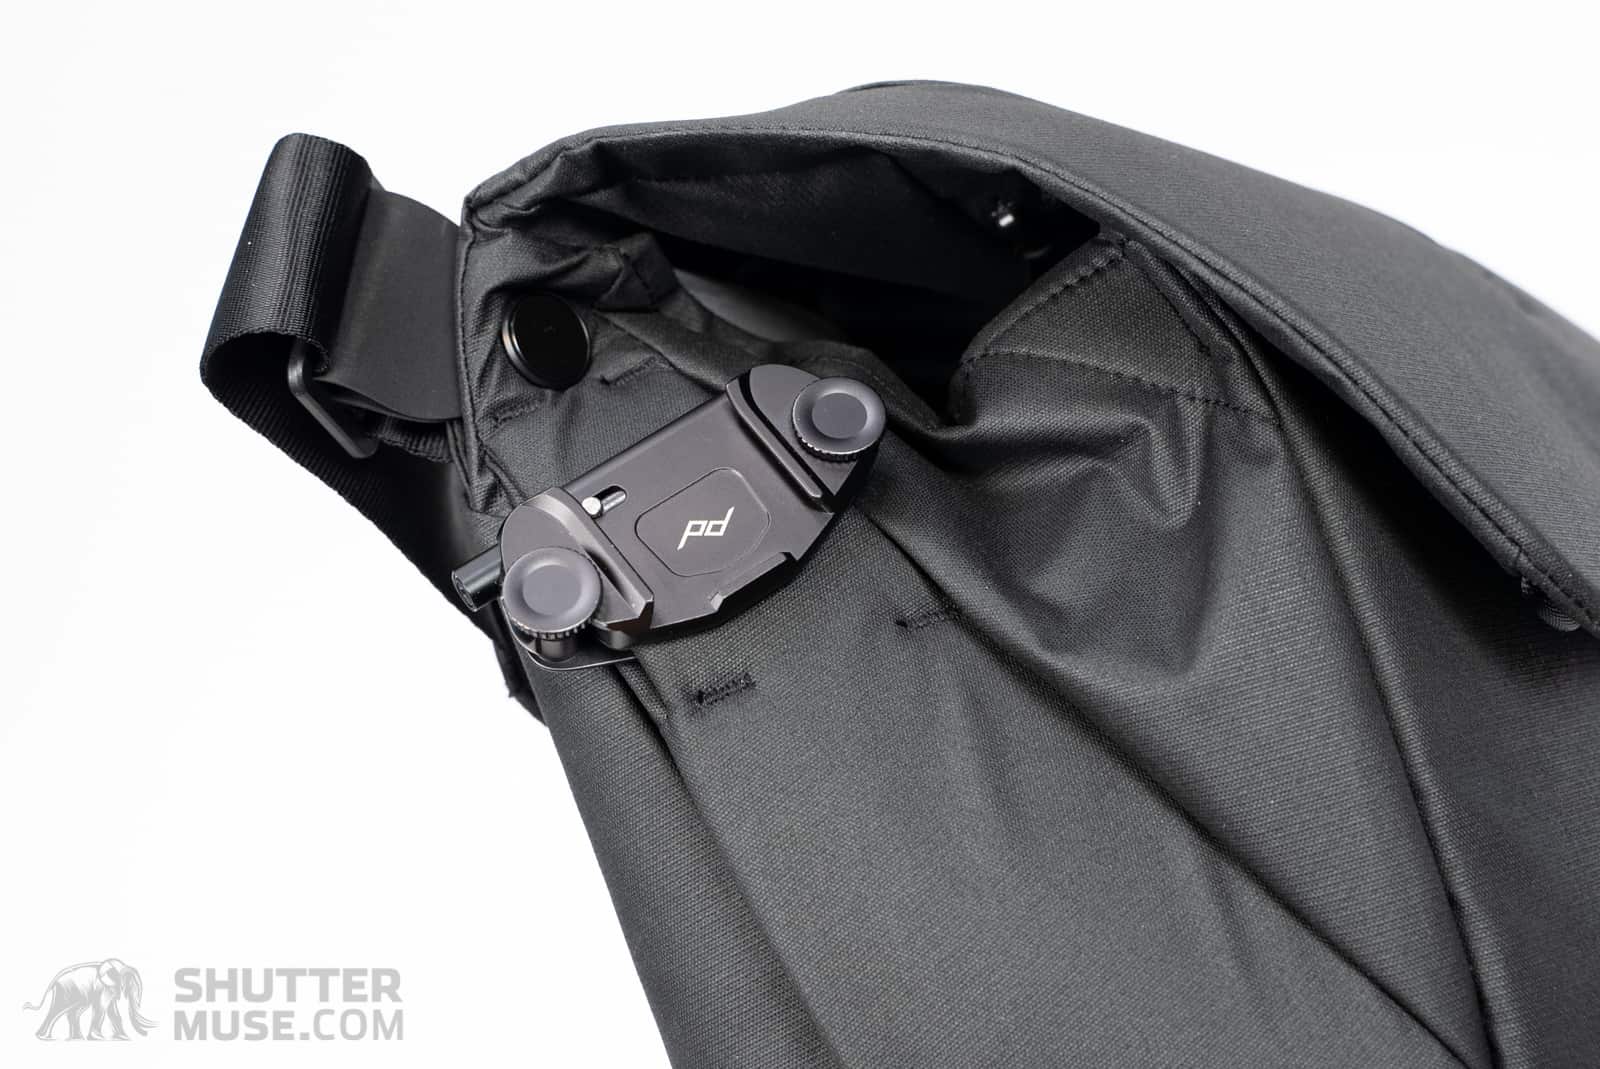
If you use Peak Design’s Capture Clip (review), you’ll find a small bar tacked onto both sides of the bag to accommodate this camera quick-release product. This works reasonably well if you use a small mirrorless camera and still have at least a few items in the bag. If you use a larger camera or have an empty bag, it tends to throw the balance off. I would use this with a mirrorless camera and a short prime lens but hesitate to carry anything larger in that way for long periods.
Alternatives to the Everyday Messenger V2
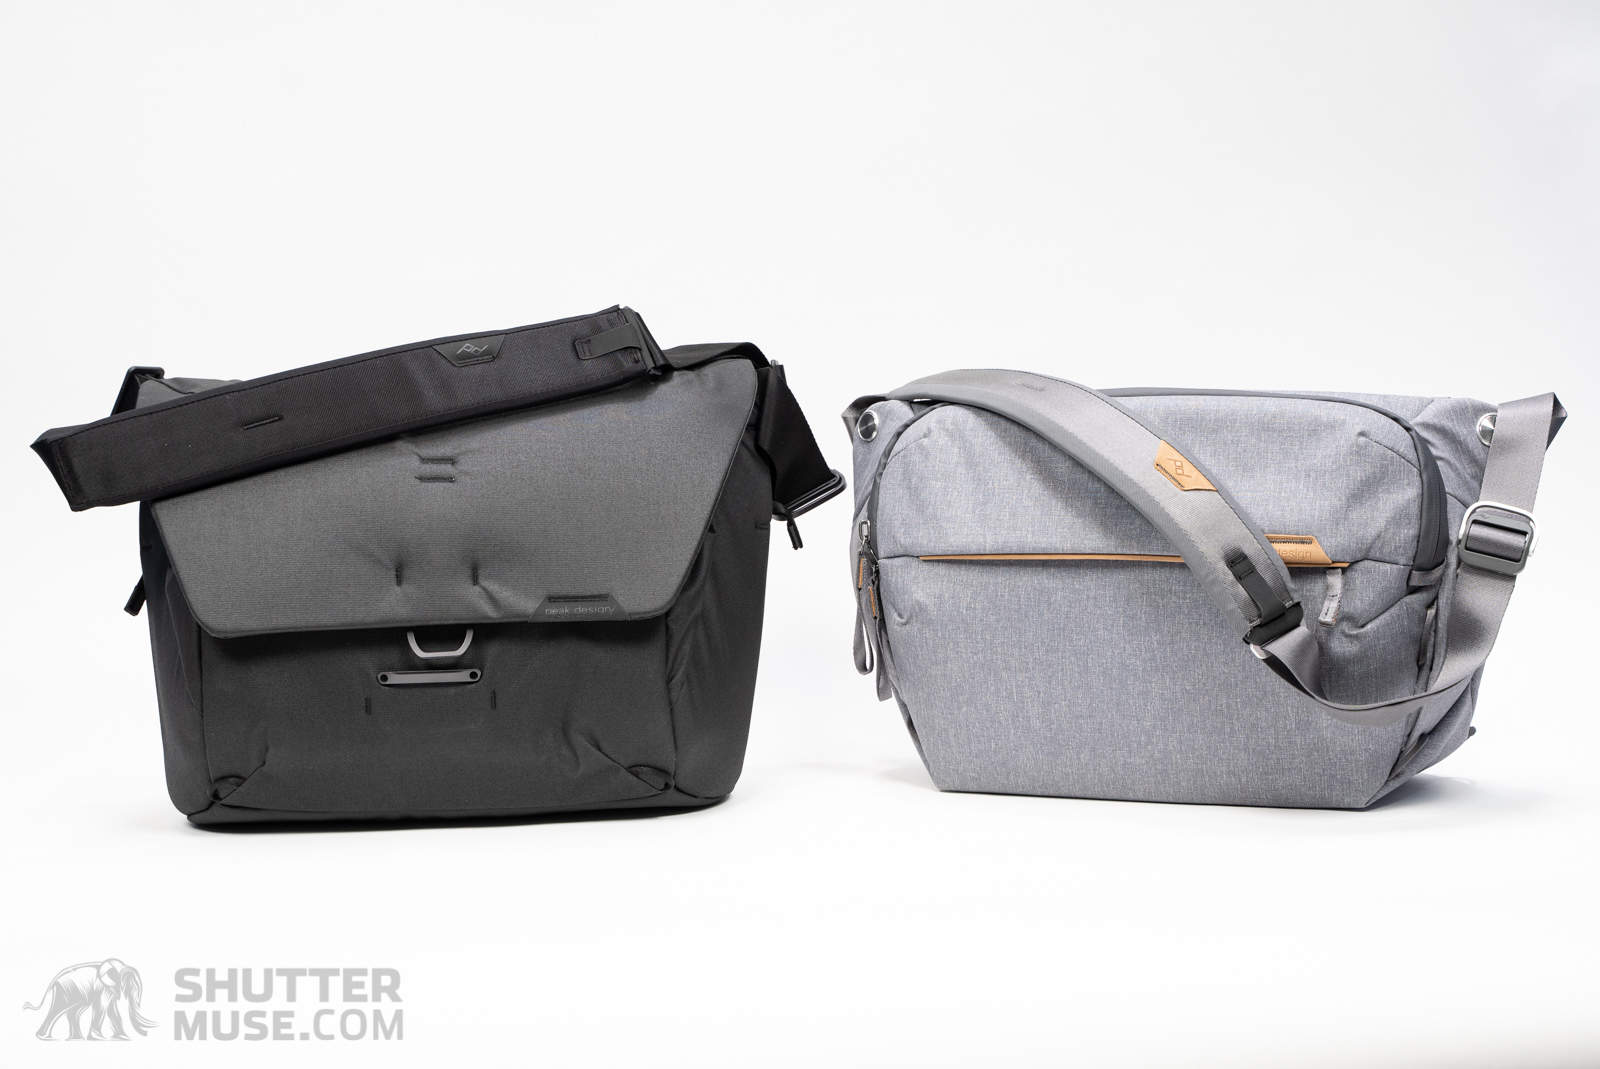
In the Peak Design lineup, the Everyday Sling 10L is the closest option to the Messenger V2. It also holds a 13″ laptop and has an identical shoulder strap to the Messenger. The biggest difference here is the overall volume of the bag is 3L less than the minimum volume of the Messenger V2, and 6L less than the Messenger V2 at its expanded size. In the Sling 10L, I prefer to keep it to a mirrorless body with a lens attached, and one additional short prime or zoom. On the shoulder, the Sling 10L feels a lot smaller than the Messenger, and this is particularly noticeable when moving through a crowded location.
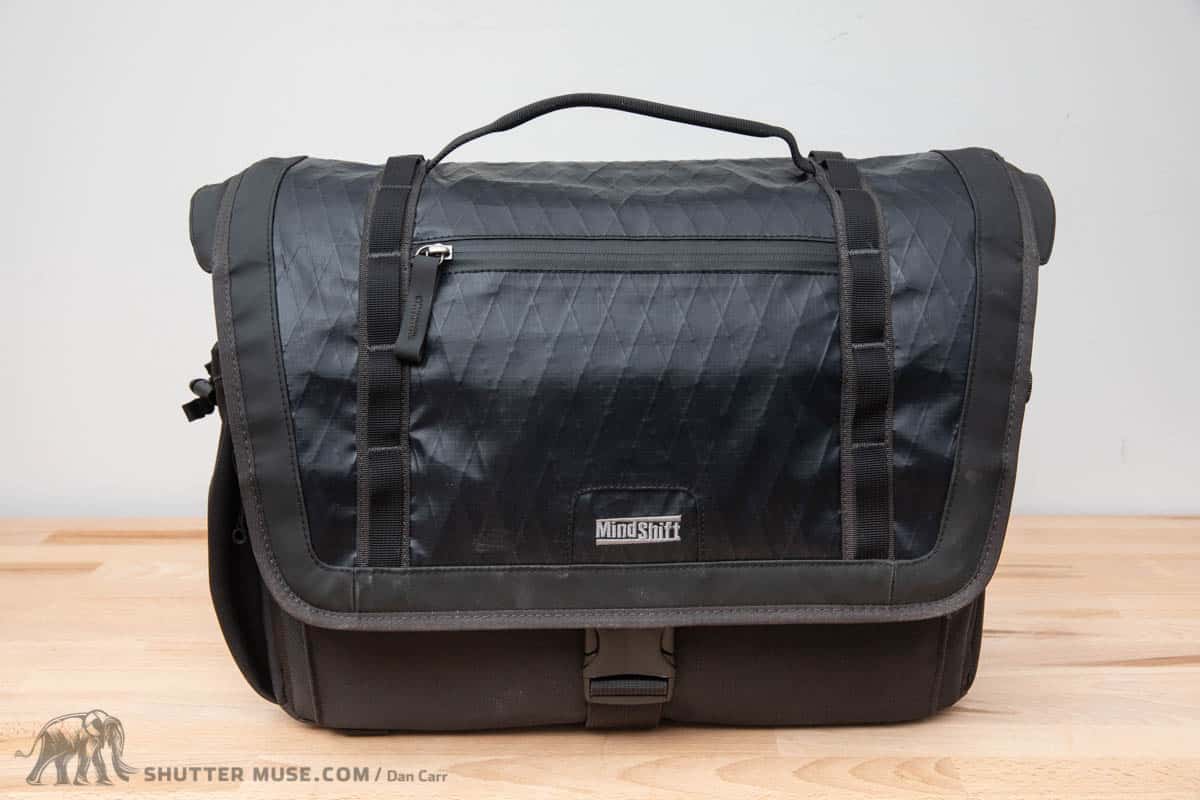
Taking things outside of the Peak Design lineup, it’s also worth considering the MindShift Exposure bags. These bags have a slightly more utilitarian aesthetic, but they are incredibly rugged, and the 13″ version is comparably sized to the Messenger V2. Of note, is the fact that the Exposure is available in a larger size to accommodate 15″ and 16″ laptops. The Exposure bags also come in a little cheaper than the Peak Design Messenger, for those on a tighter budget. You can read our full Mindshift Exposure review for more details.

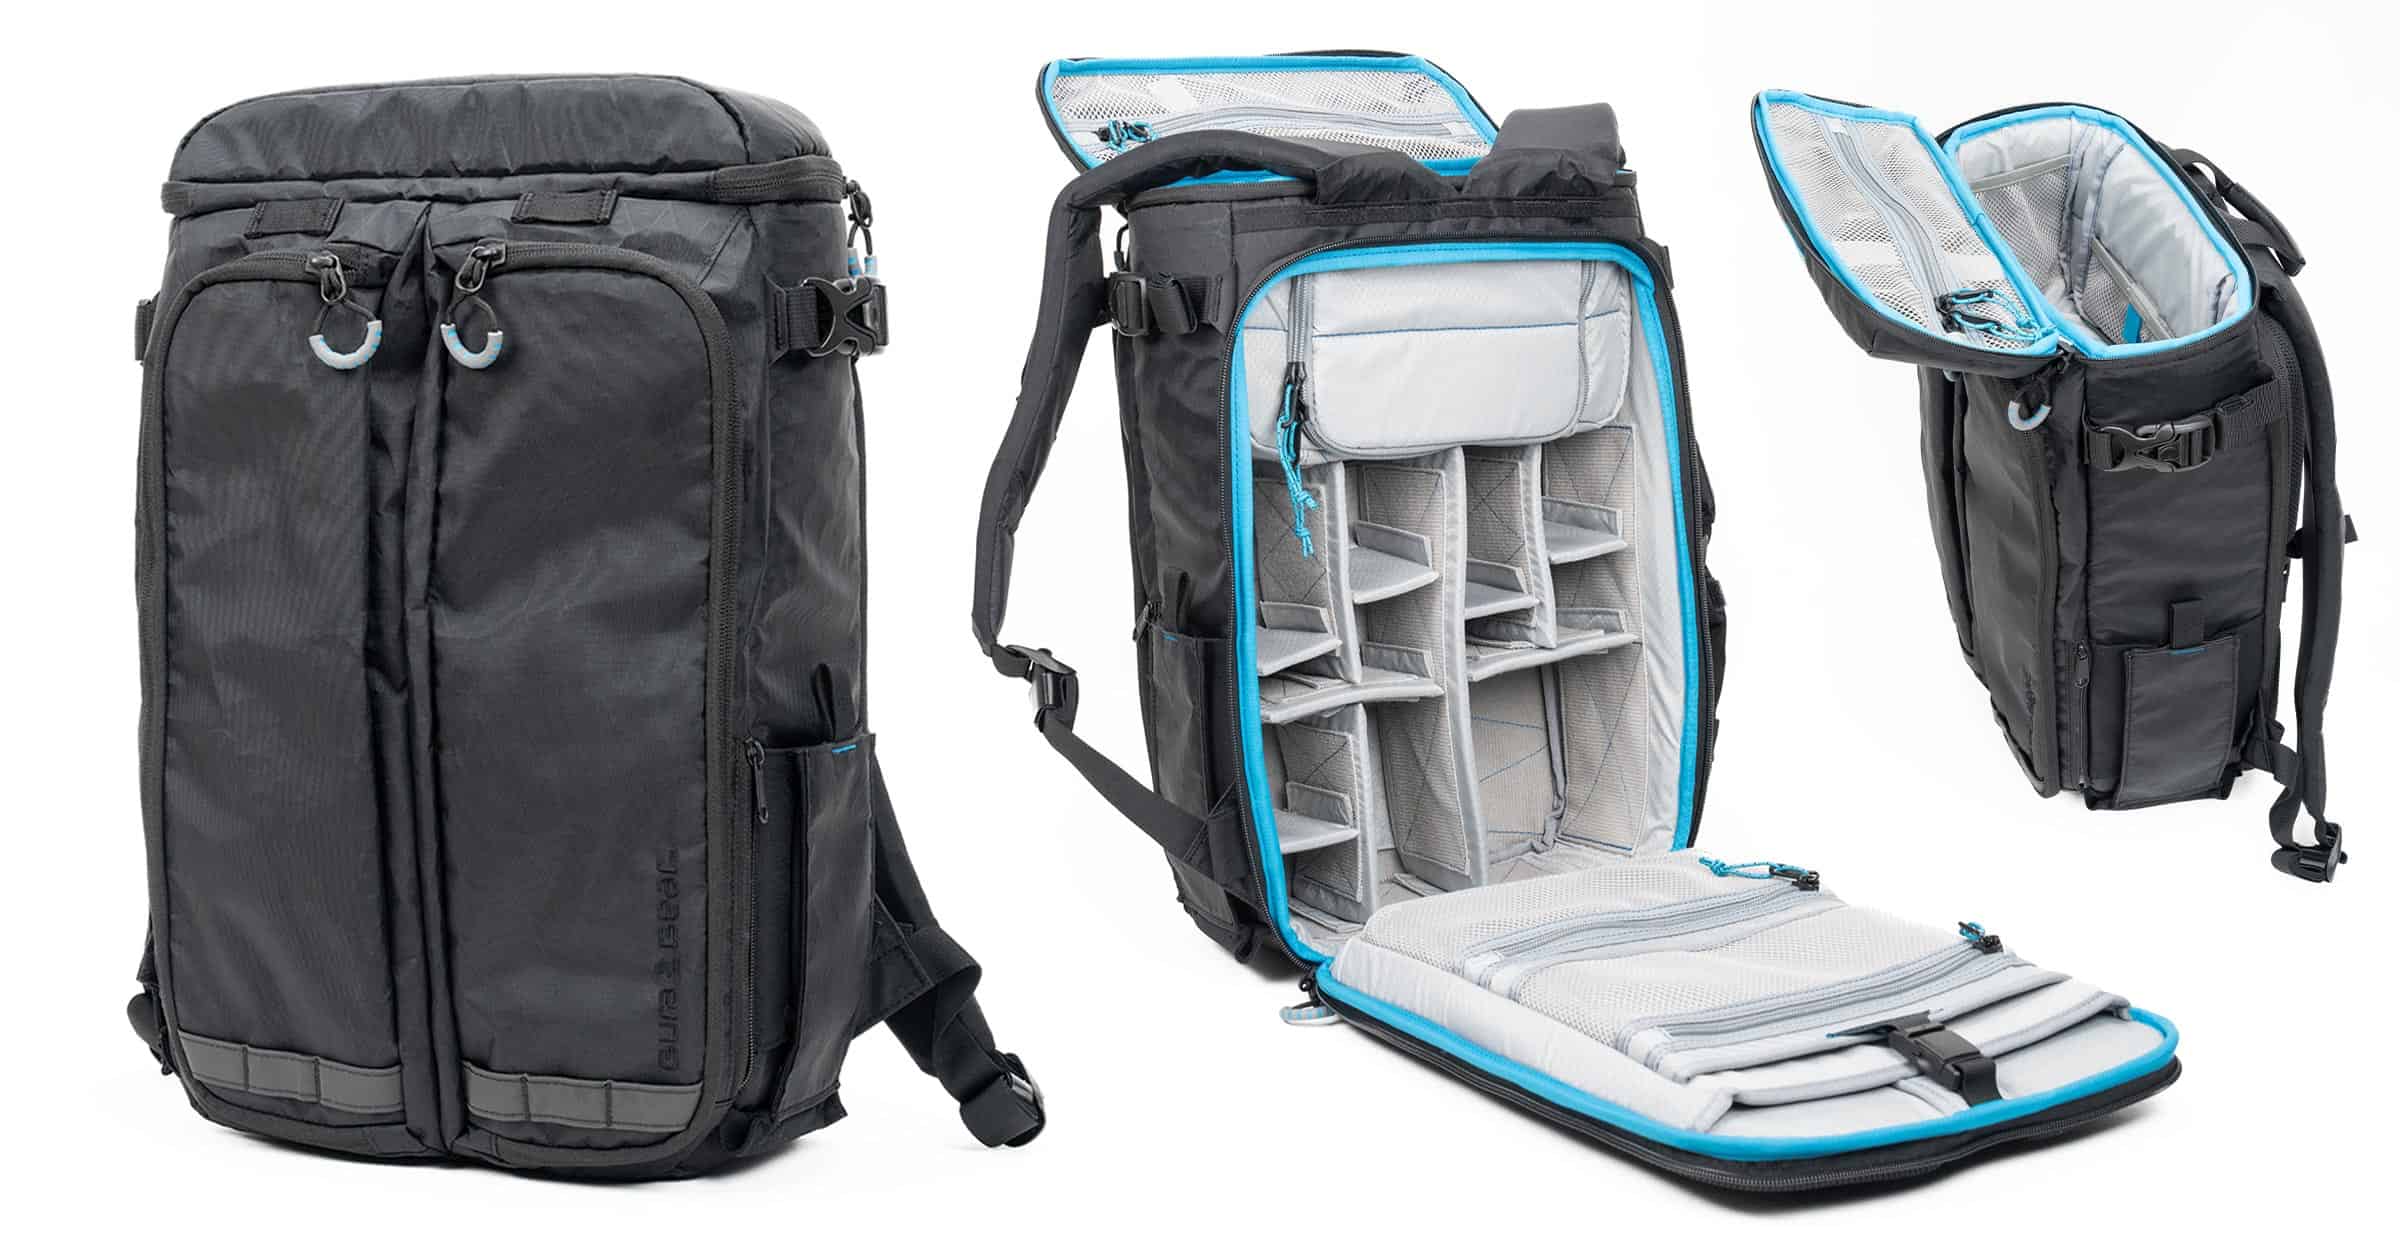
Sticking with the theme of ruggedly build laptop+camera bags is the Gura Gear Chobe 2.0. This bag is also available in both a 13″ size and a 15″ size. It is constructed with ultralight sailcloth material and comes with an incredible amount of internal storage options and organization. The internal volume of this bag is a little more than the Peak Design Everyday Messenger V2, but so is the price at around $275. You can read more about this bag in our Gura Gear Chobe review.
Conclusion
Any review of a version 2 bag must be concluded in two parts. Firstly, how good is the bag overall. Secondly, how does it compare to the original bag, and is it worth the upgrade for original version 1 owners?
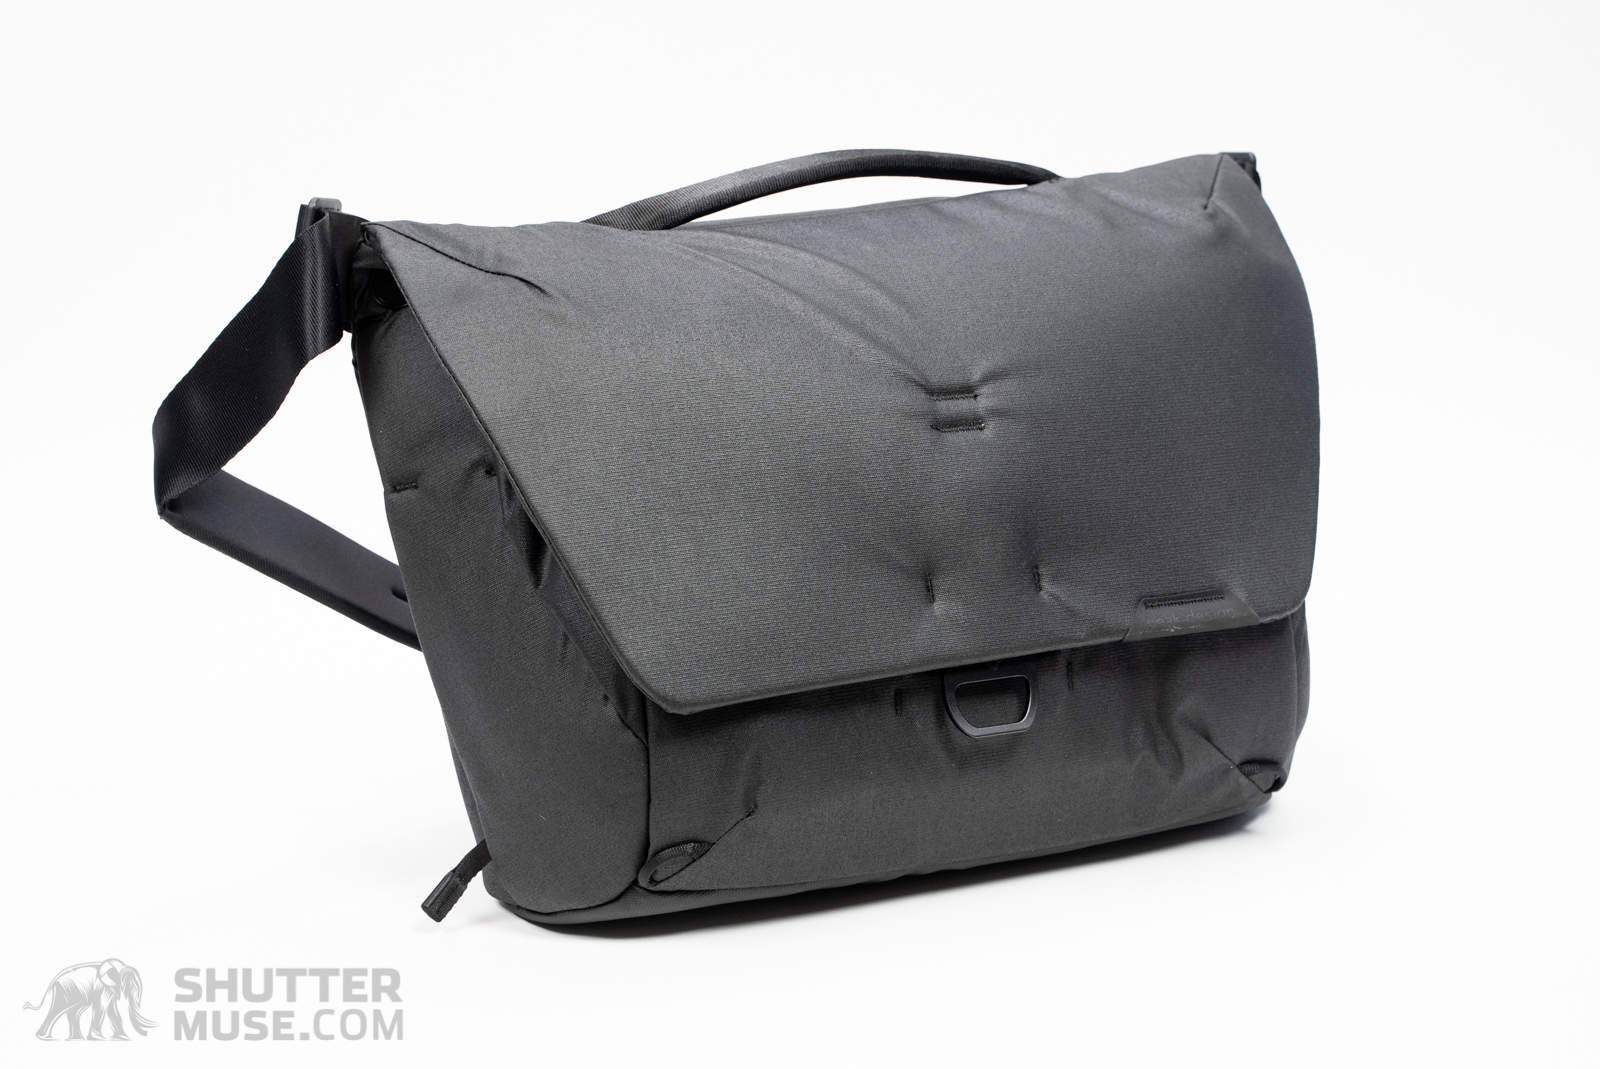
The Everyday Messenger V2 is an excellent camera bag for anyone looking to carry a camera and 2-3 total lenses, along with a 13″ laptop or tablet. It is well organized, ruggedly build, smart enough to be used in a business environment and discrete enough to be used at events such as weddings. It also scores top marks as a “personal item” for travel, alongside a larger roller or photo backpack.
The biggest downside is that it only fits a 13″ laptop. The original V1 Everyday Messenger was available in both a 13″ and a 15″ size. For V2, Peak Design has removed any sizing options, immediately discounting this bag for users of 15″/16″ laptops. Although I have to trust that Peak Design did this based on their own previous sales numbers of the two sizes, I do still find it a little odd and know that at least a few people will be disappointed by this.
What about owners of the original? Should you upgrade? Personally, I don’t think it would be worth it unless your old version 1 bag is looking very tired. Peak Design got a lot of things right with the first version, and the V2 is just a refinement of that design. A nip and a tuck here and there, but overall, not a huge change to what was already an excellent camera bag.
Where to Buy
As always, we appreciate it when you use the links on this page to make your purchases. For Peak Design gear I always recommend buying directly. They have free shipping to many places and their customer service team are always on hand to help if you have any problems.
- PD Everyday Messenger V2 – Peak Design / B&H Photo / Amazon / Adorama / WEX (UK)
- PD Everyday Sling V2 – Peak Design / B&H Photo / Amazon / Adorama / Moment / WEX (UK)
- PD Everyday Backpack V2 – Peak Design / B&H Photo / Amazon / Adorama / Moment / WEX (UK)
- PD Everyday Backpack Zip – Peak Design / B&H Photo / Amazon / Adorama / Moment / WEX (UK)
- PD Everyday Totepack – Peak Design / B&H Photo / Amazon / Adorama / Moment / WEX (UK)
- PD Everyday Tote V2 – Peak Design / B&H Photo / Amazon / Adorama / Moment / WEX (UK)
- PD Travel Backpack 30L – Peak Design / B&H Photo / Amazon / Adorama / Moment / WEX (UK)
- PD Travel Backpack 45L – Peak Design / B&H Photo / Amazon / Adorama / Moment / WEX (UK)


Thanks Dann Carr for this article!
You have never once found anything that fits in the side pocket in a useful and easily accessible way, even for lens caps! ??
Sure there are items that fit, but why would I put a lens cap in that pocket? The other issue with the pocket is that it has a vertical zipper, so you absolutely MUST zip it closed or things will fall out. When I take a lens cap off, I want to put it somewhere temporarily. I’m simply going to drop it in the main compartment of the bag, which must already be open since I am presumably just taking the camera out of the bag. I’m not going to fiddle with a silly small side pocket for this. When I put my camera back in my bag, the lens cap is conveniently right there where the camera needs to go 🙂
I disagree with you on how good the bag is. I have an old Tamrac 6511 bag which I used while doing weddings. While going down a flight of stairs the strap holding my bag to the two wheel cart broke and my bag with camera equipment rolled down a flight of stairs. When I checked my camera gear not a single piece of equipment was damaged and still works today. Now I bought a everyday messenger v1 bag and tested how it protects my gear by placing a kit lens in the bag and rolling it down a flight of stairs. Well the lens no longer works. I immediately returned the bag. Peak Design bags carry but don’t protect your equipment
Well, that’s one way to make a decision. Although the scientist in me says that this test is statistically insignificant. Surely the protection offered is based on many factors!
Also, if “best camera bag” was simply the one that offered the most protection, everyone would use a Pelican case 😉