My calendar has been packed since I returned from Tasmania. Between writing reviews for this website, processing images from my 3-week trip to the Southern Hemisphere, and far more mundane tasks like doing my taxes, I was beginning to go a little stir-crazy in the office. With a growing pile of items needing field testing and an ever-increasing lack of interest in doing another day of accounting, I packed my camping gear and camera bag. Destination and plan: Investigate the current snow situation in the mountains along the Alaskan border.
Lens Choice Conundrum
My Sony 600mm f/4 GM and Alpha 1 camera were sent to Sony for a service and a cleaning upon returning from my Tasmanian adventure. While the camera was back in my hands, I was still waiting for the 600mm lens, leaving me in a bit of a conundrum. Ordinarily, I would have grabbed my Nikon kit and the Z 800mm PF lens. However, I’d just sold my Nikon Z9 camera to fund my purchase of the new, smaller Nikon Z8. The Z8 won’t ship for a few weeks, so a Nikon kit was off the table. On the Canon side of things, my longest focal length is currently 500mm. Since I was hoping to find some migratory spring birds, I wanted something with a longer reach.
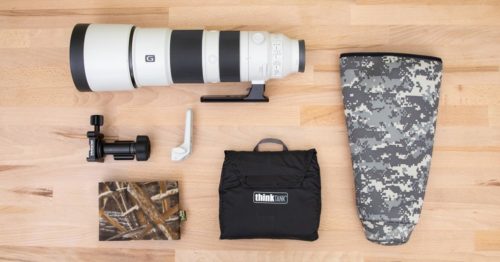
When I first entered the Sony mirrorless system, I purchased the 200-600mm f/5.6-6.3 G lens. This was my Sony long lens solution for a couple of years while I saved up some money for the 600mm f/4 GM. Even for someone making their living from photography, a lens that costs as much as a small car is a decision that isn’t taken lightly. While I loved those first years with the 200-600mm lens, I must admit that it has gathered some dust since the Sony 600mm f/4 GM showed up on the scene. For this reason, I was hesitant to grab it from the closet this week.

I know that is silly. The Sony 200-600mm G lens is still one of the best wildlife photography lenses on the market, and many people (rightly) aspire to own this lens. I’ve said it before: I’d be happy to buy it at twice its retail price! Anyway, my love affair with the Sony 600mm f/4 GM meant I had to give myself a talking-to. The truth is, I didn’t think the 200-600mm G would produce bad images. I worried that I would have some once-in-a-lifetime wildlife encounter and then get frustrated that I wasn’t carrying my absolute sharpest, most capable, and most expensive lens. Can anyone relate to this?
Thankfully, I talked myself out of a stupid line of thinking and concentrated on what was more important to me that day: I needed to get out of the office and into nature to do what I enjoyed the most. And then, wouldn’t you know I didn’t just have one once-in-a-lifetime wildlife encounter; I had two!
A Surprise Encounter
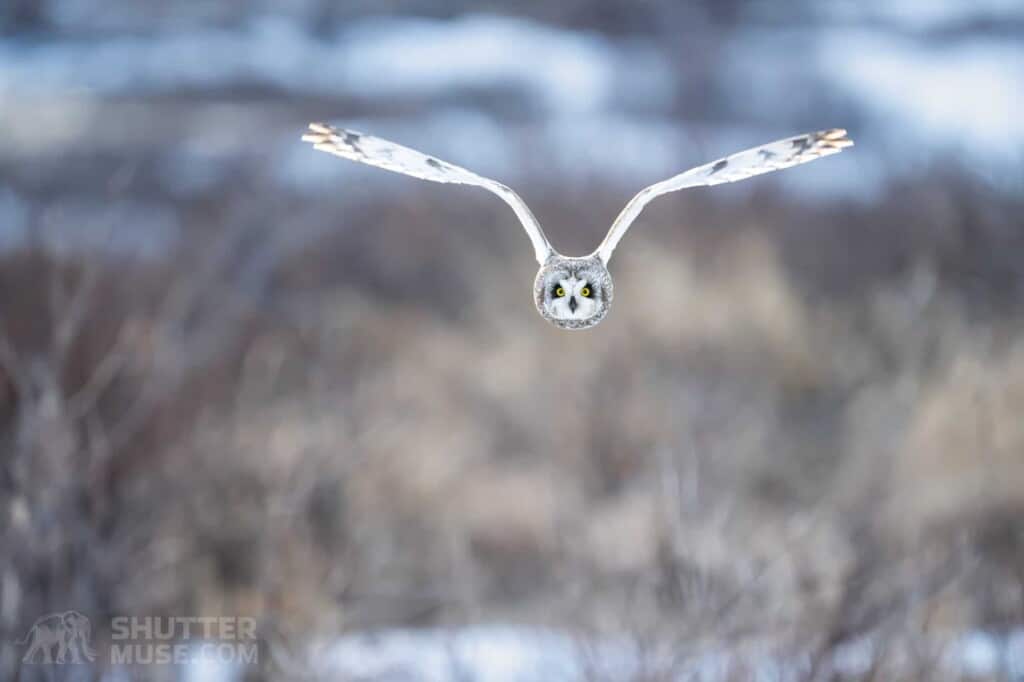
If you want to photograph owls, the Yukon is not the best place to come. I have lived here for over four years now, and in that time, you can count the number of owls I have seen on the fingers of one hand. The number of decent Yukon owl photos I have captured is even fewer. Until this week, a single great grey owl photo was the only Yukon owl shot that survived a post-shoot image culling. So imagine my surprise when a short-eared owl suddenly flew out of the scrub as I passed by in my car!
Thankfully, I was in a remote location where it was perfectly safe to stop my car. Two passing vehicles in an hour would be considered busy on this particular highway. My camera was ready, as it always is, on the passenger seat next to me, so I pulled over and tried to keep one eye on the owl’s flight path. Luck was on my side, and it settled in a short tree just over 100ft from where I’d parked.
I didn’t immediately approach closer for fear of seeming threatening. I also needed a second to consider the best camera settings for this encounter. While it wasn’t dark, it was a few minutes before sunrise, and the owl was backlit by an ever-brightening sky. The 200-600mm lens’ maximum aperture is a relatively slow f/6.3, and this can prove challenging in pre-dawn light if you need to photograph birds in flight.
Usually, I consider 1/2500 to be a BIF minimum, but there is some wiggle room there, depending on the bird’s flight path and wing speed. If a bird is coming towards you, rather than crossing the frame, you can sneak down to a lower shutter speed if you trust the AF tracking capabilities of your camera and don’t mind a little wing tip blur.
My Sony a1 was set up in manual exposure mode with Auto ISO enabled. I set the aperture to f/6.3, its widest, knowing that I would keep it there for the duration of the encounter. Then, I dialed in +2 stops of exposure compensation to take care of the backlight I knew would otherwise render the shots far too dark. This kind of 6th sense about necessary exposure compensation only comes with experience and experimentation with your camera. I know how my a1 responds to these conditions, and I’m able to adjust on the fly without much thought.
With the aperture set and Auto ISO enabled, this only left the shutter speed choice. Now, manual exposure with Auto ISO isn’t always the best option. Sometimes, if the light isn’t changing quickly and you have plenty of light to work with in the first place, full manual exposure with manual ISO is the way to go. However, leaving Auto ISO enabled in this scenario allowed me to adjust my shutter speed on the fly and let the camera automatically compensate with ISO.
As I slowly approached the perched owl, I chose a relatively low shutter speed to keep the ISO low and still give me sharp images of a static bird. If the owl took flight, I could quickly roll my finger across the shutter speed dial to increase it, knowing that my aperture was already set and the camera would take care of the ISO using Auto ISO. Had I been shooting in full manual exposure with manual ISO, a change in shutter speed would also have to be accompanied by a change in ISO. I’m pretty quick with my fingers, but I can’t guarantee I’d get that done efficiently while tracking a moving target.
At this point, I’d grabbed some fairly long-range shots of the perched owl, but I knew that, realistically, they were for ID purposes only—nothing noteworthy at that great distance. Then, all of a sudden, the unexpected happened. This beautiful little owl took flight and began heading straight toward me at eye level. Usually, I’d expect a bird to veer away and keep its distance, but not this time. It just kept coming! With a swoosh and a few wing flaps, it shot right over my head, no more than a couple of feet from my head, and headed out across the valley. Thankfully, despite my surprise at its direct flight path, I did remember to adjust my shutter speed. What an amazing moment!
Of course, the Sony 200-600mm lens didn’t disappoint me, and I was once again reminded of just how good it is and what great value it is for any wildlife photography enthusiast. I truly believe it’s a reason to choose Sony if you want to get into this type of photography on a relatively low budget. And yes, I’m thrilled to have this uncommon shot from the Yukon, whatever lens it was shot with.
Sure, if I’d had my 600mm f/4 with me, I’d have had a faster shutter speed for a bit less wing tip blur and a slightly lower ISO for a little less noise. However, I’m sure I wouldn’t have gotten this photo if I’d waited for that lens to return from servicing (it arrived the next day). I have driven that stretch of road many times and never even seen an owl there, let alone have one fly right down the barrel of my lens.
This was probably a once-in-a-lifetime opportunity, so I’m glad I overcame my ridiculous snobbishness about returning to the 200-600mm while my 600mm prime was unavailable. Lesson well and truly learned! Get out there and search for those moments, whatever gear you have. You definitely won’t find them sitting on your ass at home. And what about that second encounter, you might be thinking? I’ll save that shot of a different (canid) species for next week.


