MindShift Gear has updated its entire lineup of Rotation 180 camera bags. In this review, we are going to take a deep dive into the mid-sized version, called the MindShift Rotation 34L. I was able to use pre-production versions of this pack for over a year before it launched to the public, so I have lots to share. As well as walking through every feature, I’ll also compare it to the larger 50L version, and the smaller 22L. There’s even a quick comparison to the previous version of the pack so that you can see what has been changed and improved.
One thing to note right away is that MindShift has adjusted the naming of the Rotation backpack lineup with the launch of these newly updated models. We used to have the Pro, the Horizon and the Panorama. These have now been replaced by the Rotation 50L+, the Rotation 34L and the Rotation 22L. In other words, this 34L that we are looking at today is a direct replacement for the old Rotation 180 Horizon backpack.
Video Review
Prefer to watch a video review? Watch on our channel below, and don’t forget to subscribe!
Disclaimer: As I have been in the past, I was involved with the development of these new packs, as well as some of the marketing content for the bag’s launch. I pride myself on delivering honest reviews, so that is what you’re getting. I have not been paid to write this review, and MindShift has no idea what I’m going to say about the bag.
Table of Contents
Rotation 34L Feature Set
- Rotating belt pack offers multiple benefits
a. Immediate camera access: Stowed to shooting in 2.5 sec
b. Keep your backpack on while shooting
c. Maintain creative momentum
d. 2 bags in 1: Separate the belt pack and go light when needed
e. One-handed magnetic opening with zipper closure for complete security - Front zippered pocket fits up to a 13” laptop (unpadded) or a 3L reservoir
- Jacket sized front stuff pocket
- Torso height adjustment fits a wide range of body sizes
- Tripod carries easily on the front and/or side panels
- 10-point adjustable harness to fine-tune how you carry your load
- Weather protection: DWR coated fabrics, zipper covers and belt pack elements barrier
- Perforated, angular foam back panel for increased airflow and quick-dry
- Top pocket for quick access to essential items
- Large side pocket fits most 1.5L water bottles
- Pack weight transfers to waist-belt and moves with your hips
- Internal load compression to keep your gear tight and close to your body
- Mountain axe/hiking pole loops
- Daisy chain attachment points to expand your load
- Increase your photo capacity: The Stash Master (sold separately) maximizes photo gear in
the top compartment - Expand your access: Attach accessories (sold separately) to the belt wing
- Enhance your protection: Rain cover for downpour conditions
- Tripod Suspension Kit compatible

Rotation 34L Specifications
- Capacity:
- Total – 34L
- Top Section – 25.5L
- Belt pack – 8.5L
- Photo Gear:
- Belt pack – Gripped mirrorless or DSLR with 3-5 lenses or a 24-70 f/2.8 attached.
- Stash Master Top Load – One gripped body and 2-5 lenses including the 70-200mm f/2.8 attached with hood reversed plus a flash.
- Dimensions
- Backpack Exterior – 13.4” W x 22.8” H x 10.2” D (34 x 58 x 26 cm)
- Backpack Interior – 11.2” W x 13.4” H x 7.1” D (28.5 x 34 x 18 cm)
- Belt Pack Interior – 11” W x 7.7” H x 7.1” D (28 x 19.5 x 18 cm)
- Laptop Pocket – 9.4” W x 13.3” H x 1.0” D (24 x 34 x 2.5)
- Weight: 4.8lbs (2.2kg)
- Materials:
- Exterior: For superior water-resistance, all exterior fabric has a durable water-repellant coating, plus the underside of the fabric has a polyurethane coating. It also has high-quality YKK® RC Fuse zippers, 100D high-tenacity Triple Ripstop material, 100D high-tenacity Ace Twill, 1680D nylon ballistic bottom panel, triangle perforated high-density cross-linked angular foam, 350G air-mesh, nylon webbing, 3-ply bonded nylon thread.
- Interior: 200D polyester lining, belly-o mesh pockets, closed-cell cross-linked foam, 3-ply bonded nylon thread.
- Retail Price: Backpack $299 / Stash Master Top Load $59.99 /
Rotation 180 System Explained
The main feature of the bag is, of course, the patented Rotation 180 system. This clever design allows you to get a camera in your hand in just a few seconds, and then stow it away again just as quickly. All without removing the backpack.
To release the rotating belt pack you must first grab the dangling toggle on the right of the bag. A quick downward tug releases a magnetic latch and the side hatch springs open. Now reach for the belt pack’s side handle with your right hand and swing that hand around towards your front. You might also use your left hand on the waist belt to help with the rotation, depending on how tightly the belt is done up around your waist.
Anyone who has used the previous versions of Rotation 180 packs will be familiar with this process. Nothing has changed up to this point. Now the belt pack is reachable, unzip the lid and use the tabs on the side to break the magnets free and open the pack. Wait… magnets? They weren’t there before…
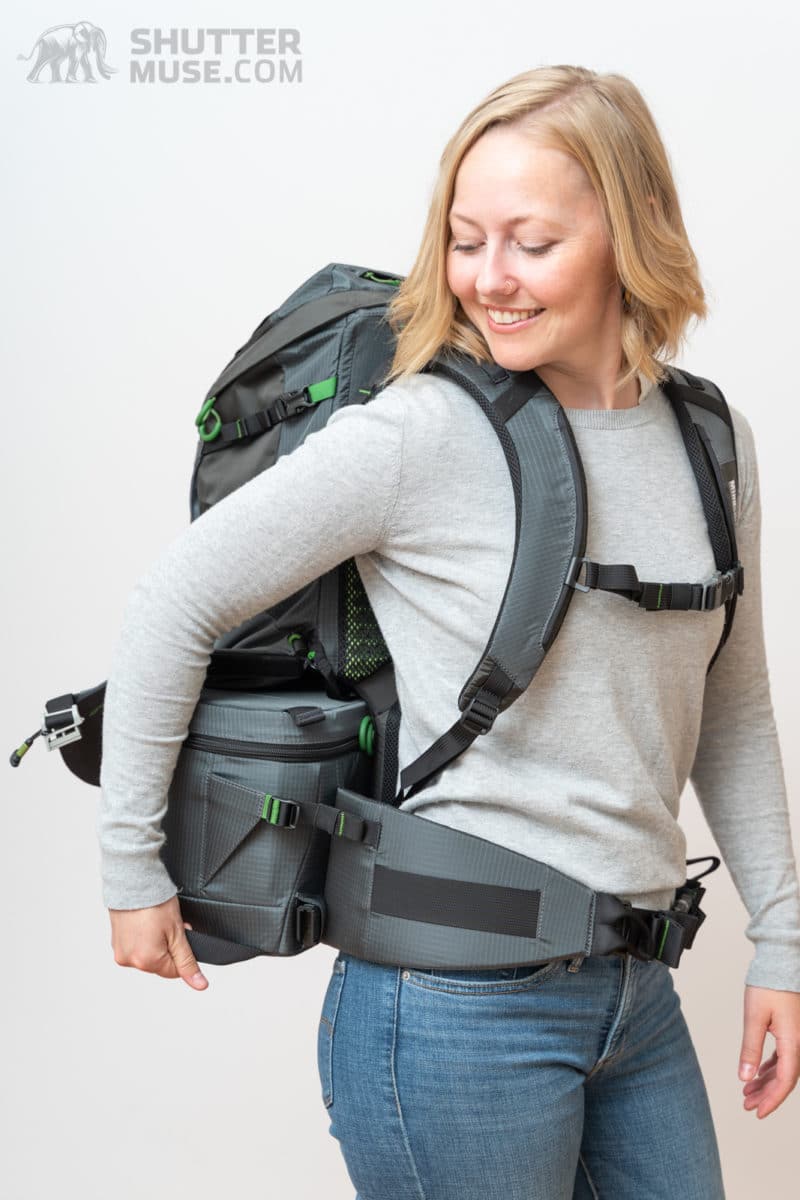


For these updated Rotation packs, MindShift has added a series of magnets around the lip of the belt pack lid. When you go to close the lid, these pleasingly strong magnets will suck the lid shut with a very satisfying “CLICK”. The general idea of this new feature is that you don’t need to use the zippers on the belt pack lid at all. The magnets are strong enough to keep the lid closed, and there’s no chance of it coming open when the belt pack is stowed away.
I was somewhat sceptical about the use of magnets, to begin with. In practice, though, I found the magnets did a great job of securing the lid, and I quickly warmed to the idea. Most importantly, this small design change now makes it even faster to access your camera. Instead of always zipping the belt pack closed, you can rely on the magnets. That means that when you do swing the belt around to your front to grab your camera, you no longer need to use both hands to open the zippered lid as you did with the original Rotation 180 packs. Now you can simply use a hand to grab one of several nylon tabs and give a quick upward tug to release the magnets and open the lid.
With these magnets, there’s no doubt that this new version of the pack gives you even faster access to your camera. During my many months with the bag I have never had any issues with this feature, and I’ve come to really love it. When I’m travelling I do close the zippers on the belt for a little added security, but once I have opened them for the first time on a day of shooting, I then rely on the magnetic closure for the rest of the day until it’s time to head home.
Benefits of the Rotation System
Over the years of using various bags with the Rotation system, the biggest thing I have noticed is that I take way more photos when I’m wearing one of these packs. Just think about all those times when you have seen something cool and thought to yourself “I should probably take a photo of that”. But then you think about it, and you think about taking your backpack off and unzipping the camera compartment, you think about how it will slow down the group you are with, or you think about putting your gear down on the ground in the dirt. And by that time it’s too late. You never take that shot and just move on, telling yourself it wasn’t quite the right shot you were waiting for anyway.
With any of the Rotation packs, you can get your camera in your hand, take the shot and put the camera away again in less time than it takes to have all those thoughts. It really is that fast. So not only do you take more photos, but you also have the chance to capture more fleeting moments of light and nature that would otherwise have passed by too quickly.
Without the need to take the pack off your back, you also gain some flexibility in where you can shoot. If you want to wade out into a river and then get your camera out, you can do that. If you want to take photos on a windy day at a beach, without fear of filling your bag with sand when you put it on the ground, you can do that. This gives you some additional creative freedom, as well as protection for your gear.
The final major benefit of the Rotation System is the fact that you not only have yourself a new backpack, but you also have yourself a new belt pack that can be comfortably worn any time without the backpack. I have worn mine on its own while rock climbing, and I have also used it in a small aircraft while doing aerial photography. You can even attach a strap to it and use it as a shoulder bag while you’re travelling and don’t want the large pack with you at all times.
Downsides of the Rotation System
It’s fair to say that the Rotation System does break the mould for typical camera backpack layouts. There are many benefits to the design, but there are also a few negatives that are worth considering before buying.
The first negative to the system is the added weight when compared to other similarly sized backpacks. Without an identical non-Rotation pack to compare it to, I have to make a bit of a guess here, but I’d estimate the Rotation System to add about a pound and a half to the weight of a pack. This includes the side hatch mechanism, magnetic buckle and some of the weight of the belt pack.
The second negative to the system is that there are probably going to be times when the piece of camera gear you need is not in the belt pack. Many people who are contemplating the 34L size are also going to be using the optional camera insert in the top part of the bag. Inevitably this means that sometimes you are going to have to take your camera out of the belt pack, and also access the top section of the bag to get to that other lens, or perhaps the filter kit that you have stored there.
At this point, you will have to remove your backpack – as you would with any photo pack – but once you have put it in the ground you’ll also have to pull the belt pack out. At first, this seems kind of messy, and it certainly takes a little longer to do than if you were using a more traditional back panel opening system to get to all your gear.
Again, this is just something you have to consider before you buy one of these packs. Do the benefits outweigh that negative aspect? How often do you see yourself having to do that? Careful packing of your bag can often offset this specific downside. You will always want to keep your wide zoom lens (16-35) and your standard zoom lens (24-70) in the belt pack, for example. I also keep a polarizing filter in there, along with my memory cards, batteries and a lens cloth. If you’re using longer lenses and happen to have a second body, keeping those together at the top of the bag can also minimize the times when you need to split the two sections apart.
Additional Features and Design
Front Pockets
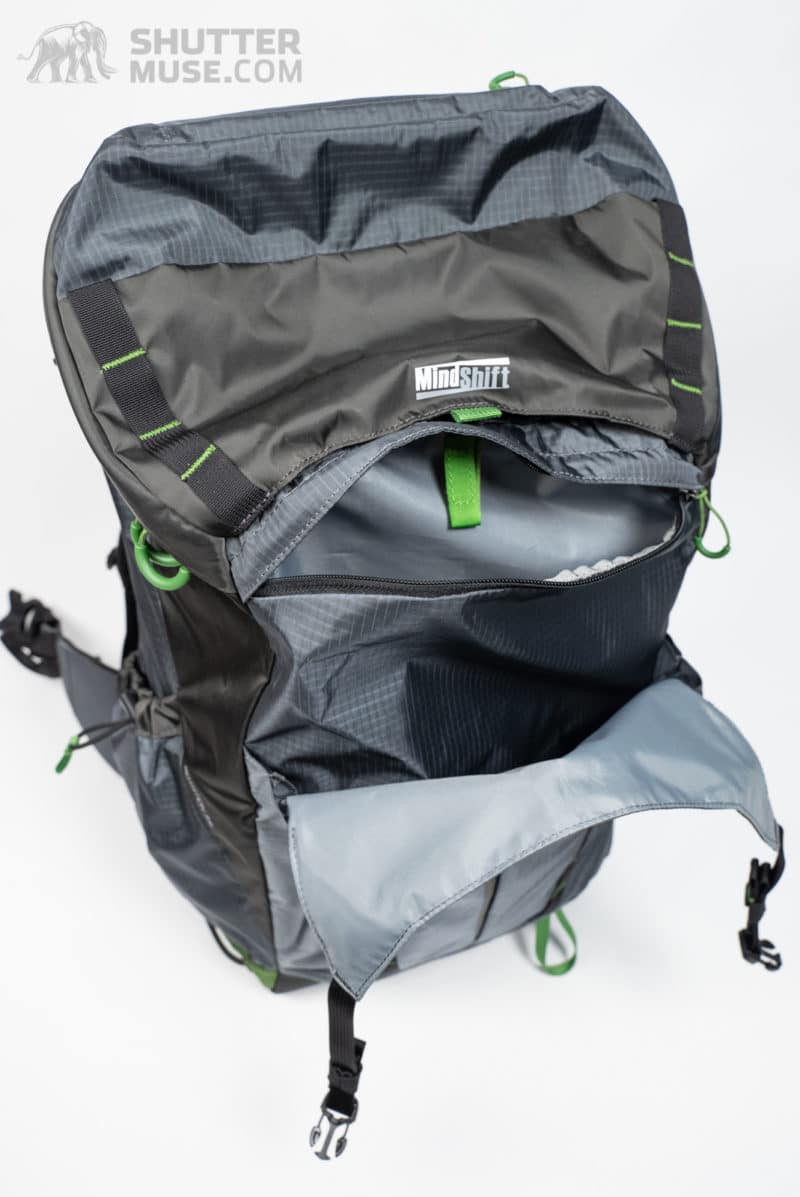

The front of the bag has a new compressible stuff pocket that is perfect for your quick-access rain layers. If they do get wet, you can stuff them back in there and keep them away from the other gear in your bag. This feature that was not on the previous version of this pack, and is probably my favourite addition to the current version.
Once you have unclipped the flap, you will also have access to a zippered pocket that runs the full depth of the pack. This pocket is large enough to store a 13″ laptop, although if you do so, you’ll want to put it into a simple neoprene sleeve as it is entirely unpadded.
The laptop option is nice for travelling with one single bag. When using the bag for day hikes, though, I would recommend limiting this zippered pocket to larger items. The opening to the pocket is not very wide, and it’s impossible to see down into its depths. As such, this would not be a place to store small items that you might need in a hurry.
Top Pocket
This little zippered pocket is the place to store quick-access small items such as snacks, gloves and sunglasses. If you dig around in there, you’ll also find a key clip hidden in the back left corner. I always use the key clip to secure my memory card wallet.
Main Pocket
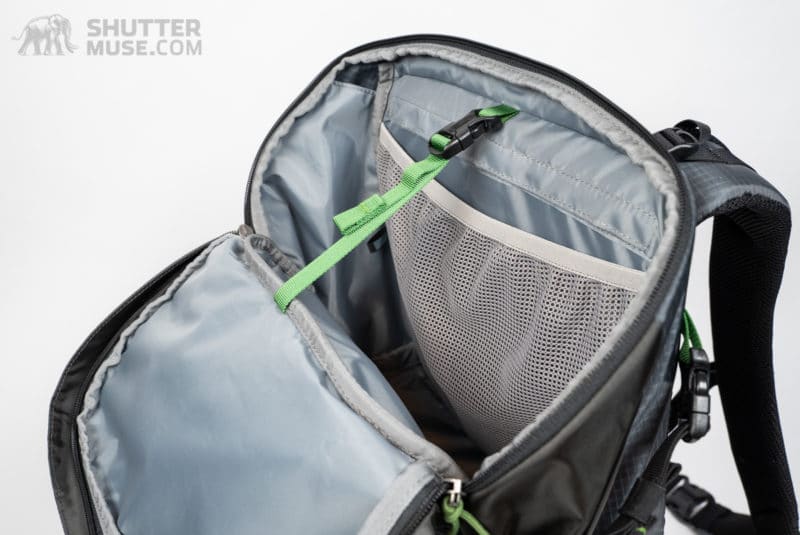

The top section of the bag has a 25L volume and an elasticated organization pocket. Many hiking daypacks are in the 20-25L range, so almost everyone will find the size of this top section to be just right for a long day on the trail. There’s enough room here for multiple additional layers, a good first aid kit plus a camp stove and food for a long day of hiking. If you’re really stuffing this top section full, there’s a strap that can be used to compress the volume slightly, and take some strain off the zippers.
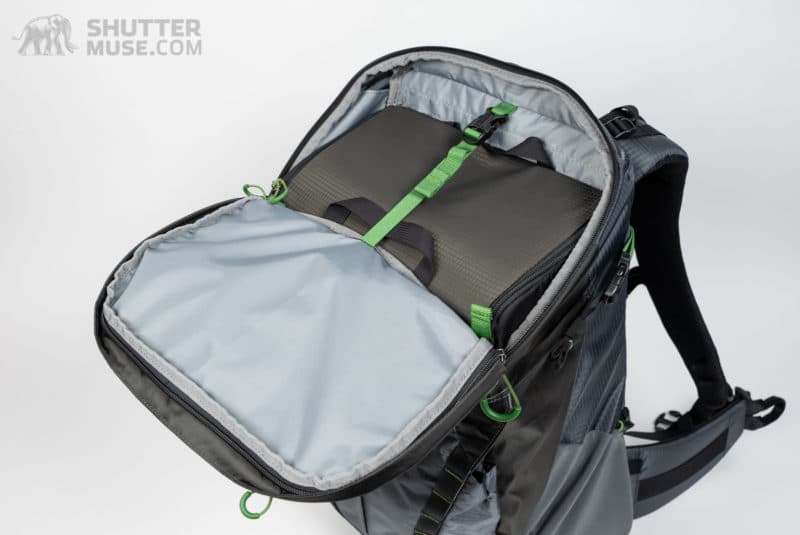
If you want to carry additional camera gear, I’ll be covering the optional padded camera insert later in the review. However, I will point out that the insert is best used when you want to carry enough additional camera gear to (mostly) fill the insert. If you simply want to carry one extra lens, such as a 100-400mm lens that will not fit into the belt pack, it’s best to just wrap that in a lens pouch or jacket, and bury it into this top part of the bag. Tamrac Goblin pouches do a good job of adding a little scratch protection for lenses stored in this fashion.
Harness
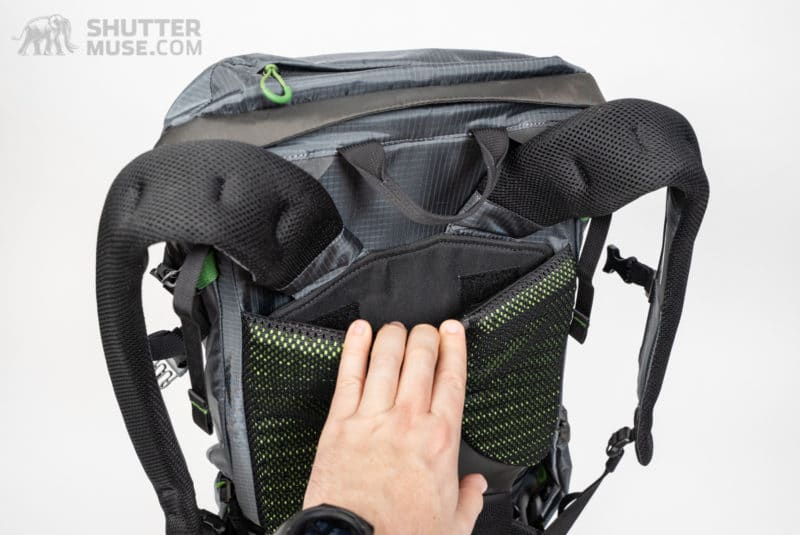

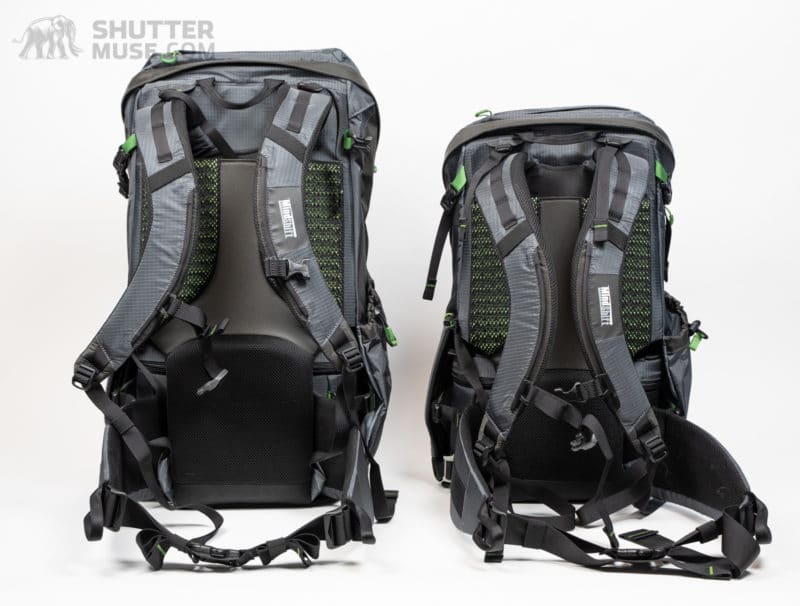
The comfort of the Rotation 34L has been improved from the previous version of this pack in two ways. Firstly this pack now has an adjustable torso length that allows you to dial in the fit to your own body shape. This is a big improvement, and it’s not just for tall or short people. I’m of average height myself, but I have shorter legs and a longer torso. This new adjustment system is simple, but it really helps to get the perfect fit. The Rotation 34L is suitable for people with a torso length of 16.5” – 19.5” (41.9 – 49.5cm).
The second improvement is the use of the green ridged foam panels on the back panel. While I do like to see this green foam used on the two top pads, I do wish that they had also carried this through to the lumbar support pad too. I guess this was a cost issue, and the older style of black foam was needed at the bottom to keep the overall pack price down to the target.
Prolonged carrying comfort is a subjective thing. I have a very triangular torso and this means that packs often fit differently on me than they do on other people. However, I can compare the comfort of some of the many other packs I have tested. I don’t know quite how the pack will fit on you, but I do know how it fitted on me, compared to these other packs.
With the Rotation 34L, I would rate the comfort as good, but not exceptional. I found that the back panel curved outwards slightly, and this took some getting used to. I never once thought that the bag was uncomfortable while using it, but I also never had that “wow” moment that I have sometimes had when carrying heavy loads with truly exceptional harness systems on some admittedly much more expensive bags. In particular, I regularly tested this bag alongside the larger (and much more expensive) Rotation 50L+. That is a pack that has an entirely different harness system that is much more comfortable with heavy loads.
Tripod Carry
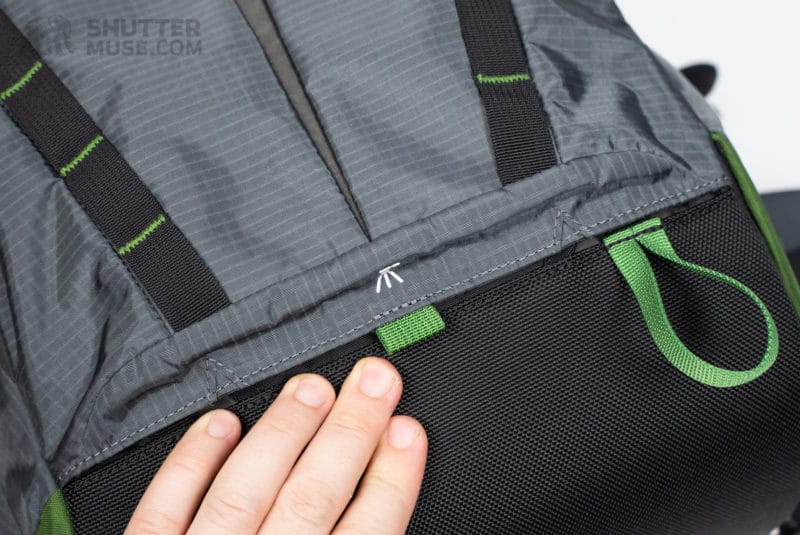

You have two choices for carrying a tripod on this bag. The first is a pair of front-mounted straps and a tripod foot cup that is all stowed away in hidden pockets until you need them. The second option is to use the large elasticated side pocket and the side strap.
I prefer to carry my tripod on the side of the bag for two reasons. Firstly, it keeps the tripod weight closer to my centre of gravity. Secondly, if you are carrying a tripod on the front, it gets in the way of access to the front zippered pocket and the front expansion pocket.
Belt Pack Details
The belt pack is an integral part of this bag’s design. You’ve already seen how it works from a camera access point of view, but don’t forget that it’s also a great little camera bag in its own right. You can easily remove this and use it on its own if you want an ultralight waist pack for a camera and a couple or three lenses.
Sometimes when I’m bushwhacking with a big telephoto lens on my shoulder in search of wildlife I like to use a waist pack to hold binoculars, batteries and my teleconverters. I have also used Rotation belt packs while rock climbing, too! They can be a very handy accessory to have in your kit, and in the case of this bag, it’s almost like getting a freebie 🙂
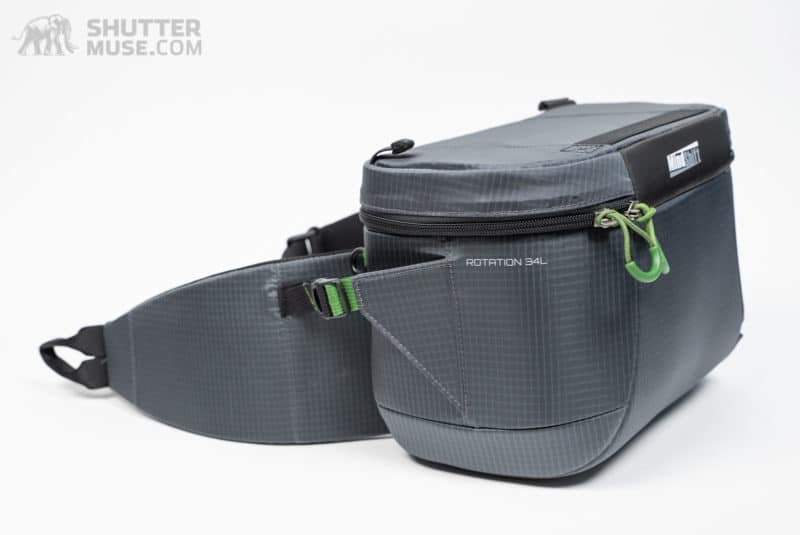


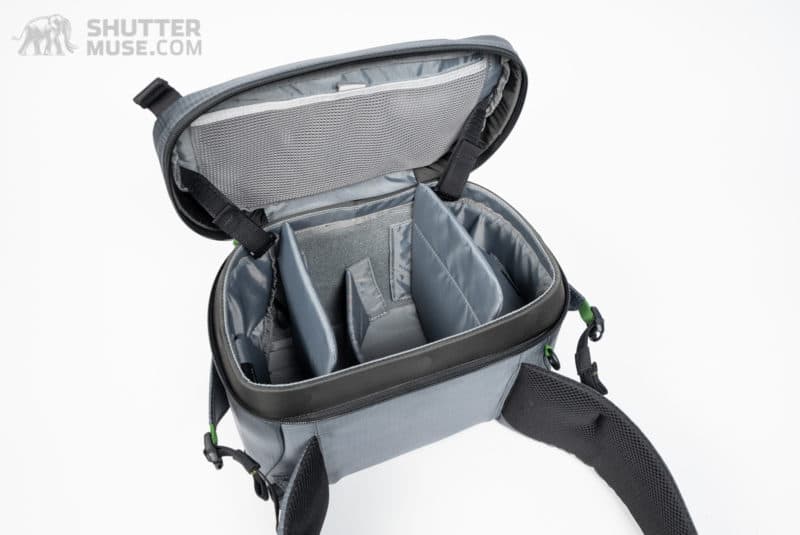
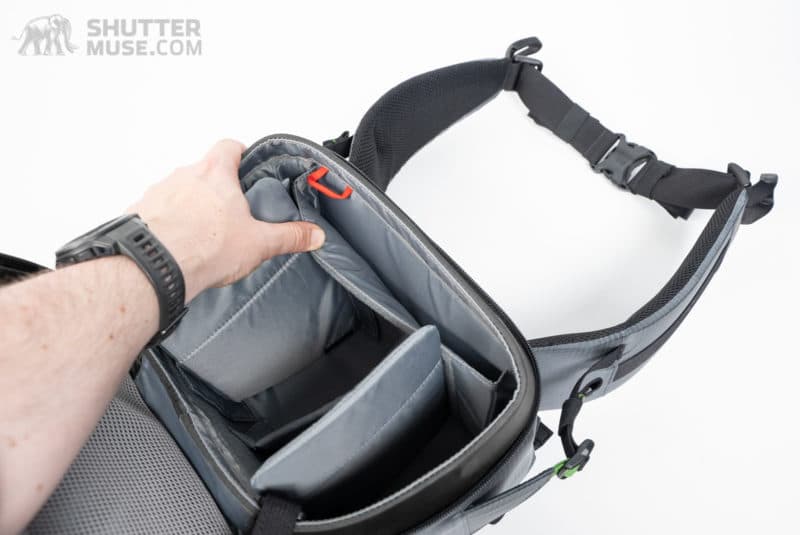

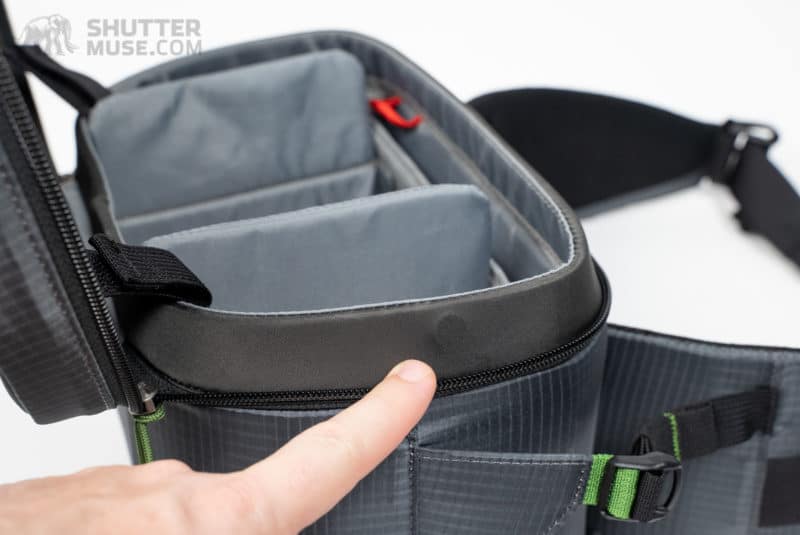
On the inside of the belt pack, you’ll find a good selection of dividers that can be configured to stack up several lenses or create a platform for a camera body with a lens attached. In the 34L, you have room for a pro-sized body with something like a 24-70mm attached. Or even one of the new Canon RF 70-200mm lenses.
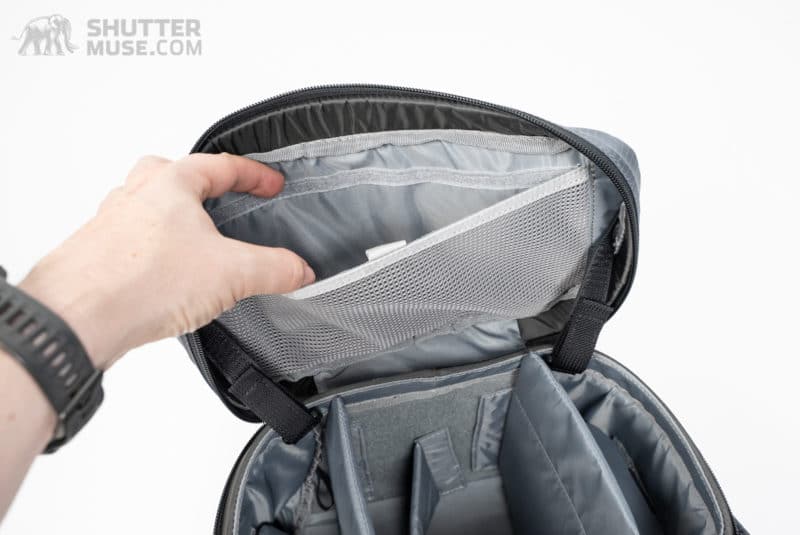
The lid features a mesh pocket that is useful for spare batteries, and your memory card holder can be clipped to the red nylon loop for security. There’s also a thinly padded slot at the back which will take a small tablet such as an iPad Mini or Kindle. Some nature guides will also fit into this slot.
Hydration Compatibility
For carrying water in the Rotation 34L you have two options. The first is to use the large side pocket with something like a 1L or 1.5L Nalgene bottle. The second option is to use the front pocket and hang a 2-3L water bladder on the green loop. I like to carry my tripod on the side of the bag, so I usually opt for the bladder option.
Included Rain Cover
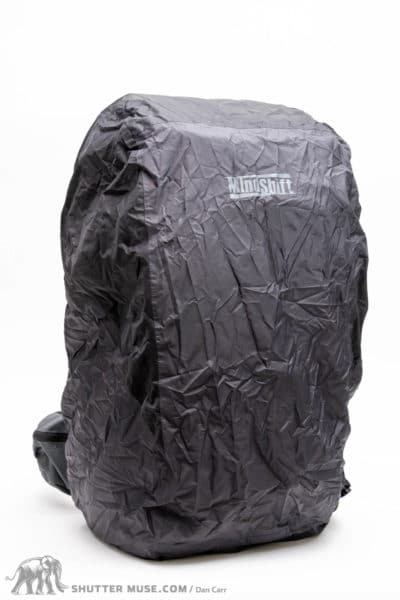
The Rotation 34L comes with a rain cover. The cover is a two-piece system, with one cover covering the main part of the pack and the second covering the belt pack. Although not fully weatherproof, these bags do shed some water when it falls on them. If you get caught in a 10-minute downpour here and there, you will be fine without the rain cover. The zippers are not water-resistant YKK AquaGuard, but they do have rain flaps covering them so that water doesn’t have a direct path to the zipper.
Optional: Stash Master Top Load
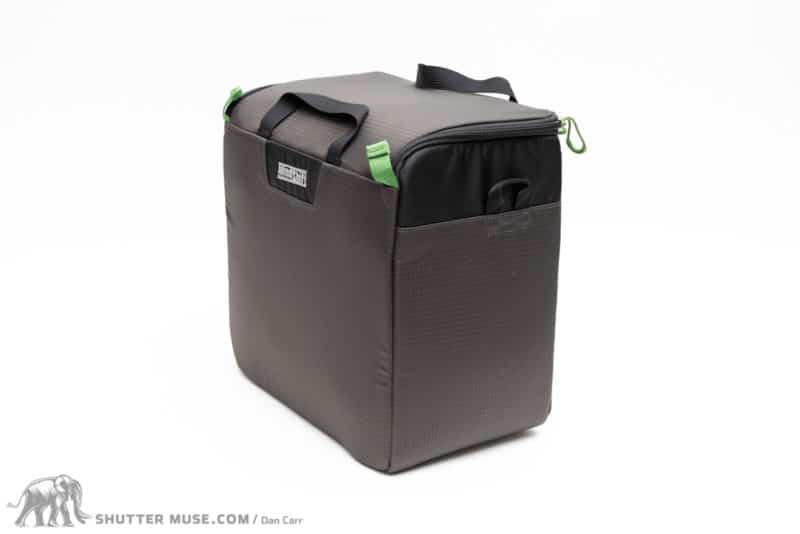
UPDATE: Think Tank has expanded its lineup of Stash Master Photo Cubes, adding new sizes and new features. More details about the new models can be found in my review of the Stash Master lineup.
Stash Master Top Load Specifications
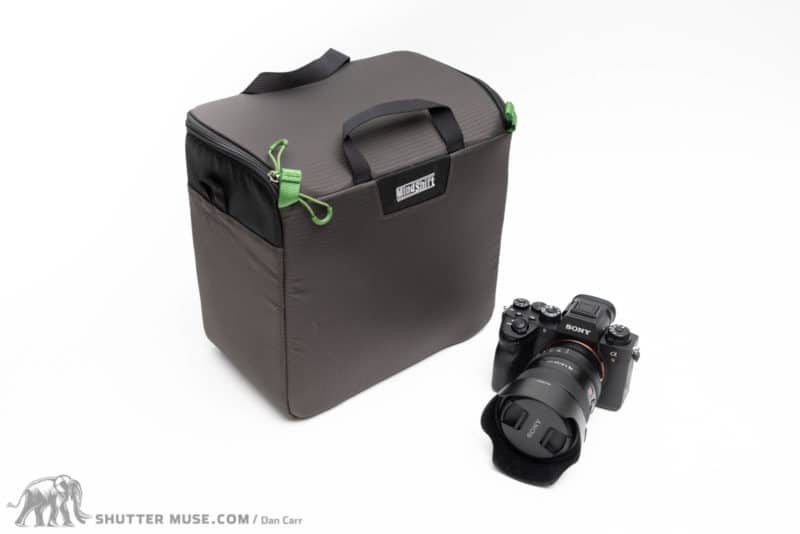
- Exterior: 10.8” W x 10.6” H x 7.1” D (27.5 x 27 x 18 cm)
- interior: 10.4” W x 10.2” H x 6.7” D (26.5 x 26 x 17 cm)
- Weight: 0.8 lbs (0.4 kg)
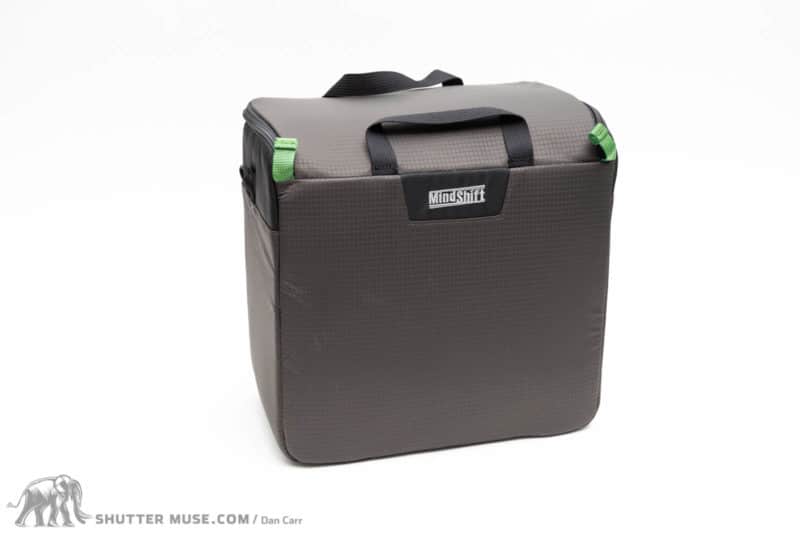
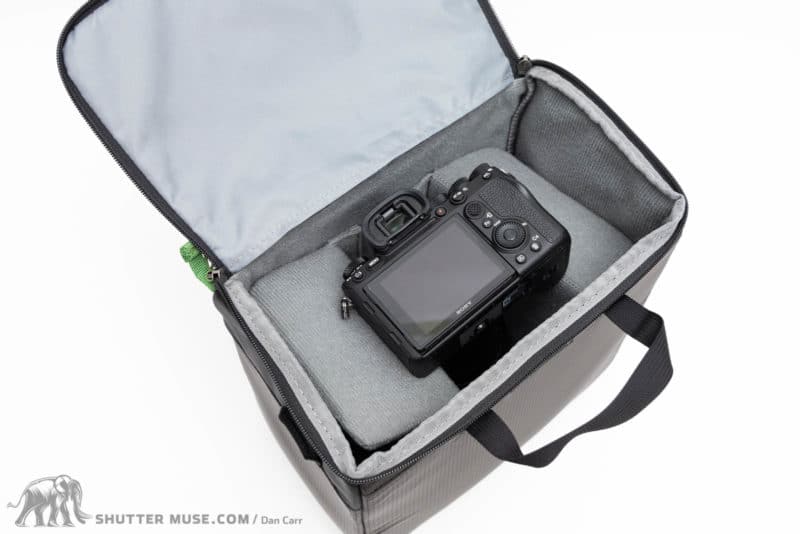
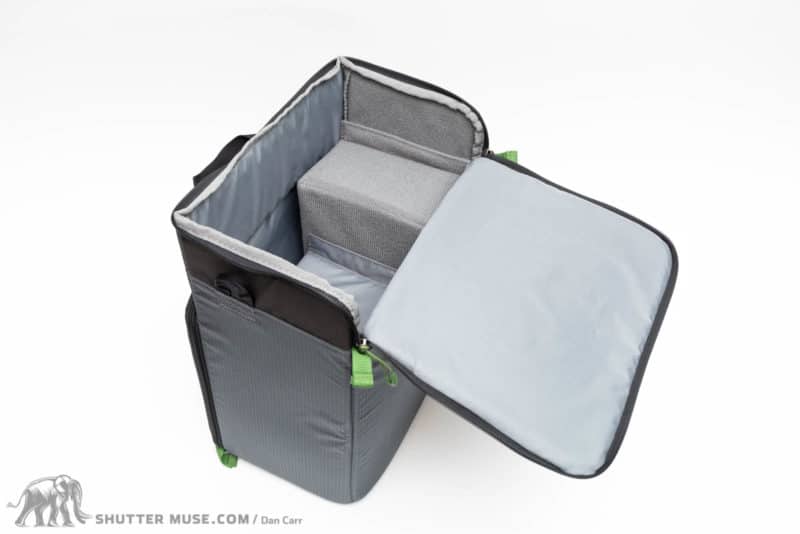
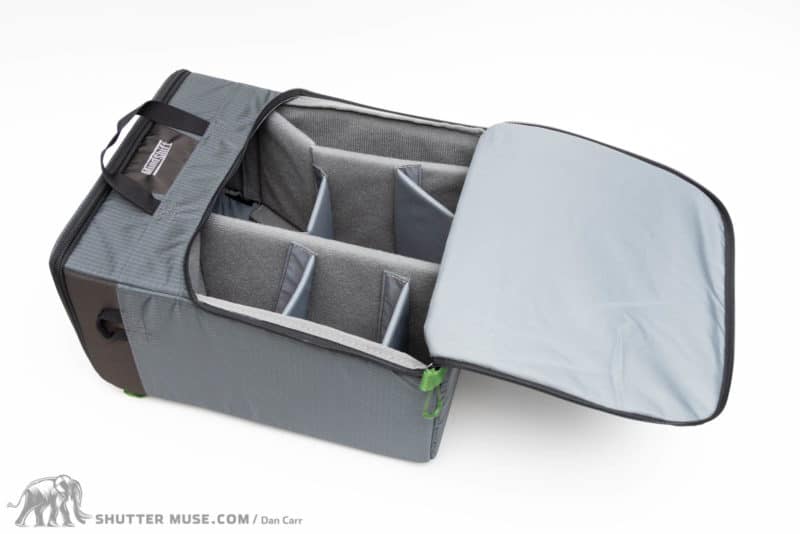
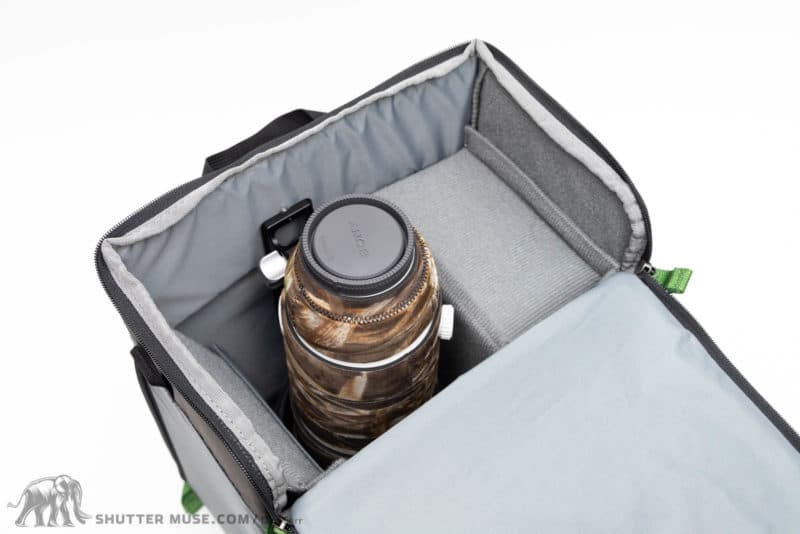
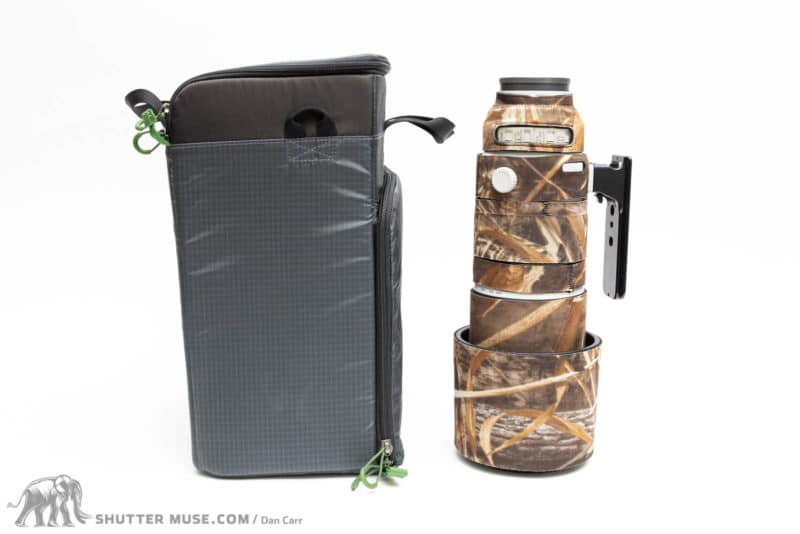
The optional Stash Master Top Load ($59.99) is a padded camera insert that is designed to perfectly fit into the top half of the Rotation 34L. It’s tall enough to hold a 100-400mm lens or a 70-200mm f/2.8 attached to a camera body. The width of the insert will accommodate pro-sized camera bodies, of those with a battery grip attached. The Top Load is supplied with a selection of additional padded dividers, and these can be used to stack smaller lenses.
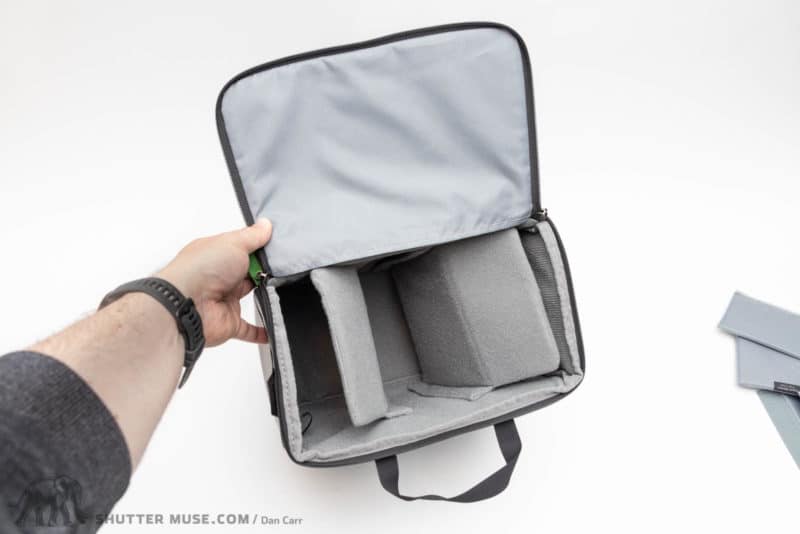
The efficient cubic design means that you can get a surprising amount of camera gear in this insert. Although obviously dependant on lens size, I was easily able to get a spare camera body and an extra five lenses into the Top Load during my testing. The deep vertical design also lends itself well to carrying flashes and would be an excellent organizer for two or three flashes, along with some remote triggers.

Compared to the Stash Master Pro
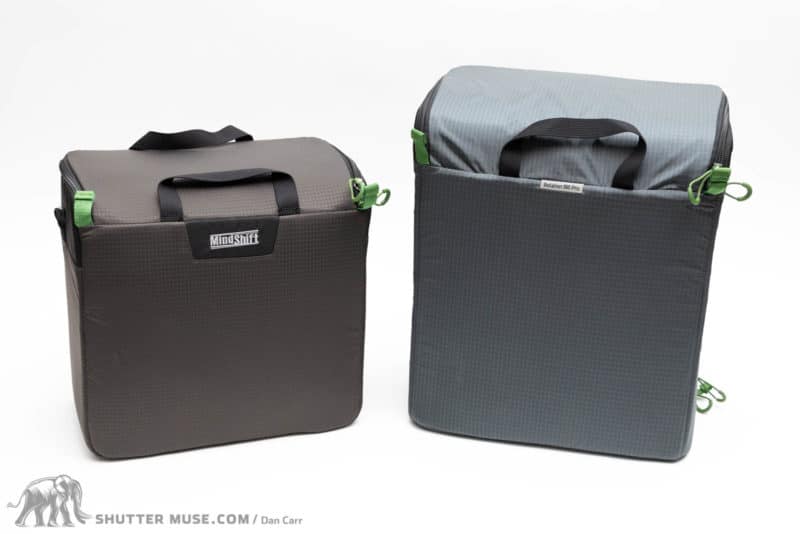
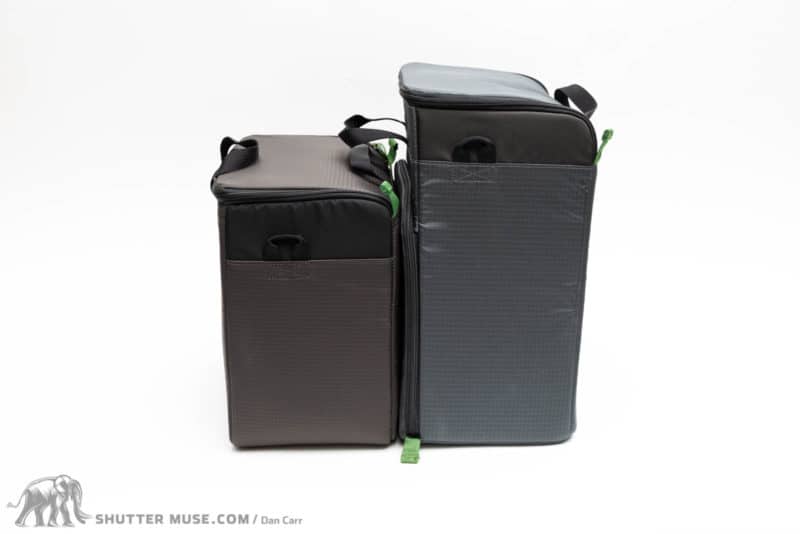
For those of you reading this review and trying to choose between the Rotation 34L and the Rotation 50L+, you will want to know the difference between the Stash Master Top Load (for the 34L) and the Stash Master Pro (for the 50L). You cannot put the Stash Master Pro in the Rotation 34L. It doesn’t fit. The Stash Master Pro is slightly longer, and thus able to hold lenses up to the length of a telephoto zoom like the Sony 200-600. The Pro also has an additional second opening so that it works in tandem with the back panel hatch on the Pro 50L pack. The Stash Master Pro is also $74.95, compared to the $59.99 of the Stash Master Top Load.
Compared to the old Rotation 180 Horizon
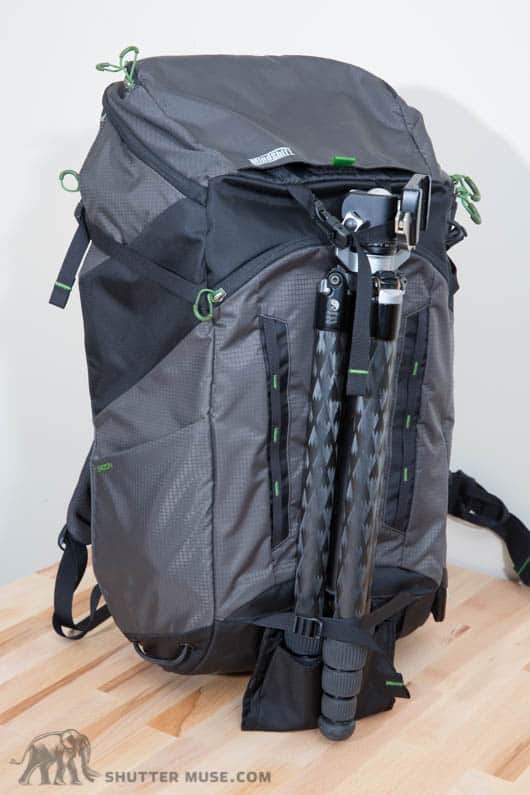
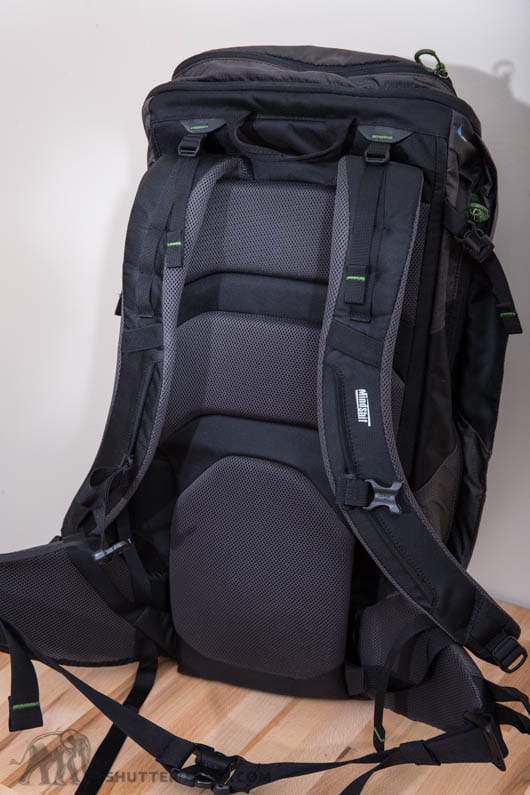
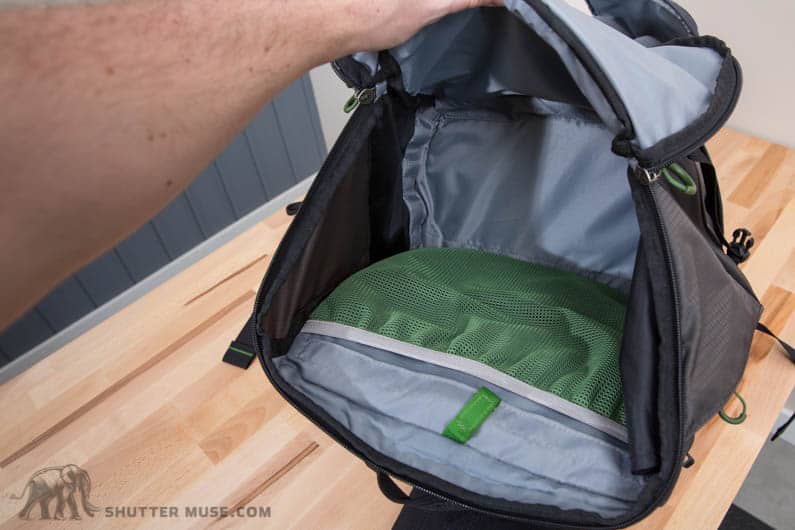
The MindShift Gear Rotation 34L replaces the old Rotation 180 Horizon backpack. Aside from an update to the design language of the bag, there are four primary improvements over the old Horizon. Firstly, the Rotation 180 Horizon did not have the expandable stuff pocket that is found on the front of the Rotation 34L. Secondly, there was no adjustable torso length on the Horizon pack. And thirdly, the new 34L features improved carrying comfort, provided by the new ridged green foam panels on the back of the pack. Fourthly, the new pack also has the magnets for the closure of the belt pack. Overall, this new Rotation 34L is an excellent improvement over the old version.
Comparison With Other Rotation 180 Backpacks
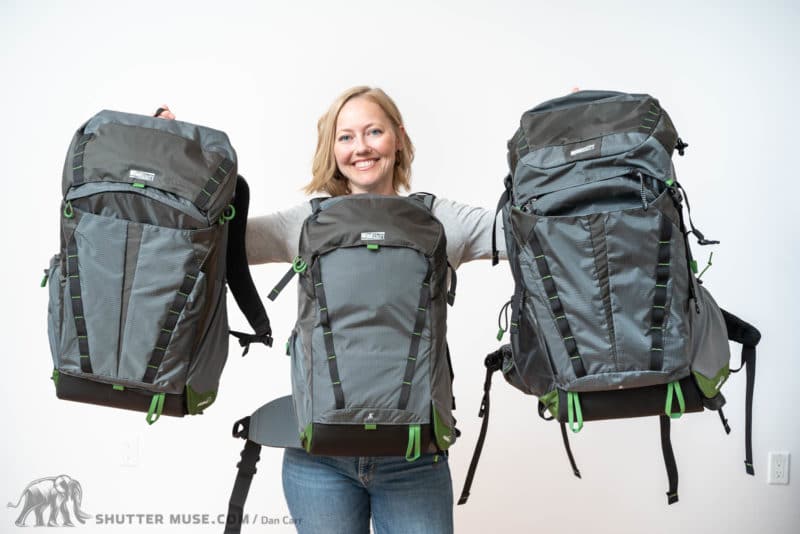
The Rotation 180 range includes three different backpacks of varying sizes. Since you are reading the review of the middle 34L size, there’s a reasonable chance that you might also be considering either the smaller 22L pack or the larger 50L pack. I have also tested these packs extensively, so I’ll make some recommendations about those now.
Rotation Pack Feature Comparison
| Rotation 22L | Rotation 34L | Rotation Pro 50L+ | |
|---|---|---|---|
| Rotating belt pack | Yes | Yes | Yes |
| Adjustable torso height | Yes | Yes | Yes |
| Laptop carry | No | 13″ unpadded | 15″ |
| Hydration compatible | No | 3L | 3L |
| Front zippered pocket | No | Yes | Yes |
| Front stuff pocket | No | Yes | Yes |
| Rear panel access | No | Yes | Yes |
| Removable top pocket | No | No | Yes |
| Extendable volume | No | No | Yes |
| Tripod Suspension Kit compatible | No | Yes | Yes |
| Accessories attach on waist belt | Yes | Yes | Yes |
| Zippered pocket on waist belt | No | No | Yes |
| Retail Price | $299 | $340 | $469 |
Rotation Pack Capacity Comparison
| Rotation 22L | Rotation 34L | Rotation Pro 50L+ | |
|---|---|---|---|
| Ungripped Mirrorless | Yes | Yes | Yes |
| Ungripped DSLR | Yes | Yes | Yes |
| Gripped Mirrorless | No | Yes | Yes |
| Gripped DSLR | No | Yes | Yes |
| Lenses | 2-3 | 3-5 | 3-5 |
| 24-70mm f/2.8 attached | No | Yes | Yes |
| Additional gear insert | Stash Master S | Stash Master S, M or M Pro | All Stash Masters |
| Additional gear insert | Yes | Yes | Yes |
Rotation Pack Dimension Comparison
| Rotation 22L | Rotation 34L | Rotation Pro 50L+ | |
|---|---|---|---|
| Backpack Exterior | 12.6″W x 20.5″H x 8.7″D (32x52x22cm) | 13.4″W x 22.8″H x 10.2″D (34x58x26cm) | 13.8″W x 24-31.9″H x 11.8″D (35×61-81x30cm) |
| Backpack Interior | 11.2″W x 11.4″H x 85.9″D (28.5x29x15cm) | 11.2″W x 13.4″H x 7.1″D (28.5x34x18cm) | 11.8″W x 14.1-19.3″H x 8.7″D (30×36-49x22cm) |
| Belt Pack Interior | 10.6″W x 6.7″H x 6.1″D (27x16x15.5cm) | 11″W x 7.7″H x 7.1″D (28×19.5x18cm) | 12.2″W x 7.7″H x 7.1″D (31×19.5x18cm) |
| Laptop Pocket | N/A | 9.4″W x 13.3″H x 1.0″D (24x34x2.5cm) | 10.6″W x 14.8″H x 1.0″D (27×37.5×2.5cm) |
| Weight | 3.9lbs (1.8kg) | 4.8lbs (2.2kg) | 6.2lbs (2.8kg) |
Rotation 50L+
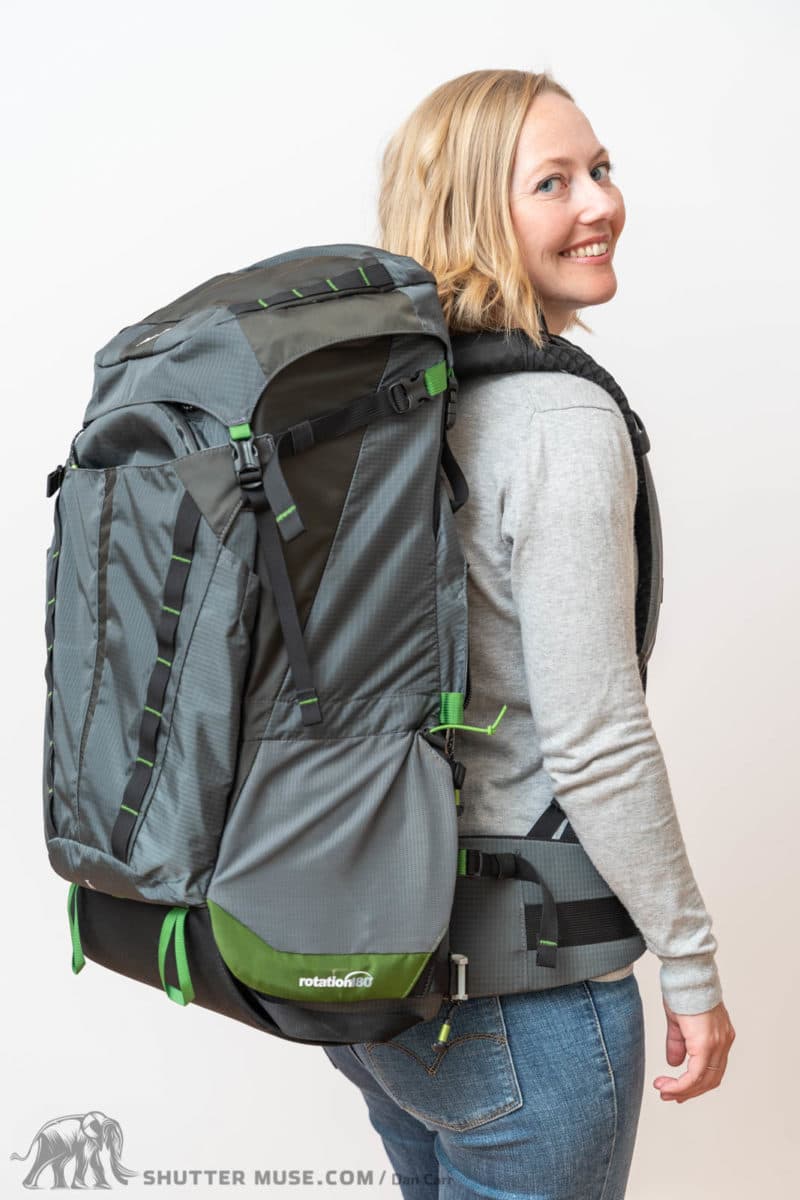
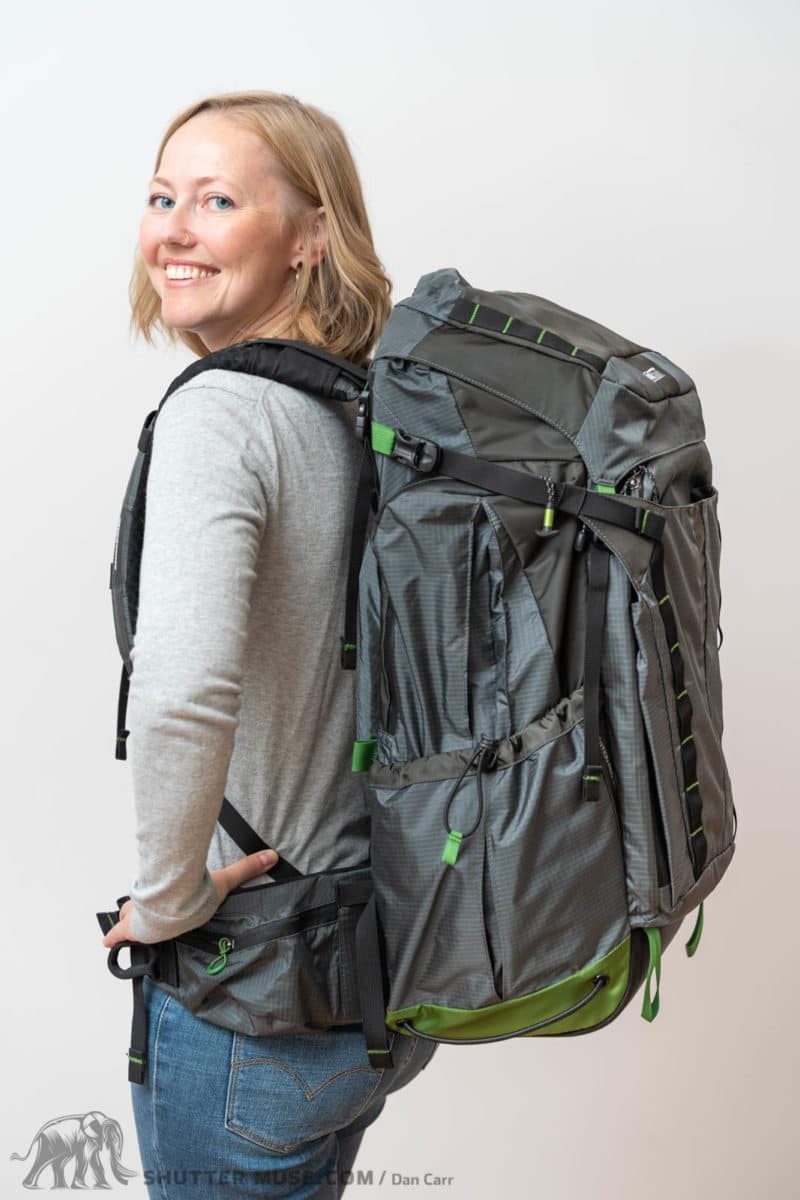
The Pro 50L is a big beast of a pack. You should choose the 50L over the 34L if you want to carry serious amounts of camera gear using the optional Stash Master Pro. Alternatively, you can also use the huge volume of the 50L’s top section to carry a huge amount of non-photographic gear, such as overnight camping gear. If you have ultralight, highly compressible camp gear, you can easily fit a sleeping bag, sleeping pad and cook stove in the top with a spare set of clothing. Then you can strap an ultralight 1-person or 2-person tent on the side of the bag.
I’m specifically using the term ultralight to describe these items. You’re not going to be able to fit a $50 synthetic sleeping bag from Walmart in this bag. If you have an ultralight, high-quality 750+ fill down sleeping bag, you should be fine. You’ll also need to stay away from big foam sleeping pads, and use something tightly foldable such as a Thermarest NeoAir.
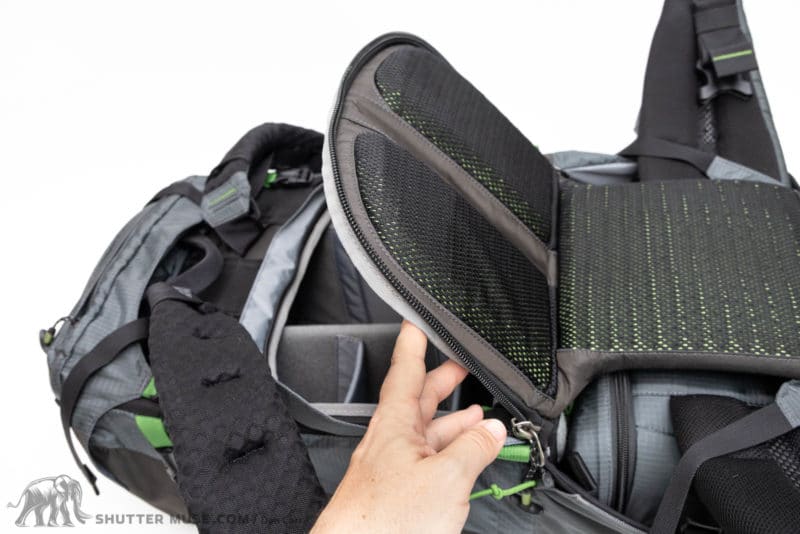
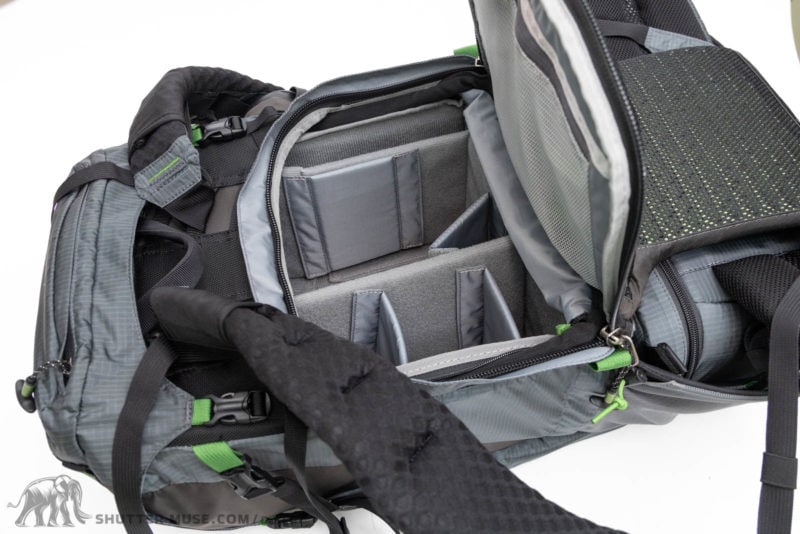
The biggest downside of the Pro 50L is that it runs slightly larger than most airline carry-on limits. I have flown with it on a few occasions, but if you choose to do that, you’re always running the gate agent gauntlet. On the other hand, the 34L will conform to all carry-on regulations with no problem. For more information about this pack, be sure to read my MindShift Rotation 50L+ backpack review.
Rotation 50L Video Walkthrough
Rotation 22L
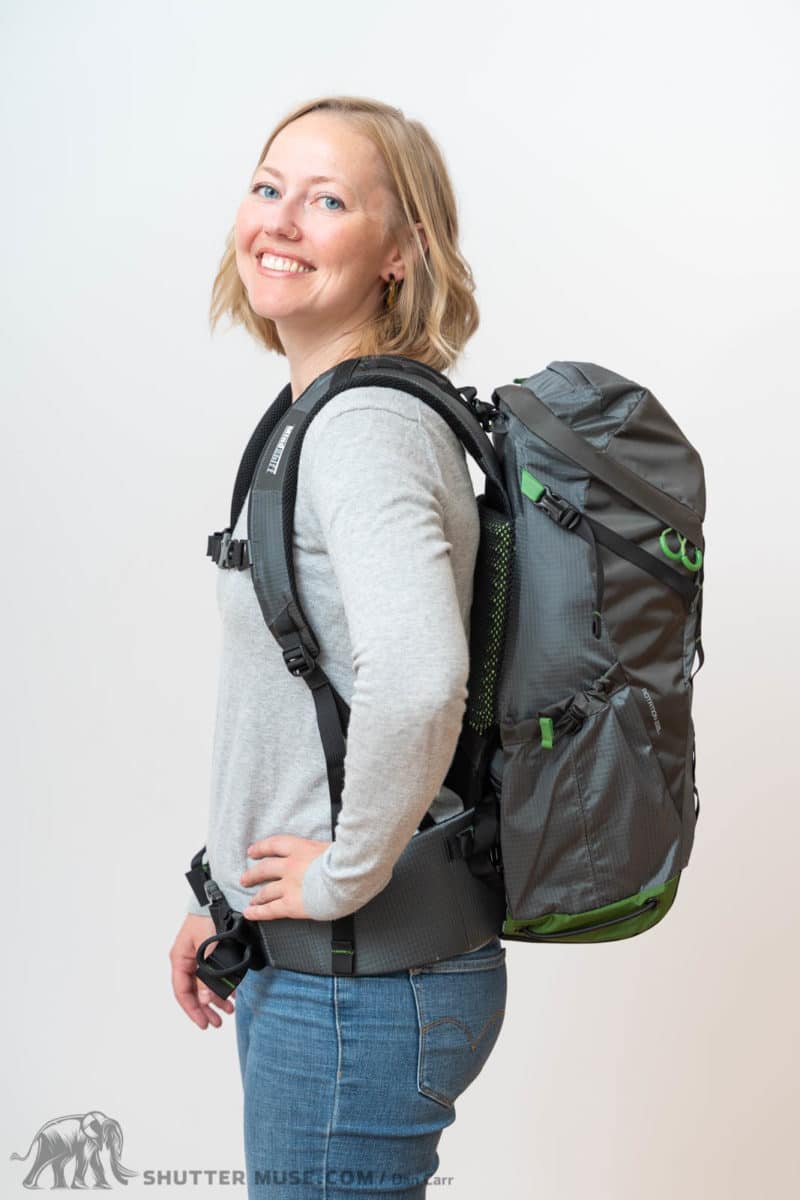
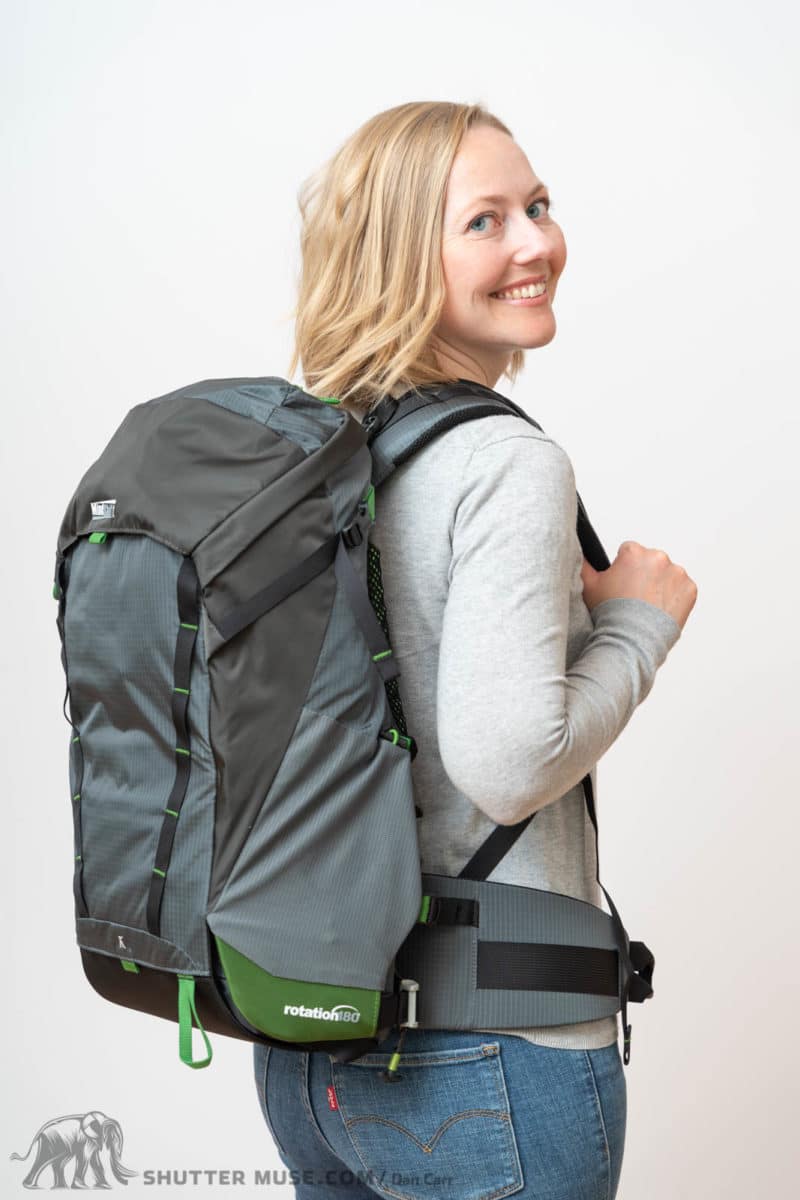
The Rotation 22L is the smallest of the Rotation family. Compared to the Rotation 34L, it lacks the front zippered pocket so it cannot hold a laptop. It also lacks the front compression pocket and has no dedicated pocket for a water bladder. There is also no optional Stash Master insert for the 22L, so your camera carrying capacity is limited.
The 22L is a great bag for a small mirrorless camera with one of two shorter lenses. It works well as a grab-and-go backpack for short walks, but for longer several-hour hikes you will likely appreciate the added capacity of the 34L. While you can carry a 1L Nalgene bottle in the side pocket of the 22L, if you prefer to use a large water bladder, that’s another reason to go with the 34L.
One area where I found the 22L to excel, was as a backpack for mountain biking. The thin profile of the pack keeps the weight close to your back when moving fast around corners. You don’t feel the bag dragging you around even when giving its weight considerable angular momentum on corners. The top section of the pack is easily big enough for an emergency bike spares kit, and the Rotation system means you can stop and snap photos without getting off your bike. When I tested this, I put a water bladder in the mesh pocket inside the top section of the bag and simply ran the hose out of the zipper. Not 100% ideal, but it worked. For more information about this pack, read my detailed review of the MindShift Gear Rotation 22L backpack.
Rotation 22L Video Walkthrough
Additional Comparative Photos
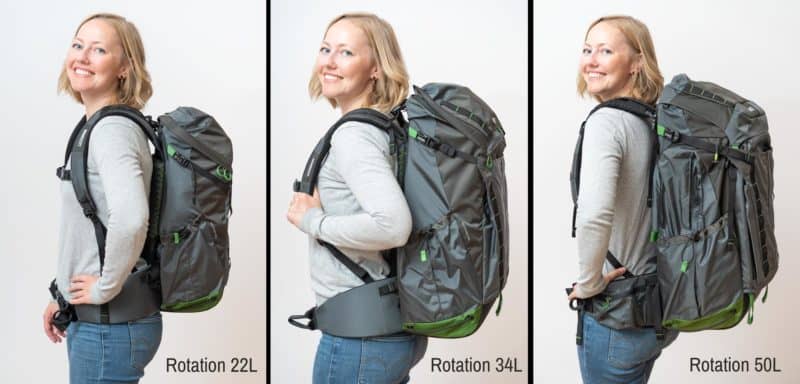
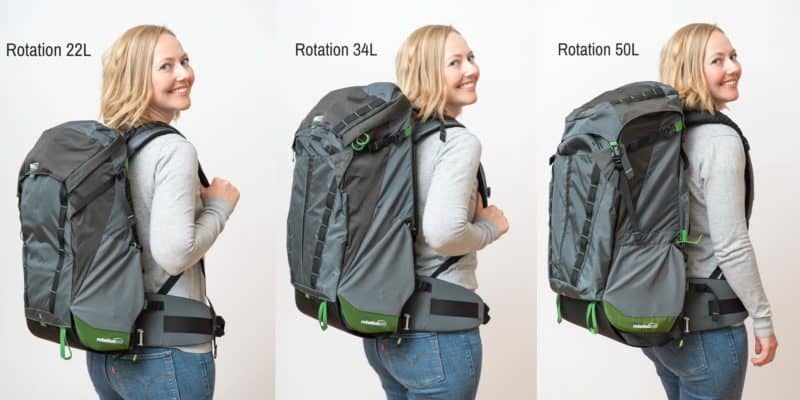
Compared to the MindShift BackLight Elite 45L
If you’re looking at the Rotation 34L then there’s a good chance you might also be considering MindShift’s other similarly sized pack: The BackLight Elite 45L. These bags share the same design language, as well as much of the same material and hardware. The primary difference is that the BackLight Elite 45L doesn’t have the rotating belt pack section. Instead, the entire volume of the pack is accessed through a back panel opening in the style that you also find in packs from F-Stop and Shimoda.
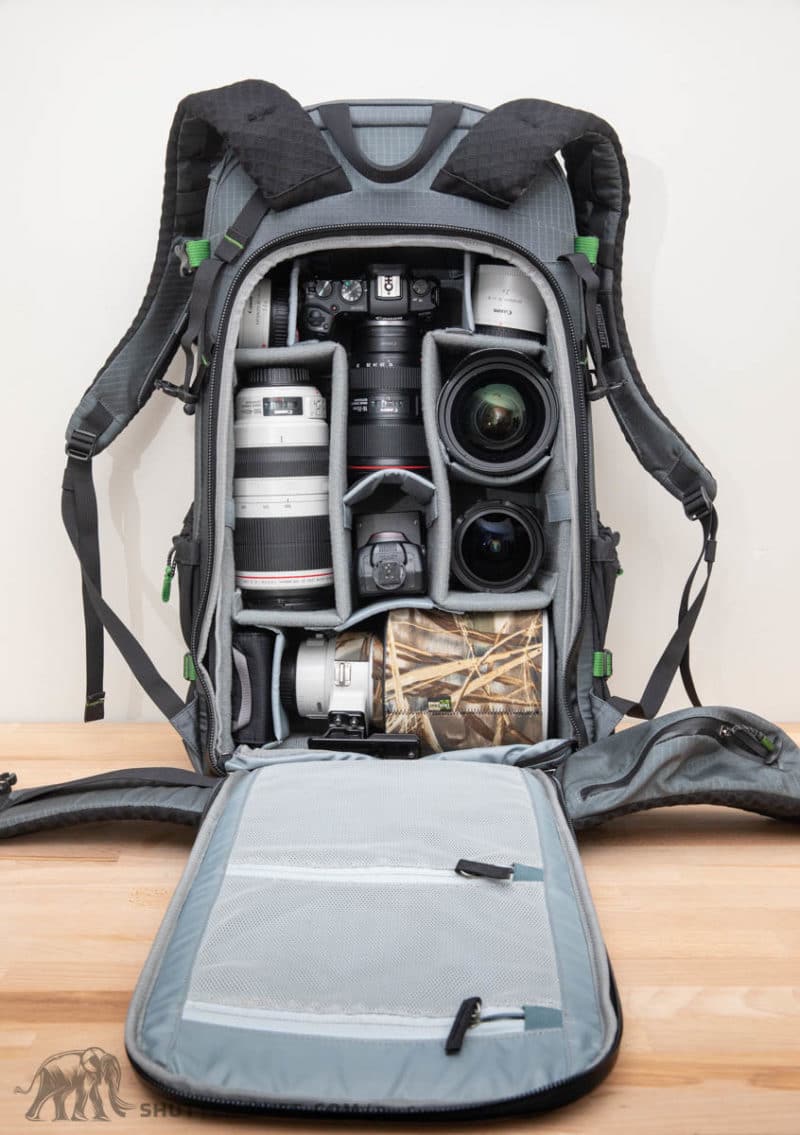
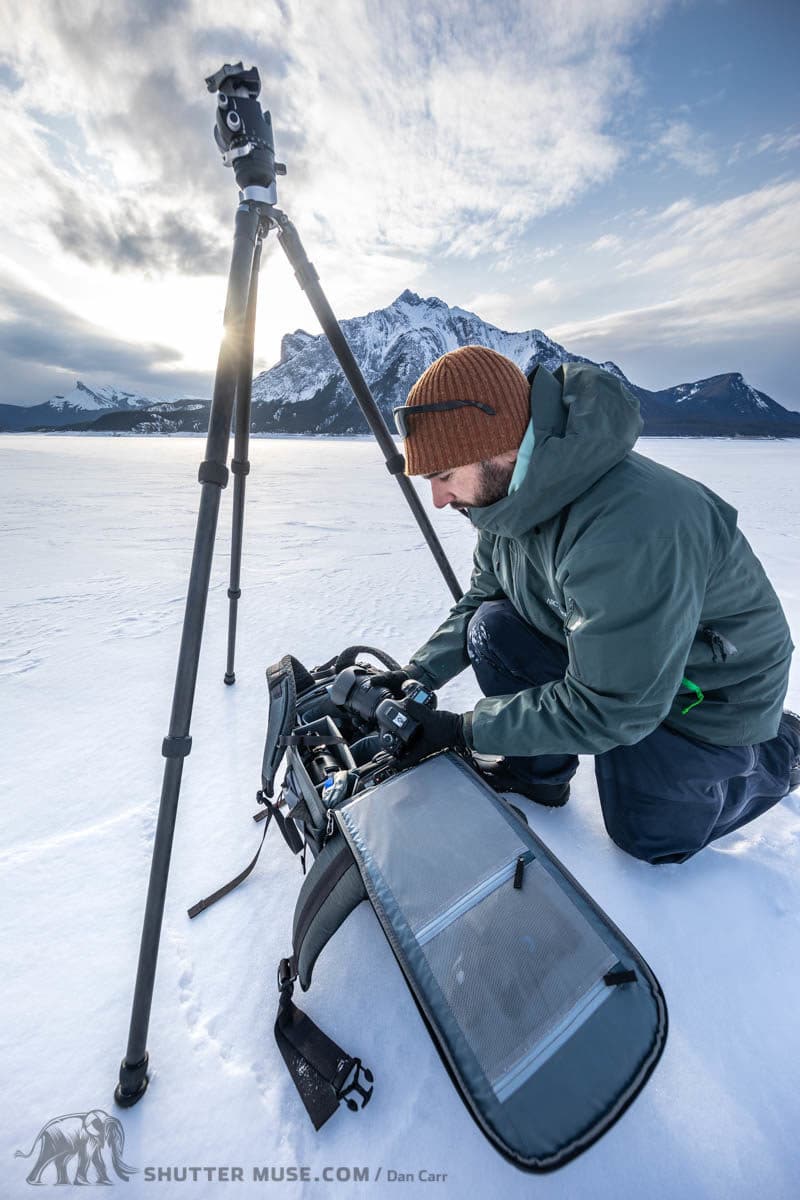
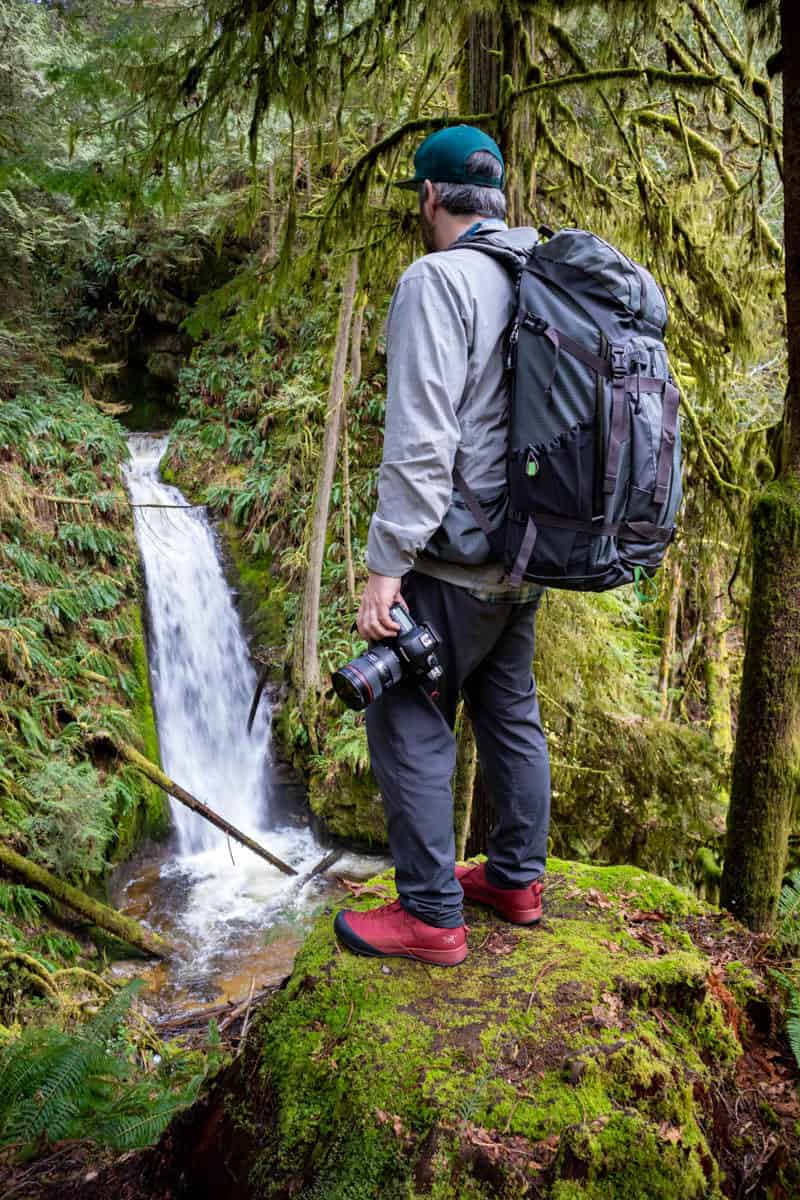
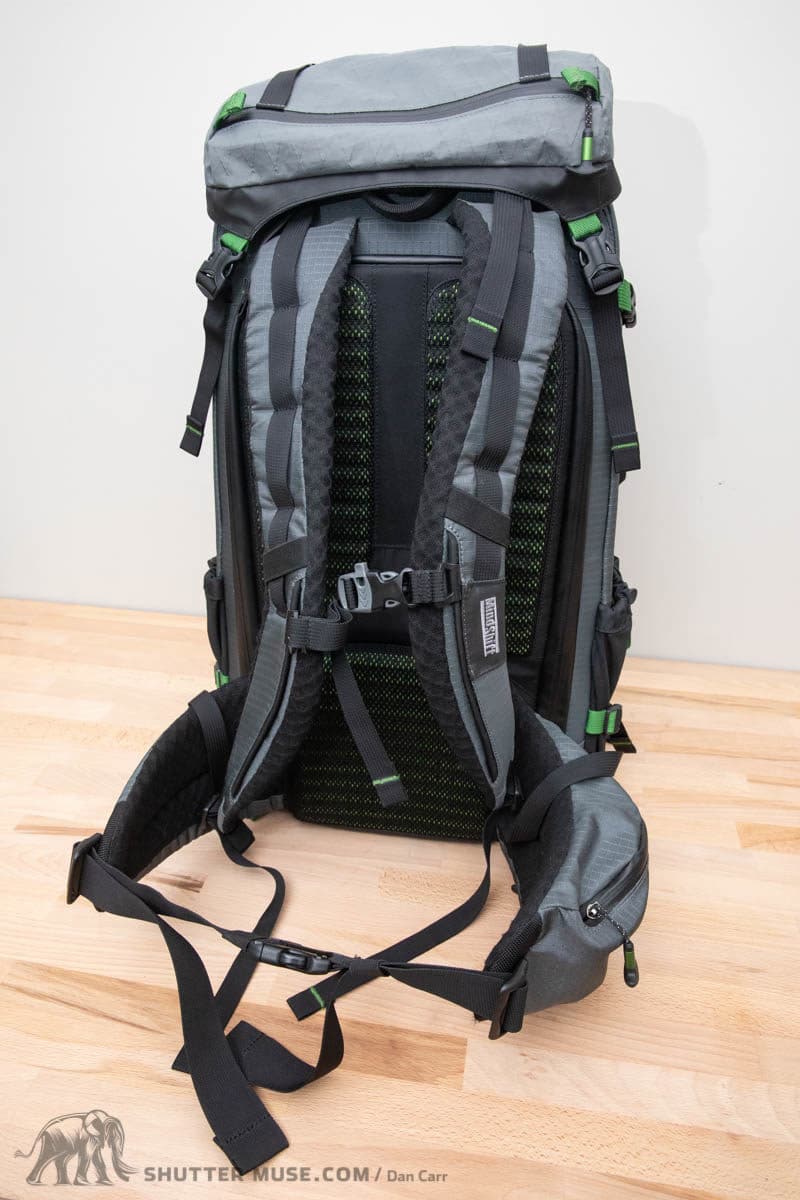
The BackLight Elite has a little more camera carrying capacity than the Rotation 34L, but of course, you don’t have that Rotation mechanism to get the camera into your hand nice and quickly. The BackLight would suit someone who wants to use large telephoto lenses that would simply not fit into the Rotation belt of the Rotation 34L. The Elite 45L also pushed the boundaries of airline carry-on compatibility, although not nearly as much as the Rotation 50L+ does.
If you want to learn even more, I have written an in-depth review of the MindShift BackLight Elite 45L. That should answer all your questions, including going into more detail about those air travel features.
Size Guide
I’m only one size, so it’s always difficult for me to answer questions about pack fit for people that are much shorter or taller than me. Thankfully MindShift has created this useful graphic that gives some visual clues as to how each pack will fit people of different heights. Using the adjustable torso length on each pack, all sizes of the pack should comfortably fit people whose height is between 6’4″ and 5’4″.
Torso Length Recommendations
- Rotation 22L – 12.3” – 15.5” (31 – 39.4cm) torso height
- Rotation 34L – 16.5” – 19.5” (41.9 – 49.5cm) torso height
- Rotation 50L+ – 16.5” – 19.5” (41.9 – 49.5cm) torso height
Conclusion
The 34L is a real sweet spot in the newly updated Rotation lineup from MindShift Gear. I do not doubt that this will be the most popular size in the lineup. Now with the inclusion of a torso length adjustment, it will also be a suitably sized pack for a wider range of photographers.
More so than the smaller 22L version of this pack, the 34L has a very versatile size to it. There is plenty of room in the top section of the bag for the non-photographic gear that would be necessary on a very long day hike. Then there is the optional Stash Master Top Load for those that want to carry longer lenses up to a 100-400mm, or perhaps some flash gear. A laptop-compatible front pocket even enables a photographer to travel neatly with everything all in one carry-on compliant bag.
One thing I must always underline about the Rotation packs, though, is the real need to consider how you will use it. The clever Rotation system is fantastic to use, so long as you do actually use it. Due to its design, it fundamentally changes how you have to pack your camera bag, by placing the camera gear in the belt pack at the bottom. If you do not actually use the Rotation mechanism while out walking around with your camera, in the way it was intended, you will find the bag a lot less fun to use. On the other hand, if you embrace the design and do use it as it was designed, there’s nothing else quite like it on the market and the speed at which you can access your camera will surely have you capturing more photos during a day of photography.
Where to Buy
US Customers spending over $50 in Think Tank Photo’s online store can get a free gift at checkout after following one of the links to the store from this review–like this one. If you have any issues, please follow the instructions on this page.
I appreciate it when you use our links to make your purchases. US residents who shop on the Think Tank Photo website through one of our links will be eligible for a free gift at checkout. This is well worth it! Canadian readers usually best shop with B&H Photo to take advantage of their free shipping to Canada on purchases over $100, plus the option to pre-pay the duties.






This looks to be an awesome set of reviews which I’m going to have to make my way through. I backpacked Europe with a standard camping backpack, a black camera ‘bag’ that was almost as large, and around 50lbs in gear. My pride? One of the first carbon fibre 4-part tripods and a magnesium head- had to save weight somewhere. I’ve been looking for a new bag for a long while and those ‘single arm’ ones just hurt… so this will be quite exciting to see.
I didn’t see any photos of your model/subject/packhorse (let’s be honest here- that’s what friends are for on photo-based hikes!) wearing the pack in front (other than the fanny)- did you test that or is packing gear in front out of vogue now?
Thanks much and I look forward to digesting this. Funny how it came up while searching for microSD card testing software…
I bought the 34L and returned it. It’s a well made pack and appeared to fit well when adjusted for my size (I. never hiked with it) and I’m 6’4″. I thought the belt pack was far too small given the considerable size and weight of the overall pack. It really limited what lenses/camera combos it would hold. I had planned to carry one camera on one of the shoulder straps with a Peak Design capture clip and another camera in the belt pouch. My R5 with a 70-200 (2.8), 24-70, 24-240 or and EF 16-35 with adapter wouldn’t fit with their lens hoods on. I wanted them to fit vertically so I could store other lenses in the belt pack plus the vertical fit (which the pouch is set up for) is the best for quick access/shoot and put it back. Would have been perfect if it was a few inches taller. Some would fit without the hoods but I use hoods and the whole purpose of the rotation system is quick access. I felt the pack was an expensive and heavy system to carry a body with a small lens. Lots of ways to do that.
I am able to easily do all of the above with a much smaller older LowePro pack I have that is side loading. That pack lacks rotation but still offers quick easy access.
Hi Al, what LowePro pack do you recommend for easy camera access from the side? I’m in a similar predicament as you were, as I am concerned with the heavy weight of the bag and limited size of hip pack. Thanks.
Do you think I could fit a 14″ macbook pro into the 34L? I know it only says 13″ but wondered if it could fit. That would be a deal breaker for me. thanks