Important Note
The Gura Gear Uinta backpack is no longer in production. Please check the current Gura Gear backpack lineup for alternative options, and save 10% when shopping in their store by using the coupon code ShutterMuse10. You can also find reviews of current Gura Gear bags at these links:
Gura Gear Uinta Specifications
- External Dimensions: 12.5 x 20.5 x 10.5 in (32 x 52 x 27 cm)
- Internal Dimensions: 12 x 20 x 8 in (30 x 50 x 20 cm)
- Weight (Bag Only): 2.65 lbs (1.2 kg)
- Weight (Bag w/Modules): 4.85 lbs (2.1 kg)
- Weight (Medium Pro Module): 1.35 lbs (.61 kg)
- Weight (Small Pro Module): .85 lbs (.39 kg)
- Volume: 30 liters
Video Review
I hope you enjoyed the video, please subscribe to the channel to make sure you don’t miss any more in the future!
Features
- Multi-Point Front and Rear Access
- Customizable Photo/Video Modules for Ultimate Flexibility (Sold Separately)
- Quick Connect Tripod & Hydration System (Sold Separately)
- Padded Laptop/Tablet Sleeve (Up to 17”)
- Fully Adjustable & Ventilated Harness and Belt System
- Multi-Function Belt Attachment Points
- Load-Managing Compression Straps
- Seam-Sealed & Fitted Rain Waterproof Cover
- Lightweight Custom Water-Resistant Ripstop X-Pac® Material
- Durable 500D CORDURA® in High Abrasion & Contact Areas.
- High-Quality YKK® PU Water-Resistant Zippers
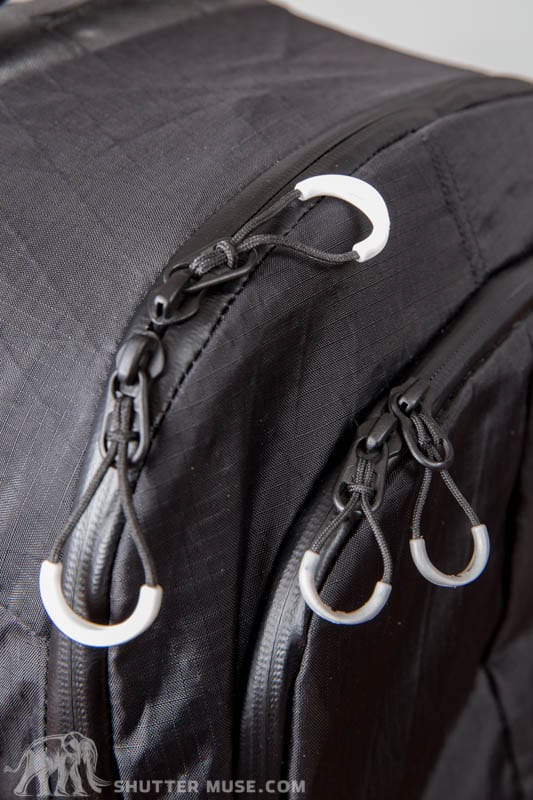
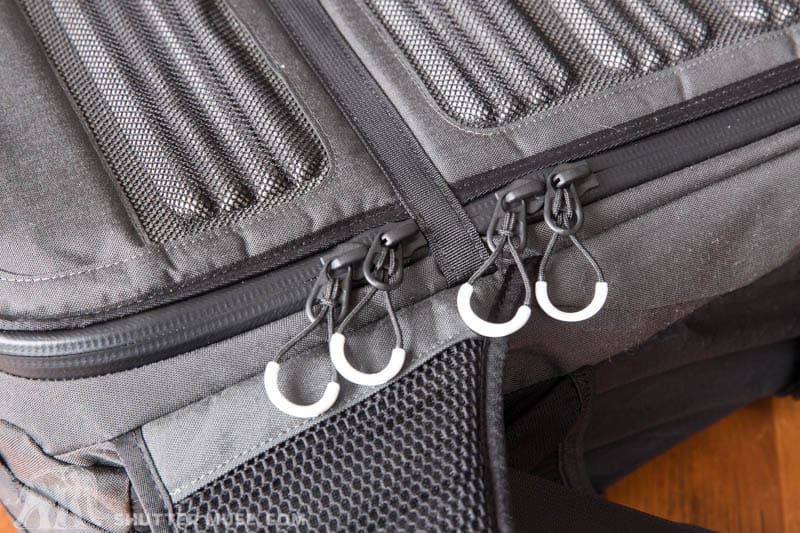
Seam-sealed zippers for ever single exterior zipper on the pack
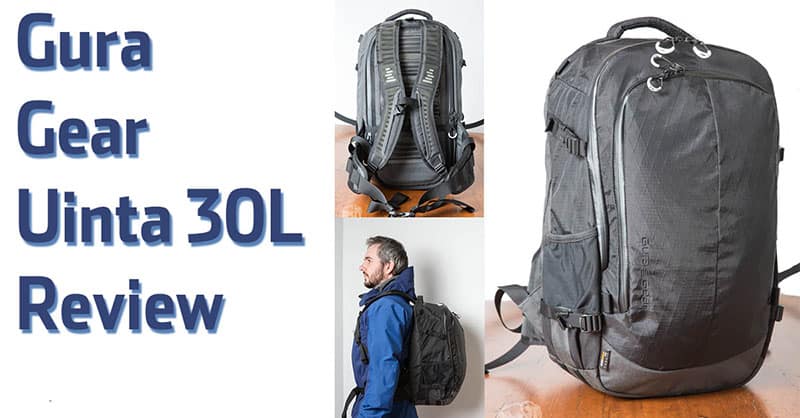
This images shows you the unique back panel access that’s slit into two parts
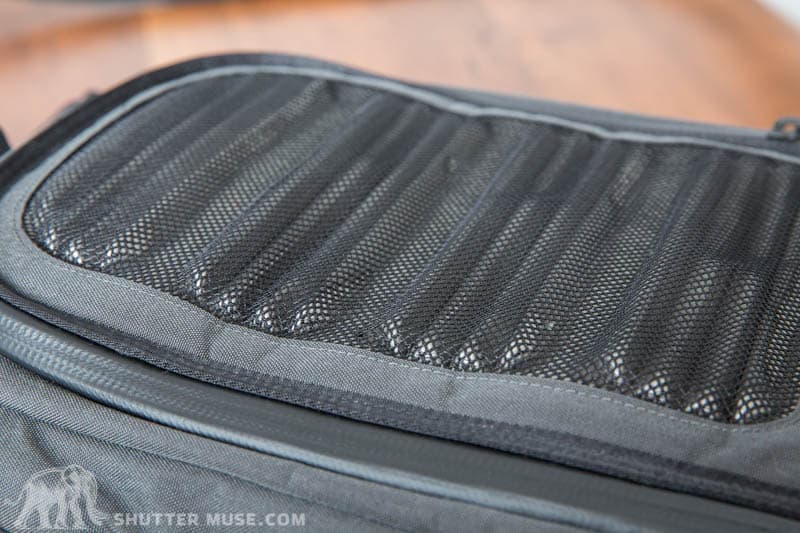
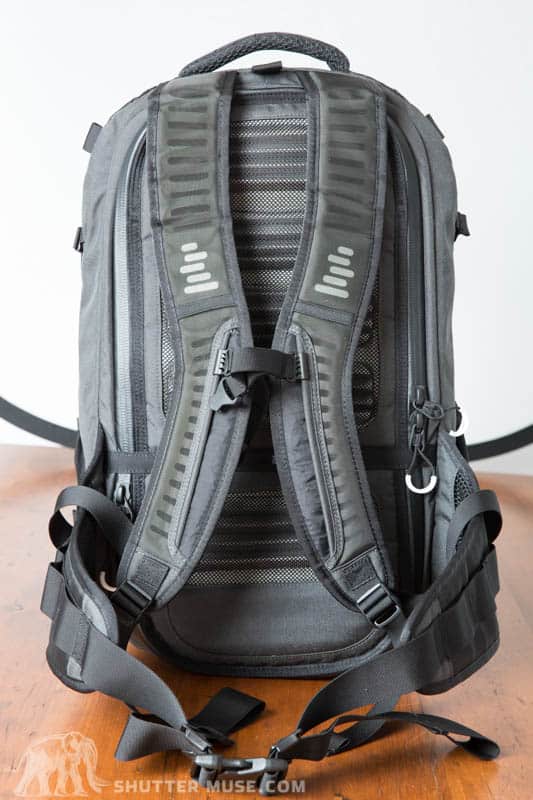
The Uinta’s back panel features a very interesting breathable design. I haven’t been able to test this in hot weather (definitely still winter up here in British Columbia) but the design looks great and I think it’ll work a lot better than most packs I’ve tried out.
The hip belt is very wide but this adds to the comfort
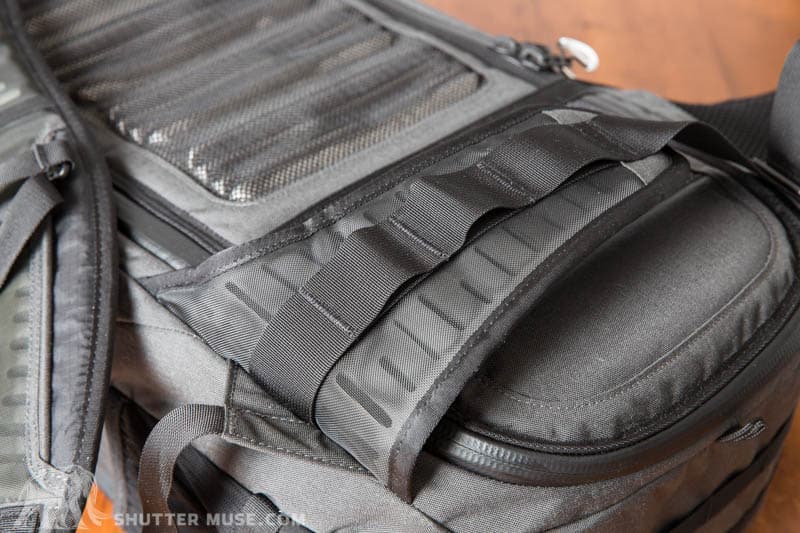
In this light you can clearly see the construction of the harness system. Extremely lightweight but very very comfortable.
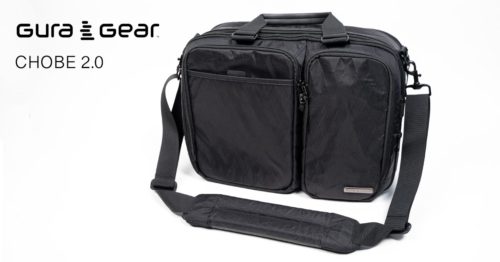
One of the added advantages of both front and back panel opening is that it’s given Gura Gear a way to include a padded laptop pocket. Personally, it’s not something I use as I always travel with the Gura Gear Chobe shoulder bag when I want to take a laptop with me, but I know that lots of people ask for this feature. I’m happy to say that it’s been done in a way that means you don’t really notice it if you don’t want to use it, but it adds enough protection to be useful if you do. It’ll hold up to a 17″ laptop which is also impressive.
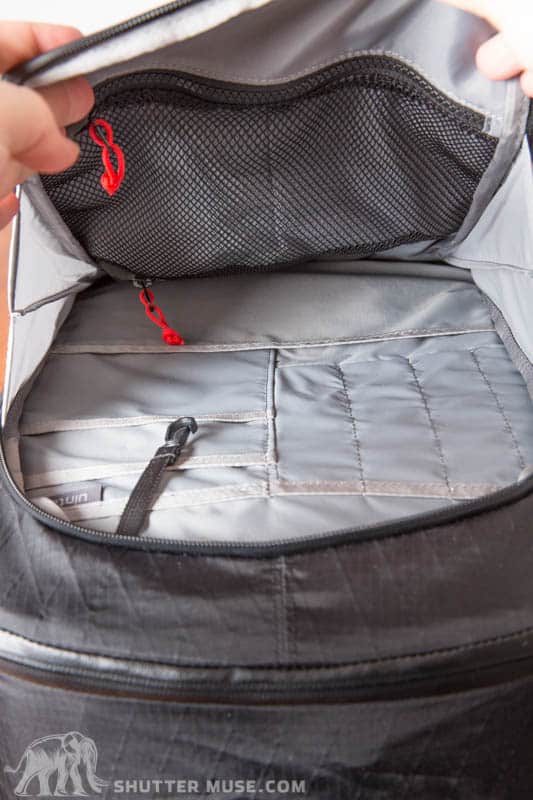
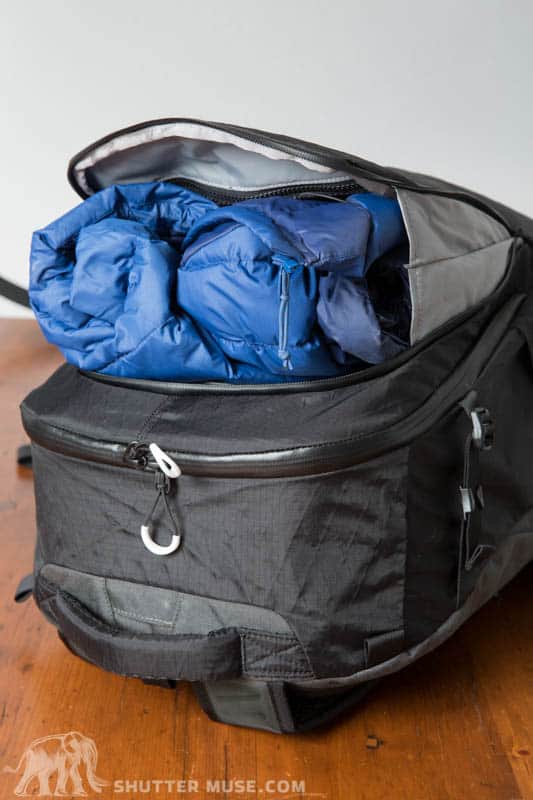
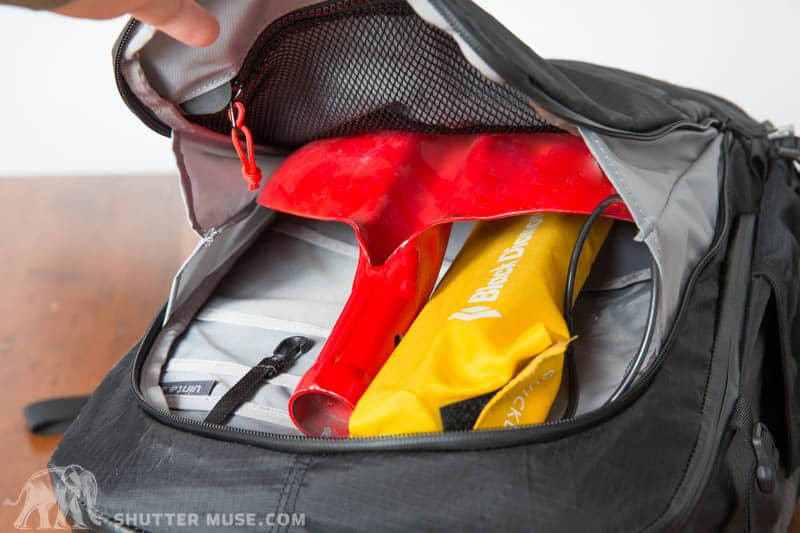
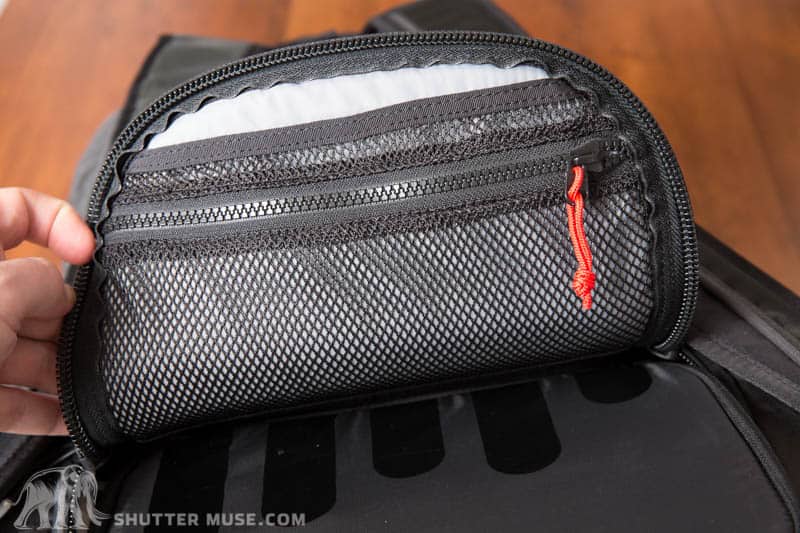
The front pocket of the pack is very well thought out. There’s two zippered pockets as well as the various other pockets for organizing things like filter, lens cloths, memory card holders and batteries. The lower pocket was also a great size for an iPad and the key clip can be used to secure your memory card holder. There’s also enough excess material in the pocket that you can stuff all kinds of other things into it. As you’ll see in the photo below, it’s easily big enough for a spare jacket and rain pants if you want to have quick access to that kind of stuff. I also had an e-mail come in asking whether it was big enough to hold snow safety gear like a shovel and probe for backcountry skiing and the answer is yes, easily. The red shovel in the photo is the largest one that I own and it easily fitted in there along with the handle, probe and snow saw. This probably wasn’t a consideration when they designed this pack but it’s always good to discover as I know there’s a lot of skiing folks following the site and my work.
The Uinta does come with a seam-sealed rain cover but he problem is that the cover gives you no option to have your tripod on the bag when you use it. This should have been better thought out for a bag that’s targeted at outdoor photographers who very often carry a tripod. It means that the cover is pretty useless for anyone carrying a tripod unless you are willing to hand carry your tripod if you get stuck in a rain storm. Personally as soon as I saw this I just took the rain cover out of the bag and tossed it in my cupboard. Many other manufacturers are shipping tripod compatible rain covers with their packs so it’s not a new thing.
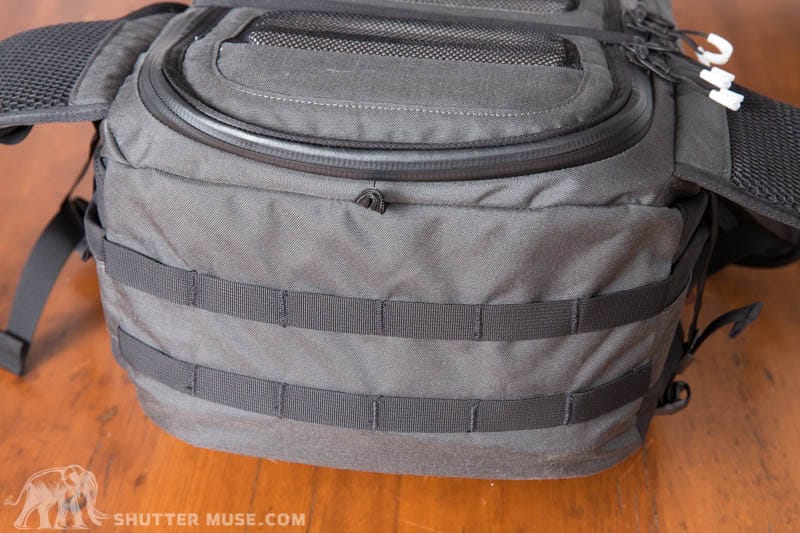
The base of the bag is a heavier cordura to be more resistant. The small loop next to the zipper secures the rain cover and then you have a variety of additional loops on the bottom to which you could tie all kinds of other items.
Both of the openings on the back panel have small zippered pockets inside them
Camera Modules
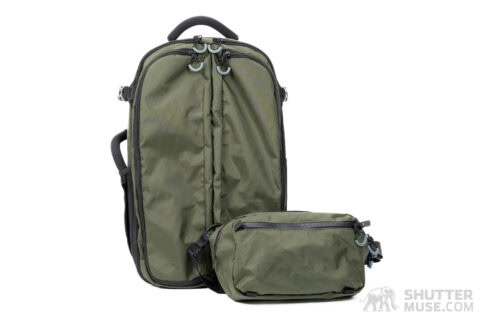
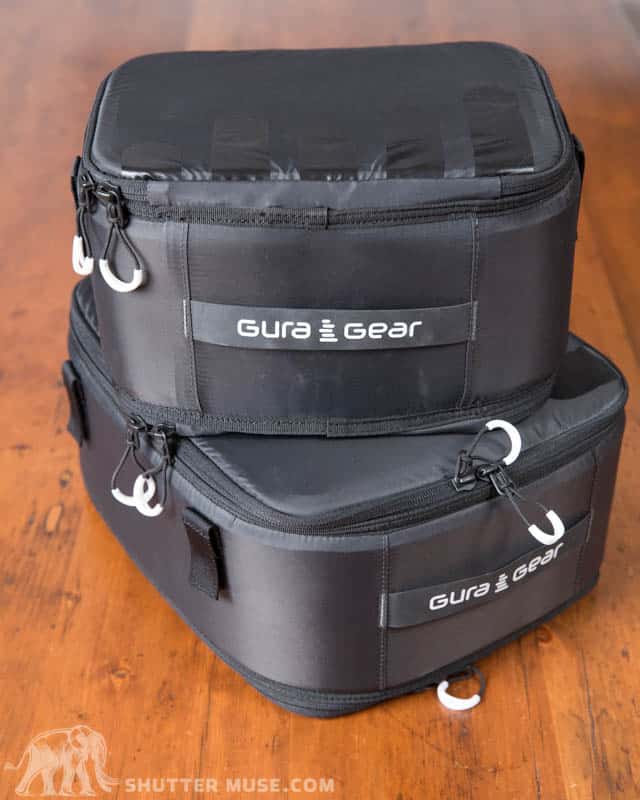
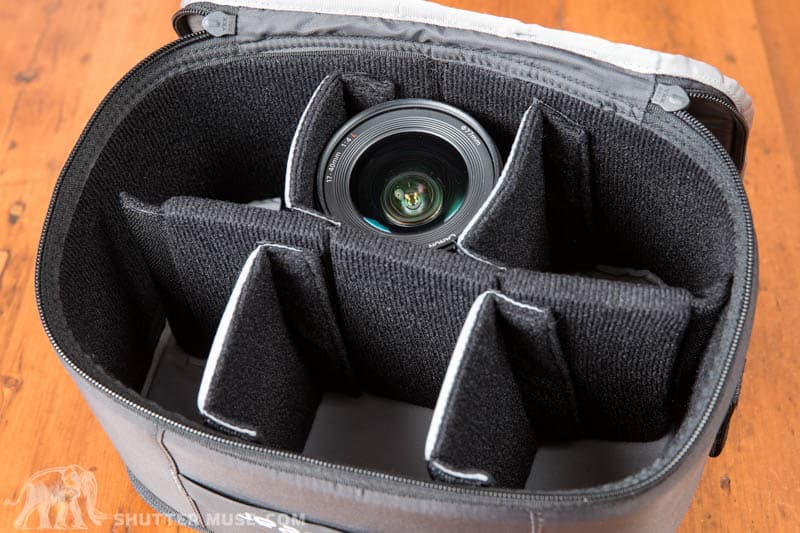
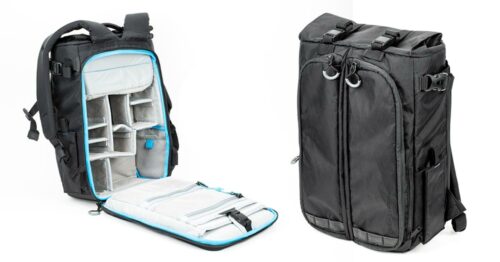
Currently Gura Gear is offering two different camera modules for the Uinta; Pro Small and Pro Medium. I’m a big fan of a modular system like this as it allows you to easily customize your load to a variety of different shooting situations. Both the small and medium modules will fit in the bag simultaneously and both can be accessed from the back panel of the page using independent zippered flaps. The medium, which sits on top, can also be accessed from the front of the bag. You can choose to just use one of the modules on its own, and that one module can either sit in the bottom of the bag, or be fastened to the top using hook and loop tabs (see photos further down). I did find that fitting both modules in the bag was a tight squeeze and I’m also not a huge fan of the construction of them which uses one single piece of foam bent round into a circle. It means that there are no defined corners which cuts down a little on useable volume and I also felt like the modules were always trying to expand on the sides to become circular.
Nonetheless they do the job of protecting your gear perfectly. The small costs $69.95 and the medium costs $89.95. I would want to own both of the modules to really make use of the bag’s potential Medium Pro module is deep enough a pro camera body and sized perfectly for a 100-400 or a 70-200 with ample space for many extra smaller zooms and primes.
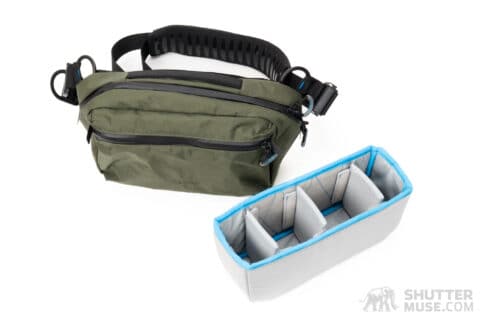
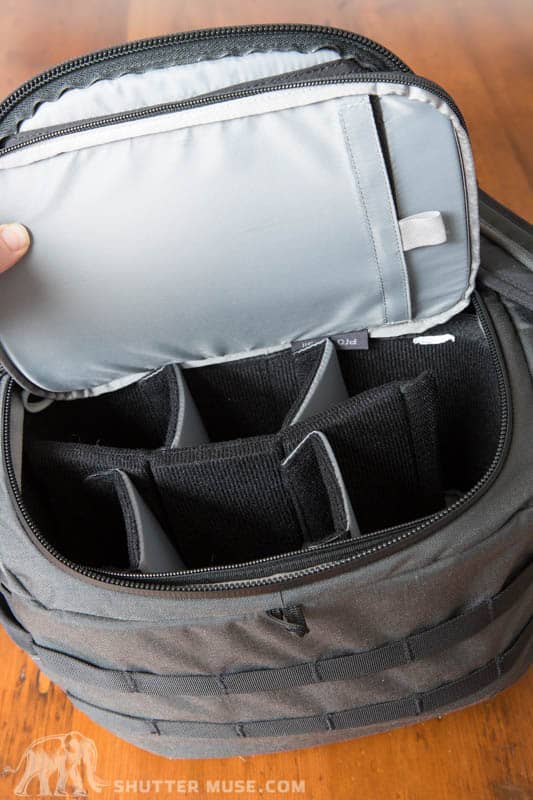
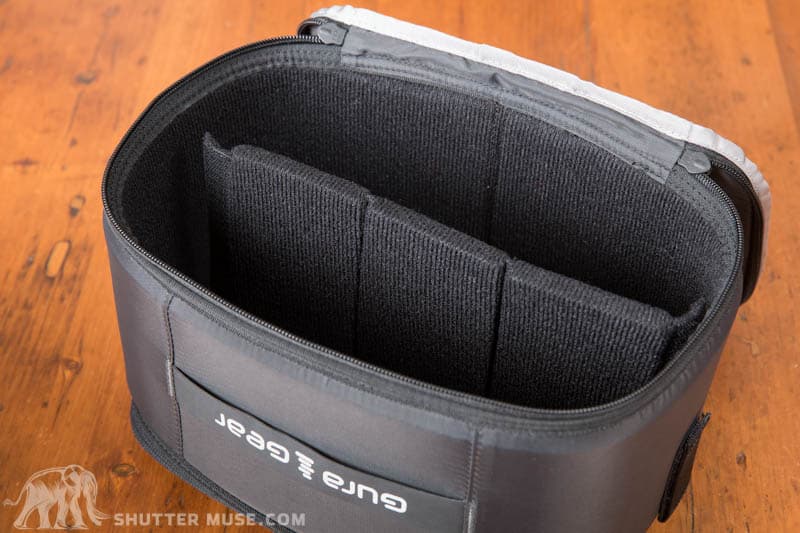
One oddity that I found with the smaller module was that the central divider isn’t nearly long enough to adequately go the full width of the module. I spoke to Gura Gear about this and they said that they are being packaged wrongly at the factory. That 3-piece divider in the photo above should actually be used in an ‘L’ shape, and not across the middle of the module as they are being shipped. For almost all of my testing I removed all the dividers on this small module and used it to store food in anyway.
Of course there needs to be zippers on both sides of the module since you can get access to it from both the front and the back of the pack.
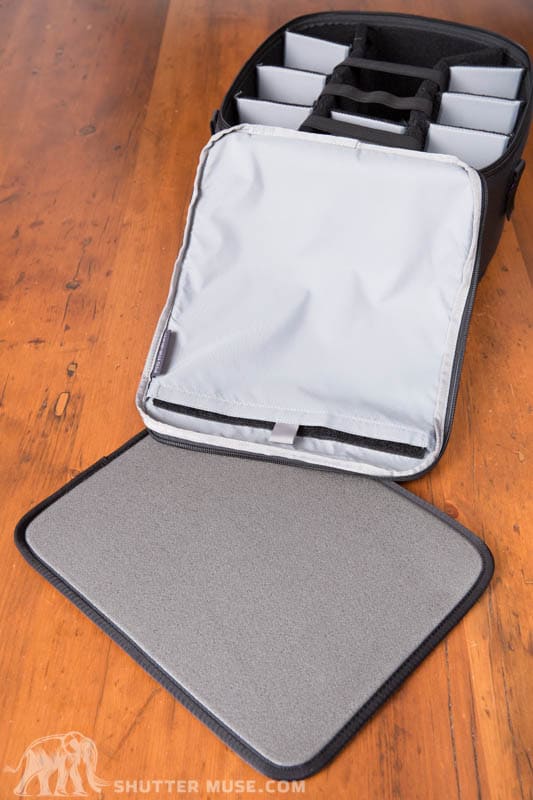
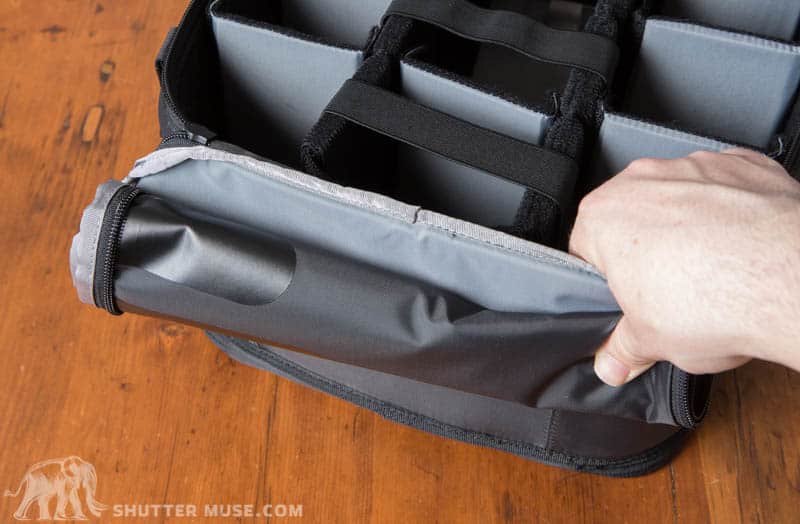
If you feel that the pack’s exterior is enough protection in itself, you can easily remove the padding from the lid of the modules. This also means that the zippered flap can be rolled up and tucked under the module when it’s in the the pack. When you open the back panel of the bag you then have immediate access to your gear without having to to open a second flap or zipper.
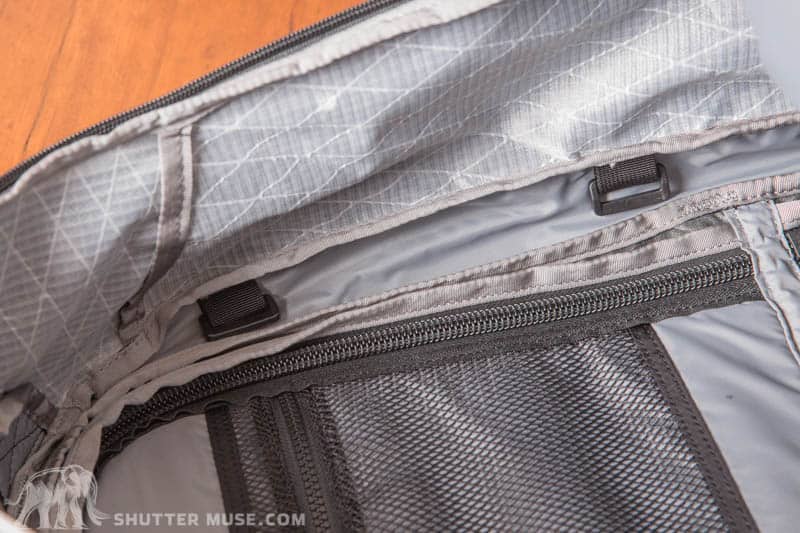
These hook and loop tabs can be secured into the internal buckles seen below, to allow you to suspend one module in the top of the bag when the bottom half is empty.
THS Accessory
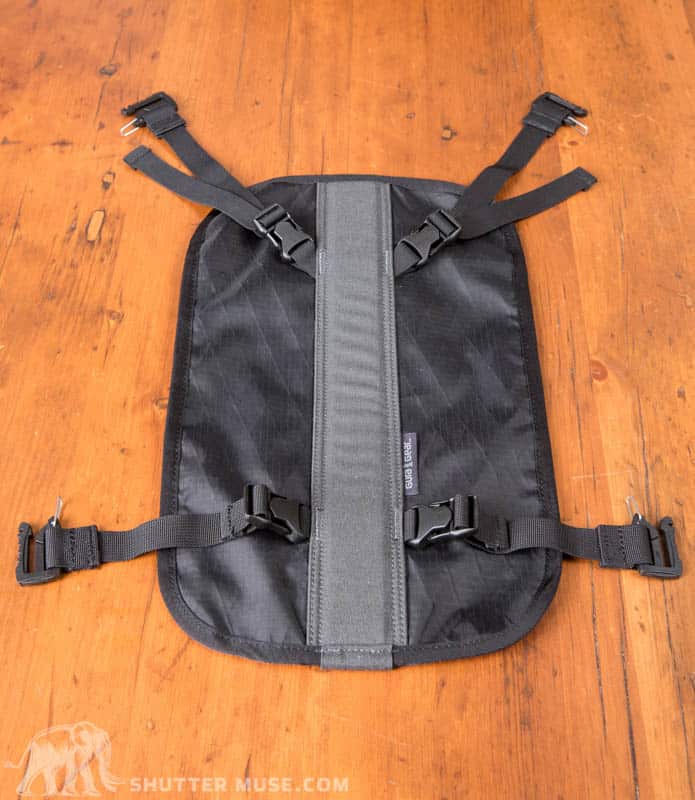
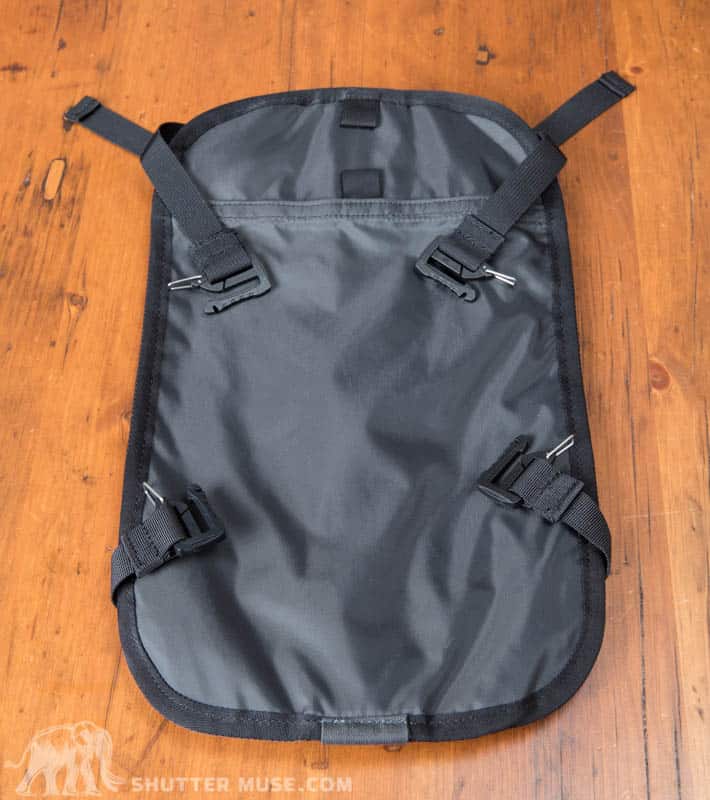
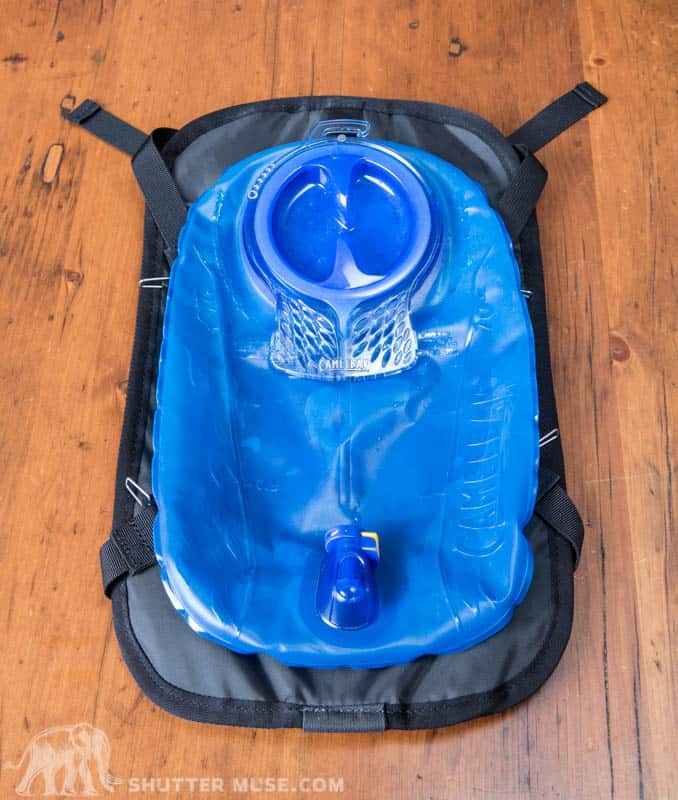
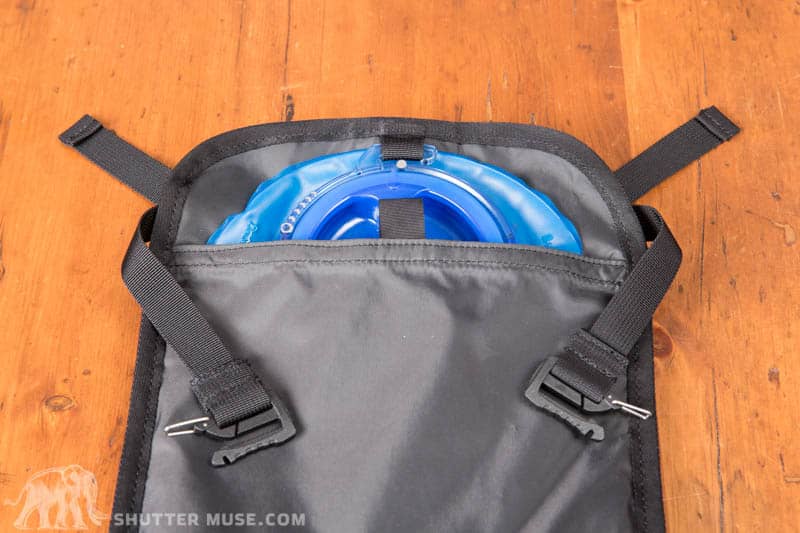
The THS is an accessory for the Uinta that costs $39.95 and adds the way to hold both a hydration bladder and a front mounted tripod. I’ve been very complimentary about the Uinta up to this point but here I have a few issues, some of which I touched on in this bag’s preview when it was first announced. Firstly, for a bag that’s designed to be used as an adventurous outdoor bag I think hydration compatibility should be built into the bag. I don’t think you should have to buy a $40 accessory. As you’ll see from the photos below, it’s also somewhat limited in size. My 3L bladder did not fit so I had to go and get a 2L one instead. There’s also no way to secure a bladder hose to the shoulder strap of of the bag!!! I can’t ever remember seeing a backpack like this that missed that simple, yet essential feature. Wherever you end up storing your water bladder, you’ll be forever fishing around behind your back trying to get hold of the hose. This frustrates me immeasurably because it’s as if nobody actually tested this bag otherwise they would have immediately spotted this glaring deficiency which would have only added a few cents to the production cost.
The THS is billed as the Tripod & Hydration System but in reality it’s either one or the other which I think it a strange choice to put on people. Why limit people to carry either water or a tripod on a bag designed for outdoor photography? Since the leg of the tripod goes over the hydration pocket, you effectively have to trap a full water bladder between the legs of your tripod which is just impractical because you cant close the legs. If you did try to go this route, the more water you drink, the looser your tripod becomes!
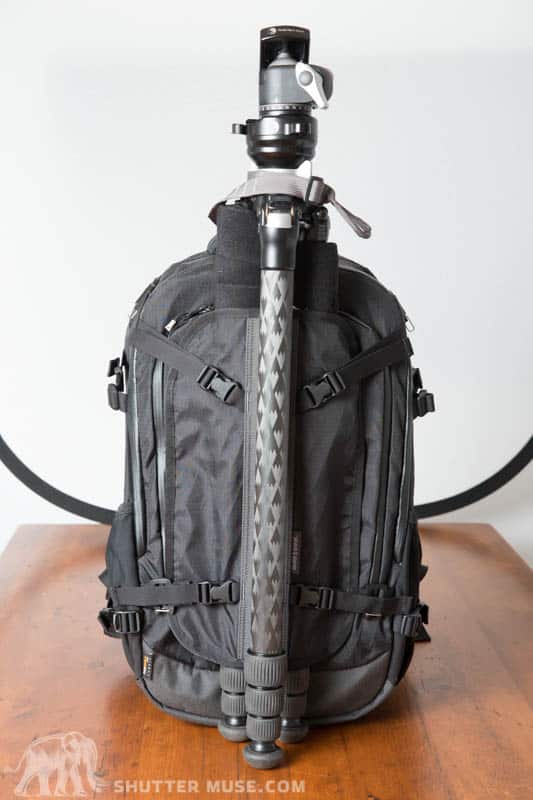
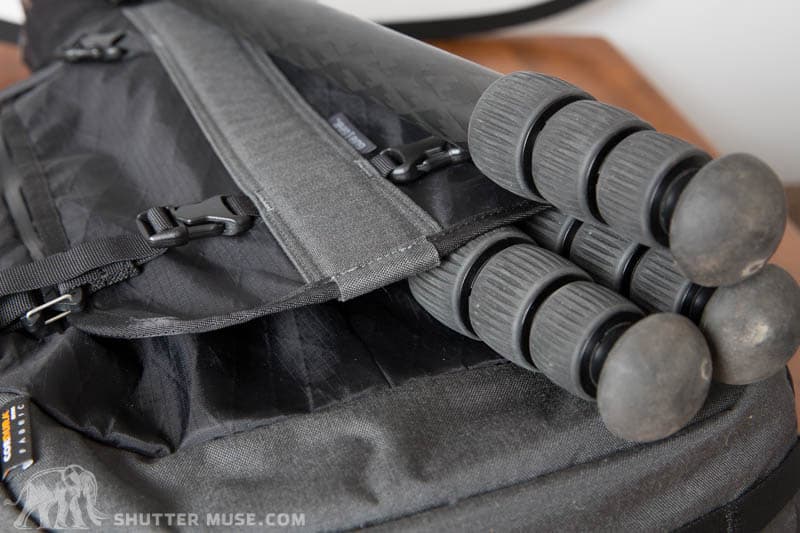
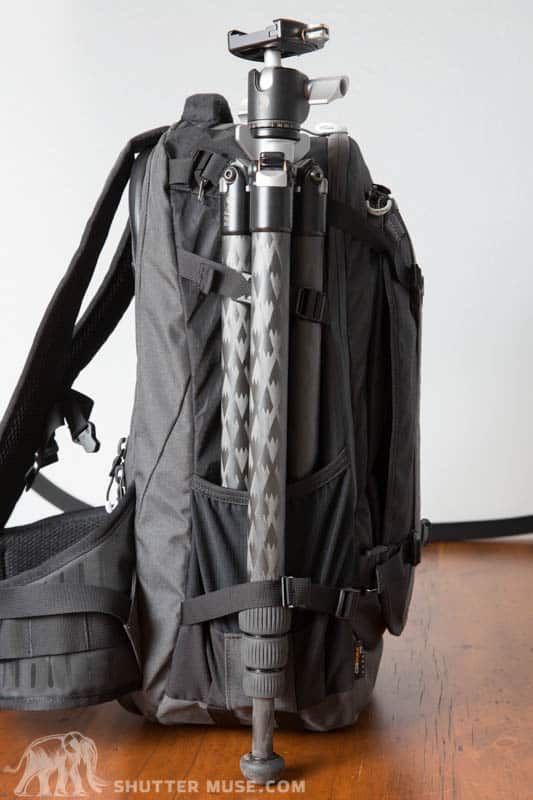
What about using it just as a tripod holder then? It falls short here as well. It’s just not secure enough for my liking, as I showed in the video review. The bottom two straps on the THS don’t add enough pressure to the tripod since their tension is horizontal. The result is the bottom of the tripod is free to move around about 3 inches either side of center (see photo below). Most bags of this type feature some sort of tripod cup that supports the tripod feet and limits their movement. I with the Uinta had a simpler system like that. The top straps don’t do a much better job either and the end result is a tripod that can move around all over the place. Whether or not that would cause you discomfort is somewhat dependent on how long you are hiking and how big and heavy your tripod is. Attaching a tripod securely to a camera bag should be an easy task though and I just didn’t get along with this accessory at all.
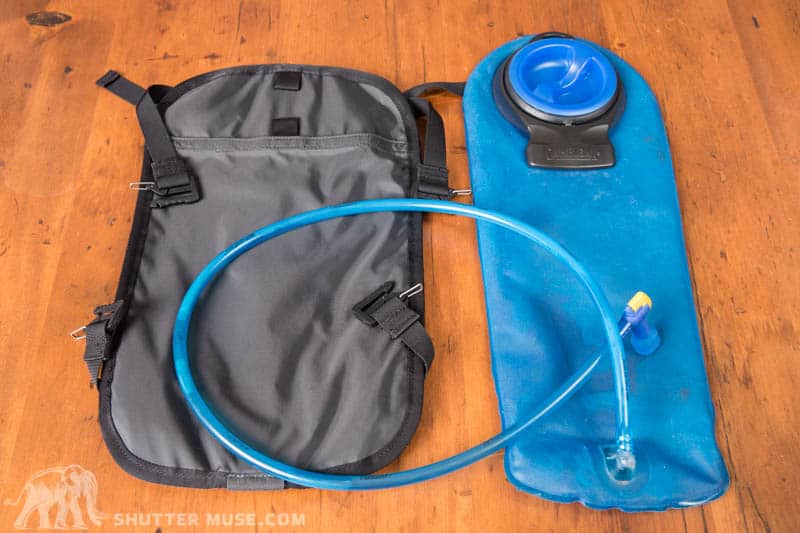
The THS is unfortunately not all that big, my 3L CamelBak did not fit, I had to use a 2L one instead.
As you can see, this 2L bladder is a much better fit.
Once installed there are a couple of nylon loops to allow you to hook the bladder on to keep it upright
This photo illustrates the lateral tripod movement that is possible when using the THS to attach it. I much prefer the usual “tripod cup” system seen on most other bags. It also gives a clear view of the reinforced strip down the middle of the THS.
Other Options For Tripod & Hydration
I’m not likely to recommend people get the THS accessory but thankfully there’s another couple of options. You can mount a tripod on the side of the bag and a water bladder fits securely in the Uinta’s front pocket. Even my larger 3L bladder fit in there! There’s no exit hole for the bladder hose though but you can just run it out between the zippers. Not ideal, but better than nothing.
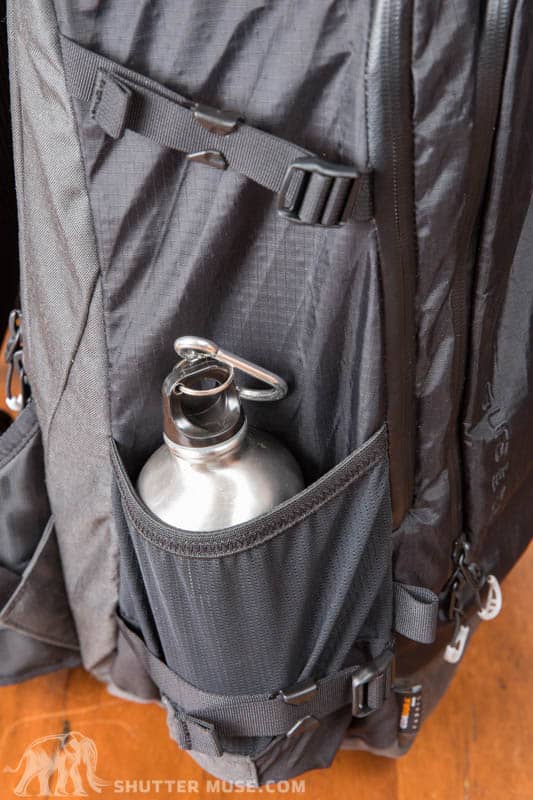
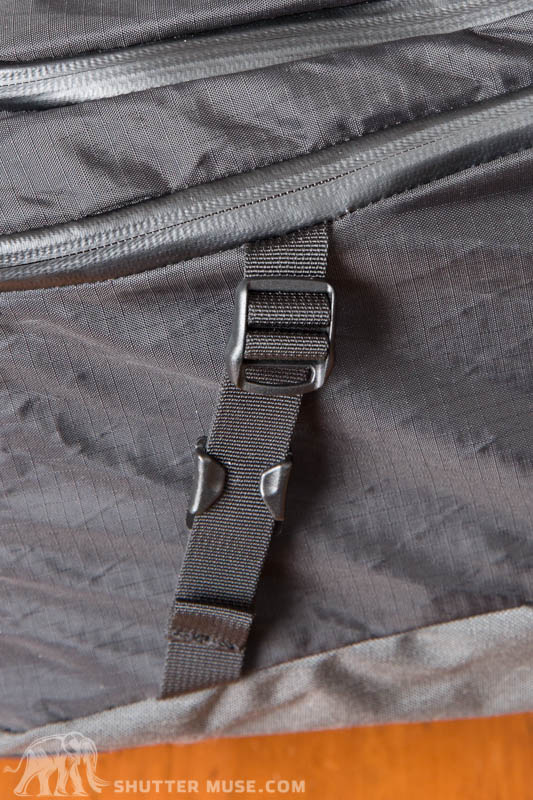
I generally prefer to mount a tripod no the side of my pack anyway as it keeps the heavy weight closer to your spine and makes it easier to transfer it down though your hips. My smaller tripod was able to make use of the mesh pockets on the side for support as well. One frustration with this side option is the Uinta’s lack of side straps that fully unclip. There’s no buckle to release them completely, only the option to loosen them. It’s a slower way to attach the tripod as you have to feed the feet down through the loops and bigger tripods with rubber feet can get caught up on the straps and the bag. It also means there’s absolutely no way to attach a light stand. Light stands don’t have open legs at the bottom like a tripod which means you can’t feed them through the strap loops, you have to unclip a strap and pass it though the legs of the light stand. You can’t do that in the Uinta so if you want to take light stands and do some remote flash work then really you’ll have to look at other pack options. I can’t see a single benefit to having this kind of captive strap on the side of a bag. Perhaps it’s a few cents cheaper to manufacture? I’m really not sure, but it’s an annoyance to me and I know that it will prevent some people who do the kind of work that I do from buying this pack which is a real shame.
These side straps can be loosened but unfortunately not unclipped completely
In Use
When I first saw photos of this pack I thought that it looked a bit chunky but once I got it in my hands I realized that’s not the case. I’m not sure if it’s an optical illusion caused by the design in some way, but it’s not a huge pack once you actually get it in your handst. I’ve always liked the materials that Gura Gear choose to use and the same quality can be seen in the Uinta. As far as photography backpacks go, I’d say that this is the smartest looking one I have ever used. If I had to show up in a suit to shoot a wedding with a backpack, this would not look out of place and it just screams quality when you play with the zippers, the harness and all the other hardware on the bag. The only problem is the my camera bags are always covered in mud and grime and that’s why I have to shoot all these photo before I take it out and test it!
The first thing I usually do when I get a new pack to test is to overload it with gear and yell “walkies” to my dog. Then we head out and get a few hours hiking around to get a feel for how it carries. This time I did a combination of walking and snowshoeing and right away I was happy with how it carried the excessive weight I put in it. Note that I almost immediately ditched the THS accessory and just went for a side-mounted tripod. The harness for the Uinta is really very good and I particularly appreciated the really big hip belt that was not only very wide but also long enough to reach around my hips. The breathable and lightweight materials they’ve chosen, mean that you can have a large belt like this, but without very much more added weight. The harness looks like it might be a bit thin but in practice it doesn’t feel like it. This is one of the most comfortable camera backpacks I’ve tested.
I’m a big fan of rear panel access to outdoor packs because it allows you to lay the bag down in the dirt, sand or dust and not worry about getting that stuff all over you when you put the pack back on. For this reason I almost always used the back panel entry on the Uinta but I don’t see a real downside to them including both front and back options and then people can choose to work in the way that suits them best. It’s worth noting that you can only access the top camera module from the front. The lower module has to be accessed from the lower door on the back of the pack. I tended to put my camera gear in the top half of the pack and use the smaller lower section to store my food, rain jacket and other basic outdoor accessories like a head torch and my JetBoil stove.
In terms of day-to-day functionality issues the only thing that continued to bug me was the tripod mounting options. I really dislike the captive straps on the side because with some tripod padding and big rubber bits on the legs it just made it harder than it needs to be to take a tripod on and off the bag. I seriously considered cutting them off at one point and getting my seamstress friend to sew some proper clips on the side!
Sizing
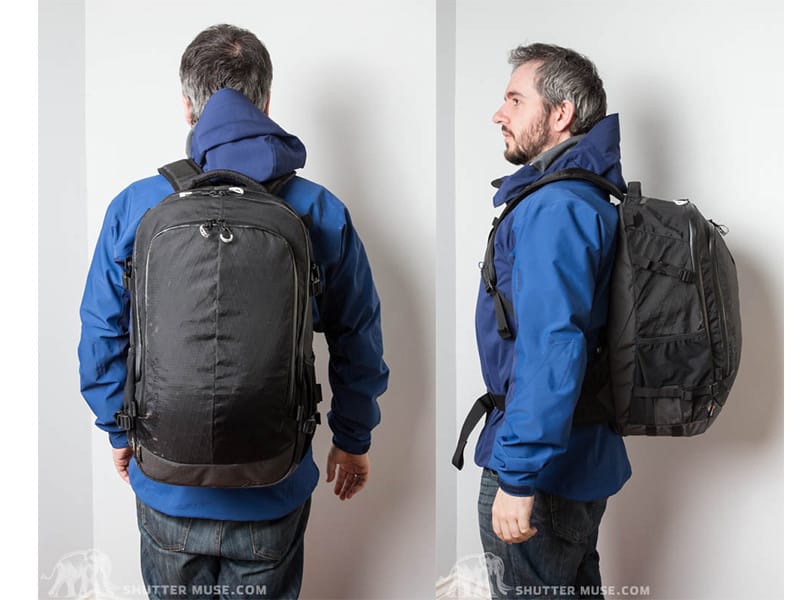
As soon as I publish a camera pack review I immediately get questions about sizing for various heights of people. Wherever I can, I’m trying to include some reference images so here is a couple of shots of a fully packed Uinta on my back. I am 5ft 8 inches so hopefully you can gauge some idea from that. It’s not possible for me to comment on how I think it would work for someone who is 6ft 2 since I’ve never been that tall!
Other Options For Bags
Uinta 30l & Battaflae 26L
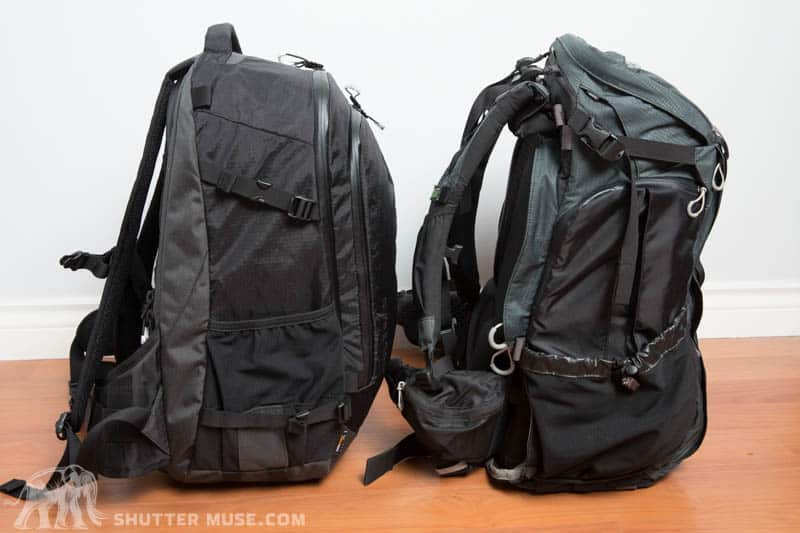
It used to be tough to find a good back for more adventurous types of photography but in recent years we’ve seen a lot of new options. Gura Gear’s existing packs have been very popular and with a 26L capacity, I’m sure a few people will be weighing up the Uinta against the Battaflae 26L. The Battaflae series features a unique butterfly opening on the front that makes it ideal for use with long lenses like a 200-400 up to an 800mm. These bags also have a deliberately boxy design to them to maximize the volume of gear that you can fit into carry-on regulations when flying. For flying with long lenses, the Battaflae is the current king, but it’s not a very comfortable pack to wear for any great amount of time. The butterfly opening means it’s a great companion in a safari vehicle where you need to grab a long lens quickly, but I would not want to go on a long hike with it. I’ve put a few photos below that show the Uinta 30L next to the Battaflae 26L. For the moment, since the Uinta is not capable of carrying long lenses, the choice is quite simple. Battaflae for the big guns and Uinta by a long shot if you want to wear it for long periods of time.
Another popular consideration will be the bags from F-Stop gear. These guys really brought the modular concept to the mainstream with their Mountain Series packs 4 or 5 years ago and I’ve published in-depth reviews of all of those packs with many of you will have seen if you’ve been using Google on your quest for the ultimate outdoor pack. F-Stop used to have a few supply chain issues that I know has put people off in the past but things seem to be a bit better now and certainly as I write this, everything they have is in stock. The Loka pack is the one that is most comparable to the Uinta in terms of volume (37L Vs 30L). Having used the Loka extensively, I’m actually surprised to see the specified 7L difference in Volume. To me there’s very little, if any, difference between what the packs can carry so I wouldn’t factor that into a decision. Pricing works out to be almost identical between the Loka and the Uinta once you have added the companies respective modules for your gear. Whilst I have in the past recommended the Loka to hundreds of people, I do think that the Uinta is now a better option. It has a better capacity to carry a laptop for those that need it, it has better organizational options in terms of pockets for all kinds of smaller items and I also love the front/back access. The only real consideration is whether the captive straps on the side of the Uinta will cause you any issues. If you have to carry light stands then the Loka will be a better option and I’ve carried anything up to four light stands on one of those in the past! Not that the F-Stop bags feel in any way ‘cheap’ but the Uinta does have a more polished feel to it and really exudes quality when you look at it. It’s also a more comfortable harness system than the F-Stop bag.
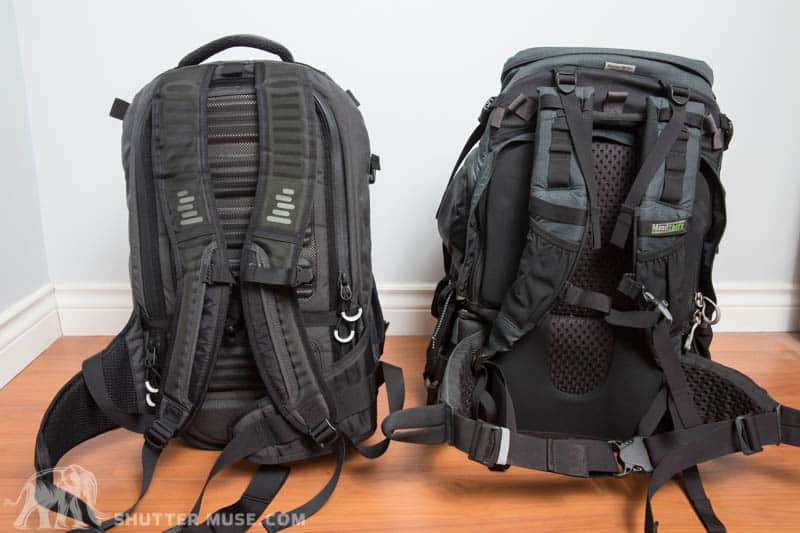
Uinta 30L & MindShift R180 Pro
Now many of you will know that I’m also a big fan of the MindShift Gear bags and those seem to invoke a lot of questions when outdoor packs are discussed. The Uinta is much larger than the MindShift Panorama which I recently reviewed. If you are looking at the Uinta and thinking that you are only going to get the small camera module with it though then it’s worth reading that review. It’s cheaper and it’s an excellent pack with a very unique feature, though it’s really designed for a pretty lightweight camera setup. The larger R180 Pro is much more similar in terms of possible camera payload. I would say that the Uinta and the R180 Pro are pretty much neck and neck in terms of useable volume. Price wise the R180 Pro is a little more expensive but it does feature the Rotation 180 technology which I absolutely love. Up to a point, the two packs are also neck and neck in terms of comfort, with the MindShift pack eventually winning with very heavy loads by virtue of the thicker memory foam shoulder straps that it has. The distinguishing feature is really the rotation system though. If you think you need that (and you should read my review to find out when you might want to use it) then of course the R180 is your only option. If the rotation feature doesn’t excite you though then the Uinta is a compelling option that is a bit lighter.
The LowePro Rover Pro 35L might also be on some people’s radar. This is a bag that I’ve also used a fair bit and it’s a bit of an odd duck. The 35L sizing makes it seem like a pretty big bag but in reality you can’t fit a whole lot of camera gear in it because the removable module for it isn’t all that big and they don’t offer options for larger ones. On the other hand it does genuinely have the best tripod holding system of any camera pack I’ve ever tested, and it has a pretty good suspension system as well that at least easily copes with the small amount of camera gear you can carry in it. Priced at $190 though, I’m far more likely to recommend the $200 MindShift Panorama over the Rover 35L these days.
I’m not saying these are the only options out there, but these are the ones I’m most familiar with and feel best qualified to compare.
Pros & Cons
Pros
- Lightweight and very durable materials used for construction
- Extremely comfortable harness system
- Back panel and shoulder straps are very breathable
- Front pocket design works well for accessories
- Laptop pocket (even though I don’t use it I know many people do)
- Access to gear from the front and the back provides good options
- All seam-sealed zippers
- Overall clean & smart looking design
Cons
- Rain cover can’t work with a tripod
- No built-in way to carry a water bladder
- THS accessory not a secure way to carry a tripod
- THS accessory can’t carry water and a tripod at the same time
- THS gets in the way of easily accessing the gear in the front pocket
- No hose loop or clip on harness for bladder hose (!!)
- Captive side straps mean no way to carry a light stand
- One-piece wall design of camera modules leads to varying shape
- Dividers on modules are too dark. People need to stop using black for bag interiors!
Conclusion
I’m really glad that Gura Gear made a pack that’s much more comfortable to carry for long periods of time. The Uinta is right up there with the most comfortable camera bags I’ve ever used when carrying larger loads. The split design of the back panel opening is excellent for separating your camera gear from all the other things that you might take you with you on a days shooting, and front access when you need it is an added bonus that allows for the inclusion of a laptop as well. The Uinta is let down by a few small things that I think could have been easily addressed though. The main ones being the inability carry a water bladder without buying a $40 accessory, the inability to use a tripod with the rain cover and also the poor tripod mounting options compared with other bags in the same genre. Gura Gear pegs the bag as “spanning the gap between urban and adventure lifestyles” but given the company’s pedigree and following in the landscape photography sector I was surprised to see some of these missed steps with key features for the folks who want to be out there amongst nature all day long (no bladder hose loop/clip on shoulder strap?). Bags that try to cross from one sector to another usually result in a less than optimal choice for both sectors and I do see a little of that happening here with the Uinta. The pack itself is an excellent platform that they can build on though and many of my quibbles are with the accessories which go with it. In terms of back panel access outdoor photography bags this is still my new favourite but it could have been even better with some minor tweaks.
Where To Buy – Save 10%
Gura Gear has offered Shutter Muse readers a 10% discount on anything purchased in their online store. Just use the discount code SHUTTERMUSE10 after clicking here to access their store.
The Gura Gear Uinta backpack is no longer in production. I always appreciate it when you use my links for your purchases. Of course, you should try shopping directly with Gura Gear for the 10% discount mentioned above and for their exceptional customer service. They offer international shipping at very reasonable rates so you can shop confidently from anywhere.
- Gura Gear Kiboko V2.0 16L+ – Gura Gear / B&H Photo / Amazon
- Gura Gear Kiboko V2.0 22L+ – Gura Gear / B&H Photo / Amazon
- Gura Gear Kiboko V2.0 30L – Gura Gear / B&H Photo / Amazon
- Gura Gear Kiboko V2.0 30L+ – Gura Gear / B&H Photo / Amazon
Would you like a matching X-Pac VX21 sailcloth travel bag for all your non-photographic gear? Check out Gura Gear’s new range of ultralight, ultra-tough Mara Duffel bags in four sizes.
- Gura Gear Mara Travel Duffels (40L-100L) – Gura Gear
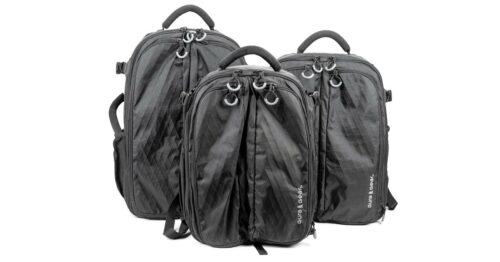
For alternative options, please check the reviews of all current Gura Gear bags and backpacks:











I would like to take a trip across Canada
Given that I live in Canada, I love this answer haha!
I am from Kelowna. One of my dream trips would be to take a year or more and drive around all of Canada taking photos the whole time to help show how great it is.
I love to travel . . . city, country, local, international, wild, tame . . . bring it on. Canada is so diverse and interesting. What a challenge to capture the beauty and idiosyncracies of this great nation . . . people, places and things what a thrill that would be.
Looks like the perfect bag for short tramps in the woods! Can’t wait to try it.
Looks like a nice bag for short trips near the beach
I think this would be awesome for camping trips
Just any travel i would do being it outside of Canada or within our own province!
I’d use it to carry all of my gear wherever I went. It is a camera pack after all!
Would be a great bag to take between the woods on hikes and in the urban jungle!
This looks like an incredible bag especially for landscape and travel photographers. Hopefully I’ll be going to Iceland this Winter and I could see this bag working very well in tough conditions.
Be great for Iceland!
Years ago I had a Gura Gear bag and it was awesome. They’ve come a long way since their beginning!
Oh I need this sooooo badly!
I’m going to take this on my trip to New Zealand to capture some of the scenery, landscape and lake photos.
I would like to go to one of National parks in my country.
Thank you. I’ve had the Uinta in the checkout on and off several times since it was released. The mix of back panel access for outdoor and every day use with an optional laptop when going back and forth to the studio is most interesting.
This has been the review I’ve been waiting for with ‘real’ photos and useful video. Super helpful and especially nice that you’ve compared them against the other manufactures. I like the Mindshift r180 when I’m wearing it. It’s a pain to use when not wearing. It’s not great when travelling light or if a laptop is needed.
Something I’ve been wondering that you could answer. The r180 top insert leaves much to be desired. Would the medium gura module fit in as an alternative? Or maybe an ICU from fstop?
Love how the bag looks and just love the quality of reviews you produce. Excellent pictures, lighting and review. Thanks
I’d love to travel up North (USA Rhode Island & Maine) to visit my family and shoot landscapes and seascapes.
Id love to take this bag on an adventure to Africa!
Looks great for day hikes or even as a travel bag. I would use it for hiking the Wasatch.
I would take it on a trip camping or mountain biking! Looks like a perfect way to bring some gear along!
I’d go travelling around Canada and then
up to Alaska.
I’d love to carry my camera up Ben Lomond, up Ben Nevis all in the Uinta. And that’s only the beginning of the adventures…
I’ve been looking for a smaller bag with customization. I currently have the Tenba DSLR bag which holds all of my equipment but it is too big for everyday shooting. Looking forward to using this bag.
I’d be stoked to take this bag into the foothills of salt lake city to shoot my friends bike jumping or trail riding, as well as southern Utah to do some more of the same!
I would use it as a travel/shooting bag on photo trips overseas. An option would be to use an F-Stop ICU in this bag so that you could take your big lenses, like a Canon 200-400mm. One drawback with the Loka is that the back flap does not open up the entire back of the bag, you lose enough at the top to make it awkward to hold a big lens. It looks like you could put an F-Stop XL pro ICU into the Uinta and have a more usable bag
following your backpack reviews closely. I trave Africa and while I have a lot of bags, I have no large packpacks at the moment. I’m on the fence between the Gura Gear Uinta and an F-Stop bag I am borrowing from a friend and taking to Turkey, South Africa & Lesotho this month.
The photo module is something I’ve been looking for for a while. Planning a trip to Jamaica!
Trekking on mountain
I am preparing for the mother of all photography road trip. Got the old SUV, most of the gear. Just need a bag for it! Good to have a Canadian blog!
Nice. Looks like a good alternative to my think tank bags
i’m planning on giving away everything i own apart from a few thing needed for traveling. some of that will be my photo gear. though i dont have the right bag for traveling yet. so this stunner of a backpack would solve the problem in the most good looking and most handy way.
I would love to bring it with me on every adventure excursion, but I’d love it most on my next trip to Toronto and Montreal in a few months.
I’d take this bag along while I hike along the beautiful lakes of Ohio!
As a wildlife photographer who tends to take my gear on long hikes and walks I’ve always struggled to find a bag that I can fit my camera gear into as well as binoculars, possibly a scope as well, along with normal day items such as lunch/clothing etc. This bag looks like it might be a solution, which is especially convenient as a I have a trip to Canada in a couple of months and I’m still trying to get a backpack for it.
Looks awesome! I’d start with a trip up the coast and into the columbia gorge!!
Going to China this Dec. Looks like a great backpack to take on the back roads there!
A very thorough review. I own a Uinta myself and agree with almost everything you said, especially about the doubtful nature of the THS add-on. I noticed two small factual errors, though—nothing serious, but I thought I’d point them out for other potential buyers:
– Contrary to what you claim, there is a small elastic loop for securing a bladder hose on the harness. It’s located just below the Gura Gear logo (on both sides), and actually quite visible in the photos you posted. 🙂
– Also, there is a way to use a bladder without the THS (though I don’t see it sanctioned officially anywhere): put the bladder in the laptop compartment. Then you can feed the hose through the small hole at the top of the pack (which, for all I can tell, has no other function anyway). This has some obvious drawbacks, like the inability to transport a laptop and increased proximity of liquids to your gear, but it also has the benefit of removing the bladder from direct sunlight, heat, and cold. I haven’t tried this in the field yet and can’t vouch for its safety, but it might work out fine if you’re careful enough.
Another thing you don’t mention that might be important for some people is that the pack becomes very unstable once you remove both modules, or even just the larger one. The pack itself is really just a soft shell and will basically assume the shape of anything you put in it. So whether it remains comfortable to wear in this scenario dependes on what you carry and how you pack it; hard or big items can “stick out” and put pressure on your back. (You can avoid this by ripping the dividers out of the modules and leaving them in, but that’s kind of a hassle as soon as you want to carry photographic gear again, and it also limits your ability to carry larger items.)
Last not least, as you mention yourself, the harness is very light-weight. It’s no doubt comfortable to wear over a jacket, but I didn’t find it as good in the summer with just a shirt since there’s not much padding and relatively hard edge. Whether it’s problematic might depend on your physiology, though.
Thanks for taking the time to write all of that! I really appreciate your contribution Sebastian. Please excuse my errors 🙂