
Camera bag manufacturer Gura Gear is best known for its Kiboko backpack. A bag whose rugged build, travel-friendly sizing, and unique features make it an ideal companion for wildlife and nature photographers who travel the globe. Now, they’re expanding their camera bag lineup by asking, “What would the Kiboko look like if it was designed for EDC in a more urban-centric environment?”.
The answer is the Kiboko City, available in two variations: Kiboko City Commuter 18L and Kiboko City Classic 18L. In this review, I’ll be concentrating on the Kiboko City Classic 18L, a camera bag unmistakably related to the nature-specific Kiboko backpacks while adding roll-top access and a greater capacity to carry your day-to-day tech accessories, whether heading to work or hopping on a plane to shoot travel photos on the other side of the globe.
On this page, we’ll be deeply diving into what makes this camera bag one of the best on the market. I’ll also compare it to its close sibling, the Kiboko City Classic 18L, and the standard, more nature photography-focussed Kiboko V2 backpacks to ensure you make the right purchasing decision.

Disclaimer: Gura Gear supplied me with this backpack for review, but they were not allowed to see it before it was published, and no money changed hands.
Table of Contents
Gura Gear Kiboko City Commuter Specifications

- Weight: 3 lbs, 11 oz / 1.7 kg
- External Dimensions: 18.5” x 12”x 8”
- Side Acces Hatch: 6.5” x 4.5”
- Main Compartment: 11” x 11” x 4”
- Roll Top Compartment – No Extension: 11” x 4.5 x 5”
- Roll Top Compartment – Fully Extended: 11.5” x 4.5” x 12”
- Laptop: Up to 16″
- Tablet: Up to 12.9″ iPad Pro
- Fidlock® magnetic fasteners
- X-Pac® VX21 fabric by Dimension Polyant
- YKK Zippers
- Apple AirTag pocket
- RFID-blocking passport pocket
- Bottle pockets with magnetic closure
- Holds 2-3 cameras with mounted lenses, additional lenses, and camera accessories.

What Fits in a Kiboko City Commuter?
Loadout Video
In this video, I’ll walk you through everything packed into my Forest Green City Commuter for three different camera kits, including all the camera and tech accessories and the hidden lenses and cameras stashed in the roll-top section. This bag holds more than you think!
Additional Photos


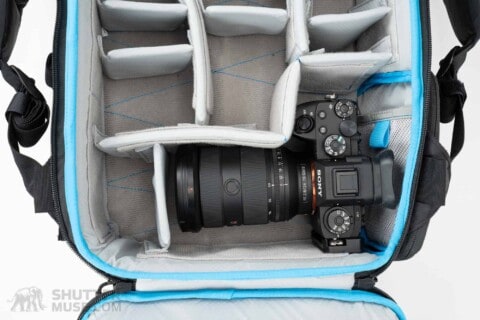
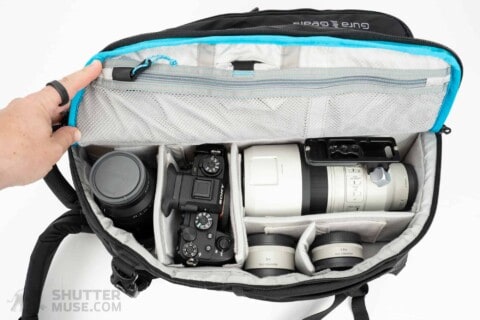
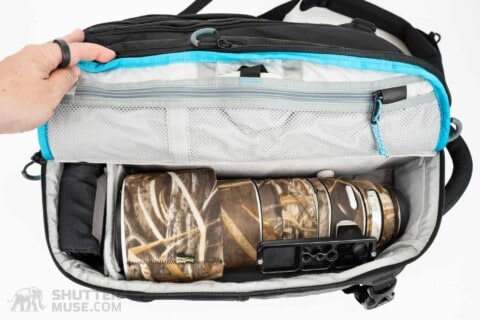
The somewhat cubic design of the bag leaves little space wasted. For a bag with an 18L volume, I was surprised by just how much gear I could fit inside. The main camera compartment comfortably holds two mirrorless bodies and 4-6 lenses with a length up to a 70-200mm f/2.8, Nikon or Sony 100-400mm, Nikon Z 600mm f/6.3 PF or Canon 100-500mm. The layout of the bag and the included dividers make it easy to leave two of these lenses mounted to camera bodies.
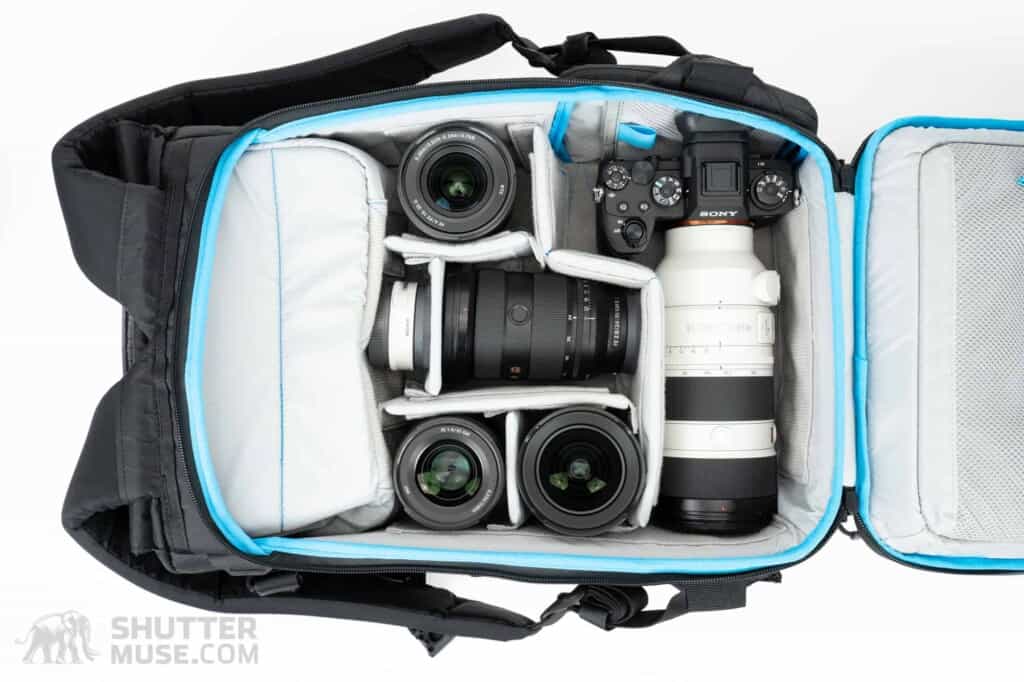
If you want to push things further, you can pack a longer lens such as the Nikon Z 180-600mm, Canon 200-500mm, Sony 200-600mm, or OM System Zukio 150-400mm. These lenses are all the same length and fit in the Kiboko City Commuter if you place the lens mount toward the top of the bag and compress the padding from the bag’s top compartment. I have included some images demonstrating this in the gallery below. Doing so will lose you a little room in that top compartment, but many will find it a worthwhile tradeoff.


In addition to storing camera gear in the obvious place, I also took to keeping a camera with an attached lens in the padded roll top section of the bag. This section offers as much protection as the main camera compartment, and to me, it felt like a convenient place to store a body with a 24-70mm lens attached. Grabbing this often-used combination from the top of the bag felt natural. If you don’t want to use it for a mounted body, you could use it as a lens overflow section capable of storing lenses up to a 70-200mm f/2.8 or 100.400mm.


Another packing scenario for this bag is the “weekender”. A camera body and 24-70mm lens goes into the roll top section, while all the dividers in the main compartment are removed and replaced with a change of clothes and a DOP kit. There’s still plenty of room for a laptop, tablet and tech accessories in the various other compartments that we’ll cover in detail later on in this review.


Outside of just dropping a lens or camera into the bag’s top compartment, you can also opt to buy the Kiboko City Insert, which adds a padded cell with up to four discreet sections for a camera and smaller lenses.
What Doesn’t Fit?

The Kiboko City Commuter is not designed for gripped or pro-sized camera bodies. Nonetheless, I was determined to give this a try. In the above photo, you can see my Nikon Z9; at first, it appears as though it’s going to work. However, when you close the bag, enough of a bulge is created in the bag’s back panel to make this unusable, and if there’s a laptop in the sleeve, it won’t close at all. Fair enough. It’s not designed for this, but I had to give it a go because somebody was bound to ask the question.
Kiboko City Commuter Design and Features
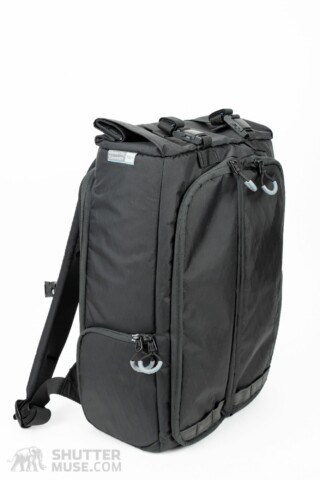
Materials and Hardware

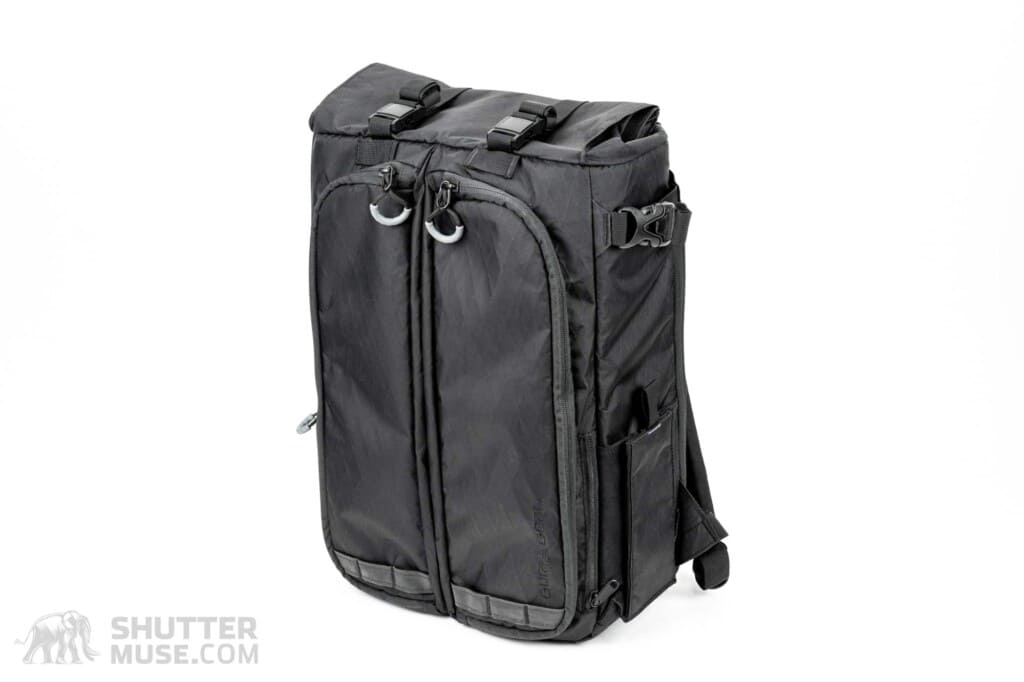
Just as with the original Kiboko backpacks and the Gura Gear Chobe shoulder bag, the Kiboko City Commuter takes a no-expense-spared approach to hardware and material choice, creating a camera bag with a premium look and feel. The main body of the bag is made from ultra-durable X-Pac VX21, a sailcloth-inspired laminated rip-stop nylon. X-Pac is tear-resistant, water-resistant and abrasion resistant. At the same time, zippers are provided by YKK and magnetic buckles by Fidlock.
Harness
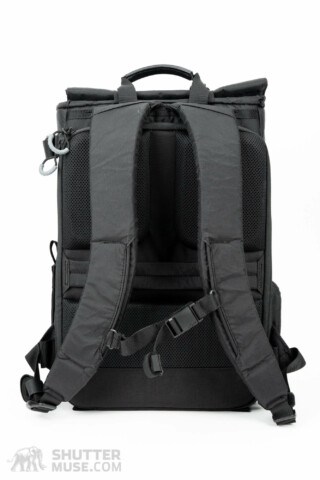

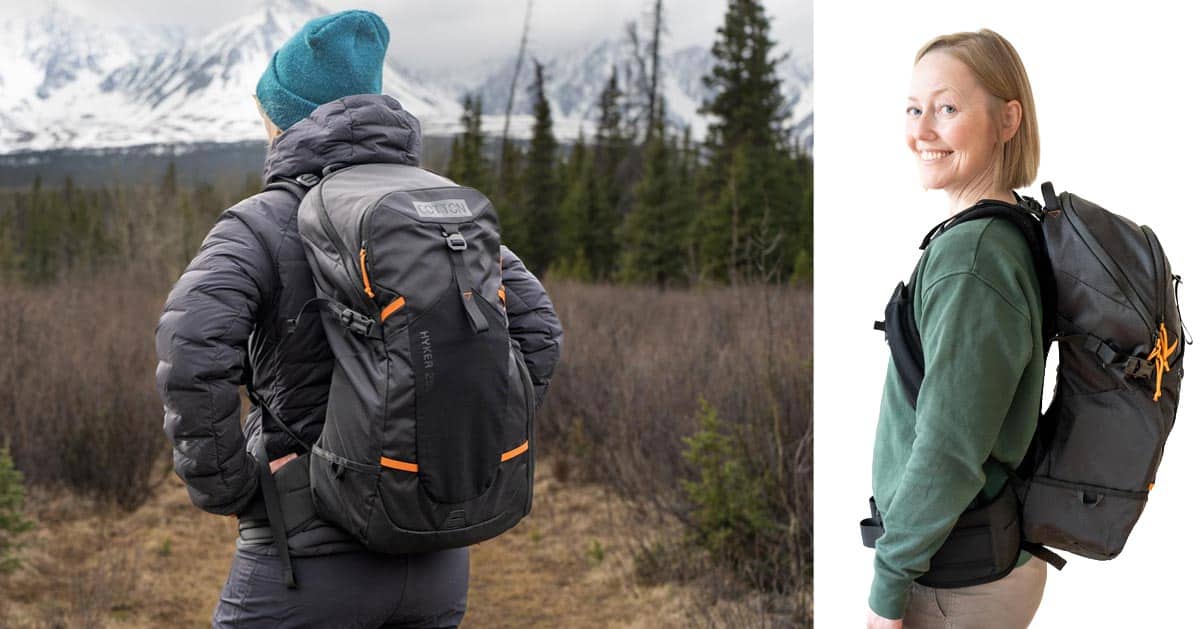
The Kiboko City Commuter has thickly padded shoulder straps and a generously padded back panel. Compared to other popular urban-style camera backpacks such as the Peak Design Everyday Backpack or the WANDRD Prvke, it is more comfortable when fully loaded.
This level of padding and comfort might not be necessary for quick trips to the office or local coffee shop, but it does extend the bag’s possible uses far beyond everyday urban carry. I would be happy to carry this bag while hiking all day for landscape photos or exploring a travel destination on foot from sunrise to sunset. While the bag’s name includes the word City, Gura Gear’s DNA lies in the world of nature photography, and the almost overbuilt comfort of the bag is the first indicator that this bag has been designed to handle a variety of environments in the urban and natural world.


Roll-Top Compartment


The top section of the backpack features a roll-top closure with magnets that help to snap the two sides of the opening together securely before being rolled. Once rolled, magnetic Fidlock buckles secure the opening, and an additional set of magnets is used to secure any excess strap length. As you’ll see as we work through the bag’s features, it has a lot of magnets which is no bad thing.
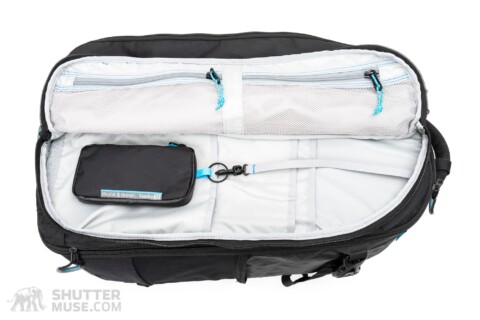
The bag’s top section within the roll top is padded and contains four elasticated mesh pockets. The Kiboko City Commuter stands on its flat base when you put it on the floor, so this positions the roll top section perfectly for quick-access items. It’s a great place to store a camera, your tech pouch, headphones or anything you might need while travelling. If you need a little extra storage space, the roll-top design allows for some volume expansion.

Optional Kiboko City Insert


Larger lenses like a 70-200mm f/2.8 or a 100-400mm zoom will fit in the bag’s top section, as will a mirrorless body with a small/medium prime or zoom. Anyone wanting to compartmentalize this bag section further can add the Kiboko City Insert to create up to four discreet, padded slots for cameras or small lenses.
Side Access
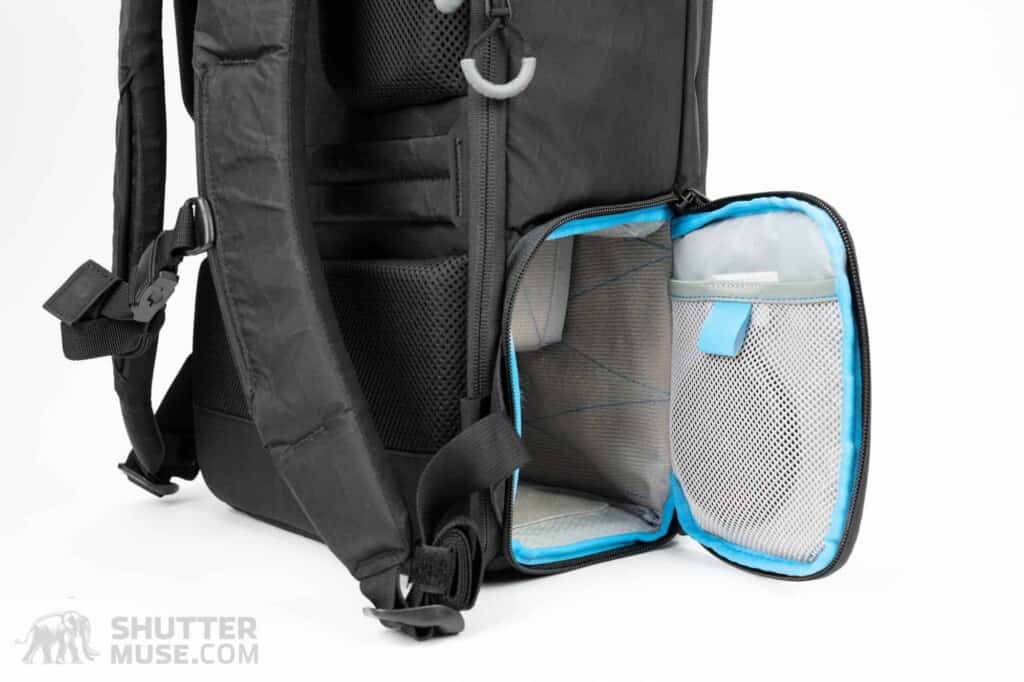


The side of the bag features a zippered hatch for extracting a camera with a lens attached. Most people will configure the bag’s interior to allow the extraction of a camera body with their favourite walkaround lens. For me, that’s a 24-70mm f/2.8, but the width of the bag would allow you to configure this with any lens up to something the size of a 70-200mm f/2.8. Thoughtfully, Gura Gear has added a mesh pocket on the inside of the hatch, giving you a place to store your lens cap while you grab that quick shot.


It’s tough to find fault with this bag. Great attention has been paid to every aspect of its design. However, if I’m going to nit-pick, which I will have to do with this bag since there are no glaring faults, it’s with the choice of the zipper on the side access. The photo above shows that the rear access hatch uses zipper heads that allow a padlock to be easily inserted. The side access hatch does not use the same zipper head, which is where I would prefer to see this feature.
When I’m wearing the bag, I’m not worried about someone being able to unzip the back panel of my pack and gain access to my gear. It would be impossible. But the side access hatch is another matter. If I’m standing on a crowded train or in a scrum of people at a busy event, sticky-fingered thieves could unzip the side access hatch, and I’d be none the wiser.
This omission isn’t a huge issue because you can still pass a small padlock through the metal hole in the zipper pulls, but I would have preferred to see the more padlock-friendly style of zippers in this area. Again, this is a huge nitpick in an otherwise astonishingly well-design bag, but this wouldn’t be one of my epic-sized camera bag reviews if we didn’t get right down to the nitty-gritty, would it?
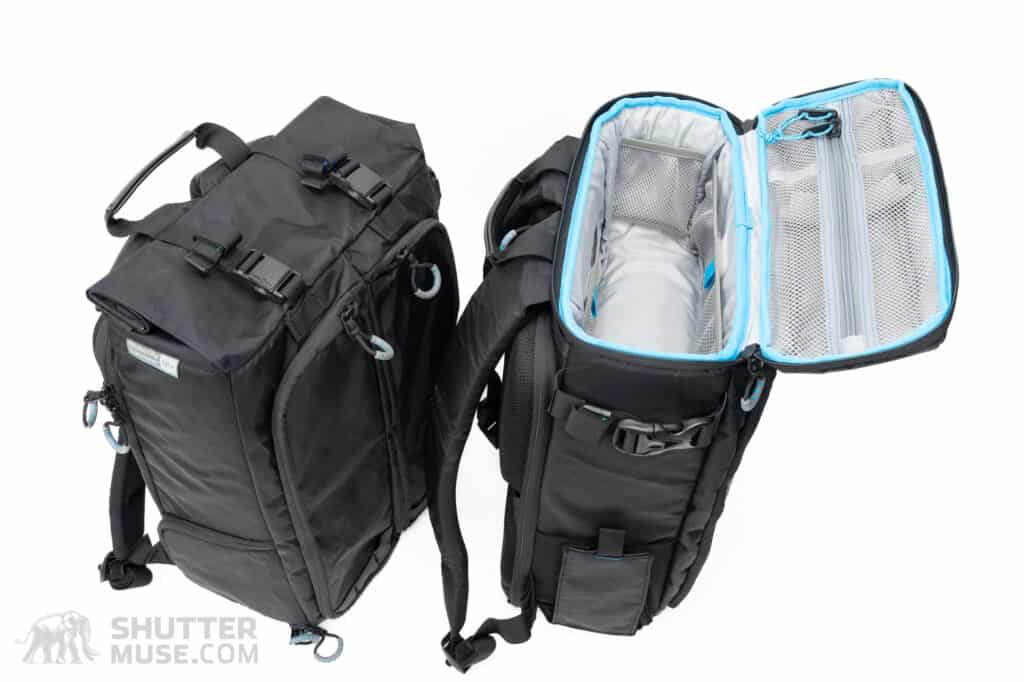
Back Panel Access

The main advantage of this design is that when you place the bag down to access your camera gear, the front of the bag is in contact with the ground. This keeps the shoulder straps and back panel clean, preventing dirt from getting all over you when you shoulder the pack again. I tend to think about this from the point of a nature photographer not wanting to get covered in mud, dust and sand. However, the same thing can be said about photography in an urban environment. In this case, a back panel access design helps to keep street scum off your clothing.
Laptop and Tablet Carry
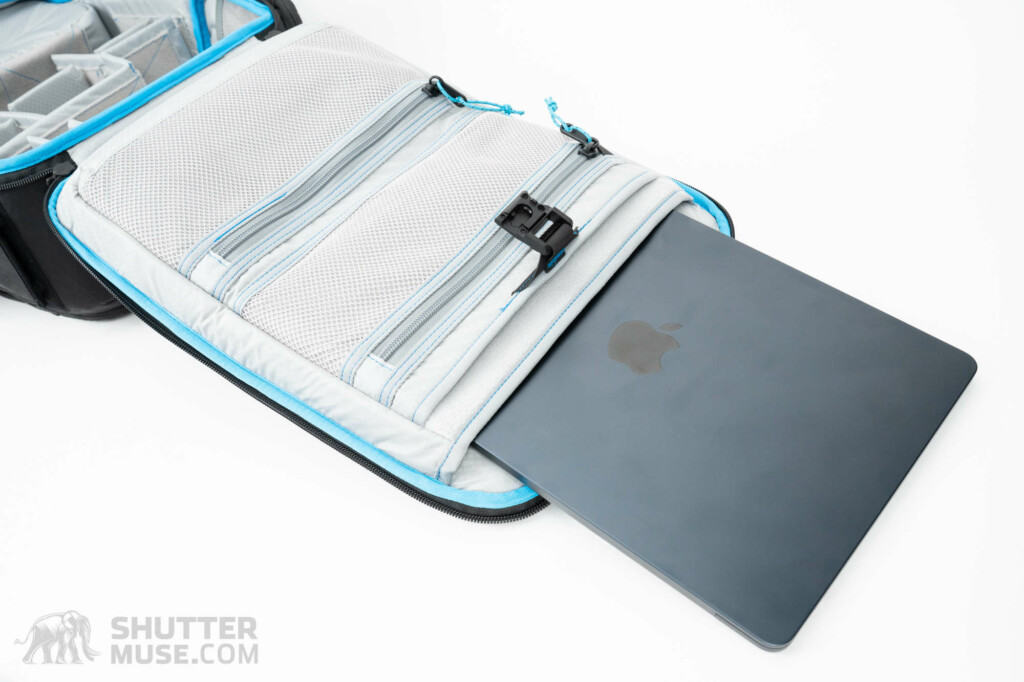


Inside the back panel is the tech storage section of the bag. The laptop sleeve will hold up to a 16″ laptop, and the tablet sleeve will simultaneously hold up to a 12.9″ iPad Pro. Both sleeves are secured with another magnetic Fidlock latch to prevent disastrous tech spillage when the back panel is opened at an angle past 90 degrees.
The latch is attached to the bag with ultra-durable Hypalon, and a padded tab prevents it from contacting the laptop, showing once again that zero expense has been spared in creating this bag. The dedicated tablet sleeve is lined with the softest material I have ever seen in a bag’s tech pocket. Seriously, I want a sweater made from this stuff!

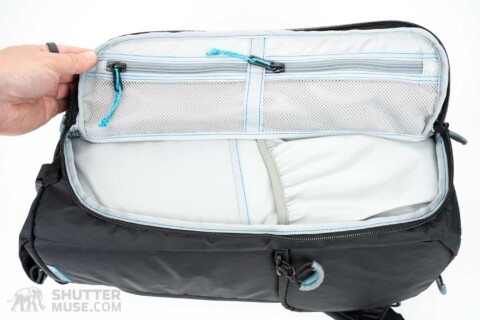
Internal Organization

Two large zippered mesh pockets are on the back panel’s inside. If you’re carrying a laptop and tablet, this is a great place to store the power adapter and cable, skinny SSDs for your photo backups and a memory card reader.

Front Organization Pockets

Located on the front of the bag are two large organizer pockets. Each has two zippered mesh pockets inside the flap for smaller items such as camera batteries. I like to use one for charged and one for depleted batteries. Pen pockets and sleeves for travel documents or notebooks can also be found on the right-hand side, with one pocket designed for your passport and featuring RFID-blocking materials.

In another stroke of clever design and photographer-centric thoughtfulness, the right-hand pocket has a key clip and a lanyard for attaching your memory card holder. Many camera bags have a key clip, but I have never before seen one that acknowledges photographers might need to secure their keys and their card holder and do so slightly differently. The card holder lanyard has a nice length to it.

The large front zippers give easy access to these organizational features, but the whole section also acts as a pocket in and of itself. The space in either side pocket can be used to store a lightweight jacket or rain pants for hiking. Alternatively, there is plenty of room to keep photography accessories such as filter cases or travel necessities like headphones, paperback books or travel guides. I find these pockets quite deceptive at first glance. They will hold a lot more than you think they will.


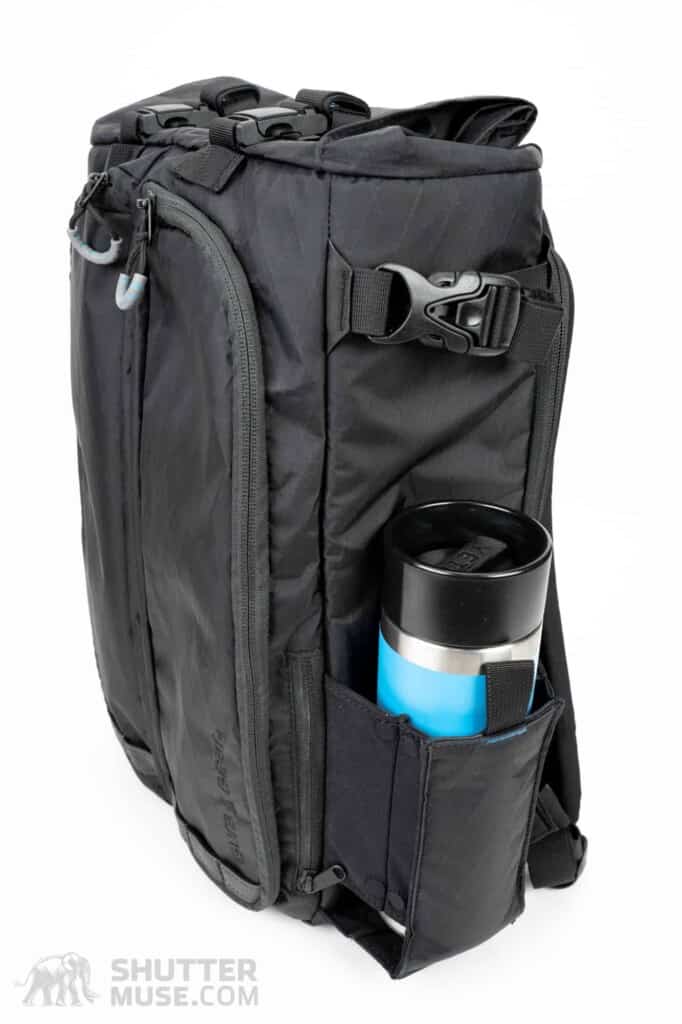
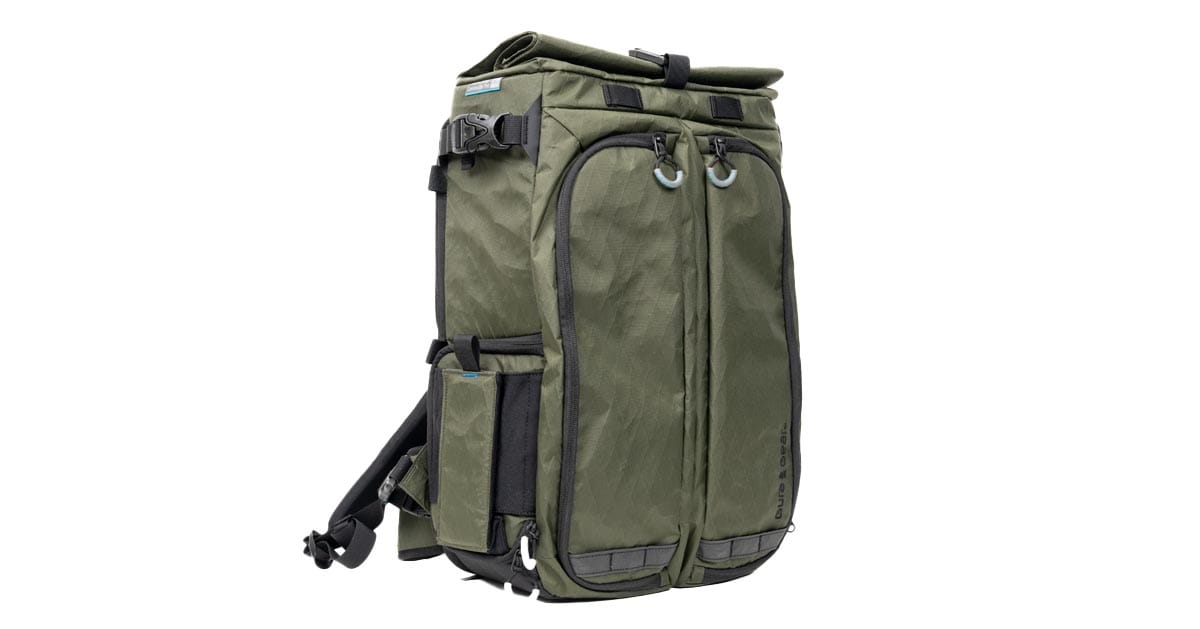
Water Bottle Pocket

As far as bottle pockets on camera bags go, this is the most elaborate design I have ever seen. To keep the sleek look and low profile of the bag, a series of four magnets and a carefully designed set of folds collapses the pocket when not in use. The pocket is designed for water bottles or coffee mugs. Off-the-shelf plastic water bottles will fit, as will most skinny steel water bottles like those from Klean Canteen or S’Well. I was also able to fit my Yeti coffee mug. Nalgene bottles (1L) do not fit.

Tripod Carry

There are two ways to carry a tripod on the Kiboko City Commuter. If you aren’t using the side pocket for a bottle or coffee mug, smaller travel-sized tripods can tuck a couple of legs into it, secured by a side strap and buckle. With the side of the bag taken up by the side access camera hatch, you cannot side-carry a tripod and a bottle simultaneously.
For those that want to carry a bottle in the side pocket and also have a tripod, Gura Gear sells a set of tripod accessory straps for $47. These straps attach to the front of the bag, top and bottom. Not only do they free up the bag’s bottle pocket, but they also allow you to carry a much larger tripod than would comfortably fit on the side of the bag.

On the side of the bag, you wouldn’t want to carry a tripod much bigger than a Peak Design Travel Tripod. If the tripod sticks too far above the top of the bag, you can get hit on the head by your ball head when moving over uneven ground or making that quick dash to train before it departs. When using the optional straps on the front of the bag, any excess length hangs beneath the bag, while only a small portion of the tripod, above its apex, sticks upwards and is held away from your head by the bag’s depth.
The downside of a tripod hanging beneath the bag is that it prevents it from standing up on its base. While I love that the City Commuter stands upright, I use that feature when I’m in “city mode”—usually wandering around my local city between meetings and coffee shops or while travelling. In those situations, I’m never carrying a large tripod and am unlikely to be carrying one at all.
When I did strap a larger tripod to the front of the bag, my RRS TFC-24L, I was hiking around my Yukon backyard. In that scenario, when I wanted to get at my camera, I either took it out of the side access hatch or laid the bag down on its front to open up the rear panel. I did not mind that the tripod compromised the bag’s ability to stand vertically for nature photography. Anyone using the bag this way, placing it face down with a tripod attached, might also consider a basic tripod cover or a simple padded case to protect their tripod head from dirt.
Apple AirTag Pocket

The Kiboko City Commuter is the first camera backpack I have seen with a hidden pocket to hold an Apple AirTag. I’m a massive fan of these tiny tracking devices and have written about how photographers can use AirTags to keep track of their gear. Gura Gear has included a well-hidden storage spot inside the rain cover pocket, making it much less likely that any would-be thieves will discover its existence. I sound like a broken record, but this is another brilliant feature.
Roller Bag Attachment

The size of the Kiboko City Commuter makes it an excellent candidate for your second carry-on item while travelling with a larger roller. If you don’t overpack the bag’s front pockets, it should slide under the seat in front of you, as required by most airlines that allow a second “personal item” alongside a primary piece of carry-on.
To ease the air travel experience, the City Commuter features a roller handle attachment strap in the centre of the back panel. Its orientation and positioning mean the backpack stands vertically on top of your roller, giving you easy access to the contents of the roll-top and positioning the front organization pockets and RFID blocking passport pocket correctly.
I like the choice to hold the pack in a vertical orientation. While this does block the bag’s back panel camera access, you don’t need your camera in the airport. You need things like headphones, charging cables, your passport, boarding passes, pens and all the other small items that will be stowed in the front organization pockets or the elastic pocket in the roll-top section. If you want to access your laptop or tablet at the airport, it is possible to unzip just the top of the back panel zipper to retrieve either one without removing the bag from your roller.

Optional Accessories
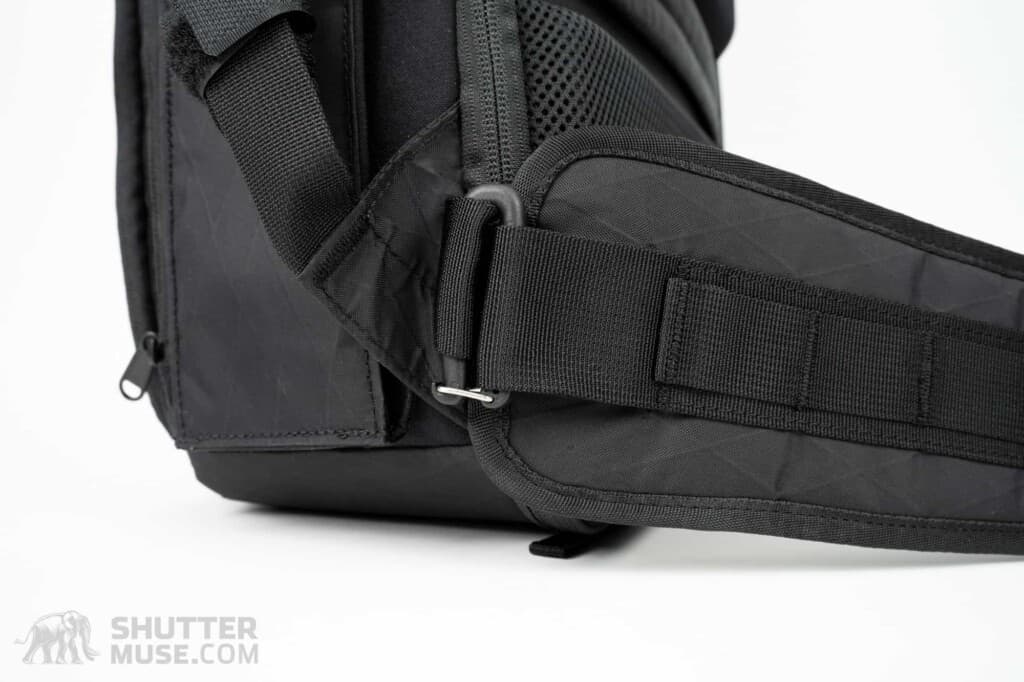
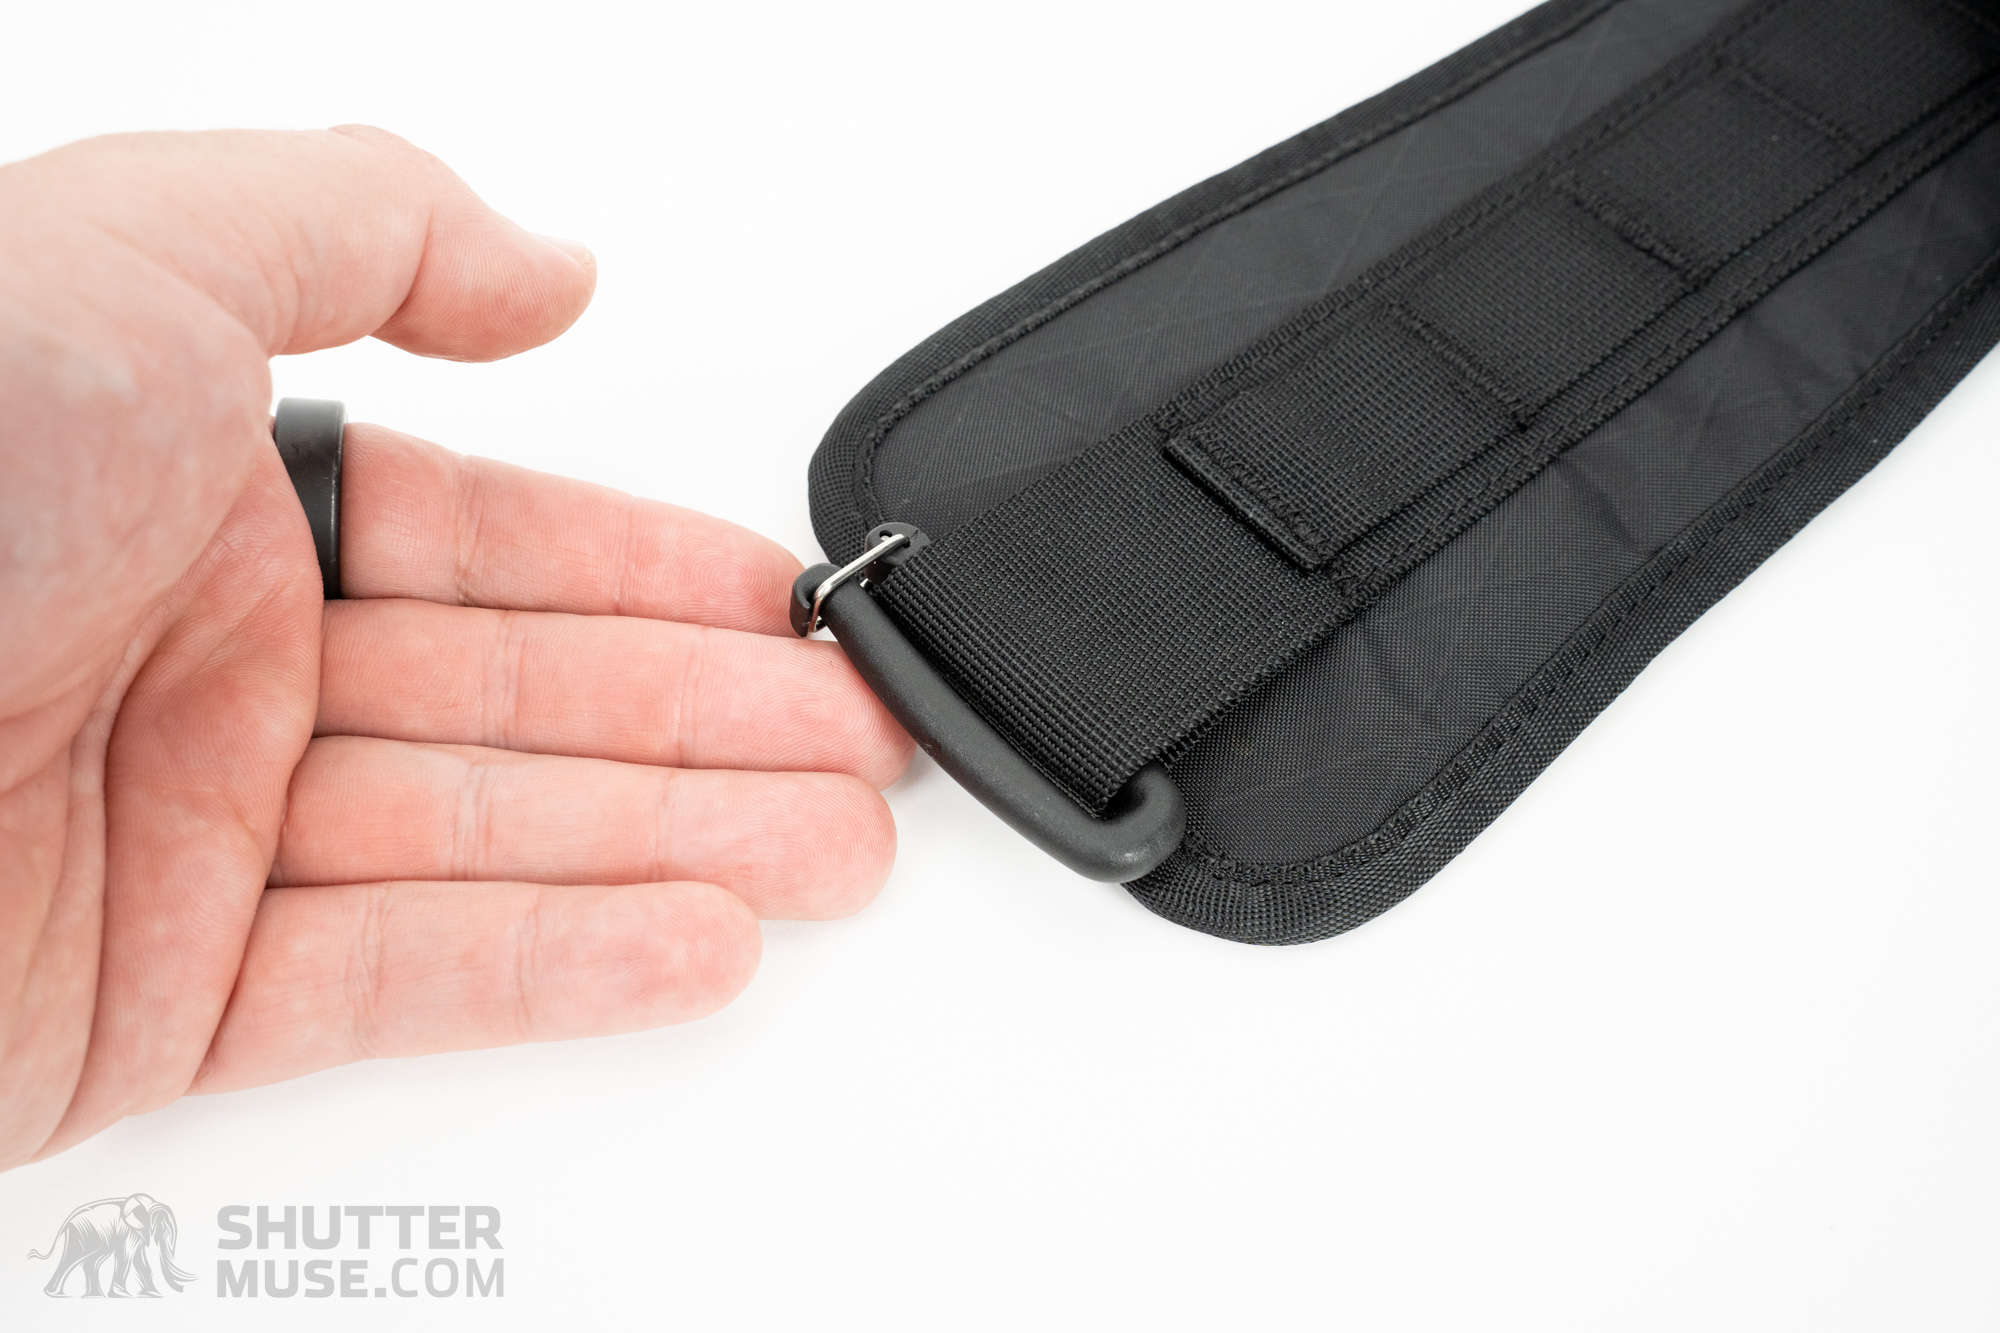
Kiboko City Commuter Waist Strap

The Kiboko City Commuter has no waist strap, but an optional one is available for just under $35. The strap is made from the same VX21 material as the bag and backed by the same aerated mesh found on the bag’s back panel. As the photos demonstrate, you should not expect the same padding thickness on the waist belt as on the back panel. Instead, the waist belt is supple and comfortable but relatively thin. Still, it can ease some of the pack’s weight onto your hips if you carry the bag fully laden for several hours. It also adds stability to the bag when moving over uneven terrain.
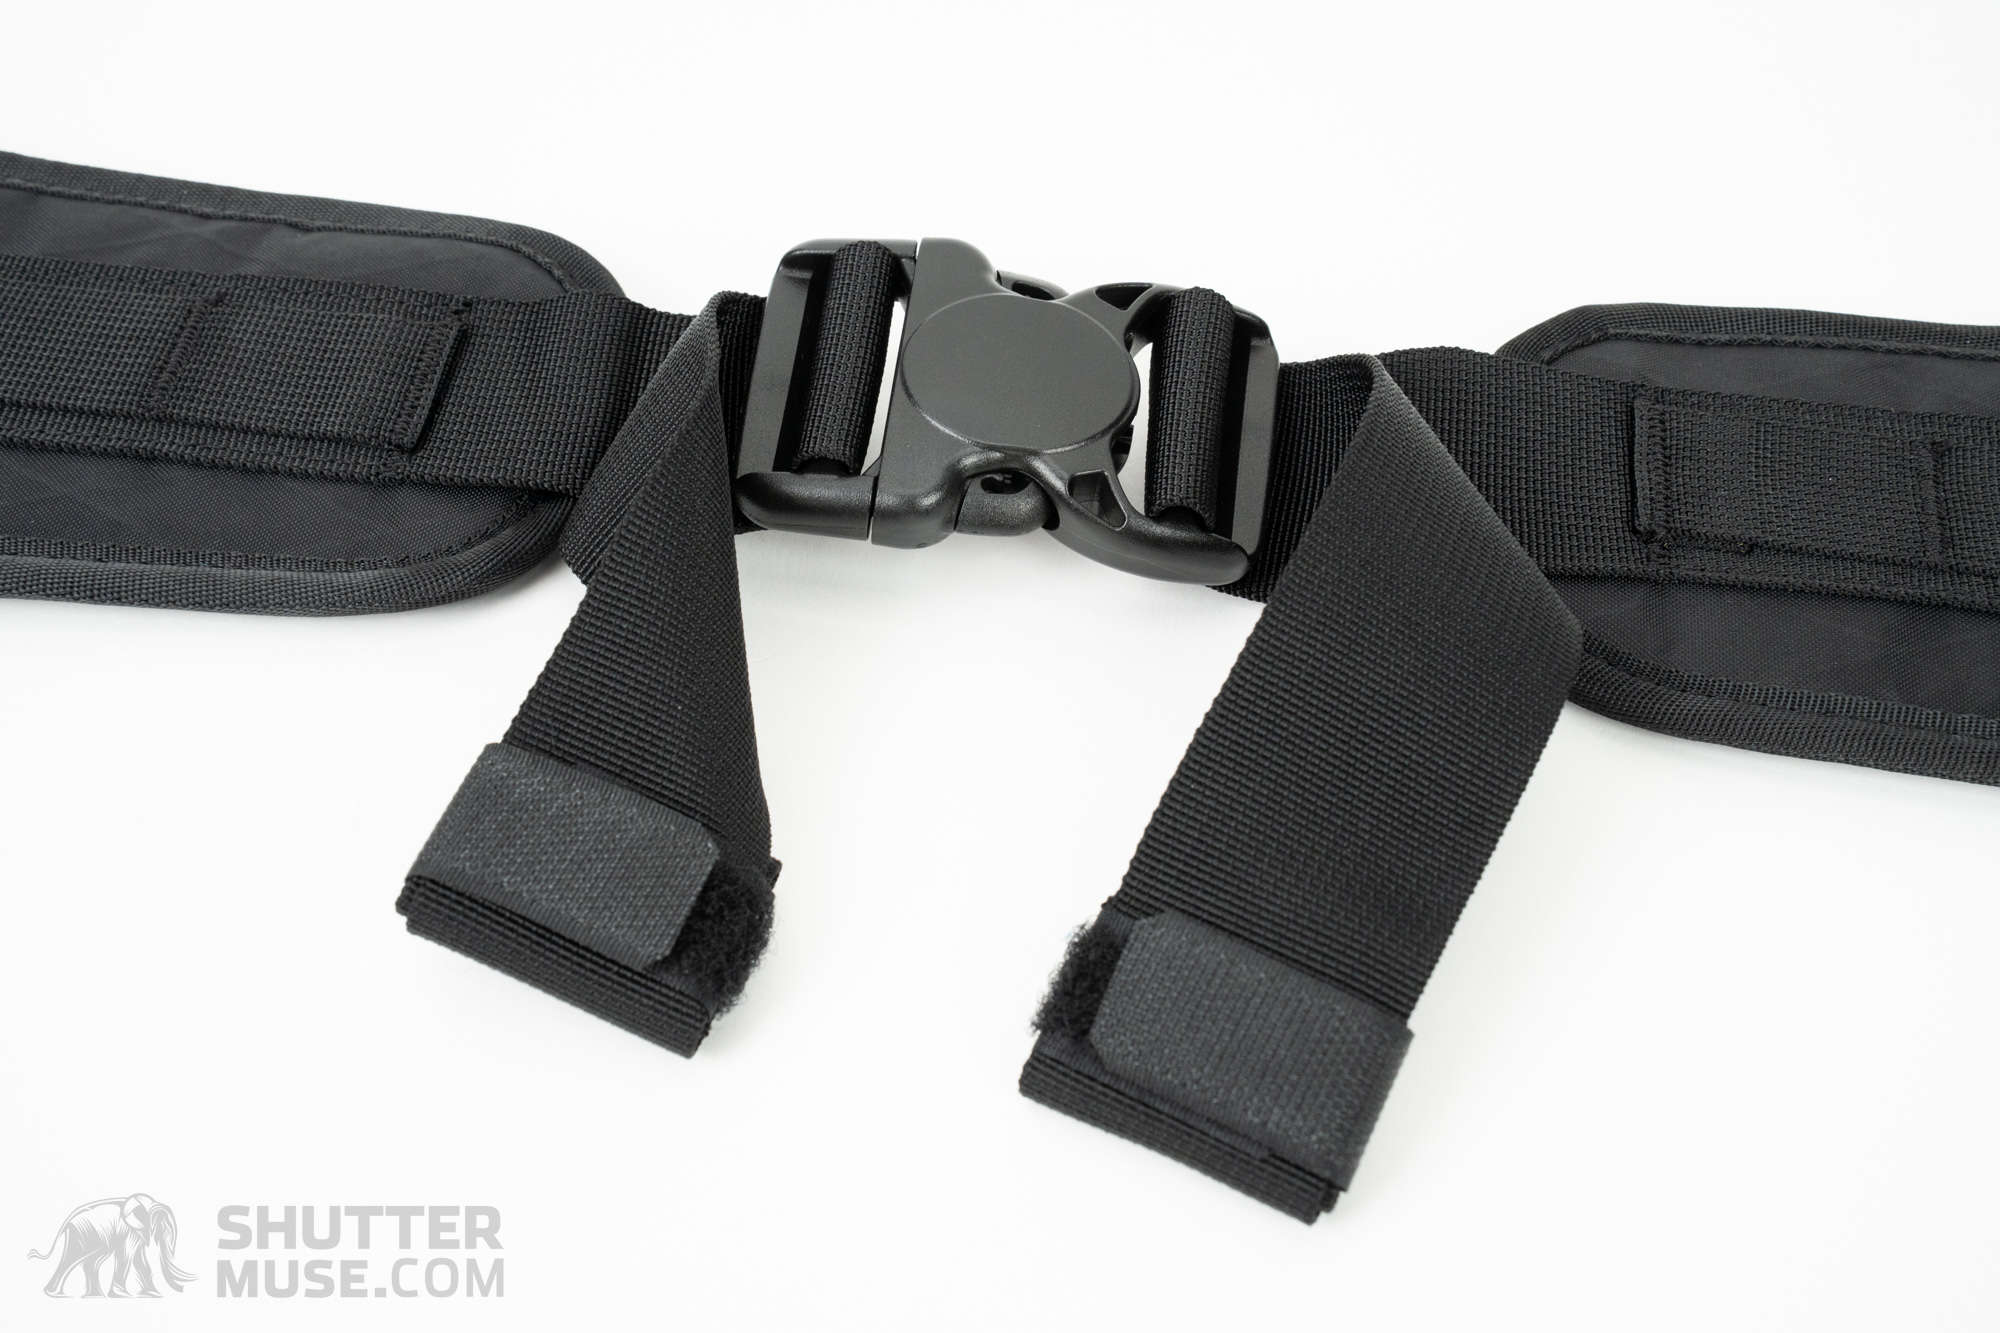
If you only intend to use the bag in an urban environment where journeys are shorter and will likely be often removed from your back, there is little point in buying the optional waist strap. Suppose you are heading out for the occasional multi-hour hike with the pack. In that case, the waist strap will be a welcome addition and gives you some added daisy-chain attachment points, which can be used with carabiners to store quick-access items such as gloves or a GPS device.

While I generally like to buy a bag with all its accessories included, I concede that the Kiboko City Commuter’s crossover nature makes the choice of an optional waist strap a wise one. I think it’s likely that most of the bag’s target audience will not need the waist strap. Still, many Gura Gear fans love the outdoors—introduced to the brand through the original Kiboko backpack, which is incredibly popular in the nature and wildlife photography community. Those customers will appreciate the option to add a waist strap as needed.

Kiboko City Commuter Tripod Straps

We have already discussed the different ways to carry a tripod on the Kiboko City Commuter and the various merits of each method. I won’t repeat myself. The decision to buy the near $35 tripod accessory straps will, for most people, come down to the size of the tripod they want to carry. Users of small travel tripods like the Peak Design Travel tripod, RRS Ascend, RRS TFC-14 or Gitzo Traveller series should be fine using the bag’s built-in side strap. The optional tripod straps are strongly recommended for anyone looking to carry something larger (2-series or 3-series tripods) while hiking for their landscape and travel shots.

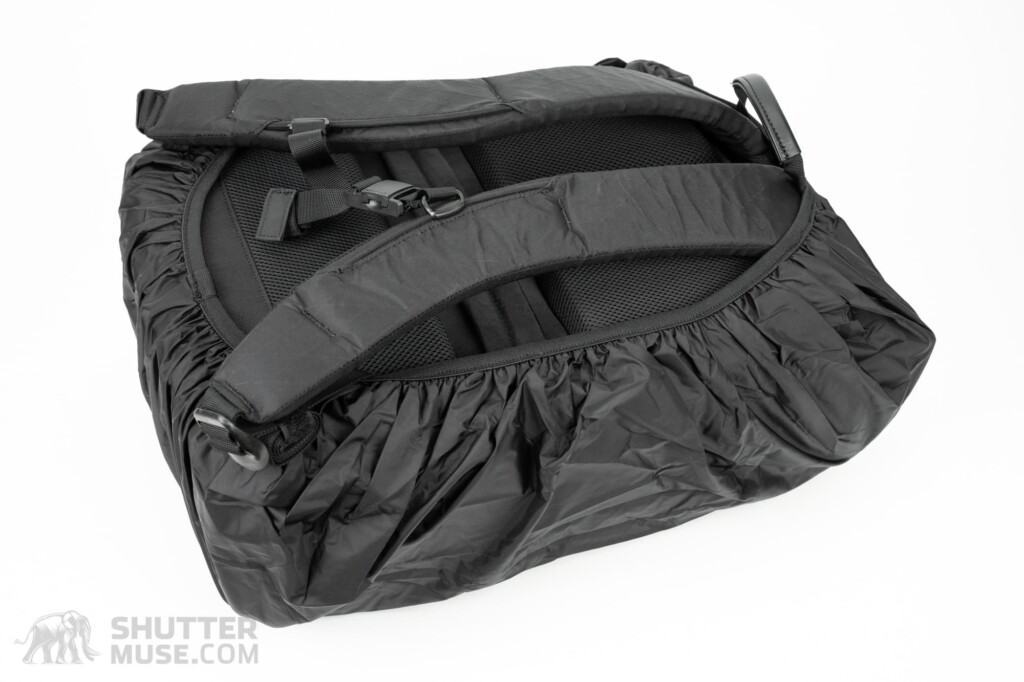
Kiboko City Commuter Rain Cover
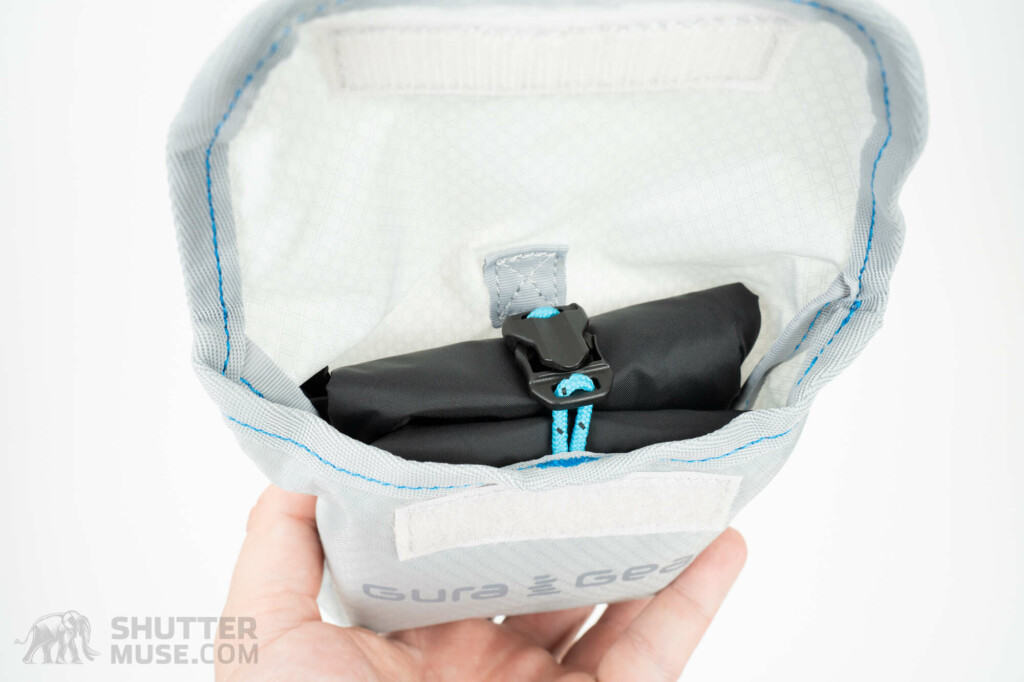
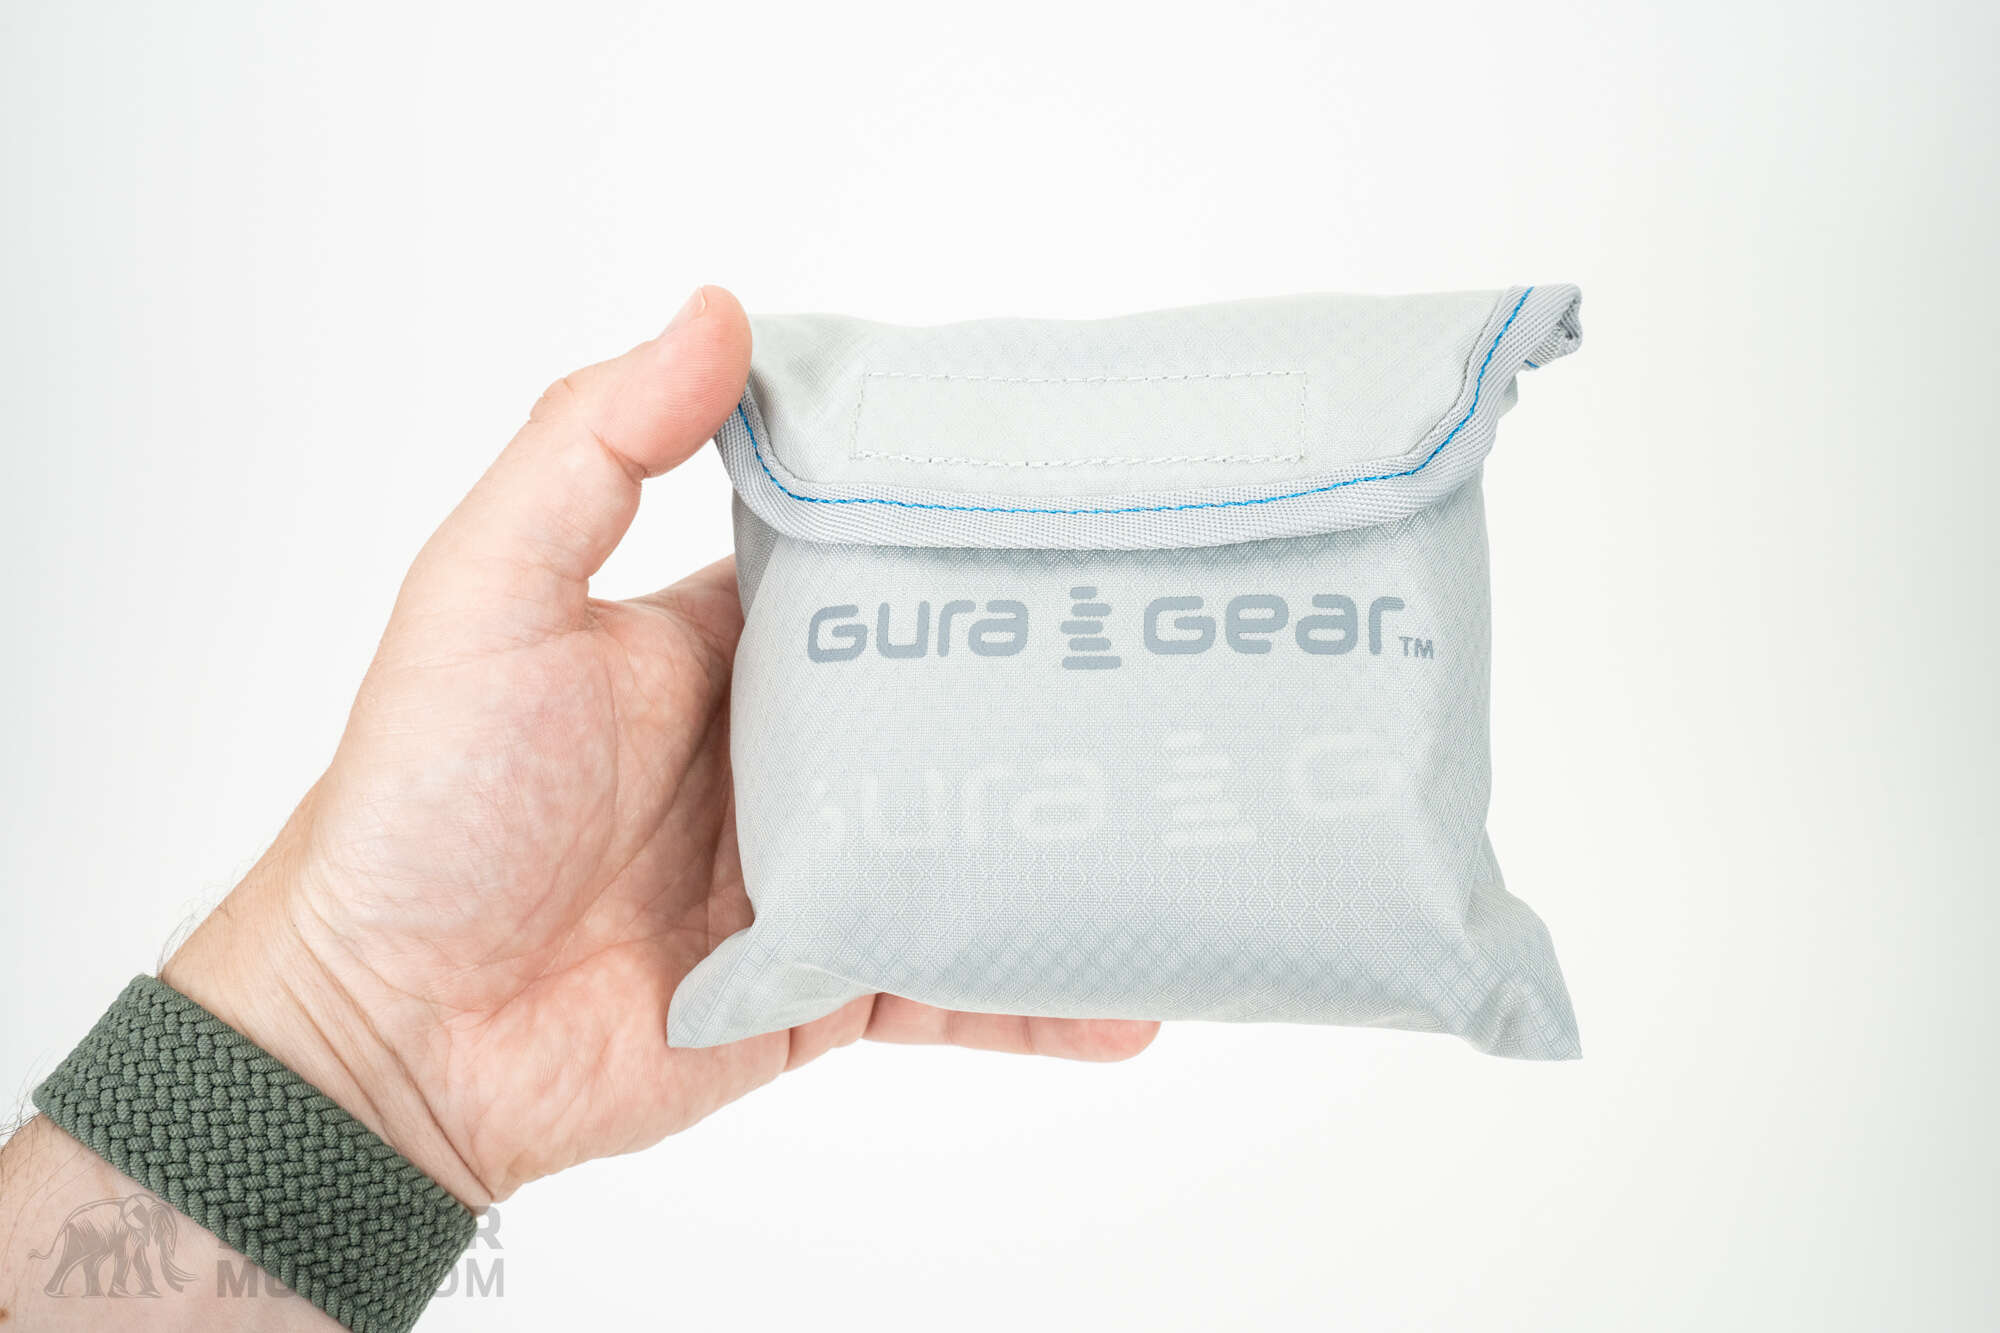

A rain cover is available for $29. This is a bit expensive, although even the bag it comes in shows Gura Gear’s attention to detail, high-end hardware, and high-quality craftsmanship. Much like the waist belt choice, whether you need the rain cover for the Kiboko City Classic depends on how you plan to use the bag. VX21 material has inherent waterproofness to it. Even without the rain cover, the bag can easily withstand a sudden downpour or prolonged light rain without compromising your camera gear. Those using the bag in an urban environment will likely seek cover and don’t need to buy the rain cover.
A rain cover is always a good idea for those who plan to use the bag for hiking and general outdoor photography. Even when a bag’s material provides effective waterproofing, as the VX21 does, zippers will eventually be a source of water ingress in prolonged heavy rain. If you buy the rain cover, a dedicated pocket for its storage can be found on the front of the bag.

Tembo Memory Card Wallet
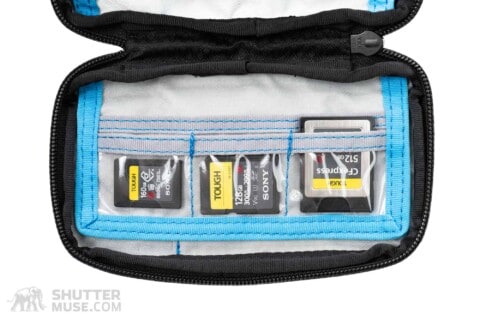

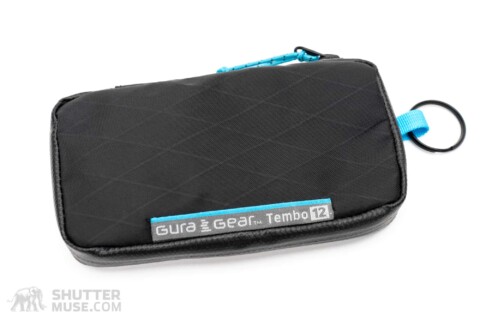
Using the same X-Pac VX21 sailcloth material as the Kiboko and the same blue+grey color scheme, the Tembo 12 is designed as the perfect partner to Gura Gear’s backpacks. This nifty little card wallet features a dedicated Apple AirTag pocket, a weather-resistant zipper, room for 12 memory cards, and pockets for other must-have items such as tools or spare batteries. You can read more about it in my Gura Gear Tembo Card Wallet review.
Et Cetera Organizers
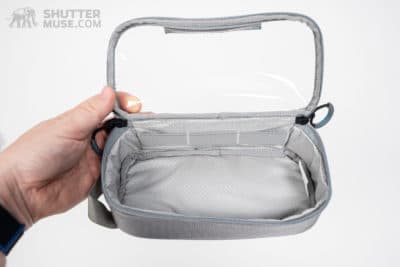
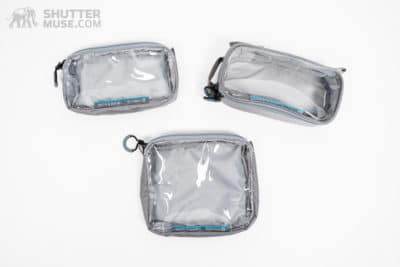

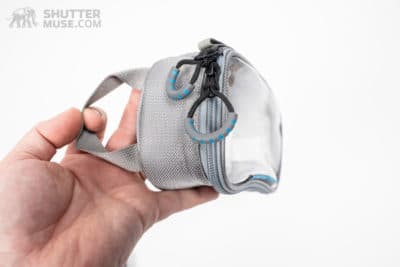
Gura Gear makes a variety of zippered pouches designed as perfect partners to any of their bags. While all of them are useful, of particular note to Kiboko City Commuter users is the Et Cetera 1L. This rectangular case fits perfectly into the roll-top section of the bag. The Et Cetera lineup starts at around $23.
Kiboko City Commuter vs Kiboko City Classic


If you’re interested in the Commuter model, you should also cast an eye over the features of the Kiboko City Classic model before deciding. I’ll summarize the main details here, but more are available in my review of the Kiboko City Classic 18L+.
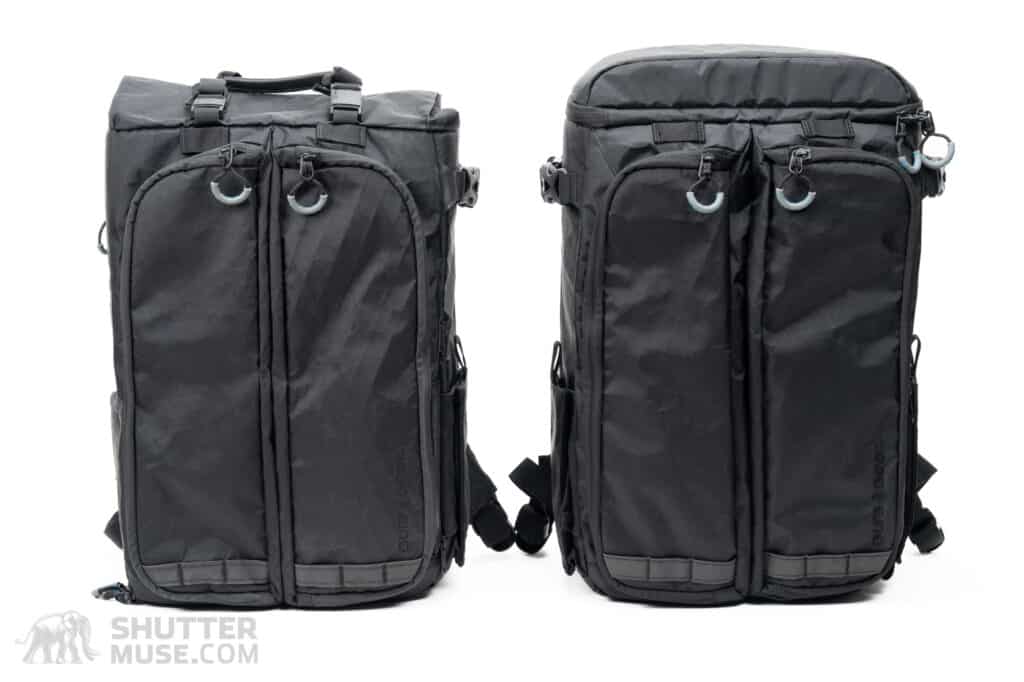
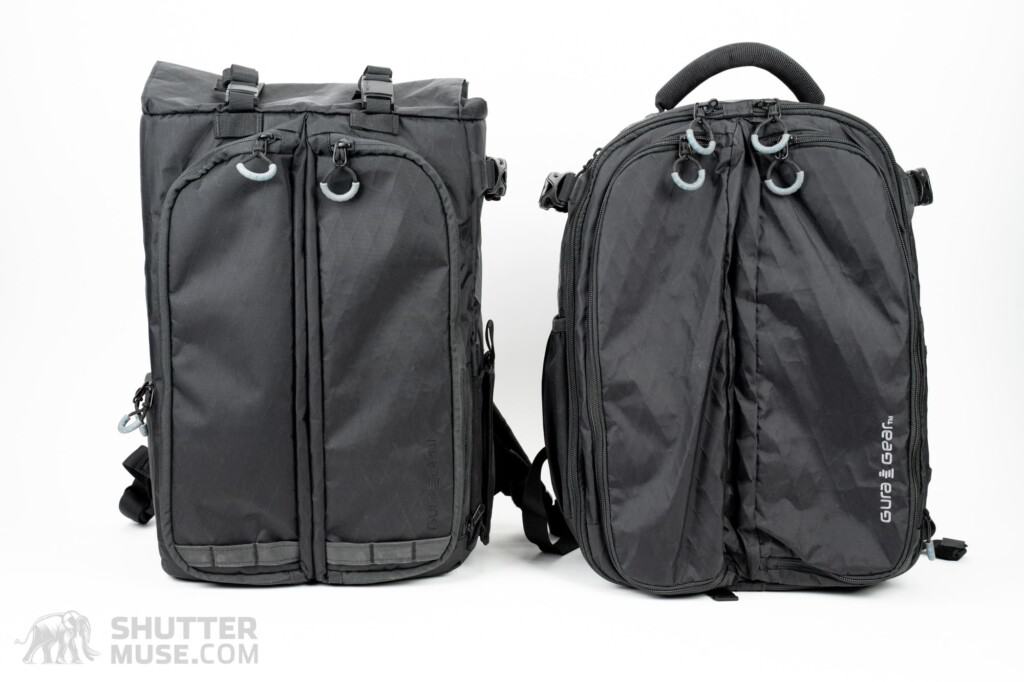
The City Commuter and City Classic bags are identical in size, with the primary difference being the roll-top access to the top compartment on the City Commuter, compared to the zippered access to the top compartment on the City Classic. Though the City Classic is a little taller due to the zippered compartment, the roll-top on the City Commuter can expand to hold the same volume of gear.

The Kiboko City Commuter has a side-access zippered door on one side of the bag, whereas the City Classic forgoes this side hatch in favor of a second magnetic, expandable side pocket. The City Classic also includes a zipper inside the main camera compartment that allows you to access the contents of the bag’s top section. On the Kiboko City Commuter, the only way to access that top section is through the roll-top.

These bags are very similar. Your decision should be made based on whether you think you would like to have a side access hatch – in which case, go for the Kiboko City Commuter – or whether you would prefer zippered access to the bag’s top section instead of a roll-top. In which case, go for the City Classic. Both bags are priced the same.
Kiboko V2 vs Kiboko City Commuter
Gura Gear made a name for itself in the photography community with the Kiboko backpack. This camera bag features a unique butterfly design that makes it optimal for carrying telephoto lenses attached to a camera. The regular Gura Gear Kiboko V2.0 backpack is available in four sizes: 16L+, 22L+, 30L, and 30L+.
The Kiboko City Commuter builds on lessons learned in the original Kiboko design. It tweaks the camera access components of the bag to be better suited to everyday carry and, as the name suggests, city usage. The City Commuter’s overall design aesthetic is similar to the Kiboko V2.0, hence why they share the name.
Those considering the Kiboko City Commuter will probably wonder how it differs from the standard Kiboko backpack. While I would encourage you to dig into my in-depth review of the standard Kiboko packs to get a detailed look at their features, I will also provide a quick summary of the differences in this section.


Kiboko 16L vs Kiboko City Commuter 18L Specifications
| Specification | Kiboko 16L+ | Kiboko City Commuter 18L+ | Kiboko City Classic 18L+ |
|---|---|---|---|
| Weight | 3 lb / 1.36 kg | 3 lbs, 11 oz / 1.7 kg | 3 lbs, 11 oz / 1.7 kg |
| Exterior Dimensions | 12.6 x 16.54 x 5.91″ | 12” x 18.5” x 8” | 12″ x 19”x 8” |
| Laptop Carry | Up to a 14″ | Up to a 16″ | Up to a 16″ |
| Tablet Sleeve | No | Up to iPad Pro 12.9″ | Up to iPad Pro 12.9″ |
| Side Camera Access | No | Yes | No |
| Back Panel Access | No | Yes | Yes |
| Butterfly Opening Access | Yes | No | No |
| Roller Bag Attachment | No | Yes | Yes |
| Waist Belt | No | Optional ($35) | Optional ($35) |
| Tripod Carry | Side | Front or Side | Front or Side |
| Rain Cover | Included | Optional ($29) | Optional ($29) |
| Carries Pro-Sized Body? | Yes*1 | No | No |
| Regular Price Price | $299 | $299 | $299 |
I am only comparing the Kiboko City Commuter 18L+ with the Kiboko V2.0 16L size in the photos and my summary of the differences. This is the only comparison that makes sense to me. The size and volume difference between the Kiboko City Commuter and the Kiboko 22L+ and the two 30L packs is too significant to make it a logical comparison.
If you have read my review of the Kiboko V2.0 and concluded that you need either the 22L+, the 30L, or the 30L+, you can forget about the Kiboko City Commuter. It’s just not big enough for your needs. On the other hand, if you are considering buying either the Kiboko 16L+ V2.0 or the Kiboko City Commuter 18L+, it is worth discussing the merits and best uses for both bags since their sizes are so close.
Which One Holds Bigger Lenses?
The most significant difference between these two bags is how the useable camera gear space is divided. Despite slightly differing volumes, I found that they can hold a very similar amount of camera equipment. However, in the Kiboko City Commuter, the internal space for camera gear is divided between the padded roll-top section and the section behind the back panel zipper. The placement of the roll-top section above the other section limits the maximum length of the lens that can be carried in the bag.
To underline this in more detail, I got out my tape measure. The Kiboko 16L+ V2.0 can hold a lens or a camera+lens combination with a maximum length of 15.75 inches (40cm). Although the City Commuter is an overall taller bag (18.5″ vs. 16.54″), the longest lens or camera+lens combination that it can hold is 10.43 inches (26.5cm).
So, while the City Commuter can hold a 70-200 f/2.8 or a 100-400 attached to a camera body, the Kiboko 16L+ v2.0 can hold a lens as large as a 300mm f/2.8, a 400mm f/4 or the Sony 200-600mm with room to spare. Or, you can add a teleconverter to a 100-400 and still have enough space to leave the lens hood in place. The butterfly opening of the Kiboko 16L+ V.20 is also perfect for extracting cameras from the bag while it is placed on the seat next to you, such as when you are on Safari. The back panel opening of the City Commuter would be awkward in that same scenario.
*1 – Which One Holds Pro-Sized or Gripped Bodies?

Neither the Kiboko 16L+ V2.0 nor the Kiboko City Commuter is designed to hold pro-sized camera bodies. However, that statement has some wiggle room with the Kiboko 16L+ V2.0. When placed, as seen in the photo, near the center of the bag, my Nikon Z9 protrudes above the camera compartment. Still, there is enough flexibility in the bag’s front zippered panel to make it easy to close. This placement means you can’t leave a lens attached to the camera, but it is still possible to carry a pro-sized camera. In the Kiboko City Commuter, it is not possible. You cannot comfortably close the bag’s back panel with a pro-sized body inside.
Choices, Choices
The original Kiboko backpack was designed with telephoto lens use and safaris in mind, so it shouldn’t be surprising that this is where it holds its main advantage against the Kiboko City Commuter. Outside the ability to hold a longer lens and larger camera body, the Kiboko 16L+ V2.0 falls short of the new City Commuter model in a few areas. The City Commuter can hold a larger laptop, has a dedicated tablet sleeve, an RFID-blocking passport pocket, a hidden Apple AirTag pocket, a roller bag attachment strap, an optional waist strap, and more ways to carry a tripod.
If you need to carry long lenses, of course, out of these two bags, you should get the Kiboko 16L+ V2.0. It remains best-in-class for this usage. However, if you need a camera bag in this 16-18L range and don’t need to carry a lens longer than a 70-200mm f/2.8, the Kiboko City Commuter would be my choice. Even if your only interest is nature and outdoor photography, don’t let the word “City” scare you away from making that choice. The Kiboko City Commuter is built with the same materials and standards as the Kiboko 16L+ V2.0 and is every bit as capable in the outdoors.
Conclusion
A camera bag this good, with this many unique features, deserves your attention. Every inch of this pack has been meticulously considered, and the result is as close to a perfect camera bag as I have ever seen. If you’re looking to carry a laptop, tablet, a couple of cameras and a few smaller lenses up to 70-200mm in length, this should be at the top of your list.
And please, don’t think this bag is only suited to use in the City. It thrives there, but the comfort of the shoulder straps and back panel padding and the rugged and durable design makes this bag an excellent choice for landscape photographers. At the same time, the RFID-shielded passport pocket, roller bag attachment strap, and carry-on-friendly sizing make this a fantastic option for travel photographers or anyone who spends time in airports.
When I first got my hands on this bag and began putting it through its paces before the public launch, I wasn’t aware of the final retail price. The no-expense-spare philosophy to material and hardware choice, plus the sheer number of features and complexity of the bag’s construction, worried me. I thought it would have a hefty price tag that might put it out of reach for most people. Instead, Gura Gear surprised me.
Don’t get me wrong, $299 is still a lot of money for a camera bag, but it’s not even close to the most expensive camera bags I’ve reviewed on this website. Price-wise, it competes closely with or matches the camera bags that I consider apparent competitors in this market segment, the Peak Design Everyday Backpack, the Shimoda Urban Explore, and the WANDRD Prvke. None of these bags uses expensive X-Pac material, and few come close to the number of features, thoughtfulness of design, quality of hardware, and carrying comfort found in the Kiboko. Gura Gear’s offering feels a step above them in every respect.
Where to Buy – Save 10%
Gura Gear has offered Shutter Muse readers a 10% discount on anything purchased in their online store. Just use the discount code SHUTTERMUSE10 after clicking here to access their store.
I always appreciate it when you use my links for your purchases. Of course, you should try shopping directly with Gura Gear for the 10% discount mentioned above and for their exceptional customer service. They offer international shipping at very reasonable rates so that you can shop with confidence from anywhere.
- Gura Gear Kiboko City Commuter 18L+ – Gura Gear / B&H Photo / Amazon
- Gura Gear Kiboko City Classic 18L+ – Gura Gear / B&H Photo /
- Gura Gear Kiboko City Insert – Gura Gear
- Gura Gear Kiboko City Tripod Straps – Gura Gear
- Gura Gear Kiboko City Waist Strap – Gura Gear
- Gura Gear City Rain Cover – Gura Gear
Would you like a matching X-Pac VX21 sailcloth travel bag for all your non-photographic gear? Check out Gura Gear’s new range of ultralight, ultra-tough Mara Duffel bags in four sizes.
- Gura Gear Mara Travel Duffels (40L-100L) – Gura Gear


AdBlock blocked 791 items on this page and I still see ad and ad and another ad. I wanted to count them but I gave it up.
There are not 791 ads on this page. That would be one ad every 7 words.
Your AdBlocker is counting other things. I do not know what it is counting, but it certainly is not the number of ads.
That said, of course, there are some ads. Unfortunately, if everyone were to see no ads, you would see no review. Ads are how I am compensated for the two days I spent creating this review, not to mention the time spent testing the bag in the field. There will always be ads on the site if I’m to put a roof over my family’s head. I would suggest finding another place to read reviews if they bother you that much while you consume your free content. That said, at the time this product is launched, this is the only website where you will find a review of this bag, so that would leave you in a quandary if you needed a pre-purchase opinion about it. Using an AdBlocker, by the way, is literally like taking money out of my pocket. I would urge you to consider that in the future, and perhaps put sites like mine on a whitelist. I’m not some huge corporation with a staff of people. I’m one man, just trying to pay my bills and feed my family by providing you with helpful, detailed, free content. It’s unclear to me why you think you are entitled to get that without me earning a cent. The ads don’t cost you anything, but they pay me. It seems like a good solution to me. The alternative is I put things behind a pay wall, but then that would cost you, and I’m sure you’d be unhappy about that.
Hello Dan,
Thank you for the detailed summary.
I am in lookout for a smaller camera bag that can still hold the new 16inch MBPro.
The Kiboko city commuter looks perfect given that its 18L and can hold a 16″ laptop.
However looking at the dimensions you will find that this is almost similar to WANDRD PRVKE 31 (19″H X 12.5″W X 7.5″D), which is a 31L bag.
So i am a bit puzzled, similar dimensions but different volume!
Kiboko External Dimensions: 18.5” x 12”x 8”
Hope you can shed some light on this.
Thanks.
The simple explanation is that Gura Gear use more accurate volume measurements, and almost all other camera bag manufacturers exaggerate. It’s a very strange thing that I have commented on in the review of the Kiboko V2.0 too. Their Kiboko 30L holds just as much camera gear as some 40/45L bags from other manufacturers that I have in the office. If anything, Gura Gear seem to slightly underestimate because they do not count expandable volumes. And, for example, I can fit several litres of additional gear in the front pockets of their bags which is not counted in the volume.
I’m familiar with the PRVKE, I have one here in the office. They are very similar in size and would hold the same amount of camera gear. But there’s really no contest as to which one is the better bag. The PRVKE feels like a cheap bag compared to the Kiboko. By the time you buy the camera cube, the PRVKE is actually a lot more expensive than the Kiboko City Commuter, especially with the current Kickstarter pricing.
The main difference would be that the PRVKE has a removable camera cube, and the Kiboko’s top roll-top section is fully segregated from the main part of the bag.
Yeah its really strange. Some customers might look at the spec find 18L too small and not look into this bag.
The organization of the kiboko City Commuter seems far better than any bag in the market.
Thanks Dan.
Hi Dan,
Just to confirm, would you recommend this backpack over the Wandrd Prvke 31L then?
I currently own the 31L backpack but I sometimes find it feels a little on the big side and the velcro rolltop is slow to get in and out of quickly.
I’ve noticed the Prvke scratches really easily when placed on the floor.
Do share any thoughts you have between the two, I’d appreciate it. I’m tempted to back the Kickstarter.
It’s a better bag than the PRVKE, but I wouldn’t say the roll top is really any quicker than to access than the PRVKE, so if that is one of your issues, I’m not 100% sure this bag will solve the problem. It will feel less bulky, though.
Dan,
Been working with the Kiboko City Commuter 18L for a couple of weeks now…..
…overall, really like it……super light, and I’ve *squeezed* my gripped Sony a1 & a7R V (each with Really Right Stuff L-Brackets attached) into the pack…..
….but this arrangement means I can’t use the side access; a gripped/L-bracket body wont’ fit through the side access….
But love the rear access!!! Been using the Mindshift Backlight series of packs previously……but they did not offer the rear access nor the pocket organization the City Commuter or other Gura Gear packs have always offered…..its why I used my old Gura Gear 26L pack on a recent Alaskan photo adventure…….
The Gura Gear City commuter offers rear access, which is new for Gura Gear (except for their previous Unita 30Lpack , which I have, use, and like but was not successful); I love the rear access….and the Gura Gear front panel organization……My only pet peeves are 2:
1. Wish the pack was deeper to accept larger bodies/gripped bodies, as you pointed out……hopefully, Gura Gear will release a 22L/26L version that is deeper to accommodate pro bodies/gripped bodies…and allow the side access for larger/gripped bodies.
2. Internal flap/backside organization is ok; wish if was more like the previous butterfly backpacks; two side, lots of pockets, etc on the inside.
Haven’t really used the top part of the pack much except for my rain coat, snacks etc…which is very valuable space!
Overall, I really like this backpack and is now my pack for casual photography……my larger Gura Gear packs (older 22L & 26L) are my go-to packs for extended hikes or travel…..they’ve actually become my go to’s over my Mindshift Backlight packs……..
Hopefully, Gura Gear will consider expanding this line to larger packs.
Thanks for sharing your extensive thoughts, Michael. I’m glad you are getting on well with the pack.
Hi Dan,
I see you’ve tried the Z9, but would the Z8 fit? For the external depth of 8in, the internal depth of 4in seems very little. With a plate, the Z8 is about 5.1″ high
Hi Dan,
Just came across your excellent review of the Kiboko City Commuter.
I was wondering if you could offer any insight into its similarity with the Lowepro Flipside 400 AW?
If using the optional Kiboko waist straps could it be used in a similar ‘table top’ style hanging open from the user’s waist?
Hey I’m curious is it possible to remove the top compartment on the City Classic and rearrange it somewhere else in the bag? I want to put a telephoto in the bag similar to the dimensions that you demonstrated but it doesn’t seem great resting it on top of it like that…
Another thing I’m wondering… do gripped cameras really not fit in this bag or it’s not ideal at all? If so that’s a missed opportunity for sure. I only use my camera with a grip I guess this isn’t the bag for me?
I bought a Compagnon Element and while the materials are high quality, the design decisions of the bag were not thought out well and there are many inconsistencies…
You can’t remove the top section, no. And gripped cameras definitely do not fit.
Hi,
Can a Nikon Z8 fit through the side access?
Thanks so much!