
I’m on a journey at the moment to make print sales a larger part of my business model and I want to bring you guys on the journey with me. Last week I wrote about numbering print editions and this week I have a quick and simple tip that will spruce up your photography website and help customers imagine your images on their walls.
In researching how I wanted to tackle print sales, I must have been on over 50 websites from other photographers who also sell prints of their work. Whenever a photographer also had a physical gallery space, there was almost always photos of prints hanging in their gallery. I quickly noticed though that when a photographer doesn’t have a gallery, there was typically no attempt made to showcase their work in any way other than the online thumbnail gallery. In my (free) eBook; 10 Incredible Tools For Professional Photographers, one of the recommended tools was an iPad app called Shoot & Sell. This app allowed you to fairly quickly create illustrations of what prints would look like when hanging on a wall in a living room or bedroom. The app works fine, but the resulting images aren’t very high quality and the number of available ‘backdrops’ is a bit limited. These images weren’t going to do that job I wanted them to on my website where I wanted images of a specific look, in order to match the overall design of my site.
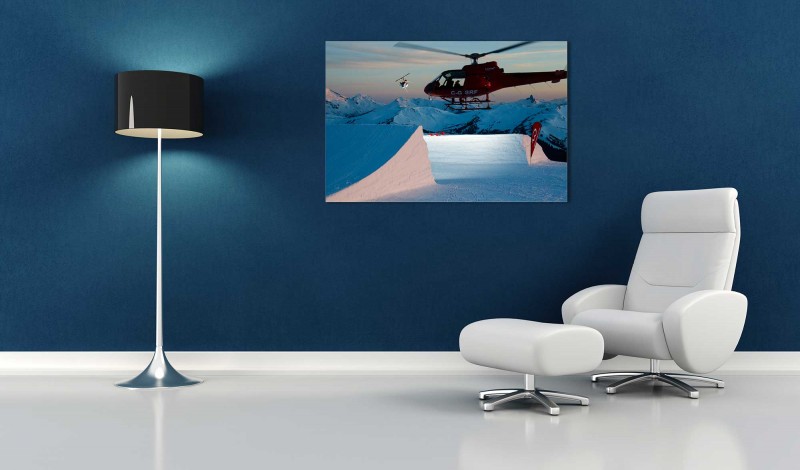
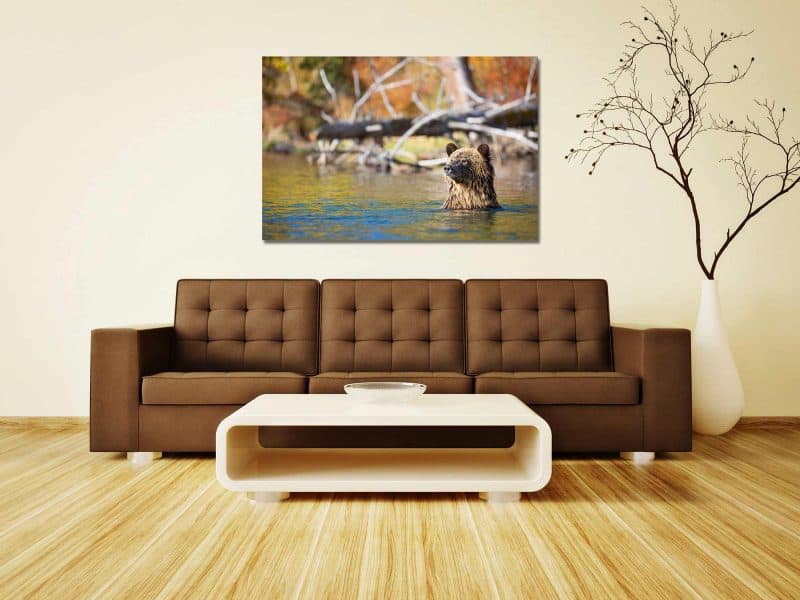
The solution was to first go to ShutterStock and purchase a 5-pack of image downloads (get 10% discount here). I then used these backgrounds and Photoshopped some selected images onto the walls. It’s a simple, but effective way to give people a bit of inspiration and get them imagining your work on their walls. Now most people offer prints in a variety of formats like canvas or gicleé and these might come with frames or they might not. I would recommend that you keep it simple, just as I did in the images you see below. I didn’t bother to add any frames in Photoshop and I don’t think that this has any really negative effect. In fact overall, I’m very pleased with how these quick mockups turned out.
Video Tutorial
Photoshop Tutorial
Simply pasting the images onto the walls wouldn’t look at all realistic, but it only takes a couple of very simple effects to bring some realism to this method.
Step 1.
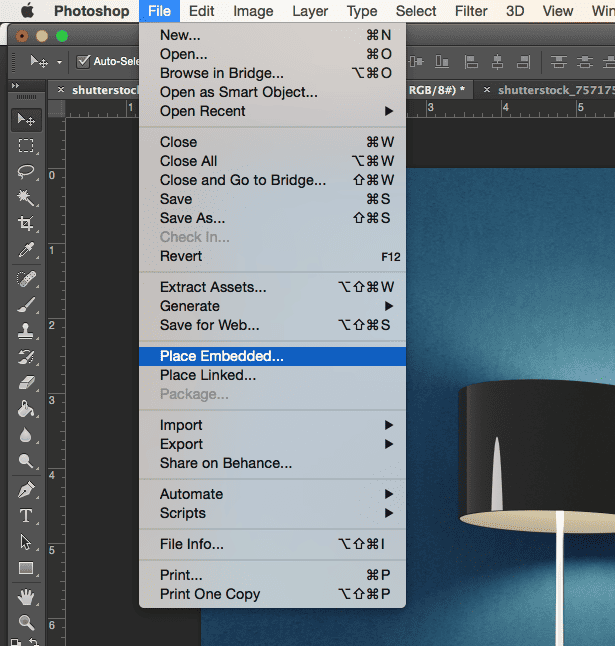
Open your background image, then go to ‘file’ and click “Place Embedded”. Select the photo you want as your print and then drag it into position and re-size it.
Step 2.
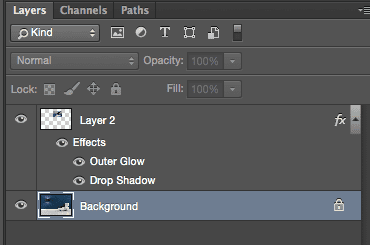
In the layers pallet you’ll see a new smart object layer with your print image on it. Double click this to open the layer styles menu.
Step 3.
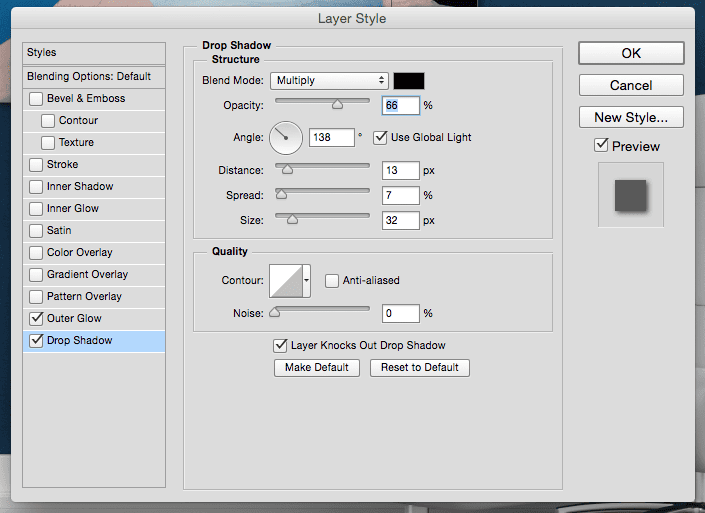
Enable the Drop Shadow style and drag your shadow into position to match the lighting in the room you’ve chosen. Tweak the sliders to achieve your desired effect. You only need a subtle shadow.
Step 4.
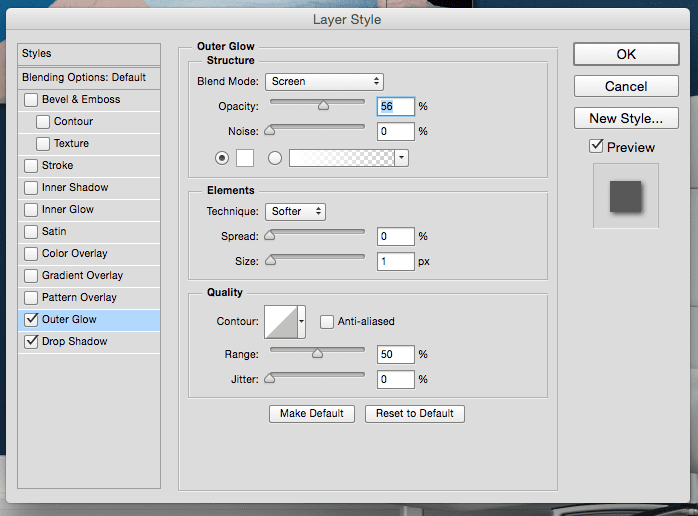
Enable the Outer Glow style and change the size of the glow to something small like 1px. Then change the colour of the glow to suit your prints. I’ve found that almost all images work well when the glow is set to white and then the opacity can be adjusted to suit.
Step 5.
There isn’t one. That’s it, you’re done! Simple eh?
Results
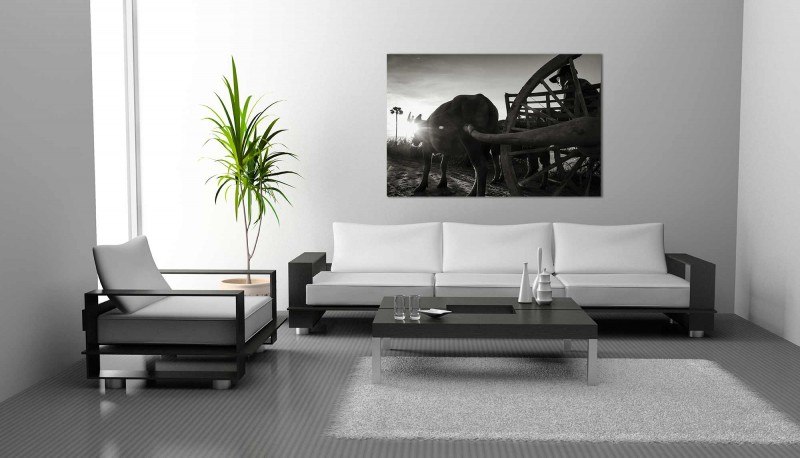


Excellent tutorial and great idea… the end result really looks top-notch! Just wondering if there was any strategy to sizing the ‘print’ on the wall? Were you aiming for something that appears 20×30″ in the scene, and just eye-balling it or…? Either way, the proportions look very consistent between your three examples.
Thanks Matt. Really I just eyeballed it to balance the other objects in the room. The overall aesthetic of the room was most important to me rather than demonstrating one particular size.
Great idea, Dan
Cheers!
Dan,
did you made any statistics to see what kind or type of photos sell better? Prints and digital.
I don’t have that kind of data. It would be very hard to gauge because it would really depend on how you market your work/products. My gut feeling is that unless you have an archive of literally hundreds of thousands of digital downloads to sell, theres little point to it. No art buyer is going to go anywhere but the major stock websites unless you can give them a serious selection to choose from, it’s just not worth their time.