Today is World Backup Day, so it seemed like a fitting time to update my long-running post series that details my own photo backup strategies. This series dates back several years, and the historical entries in this series are chock-full of useful tidbits to help you secure your photos.
The reason I started this series many years ago, was to try and put an end to people emailing me and telling me that they had just lost all their photos. I hate hearing things like that, especially when it is easily prevented. Sadly, those kinds of messages still don’t stop. I still hear stories of total photo loss every year, and it breaks my heart. I can’t even begin to imagine how I would feel if that were to happen to me.
So, here we are again. In this post, I’m going to break down my own photography backup routine, as well as explaining what has changed since my last entry in this series. I’m always testing new equipment and trying to stay on top of the latest technology. In that way, I’m like your guinea pig. Let me figure out what works, and what doesn’t.
Backup Basics
Before delving into my current setup, it’s important to have a good understanding of what we call a 3-2-1 backup strategy. This “rule” or strategy, whatever you want to call it, is the foundation of a solid backup routine that will remove all the risks of you ever losing your photos.
3-2-1 Strategy
I have written a detailed article about the 3-2-1 backup strategy which you should read if this is an entirely unfamiliar concept. If you just need a refresher, here it is: A 3-2-1 backup strategy states that you should have at least three total copies of every file. Two of which are local (at home or in your office), but on different devices. One more copy is kept offsite. Further on in this post, you’ll see how I accomplish each of these three copies of my own photos.
RAID is NOT a backup
Another basic concept to understand is that a RAID is not a backup! Too many people make this mistake. A RAID can be one of your two local copies, but it cannot be both of them. If you accidentally delete or corrupt a file on a RAID, that file is also instantly deleted or corrupted on the RAID’s second copy. So you can see that this is not, in and of itself, a backup. More details on this topic can be found in this previous article.
Budgeting is important
When people tell me they have lost their photos, whether it be their entire archive or just a day’s worth of shooting for a client, there is another point that continually comes up. You see, some people do understand the importance of a 3-2-1 strategy, but then fail to leave enough room in their photo gear budget to buy the necessary drives to accomplish it. Sadly, this is something I have heard all too often.
When people think about saving up for new camera gear, they set aside money for the sexy stuff, like a new camera, or a new lens. Most people don’t bother to think about putting money aside for new hard drives. Don’t make this mistake. And again, I have another detailed post discussing this topic. More great foundational stuff on the topic of photo backup strategies.
My Backup System
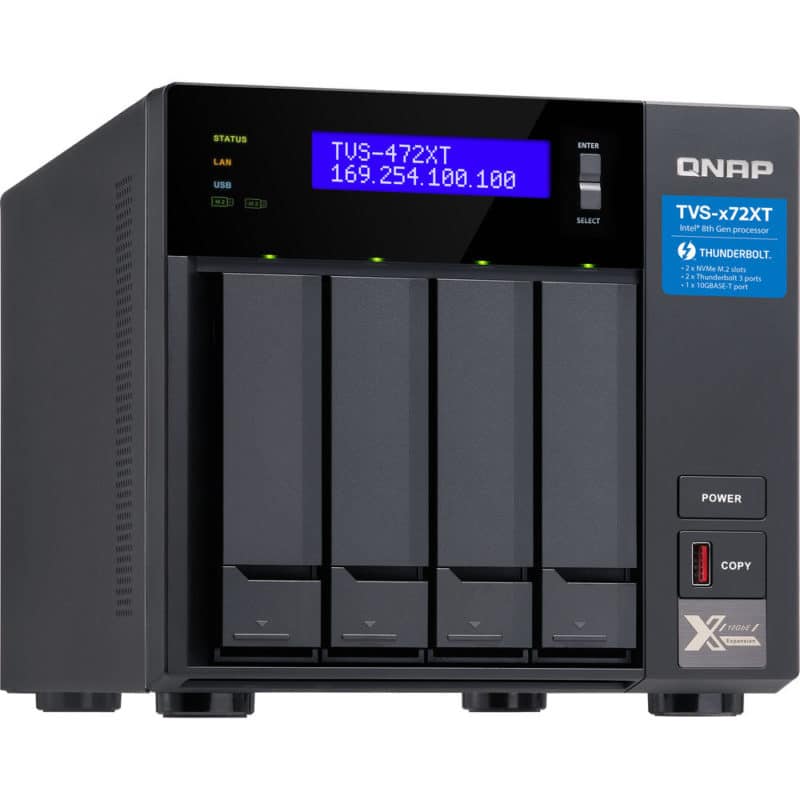
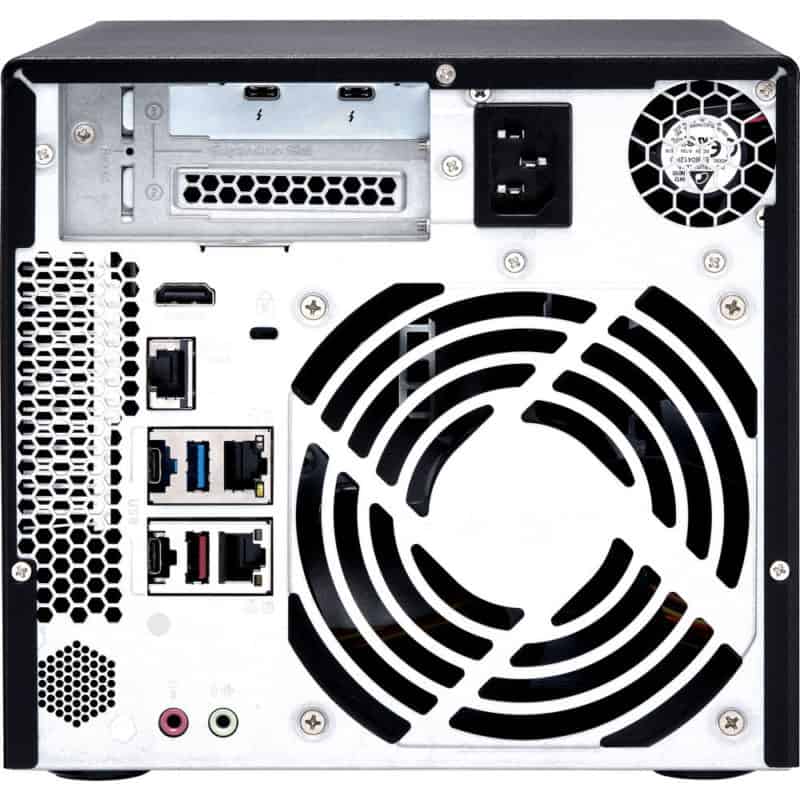
Primary Location – QNAP TVS-472XT


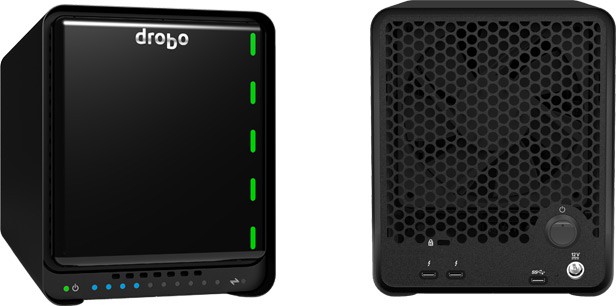
There has been a huge change in my backup system since I last wrote one of these posts. Previously, my primary storage location was a Drobo 5D3, but this has now been swapped for a QNAP TVS-427XT NAS with Thunderbolt and a 10GbE network connection. Drobo and I have had our ups and downs over the years, but it was time to move on and find something that offered more power and more features. Note: QNAP kindly provided this NAS.
The 472XT is a NAS (network-attached storage), which means that I can access its contents over a wired or wireless network in my home office. Unlike other NAS brands, though, QNAP has been adding Thunderbolt 3 connections to some of their devices. This means that I can also choose to directly connect to the device using a simple Thunderbolt 3 cable.
My old Drobo was a DAS (direct attached storage) device. This is the same as any kind of USB drive. You plug it into your computer and it shows up as an external drive. A DAS like this is simple to use, but it has many limitations. Firstly, it can only be connected to one computer at a time. With my new QNAP NAS, many computers can connect to it simultaneously and all access the same set of files. This can be done over the network, or even two simultaneous Thunderbolt connections.
The second big difference between a NAS and a DAS is the ease of remote access to your files. While it’s possible to remotely connect to a DAS, such as a Drobo, there are a lot of hoops to jump through, and your computer will need to be on all the time. With a NAS, it’s incredibly simple because your device is connected directly to the internet over your home or office network.
In fact, QNAP even offers several apps for your phone which allow you to browse, download or share files directly from your NAS. This is useful when you are on the road and need to grab some files from your archive to fulfil a print or stock sale. Although there hasn’t been much travel in 2020, things will get back to normal one day and then I’ll be immensely glad to have this feature.
I loaded my QNAP NAS with Seagate IronWolf drives and set it up in a RAID 5 configuration. These are the only drives I’ll ever use in any kind of RAID device. After a few too many issues with WD drives, I have switched everything to IronWolf drives now and I couldn’t be happier. At this point, spanning all my devices I have over 150TB of Ironwolf drives. These drives are also a perfect match for a QNAP NAS because the QNAP operating system recognizes them as IronWolf drives and routinely runs a special IronWolf Health Test on them to make sure there are no bad sectors or other issues.
For those migrating to a QNAP NAS from a device such as a Drobo, another huge change will be the applications that are available on the device. Essentially the NAS is a computer. It has its own operating system and you can install applications onto it from an app repository. This means you can really put your NAS to work by using applications to automate your entire backup routine.
Options seem almost endless, but just as an example, you can use the apps to backup your photos to a second local device, or even an off-site device. You can also use them to backup files to any number of cloud storage locations, or even USB-connected drives which can be plugged directly into the NAS. All of this work is powered by the operating system in the NAS, so you don’t even need to have your computer on.
Secondary Location

The second copy of my files is still stored on a Drobo 5D3. Having spent some time getting used to the QNAP NAS systems, I’m planning to purchase a second one in the near future and use that to replace the Drobo. For now, though, it does the job and has been reliably chugging away for close to four years now.
Every night, the QNAP NAS uses its own backup application to clone any new files over onto the Drobo. While I used to use Carbon Copy Cloner to backup my primary location to my secondary location, this is no longer necessary as the QNAP NAS comes with its own powerful backup application that can handle the same process.
Off-Site Location
To stick to a 3-2-1 backup strategy, I need a third copy of my files in an off-site location. Historically, this has been a tricky one for me to deal with. If I was living in a metropolis, I would be able to use an internet connection with unlimited bandwidth, and the QNAP NAS, to automatically back up any new files to a cloud storage service, or even another QNAP NAS stored in an off-site location.
Unfortunately, that’s not the case. I live in a very remote part of Canada, and such things as unlimited bandwidth are simply not available. This means that I’m still doing things the old-fashioned way.
I have another Drobo in a Pelican case that is stored in an office about 50KM from me. Every couple of weeks, I grab the Pelican case and bring it to my home office. Once connected to the computer, the QNAP NAS recognizes it and immediately starts to copy all the new files onto it. This process generally takes a few hours, and after that, I take the Pelican case back to the off-site location.
This does leave my 3-2-1 strategy somewhat vulnerable for my newest work, during the period between off-site backups. I try to minimize this also having a small USB drive plugged into the QNAP NAS. Every night, the NAS runs a backup of my latest few months of work onto that USB drive. If I go away for a few days, I grab that drive and take it with me. Should I suffer a break-in or a house fire while I’m away, that USB drive, in combination with my off-site backup, contains a complete copy of my archive.
Hopefully one day we will get unlimited internet bandwidth connections up here. I certainly have my eye on Elon Musk’s Starlink project for that. If, or when that happens, I will certainly just put another QNAP NAS in an off-site location and sync my new files to it every night. That’s the dream!
Internal Computer Drive Backups
Keeping my photos backed up is important, but I also pay close attention to the systems I have in place for other files that live on the internal drive of my computers.
Time Machine Backup
I always use the Mac OS Time Machine system to backup the internal drive of all my computers. In the past, I have used a USB hard drive for this purpose. The downside to this was that while a drive can always be connected to my office computer, there was not one constantly connected to my laptop. To get a Time Machine backup of the laptop I would have to periodically remember to connect the drive to it.
This year I have made a huge improvement to this system by using my new QNAP NAS. I simply created a new volume on the NAS called “Time Machine”, and set that as the Time Machine backup location for every computer in the house. With the NAS always on and reachable over the wired or wireless network, I no longer have to worry about connecting a specific drive. Time Machine backups now happen over the network for my laptop as soon as I turn it on. Of course, my desktop machine is directly connected to the 472XT using Thunderbolt, so it can generate a new Time Machine backup whenever it feels like it.
Bootable System Clone

Time Machine is great for recovering a lost file here and there, but it’s not a bootable drive. If the drive in your computer fails, you cannot simply plug in the Time Machine backup and get going. You would first need to replace your broken drive, and then clone the Time Machine backup to that drive. These days, replacing the internal drive on a Mac is not easy. It requires returning the computer to Apple because the drives are soldered to the computer’s mother board.
What if disaster strikes when you are right in the middle of a project? Can you really afford to send your computer to Apple for weeks at that point? Probably not. And that’s why I also create a daily bootable clone of my internal drive using Carbon Copy Cloner.
This part of my routine hasn’t changed for years. I simply have a USB drive connected to my main computer and every night, CCC makes a perfect clone of my computer’s internal drive, to that external drive.
If I was to experience internal drive failure – which has happened – I would be able to boot my computer using the cloned drive, and aside from running a little slower, it would appear as if nothing had ever happened.
This isn’t a long-term solution to a drive failure. The computer’s internal drive would still need to be replaced at some point. But it does allow you to finish your project and send the computer in for repair on your own terms.
Backups on the Road
When I’m out of the office I take a series of small portable drives with me to store backups of my new work. In the area of portable storage, it seems that technology has been moving fast in recent years. New NVMe SSD technology has allowed portable drives to reach incredible speeds, and what’s more, the physical size of the drives has greatly diminished.
This year I’m using the excellent, OWC Envoy Elektron Pro drives for my on-the-road backups. These tiny drives are made from a solid block of aluminium, giving them incredible protection from the elements. The USB-C 3.1 Gen 2 connection delivers excellent speed, reaching 949MB/s in my own testing. More than enough for photography backup purposes. For reference, a good spinning-disk hard drive like my old LaCie Rugged drive would top out at just 160MB/s!
The Elektron Pro is available in sizes up to 2TB. I use Photo Mechanic to download my photos in the field, and Hedge to download my video and audio files. Both of these applications allow you to ingest the files onto multiple locations at the same time, so everything gets stored on a pair of Elektrons. One drive then lives in my duffle bag, and one in my camera bag. Never store both of these drives in the same place! If you are interested in these drives, please read my OWC Elektron Pro review.


I think you have just sold me on a QNAP NAS! I’m about to replace my desktop with a laptop with a bigger hard drive, so need to fully re-evaluate by backup strategy. A NAS sounds like just the ticket. Are you going to be posting a more detailed review – I would be keen to hear if you are just using it as a big storage drive, or which of the apps etc you have set up.
Also – after a trip, what is your workflow for syncing up files from laptop back to desktop and ensuring they are covered by your usual workflow?
I’m really loving mine!
How is customer support for the QNAP? I would love to have help setting it up the RAID, and creating a time machine back up on it as well that backs up my desktop.
Have been interested in upgrading from my DAS to a NAS for years now. Enjoy your series on back ups. Did you evaluate the Synology NAS as well. I have heard good things about it and noted that it was less costly then the QNAP? Lastly are your Seagate Ironwolf drives pro or the regular?
My IronWolf drives are the regular ones. I did not really look at Synology as they don’t make a NAS with a Thunderbolt connection. If you were to find like for like models in their ranges, I think the prices would be very close. Synology is not known for being cheaper than QNAP.
Just be aware that connecting your NAS to the internet (in order to automate back up to a remote location, or for remote access) brings along a whole host of extra security risks (malware, virus, ransomware, etc.) that need to be taken into account when considering your backup solution.
Even with robust passwords and following security protocols, hackers can some times exploit software vulnerabilities and backdoor access that is out of the user’s control. For example, take a look at the Qlocker ransomware that targeted tens of thousands of users worldwide.
100%. For me, I’m protected by my offsite backup. That one is not connected to the internet or any computer at all.
Very useful, thank you for making me think more thoroughly about my poor back-up practice.
One point you do not cover is version back-up.
Very occasionally over the past decades, an important file has been corrupted (usually by me). Having an old, un-corrupted, file would have been very useful in reconstructing a useable file.
Can you suggest software that provides generational back-up of files?