Table of Contents
What Is an Extension Tube?
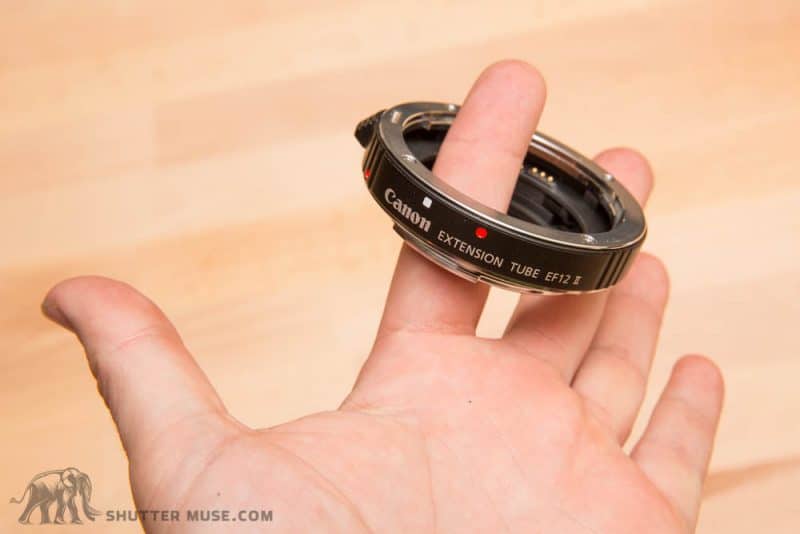
An extension tube is a spacer that sits between your lens and the camera body to alter the MFD (minimum focus distance). The MFD of a lens is a measurement of the closest point a subject can be from the camera’s sensor, whilst still being able to focus. If a subject is closer to the sensor than a lens’ MFD, you cannot focus on that subject.
The thicker the extension tube used on a lens, the higher the lens magnification becomes as you’re able to move the lens much closer to the subject and still achieve focus. What all this means is that you can turn a normal lens into something with much a much higher magnification factor to achieve macro-like images, without needing a dedicated macro lens.
Later in the article I will discuss the knock-on image quality issues caused by extension tubes, but the other important thing to realise is that when extension tubes are in place, you can no longer focus all the way to infinity. This has few practical implications because most people are using extension tubes to try to focus on something at a very close distance, but it’s worth knowing so that you don’t think your lens is broken when you find it’s no longer able to focus on something further than a few feet away. It’s for this reason that you should generally not leave an extension tube in place all the time. Instead it’s something you need to carry in your bag and use when it makes sense to do so.
How Do Extension Tubes Affect Image Quality?
Unlike teleconverters, extension tubes have no optics in them at all. This means that in most circumstances they have very little effect on image quality. The tricky thing about this point is that every lens reacts very differently to using extension tubes, so it’s hard to deliver a sweeping answer to this question.
When manufacturers design the optics inside a lens, they take into account distortion and try to correct for it as much as possible. Focusing a lens does move the optics inside a lens, so that usually means that the amount of distortion varies depending on how far away your subject is from the lens. Lens designers try as hard as they can to correct for distortion at the most important points in the focal range of a lens. The result is that some lenses are sharper than others when they are used at the minimum focus distance.
Take a macro lens for example; The designers know that it’s going to spend much of its time being focussed at the absolute closest focus point, so they correct distortions for that point. Often a macro lens is at its absolute sharpest when used at the MFD. Conversely, super telephoto lenses tend to be used for focussing on objects that are quite some distance from the lens, so the opposite is true.
What all this means is that every lens performs differently at the MFD, and you can’t necessarily trust that an expensive, well regarded lens is going to be super sharp at the MFD. Extension tubes have the effect of magnifying these imperfections on the sensor, so if you start with a lens that performs poorly at the MFD, you’re going to notice it pretty quickly once you start using the tubes.
A great example of this is found in the section further down this guide where I tested the $130 Canon 50mm f/1.8 STM with extension tubes, and the $2300 Canon 24-70 f/2.8 L II with the same tubes. The “nifty fifty” actually performed much better in terms of overall sharpness with extreme extension. Close examination of my 24-70mm images showed considerable distortion and loss of fine detail. In normal usage I would regard this very same lens to be one of the sharpest EF lenses that Canon have ever made, so it just goes to show that not all lenses take well to being operated outside of their designed parameters.
For many people, the whole point of using extension tubes is so that you don’t have to buy a new (macro) lens. You’ll most likely have to use whatever lenses you already have. After purchasing the extension tubes, though, make sure to test them out on all your lenses to figure out which ones respond best to this kind of usage.
The other side effect of extension tubes is that they can cause vignetting when used on lenses that are set at, or close to, their widest aperture. The amount of vignetting is dependant on the lens, but also very dependant on the thickness of the tubes you are using. 12mm extension tubes rarely prove to be much of an issue in this regard, but once you start getting into the 20mm or greater thicknesses, you’ll want to pay attention to this and stop your lens down to counteract it.
Extension Tubes and Effective F-stop
The other thing you’ll notice if you are manually exposing your images is that there is significant overall light loss when extension tubes are used. This occurs universally across the image, so it’s distinct from the previously mentioned vignetting. The process of shifting the lens further away from the sensor actually increases the aperture of the lens, so your image gets darker and your depth of field will increase just as if you had changed the aperture setting of the lens via the dial on your camera. The difference is that this change in aperture isn’t actually shown on the camera, because the camera doesn’t know how much you have extended the lens. If you aren’t deeply familiar with f-stops then I’d recommend brushing up by reading my Understanding F-Stops article.
The important point that’s hidden within that previous article is that “The diameter of an aperture is equal to the focal length, divided by the f-number”. This means that f-stop is directly related to the focal length and since focal length is related to various dimensions in the lens design, extension tubes also change the effective focal length of a lens. This in turn causes a change in effective f-stop.
In practice, you probably wouldn’t notice it if your camera was set to some sort of automatic exposure mode because the camera will compensate for it. What you should remember, as a rule of thumb, is that by the time you get close to magnifications of 1:1, the effective f-stop of the lens will have changed by about 2 stops. That means you, or your camera, are needing to compensate for this with a higher ISO, or a shutter speed that’s 4-times longer than you’d need without those tubes.
It could make the difference between being able to hand-hold the lens, or not. And it could also make the difference between being able to get a sharp shot of a small moving subject, or not. In low light, if you are struggling to get the exposure settings required for a sharp shot, then it might be a good idea to use a shorter extension tube to gain back some of that lost light, and therefore maintain a faster shutter speed.
Another consequence of altering the f-stop of a lens in this way is that less light is getting to the camera’s AF sensor if you are using a DSLR. As a result, you may find that AF performance is decreased in low light when using an extension tube. This is less of an issue with newer mirrorless cameras where AF is performed on the imaging sensor with phase detect autofocus, but it might still have a small performance impact.
In practice, whether using a DSLR or a mirrorless camera, most people use extension tubes with static subjects so you can always tun on live view and focus manually. You should also remember that this light loss will occur with any brand of extension tube. It’s simply a mathematical function. Any change in AF performance isn’t linked to the brand of extension tube that you are using.
Calculating The Change In Magnification from an Extension Tube
The magnification of your existing lens can usually be found in the lens specifications from a manufacturers website. Once you have that magnification, you can calculate the new magnification with an extension tube, using the following formula:
New magnification = Native lens magnification + (extension amount/focal length)
Example 1: The Canon 50mm f/1.8 STM has a native magnification of 0.21x. If we use a 12mm extension tube on it, our new magnification will be 0.21 + (12/50) = 0.45x
Example 2: Using the same Canon 50mm lens with stacked 12mm and 25mm extension tubes would give us a magnification of 0.21 + ((12+25)/50) = 0.95x
0.95x magnification is very close to life-sized 1:1 that you would get in a true macro lens!
Calculating the Change in Minimum Focus Distance from an Extension Tube
-Added July 2017
When I first published this post I didn’t delve into the mathematics of calculating the new MFD of a lens when the extension tube is in place. It’s a bit more involved than the change in magnification and I thought most people would gloss over it. I did receive a comment asking how to calculate this though, so if you are particularly interested then you can go to a separate (and quite in-depth) tutorial that will walk you through the math for figuring out your new theoretical MFD when using an extension tube.
Extension Tube Examples
In order to demonstrate how these tubes work, I set up a test subject and then photographed it with several different lenses, both with and without extension tubes. Note that each time a new photo was taken, the camera has been physically moved closer to the subject. The tubes themselves do not “zoom in” in the same way that a teleconverter would do.
For these examples I’m using Canon EF lenses because that is the system I was shooting with at the time this guide was created. You can of course get extension tubes for all other systems such as Fuji X, Canon RF, Nikon Z, Sony E-mount and Nikon F-Mount.
You can expect the same kinds of results with whatever system you are using, so don’t get too hung up on the actual lens that is being used in the examples. Instead, concentrate more on the type of lens: Telephoto zoom, medium zoom, pancake prime and standard prime. You almost certainly own some lenses like these yourself, so think about how you could expand their usefulness using simple extension tubes in the same way.
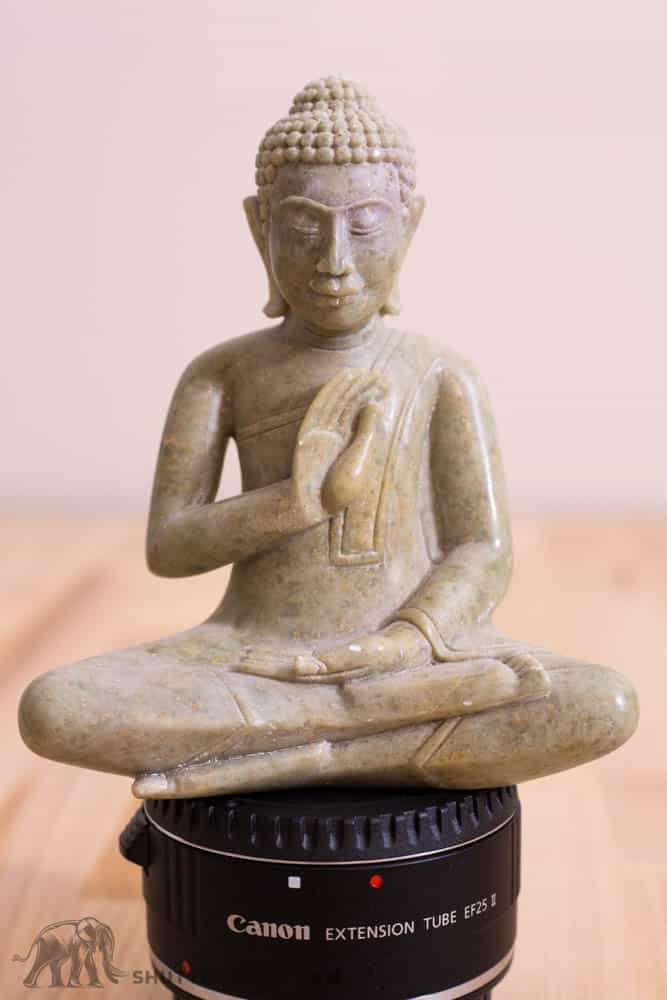
Canon EF 50mm f/1.8 STM
I particularly wanted to include this lens because it’s by far the most cost-effective way to use extension tubes for macro-like photos. This lens costs around $120 and has a minimum focus distance of 1.15 ft./0.35m. This is already quite a close focus distance, and that makes it a great candidate for use with extension tubes. In general, 50mm prime lenses are great options for extension tube usage, so if you’re not a Canon user, be sure to check out the equivalent lens for Nikon, Sony, Fuji or whatever brand you use.



Canon 40mm f/2.8 STM
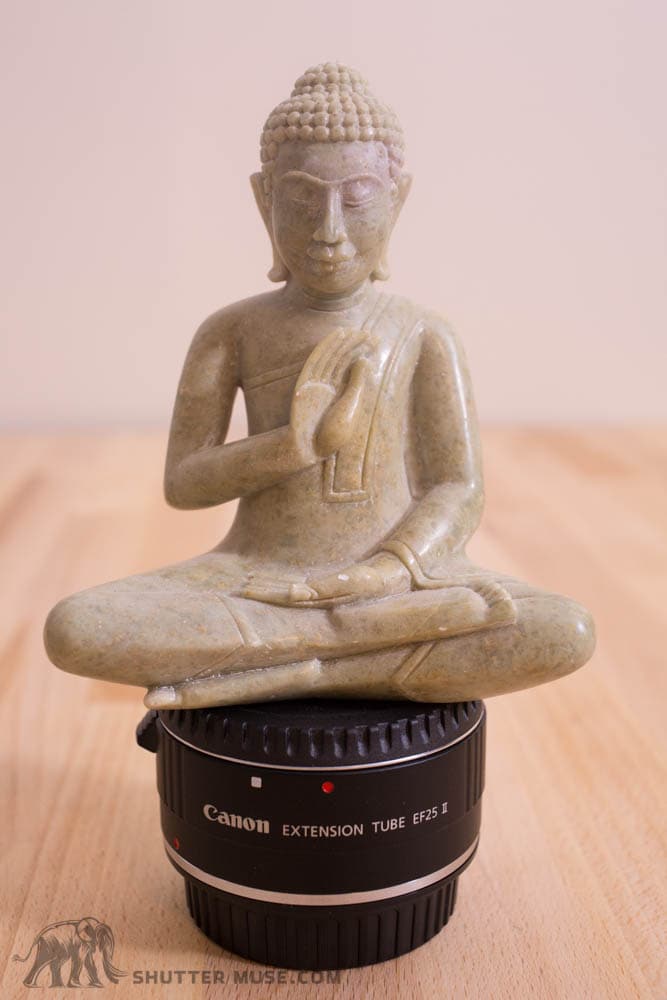
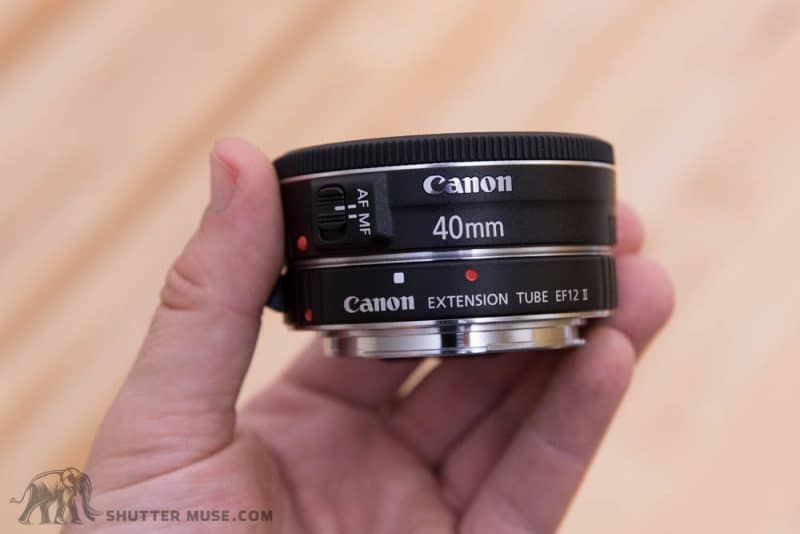
This Canon 40mm pancake lens is another great option for Canon users because it already has an MFD of just 0.3m. Results are fairly similar to the Canon 50mm f/1.8 STM, but the 40mm pancake is so small, you could call this a pocket-sized macro lens! Pretty awesome!



Canon 24-70 f/2.8 L II
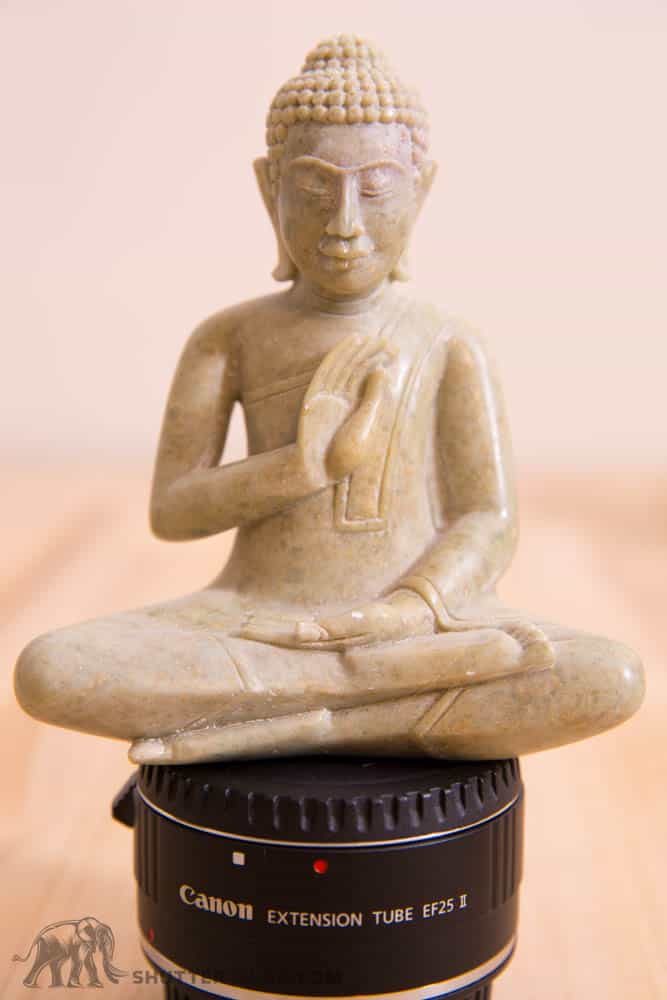
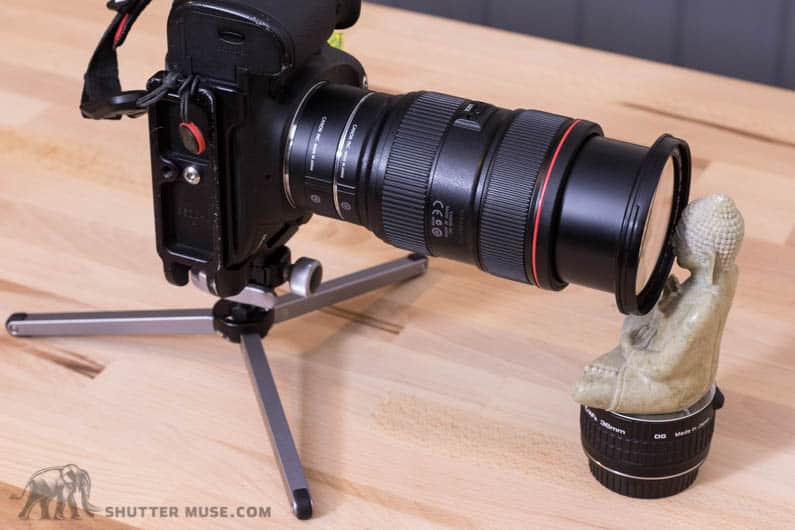
I’ve included this lens because it demonstrates the reason why smaller prime lenses are more suitable for usage with extension tubes for macro work. I performed the same test as with the previous two lenses, but ran into troubles when attempting to use 25mm tube. The problem is that the minimum focus distance is a measurement from the camera’s sensor and NOT the front element of the lens. That means that with physically longer lenses, particularly ones that extend while zooming like this one, you can actually reach the point where the MFD is inside the lens and you can never focus at that point. Of course you could move the subject back away from the lens, but then you might as well not bother with the extra extension tube at that point.
The other problem is the physical proximity of the subject to the lens. The lens eventually blocks light from falling on your subject, and if you’re trying to shoot small insects, good luck getting a lens this close to them!
Canon EF 100-400 f/4.5-5.6 L IS II
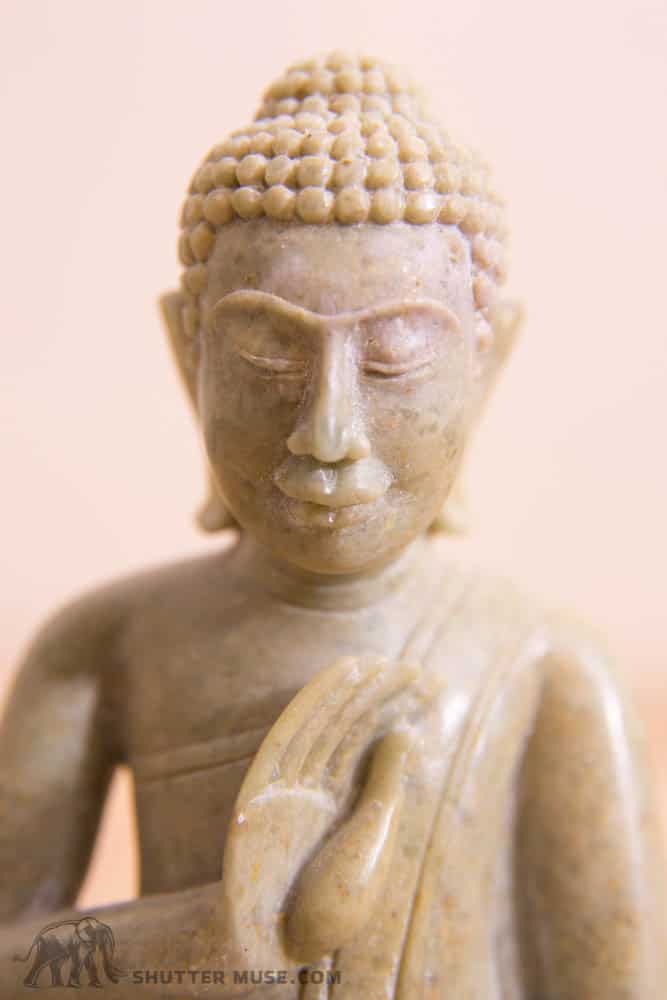
The reason I’ve chosen to include this lens in the examples is to demonstrate the difference between using extension tubes on shorter and longer focal lengths. Compare these images to those from the first example of the 50mm lens, and you’ll see that the difference in subject size varies much more greatly with shorter focal lengths.
For the 50mm lens there is a drastic difference between what you can capture with the native 50mm and what you can capture with the 37mm of extension tubes. The same can’t really be said for that on this longer focal length zoom. Yes, there is a noticeable difference, but it’s not what I would call drastic, so it’s worth understanding this difference as you get into longer focal lengths.
Despite the EF 100-400 lens having an admirably short MFD for a 400mm lens, the end result isn’t nearly as “macro like” as the results you get with the shorter prime lenses. For this reason, many people choose to use a close-up lens with longer focal length lenses, rather than using extension tubes. Extension tubes work best for adapting short focal lengths, close-up lenses work best for adapting longer focal lengths.
Of course one advantage this longer focal length setup does have, is that you aren’t as close to the subject. This makes it a good option for small animals and insects where a closer presence could cause them to flee.




Types of Extension Tube
Extension tubes come in several varieties but they are usually discussed in three distinct categories.
OEM Extension Tubes
These are the most expensive kinds of extension tubes and they are manufactured by the manufacturer of your camera, such as Canon, Nikon, Sony or Fuji. They allow full autofocus when used with compatible lenses, and you can communicate with the lens via the camera in order to change the aperture or engage image stabilization.
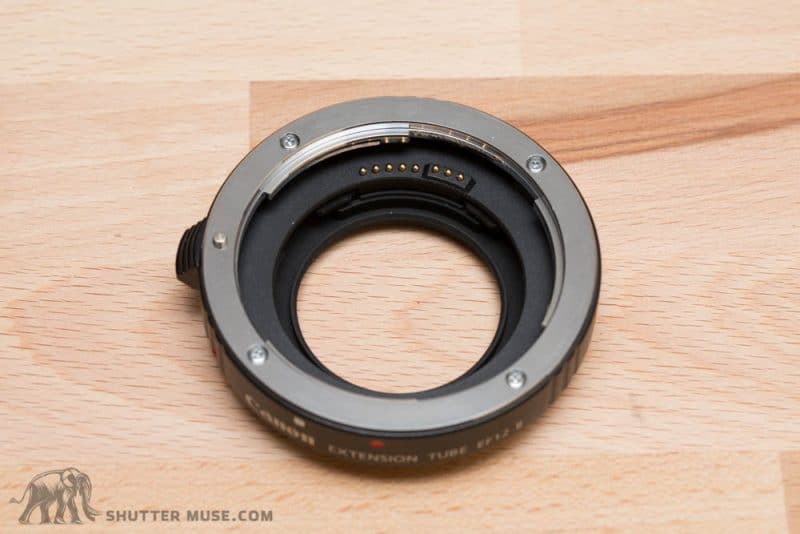
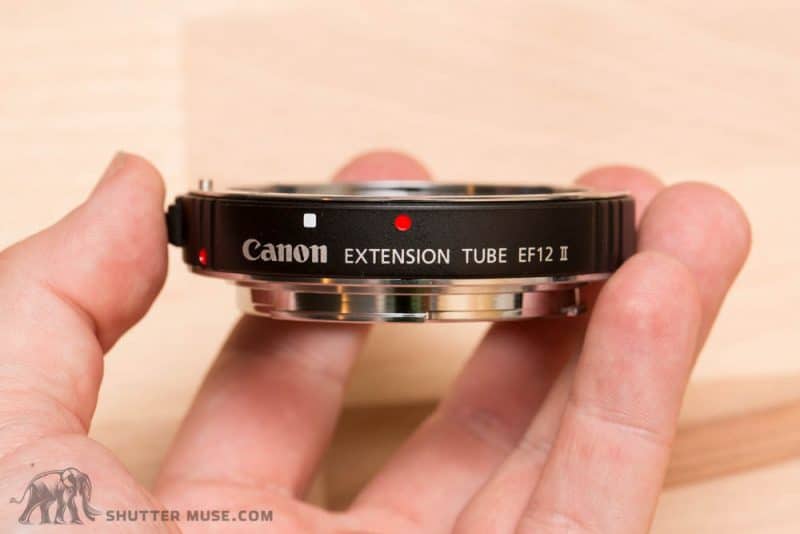
Third-Party Extension Tubes (with AF)
Third-party tubes are any ones that are not made by the manufacturer of your camera or lens. Popular third party extension tube manufacturers include Kenko, Vello, Fotodiox and Neewer.
When it comes to buying lenses many people really prefer to buy the ones that are made by the brand that makes their camera. In many cases (but not all) these do tend to be of a higher quality. Since extension tubes are really just spacers, and contain no optical elements, it’s much easier for third-party manufacturers to make competitive products.
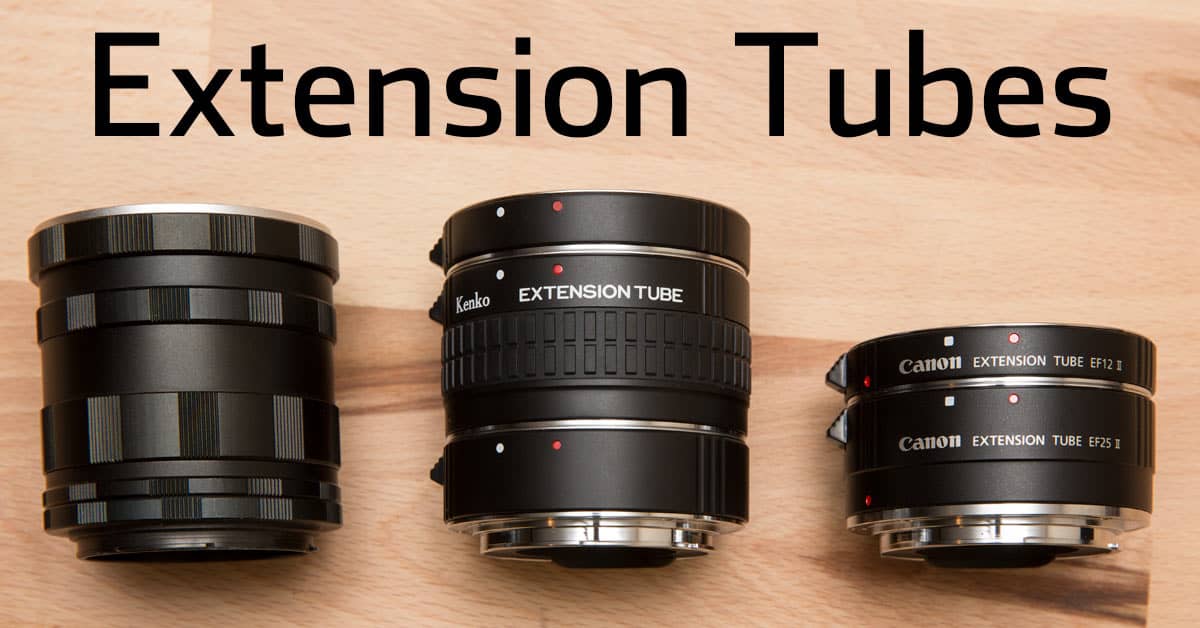
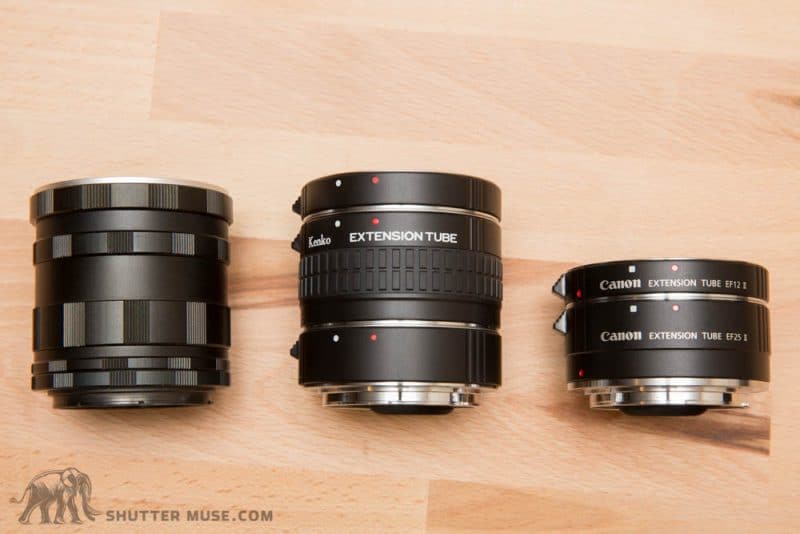
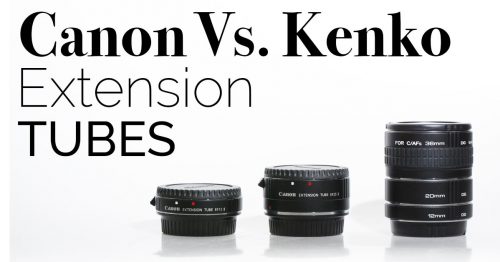
Third-party extenders are always much cheaper than OEM tubes, typically 50% of the cost or less. As you can see below in the comparison between the Canon EF and Kenko EF tubes, it’s often hard to tell them apart!
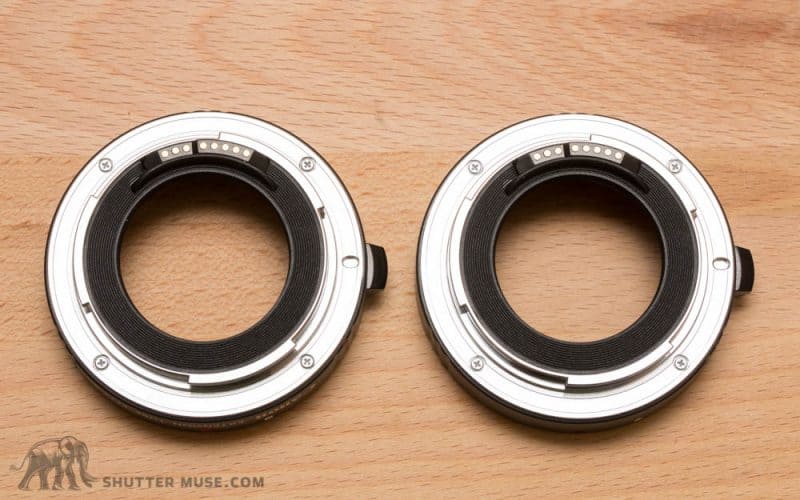
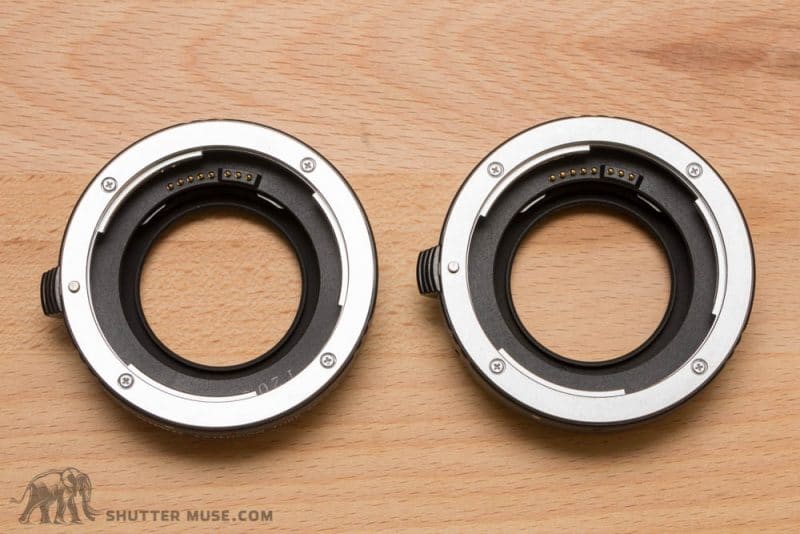
Third-Party Extension Tubes (without AF)
The next type of tube you can buy is even cheaper than the previous ones. In fact there are many Chinese brands that sell them for prices as low as $10. These kinds of tubes do not have any electronic contacts in the mount, so you can’t autofocus with the lens, and you can’t even adjust your aperture because the camera has no way of communicating with the lens.
These can be a cheap way to give extension tubes a try, but there’s no getting around the fact that they are much less convenient than tubes that do have electrical contacts. Most people will find that these cheap tubes end up gathering dust in a closet after a couple of shoots. By all means use them to verify that you might enjoy using extension tubes, and that you have a lens that would suit extension tube usage. But if you want to do some serious macro photography it is definitely worth paying for the more expensive automatic ones so that you can adjust your aperture.
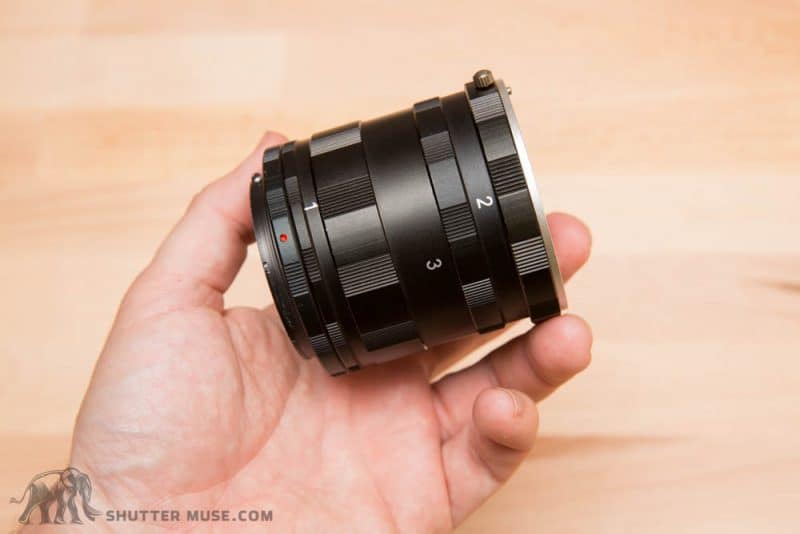
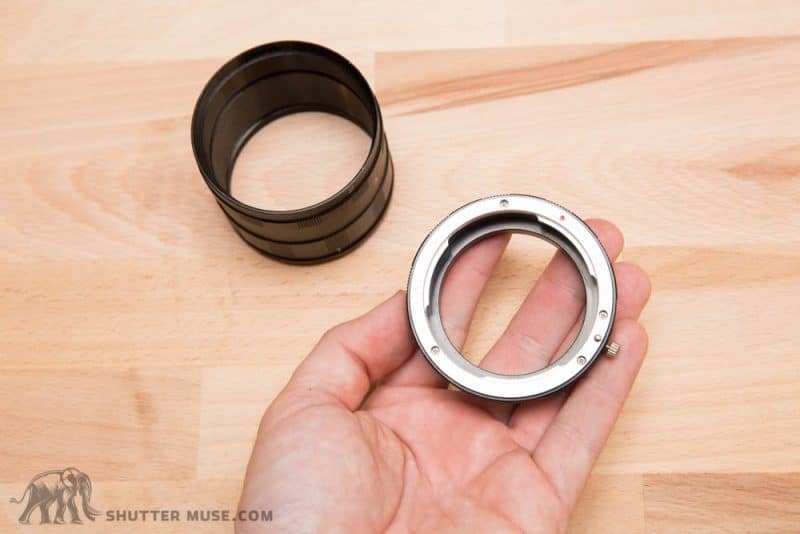
the most popular ones being the Kenko tubes. I’ve previously written a direct comparison between the Canon EF extension tubes and the Kenko EF extension tubes.
How to Change Your Aperture When Using Manual Extension Tubes
In most circumstances the following procedure will work as a way to manually adjust adjust the aperture of a lens that does not have a dedicated aperture ring on it.
- Mount the lens directly on the camera
- In aperture priority or manual mode, select the aperture you want to use in your image
- Hold down the DOF preview button on the camera. This causes the aperture to engage to the chosen value
- Whilst holding the DOF preview button, remove the lens from the camera. This causes the aperture to stick at the requested value
- Mount your extension tubes to the lens
- Connect the whole lot to the camera body again
As you can see, it is a real pain in the butt to have to go through this process every time you want to change your aperture value! My first set of extension tubes was just such a set, and I think I used them once before deciding to buy some that included electronic contacts instead.
Which Kind of Extension Tubes Should You Buy?
I have to be honest and say that I do not think the fully manual, contactless, super cheap extension tubes are worth the hassle at all. I tried them and hated the experience! They may be ludicrously cheap, but since the third-party AF compatible ones aren’t even that expensive I really would recommend saving up for them, or the OEM ones if available.
So what about choosing between the OEM or the third-party ones? It’s hard to make a sweeping statement in that regard because I haven’t used all the third-party ones that are available. I tested the Kenko EF ones and came away much more impressed than I expected to be, but I still choose to own the OEM Canon ones myself. My personal reason for that choice is that I’m using these things on lenses that cost over $10,000 when they are paired with my super telephoto lenses. If I think there is even a 1% chance that the Canon ones are stronger or more reliably built than then third-party ones, it makes sense for me to use the Canon ones. In the grand scheme of things, the price difference is a tiny fraction of the cost of my lenses.
Having said that, for most people I do think that good third-party ones like the Kenko set are the best option. There’s certainly no difference in performance between those ones and the Canon ones. My choice to use the Canon’s is specific to the lenses I’m using them with, but I would be much more inclined towards the third-party ones if I was just using smaller, cheaper prime lenses with them. I think the Kenkos, or similar third-party ones are probably the right choice for 95% of people out there.
Sony E-Mount
Sony do not make OEM extension tubes at all. Given the age of E-Mount it seems unlikely we will ever see OEM extension tubes, so Sony shooters will have to use a third-party solution. The best ones are the Kenko E-Mount extension tubes. Avoid the Viltrox ones. I have heard some really bead stories about them.
Canon RF Extension Tubes
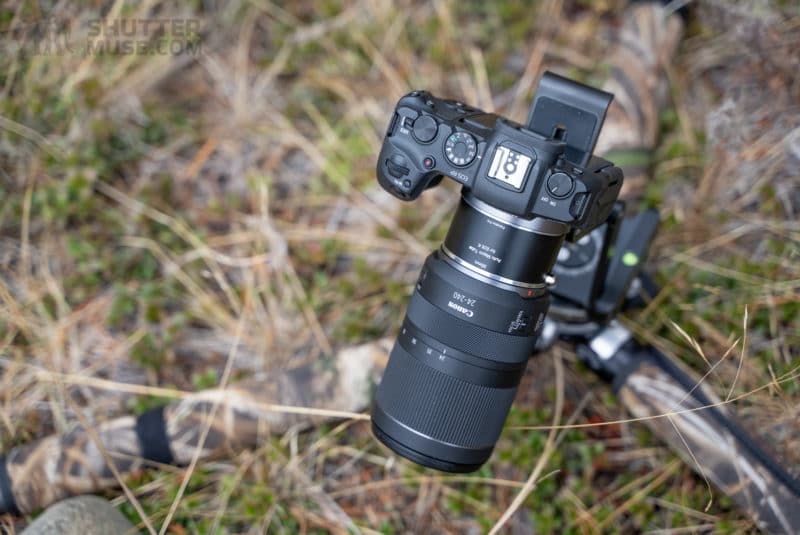
At the moment Canon do not make an OEM set of extension tubes for their mirrorless RF mount. This mount is relatively new, so we may yet see Canon introduce some official ones at some point.
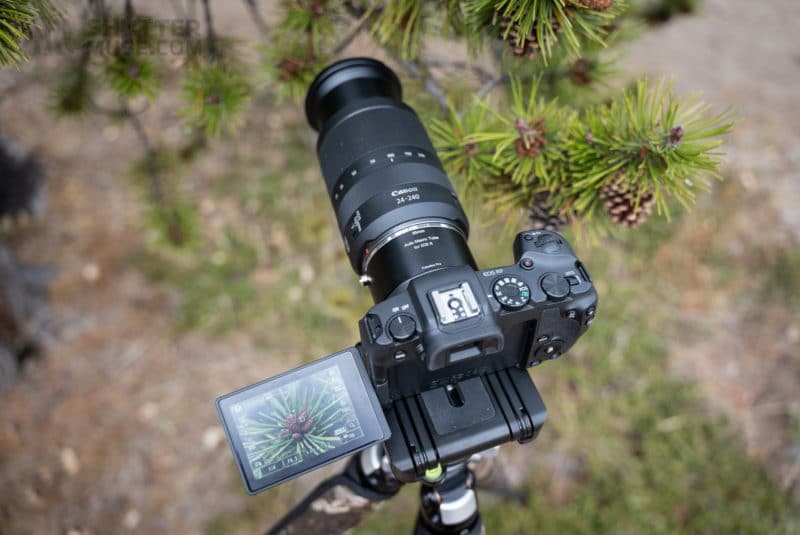
For now, the best Canon RF extension tubes are the ones from Fotodiox. They are built like a tank with an all metal design. This includes a metal mount with a full set of electronic contacts. In my testing they offered excellent AF performance and no issues whatsoever in controlling an RF lens from the camera. They are available in two sizes of extension: 35mm and 15mm. For Canon RF mirrorless shooters, this is undoubtedly the way to go.
Look for Light Leaks
Sometimes with cheaper extension tubes stacked together, it’s possible for a small amount of light to creep into the tubes where they are joined together. If you experience areas of low contrast in your image, or odd looking bright sports or artifacts, this could be the problem. It’s easily solved by using some black electrical tape around the joins in the tube stack.
Using Extension Tubes to Stack Extenders
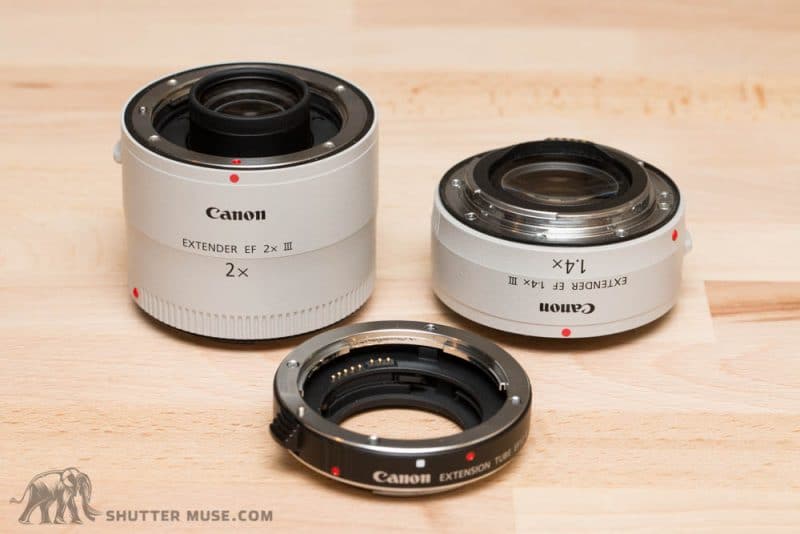
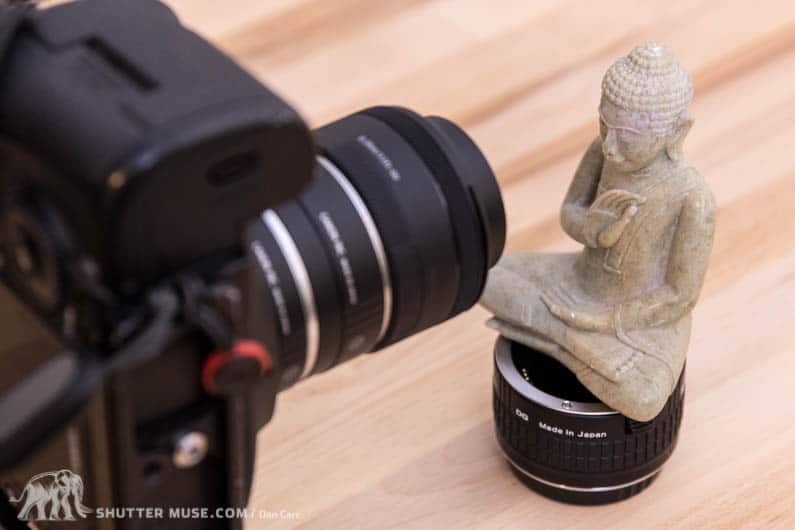
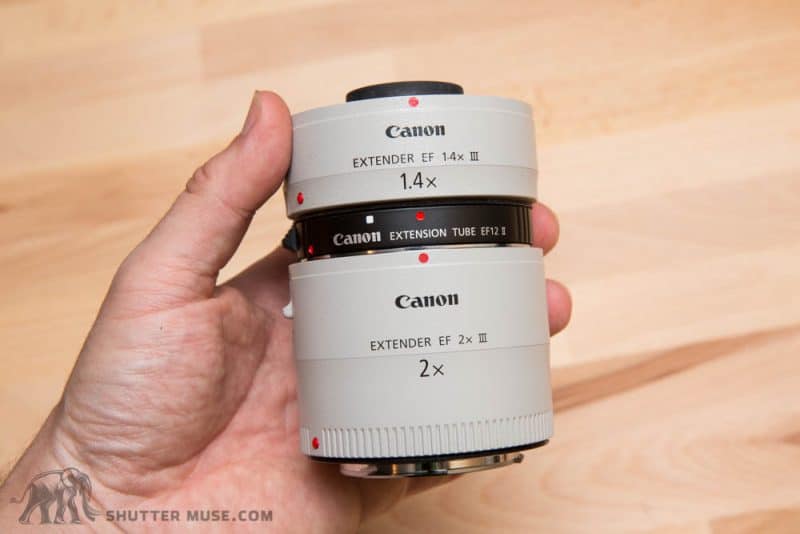
Another useful way to use extenders is to use them for stacking together two extenders that will not natively connect due to protruding optical elements. For example, as you can see in the photo below, Canon’s extenders have an optical protrusion that would physically prevent them from connecting directly to a lens that has a rear element close to the mount. By using a 12mm extension tube between them, they will connect without a problem. It’s also a very convenient way to store multiple extenders in your camera bag!
Summary With Pros & Cons
I hope by now you’ve come to the same conclusion that I did when I first learned about extension tubes; These things are very useful, and highly affordable! If you like nature photography then they can come in very handy for photographing small animals or plants, and if you’re a travel photographer than they are great for picking up detail shots of food using your existing travel zoom lens, or a fast prime. There are very few photography accessories out there that can make such a vast difference to an image for such a small amount of money. When you take into consideration the fact that they also weigh very little, making them easy to carry, you can see why I’m always recommending them to people.
Extension Tube Advantages
- Cheaper than buying a dedicated macro lens.
- Light weight and easy to pack compared to carrying a dedicated macro lens.
- Often minimal loss in quality due to lack of optical elements.
- Stackable to provide magnification options depending on your subject.
Extension Tube Disadvantages
- A lens can’t focus at infinity with an extension tube on it.
- Minimal effect to magnification on longer focal lengths.
- Can cause vignetting at wide apertures and stack heights.
- Increases the effective f-stop of the lens, thereby requiring a longer shutter speed or higher ISO to compensate.
Cool Story From a Reader
I recently received a really great email from a reader, Lynda Chan, that related to this specific extension tube guide, so I asked her for permission to share it here with future readers because I think it’s a wonderful story, and great inspiration!
Hi Dan,
A while ago, you did an article on extension tubes, and I was quite interested, since I had been thinking about macro. Anyway, I found one on Kijiji, for something like $25 or $50. I got it, and fooled around with it a bit, and liked it.
Tonight, I came home: “Kids, here’s your frozen pizza. I have 4 solid hours of editing work to d–spider! Quick–here’s a flashlight! Don’t move or hardly breathe!” I ran to my room and stealthed back out, extender on my 24-70mm f/2.8. Jumping spider with mosquito prey, right on my kitchen counter. Always told the kids jumpers were nice, because they eat mosquitoes–now I have proof.
Here it is, handheld, manual focus, kid-held-flashlight lit 🙂 I was pretty excited about this one, and sure wouldn’t have got this shot if I hadn’t read your review on these 🙂
Thank you so much, Dan! ???




Hi Dan,
Great post! I had actually never heard of extension tubes before and I’d just fudge around trying to find the right focal distance to take a sharp macro picture. I’d take it at a really high resolution, and start cropping in Photoshop. Very amateur, but hey!
I should look into extension tubes. Thanks!
Thanks! Yeah they are such a cost-effective way to get into macro photography! Definitely worth checking them out. Glad I was able to introduce you to something new, Shabbir!
Thank you, I read guide to extension tubes and also found the linked article about FStops – extremely well written and easy to follow [and have read more than a few]. Thanks very much for sharing your work and for the time you invested. Jerry
You’re very welcome, Jerry! Glad you found them useful.
Hi Dan,
Thanks so much for the great article! Really informative and easily accessible for the amateurs like me!
I’m just wondering if you have any experience or knowledge of using extension tubes with a dedicated macro lens? This wasn’t something you touched on in your post, but I have come across mention of it elsewhere online and I just wondered what your take on it would be?
Best wishes,
Matt
You’re welcome, Matt.There’s no reason why you couldn’t do that, I just think it would not be necessary for most people unless you are really focussing on tiny tiny creatures like a fly or an ant or something like that. All it would do is to give your macro lens an even closer focussing capability.
One thing to remember is that macro lenses often have “floating elements” that are engaged at close focusing distances.
Sometimes, people use an extension tube with a macro lens, then back off the focus of the macro lens in order to achieve focus.
This at least partially (depending on how far from minimum you change focus) disengages the floating element group, which then degrades macro performance!
So if your macro lens won’t get you close enough, leave the macro lens on its closest focus, put on your thinnest extension, then move back and forth to achieve focus, rather than moving the focus on the macro lens. You can see the difference!
Fascinating comment, Jan. What you say makes total sense when you think about it, but I had never thought to express it to people before. Thanks for the hugely inciteful comment.
Dan, thanks for the article. How would you go about calculating the new minimal focusing distance when extenders are inserted? Appreciate you put the formula for the new magnification.
best,
brian
Hey Brian,
This is a most excellent question, and one that requires significantly more mathematics than would be useful in a comment. What I’m going to do is write a brand new post about this topic, so look out for it shortly on the front page of the site!
Brian, I have now completed this new article here: http://shuttermuse.com/how-to-calculate-mfd-of-a-lens-with-an-extension-tube/
I hope you find it useful, it wasn’t the work of a moment haha, Give it a share if you can, it really helps me out 🙂
Thank you so much, Dan, for this well written and informative article. I am very likely going to buy some extension tubes, but I am really unsure about the *risks* of buying cheaper quality ones. I read some reviews on cheaper, third party extension tubes that said they had trouble disconnecting them. Others said even the weight of the lens with the Canon extension tubes caused the lens (and therefore optics) to “sag” slightly and result in a blurrier image (which could be corrected by physically supporting the lens). Even though my camera and lens amounts to a few $K and not $10K like yours I am still very unwilling to risk damaging the electrical contacts or fine components of my lenses and camera with cheaply manufactured extension tubes. Have you heard of any more risky things one should consider with cheaper extension tubes? Are there any brands that are most trustworthy for solid manufacturing, in your experience?
I shoot with a Canon 7D and intend to use my 40mm f/2.8 Canon prime lens with extension tubes. I do landscape photography and carry a pack half my body weight, so fitting another large lens into my pack is the last thing you want to do.
If you like to photograph the wilderness, you should come visit Tasmania sometime, where I live. 80% of the flora and fauna are endemic to our island, and nearly half of it is preserved parkland and/or World Heritage Area. Every direction you point your camera is photogenic.
Thanks again–
Rebecca
I think you covered the most likely negative issues with cheaper ones, although one might consider that third party lens mounts sometimes have issues engaging the lock pin as well. If the pin doesn’t engage, the lens could drop off the camera entirely. I have not had this happen (fall), although with another accessory I have had it so that the pin did not engage. Kenko is a solid brand for third party tubes, these are in some of the photos on this page. If you are concerned, I would go with them, or the official Canon ones. How amazing that you live in Tasmania! I have actually been thinking about coming over to hike to Cradle mountain and photograph that area. Have you been?
Thank you so much for this, Dan. I really appreciate the free, articulate and solid advice. I think I’ll probably go with Kenko.
Yes, I go bushwalking and backpacking frequently here in Tasmania, and I’ve gotten into landscape photography the last few years because it’s so gorgeous here. And, yes, I’ve been to Cradle lots of times. Here is a photo I took of Cradle Mtn from Dove Lake a little over a year ago:
http://jtbarts.com/homepage-gallery/cradle-mountain-dove-lake-sunset-cradle-mountain-national-park-tasmania/
Here is another link to my Tasmanian Wilderness Landscape Photography Series (I’m a full time professional Christian artist; photography is a relatively new thing I’m taking on). These are a just a handful of the photos I’ve been able to get up on the site, I have HEAPS more I need to edit and get on the website……one day when I can find the time.
http://jtbarts.com/landscape-photography-gallery/tasmanian-wilderness-landscape-photography-series/
If you ever come down I’d be more than happy to tell you some of the best places to go for landscape photography, which aren’t always on the tourist map. You’ve got my email. The best time to come is probably November/early December, before the summer tourist rush and plane tickets are cheaper. The second best time is probably in March or April cuz we aren’t into the cold, winter yet and the weather is most stable.
God bless and thanks again!
Wonderful! Thanks for the links, Rebecca! And the kind offer for help. Really appreciate it 🙂
Hi Dan
First, thank you for your informative article. I have used extension tubes with a 70mm macro lens in the past, with fair results. Since recently buying a 300mm lens for dragonflies and damselflies, I wondered about using extension tubes to increase the magnification and after reading your article I started experimenting. The results appear to be promising, though my comparisons so far have been shots of a piece of kitchen paper, torn to length at about 40mm (the length of a typical damselfy in the UK) since the weather today is probably too cloudy and breezy to be a good day for these insects. The torn fibres are useful in imitating the hairy details of my eventual targets.
With no extension, the 300mm lens has a minimum focus distance of about 1100mm (to front of lens) giving an image 43% of the width of a Pentax APS-C sensor.
With 52mm of extension, the minimum focus distance is about 700mm giving an image 85% of the sensor width.
So, extension tubes could be useful on a longer lens and I am looking forward to trying this in the field – double the effective magnification and the fibre details seem to be good. In the past I have had to get much closer to the subject with a macro lens to almost fill the frame like this and of course that can make the insects nervous.
By the way, my two extension tubes (26mm each) are second-hand 2x teleconverters with the glass removed, so I can still control the aperture from the camera and they didn’t cost much.
Thanks again for inspiring me to try this.
Best regards
Steve Hewitt
You’re welcome! I’ve never heard of extenders with the glass removed! What a fascinating idea.Thanks for sharing this! Hope your photos of the damselfly work out. Would love to see one when you get it, send me a link 🙂
Lenses eh? Oh well. Despite the continuing cloudy weather, I tried the 52mm extension today and discovered that the maximum focal length is now something less than two metres, so it isn’t the all-round solution I was hoping for. The link is to a shot from today, using flash because of the gloom. It gives an idea of the pseudo-macro possibilities with a longer lens and I suppose the lesson I take from this is to suck it and see, then practice with each setup – getting the correct exposure becomes an issue with the extension tubes. The insect in the link is no longer than 50mm and there is no crop.
I read about removing the glass from teleconverters a few years ago while I was trawling for ideas online – I can’t claim it as my own.
https://500px.com/photo/224657281/female-beautiful-demoiselle-by-steve-corvus
Wow, so cool! Incredible patterns in the wings. I can see why you are drawn to that subject. Thanks for sharing, Steve!
Hi, Thank you for the article. Overall it is was very helpful, but I’m confused by this statement: “extension tubes also change the effective focal length of a lens when you add them, and this in-turn causes a change in effective f-stop.”
As you mention extension tubes contain no optics, and they, therefore, do not change the effective focal length of the lens. The lens elements have the exact same effective focal length with and without the extension tube. The extension tube just changes the placement of the sensor with respect to the back focal length which in turn changes the focal range of the lens. Given this, are you sure the extension tube changes the f/# of the lens?
Yes, I’m confident in this information. The use of the word “effective” is very important. I’m not saying that optically the field of view is being changed, but for the purposes of calculations derived from the universal thin lens formula, the effective focal length has been increased because these formulae relate to the physical length of the lens. Here is a good link to the mathematical explanation http://scubageek.com/articles/tubes.pdf
Hi Dan, can I go for the Kenko extension tube with my Canon EF 400mm f/5.6L prime lens. I would like to use it for some small birds and butterflies. Thanks!
Yes absolutely you could use the Kenko with the 400!
Thank you for the very useful article!
Hi Dan, I recently purchased a 2x teleconverter for my 18-135. Learned the hard way that it won’t stack. Using a 12mm extension tube looks like it would fit, but I’d loose a total of -4 f stops? When you are stacking for telephoto do you loose enough shutter speed that you are limited to static subjects? I’m looking for a budget birding setup and don’t want to keep pursuing impractical options for “flitting” subjects. Thanks!
You’re fighting a losing battle if you’re trying to get a 135mm lens to work for bird photography. Never going to happen in a useful way I’m afraid. Not only will you have a terrible shutter speed, but it’ll barely be able to focus, and the image quality is going to be absolutely awful. Sorry to be the bearer of bad news!
If you are budget-limited, your best bet is trying to find something like a second hand Tamron 150-600 Mk1 from about 8 years ago.
very well done, Dan!! I am printing this one out for inclusion in my gear bag. Clearly thought out and articulated!!
Jack Blanke
Metairie, LA
Thanks Jack!
Do you have any suggestions to improve the clarity when using the tubes. I have not succeeded in getting a single sharp photo with my Sony a6000 kit lens whether I used a flash or a faster shutter speed or a tripod. And whether the tube is 16mm or 10mm or both together. There’s always some blur in the result,
It’s probably motion blur from Hand shake unless you are using a tripod. You need to shoot in “A” or “S” mode and keep your eye on shutter speed. A classic rule of thumb is the number should be 1 or 2x higher than the lens length. So 100mm lens shoot at 125 shutter speed or higher. Any kit prime lens on the market will be good enough, at least not blurry. A kit zoom can have sweet spots through it’s focal range but shouldn’t create blurry images at any if them with a tube. Manually focusing with the view zoomed in is the only way to assure accurate focus. Good luck.
I would like to point out a missed “bullet point” in your otherwise outstanding article. This missed point might be the source of Stephen’s consternation.
You (correctly) stated that using extension tubes increased the effective f-stop of the lens. However, extension tube use also DECREASES the depth of field. You would think in your head the opposite, if it increases the effective f-stop it must also make the depth of field deeper, right? Wrongo. What Stephen may be seeing is that his image has a horribly narrow depth of field, with only a small section being in focus, despite the now small aperture, and the rest horribly blurry.
Extension tube (and even regular) macro photography is very DOF limited. It is one of the reasons for the inclusion of “Focus Stacking” in Photoshop and the like. You can KIND OF preserve the DOF by shooting very small apertures, but even this has limits. You need lots of light and a solid tripod to take macro photos at f22. But this will give you much more DOF than you’re probably getting. The other obvious solution is to take a series of images focused on various parts of the subject and, once again, focus stack them in Photoshop.
Thanks for contributing to the discussion!
Correct me if I am wrong… but the extension tube itself doesn’t decrease the depth of DOF. What decreases the DOF is that you can move the subject closer to the lens when the extension tube is applied. Subject to lens distance does decrease DOF.
Hi Stephen. That’s strange because there are obviously no optics in there that could cause the softness. One thing that can happen is that a lens design can have poor sharpness at its minimum focus distance. To test this you should take some test shots of something further away, anything will do! Just make sure it’s 5-10 metres away, and make sure you have your tubes still attached. Now examine those shots. Do they look much sharper? If they do, then the answer is simply that your lens is not a sharp lens when used at its MFD. Unfortunately I don’t have specific experience with Sony kit lenses so you’re on your own there. Please let me know how you get on.
Hi Dan, this is a great article and I’ve hardly gotten my big toe wet so far. I have an old Canon kit lens, EF 18-55mm, and now have a Canon mirrorless EOS R camera with an adapter ring. I can put extension tubes between this lens and my camera to get effective magnifications up to around 1.5:1 with moderate to small working distances, but I can also turn this lens around with the same extension tubes to get magnifications up to 5:1 or more with an average working distance around 3cm. Obviously there’s no free lunch so there must be some good reasons why turning lenses around to get higher magnifications is not as desirable as not turning them around. At this point I’ve only verified that getting sharp focus with 1.5:1 and 5:1 magnification is possible with a 24mm converter ring plus a 29mm extension tube. I haven’t assessed the Depth of Field or image quality from this $50 lens, but I can live with some degradation at 5:1 magnification. For serious photography and cooperating subjects I can do focus bracketing using my iPhone or MacBook Pro to control the camera.
Thanks for the kind words Roger! Sounds like that lens is actually a very good way to get in on some budget-friendly macro photography. If you ever get some photographic results you’d like to share with me, I’d be very interested to see what you get. Please email me through the contact form 🙂
I bought a 3-pack of Neewer extension tubes for $20 USD. I paired the 13mm tube with my 24mm EF 2.8 pancake lens. It takes really good close-ups with my T7i rebel. I used to have the $300 35mm 1:1 Macro lense from canon but had to return it. While that was easier to use and produced real macro, I am so satisfied with my < $200 lens setup I won't be spending money on a macro lens until I get really good income. If you don't make money with photography and really like macro, try tubes first.
Thanks for sharing your success story! Glad it worked so well for you.
Thanks for the Article. I was trying to decide on buying a ‘macro’ lens or use my nifty fifty with ext tubes. I’ll save my money to pay for gas for a photo road trip.
Hi Dan,
Thanks for this really useful article, very clearly written and easy to follow. I now have a question:
I have a Canon EOS 700D and my only non-zoom lens is a Canon 50mm f/1.8 STM (‘nifty-fifty’). With this combination I would like to be able to focus precisely on and fill the frame with a mounted 35mm slide or negative. So, my question is which (Canon EF12 or equivalent) extension tube(s) do I need to achieve this, please?
Dan, Great article. I have used extensions tubes with success on my old Nikkormat. Now that it died I am testing on a Nikon F2. This was a good reminder of all the details involved in adding a few mm between the body and lens. Interestingly, in the F2 with a DP-1 head the rabbit ears can no longer engage the light meter so I am using a spot meter and will adjust the F stop accordingly. Yea, not so fast, but then again I’m a film guy so it’s part of the turf. Keep up the good work.
Thanks John! I’m glad there are still “film guys” out there 🙂
Very interesting article. I have never used the auto tubes but might now with my EF lenses.
I have been using the old M39 Canon screw tubes adapted to my bellows adapted to my 7D and then a FD 50mm macro adapted to the front of the tube.
I use the bellows for focus as well.
Thanks Lawrence!
I’m still unclear about one thing: say you calculate the new magnification, and the new MOD. How do you know what the actual smallest possible FOV will be?
Couldn’t it be limited by the MOD being too long, so you can’t do sensor size * new magnification?
How do you check that and how do you calculate the FOV at the MOD?
I agree with you
GREAT article, I thoroughly appreciate the effort.
Four years ago I got a cheap set of ext. tubes, though I like the idea presented of buying ‘parts’ TeleExtenders & removing inner workings.
I doubt that I was rough on the tubes, hauled around a while, then they lived in a drawer. Fast forward to 2021, and the 21mm jobber had the blue aluminum face decouple from the housing. I see the metal faces are secured w/ ~4.5mm screws threaded into the housing supports that could be, let’s say, more robust. Caveat Emptor. But, I still do not take the hint.
I start w/135mm for the stand-off distance, with & w/o a 2x TeleExtender. A series or issues getting started had me going back & forth from the flower to my desk. After the final adjustment, the 13mm aluminum face comes off the 1st tube dropping the works right into my lap. I’ll try not to gripe about a breeze or a dead battery again, otherwise it would have hit concrete from a meter or more.
Buying cheap gear can give you expensive results. I was prepared for amazing images (which I got).
I was lucky to not get an expensive repair bill (different kind of result).
Thanks for the helpful article.
Cheers.
Thanks for the kind words, Marc. And thanks for taking the time to share your story, too. You certainly were lucky that this didn’t send your lens crashing to the ground!
Hi Dan,
Really nice article. I am wondering if I can use some kind of extension tubes like kenko or meiko to use with Nikon D3200 and nikkor micro 40 mm lens which is already a macro lens. And also like to use with my telephoto lens (nikkor 55-300)
Thanks in advance
Cheers!
Excellent presentation of information – thank you. Just what I needed.
Neat guide, unfortunately missing what I was hoping to find! Although most likely more niche, not being for macro, I was hoping to find some information on projection photography and telescopes.
I’m fumbling in the dark with how much length to use, and how to maximize magnification and image quality, while the sheer number of configurations has me scratching my head
Sorry, I know nothing about telescopes!
I’ve been looking into the difference between using extension tubes and teleconverters specifically for macro use and your article does the best job I’ve found at explaining it fully AND simply. Including how and why adding an extender changes the effective f/stop. Thank you!
Hi,
12-13mm is a too long ET for a 12mm lens on APS-C.
There is a shorter one for EF?
No, I don’t think so. There has to be a minimum size to be able to include the physical size of the mount.