
The WANDRD Fernweh backpack is described by the brand as “The backpacking bag for photography & the outdoors”. In fact, Fernweh means “wanderlust” in German, which gives you a good idea of how they are positioning this bag.
Update: When WANDRD first sent me a pre-production version of this bag to review, they sent me the smaller of the two available sizes. It was too small for me to draw accurate conclusions about carrying comfort, but I published my initial thoughts on the bag’s features, design and build. Some months later, I was able to get my hands on the correct size and I’m now updating this review to its final completed state.
In recent years camera bag manufacturers have paid increasing attention to the comfort of photo backpacks designed for the outdoors. Alongside the likes of F-Stop, MindShift Gear, Gura Gear and Shimoda, WANDRD now presents their challenger – the Fernweh – to an increasingly competitive market segment.

To stand a chance of even being considered alongside the backpacks made by the previously mentioned brands, a bag in this market segment must tick several boxes:
- Have a large volume (30L+)
- Be built from extremely durable high-grade material
- Offer an excellent level of weather protection
- Be comfortable with heavy loads for many hours
- Offer good options for externally carrying camera or outdoor equipment
- Offer enough harness adjustability, or size variations, to fit a range of body types and sizes
In order to offer these foundational features of a truly great outdoor photo pack, none of them come cheap. The WANDRD Fernweh is no exception to that, coming in at $349 before you choose your camera insert. This price point means its features and comfort will be closely scrutinized by potential buyers and me!
Has WANDRD ticked all the right boxes with the Fernweh backpack? Can it live up to their claims of being a backpacking bag that holds a camera, instead of a camera bag that can go on a hike? In this review, I’ll dig into these questions and explain all the features of the bag in detail.

Wandrd Fernweh Specifications

The Fernweh comes in black or Gobi Tan. I had the opportunity to test both, so you will find photos of both throughout the review. The Fernweh is also available in two different sizes to suit people of different heights: M/L and S/M
Frame Size: M/L
- Weight: 5lbs (2.2kg)
- Volume 50L
- Height: 26″ (66cm)
- Width: 13.75″ (35cm)
- Depth: 9.5″ (24cm)
- Recommended torso length: 18″-23″
- MSRP: $349 (bag only price – camera cubes are extra)
Fame Size: S/M
- Weight: 5lbs (2.2kg)
- Volume 48L
- Height: 25″ (64cm)
- Width: 13.75″ (35cm)
- Depth: 9.5″ (24cm)
- Recommended torso length: 16″-20″
- MSRP: $349 (bag only price – camera cubes are extra)
Design and Features

The bag’s side panels are made from 420D TPU coated nylon, while the main body of the bag is made from incredibly durable 630D Robic Nylon. This 630D material starts on the top pocket and wraps all the way around the front of the bag to the base, providing a durable and extremely weather-resistant shell. This fabric feels great to the touch, and you can tell right away that it’s built to last. Anyone that has concerns about the bag’s value will probably have those concerns put to rest as soon as they put their hands on the bag. It feels every bit as high-end as the price would suggest.
This bag is absolutely stacked with design features so I’m going to split the bag up into sections to try and organize the photos and discussion.
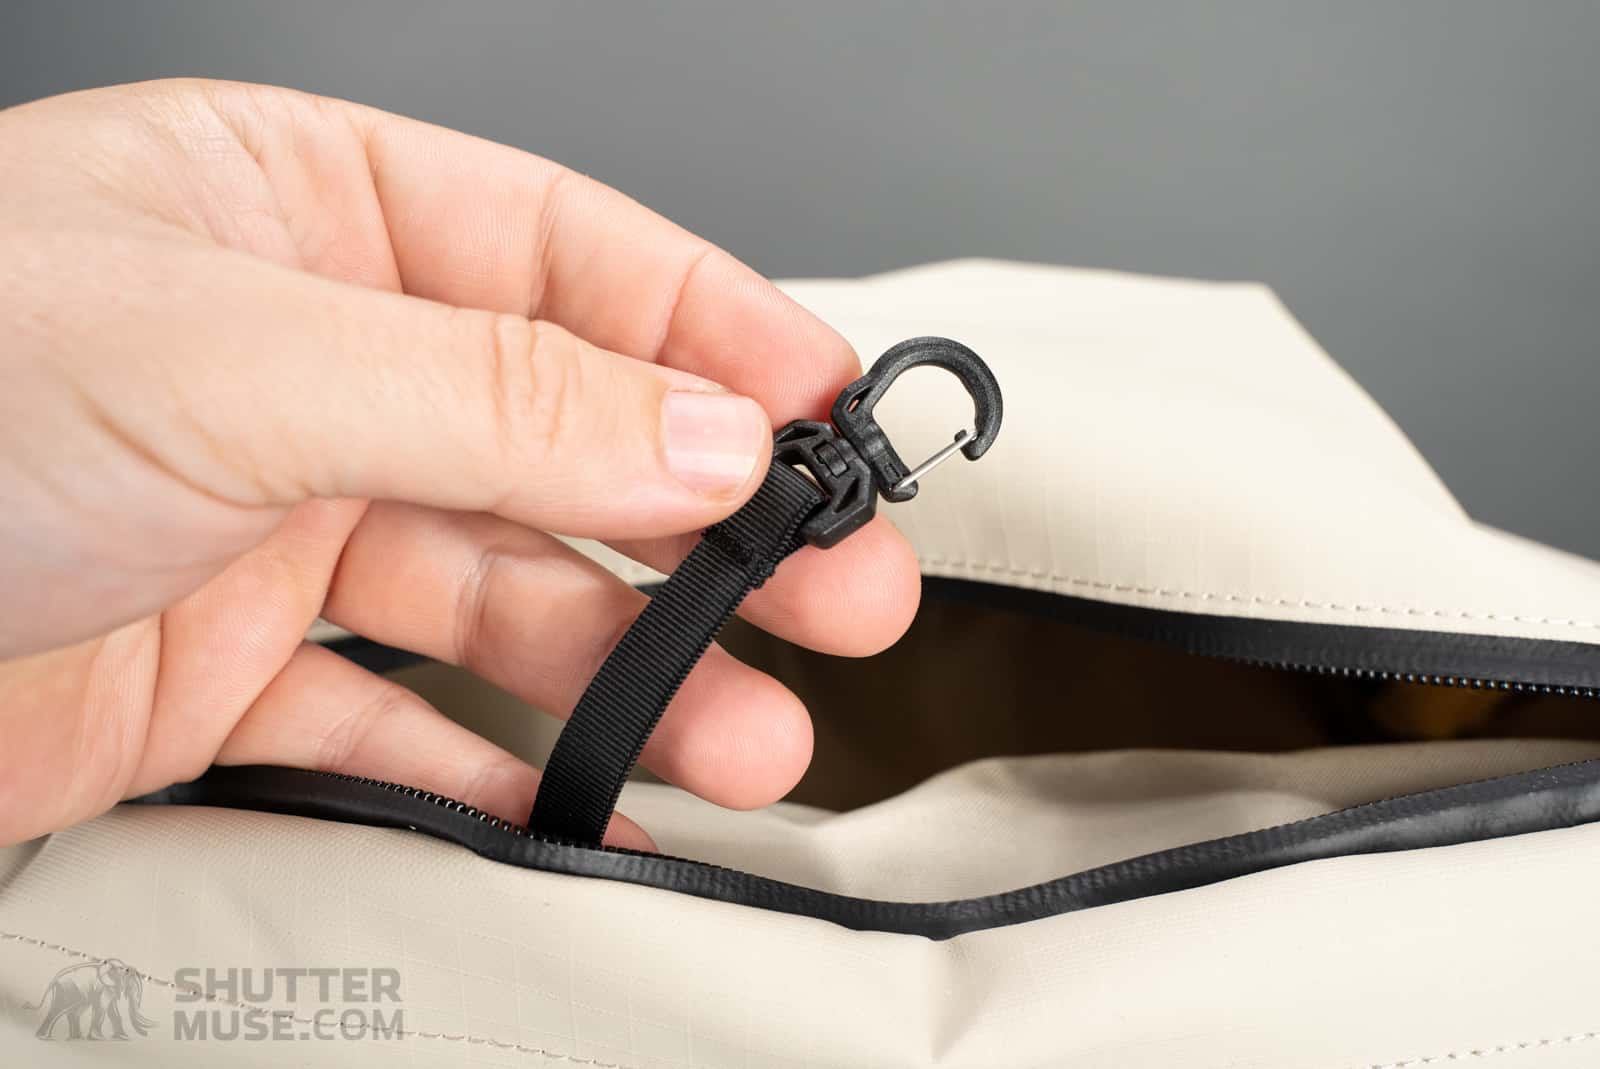
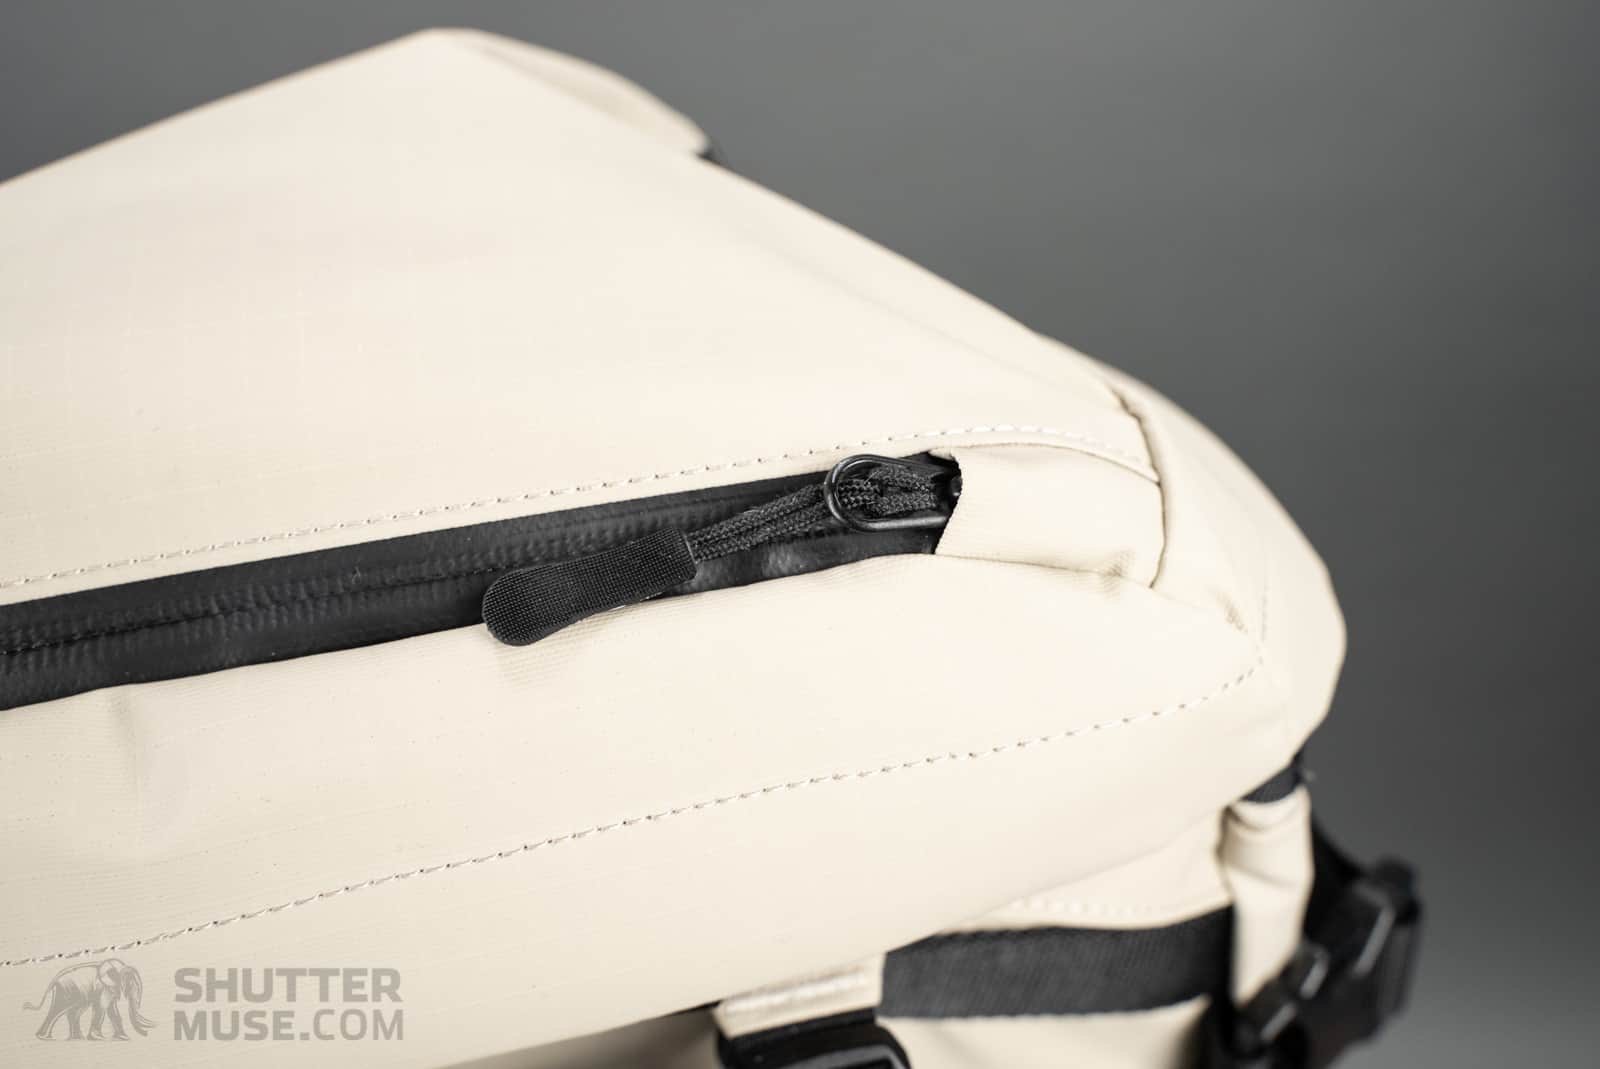
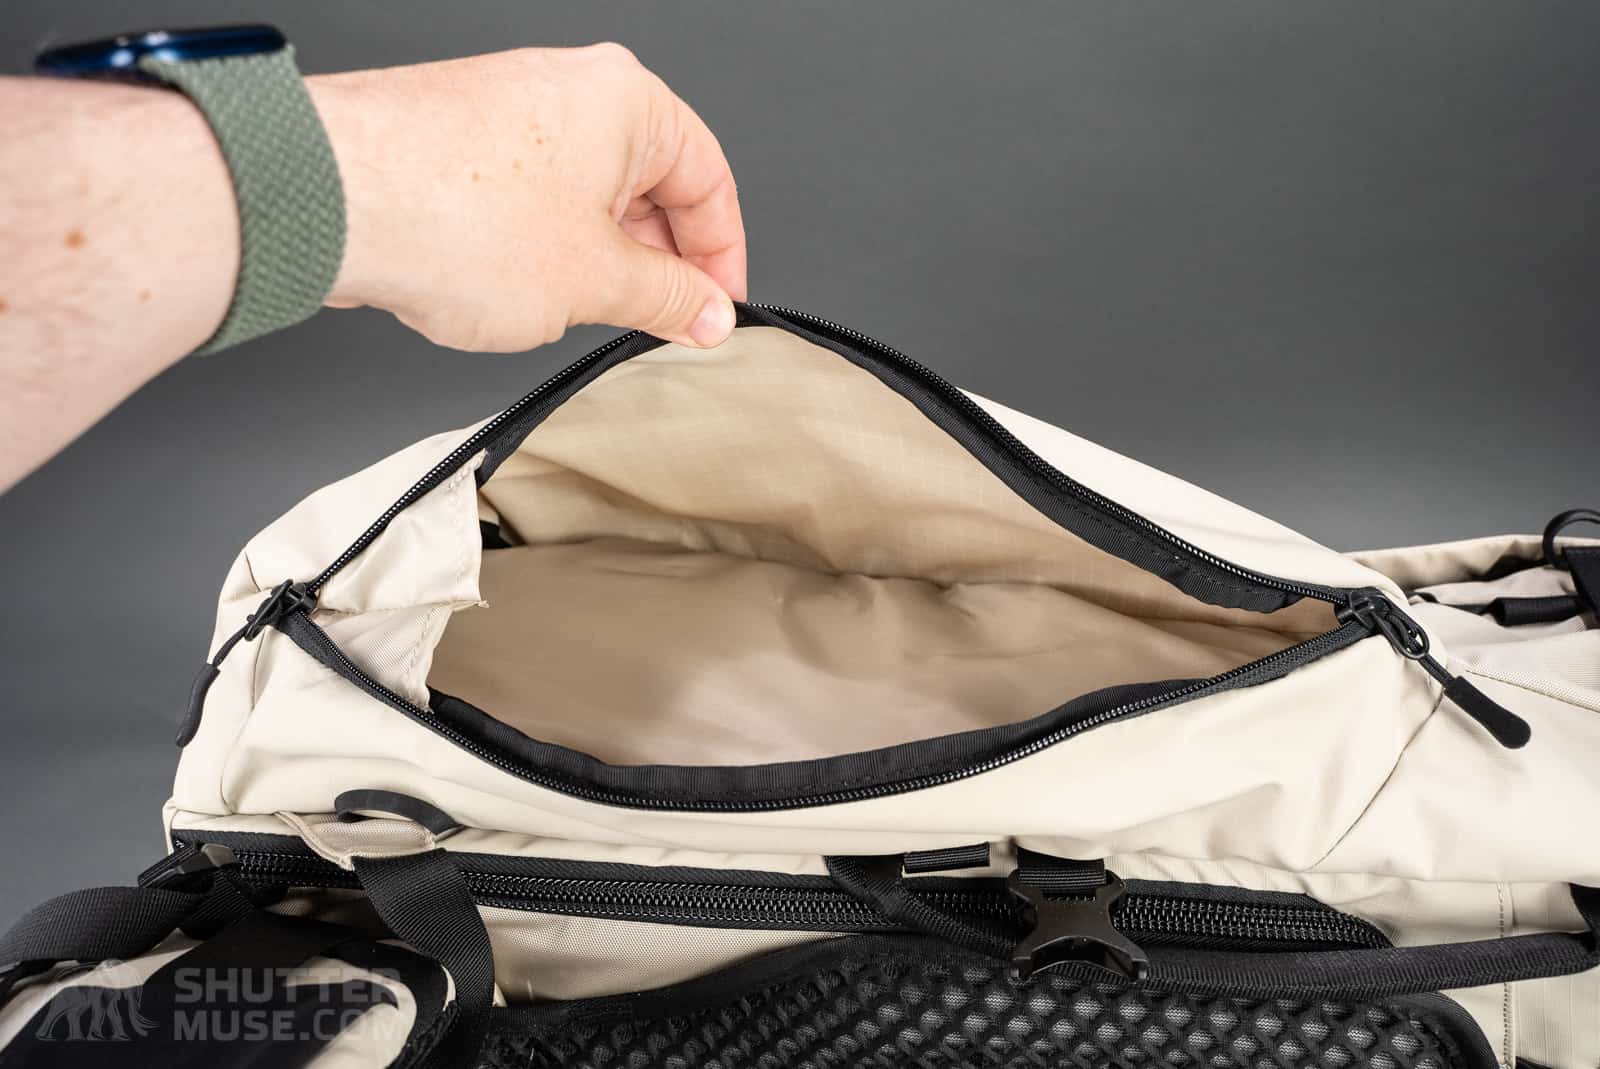
Lid Pockets
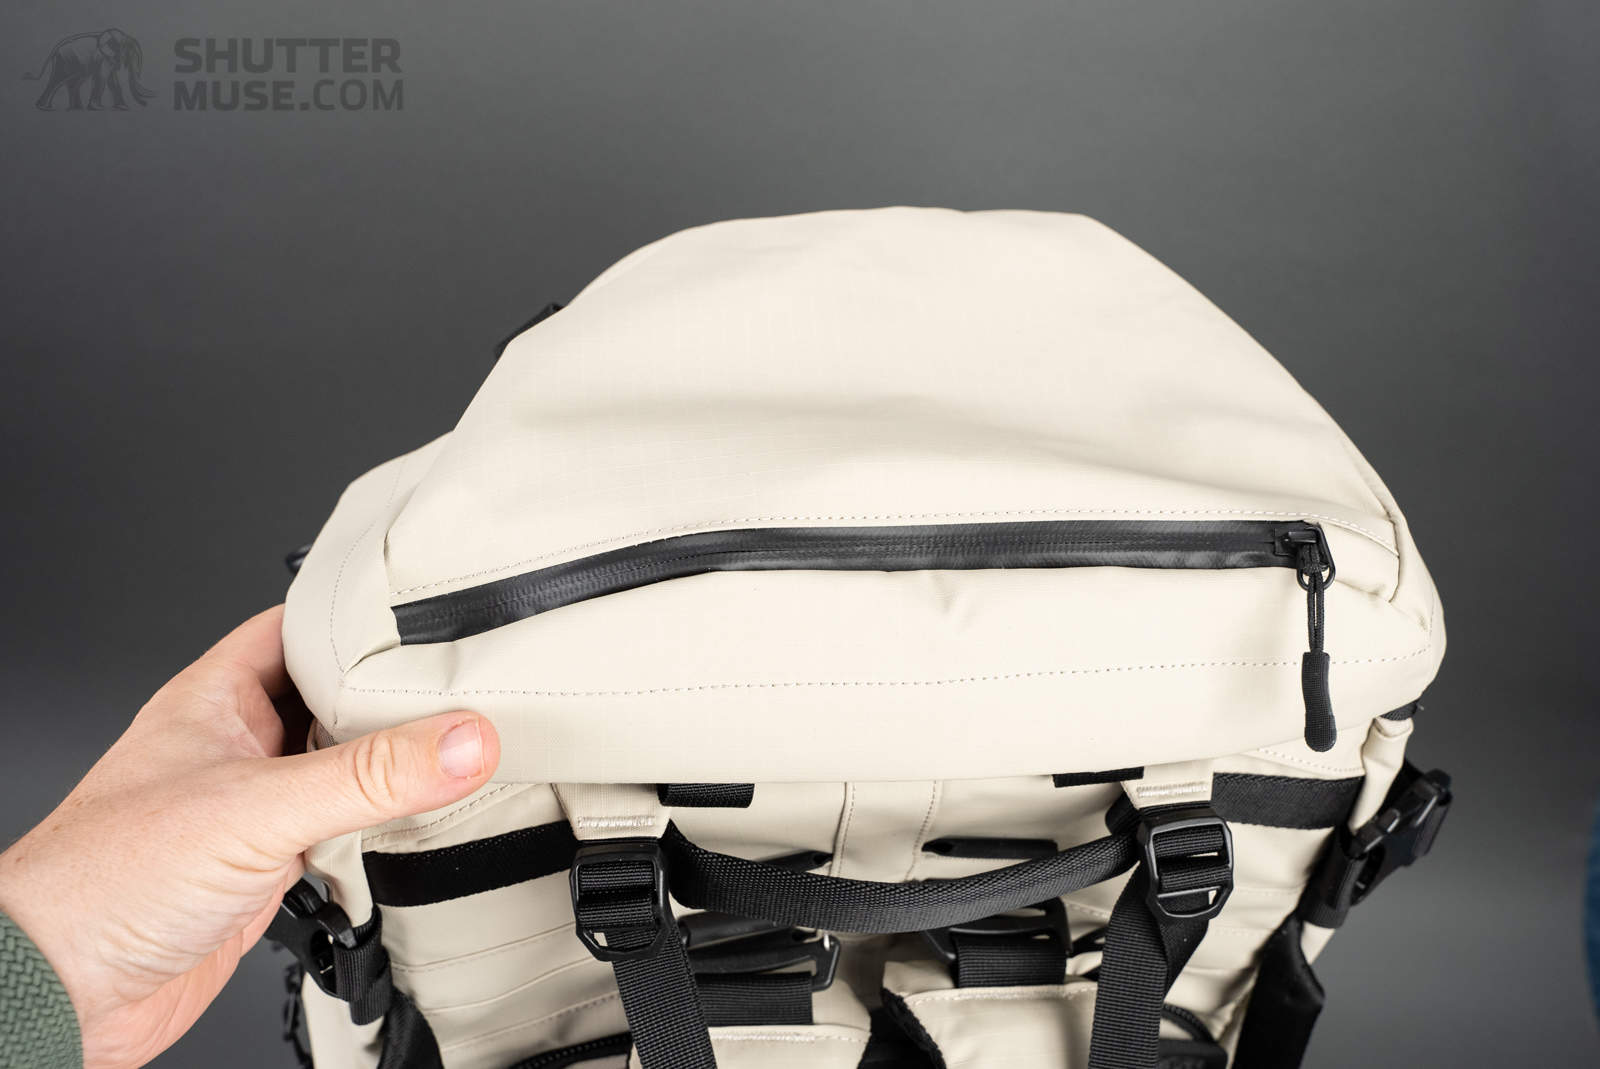
On the top of the bag is a reasonably large zippered pocket that’s protected with a YKK Aquaguard zipper to prevent moisture ingress. A zipper garage is provided for added water resistance. Inside this top pocket is a key clip, which of course also works well to secure your memory card case containing all your precious photos.
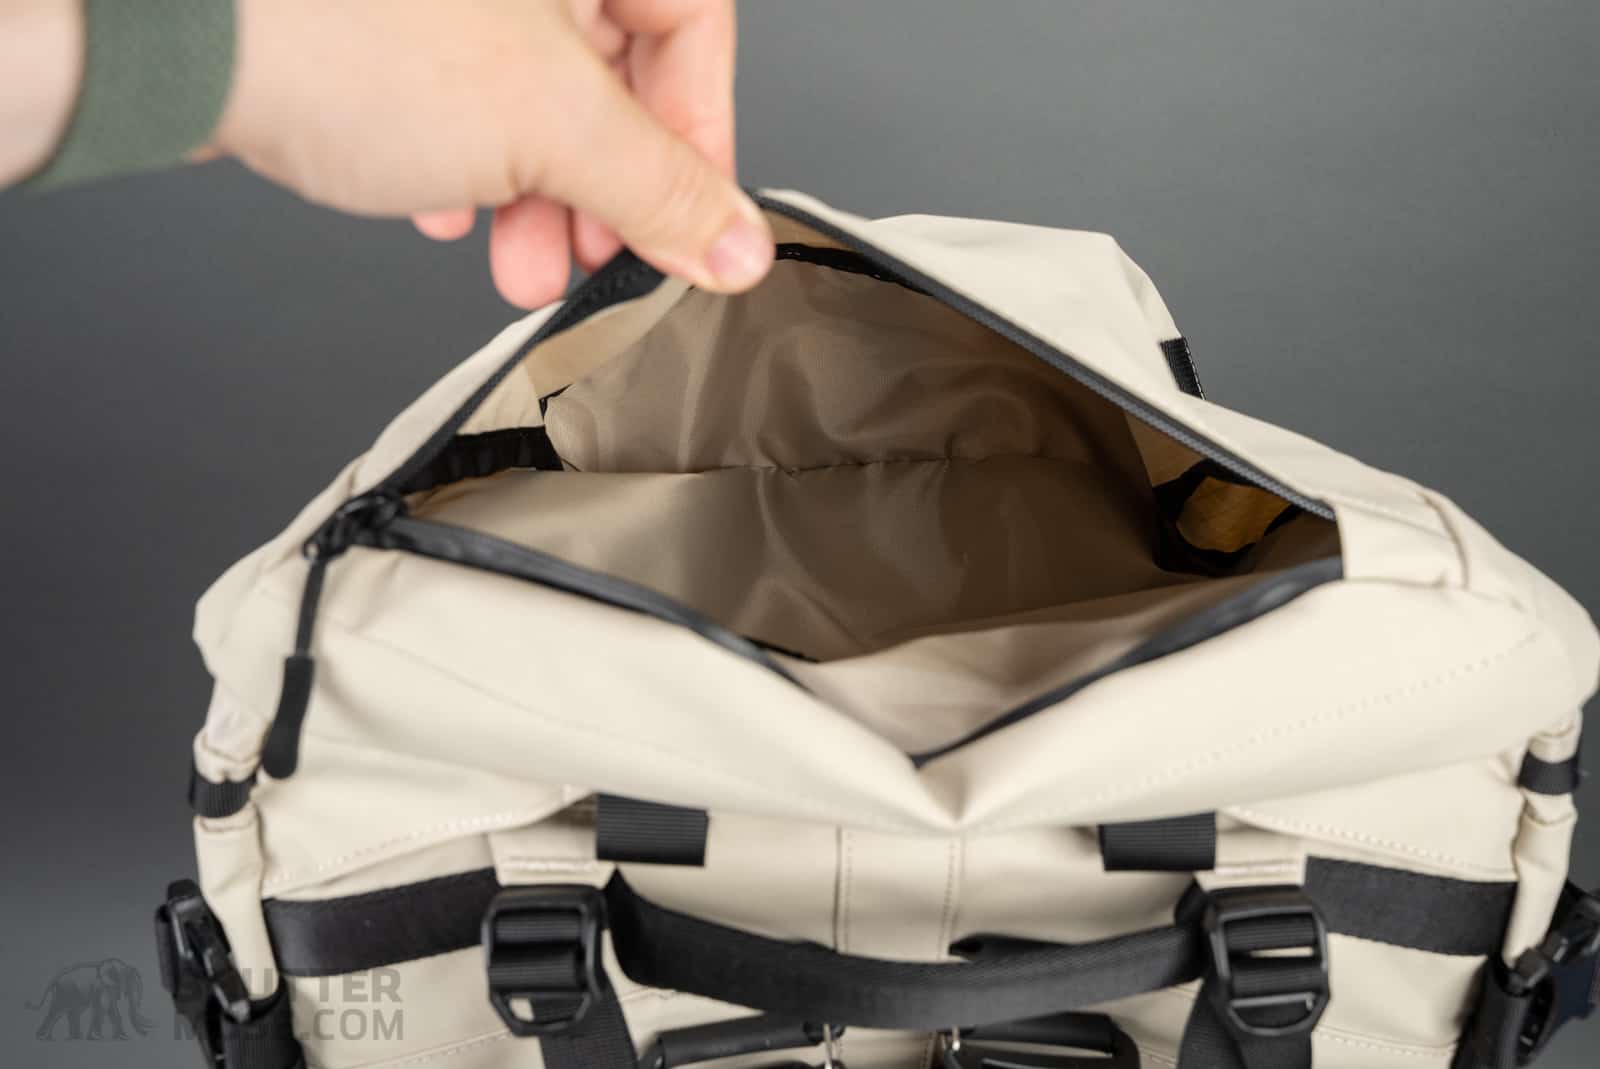
The first version of this bag that I tested was black. As is the case with a number of WANDRD bags, they take their black bags very seriously. When the outside of the back is black so is the inside of every pocket. I have never been a fan of this because it makes it very hard to see what you have in your pockets, particularly when so many small photo accessories are also black.
I wish that WANDRD would move away from black interiors on the black bags and at least use a shade of grey. Or even better, use the Gobi Tan colour on the inside of the black bags. I think the tan colour is perfect, and the black is far from it.
The lid pocket is a good size and you can easily fit all your necessary quick access items in here. I usually keep a pair of gloves, a hat, my headlamp and my food in here if I’m out and about with my camera. If I was travelling with this bag, I’d be using the top pocket to store my noise-cancelling headphones and other items that I might want easy access to when boarding a plane.

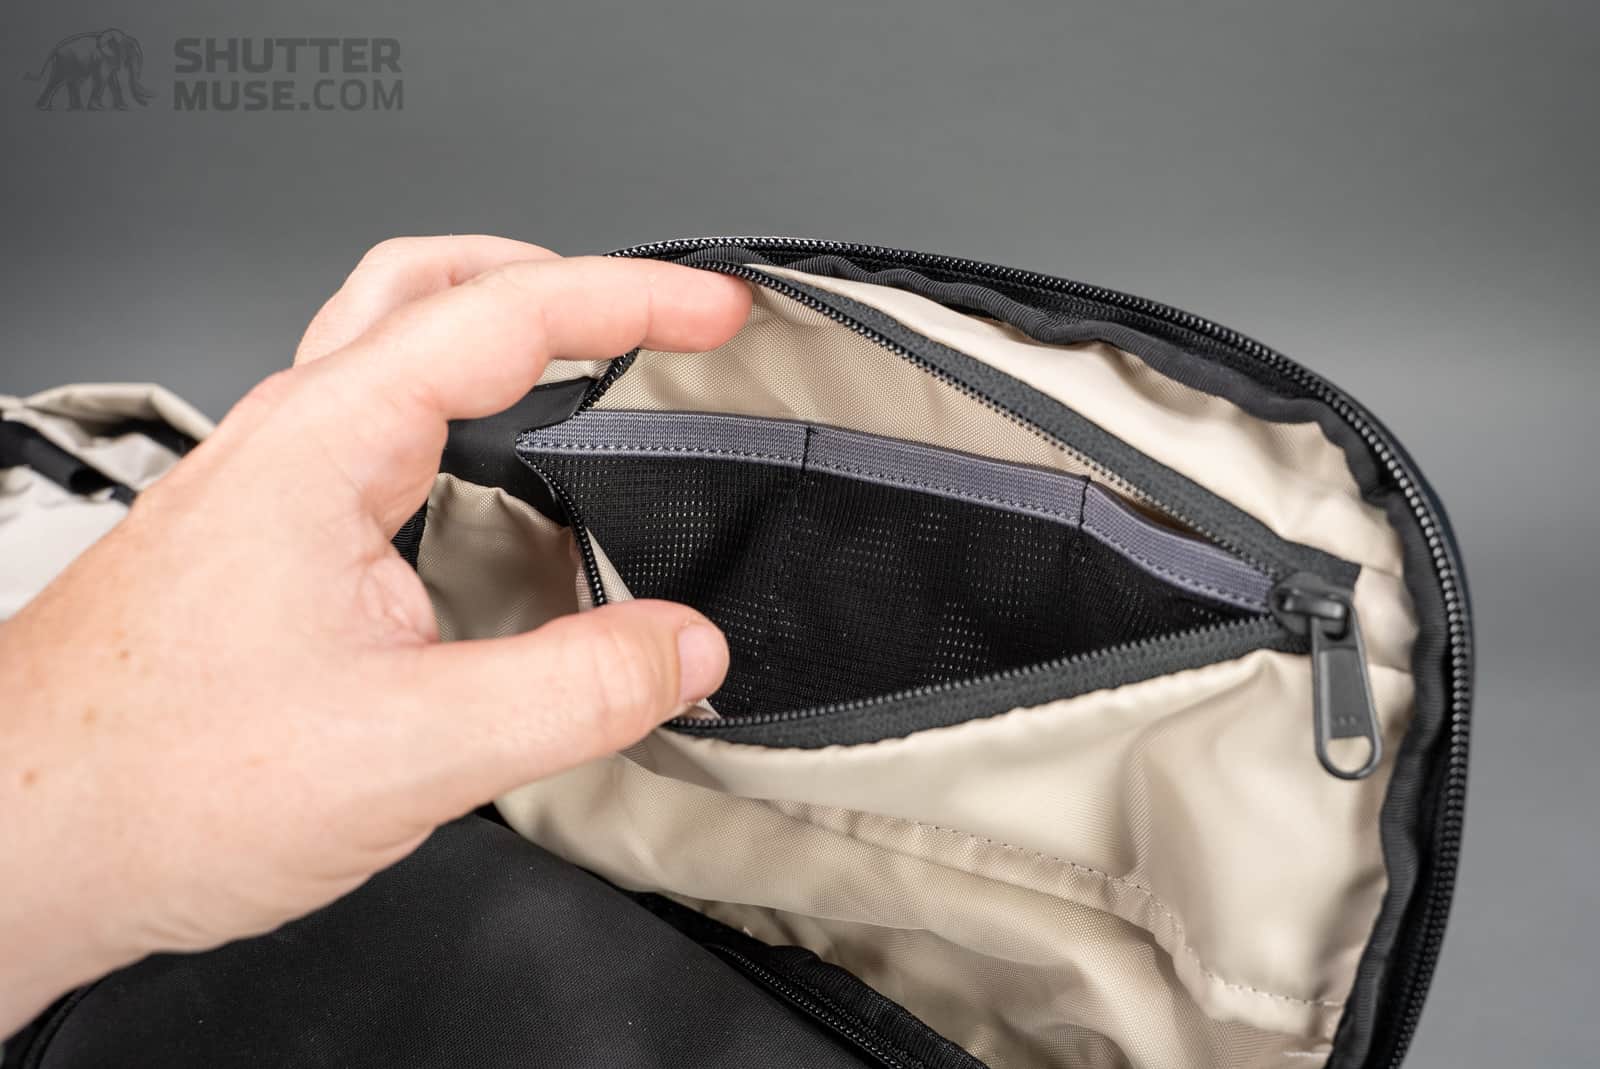
On the inside of the bag’s lid, you’ll find another large mesh pocket. While these kinds of top pockets and mesh pockets are fairly standard affairs on outdoor backpacks, I did find the ones on the Fernweh to be of a very generous size. I tend to think of these as places to stash small items, but on this bag, they are quite capable of holding larger items of clothing such as rain pants, a rain jacket or a down jacket layer.
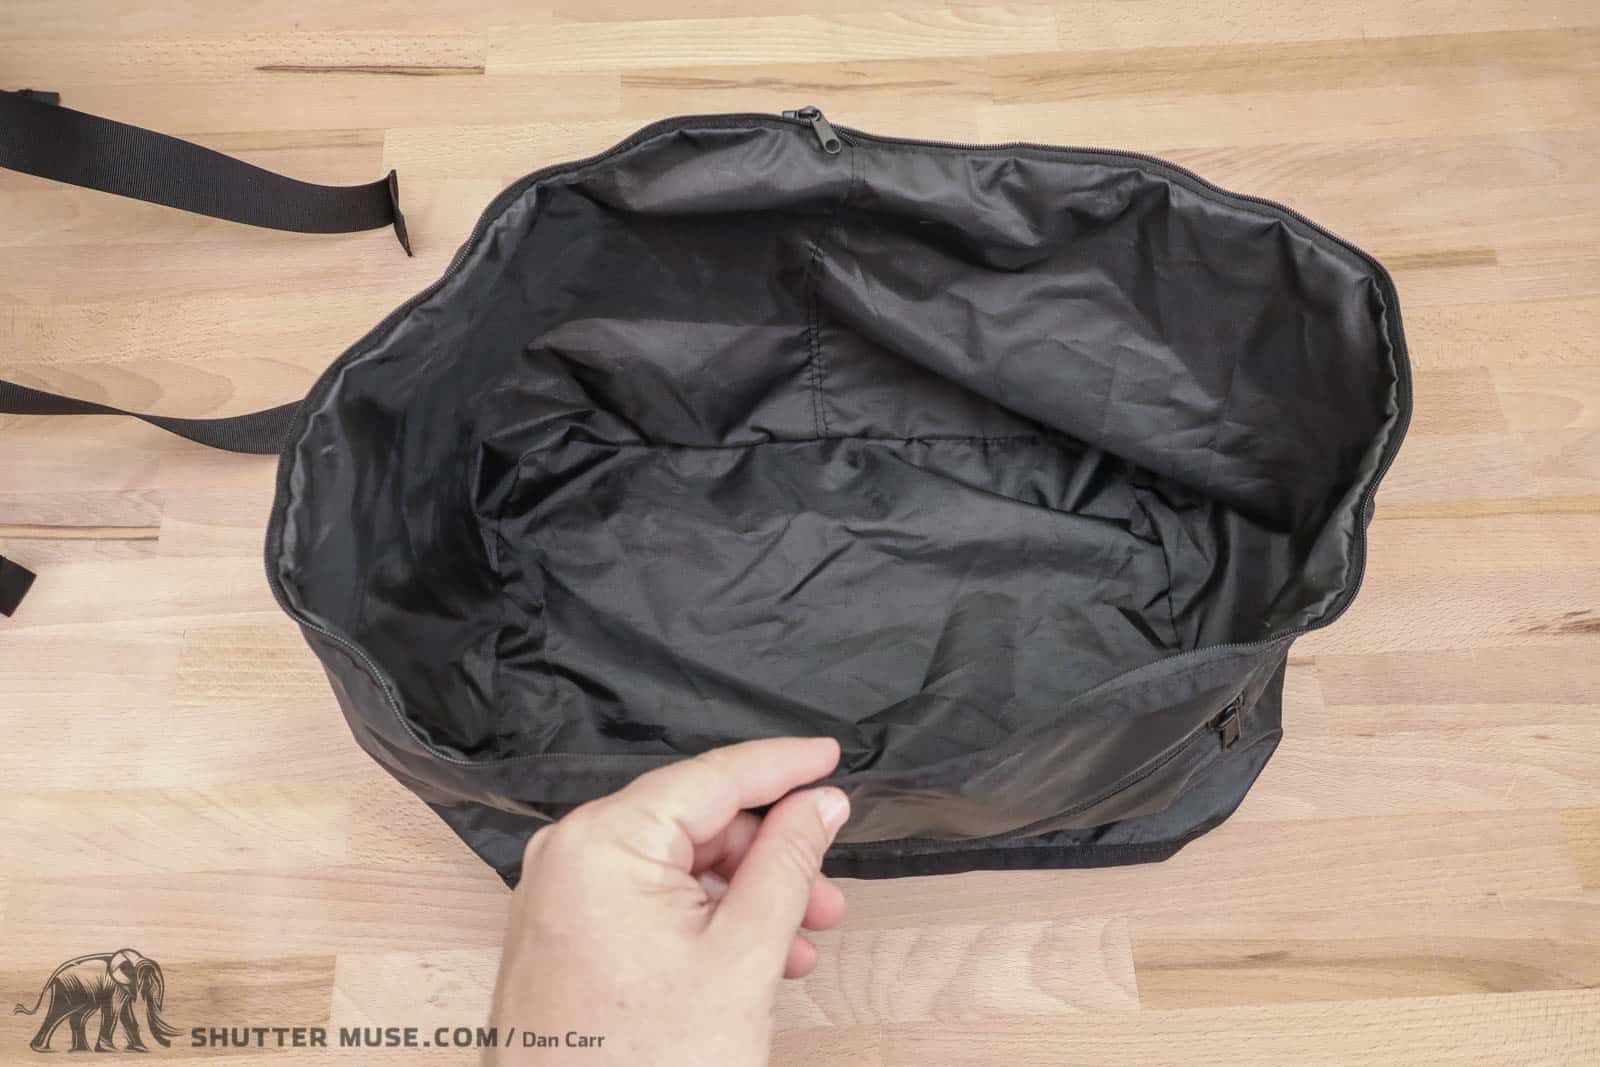
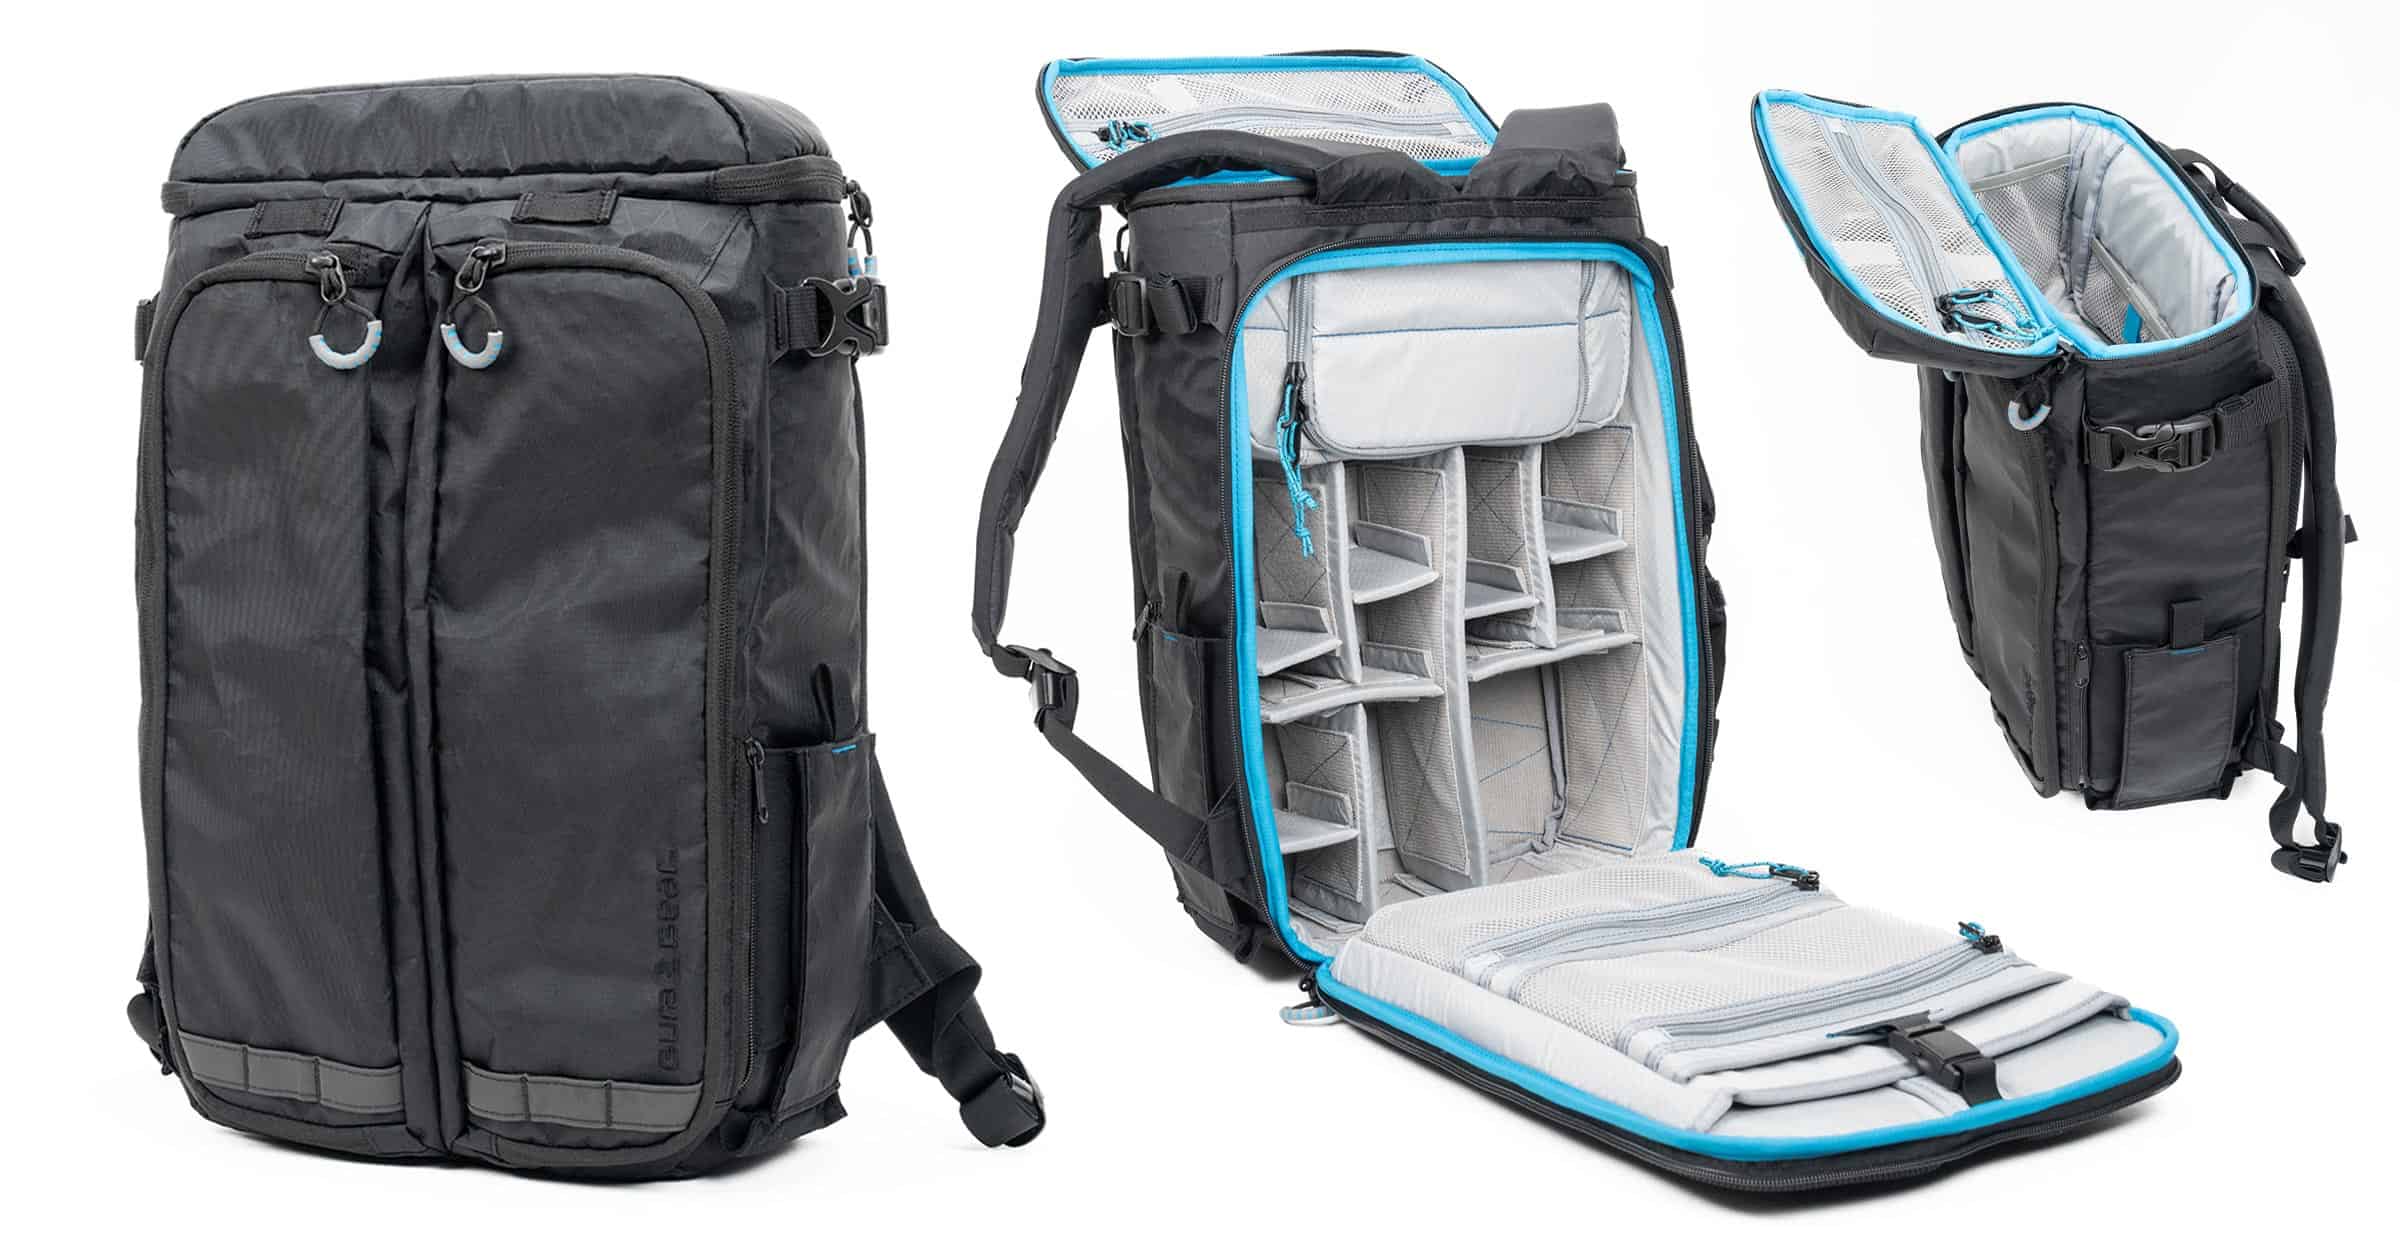
The Bucket
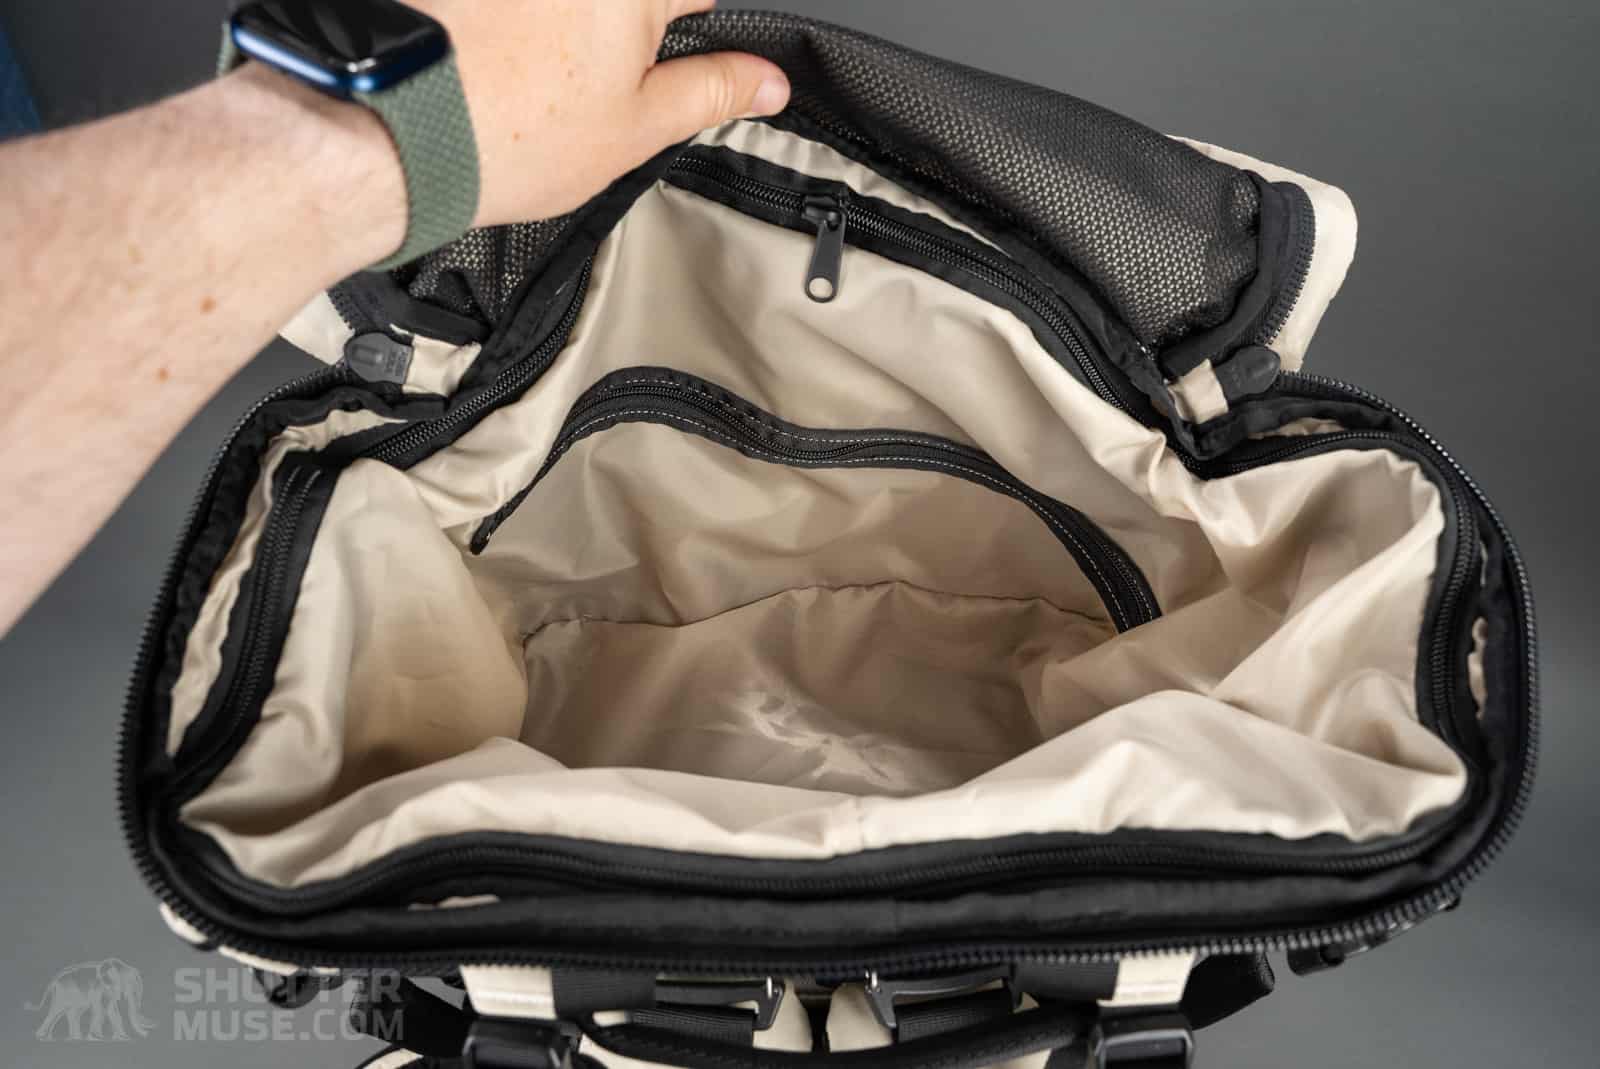
Once you open the top of the bag and peer inside, you’ll see that the space in the top half of the bag has been separated into its own section by a lightweight nylon liner, called the bucket. It’s very similar to the design we have seen on the top of Shimoda’s Explore backpacks.
This bucket will expand and contract depending on the volume of gear you put in the main section of the bag. Even if you were to nearly fill the main section, thereby shrinking your bucket volume, it still provides a nice section of separated space that could be used to keep things like food or wet gear away from the contents in the main section. If you were using this pack for one-bag travel, this top section could hold your increasing amount of dirty laundry. If you don’t need the bucket at all, and prefer to have just one large volume in the bag, it can be removed with a zipper.
The contents of the bucket can also be accessed through a zipper near its bottom. This is useful if you have really packed the bucket with gear, and want to get at something in the bottom of it. While it does require the opening of the main front zipper to access this bucket zipper, it’s still a pretty cool feature that shows the WANDRD designers thought long and hard about gear access.
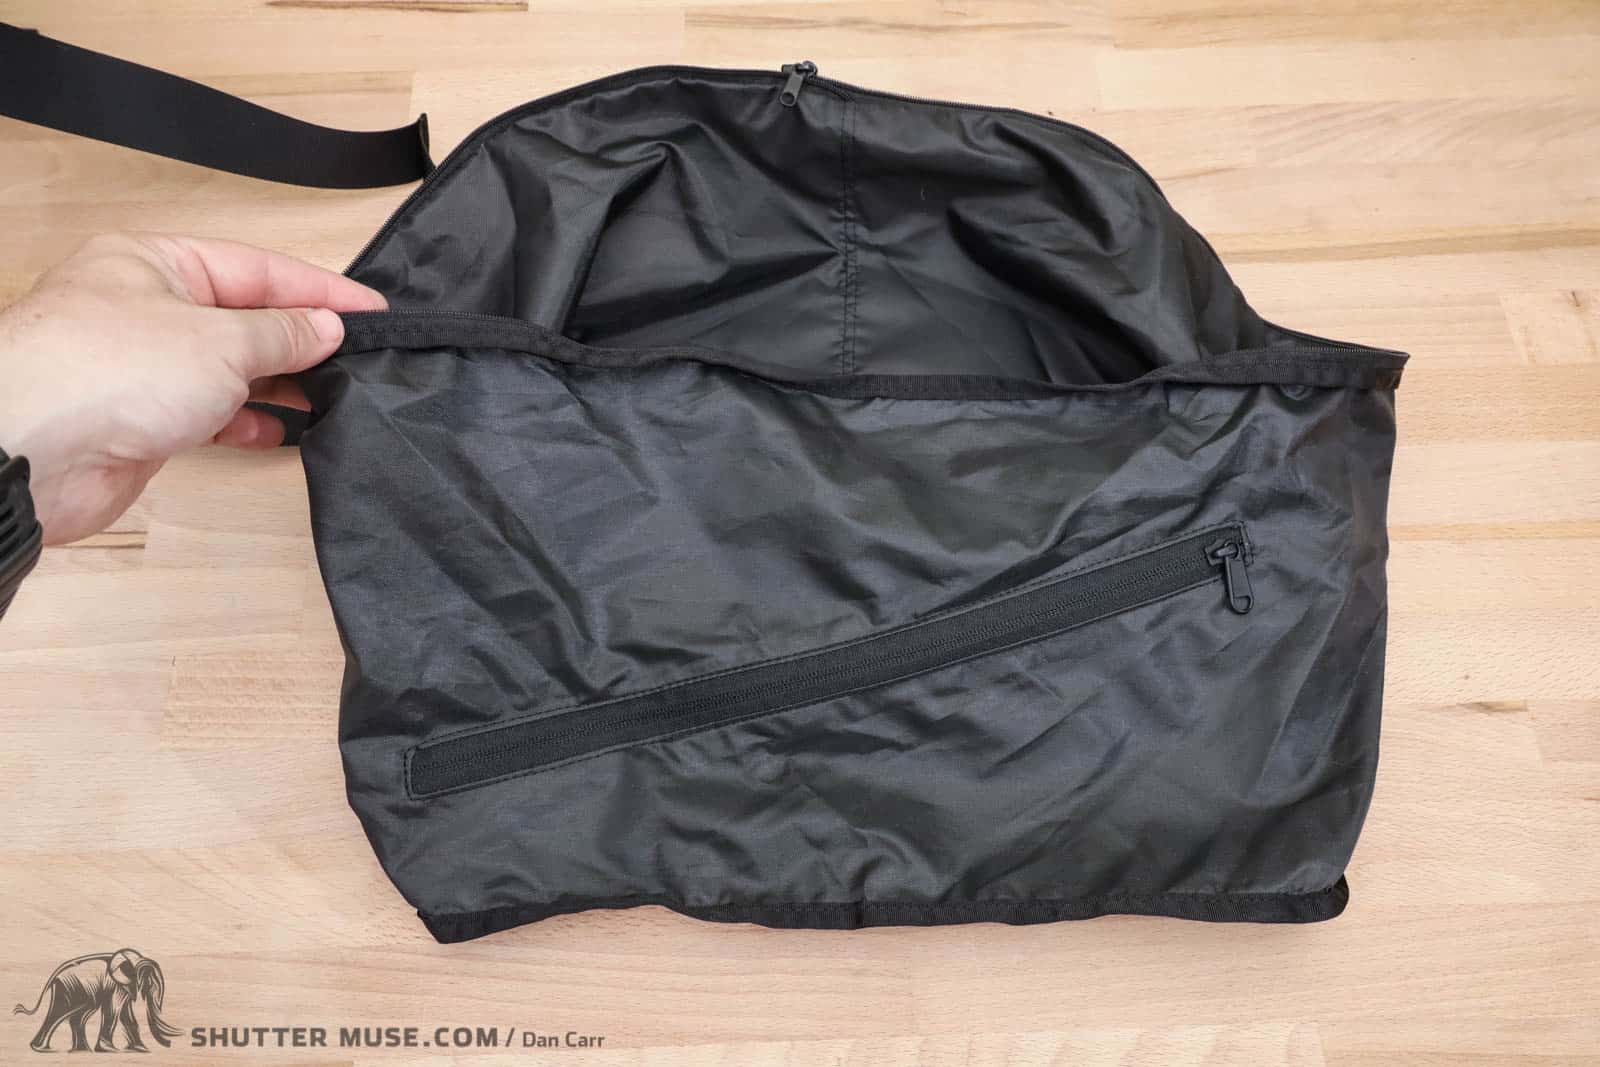
Front Hydration Pocket

The front of the bag features a dedicated hydration sleeve and additional space for compressible items such as rain layers. The important thing about this part of the bag is that it’s a totally separate section from the main bag. If your water bladder springs a leak, that water isn’t going to get anywhere near the contents in the main part of the bag.
I tested this with a 3L Platypus bladder and found it to be too big. The bladder extended above the small strap/hook that is designed to support it. I would recommend using a 2L bladder at a maximum in this front pocket.
The hose of your bladder can be routed through a hole, through the main section of the bag and out to the back panel for securing to the shoulder strap. With the bladder pocket being located on the front of the bag, the hose routing is a little convoluted. If you can, I would recommend using a bladder that has a quick detach hose on it. This allows you to pass the thin end of the hose through the various holes, instead of having to pass the rubber bite valve through them.


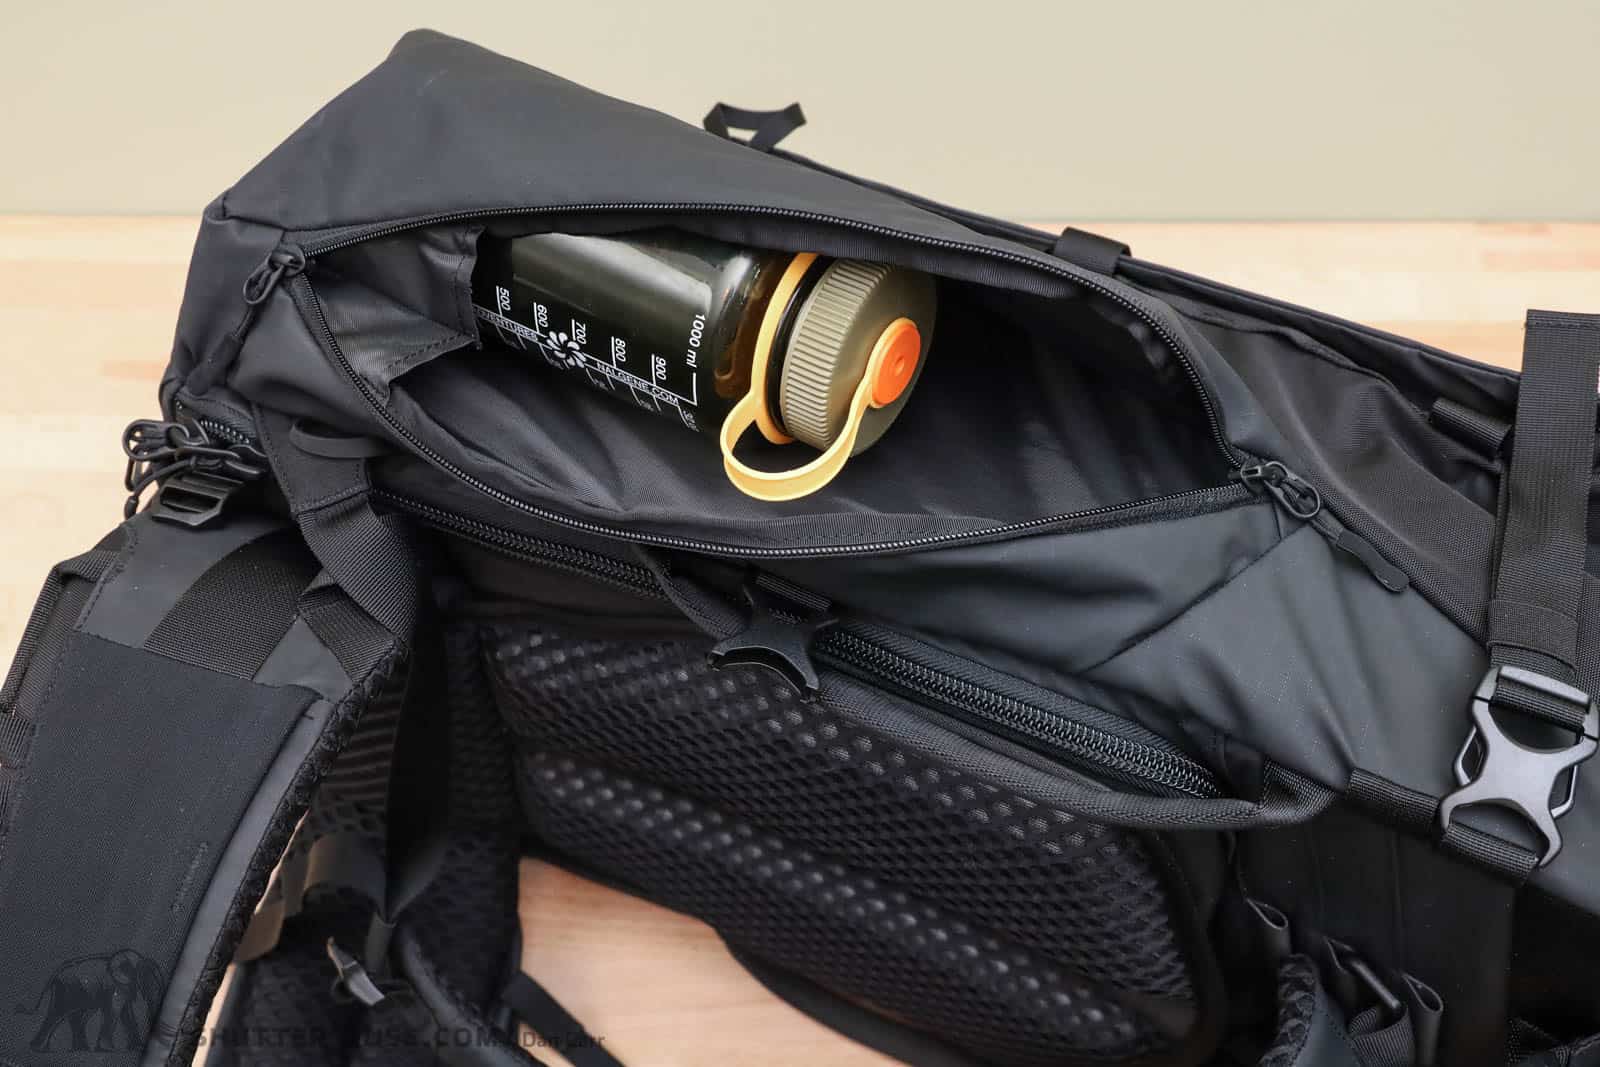
Side Pocket + Tripod Carry
One side of the bag features a tall zippered pocket that can be used to secure the legs of a tripod or hold a Nalgene water bottle. As you can see from the photos, it works particularly well with an ultralight travel tripod such as the Peak Design Travel Tripod. Most of the tripod is protected in the pocket, while the protruding head gives the side straps something to grip onto for a tightly secured load.
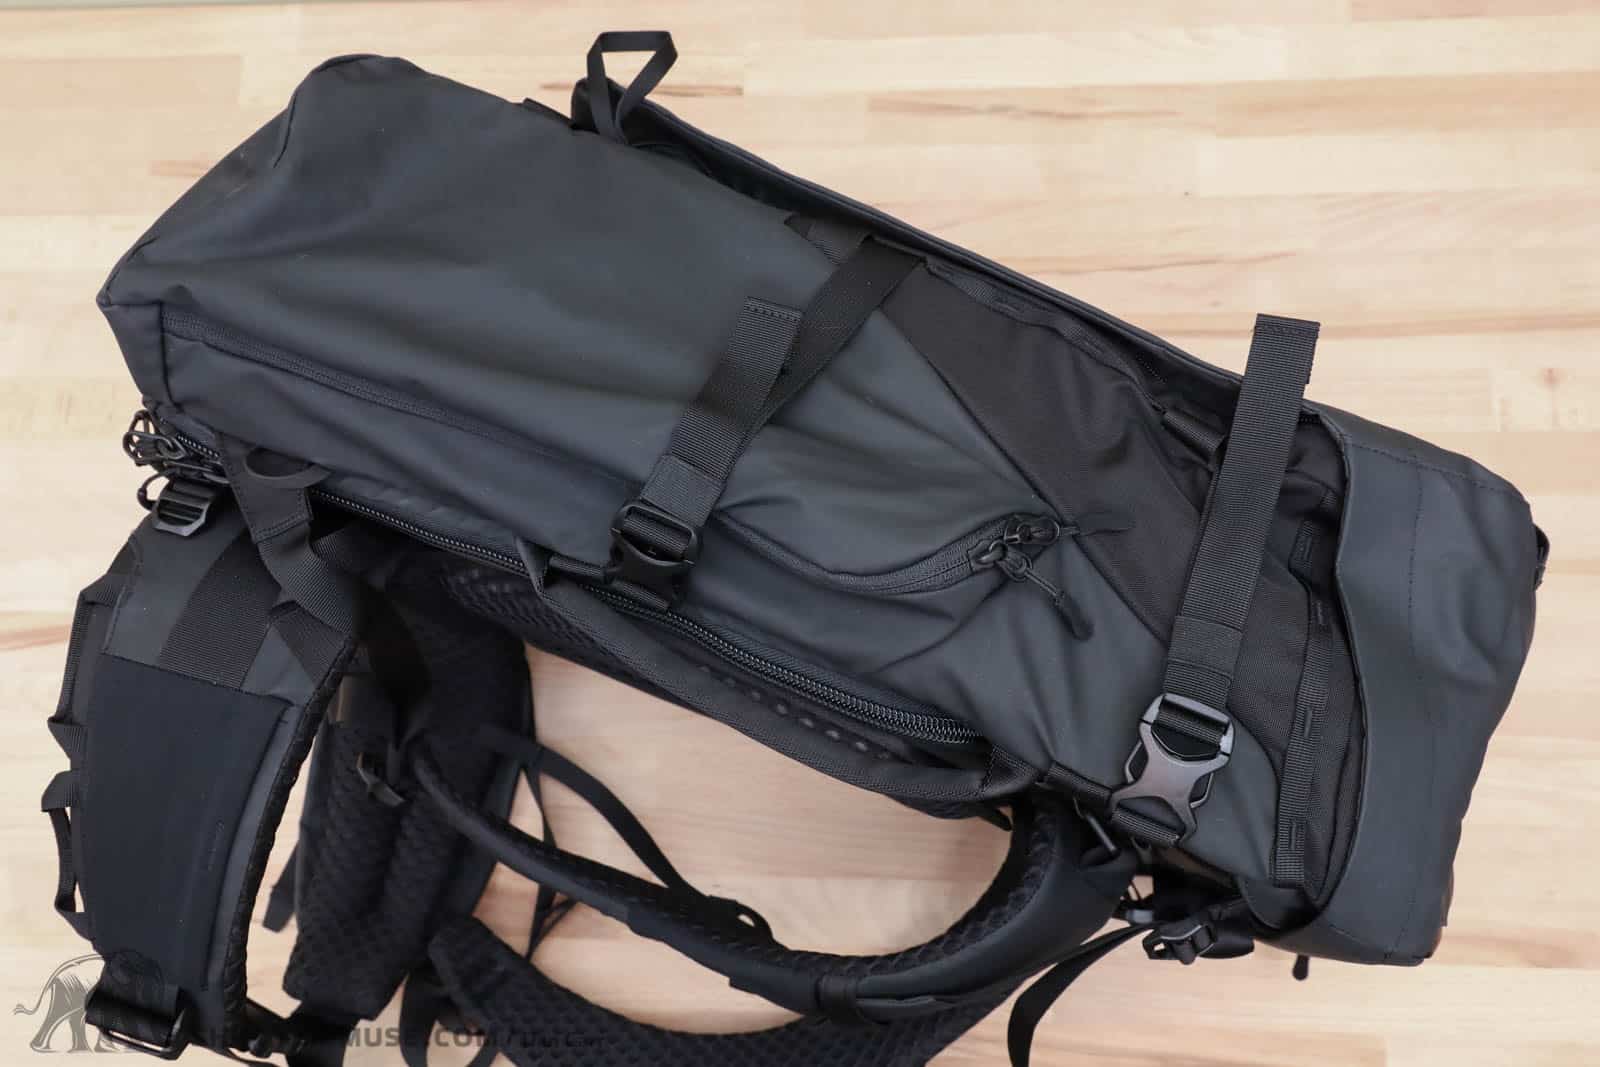
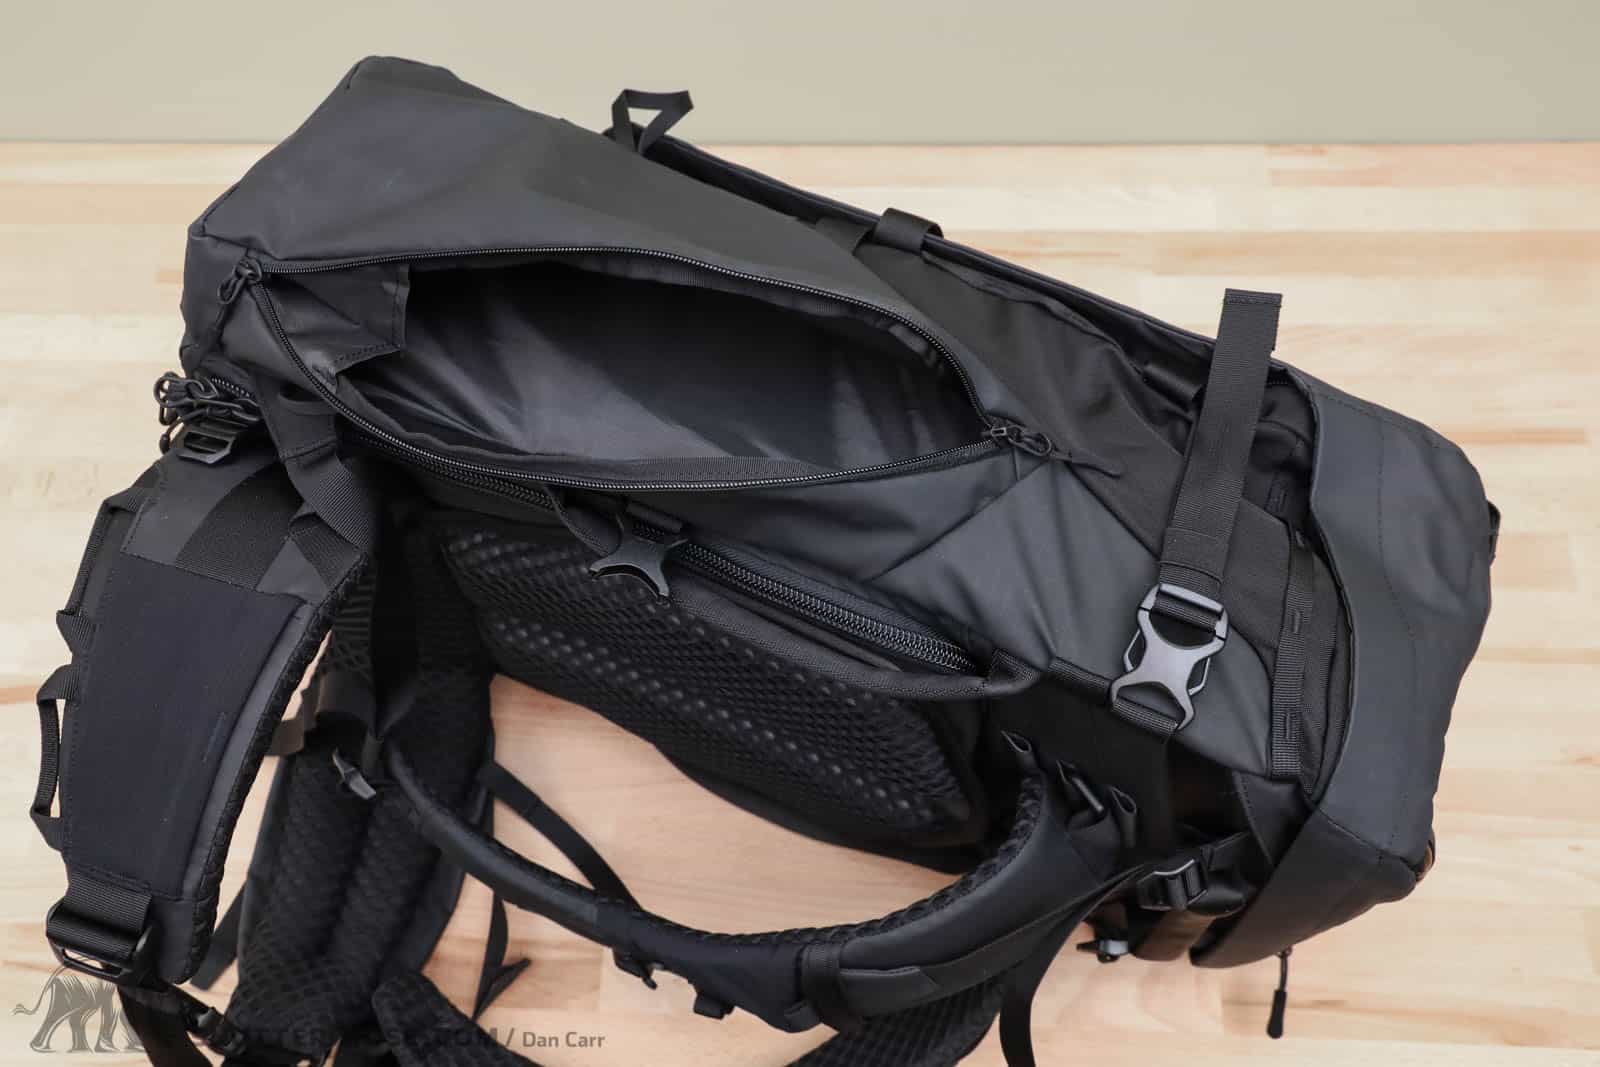
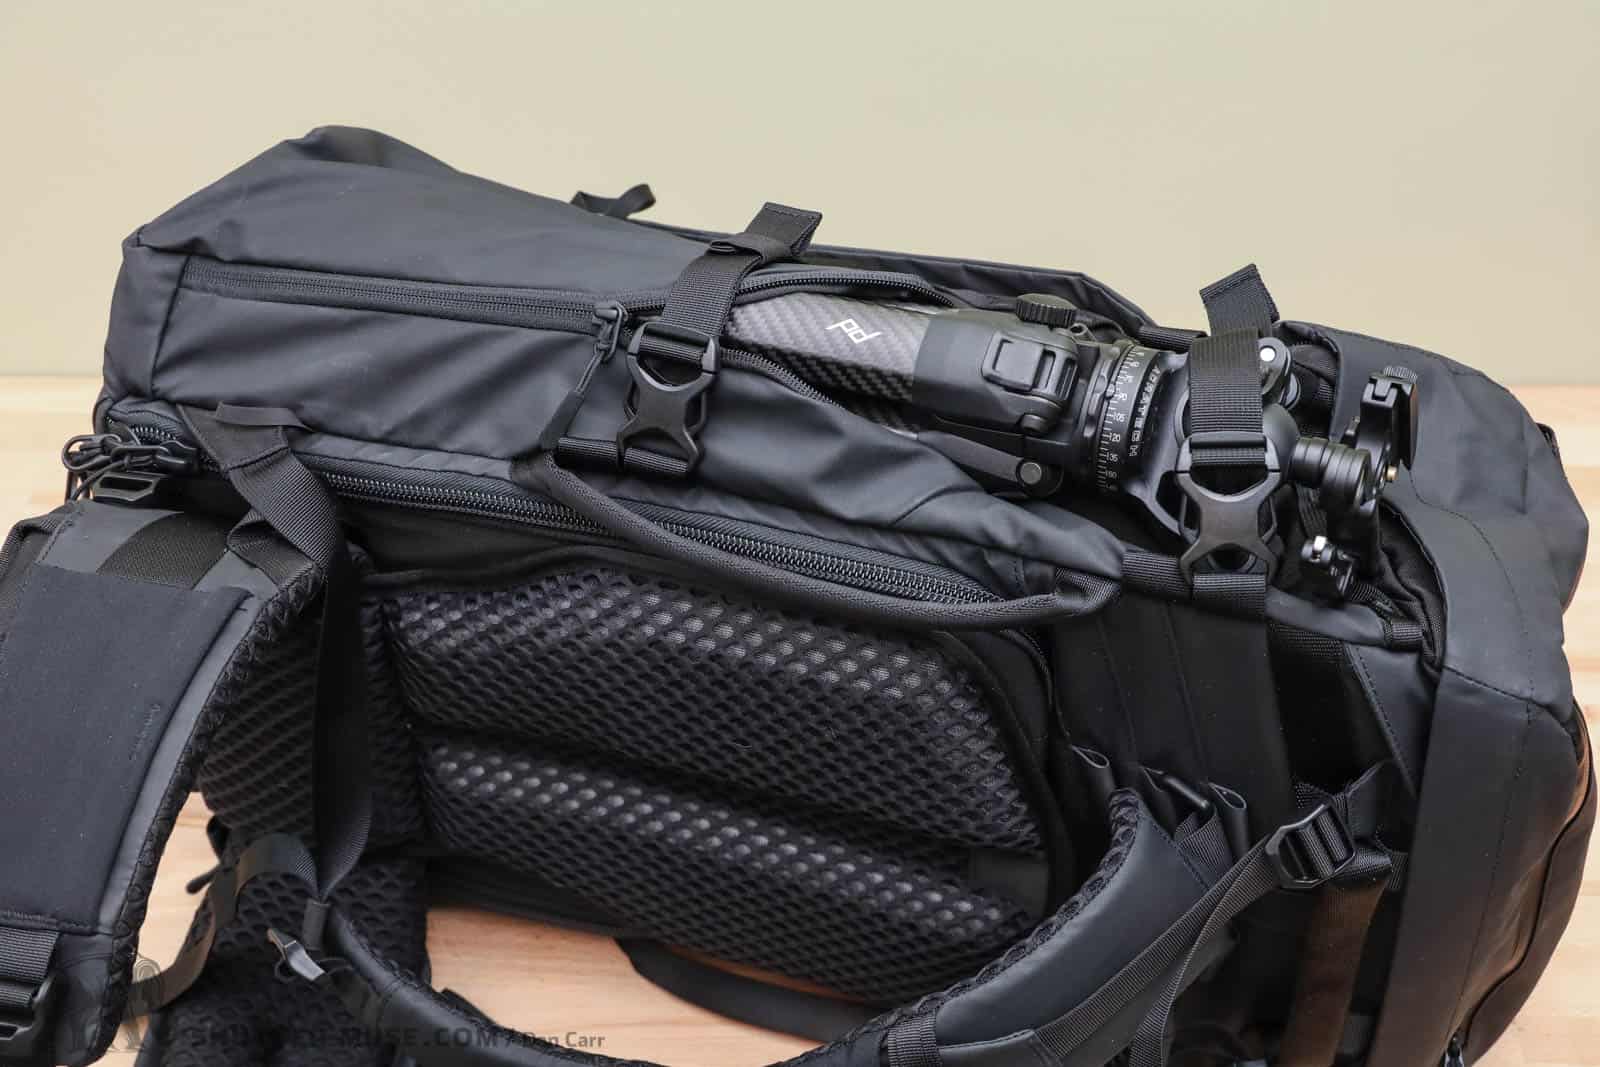
This pocket design is a great example of how Wandrd have managed to create a feature that suits their split target audience in equal measure. A good travel pack should have a water bottle pocket on the side because bladders aren’t very practical as you transfer through airports, but a good photo pack needs a great way to secure a tripod. Kudos to the designers for this feature.
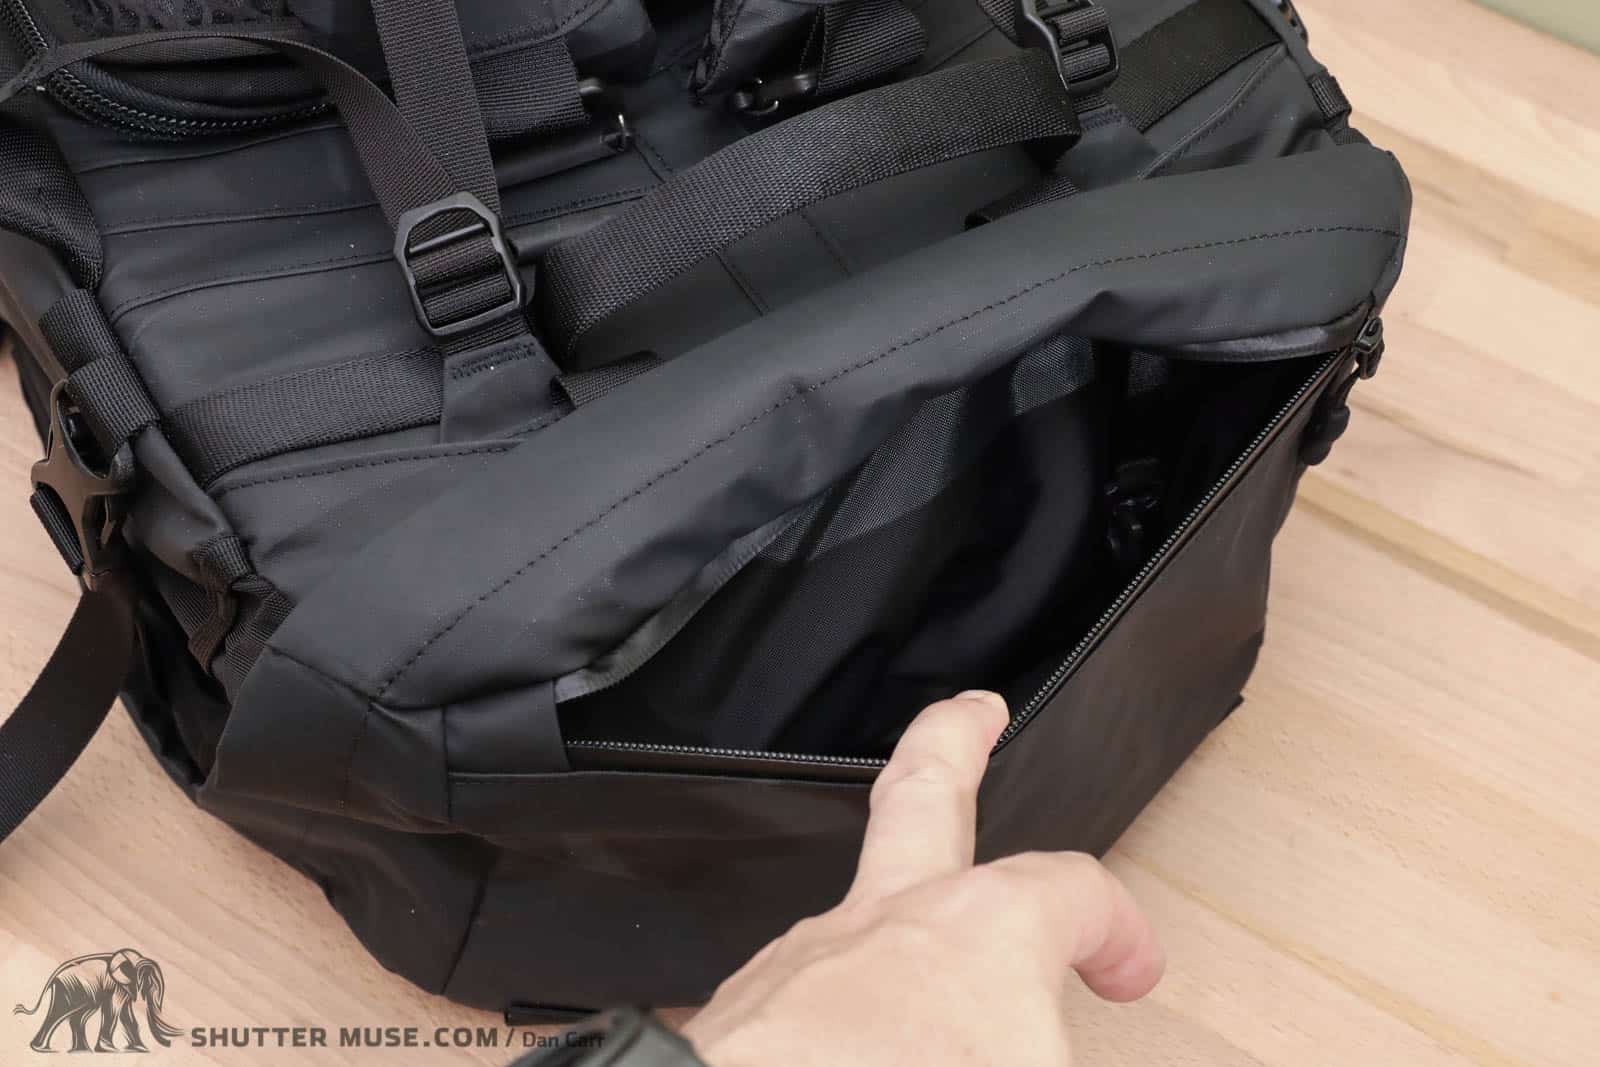
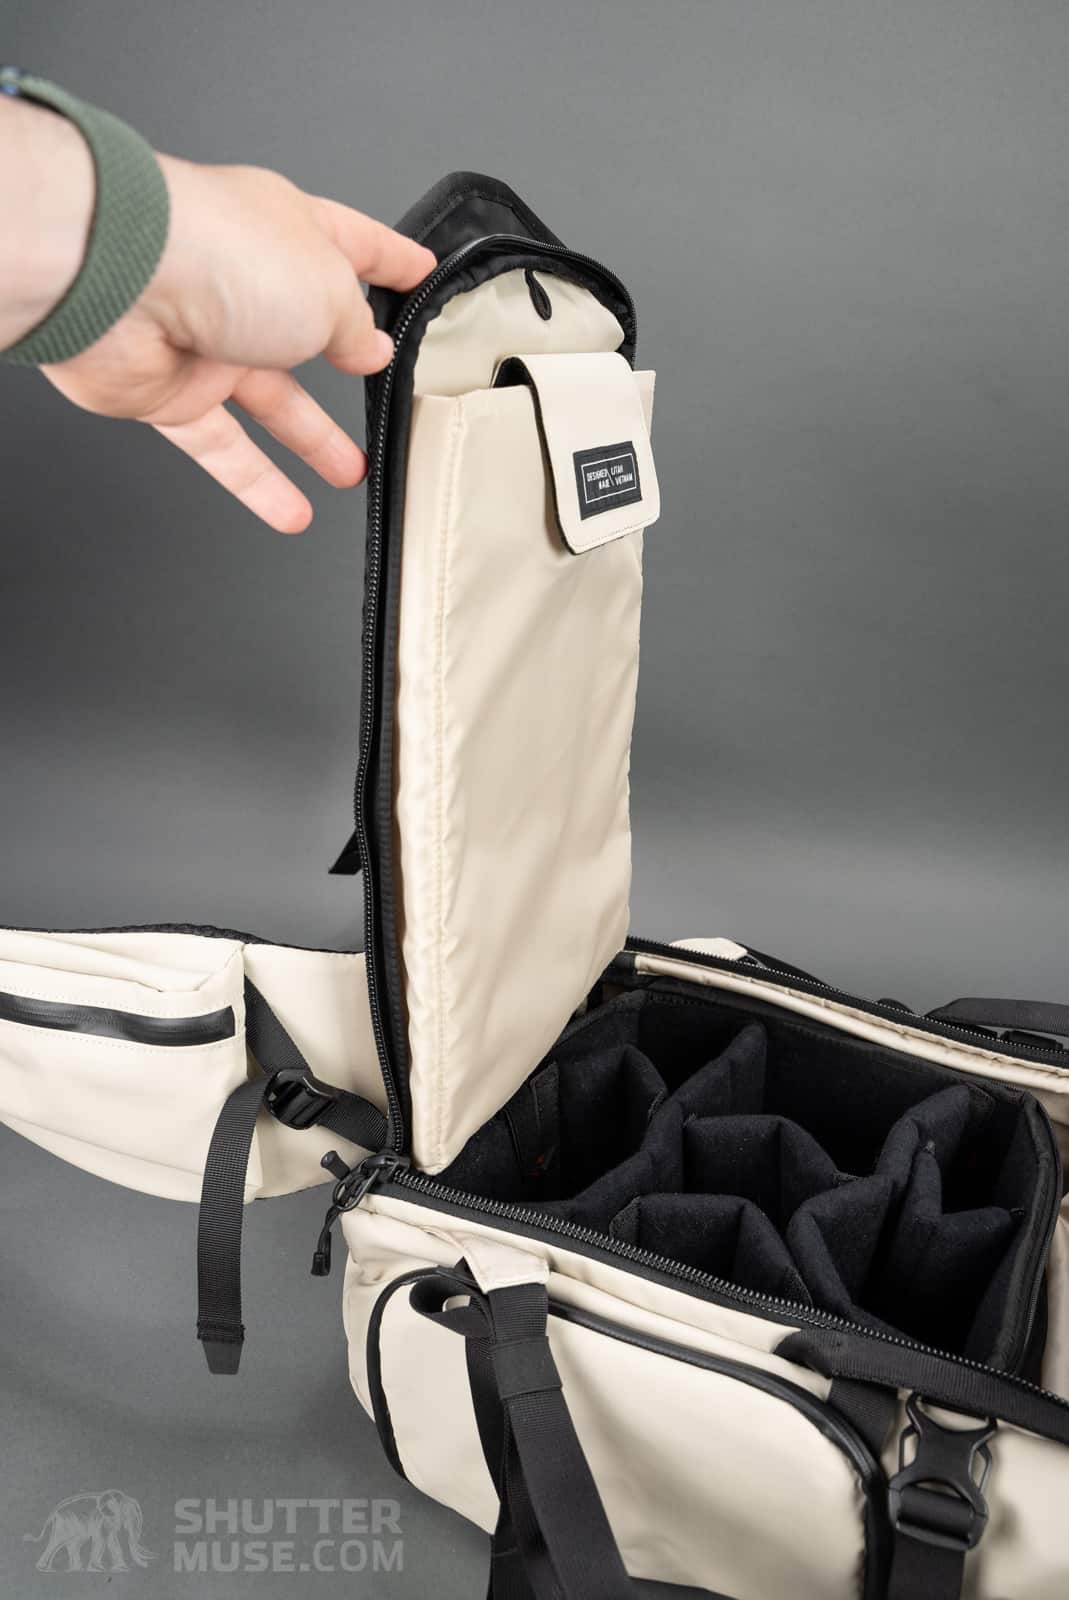
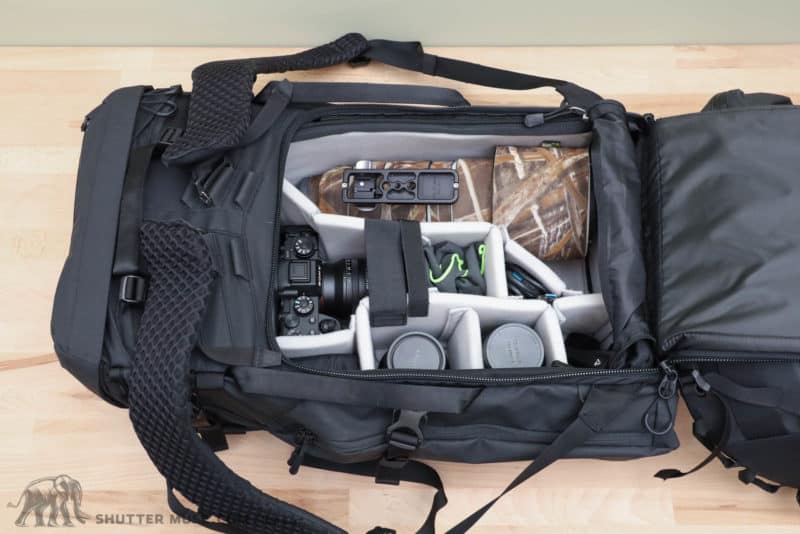
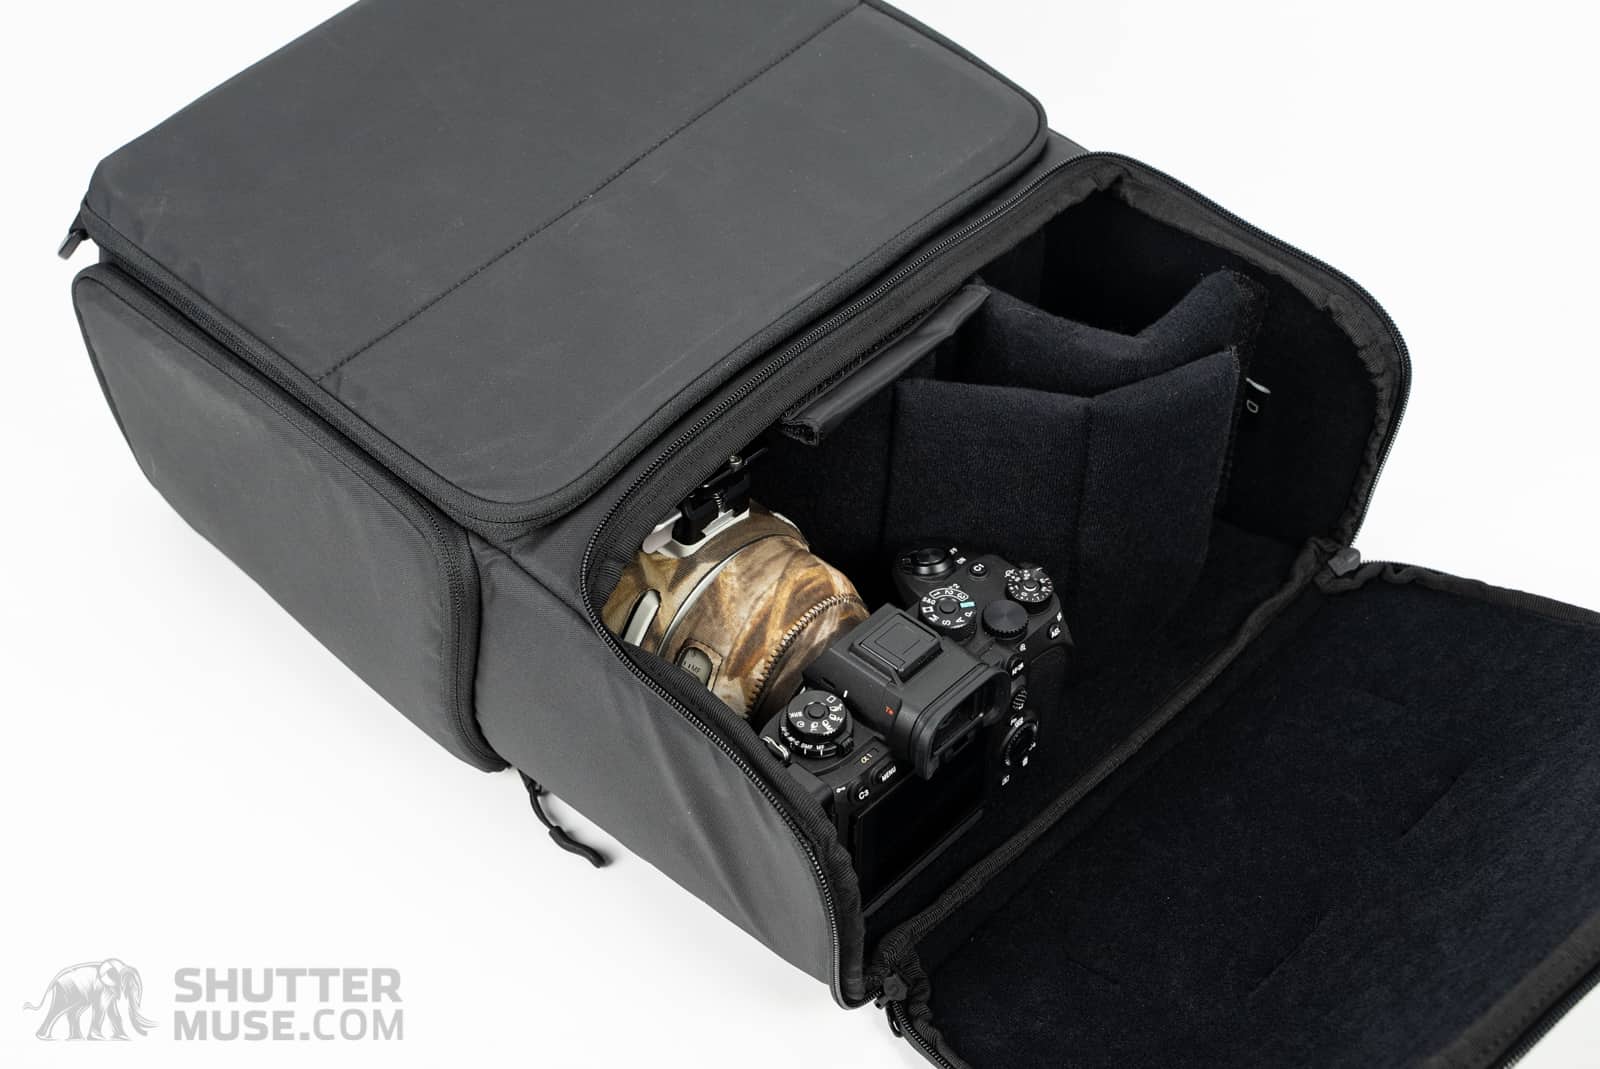
Side Camera Access

On the other side of the bag is a zippered access door to the interior of the bag. When the Fernweh is used in combination with one of WANDRD’s camera Cubes, this provides immediate access to a camera with a lens attached to it. One thing to note is that I don’t think there is enough height on this side hatch to retrieve a gripped mirrorless camera body or a pro-sized DSLR. If you are using a larger camera body, you will have to access it from one of the other entry points.

On the one hand, side access can be a good way to ensure you take more photos, with the camera being that much easier to reach. On the other hand, side access doors put limitations on what can be strapped to that side of the bag. If you don’t think you’ll use that side door, that side of the bag then ends up seeming like wasted space where it would have been nice to have another external pocket.
Grab Handles
Aside from picking the bag up by the shoulder straps, there are four additional carrying handles that make it much easier to lift a heavy pack into a vehicle, or the overhead bin on an airplane.
Travel Features


WANDRD doesn’t call itself a camera bag company. Instead, they call themselves a travel company that makes bags that are also suitable for photographers. A considerable amount of thought was put into how the Fernweh would handle as a travel bag, whether that be for a travelling photographer or anyone else who wants to travel the world with a rugged backpack.

The first evidence of this is a hidden passport pocket behind the padded back panel. You could certainly store some money in there, as well as boarding passes. Another nice travel-friendly feature is that the oversized size carry handles work as a luggage pass-through.
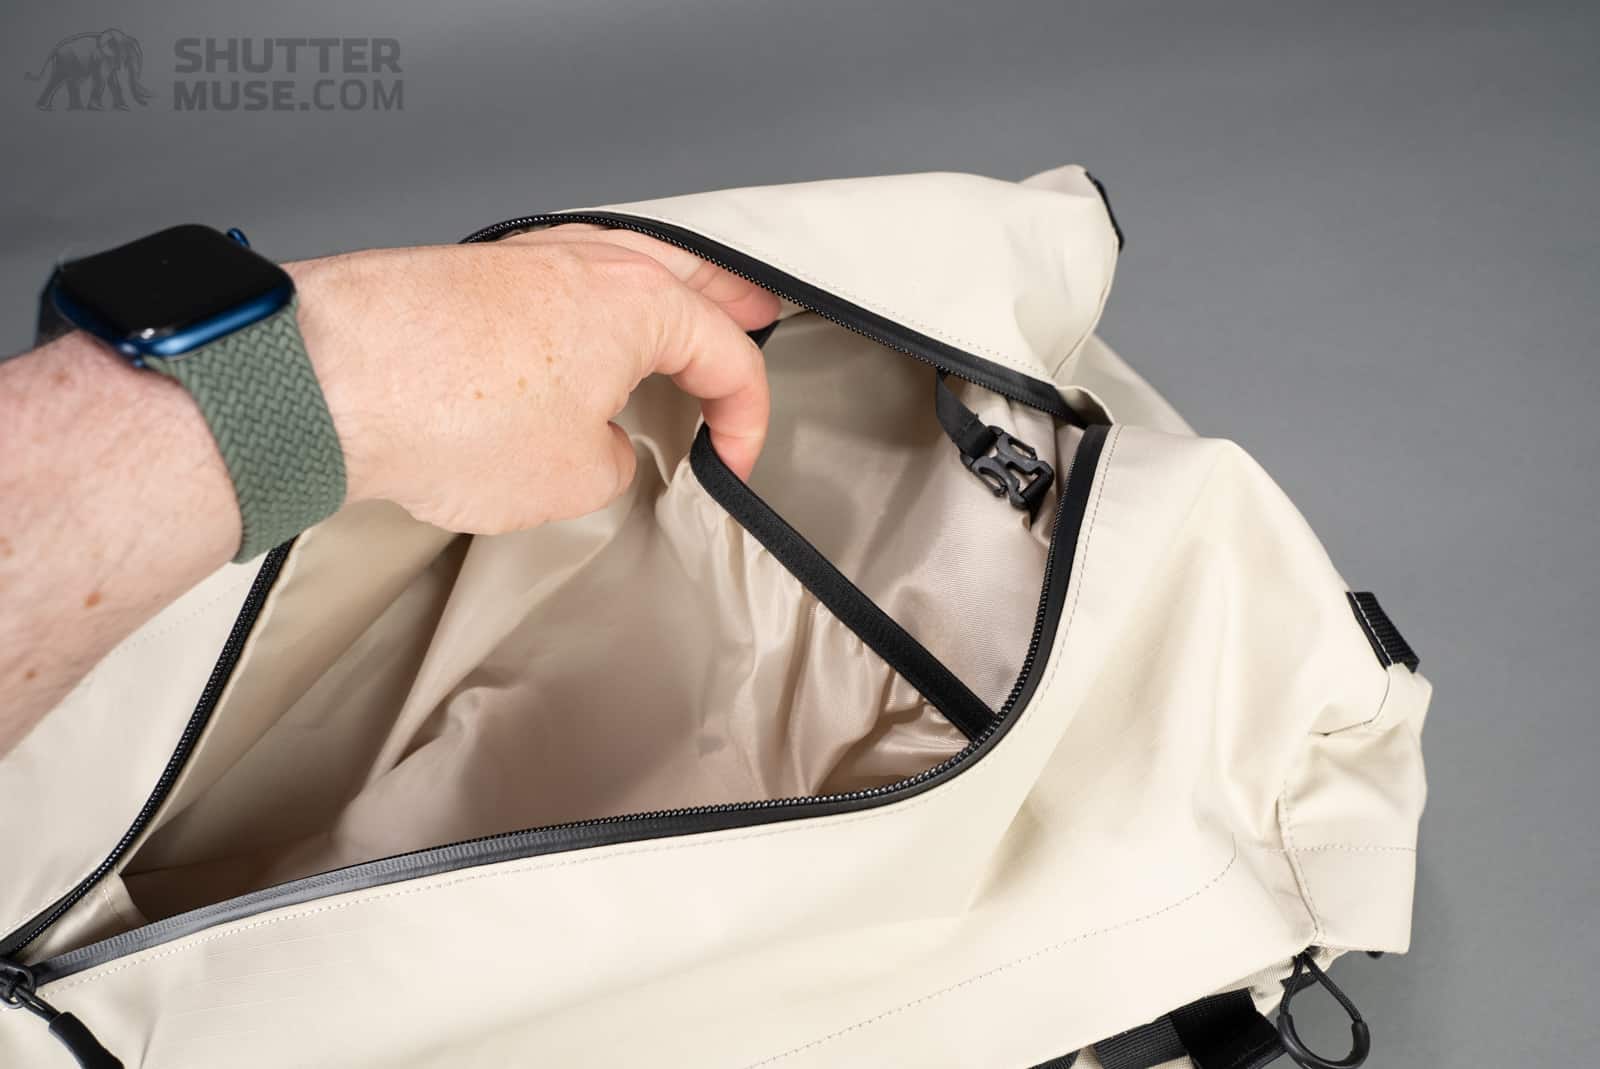
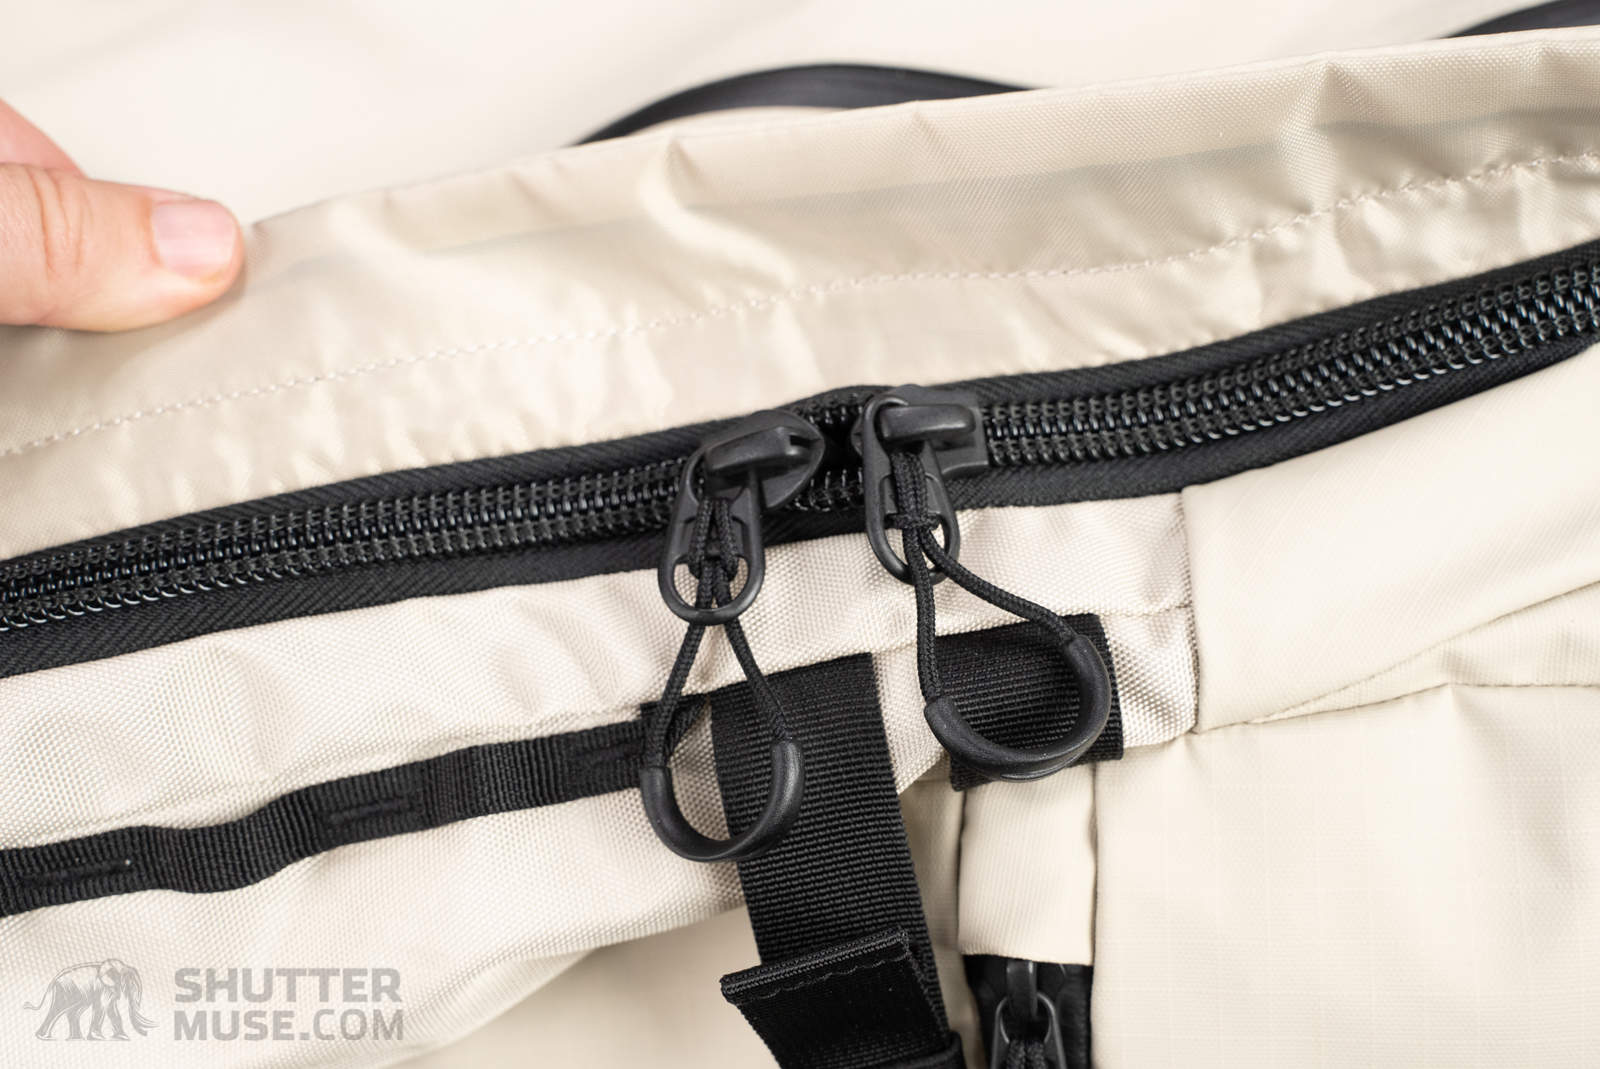
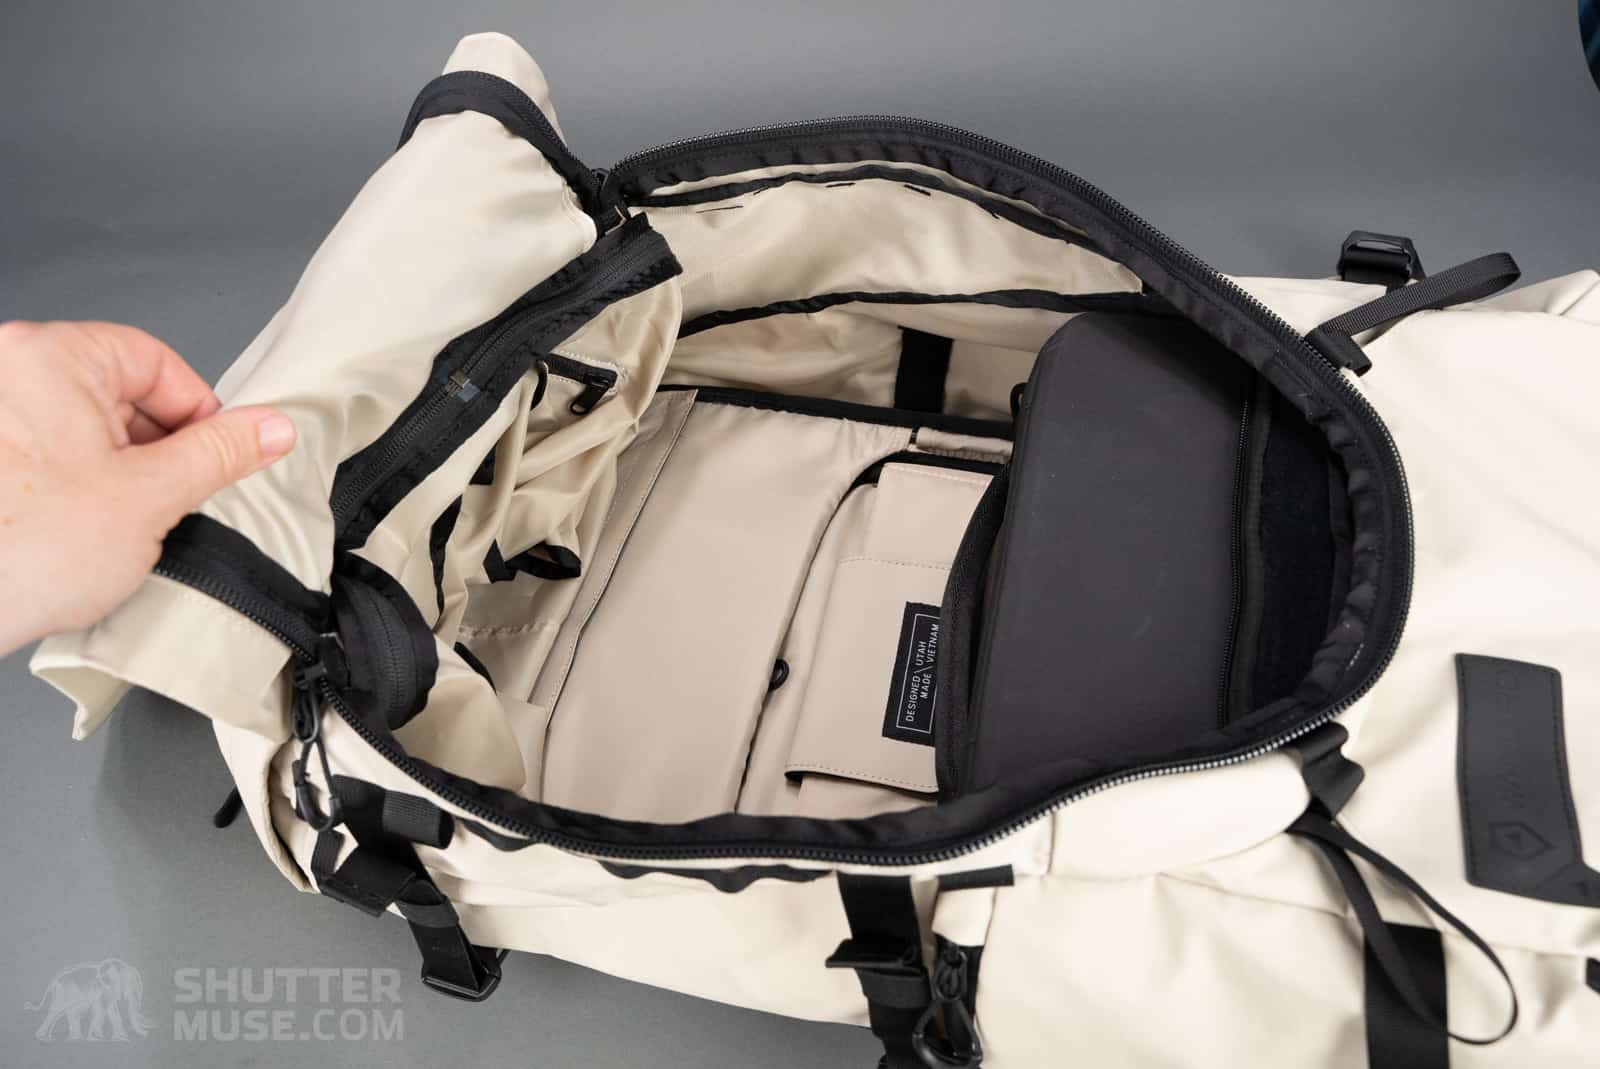
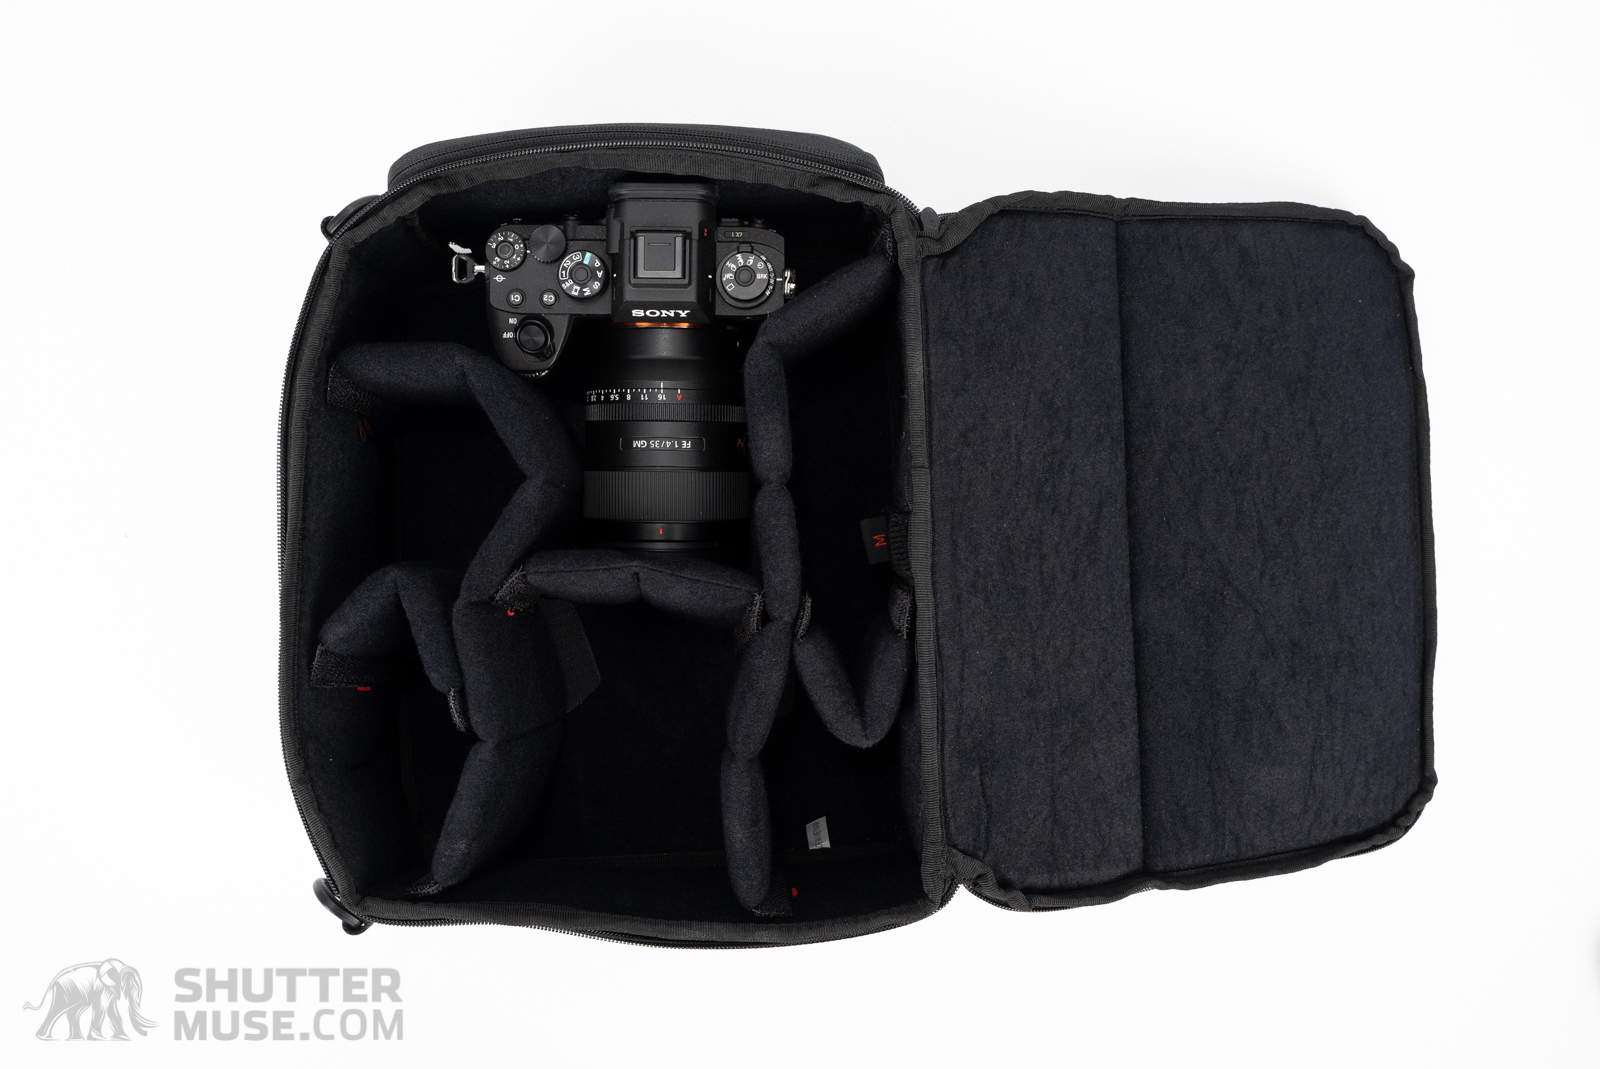
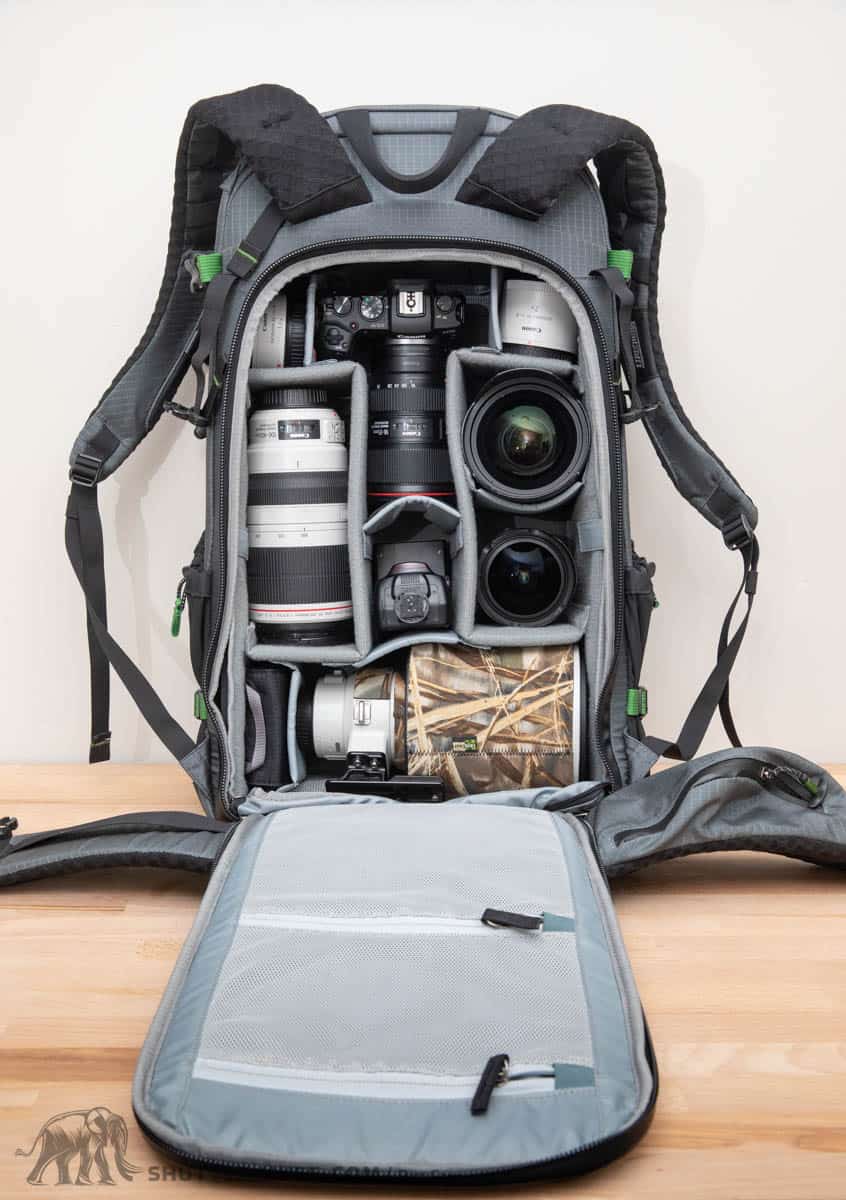
Internal Access
We have already discussed how the bucket from the top of the bag is removable, giving you access to the main compartment from above if you want to use the whole bag as one large packing volume. The two other ways you have access to the main section of the bag are from the front or from the back via large zippered openings.
A zippered back panel is seen on most outdoor camera bags these days. The reason it is popular is that it allows you to lie the bag down on its front to get access to your gear. If the ground is dirty, it keeps the back panel and suspension system clean so that the dirt doesn’t transfer to you once you put the bag back on.
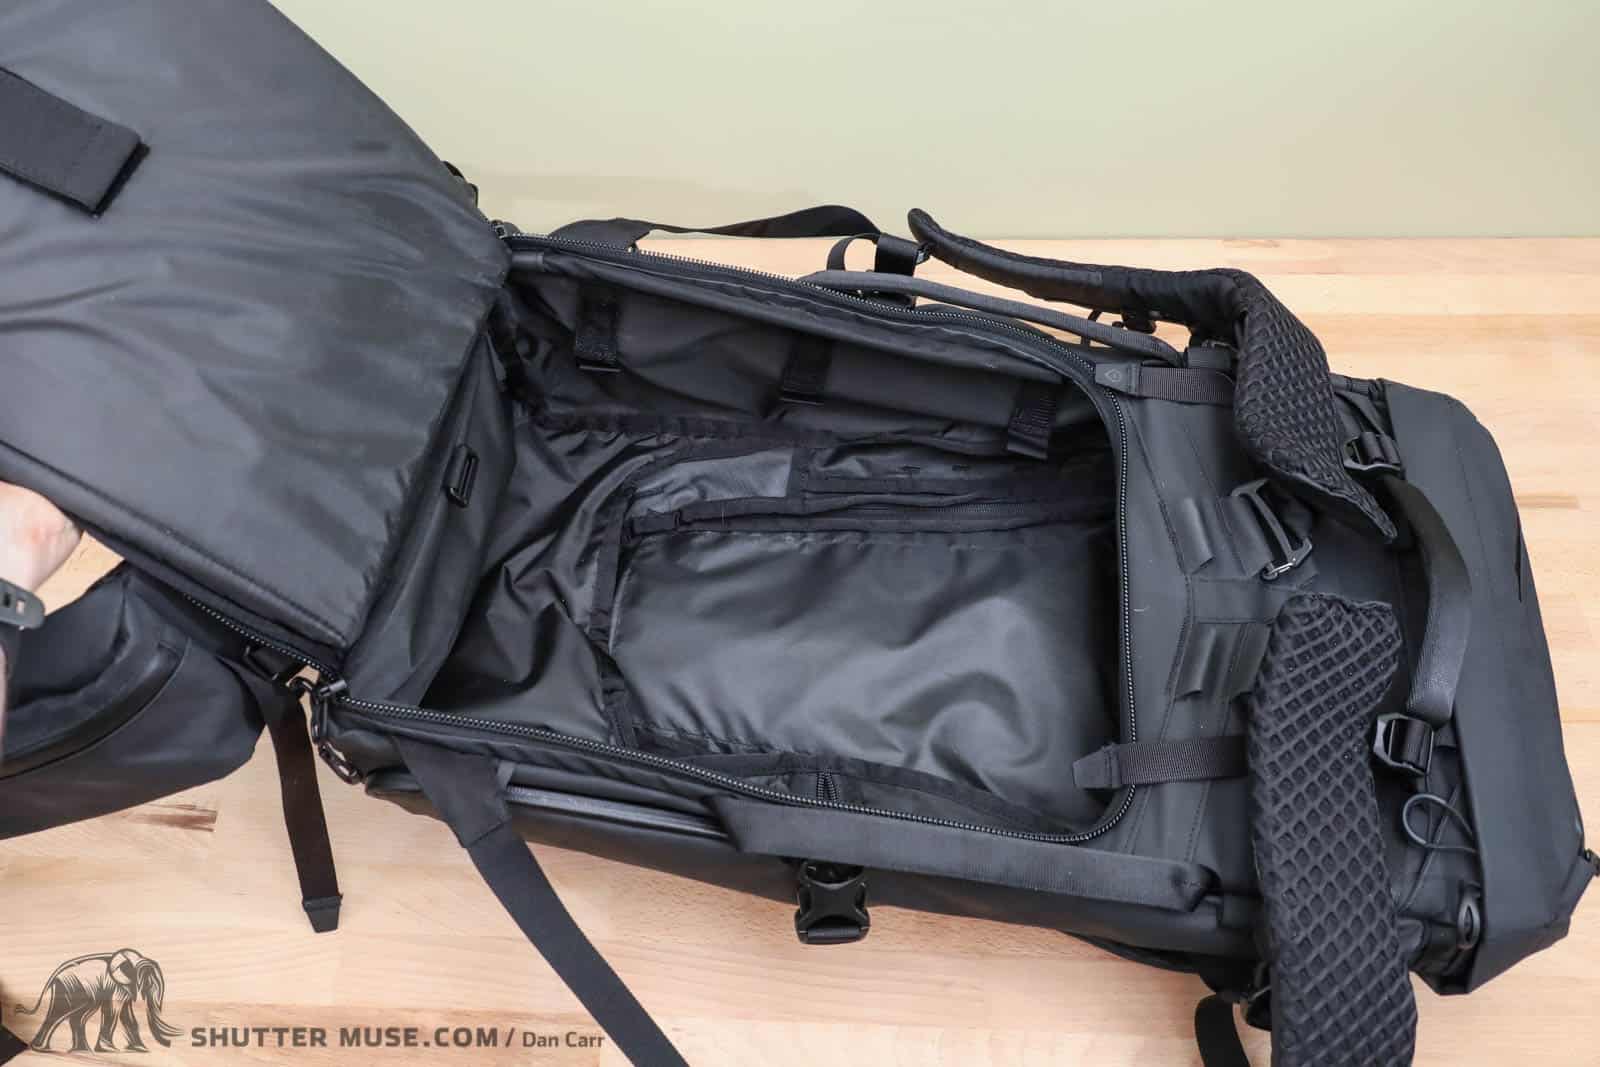
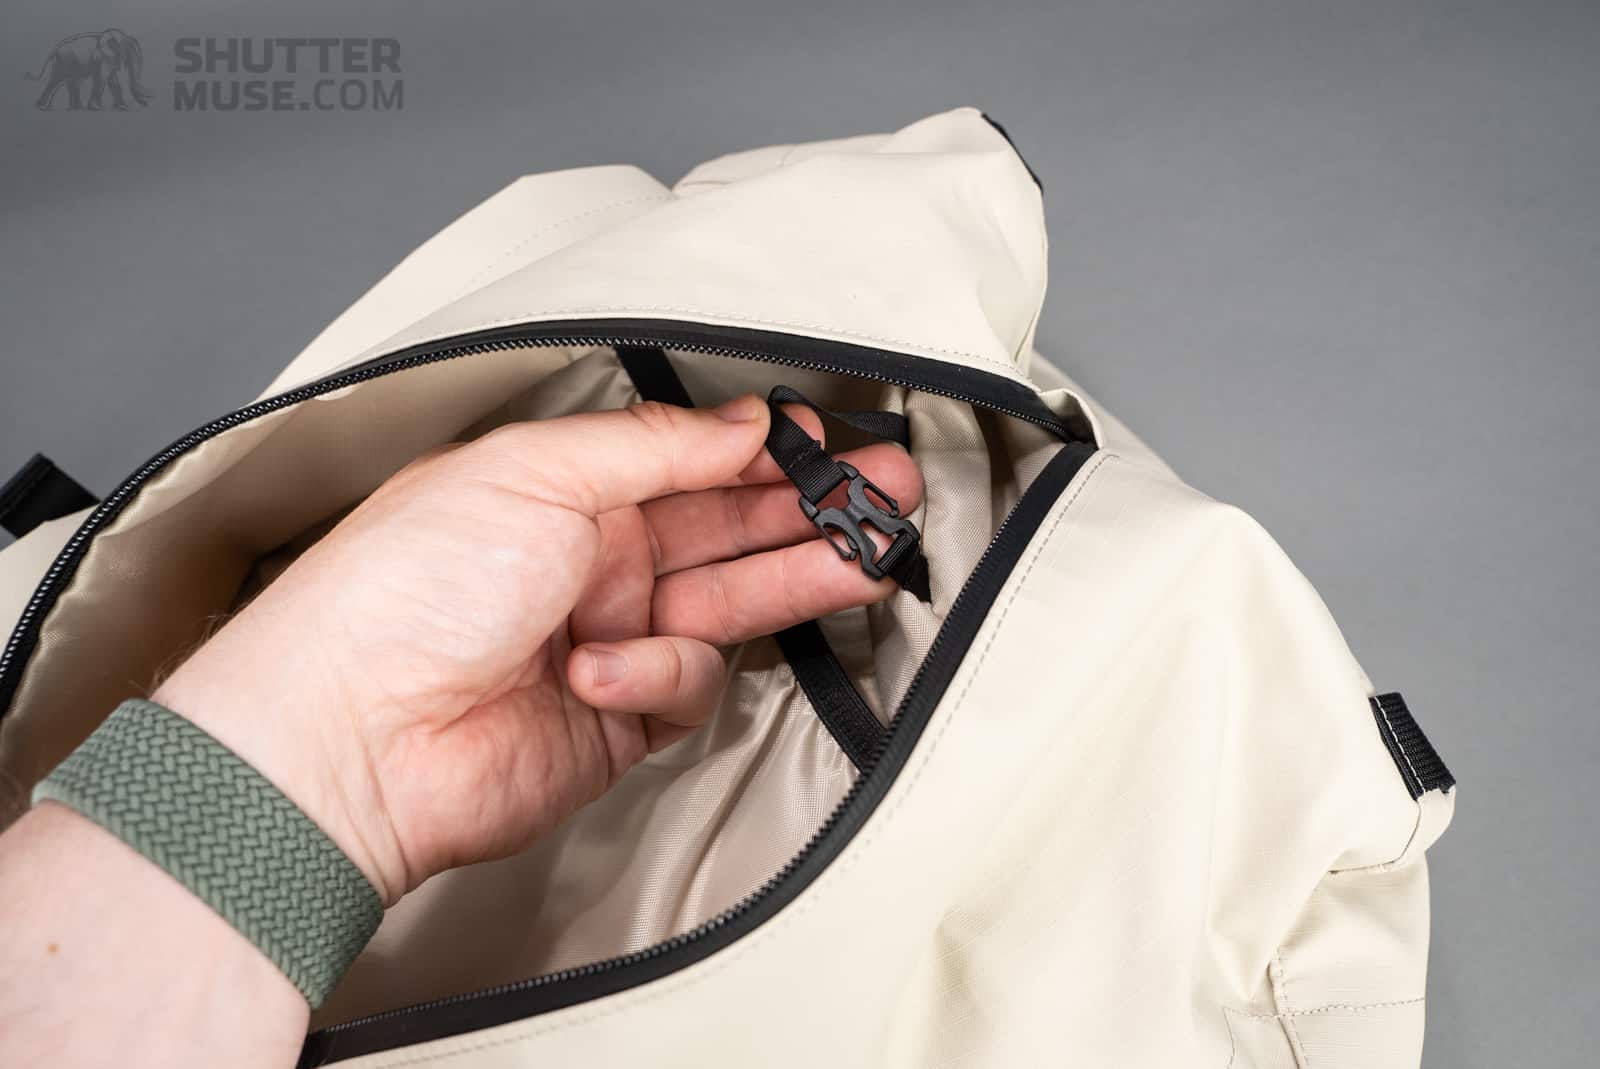
The downside to a back panel opening design is that the size of the rear opening is always constricted. As well as your opening, you also need to find room for your harness attachment points. If the pack has an adjustable back length as the Fernweh does, the space that is taken up by harness attachment points only gets larger. In the lefthand photo above, you can see how much space is taken up by these attachment points.
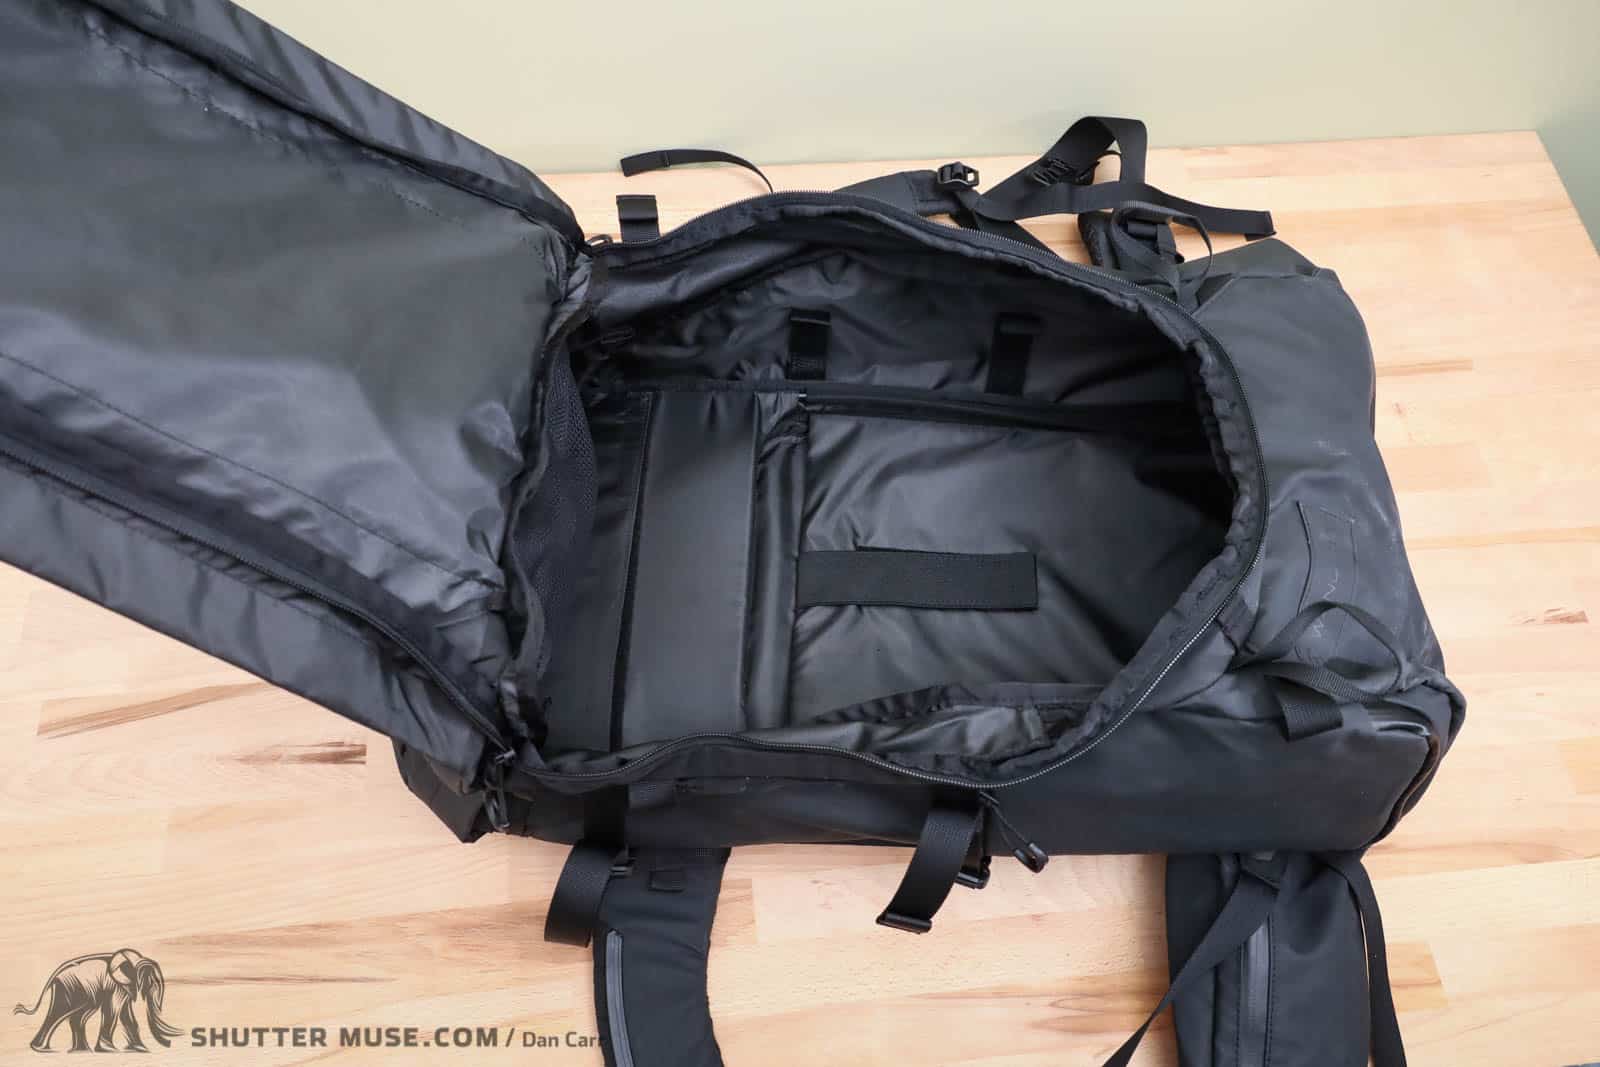
For travel usage, Wandrd has solved this problem by also offering a zippered front opening. As you can see from the comparison photos of the front opening vs. back opening, you have much easier packing access with this front zipper. If you’re using this bag primarily as a travel bag, this is certainly the opening you are going to want to use for packing and accessing your gear.
Overall, as a travel bag, I think this is pretty fantastic. The bag sizing should work for most international carry-on regulations, and some careful thought has been put into how you can access this bag’s content when it’s not being used as a camera bag. That front zippered opening is really the key to turning this from a camera bag into a travel bag. Kudos to the Wandrd designers for managing to make that work, and not make the bag look like it is entirely made from zippers!
Laptop Pocket

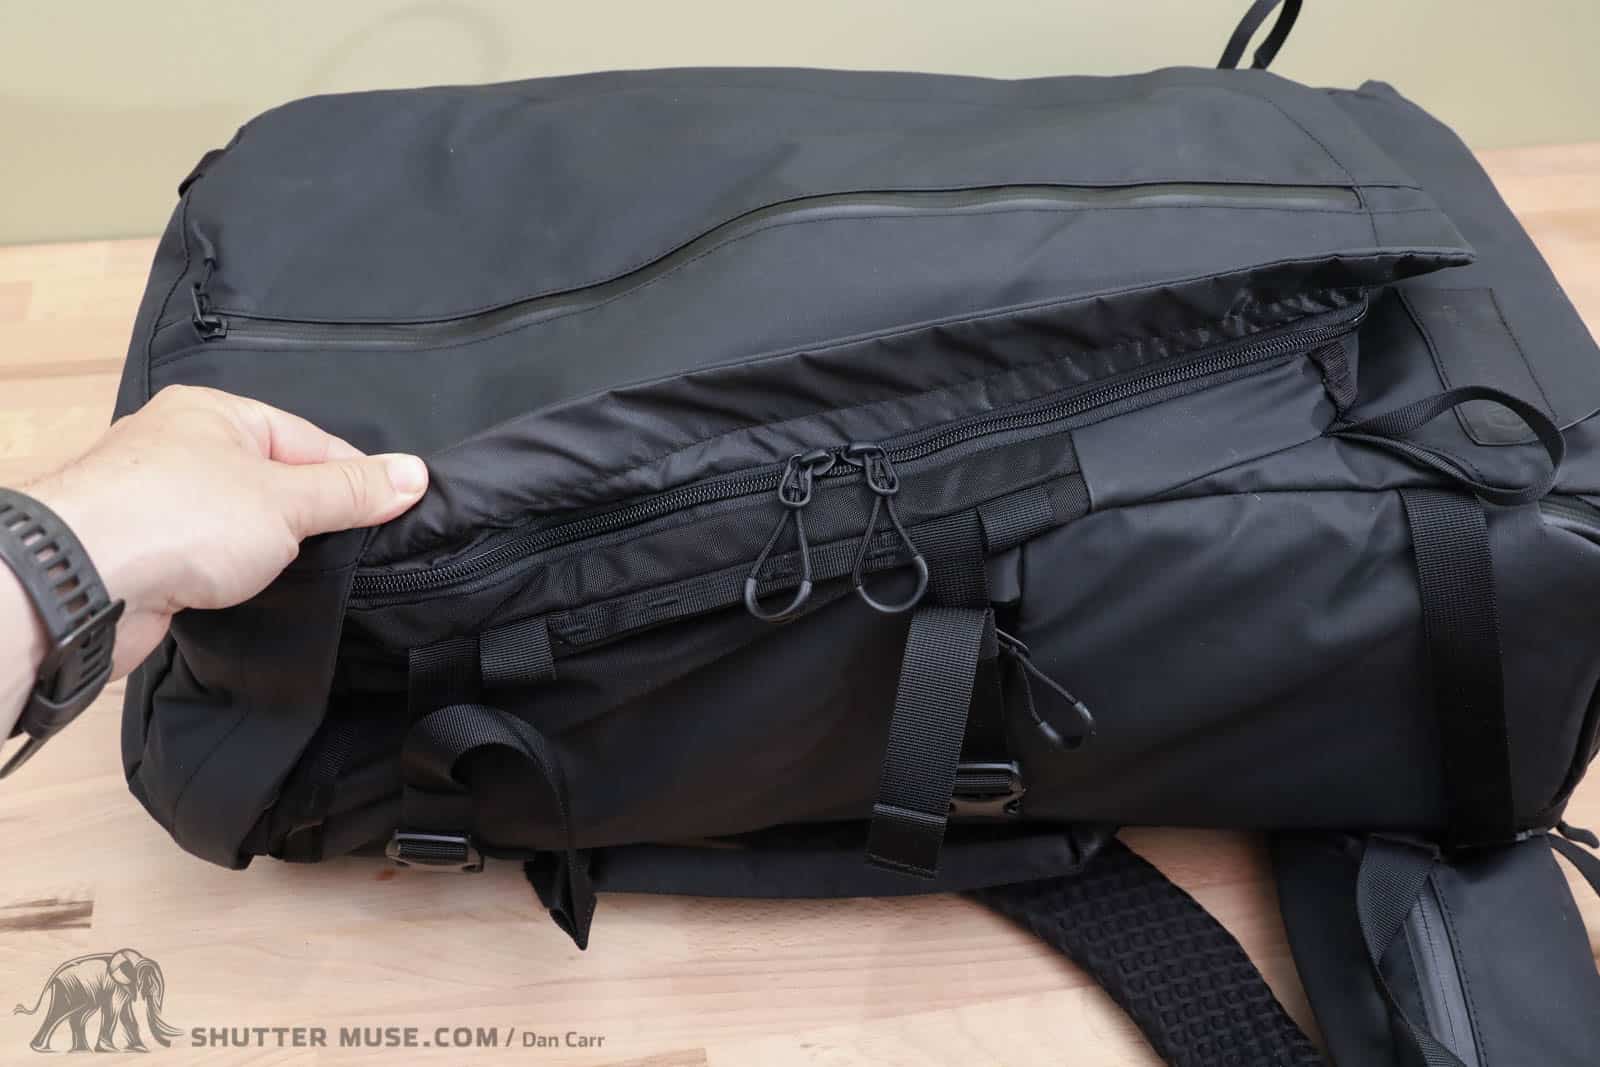
A thickly padded laptop pocket can be found on the inside of the back access point. The pocket certainly works with a 15″ MacBook Pro, and while I think the 16″ MPB would be a tight fit, the padding is thick and has some give to it so it should be fine. If you remove the bucket from the top section of the bag, the laptop can be retrieved from the bag using the top opening.
Note also that you can get the laptop from the rear opening by only opening the zipper slightly at the top, and sliding the laptop upwards. This is definitely how you would want to do it at airport security or on the plane, saving you from opening the entire clamshell.
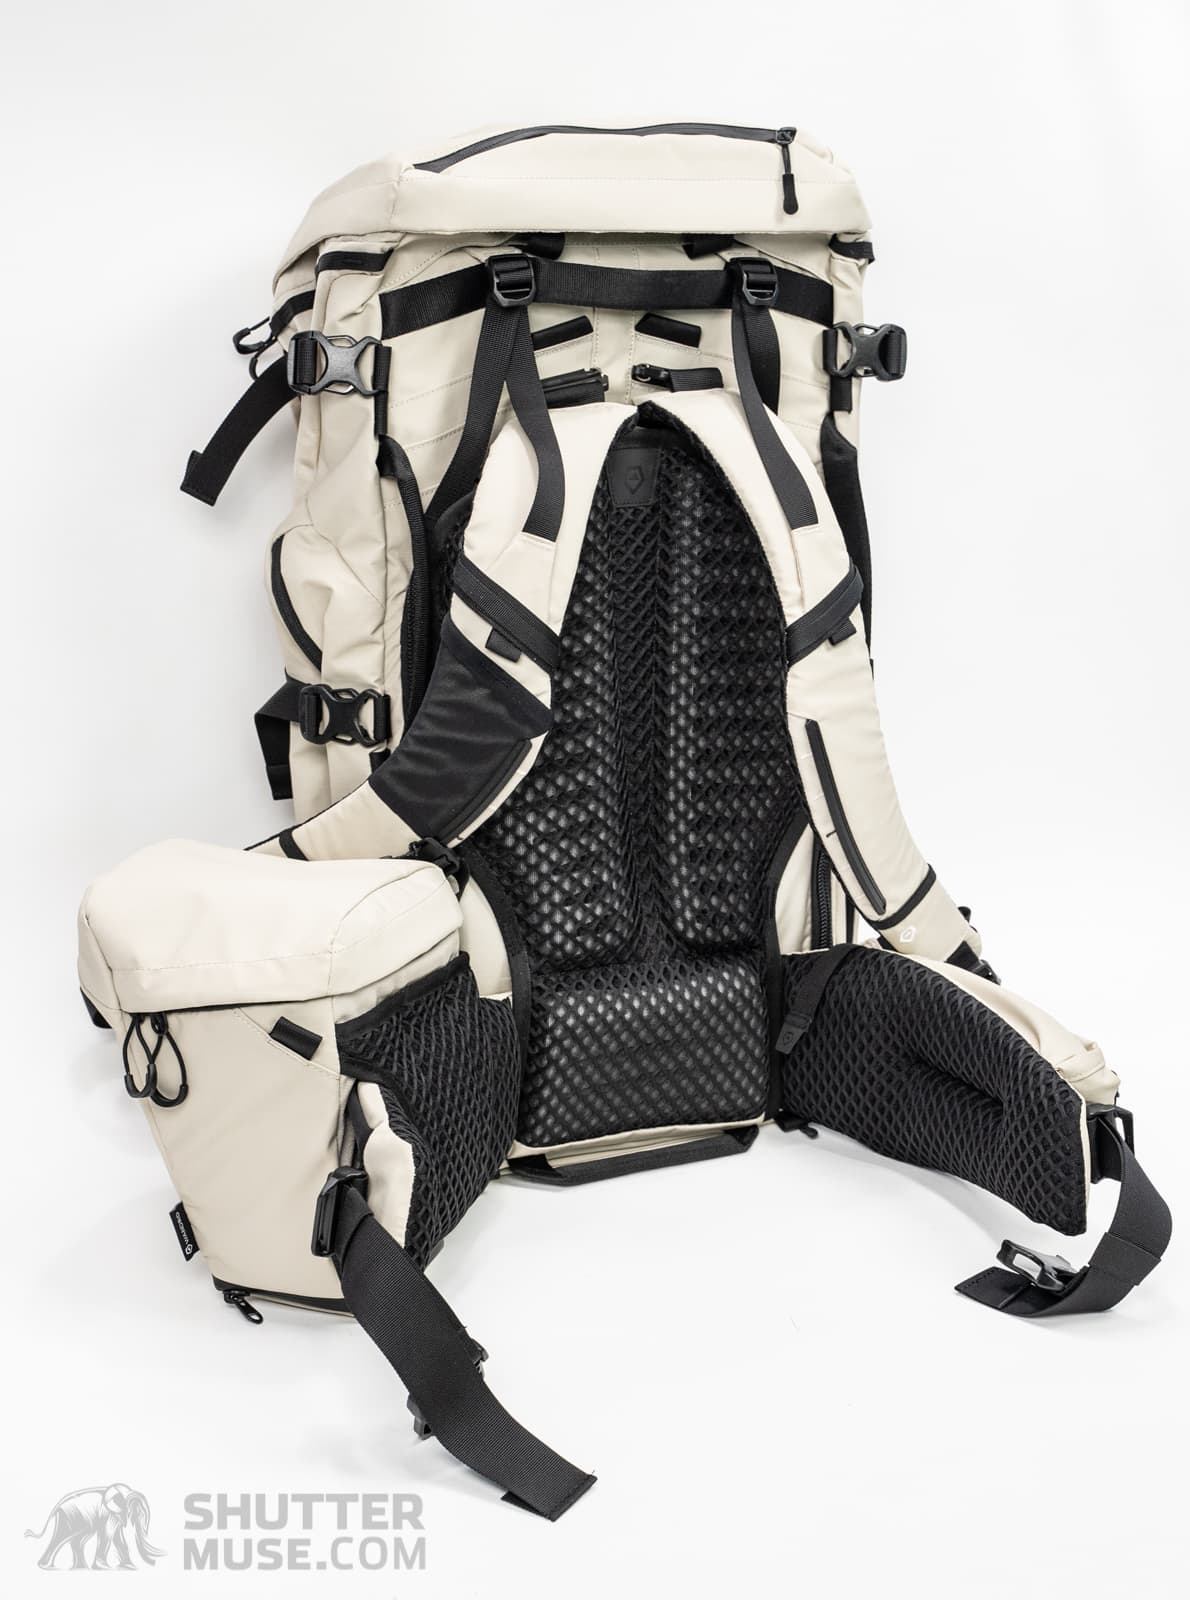
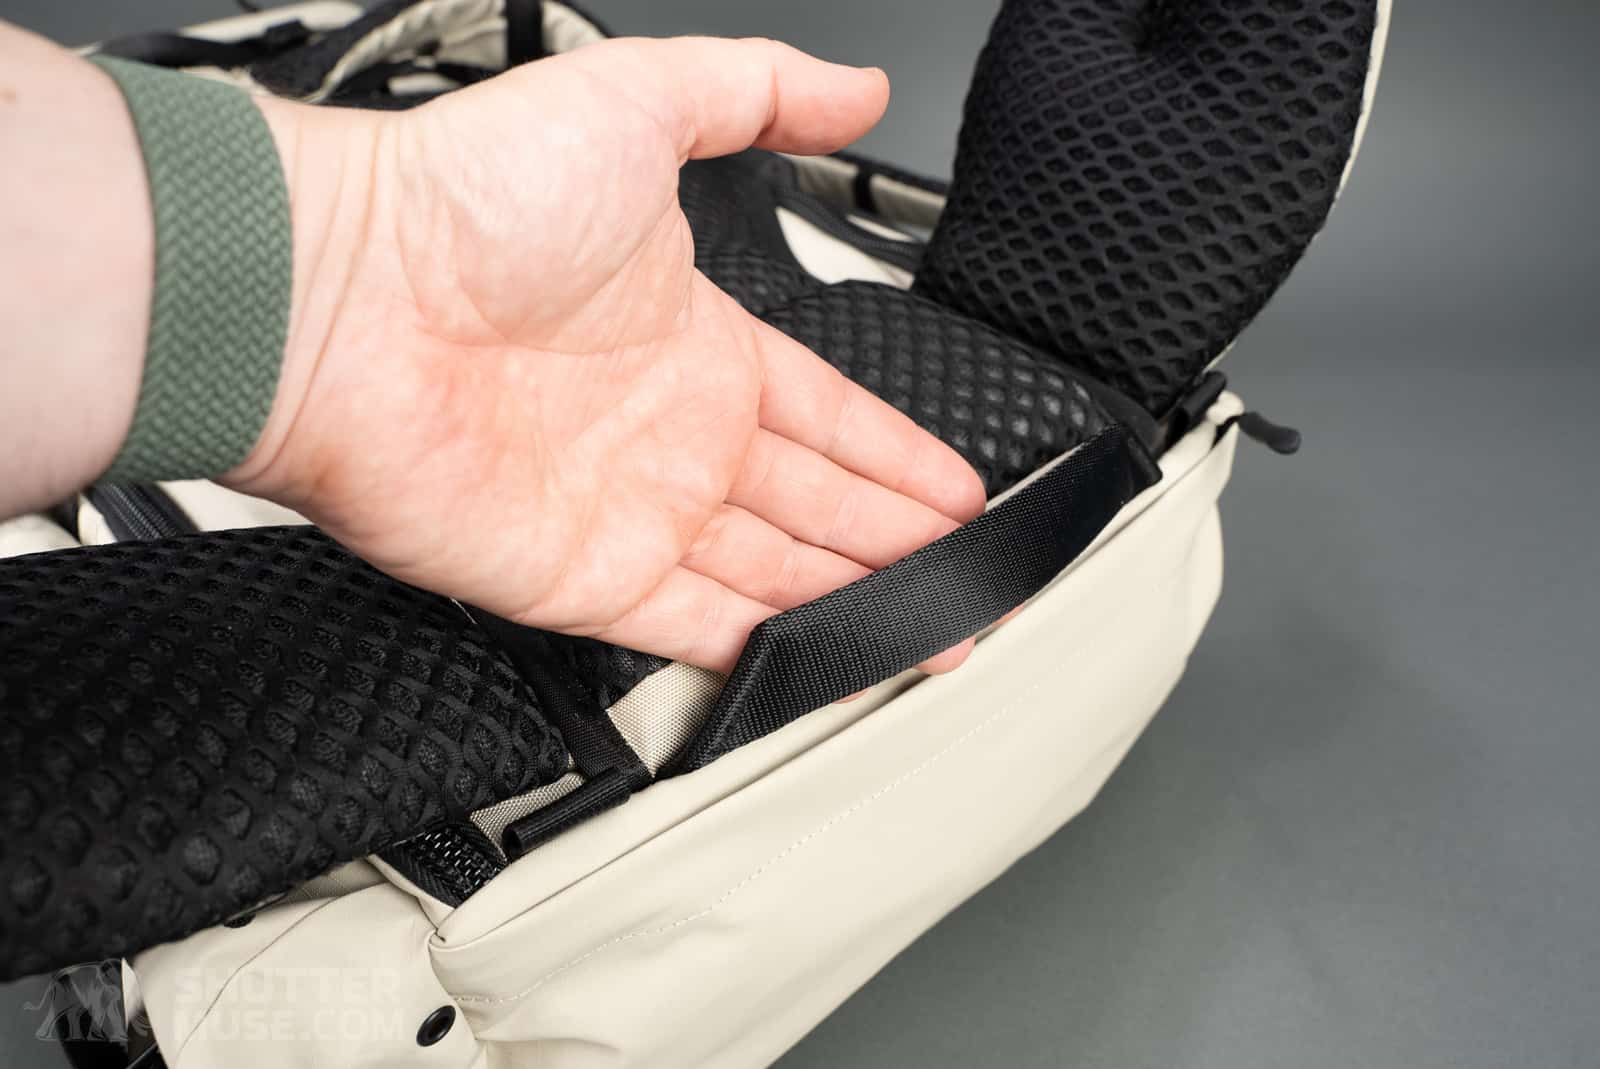
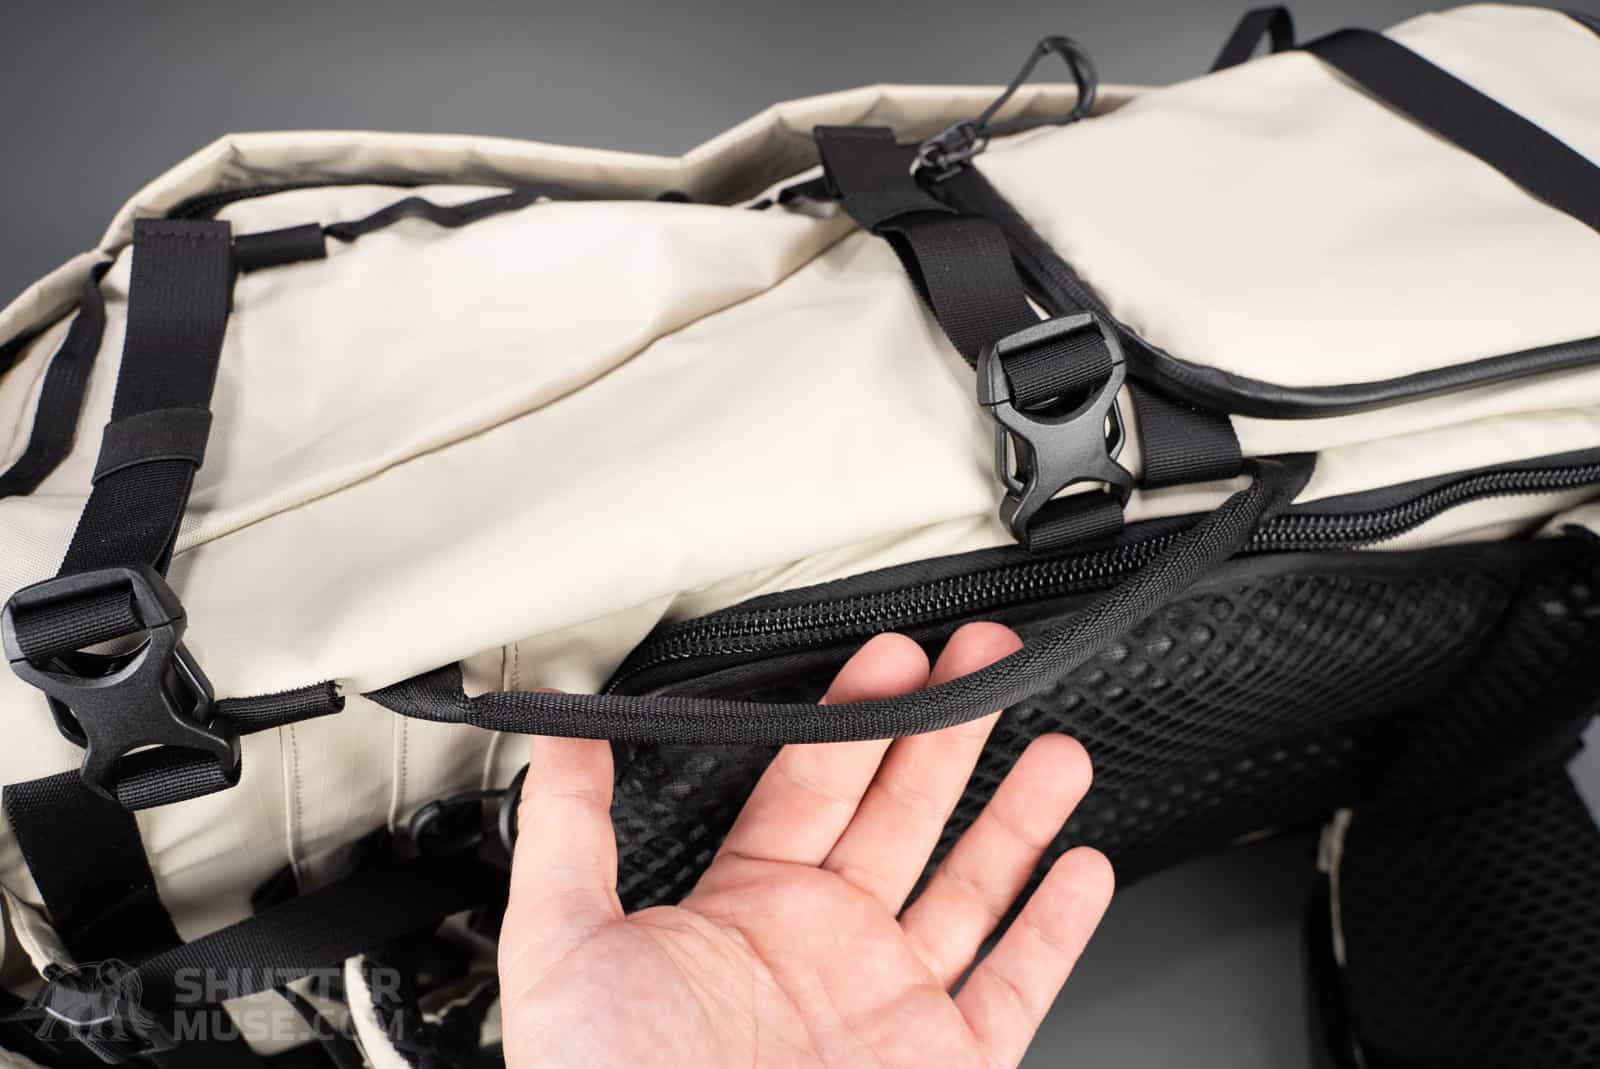
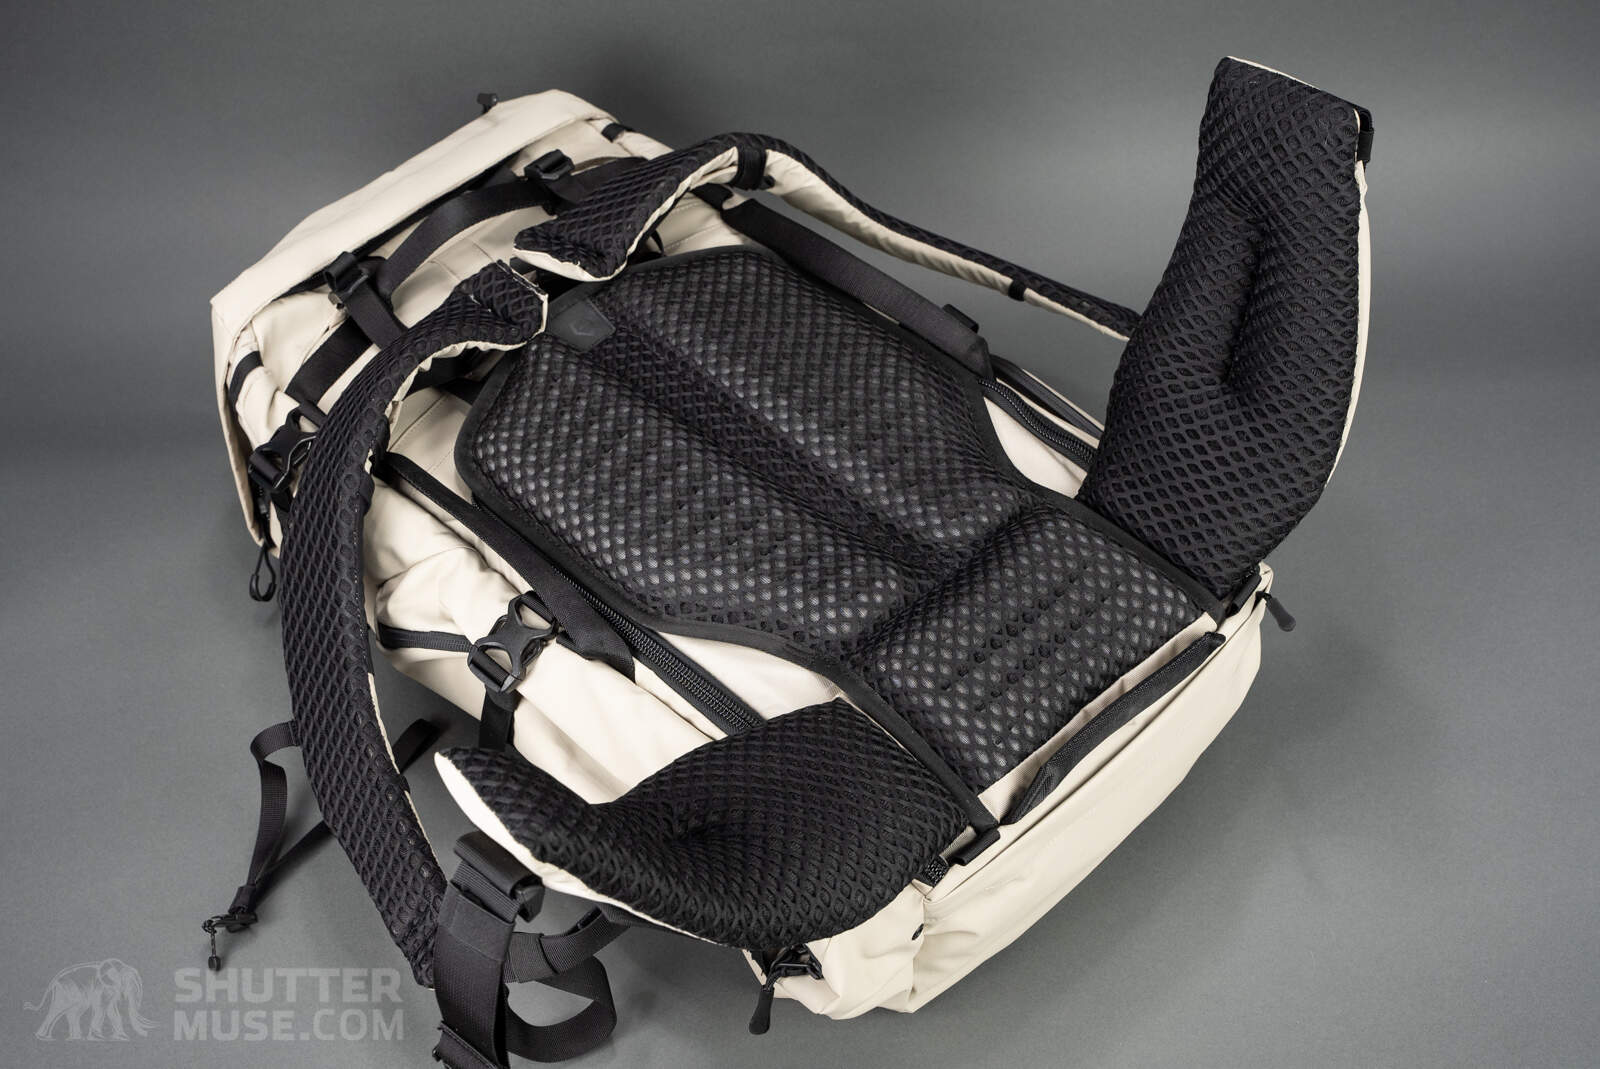
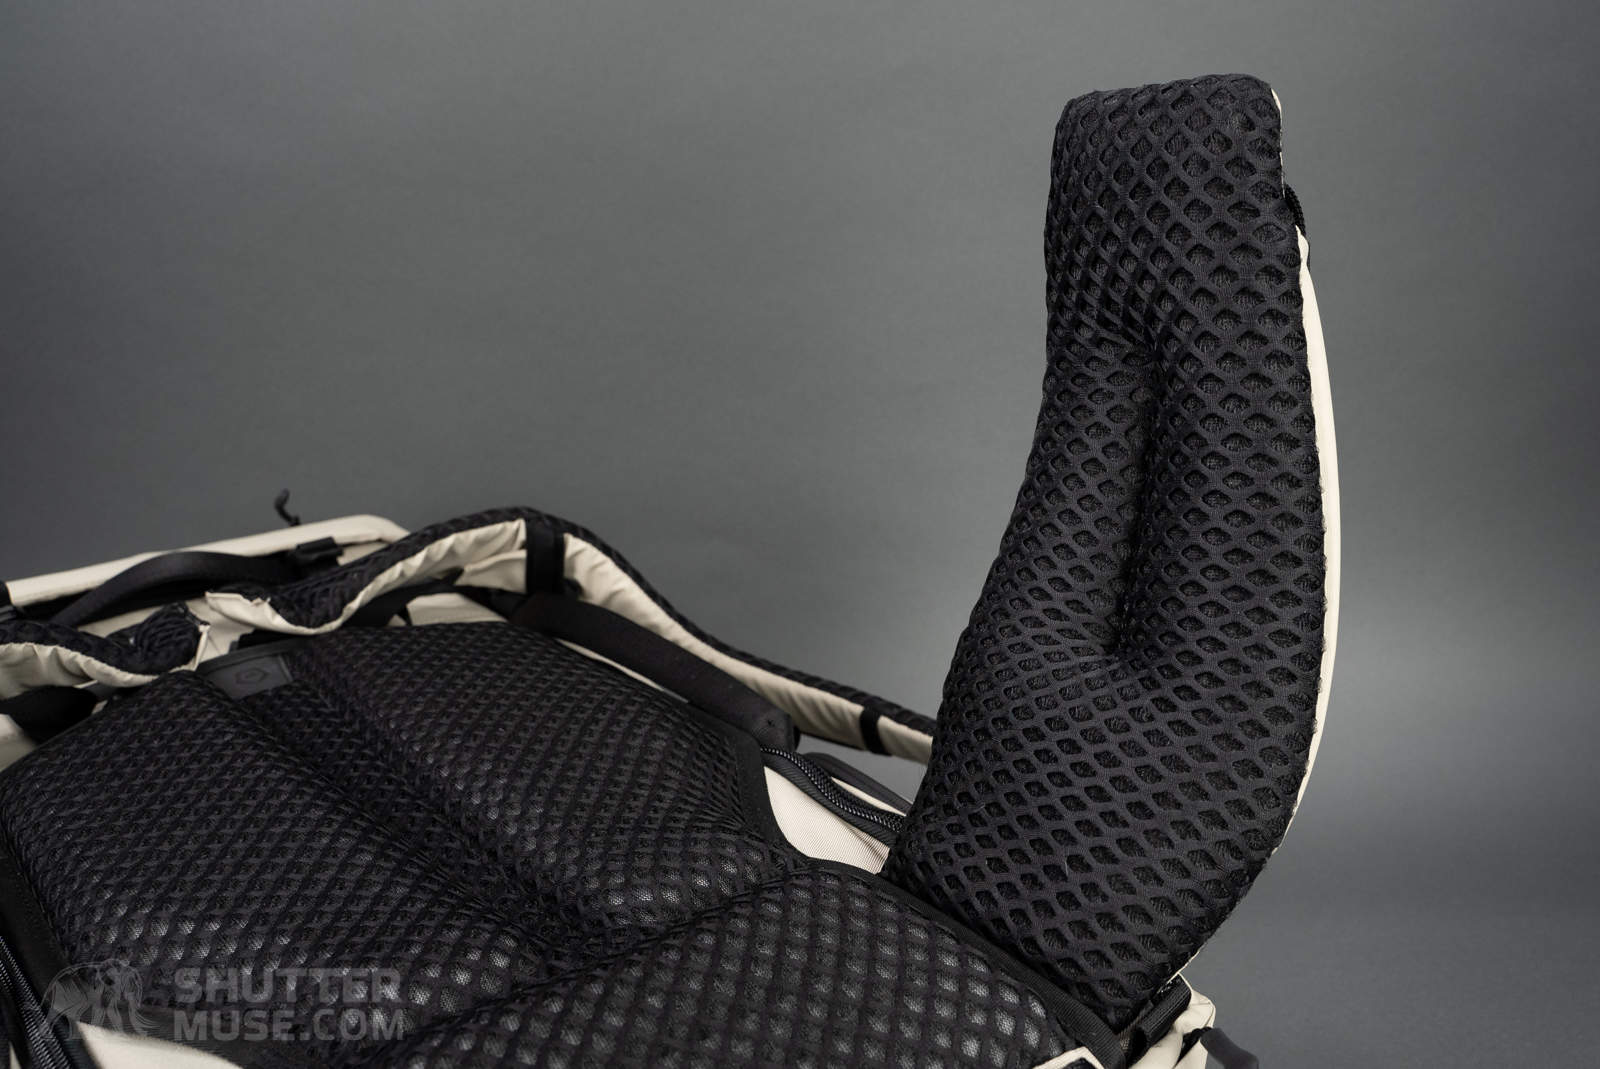
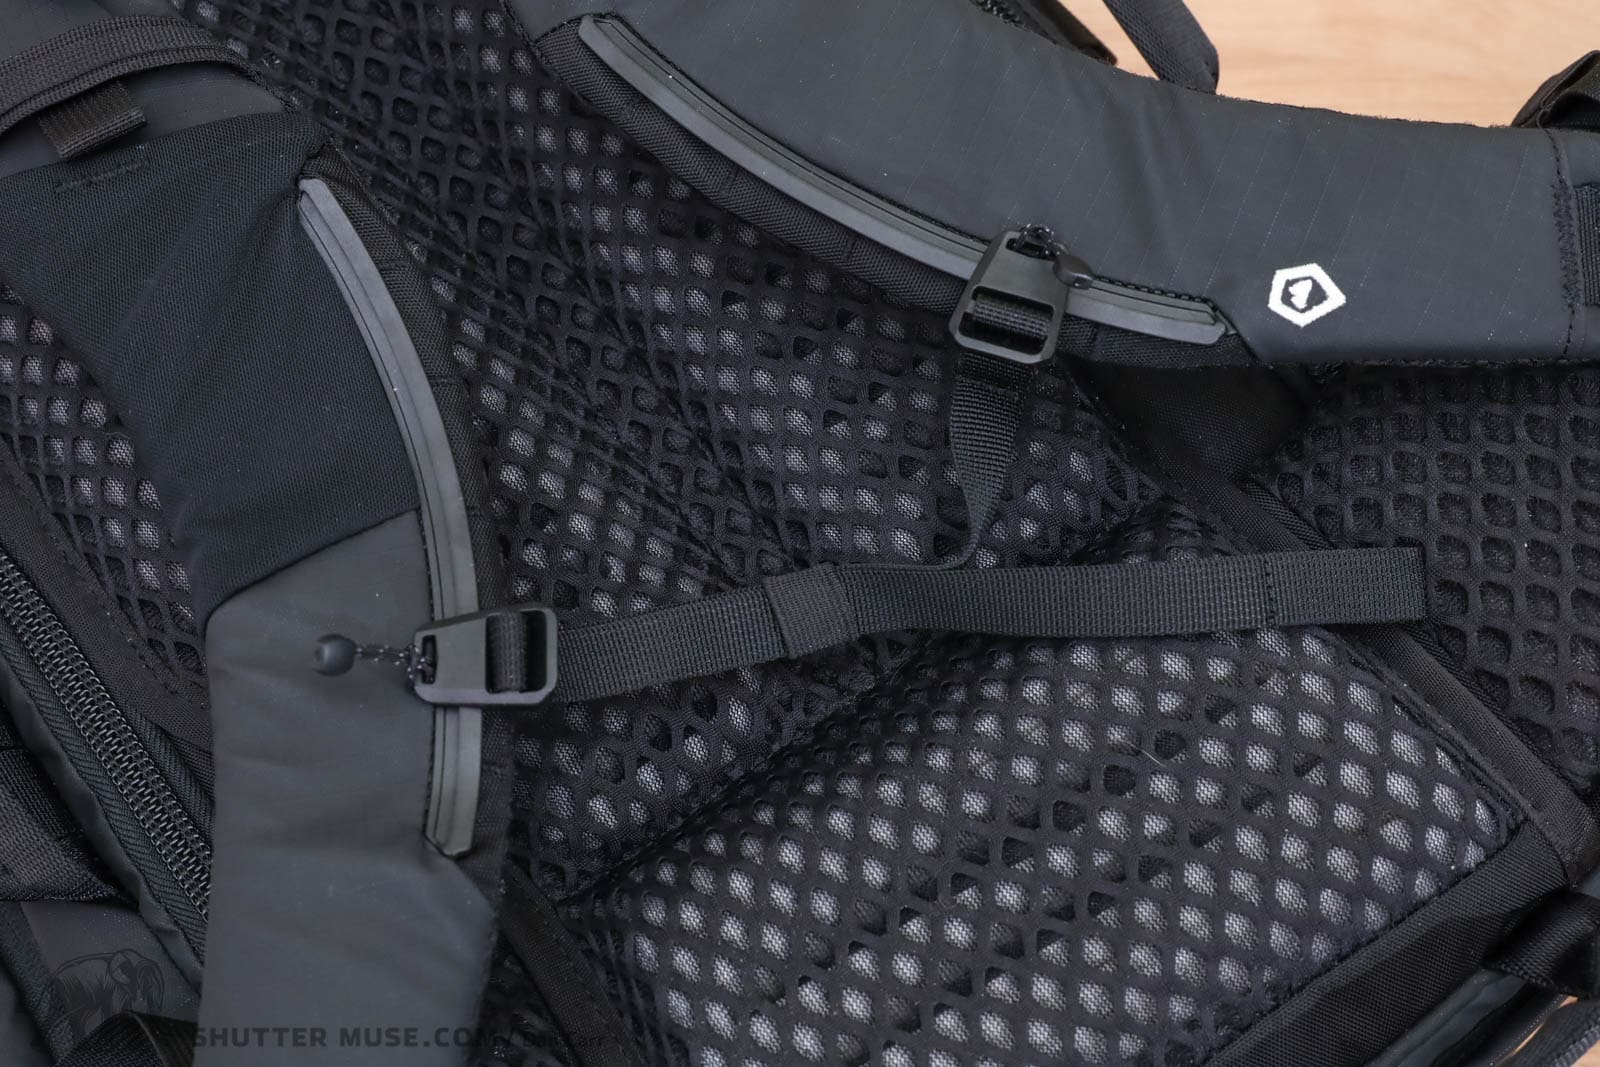
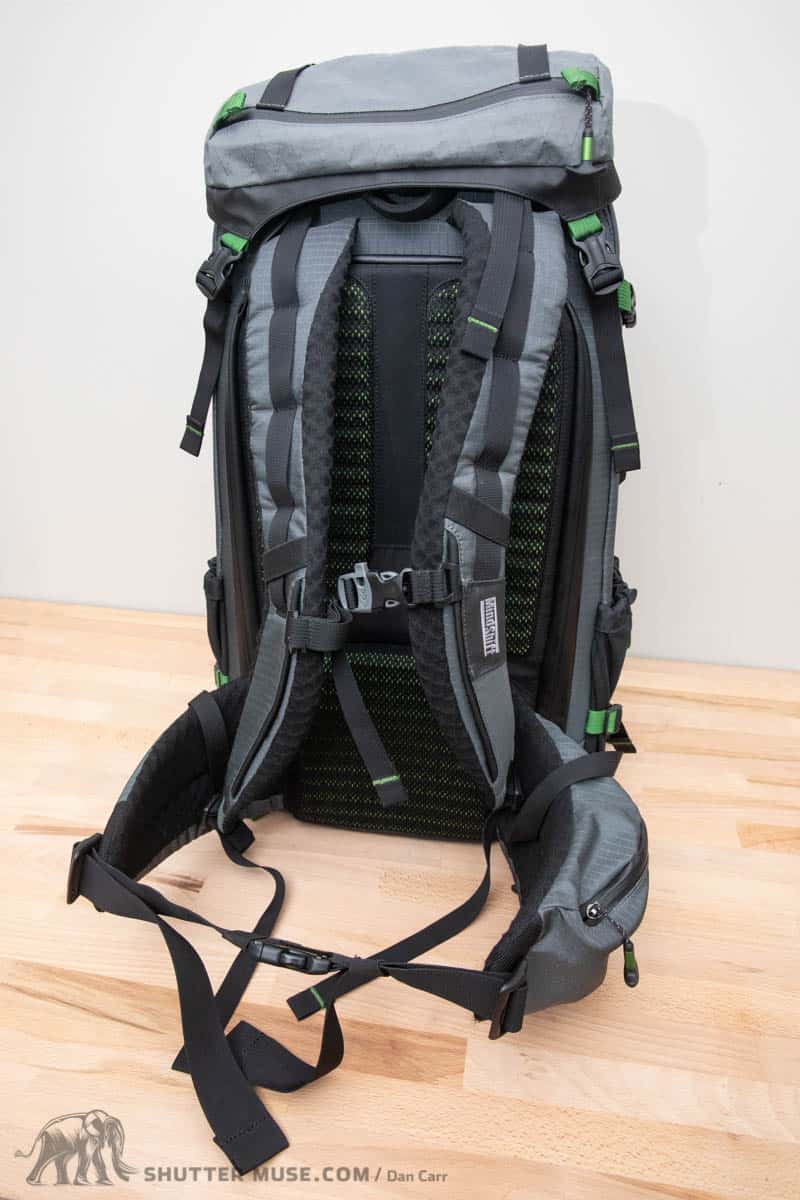
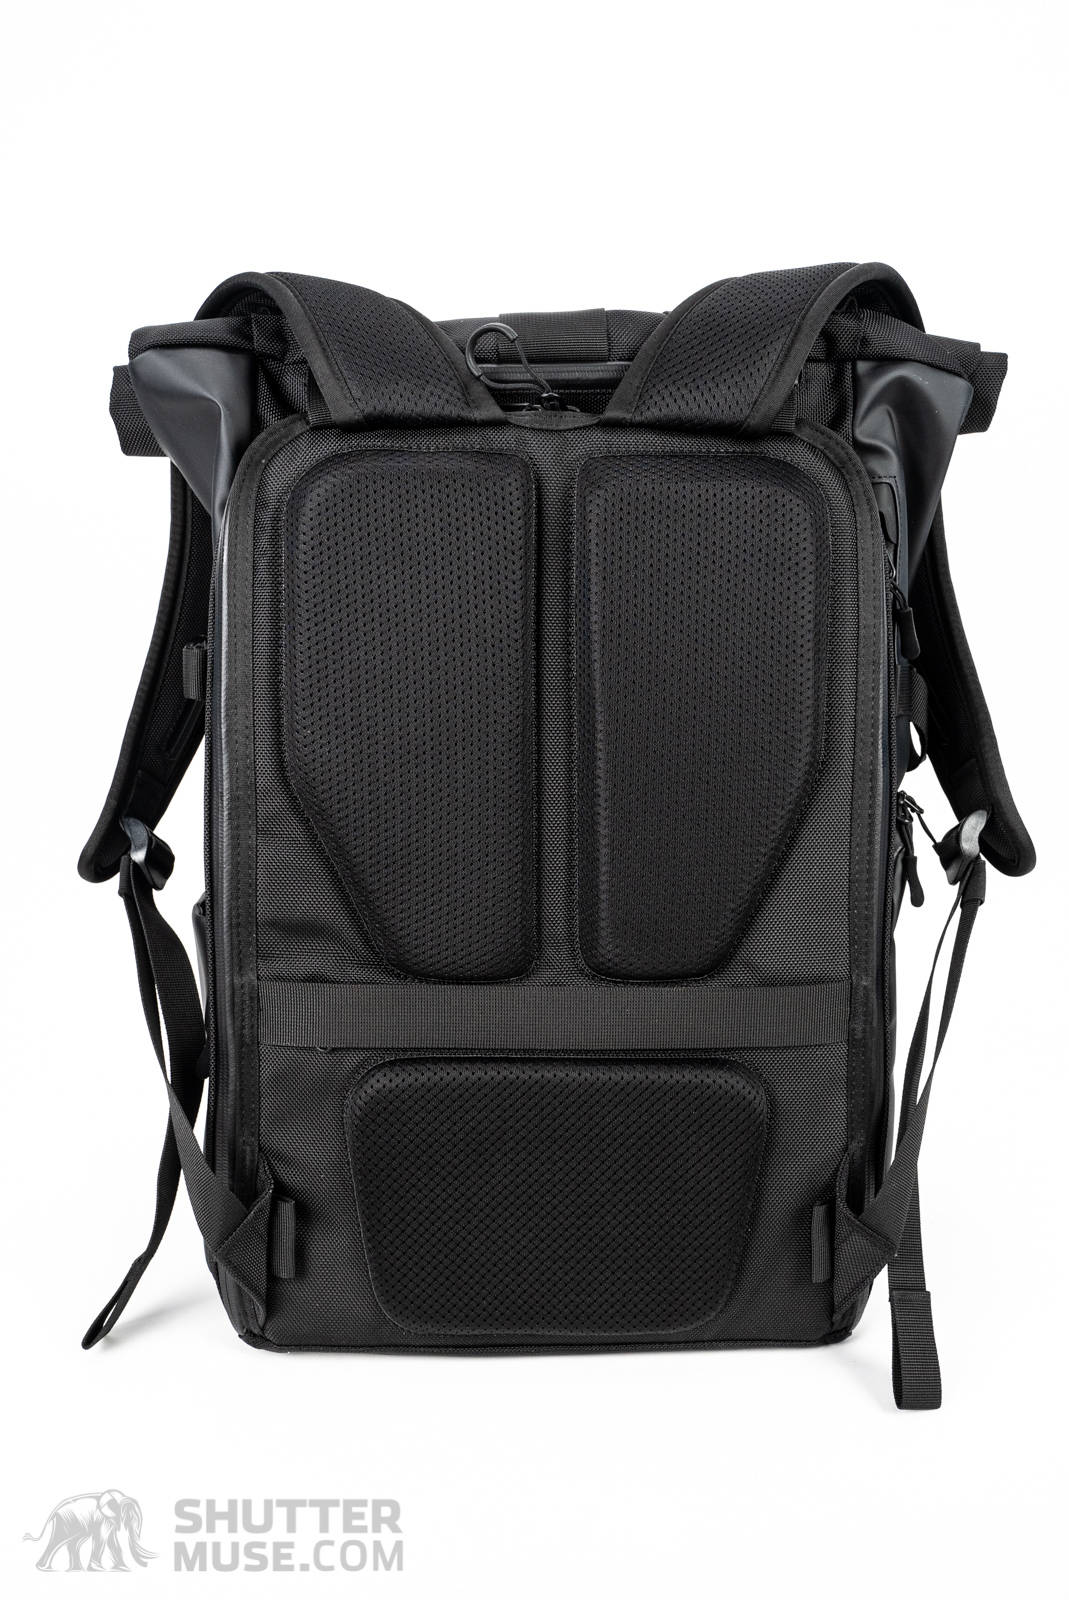
Padding and Harness
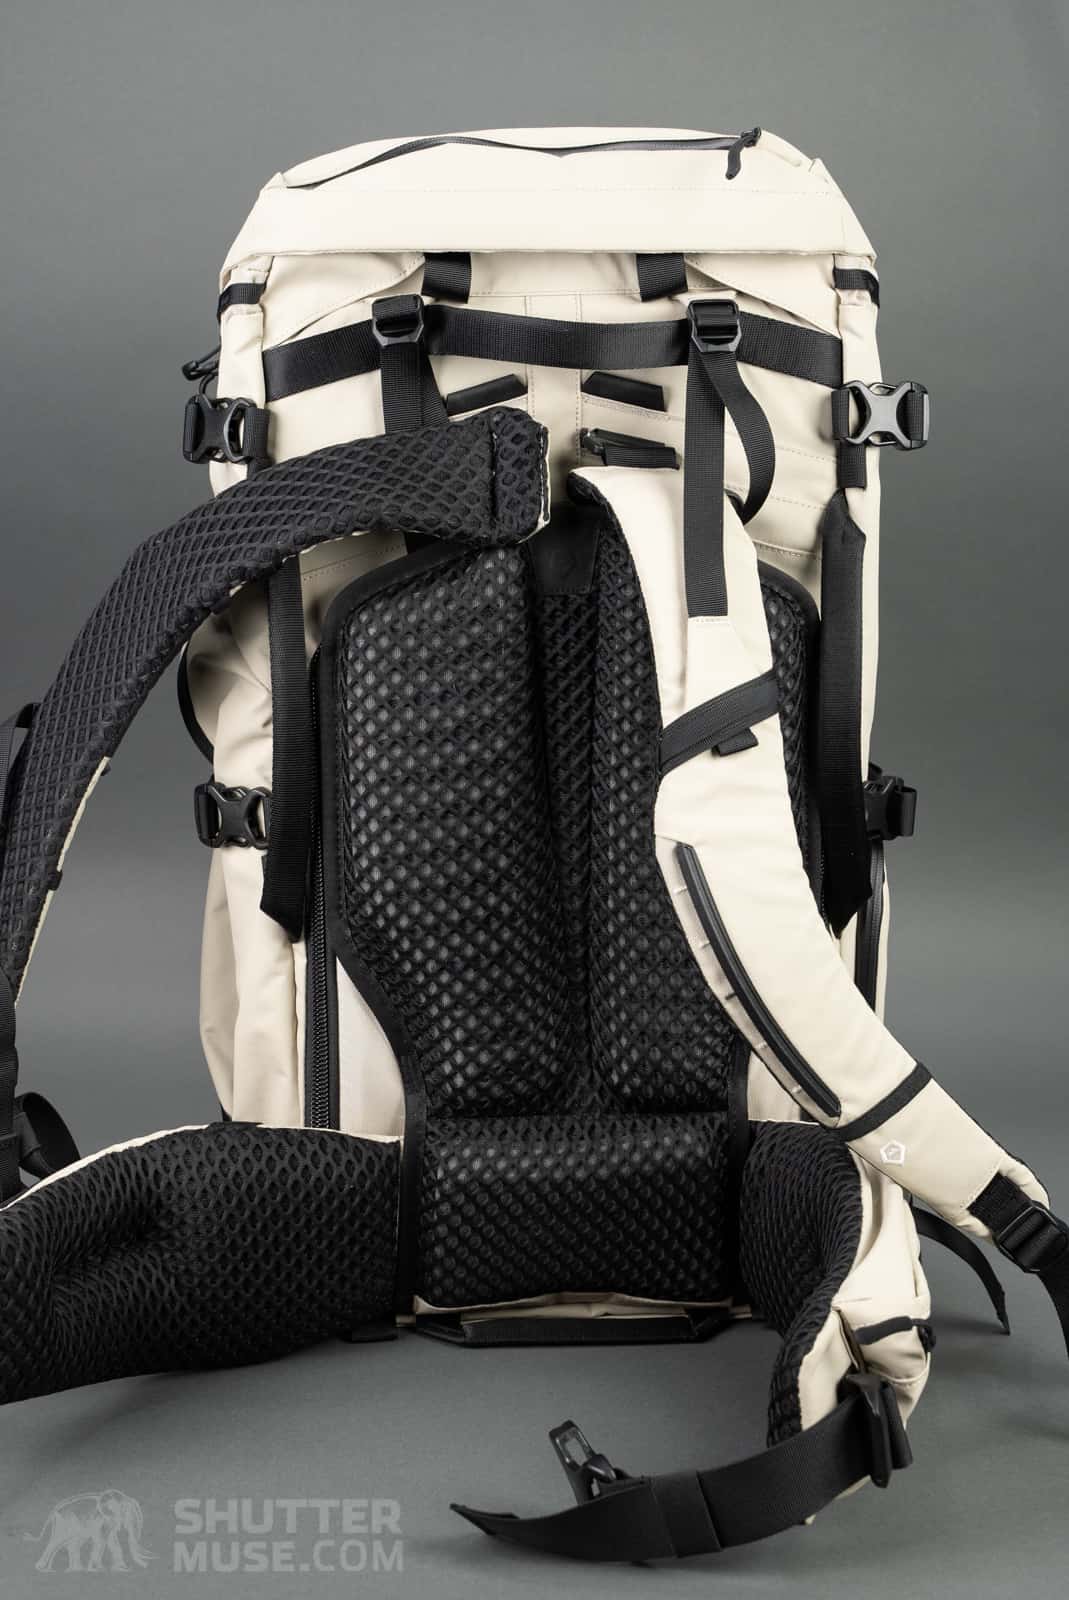
The padding and harness system on the Fernweh is comprehensive. Airmesh is used on the shoulder straps and waist belt, with heavily ventilated foam used in the centre of the back panel and lumbar support. At first glance, most people will not assume this is a camera bag at all. It appears to be a high-end hiking backpack.
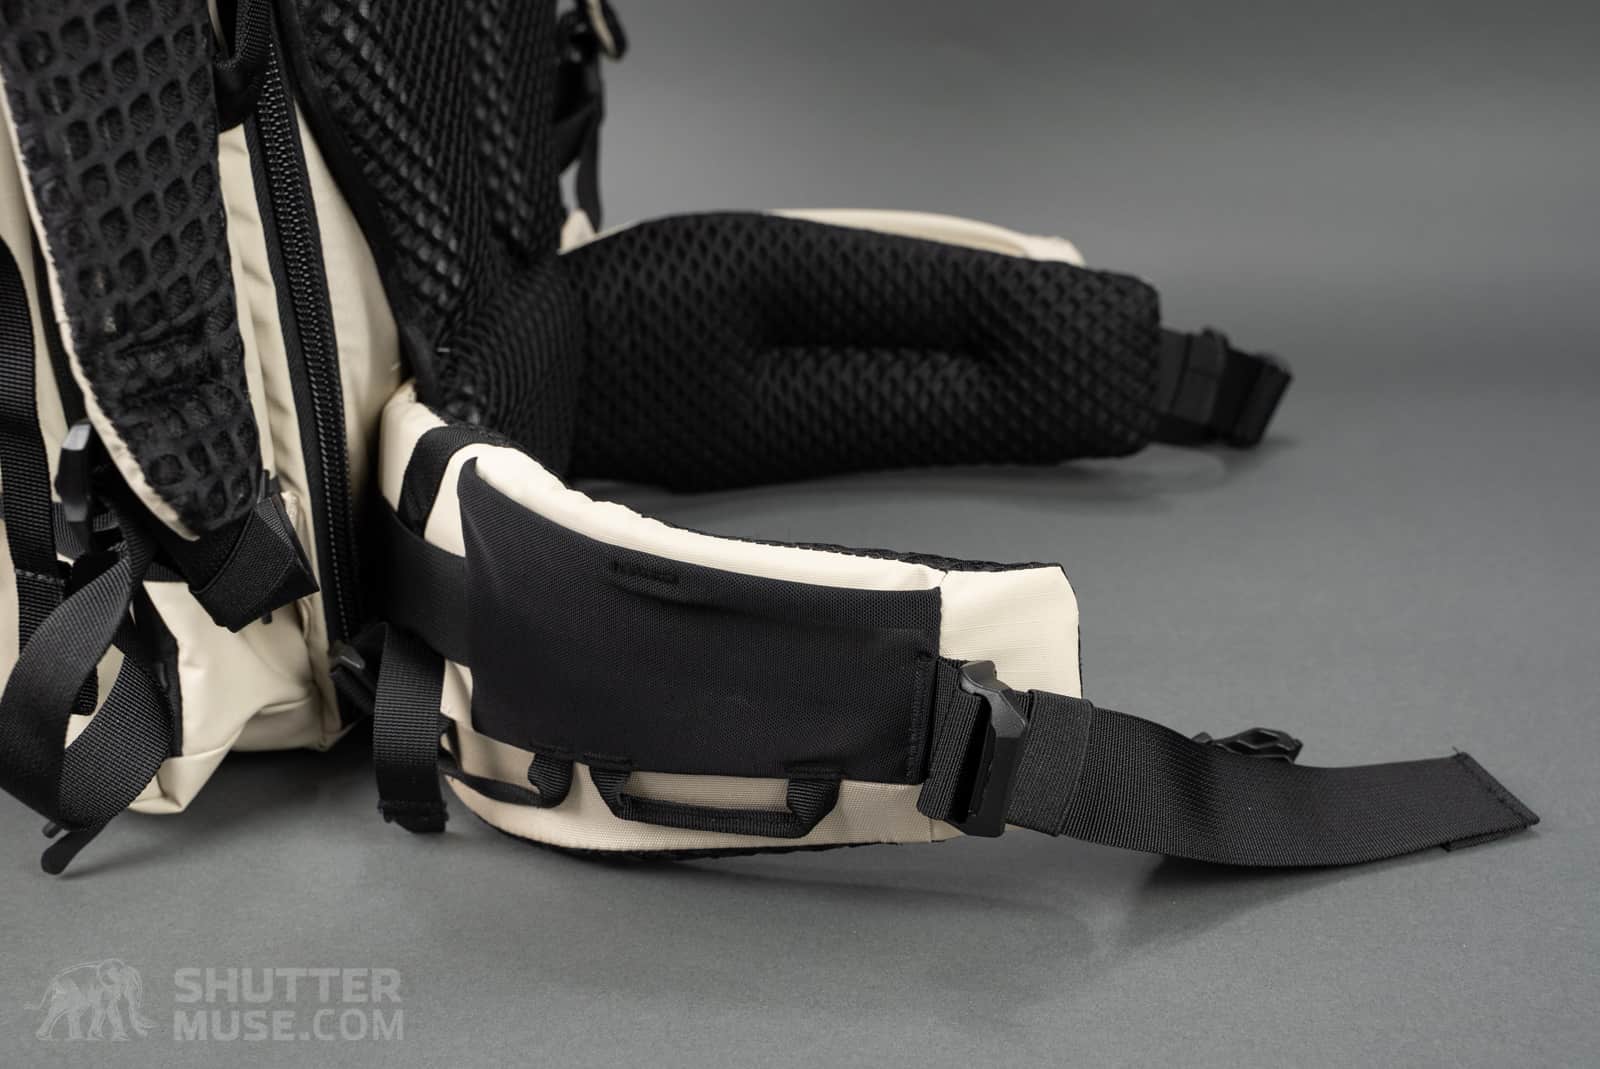
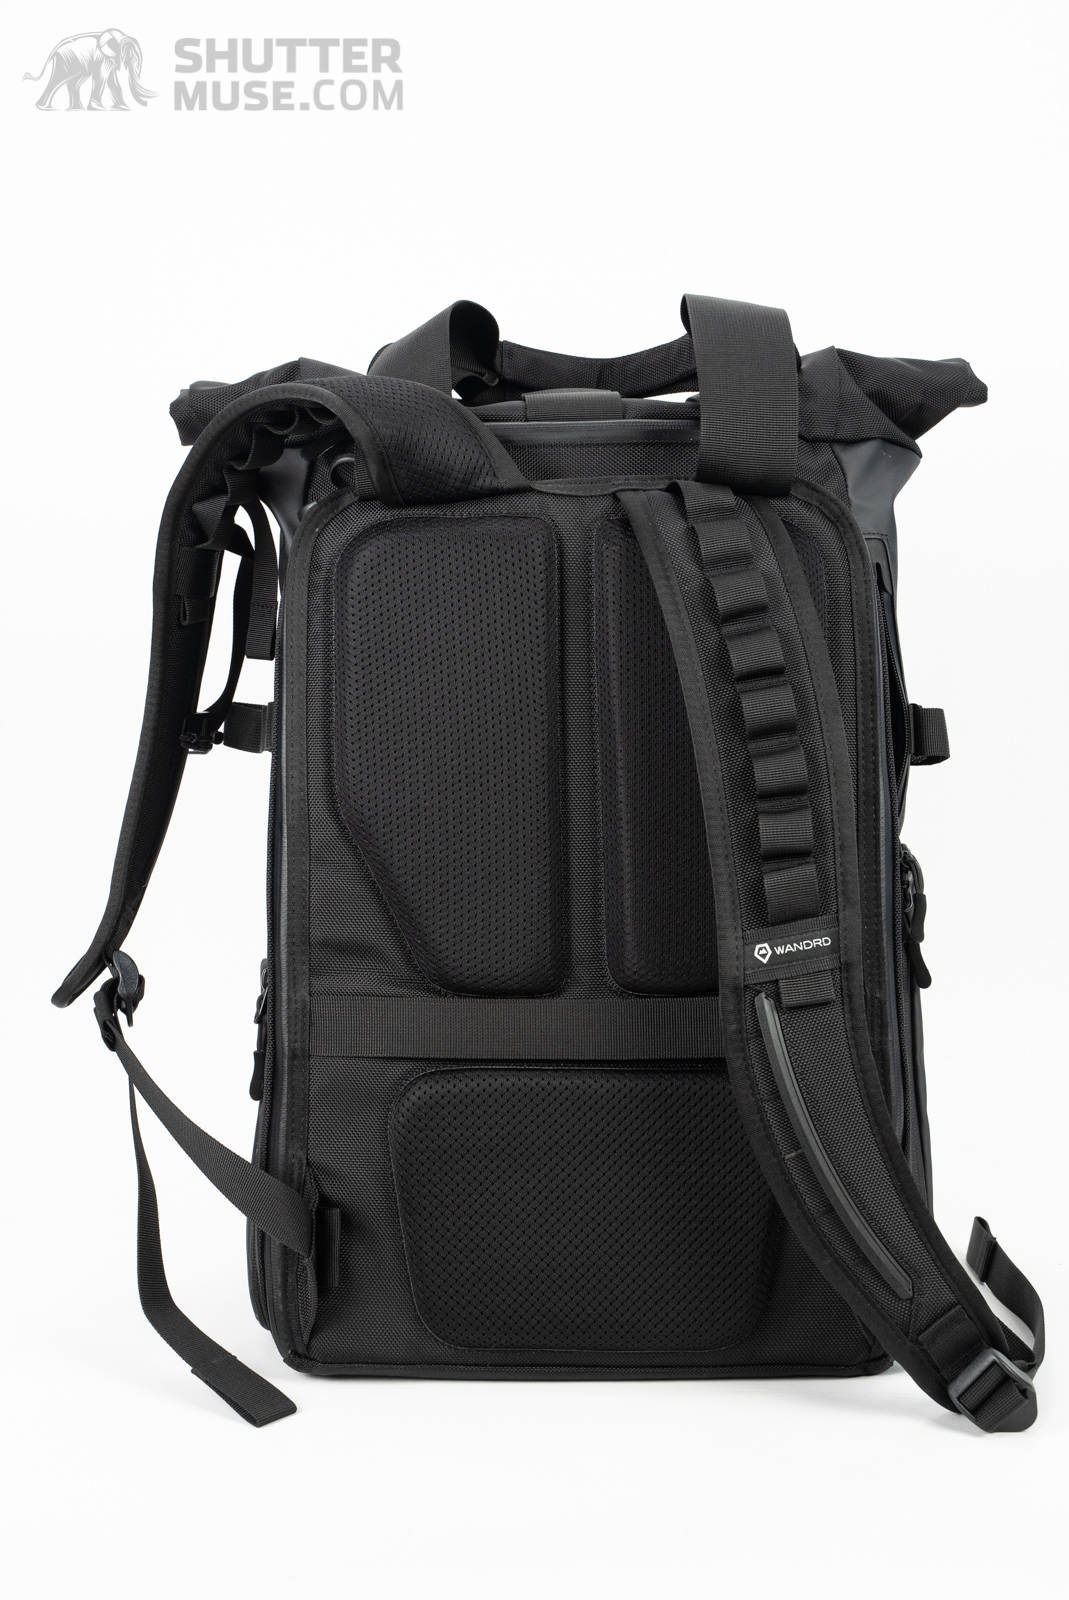
Hip Belt
The hip belt is also substantial. In fact, I would go so far as to say that it is the most substantial I have seen on any camera bag that has crossed my desk. Not only is the padding generously thick, but the width of the belt is also above average. There also appears to be a certain amount of memory to the curvature of the belt. After some use, it seems to conform to your shape. I like this hip belt a lot, and when you are using the bag as carry-on luggage, the belt can be entirely removed.
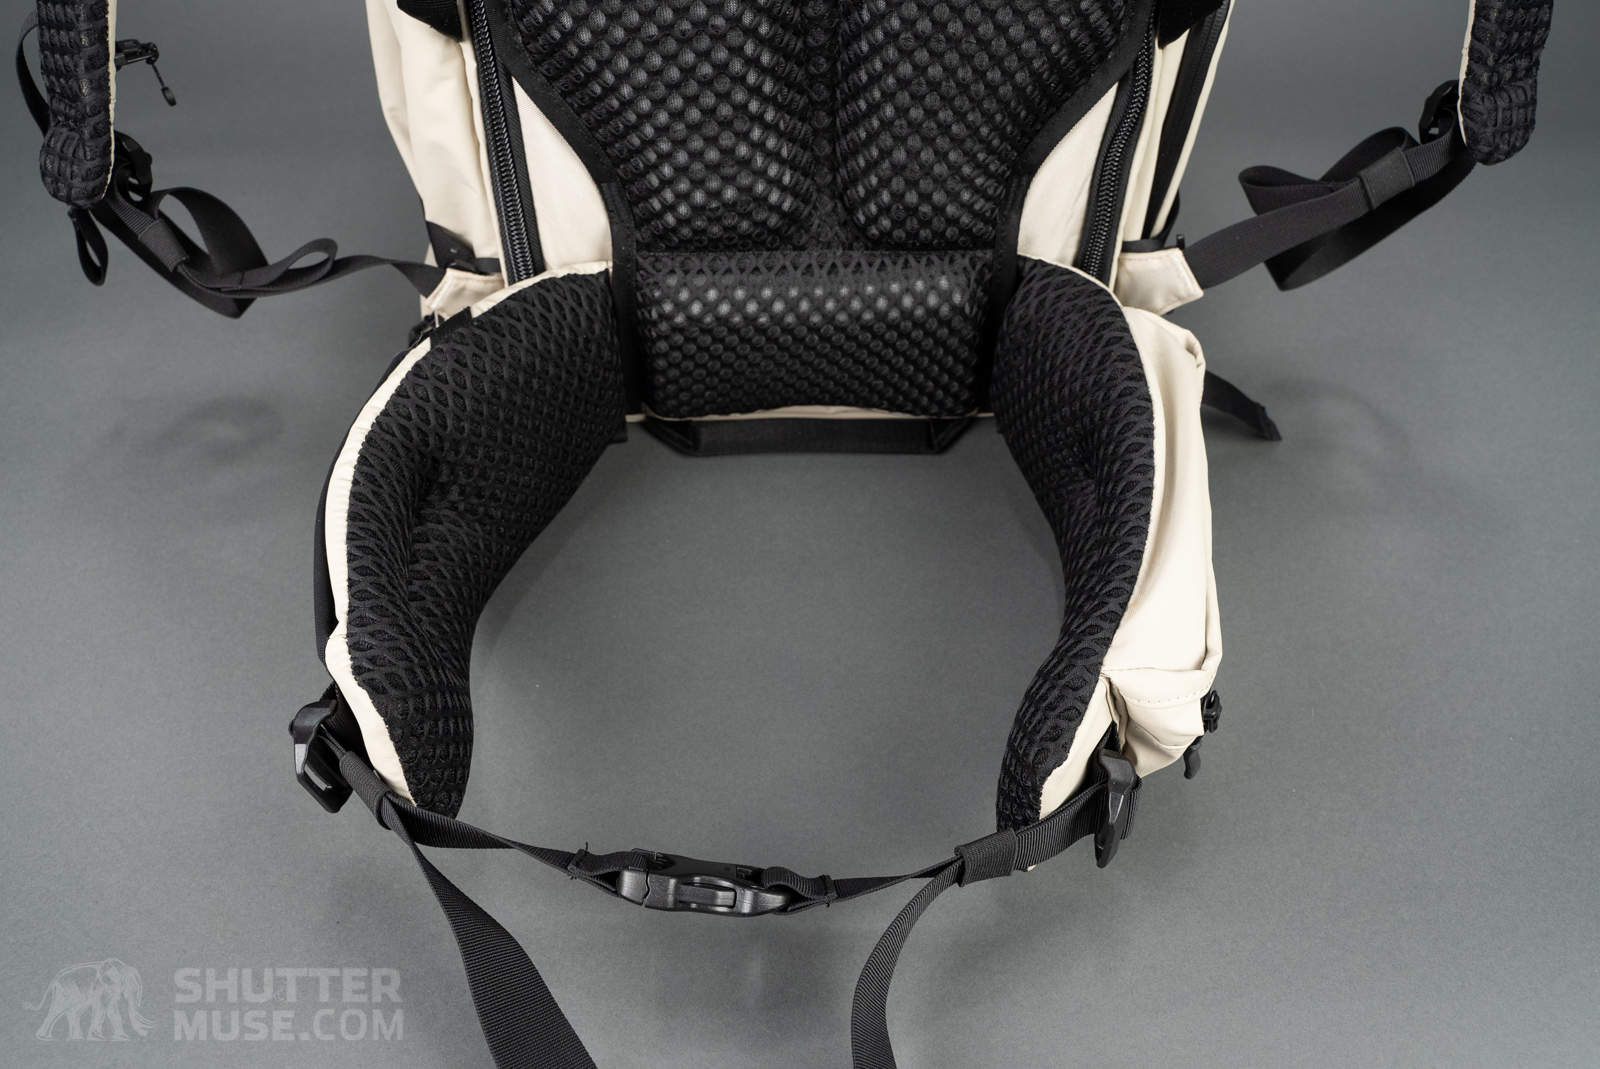
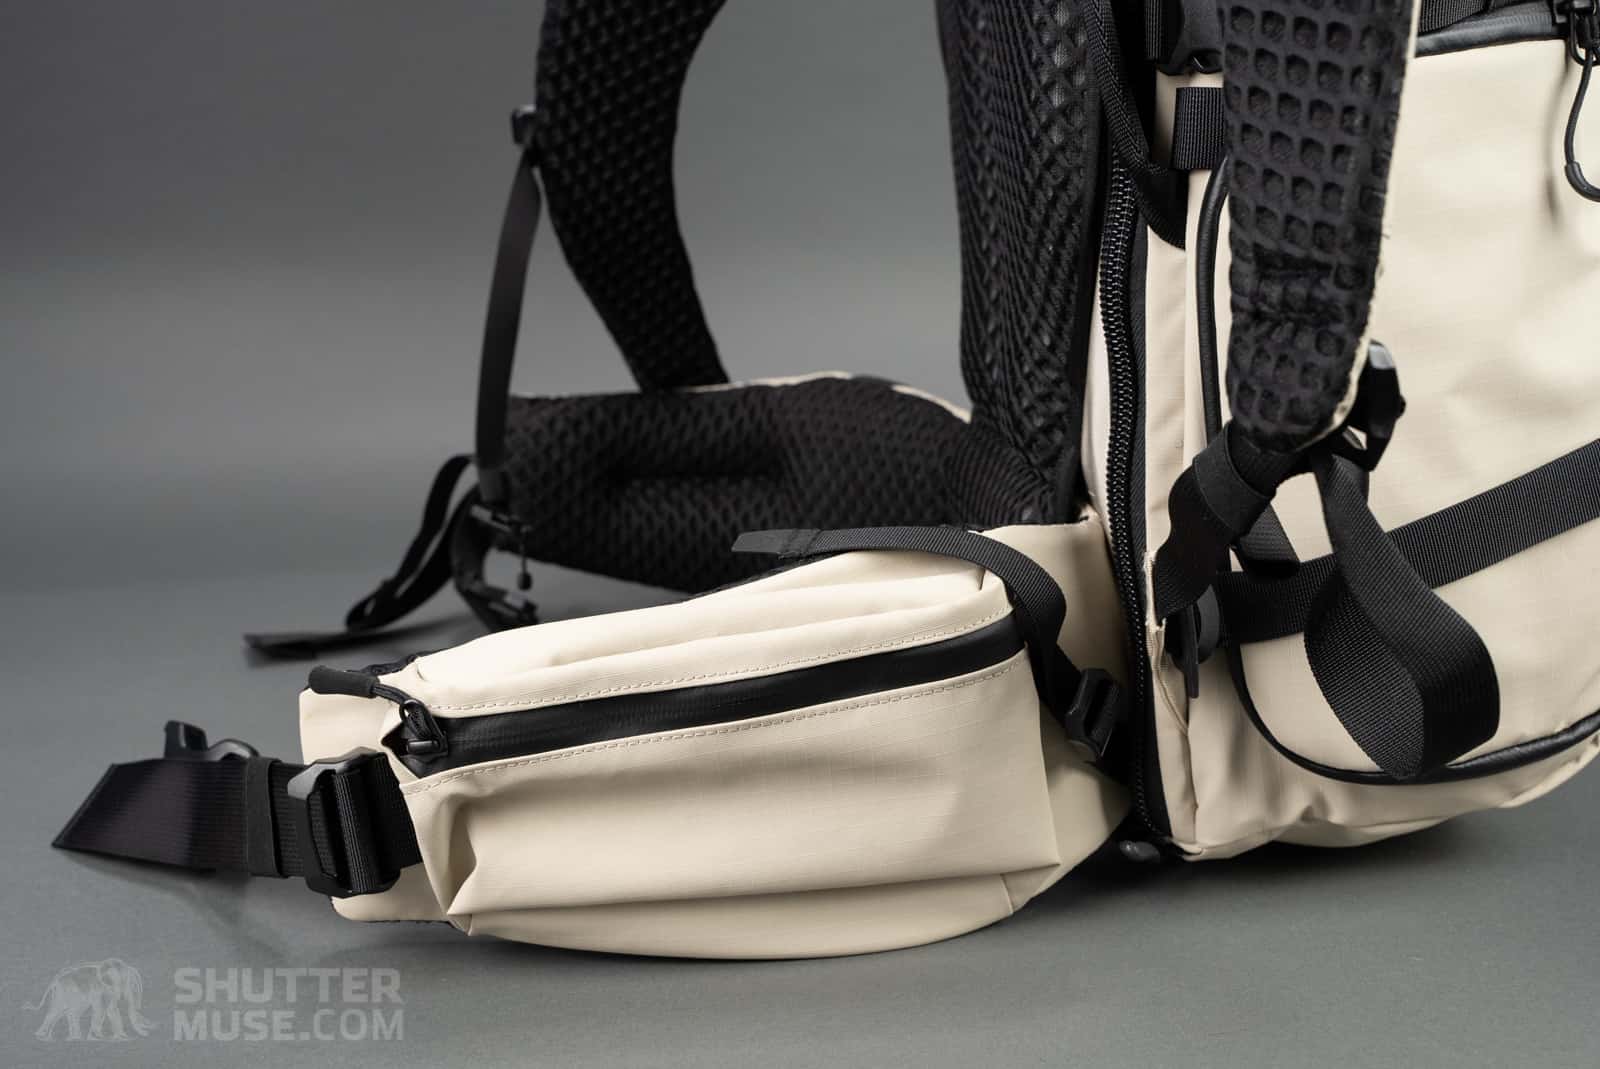
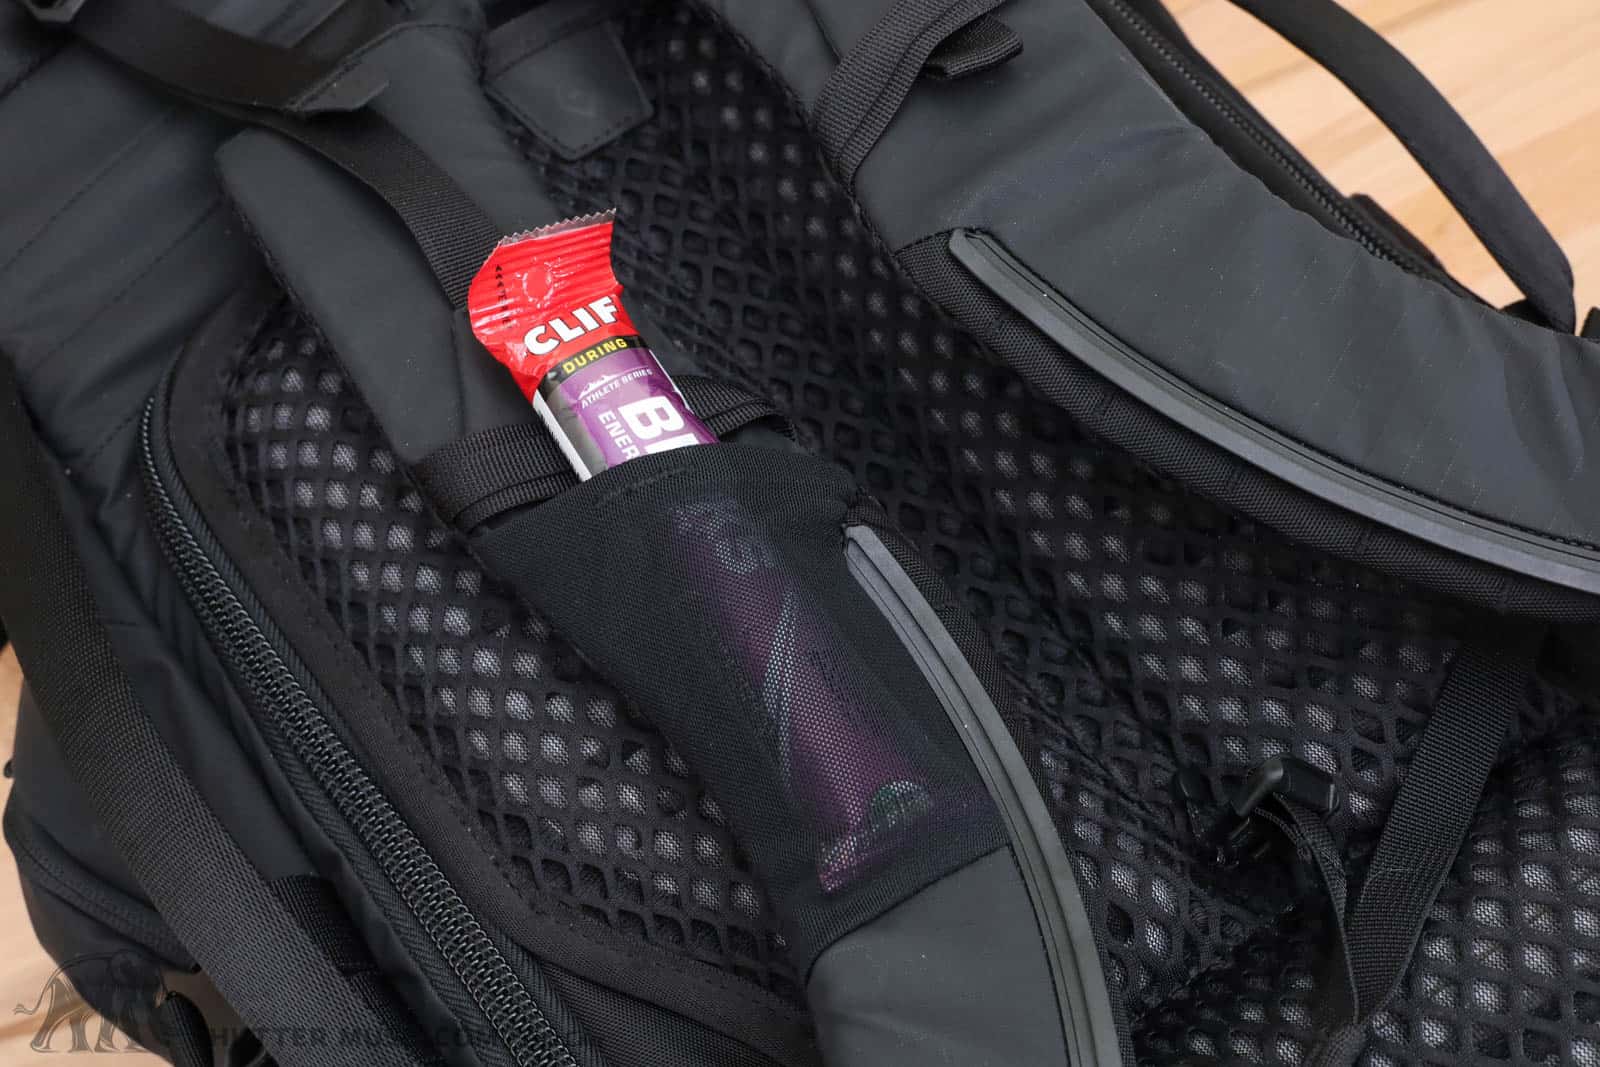
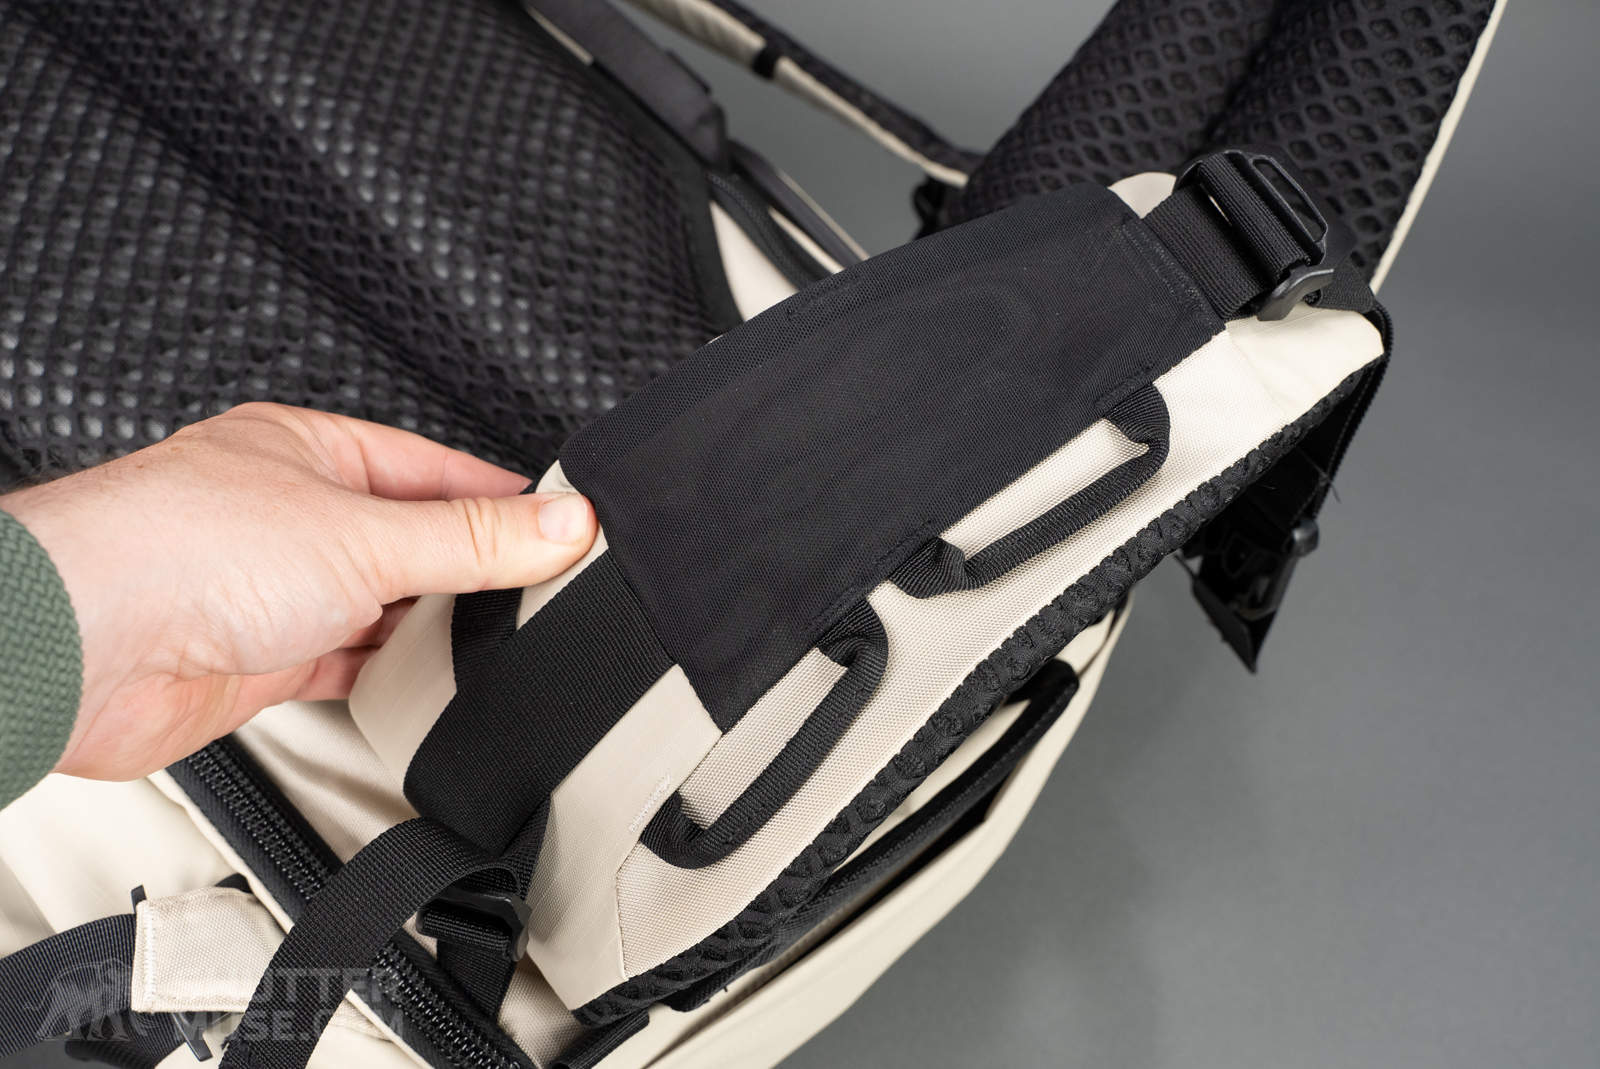
The hip belt also has some very functional features. On the left-hand side, you’ll find a large zippered pocket. It is larger than the average hip belt pocket, and easily able to carry my phone and Garmin GPS device. On the right-hand side, you’ll find a skinny mesh pocket for holding a granola bar of gel snacks, plus a few larger daisy-chain loops for attaching carabiners. There’s just about enough space there to hold a lightweight glacial rescue kit.
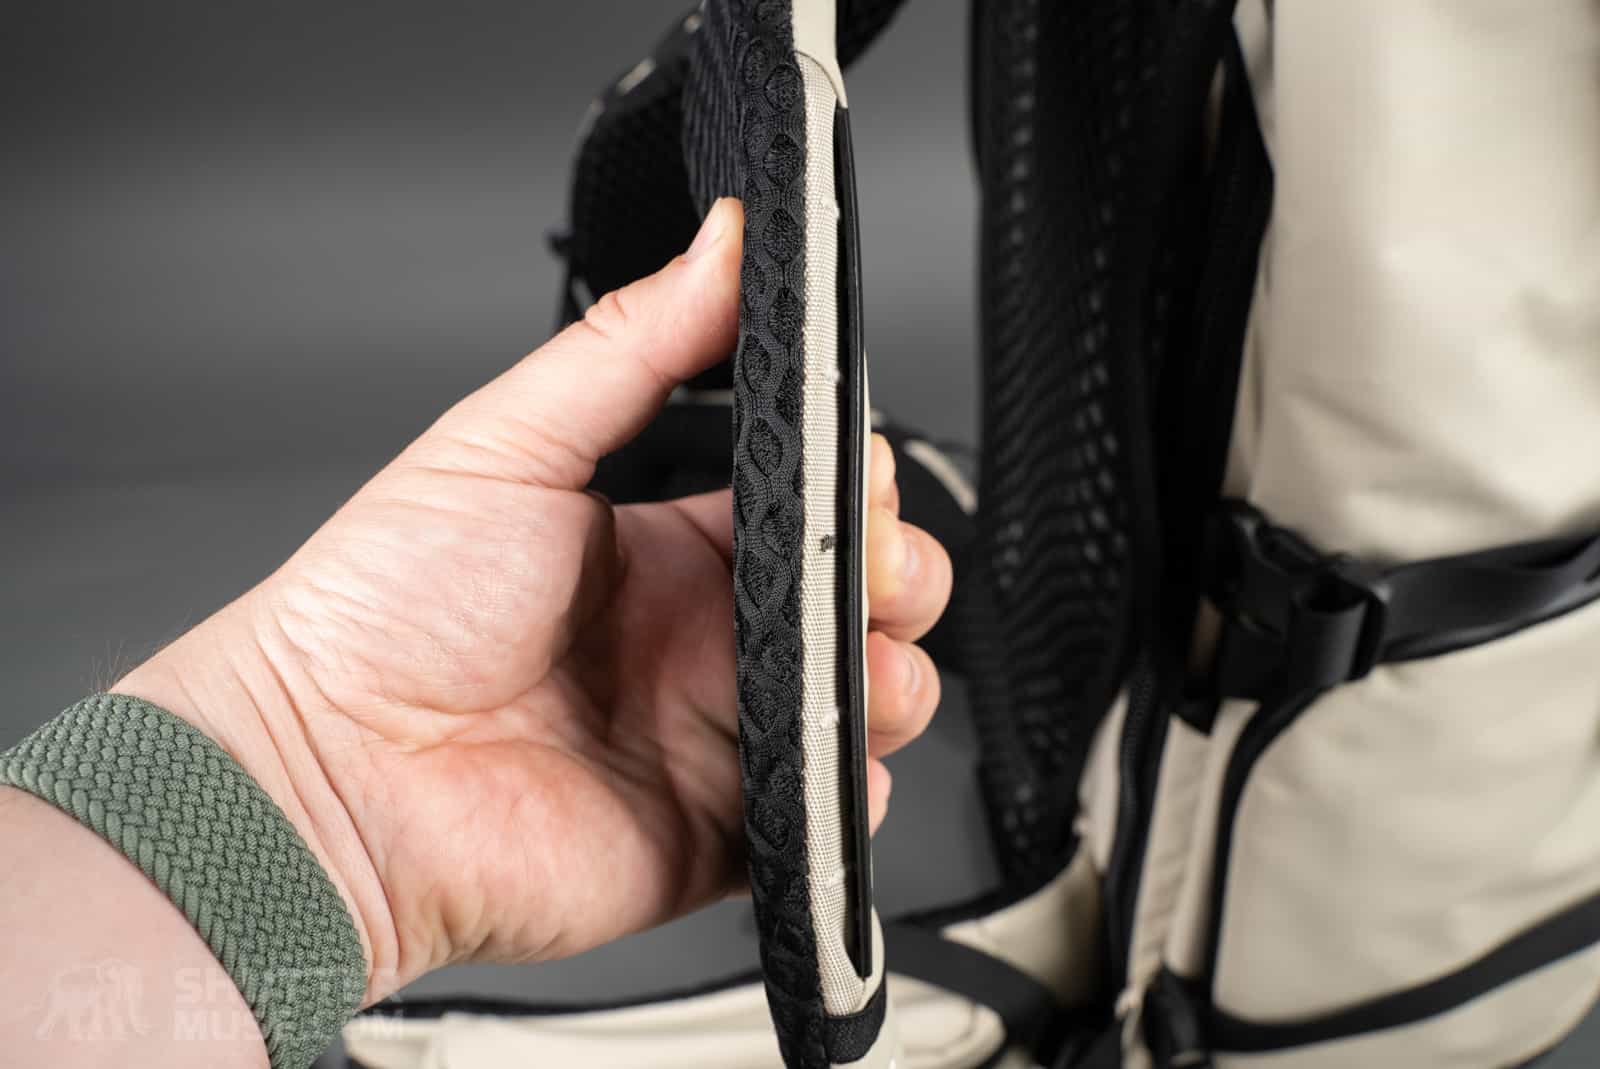
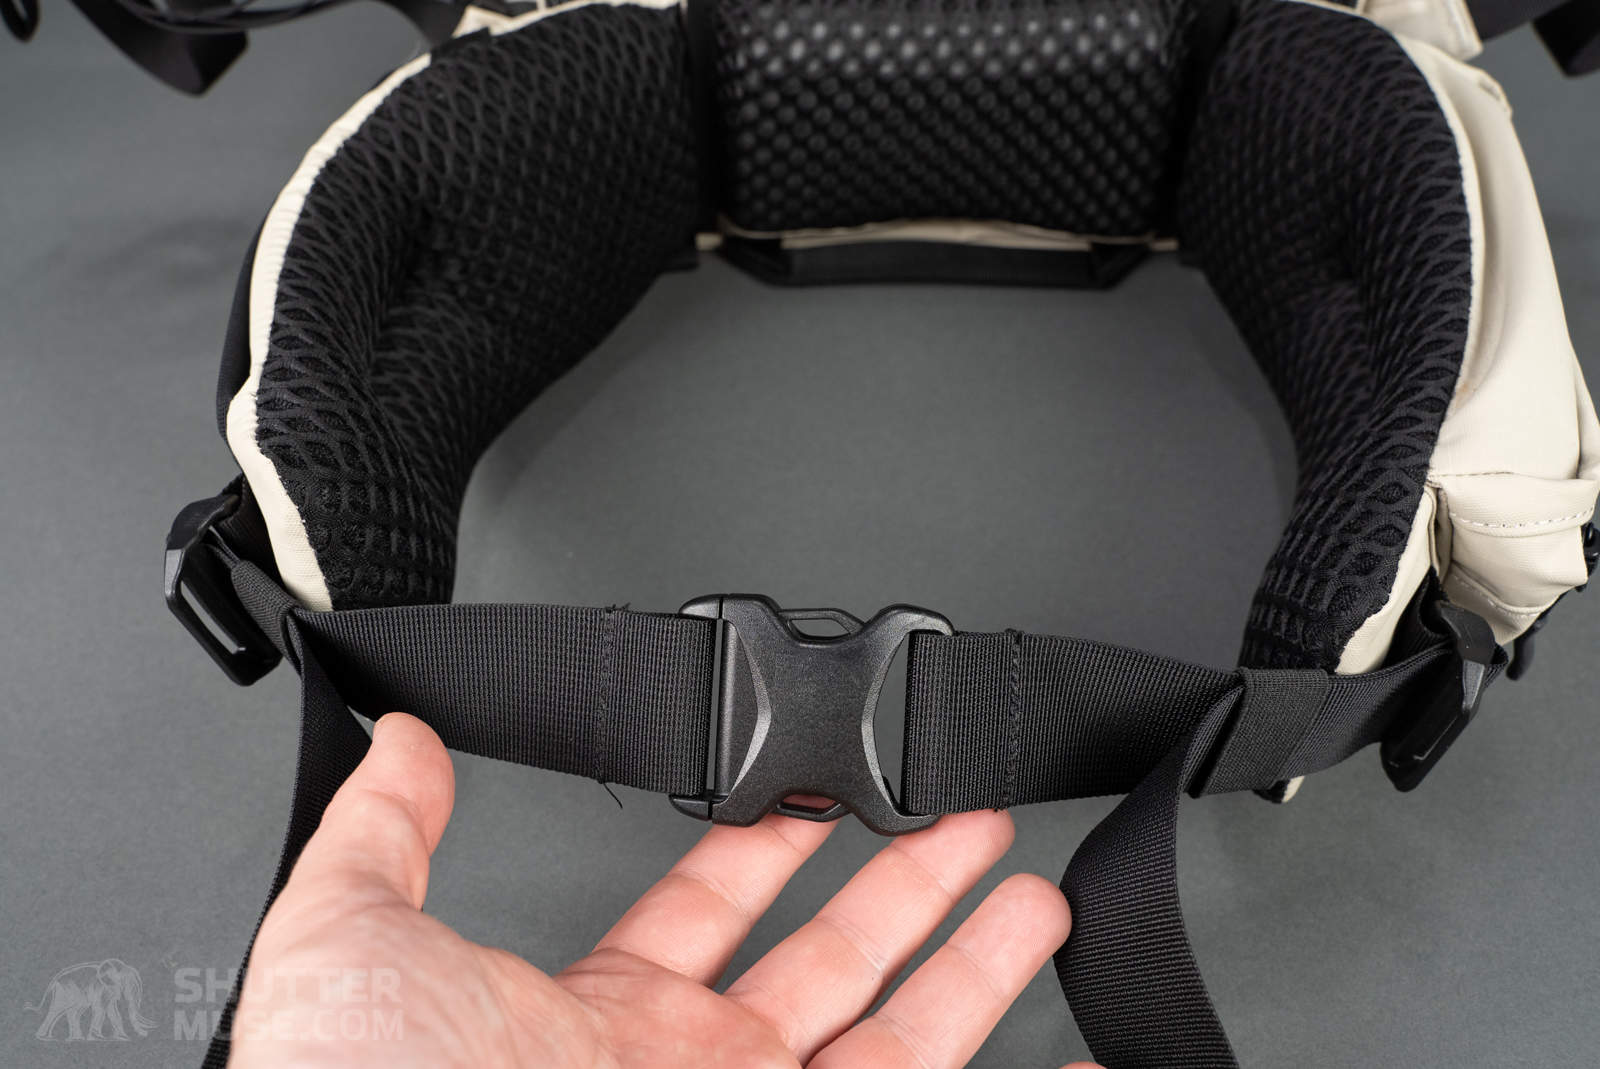
Sternum Strap
The sternum strap is quite unique. instead of connecting in the centre with a traditional plastic buckle, it attaches to a plastic rail on either side. When you want to release the strap, you can choose which side of the strap you release. Both sides can then be connected to the same rail to stop the strap dangling around when not in use.
The designers said that this design came about after feedback from female photographers revealed that central plastic buckles can often be uncomfortable. This solution is both low profile and lightweight. Another great, unique feature.
Adjustable Torso Sizing
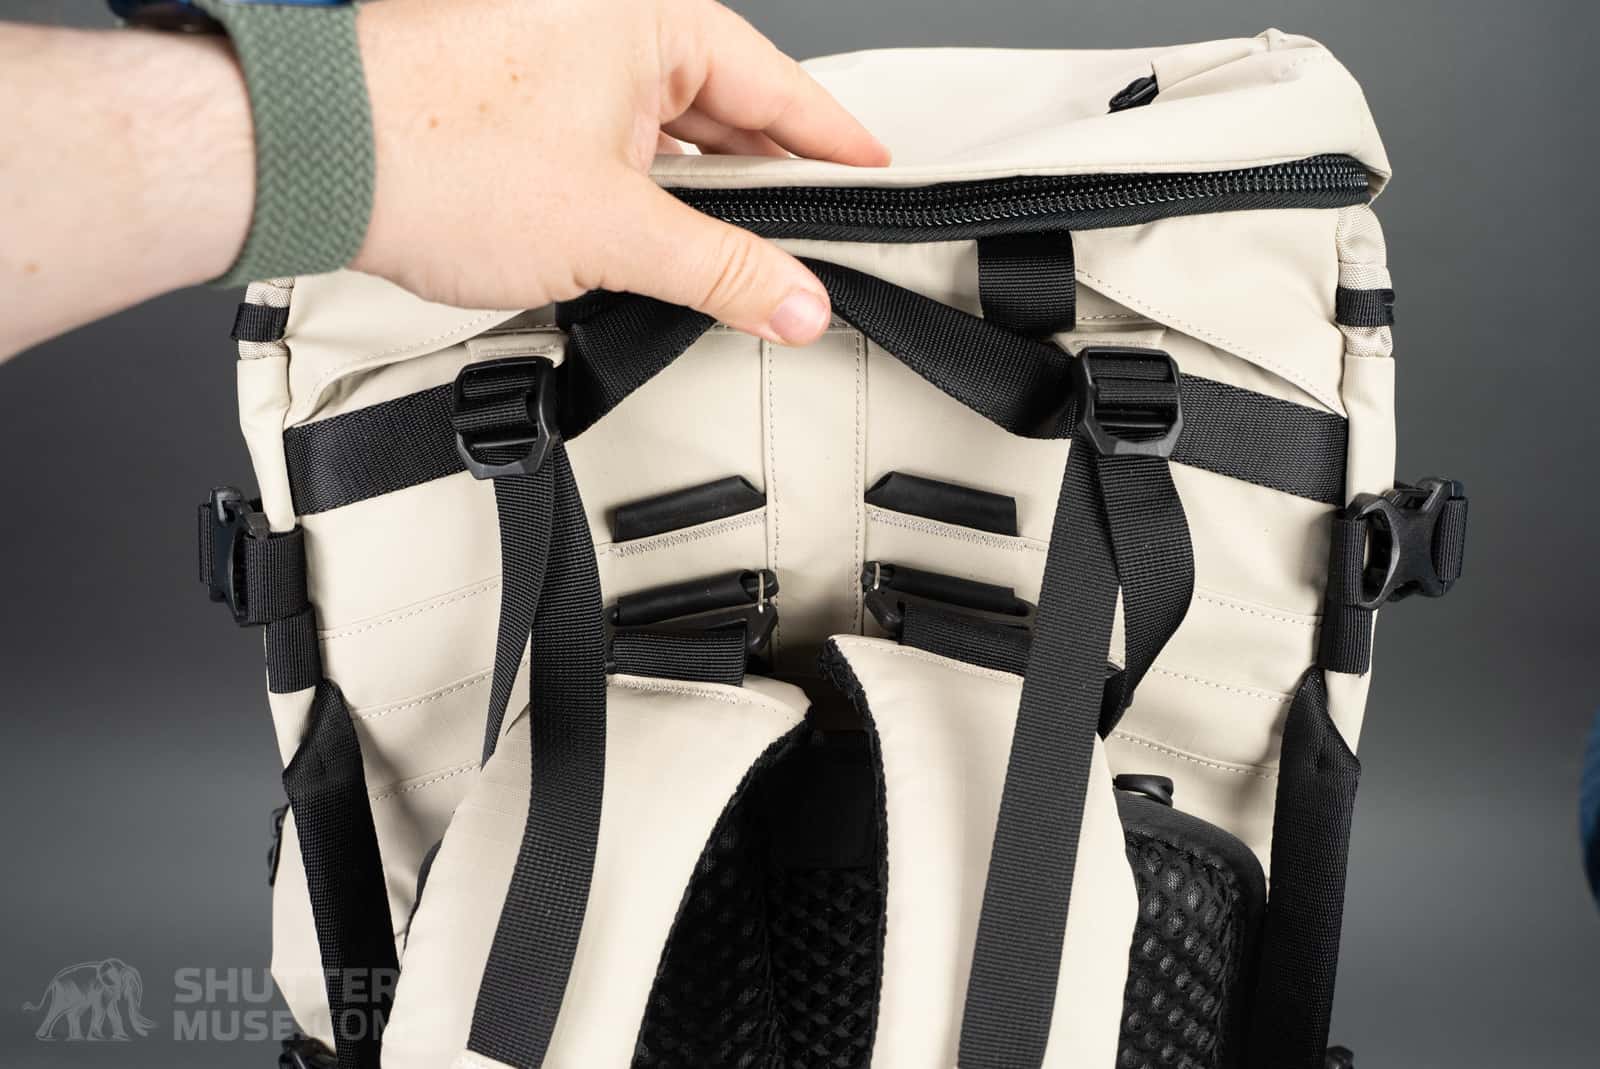
The Fernweh has adjustable torso sizing to help you find the perfect fit. It uses the same adjustment method that has been adopted by MindShift Gear and Shimoda Designs in recent years, allowing the top of the shoulder straps to connect to one of three different pairs of nylon loops, providing three different torso lengths.
What’s unique about the Fernweh is that the bag is also offered in two different sizes. This means there is a total of six different possible torso lengths in the range. No other camera bag that I’m aware of has this kind of flexibility in sizing. It will definitely be an excellent option for people at the extremes of the height spectrum – tall or short – and a great option for women, who are often not catered for in this market. More kudos to the designers.
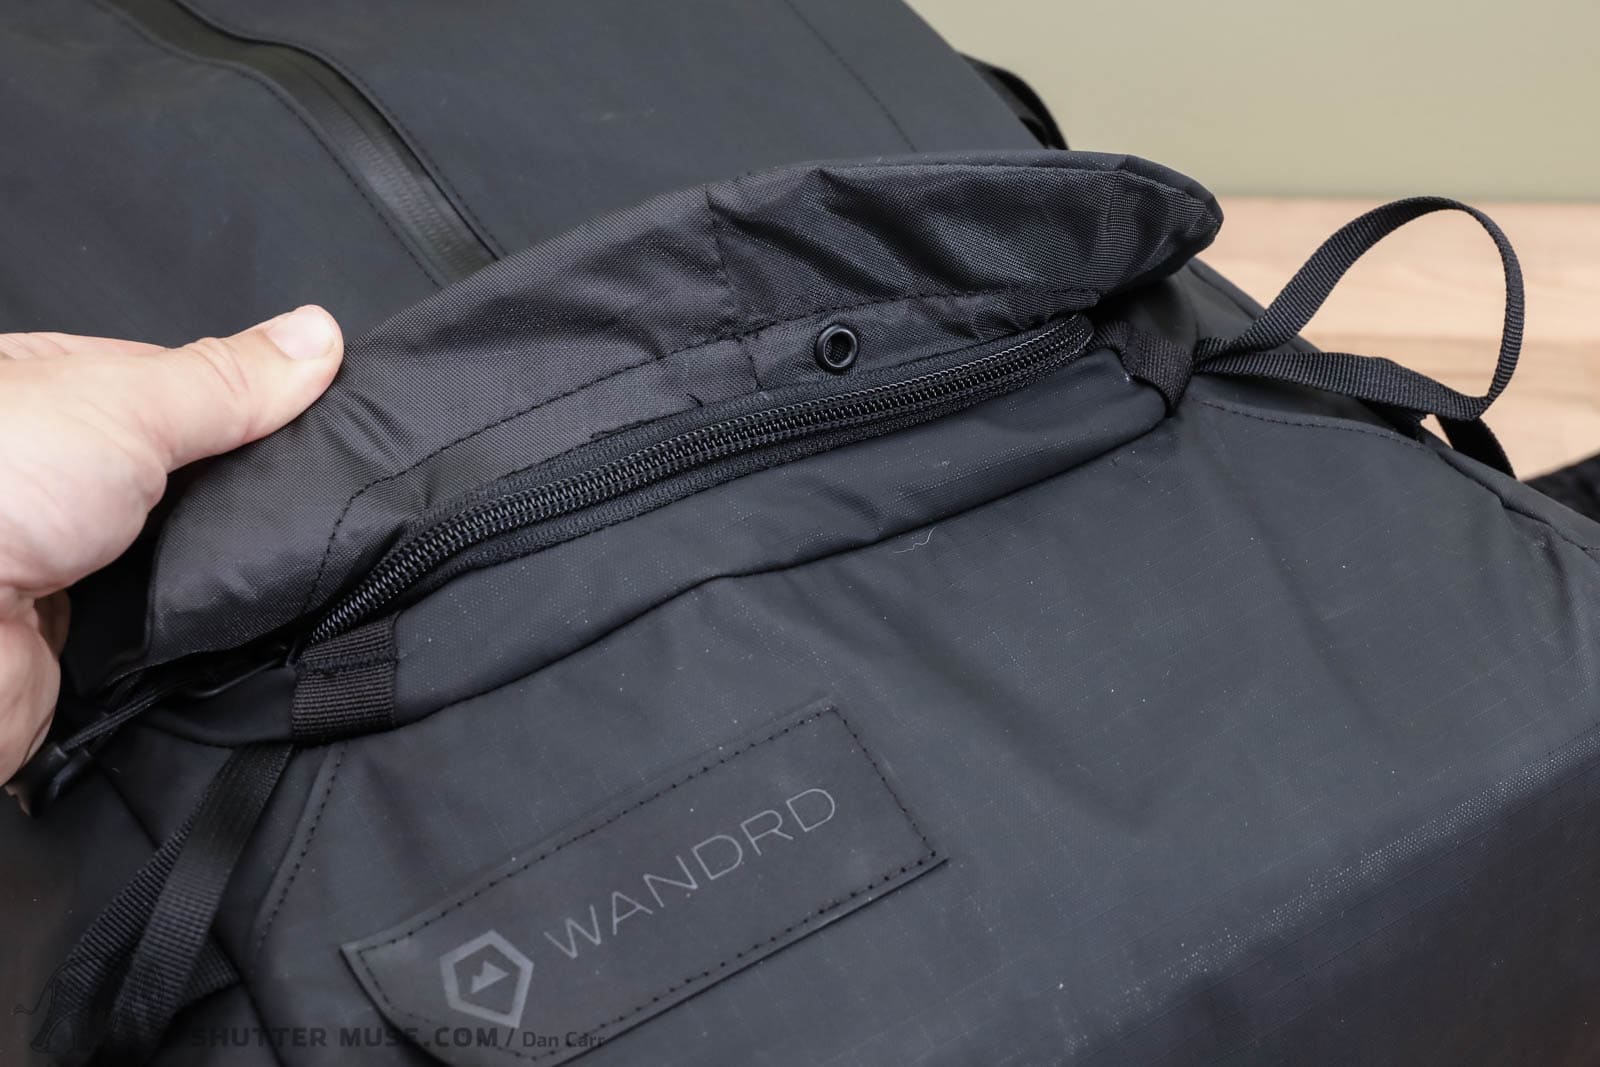
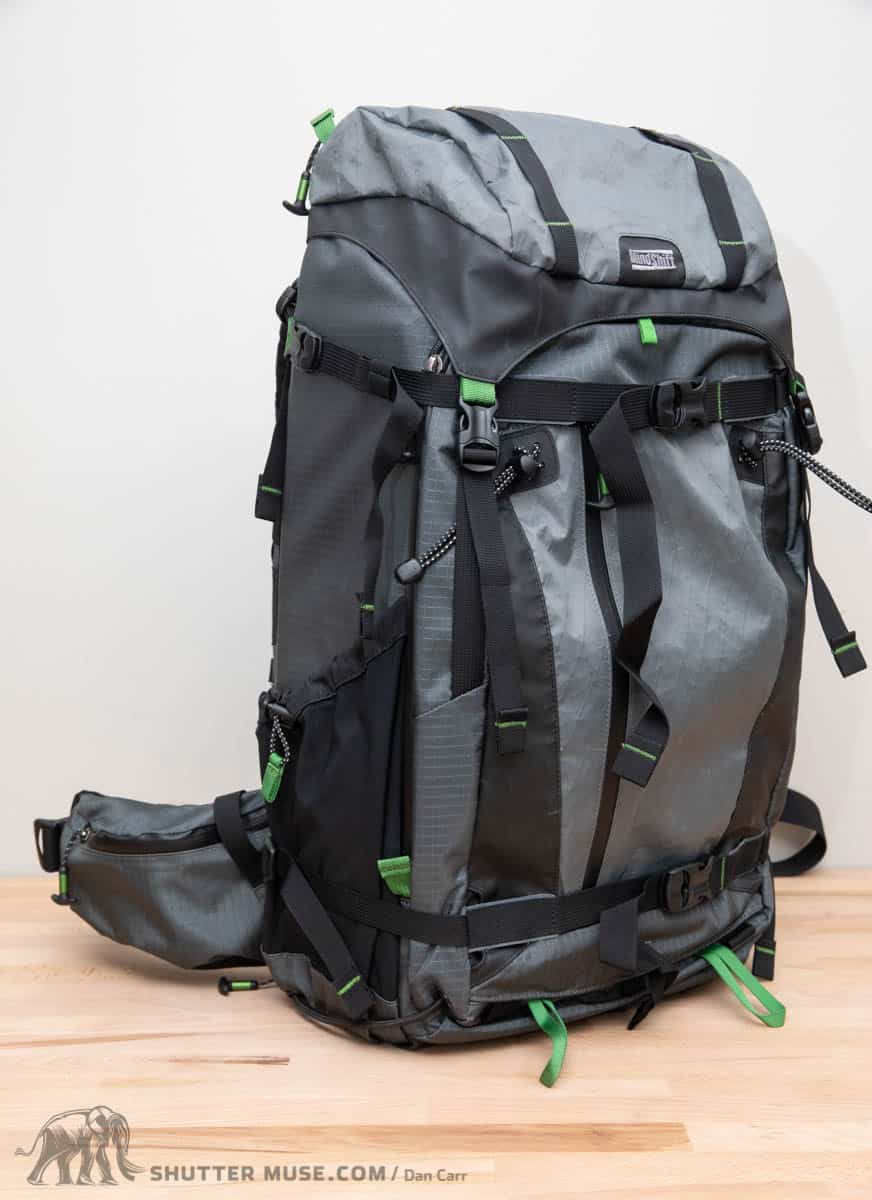
Additional External Storage for Tent or Sleeping Bag

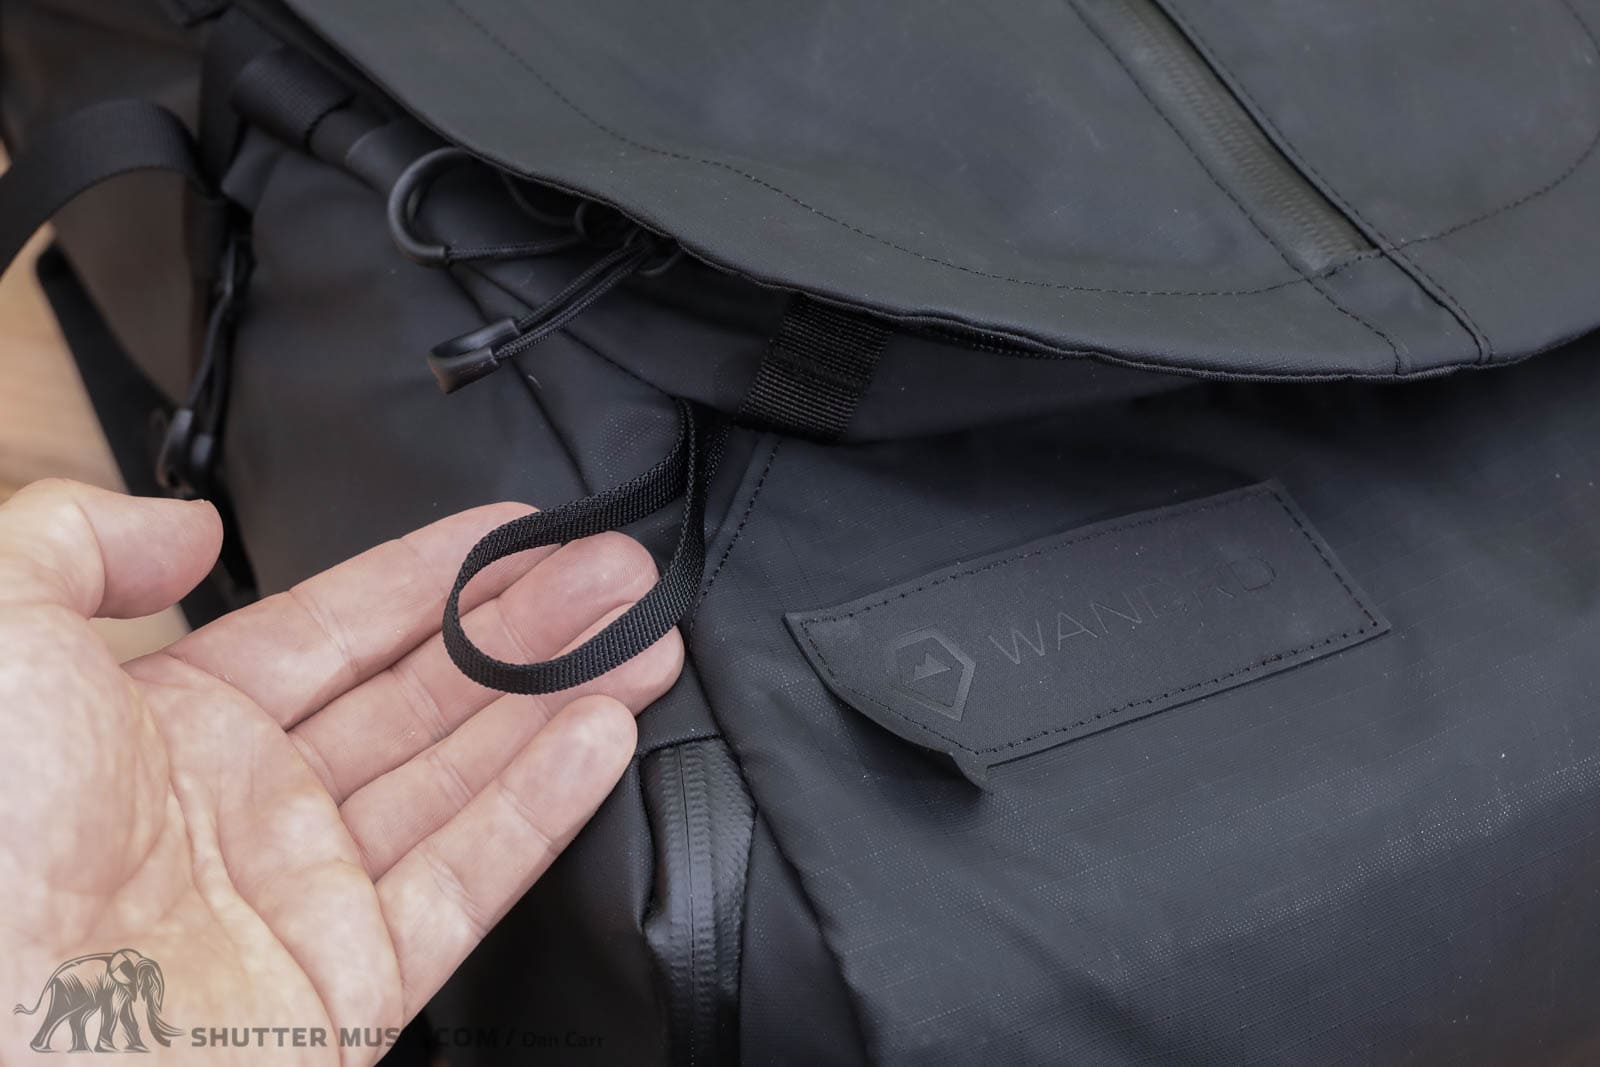
Emerging from a zippered pocket on the base of the bag is a broad strap for securing a tent or sleeping bag. Using this, it’s possible to put the Fernweh to use for occasional overnight backcountry camping missions. My recommendation would be to use the top half of the bag, the “bucket” for your stove, clothing, tent shell and an ultralight air-filled sleeping pad. Then strap your sleeping bag to the bottom of the bag using this large strap. Your tent poles can then be strapped to the side of your bag with your tripod, using the large side pocket.
Additional Images

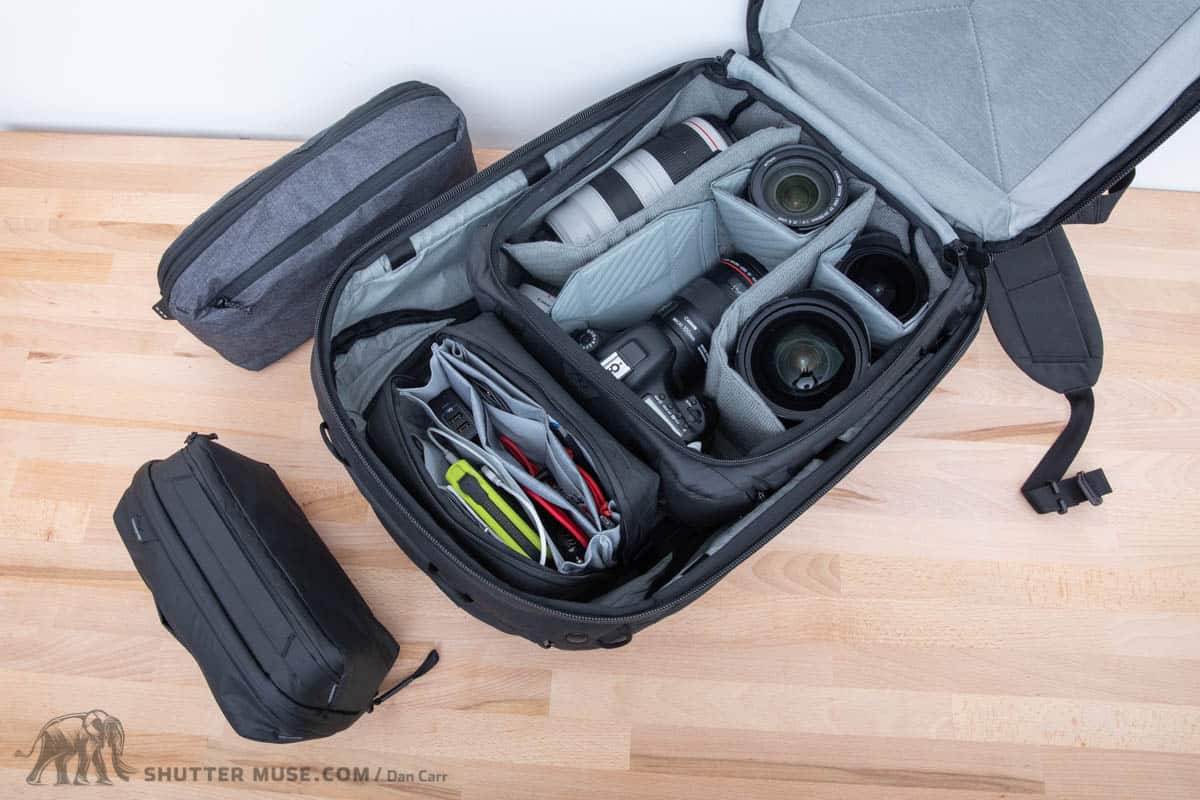
Wandrd Camera Cubes
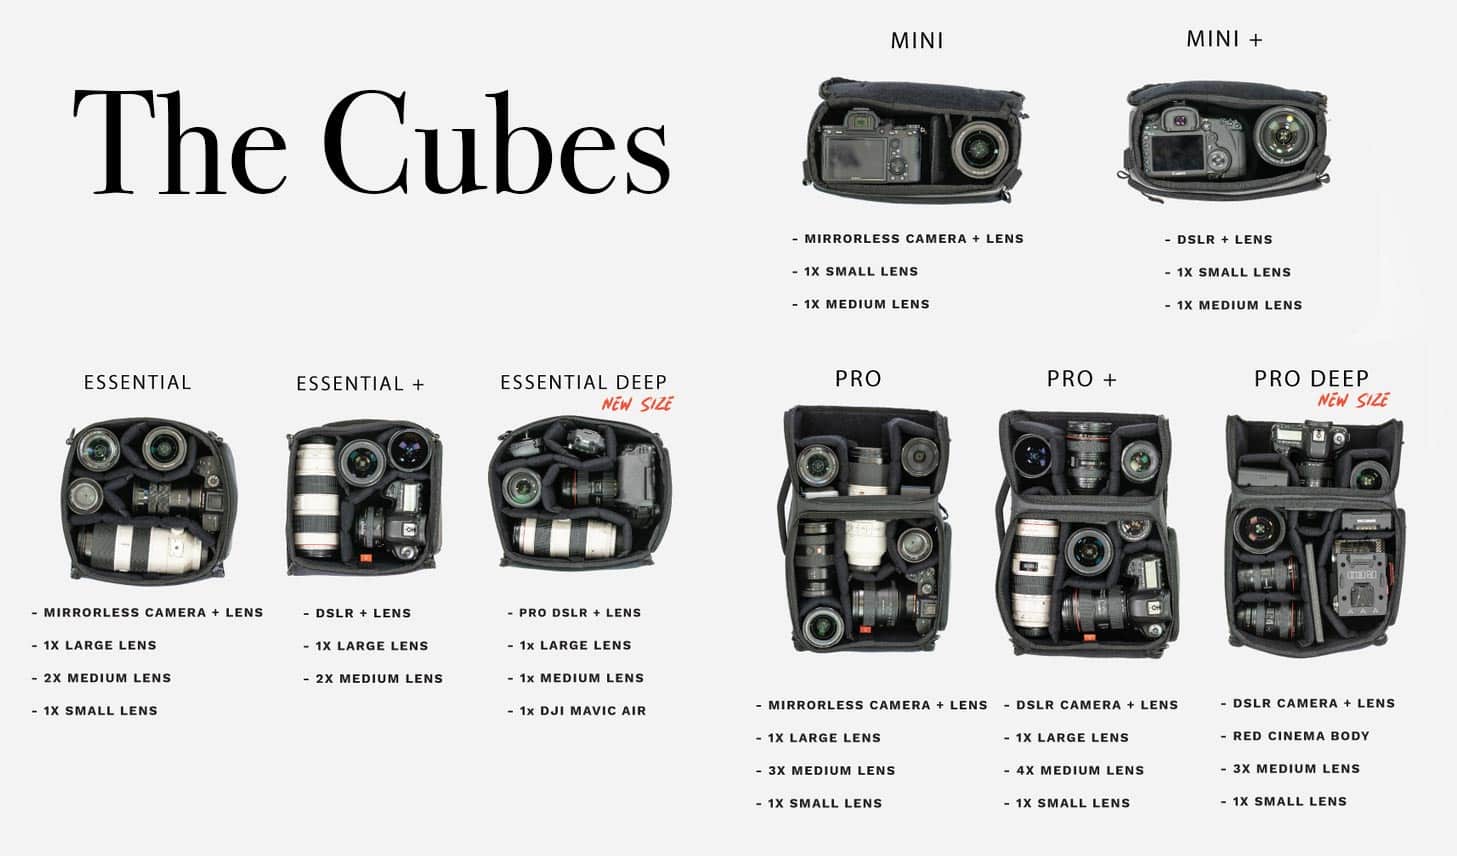
WANDRD has been making their camera Cubes for some years now. They fit into several of their other bags such as the Hexad Access duffel, Hexad Carryall duffel and the Prvke backpack. These Cubes fall into three different size categories:
The existing cubes range in price from $49 (mini) to $109 (pro+). The Fernweh pack is priced at $349 on its own, so you’ll have to factor the cost of a cube or two into your pricing calculations.

When choosing a cube for the Fernweh, you have to keep in mind how much of the internal volume of the bag will be consumed by the cube. All of the cubes will fit, but the Pro cubes consume about 90% of the bag’s internal volume and leave little room in the upper “bucket” section for your non-photographic gear. If you have a long lens such as a 150-600mm or a 200-600mm, you will need to go for the Pro cube, otherwise, it’s best to stick with the Essential cube.

It’s worth noting that most of these camera inserts from the various outdoor photo pack brands perform roughly the same job. If you have existing inserts from another brand, you might want to measure them first and compare them to the dimensions of the Wandrd ones to save you needlessly spending money on very similar products.
That said, the one thing you do need to consider is the side opening flap on the Wandrd Cubes. This is designed to perfectly line up with the side opening of the Fernweh and Prvke packs. If you use an existing insert from another brand, it might not have a side flap at all (F-Stop, MindShift). Or for those that do have side flaps (Shimoda, Peak Design), they might not line up perfectly.
Once again on these Cubes, we do see Wandrd’s insistence on using black for the interior of their bags. As you already know, I’m not a fan of this decision. I have so many small black pieces of camera gear. I really don’t want to store them in small black holes.
Fernweh Accessories
Wandrd Route Pack
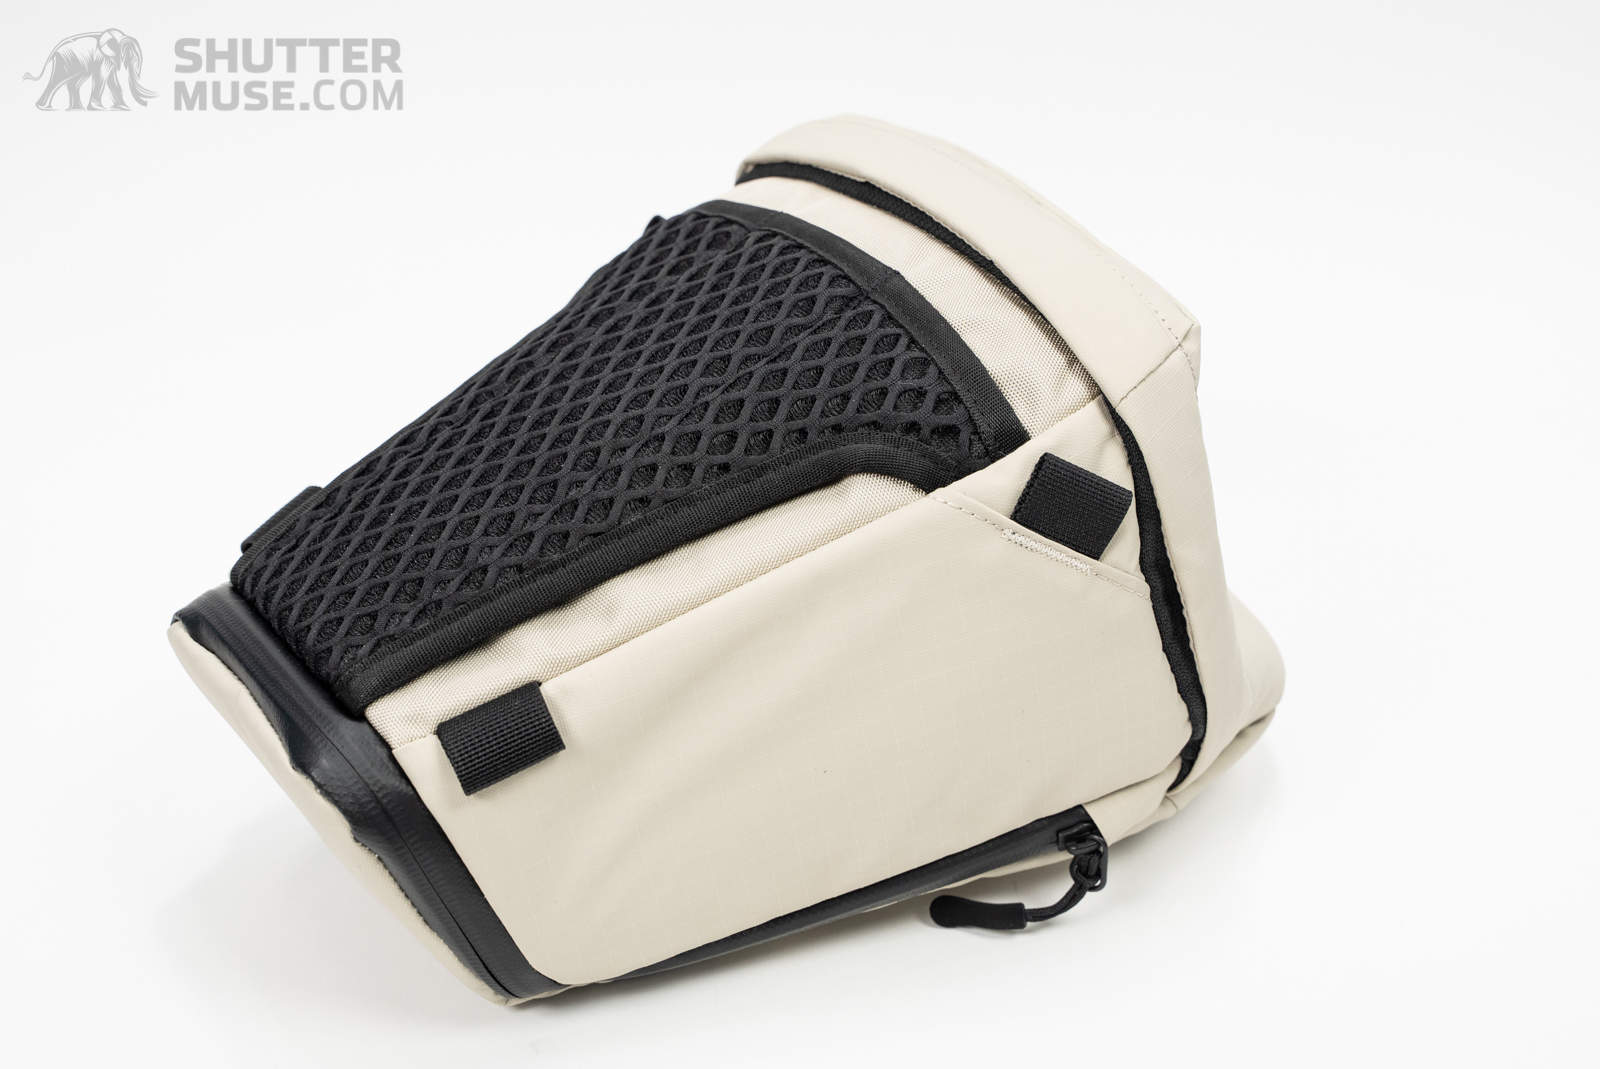
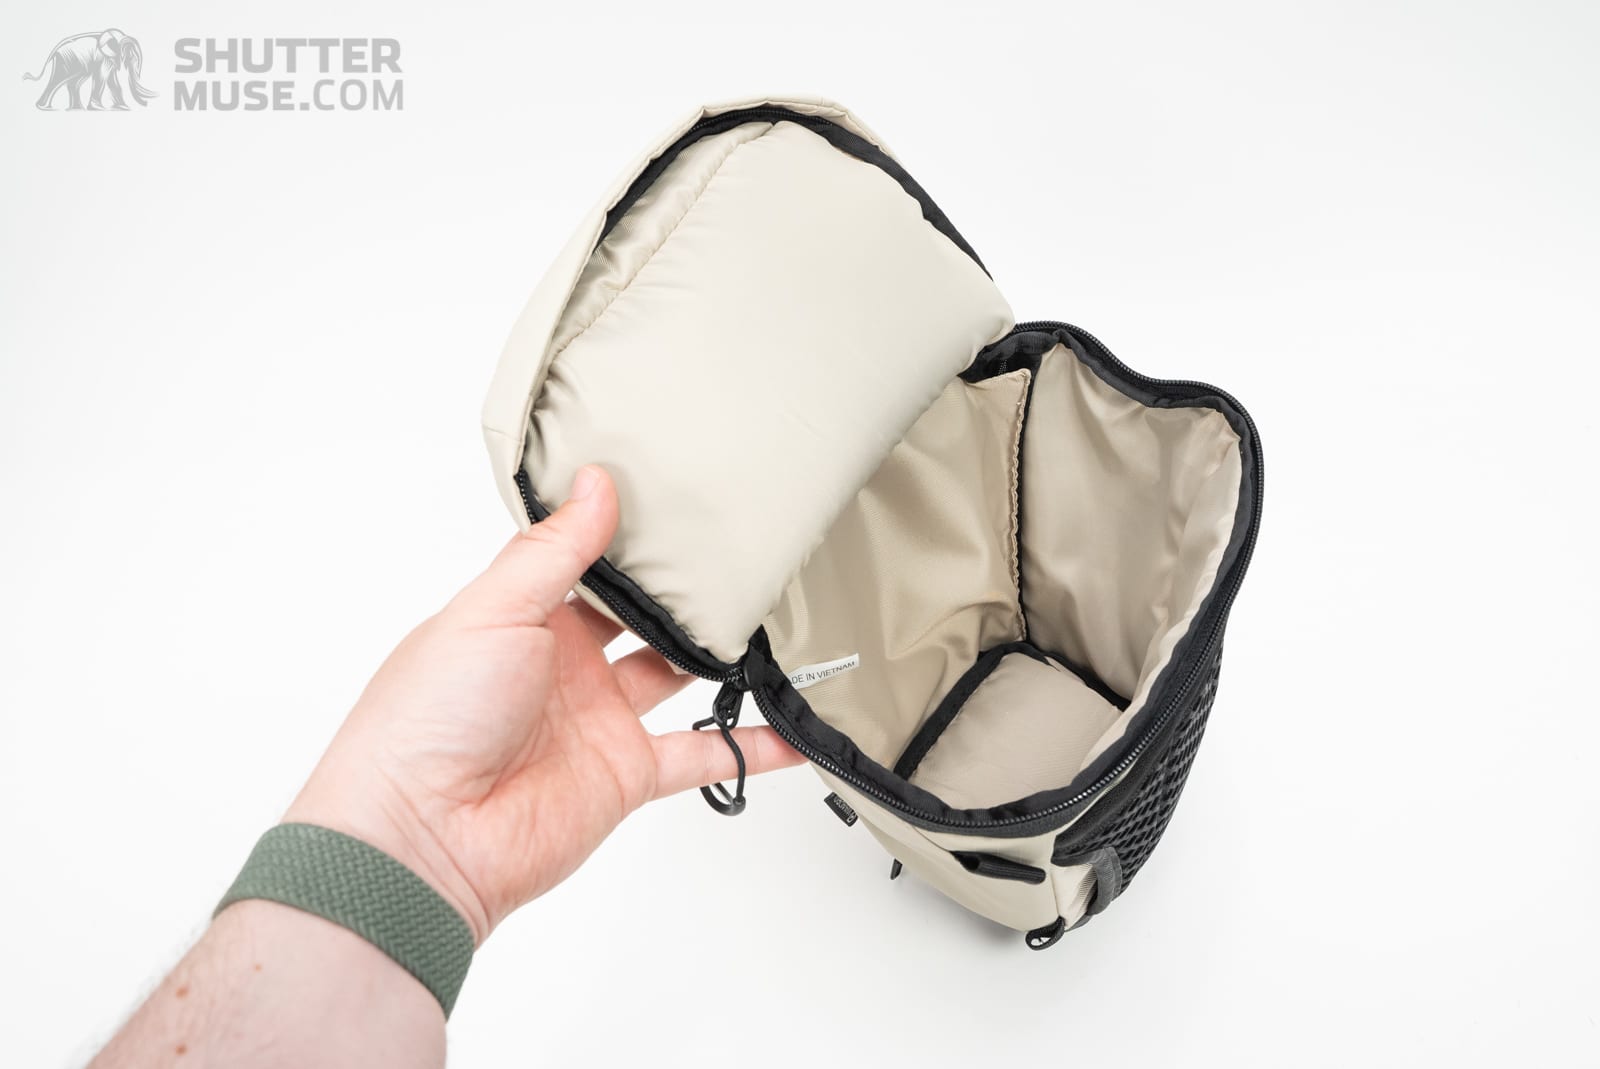


The Route Pack is a new holster style shoulder bag that can also be attached to the shoulder straps of the Fernweh pack. This gives you instant access to a camera body with one lens. In the standard configuration it will hold up to a 24-70mm lens, but there’s also a zippered expansion to allow you to use up to a 70-200mm. A small zippered front pocket gives you a small space for batteries or a memory card wallet.
As well as connecting to the shoulder straps of the pack, you can also use a rear passthrough to slide the bag onto the waist belt of the pack. Matching the Fernweh, the Route uses a 420d TPU coated ripstop nylon. The Route Pack is available in black or Gobi Tan for $69. For more details, and to see a video of the Route Pack, please check out my separate WANDRD Route Pack review.
Accessory Straps

The Fernweh has attachment points all over it that are designed to work with the optional accessory straps. If you really need to add a huge amount of external gear, you can buy these at $15 for a pair. Most people will not need these. There are already multiple side straps, as well as the sleeping bag holder that I have already detailed. Adding anything else to the exterior of the pack would have a negative effect on the accessibility of your gear.
Rainfly
The black rainfly for this bag is an additional $20 purchase. For the price you pay for the bag, I would really have liked to see this included as standard. Some brands are good at including the rainfly in the price (Think Tank, MindShift), but many others are not, and I find myself repeating this in many of my reviews.
That said, I probably wouldn’t bother to buy the cover for this particular bag unless I was heading to a location during monsoon season. The bag is incredibly water-resistant without the cover.
Compared to the Competition
It’s always worth having a discussion about the other options that people might be considering. Here are a few thoughts on the five bags I think people are most likely to consider alongside the Fernweh.
Peak Design Travel Backpack 45L
The PD Travel Backpack is a popular travel pack that also has the option to be kitted out with several sizes of camera cube. Although built from impressively rugged materials just like the Fernweh, the PD pack doesn’t have a harness system that’s really built for prolonged outdoor usage. The harness padding is minimal, and the waist belt is almost non-existent. The compensating virtue is that it is lighter and has far fewer “dangly bits” on it than the Fernweh, making it a little more travel friendly. If you want more details, check out my review of the Peak Design Travel Backpack 45L.
MindShift BackLight Elite 45L
The BackLight Elite 45L is another high-end photo pack designed specifically for outdoor photographers. The size of the pack is comparable to the Fernweh, but the bag is slightly lighter due to the material choices. The BackLight features a lot of ultralight sailcloth nylon that has an incredible strength to weight ratio, but likely isn’t going to be quite as weatherproof as the heavily TPU coated material on the Fernweh.
The camera compartment is also larger on the BackLight, making it a more suitable option for photographers who carry super-telephoto lenses. At $399 including the internal camera compartment, this is a bag that delivers a ton of value in this segment of the market. For more details, read my MindShift BackLight Elite review.
F-Stop Tilopa
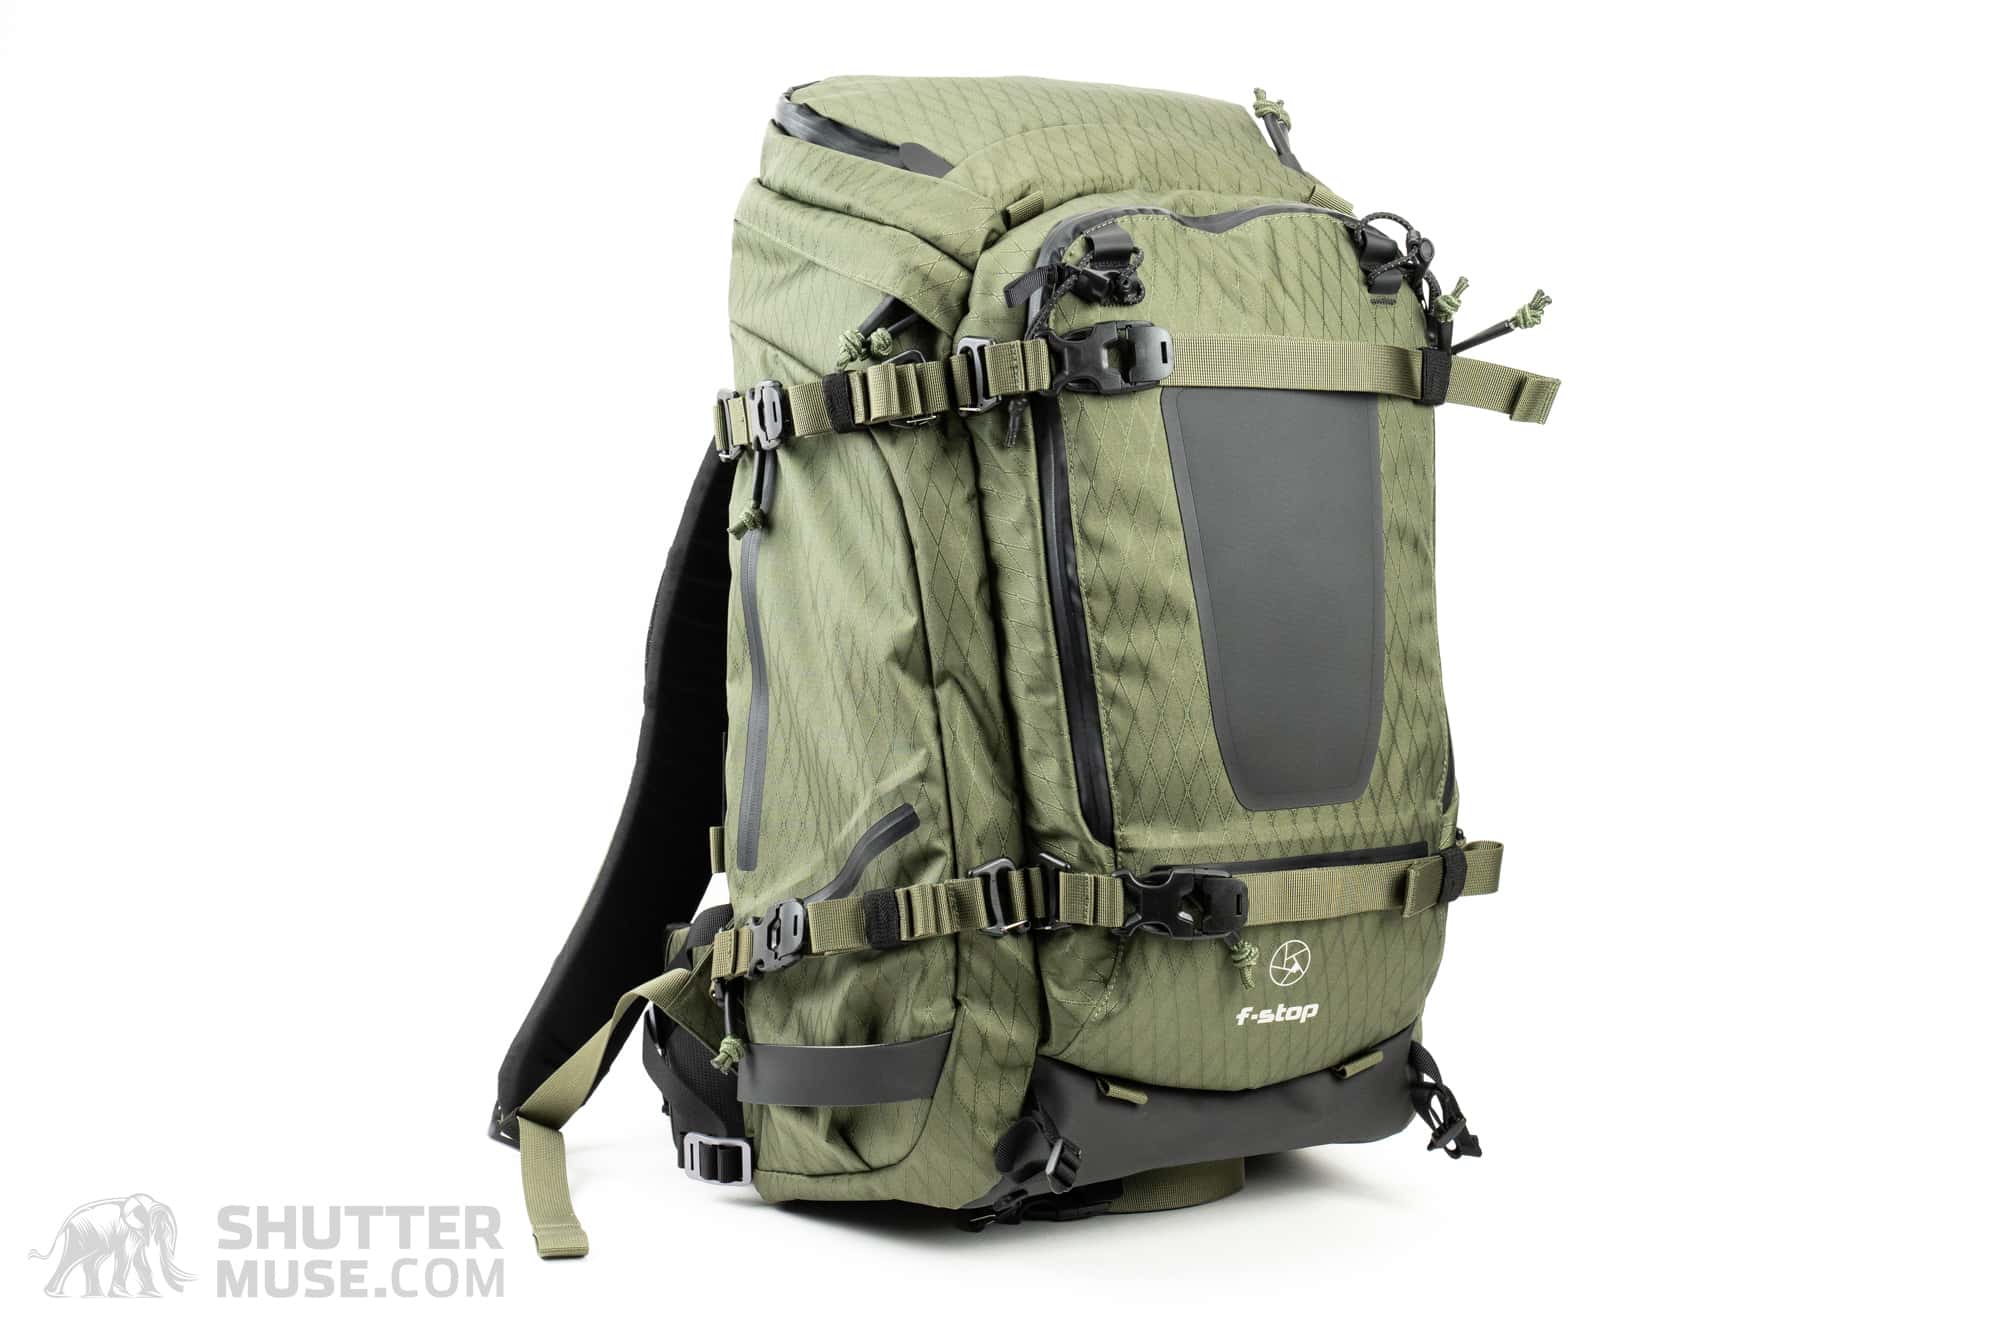
The F-Stop Mountain Series packs should really be credited with the birth, or at very least the popularization of this particular category of camera bags. A fact that is easily demonstrated by that many photographers that use of the term “ICU” to describe the padded camera blocks which insert into all of these bags. ICU (Internal Camera Unit) is the name of F-stop’s own camera blocks, but over the years it has become a near-universal term.
While the Mountain Series contains several different sizes of bag, it’s the 50L Tilopa that best compares to the 50L Fernweh. The Tilopa is a highly dependable bag that I put to use for many years at the beginning of my career. It uses a similarly burly 420D TPU coated nylon, but a simpler harness and a less bulky EVA moulded foam back panel shaves a good chunk of weight off the pack compared to the Fernweh.
Another standout difference is the specific straps on all F-Stop Mountain Series bags that are designed to carry skis and snowboards, as well as the front pocket that is designed to carry snow safety equipment for long days in the backcountry. If the Fernweh walks a line somewhere right between travel and backpacking, the F-Stop Mountain Series bags are definitely more like 10% travel, 90% outdoors. For more information, read our F-Stop Tilopa review.
Shimoda Action-X 50
There are more than a couple of features on the Shimoda Action X v2 bags that are similar to those on the Fernweh. Since the Action-X bags came first, I’m pretty sure the Wandrd designers must have had their hands on them. The removable bucket system, carrying handles, gigantic side pocket, side camera access and laptop slot placement are all extremely similar between these two. The price of the 50L version? Oh yeah, that’s the same too: $329.99 + the cost of the internal cubes.
The biggest difference is the tighter specialization of the Shimoda Action-X bags. They are far more mountain-centric than the Fernweh. They have straps for skis and a snowboard, as well as a moulded back panel that tends to work better in a snowy environment compared to mesh-backed bags that get snow caught in them. The Action-X packs also have a roll-top design that gives some flexibility to the internal volume. In the Action-X 50, you can use this roll-top to expand beyond a 50L capacity.
Shimoda Explore V2
While the Shimoda Action X v2 bags are aimed more specifically at outdoor adventure sports photographers, their Explore V2 line is aimed at travel and adventure photographers. The bags are smaller than the Fernweh, though, coming in at 25L, 30L, and 35L compared to the 50L volume of the WADNRD bag.
If you like the look of travel-specific features such as hidden passport pockets and luggage trolley-compatible handles but want something smaller than the Fernweh, the Explore Series is a good bet. You can read a detailed review of the Shimoda Explore V2 series here.
WANDRD Prvke 41

WANDRD’s best-known camera bag is the Prvke. Now available in a larger 41-litre size, some people might be wondering how it compares to the 50L Fernweh. Both of these bags are capable of carrying all sizes of WANDRD’s camera cubes, and both are built with very rugged materials. The biggest difference is the carrying comfort.
The Prvke’s harness system is extremely basic, and not suitable for carrying a heavy load while hiking for more than a few minutes. The Fernweh is a bag that belongs on the trail or in the mountains, where the Prvke is far more at home in an urban environment. Check out my WANDRD Prvke review for more details.
Conclusion
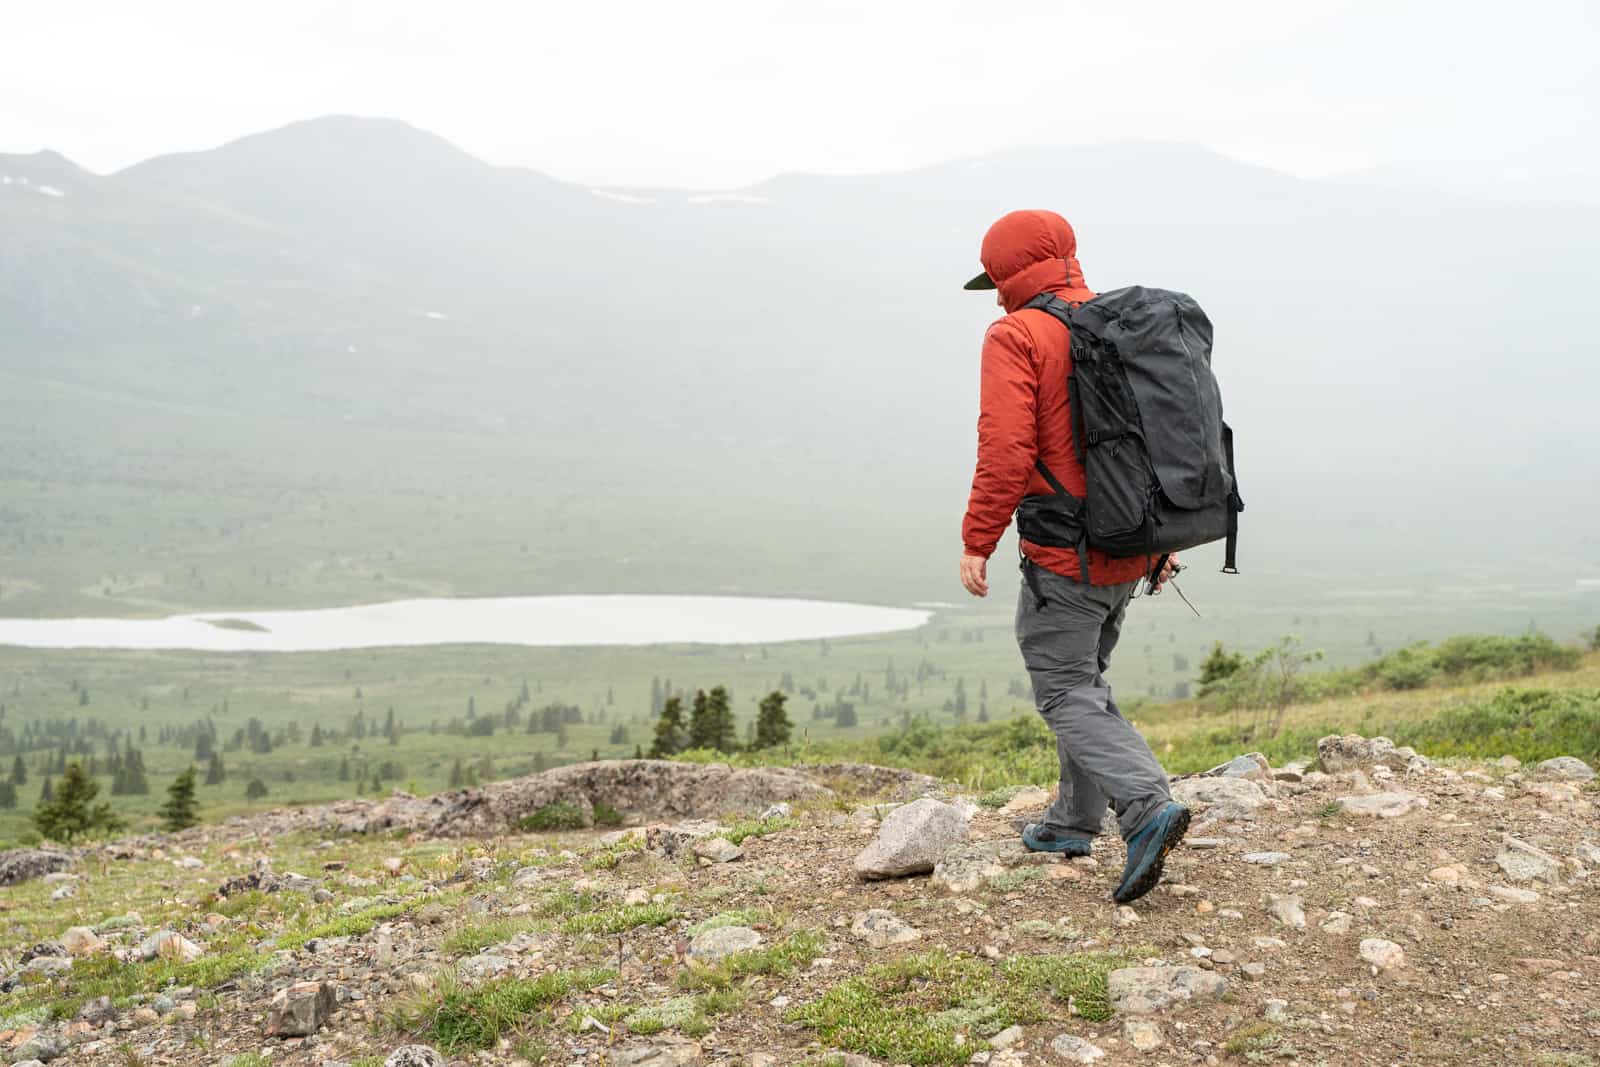
In terms of design, build quality and features, Wandrd have done a fantastic job with this bag. As a travel company and not a camera bag company, this is a bag that walks a slightly different line to some of the bags that many will initially compare it to. It’s designed for a broader range of uses, and yet it doesn’t feel like the photography aspects of the bag have suffered in order to achieve that broad appeal. That’s an impressive feat.
The harness of the bag is particularly impressive. Where many camera bags compromise in this area, WANDRD has managed to create something that looks and feels much more like a high-end hiking pack. If you take the time to dial in the fit, by using the adjustable torso length and the many adjustment straps, this bag carries a heavy load exceptionally well.
I have very few gripes with this bag, and I’m pleased to see the Gobi Tan colour option for those people, like me, who hate black bags with all-black interiors.
Where to Buy
The Fernweh is available from the Wandrd website:


Hi Dan,
Since you are branching out into packs that are less mainstream than LowePro and Mindshift Gear I would be very interested in a review of the Atlas packs and how they would compare to this new pack and the ones that you have compared it to. I know that you do a lot of reviews and probably don’t need something else to review but the Atlas packs look very interesting seem to offer different options than the other packs that are available.
Hey Mark. This is definitely something I’m interested in. There are two other pack brands that I have on my radar for a mega group test of “best outdoor photo packs” and Atlas is one of them. I’ll definitely shoot them an email.
Can I ask, what specifically is the feature(s) that is drawing you to them?
Cheers, DC
Hi Dan,
Sorry to be slow in responding but it was a bust week at work. The two main features of the Atlas bags that interest me are the fact that it seems to fall in the category of an outdoor bag that is also a camera bag, but is also well designed for carrying camera gear and the fact that it comes in different sizes for different length torsos. The latter is very important to me as I am short (5′ 5″) and have had trouble finding a bag that carries comfortably due to most bags being designed for people with longer torsos. An example of this is that I purchased the Mindshift Backlight 26L, thinking it was the perfect size for my camera gear and extra non-camera items I tend to carry. It held everything I wanted very well but isn’t comfortable for me to carry as the torso length is too long. I have since purchased the MIndshift Backlight 18L and it is more comfortable to carry but has less space for non camera gear. It’s harness system also isn’t the most comfortable for me. The most comfortable to carry bags I have are the Mindshif Gear Panorama 180 and the Thinktank Photo Glass Taxi with optional steroid waist belt, but the 180’s camera gear capacity is very limited and the Glass Taxi has no provision for carrying non-camera gear. It is also very important to me that any bag meet the international air travel size regulations, which the Atlas bags, especially the Athlete bag which I am more interested in, seem able to do.
I have seen other reviews of the Atlas bags but I trust your reviews and also value that you compare bags with each other, which is a very useful added dimension in a review.
I am hopeful of a review by you of an Atlas bag at some point in the future as I haven’t found any camera store, including Hunt Photo, which carries them so I could see one in person.
Thanks,
Mark
Thanks for the additional details Mark. I’ll do my best to get hold of one. I’m not sure how I’ll judge suitability for your height, though.
It’s worth underlining that the Wandrd Fernweh does have both a small version, as well as having adjustable torso length within that. So at the moment it is the best suited bag to a short back length that I have seen. Cheers, Dan.
Great review! I also hate thats its all black on the inside. I put in for one on kickstarter and plan on using cube from my action x for it as there is contrast in color with that cube. I have the action x 50 and hate it! Super uncomfortable, sweats me out , the pockets are tight bottomless caverns and the backplane always gets pushed into e.pty upper part of bag while hiking. Very annoying. If the fernweh disappoints as well im going back to carrying my millet peuterey integrale 45+10 with shimoda cubes. Thanks for reviewing this bag
Hi Aarin. Thanks for the kind words. It’s interesting that you dislike the Action X50. I guess this just goes to show hoe different bags really suit different body shapes. I have the Action X70 and find it to be very comfortable. Although I do get sweaty as hell.
Hey Dan,
Thanks for the detailed review. There seems to be a typo for torso length of the M/L which the Kickstarter lists as 18-23 inches. Thanks.
Thanks! Fixed 🙂
I’m still working on getting to correct size of pack to me to really finish off my thoughts on this pack. It has been hard to get one as there are only a very small number of pre-production packs in circulation around different reviewer at the moment.
Dan,
On the subject of Atlas packs I’ve used the Athlete extensivly owned a few other packs, Think Tank, Lowe & F-Stop. In a previous life I designed a few high altitude packs with Jan Sport and Wilderness Experience (that’s dating me!). What I like about the Atlas packs is no inserts which I find do not lend themselves to any sort of stability in the pack. The carry capacity of the athlete is really good, workmanship is great and most importantly the harness and hip belt system is first class.
I’ve used the Atlas Athlete throughout the US from events like judo, taekwondo, surfing, cycling, architecture, portraiture, alpine ski racing etc. As well as multi day hikes for landscape photography in Italy and two trips to Mt. Everest and the 3 passes trek in winter in Nepal. The Athlete carried everything I needed, as we were unsupported, along with two Sony bodies, 16-35 2.8, 100-400, 20 1.8 and a Leica Q2 monochrome and a tripod.
The adventure hip belt and the quality of the shoulder straps and internal frame make the Atlas packs top shelf and I am not sponsored by them in any way. I buy my gear and the Athlete has performed so well I’ve ordered the larger Adventure pack to carry larger glass.
Keep up the good work!
Bill
Dan,
This is the first time I have read one of your reviews and I’m pretty impressed. I’m having a difficult time coming up with a solution to my photography needs. I do a lot of traveling and camping and recently started doing desert safaris along with off roaring trips.
My issue is that I carry a drone (1 for now), at least 2 GoPros and associated gear. I’m leaving my main camera at home due to space that it consumes. But I miss having my camera and lenses on these trips.
My drone and GoPros are housed in separate Pelican Cases while my camera has its dedicated backpack. I’d really like to combine all this gear into one pack, preferably a backpack; which is what lead me to this article. As I’m looking at joining all three camera platforms into a single pack I’m concerned with accessibility of everything. I really wouldn’t want to have to remove everything to get to a camera on the bottom of the pack.
I’m unsure of direction I should go in, the WANDRD seems like it could be a good solution.
Can you give me some insight of possible solutions?
Jay
Dan,
How does the suspension system (and specifically the hip belt) on this pack compare to the F-Stop Tilopia? Also, I am currently using a Gregory Baltoro 65L backpacking pack with an ICU. The Gregory has a great suspension system but I have to access my gear through the front three quarter zip. In addition, the Gregory pack is a bit on the large side, so I’m considering switching packs but I don’t want to settle for something with less support. Thanks!
Josh
It has been a long time since I used a Tilopa, and I haven’t had my hands on the latest version at all. I’m hoping to get them in for review shortly. Trying to arrange this with F-Stop right now. So, unfortunately, for now I can’t comment 🙁
Thanks Dan. Do you mind if I ask what you are currently using?
Ok, firstly, I can confirm that I have a brand new F-Stop Tilopa coming to me in mid-January for review. This is the new DuraDiamond version launched last month. Right now I use a Shimoda Explore V2 25L, a MindShift Backlight Elite 45L and a Shimoda Action-X 70L. These three sizes have me covered for different capacity needs. Sometimes I throw a Gura Gear Kiboko 30L into the mix, too. That bag is especially good for air travel.